MVVM Design Pattern in Flutter
Flutter is a cross-platform framework that allows you to write iOS and Android apps using a single codebase.
By default, Flutter apps don’t use any specific design pattern. This means the developer is in charge of choosing and implementing a pattern that fits their needs. The declarative nature of Flutter makes it an ideal candidate for the MVVM design pattern.
Understanding MVVM
MVVM stands for Model-View-ViewModel. The basic idea is to create a view model that’ll provide data to the view. The view can use the data provided by the view model to populate itself. Creating a view-model layer allows you to write modular code, which can be used by several views.
The MVVM design pattern originated from Microsoft. MVVM was heavily used in writing Windows Presentation Foundation (WPF) applications. The MVVM pattern is a fancy name for the PresentationModel.
Since design patterns are platform-agnostic, it can be used with any framework, including Flutter.
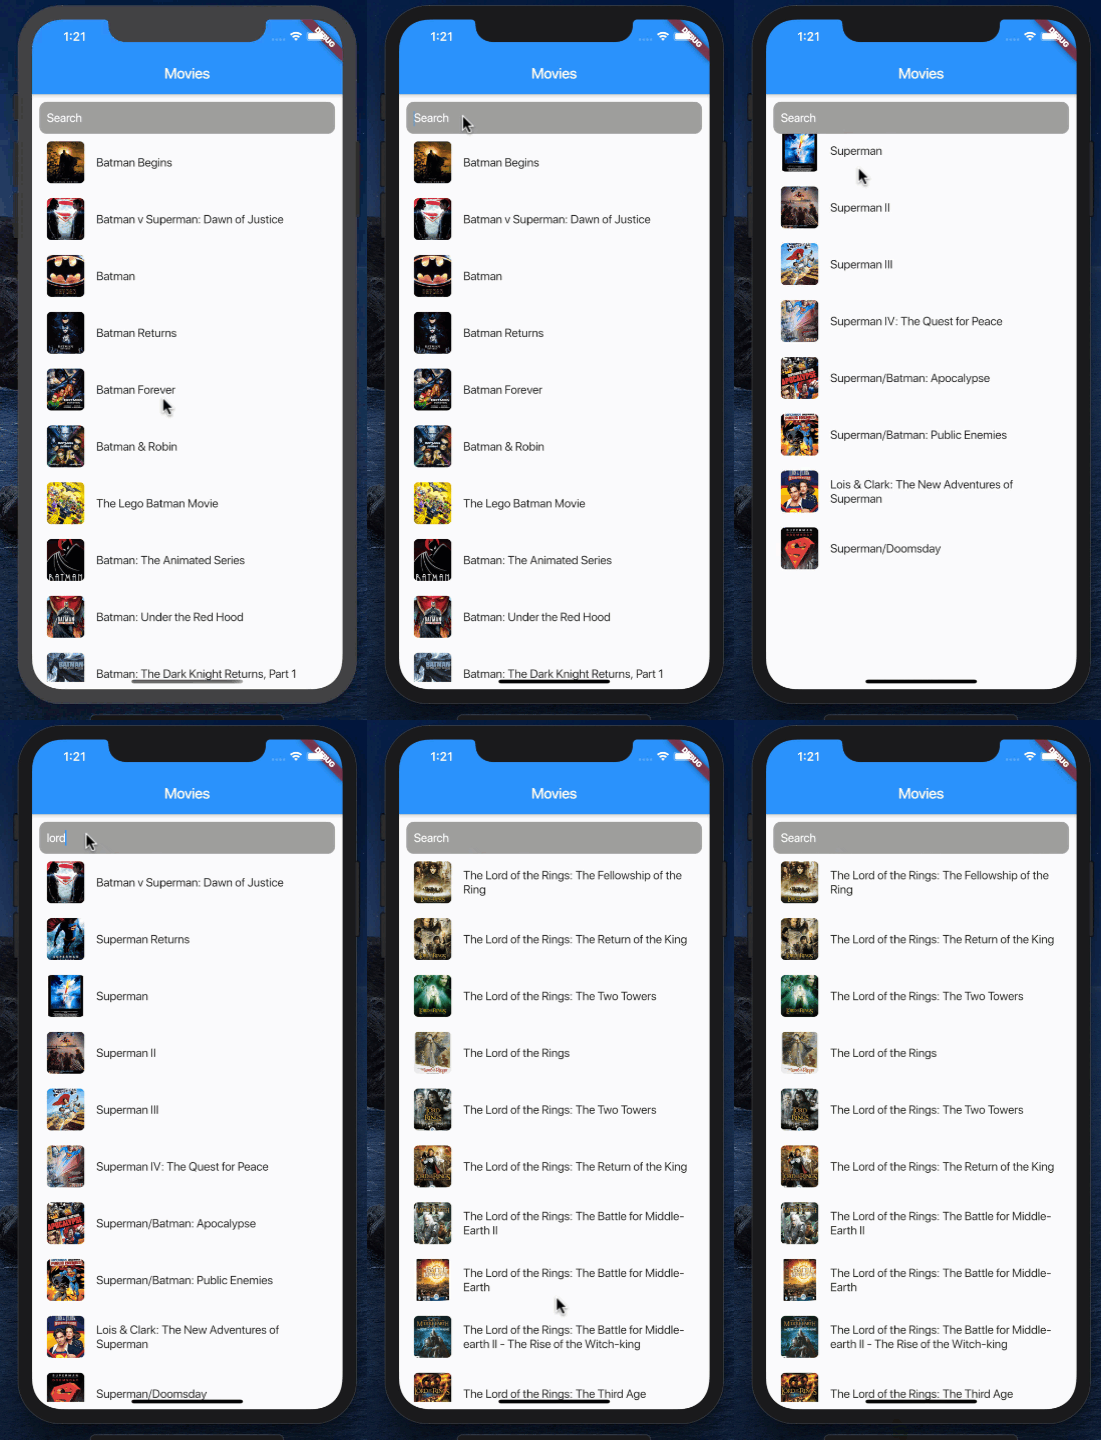
In this piece, we’ll create a movies app, which will fetch the movies based on an entered keyword and display them to the user. This app will be created based on the MVVM principles. Before diving into the code, check out the animation below to get an idea of the app we’ll be building.

Movies app
Implementing the web service
We’ll be using the OMDb API to fetch the movies. Make sure you register on their website to obtain an API key. Without a valid API key, you won’t be able to perform a successful request.
Now that you’ve registered with the OMDb service and have received your key, we can move on to implementing the web service/client. The web service uses the HTTP package to make a network request and to download the JSON response, but feel free to use any networking package you want.
After JSON has been download, it’s fed to the movie model to get a list of movie objects, as shown below:
import 'package:movies_app/models/movie.dart';
import 'package:http/http.dart' as http;

class Webservice {

  Future<List<Movie>> fetchMovies(String keyword) async {

    final url = "http://www.omdbapi.com/?s=$keyword&apikey=YOURAPIKEYHERE";
    final response = await http.get(url);
    if(response.statusCode == 200) {

       final body = jsonDecode(response.body);
       final Iterable json = body["Search"];
       return json.map((movie) => Movie.fromJson(movie)).toList();

    } else {
      throw Exception("Unable to perform request!");
    }
  }
}
The movie model is implemented below:
class Movie {

  final String title;
  final String poster;

  Movie({this.title, this.poster});

  factory Movie.fromJson(Map<String, dynamic> json) {
    return Movie(
      title: json["Title"],
      poster: json["Poster"]
    );
  }

}
Movie simply consists of a title and a poster. It also exposes a fromJson function, which allows us to create a Movie object based on the JSON response.
We used the term model to define our Movie objects, but, in reality, they’re serving the purpose of data transfer objects (DTO).
At this point, we have all the required data, and the next step is to display it on the screen. Before moving to the user interface, we must create view models that’ll be responsible for providing the data to the view.
Implementing view models
Although you can achieve the desired result by creating a single view model, we’ll create two separate view models in our application.
One view model, MoviesListViewModel, will represent the entire screen of displaying the movies. The second view model, MovieViewModel, will represent an individual movie — which will be displayed in the view.
The implementation of the view models is shown below:
class MovieListViewModel extends ChangeNotifier {

  List<MovieViewModel> movies = List<MovieViewModel>();

  Future<void> fetchMovies(String keyword) async {
   // TODO
  }

}

class MovieViewModel {

  final Movie movie;

  MovieViewModel({this.movie});

  String get title {
    return this.movie.title;
  }

  String get poster {
    return this.movie.poster;
  }

}
The MovieListViewModel consists of the movies property, which is going to return a list of MovieViewModel objects. The MovieViewModel takes in a Movie object and returns the title and poster as readonly properties. The next step is to fetch movies using the web service.
Setting up ChangeNotifier and ChangeNotifierProvider
The fetchMovies method in MovieListViewModel is responsible for retrieving the movies from the OMDb API using the help of the web service.
The implementation is shown below:
class MovieListViewModel extends ChangeNotifier {

  List<MovieViewModel> movies = List<MovieViewModel>();

  Future<void> fetchMovies(String keyword) async {
    final results =  await Webservice().fetchMovies(keyword);
    this.movies = results.map((item) => MovieViewModel(movie: item)).toList();
    print(this.movies);
    notifyListeners();
  }

}
We have updated our MovieListViewModel to inherit from ChangeNotifier. ChangeNotifier allows us to publish change notifications, which can be used by the view to update itself.
After we fetch the movies using the web service, we call the notifyListeners function, notifying all the subscribers/listeners. At present, there is no one listening, so no one is notified the movies have been downloaded.
In order to notify the view with the updated MovieListViewModel, we’ll have to use the ChangeNotifierProvider, which ispart of the Provider package. Add the provider package by adding the dependency in the pubspec.yaml file, as shown below:
dependencies:
  flutter:
    sdk: flutter

  # The following adds the Cupertino Icons font to your application.
  # Use with the CupertinoIcons class for iOS style icons.
  cupertino_icons: ^0.1.2
  http: ^0.12.0+2
  provider: ^3.2.0
Next, we need to find a good place to inject the value from the provider. The value we’re talking about is an instance of MovieListViewModel since it extends ChangeNotifier and publishes notifications to the listeners.
In our case, we can use the main.dart file and inject the value to the MovieListPage. This means the MovieListViewModel will be available to MovieListPage and all of its children.
void main() => runApp(App());

class App extends StatelessWidget {

  @override
  Widget build(BuildContext context) {
    return MaterialApp(
      title: "Movies",
      home:
      ChangeNotifierProvider(
        create: (context) => MovieListViewModel(),
        child: MovieListPage(),
      )
    );
  }

}
Awesome. The final step is to display the data on the screen. This is covered in the next section.
Displaying movies
For our app, we’ll ask the user to input the keyword and press return key on the keyboard. This will call the fetchMovies method on the MovieListViewModel, as shown below:
Container(
            padding: EdgeInsets.only(left: 10),
            decoration: BoxDecoration(
              color: Colors.grey,
              borderRadius: BorderRadius.circular(10)
            ),
            child: TextField(
              controller: _controller,
              onSubmitted: (value) {
                if(value.isNotEmpty) {
                  vm.fetchMovies(value);
                  _controller.clear();
                }
              },
fetchMovies will fetch all the movies based on the keyword and trigger notifyListeners. In order to get an updated instance of MovieListViewModel, we’ll get help from the provider package, as shown below:
@override Widget build(BuildContext context) {
final vm = Provider.of<MovieListViewModel>(context);
By adding the Provider inside the build method, we ensure whenever notifyListener is fired, we have access to the instance of MovieListViewModel.
Now if you run your app, it’ll fetch the movies based on the keyword and display them on the user interface.
If you want to perform an initial fetch when the page is loaded, then you can update your StatelessWidget to StatefulWidget and call fetchMovies from inside the initState method, as shown below:
class _MovieListPageState extends State<MovieListPage> {

  final TextEditingController _controller = TextEditingController();

  @override
  void initState() {
    super.initState();
    // you can uncomment this to get all batman movies when the page is loaded
    Provider.of<MovieListViewModel>(context, listen: false).fetchMovies("batman");
  }
Note that we’re passing listen: false for the Provider, which means this is a one-time call only, and the changes won’t be tracked by the Provider.
View the GitHub repo here.
Thanks for reading!
#flutter #ios #programming
