Code walkthrough for the Login page
Hey Folks
Welcome back, So today we’ll create the amazing login page using Flutter. So you all know by using Flutter we can create Cross-platform applications like Android, iOS, Desktop, web, and Linux. I’m using an Android studio for creating flutter applications you can use Visual studio also it’s fully up to you. So without further due let’s get into the coding part.
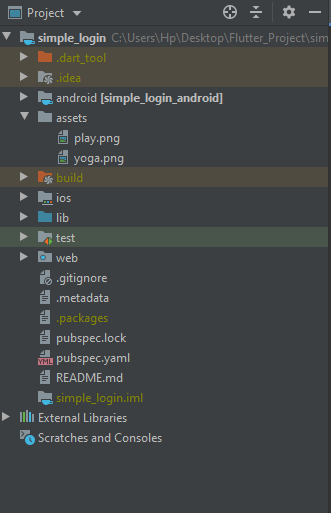
You can see the below image, which will show how does the project directory looks like when you open the Android studio. So here we have to Add the **Assets folder **where we will store the images which are needed for the project.

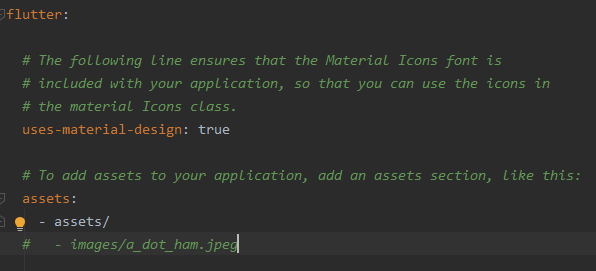
So once you added that folder you can’t able to use that images right away you have to set some properties for that (Simply you have to mention the path of that image). To do that you have to open the Pubspec.YAML file in that project directory.

Inside that file, you have to mention that assets file location and here you have to be careful because here the indentation is important. Once you set that path you are good to go. Yeah, you can now use that images on your projects sounds good right 😀
Then you have to open the main. dart file and start working on that coding part. Once you open that file you have the default code just remove that code and use your own which will help you to improve your implementation skills. you can see on this below image I used the **MaterialApp widget **in that main function. Inside that, you can see I have a home property which is set to be the dart class named Myapp. which is known as a stateful widget.
Lifehack 💡 You can type **stf **and hit enter to create the stateful widget or if you want to create a stateless widget just type stl and hit enter.

So yeah we completed our first step. Now we can start creating some other widgets inside that Build method which will return the widgets.
double width=MediaQuery.of(context).size.width;
double height=MediaQuery.of(context).size.height;
Here I create some double variables inside that Build method which will give me the current devices screen size and we can use this for creating responsive applications.
return Scaffold(
      body: Container(
        height: height,
        width: width,
        child: SingleChildScrollView()));
Initially, I Created a Scaffold widget and then I created a Container and set that width and height to the screen size, and inside of that container, I use the SingleChildScrollview widget to scroll the widget.
#ui #flutter-app-development #ux #flutter #login
