Learning how to use HTML, CSS and the basics of JavaScript can be fairly simple. Almost anyone can produce a small, functional website providing you know how to use Google and have some patience.
However, if you bump the scale of that website up about 10x, add in another developer and create multiple variants – each with their own unique functionality and styles – your code is going to become a hassle to maintain and new hires are going to have a nightmare trying to figure out your codebase.
Using a CSS preprocessor like Sass (Syntactically awesome style sheets) effectively will help modularize your CSS code making it more maintainable, understandable and reusable. Sass consists of two syntaxes, the original syntax called “the indented syntax” and the newer “SCSS”. The examples I give in this post use the SCSS syntax as this is my personal preference, but you can use either. In this Sass tutorial, we’ll walk through the setup process and what you need to know for writing more maintainable and reusable code.
Setting up Sass in your new project
Firstly, before we dive into writing any Sass, make sure you have checked out the Sass documentation on installation and the Sass basics section to get the Sass compiler working on your system.
Once you have Sass successfully set up for your project, we can now start setting up the file structure for our stylesheet partials and master files.
I like to create a sass/ directory to hold all our precompiled code and a css/ directory to hold all the output. For easier maintenance on large projects, I would recommend creating extra directories within the sass/ directory to hold different types of partials. As a basic example, I will create the following folder structure:
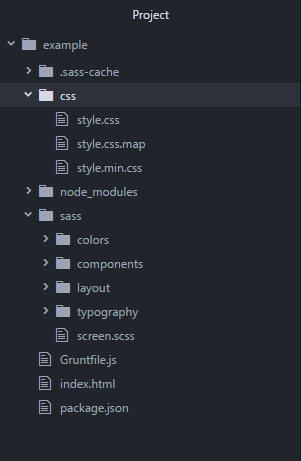
As you can see in my example colors, components, layout, and typography have been separated into their own directories. This enables us and anyone else digging around in our codebase to easily find files later on.
Sass variables and style modularization
Adding Sass to your project brings many advantages. One of the biggest is the ability to set and use variables. When it comes to writing maintainable styles the use of variables is a no-brainer. To create a variable we just need to add a $ before the variable name then just assign the variable a value.
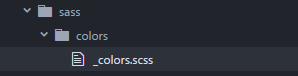
As an example, I’ll create a _colors.scss stylesheet partial within our sass/colors/ directory that will hold all our color values. Note that I prefixed the partial with an underscore. This lets Sass know that the file is only a partial file and that it should not be generated into a CSS file:
 // _colors.scss

$white: #FFFFFF;
$black: #000000;

$red: #C62828;
$blue: #3b88ad;
$green: #2E7D32;
$yellow: #F9A825;
$grey: #424242;
// ...
Now that we have the _colors partial we are going to need to import it to the master screen.scss file found in the sass/ directory. Sass offers the ability to reference other stylesheet partials using the @import keyword, so, using this, I’ll import the _colors.scss into screen.scss like so:
// screen.scss

// Colors
@import "colors/_colors.scss";
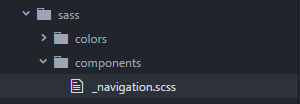
Now any style partial added to screen.scss will have visibility of the color variables. I’ll go ahead and create a navigation partial inside of components/ , add it to screen.scss and use a color variable as one of the properties:
// screen.scss

// Colors
@import "colors/_colors.scss";

// Components
@import "components/_navigation.scss";
// _navigation.scss

.navigation {
  position: fixed;
  top: 0;
  width: 100%;
  height: 50px;
  color: $white;
  background: $grey;
  box-shadow: 0 0 5px rgba($grey, 0.8);
  text-align: center;
  line-height: 50px;

  ul {
    display: inline-flex;
    margin: 0;

    li {
      list-style: none;
      padding: 0 50px;
      height: 100%;

      &:hover {
        background: rgba($blue, 0.5);
      }
    }
  }
}
#sass