Create and use private rooms in an Angular 7 chat app with Chatkit
If you want to grab the complete code used in this article, head to this GitHub repository and follow the instructions in the README.md file.
Prerequisites
Previous experience with building Angular and Node.js applications is a must, but you do not need to have used Chatkit before. You will also need Node.js (version 6 or later) as well as npm installed on your machine. Installation instructions for both Node and npm can be found on this page.
Sign up for Chatkit
To take advantage of Chatkit features in your application, you need to sign up for a free account from Pusher. Once your account has been made, you will be redirected to the Chatkit page. Create a new Chatkit instance for your application, then locate the Credentials tab on your instance’s dashboard and take note of the Instance Locator and Secret Key as we’ll be using them on the server and in the application code.
Next, hit the Console tab and create a new user and a new public room. You can follow the instructions on this page to learn how to do so. Take note of the room ID as we’ll be using it later.
Set up the application server
Create a new directory for this project in your filesystem and cd into it through your terminal application. Then run npm init -y from within your project directory to initialize your Node project with a package.json file.
The run the following commands to install all the dependencies we’ll be needing to build the application server:
npm install express body-parser cors dotenv @pusher/chatkit-server -S
Next, create a .env file in the root of your project directory and paste in the credentials you retrieved from your Chatkit instance dashboard:
// .envPORT=5200 CHATKIT_INSTANCE_LOCATOR=<your chatkit instance locator> CHATKIT_SECRET_KEY=<your chatkit secret key>
Next, create another file called server.js and add the following code into it:
// server.jsrequire('dotenv').config({ path: '.env' }); const express = require('express'); const bodyParser = require('body-parser'); const cors = require('cors'); const Chatkit = require('@pusher/chatkit-server'); const app = express(); const chatkit = new Chatkit.default({ instanceLocator: process.env.CHATKIT_INSTANCE_LOCATOR, key: process.env.CHATKIT_SECRET_KEY, }); app.use(cors()); app.use(bodyParser.json()); app.use(bodyParser.urlencoded({ extended: true })); app.post('/users', (req, res) => { const { userId } = req.body; chatkit .createUser({ id: userId, name: userId, }) .then(() => { res.sendStatus(201); }) .catch(err => { if (err.error === 'services/chatkit/user_already_exists') { console.log(`User already exists: ${userId}`); res.sendStatus(200); } else { res.status(err.status).json(err); } }); }); app.post('/authenticate', (req, res) => { const authData = chatkit.authenticate({ userId: req.query.user_id, }); res.status(authData.status).send(authData.body); }); app.set('port', process.env.PORT || 5200); const server = app.listen(app.get('port'), () => { console.log(`Express running → PORT ${server.address().port}`); });
The /users endpoint creates a new user in your Chatkit instance with the provided userId if that ID doesn’t already exist. As for /authenticate, it’s used to authenticate users who try to connect to your Chatkit instance, but we don’t try to authenticate anyone here for the sake of brevity. This means that anyone who tries to connect to the chatroom would be granted access without any authentication flow.
That’s all we need to do on the server side. You can start the server with node server.js. It will be available on http://localhost:5200 unless you change the PORT variable in the .env file.
Bootstrap the Angular app
We’ll make use of the Angular CLI to build our app so that we can quickly get up and running. The first thing to do is install it globally using the following command:
npm install -g @angular/cli
Once the command above finishes running, you should have access to the ng command in the terminal. Make sure you are at the root of your project directory, then execute the command below. When prompted to add Angular routing, hit N, and choose CSS as the preferred stylesheet format.
ng new client
Following that, cd into the client folder and install the additional dependencies that we’ll be making use of on the frontend of the application, which are the axios library for making HTTP requests, and the Chatkit client SDK for interacting with our Chatkit instance.
npm install axios @pusher/chatkit-client -S
You can start the development server by running ng serve from within the client directory. The app should be available at http://localhost:4200.
Add the markup and styles for the application
Before we write the application logic, let’s add some markup and styles for the app. Open up client/src/app/app.component.html and change it to look like this:
// client/src/app/app.component.html<div class="App"> <aside class="sidebar left-sidebar"></aside> <main class="chat-window"></main> <aside class="sidebar right-sidebar"></aside> </div>
Basically, there are three main aspects to the UI: the left sidebar which holds the list of users in each room, the main chat window where messages are sent and viewed, and the right sidebar which lists all the rooms that the logged in user belongs to.
Let’s go ahead and add the styles for the app. Download the Skeleton CSS boilerplate, extract the zip file and copy normalize.css and skeleton.css from the css folder to your client/src/assets directory. Then open up client/src/style.css and change it to look like this:
// client/src/style.css@import 'assets/normalize.css'; @import 'assets/skeleton.css'; body { overflow: hidden; margin: 0; }
Next, change the contents of client/src/app/app.component.css to look like this:
// client/src/app/app.component.css.App { width: 100%; height: 100vh; overflow: hidden; display: flex; border: 1px solid #ccc; color: #333; font-family: -apple-system,BlinkMacSystemFont,"Segoe UI",Roboto,Oxygen-Sans,Ubuntu,Cantarell,"Helvetica Neue",sans-serif; margin: 0; } h4 { margin-bottom: 10px; } ul { list-style: none; } form { margin-bottom: 0; } input[type="text"] { color: #333; border-radius: 0; } .sidebar { flex-basis: 15%; flex-shrink: 0; flex-grow: 0; background-color: #300d4f; color: #fff; padding: 10px 10px; } .left-sidebar section { margin-bottom: 20px; } .left-sidebar { display: flex; flex-direction: column; } .room-members { flex-grow: 1; } .right-sidebar .room { display: flex; } .newUser-input { margin-bottom: 0; } .right-sidebar { display: flex; flex-direction: column; justify-content: space-between; padding-left: 0; padding-right: 0; } .room { padding: 5px 10px; cursor: pointer; } .room:hover { background-color: goldenrod; color: #333; } .room.active { background-color: #11D771; color: #333; } .room-name { display: inline-block; margin-left: 10px; } .user-list li { margin-bottom: 10px; font-size: 16px; display: flex; align-items: center; } .presence { display: inline-block; width: 20px; height: 20px; background-color: #fff; margin-right: 10px; border-radius: 50%; } .presence.online { background-color: green; } .chat-window { display: flex; flex-grow: 1; flex-direction: column; justify-content: space-between; } .chat-header, .chat-footer { display: flex; align-items: center; flex-shrink: 0; } .chat-header { border-bottom: 1px solid #ccc; padding: 10px 20px; height: 40px; } .chat-header h4 { margin-bottom: 0; } .chat-session { flex-grow: 1; padding: 10px 20px; overflow-y: auto; } .message-list { display: flex; flex-direction: column; justify-content: flex-end; } .user-message { margin-top: 10px; } .user-message span { display: block; } .user-id { font-weight: bold; } .chat-footer { padding: 0; border-top: 1px solid #ccc; height: 50px; } .message-form { width: 100%; height: 100%; } .message-input { width: 100%; border: none; margin-bottom: 0; height: 100%; } .message-input:focus { border: none; } .send-message { background-color: #300d4f; color: #fff; border: 1px solid #300d4f; padding: 10px; } .create-room { padding: 0 10px; } .create-room button { display: block; } input[type="checkbox"] { margin-bottom: 0; display: inline-block; margin-right: 5px; } .is-private { display: flex; align-items: center; } .user-rooms h4, .joinable-rooms h4 { padding-left: 10px; }
At this point, the app should look like this:
Identify the user
Add the following code to your app.component.html file:
// client/src/app/app.component.html<div class="App"> <aside class="sidebar left-sidebar"> <section *ngIf="!currentUser.id" class="join-chat"> <h4>Join Chat</h4> <form (ngSubmit)="addUser()"> <input placeholder="Enter your username" type="text" name="userid" [(ngModel)]="userId" /> </form> </section> </aside> <main class="chat-window"></main> <aside class="sidebar right-sidebar"></aside> </div>
Since we’re dealing with forms, we need to import FormsModule which exports the required providers and directives for template-driven forms and makes them available in our AppComponent:
// client/src/app/app.module.tsimport { BrowserModule } from '@angular/platform-browser'; import { NgModule } from '@angular/core'; import { FormsModule } from '@angular/forms'; import { AppComponent } from './app.component'; @NgModule({ declarations: [ AppComponent, ], imports: [ BrowserModule, FormsModule, ], providers: [], bootstrap: [AppComponent] }) export class AppModule { }
Now, change app.component.ts to look like this:
// client/src/app/app.component.tsimport { Component } from '@angular/core'; import Chatkit from '@pusher/chatkit-client'; import axios from 'axios'; @Component({ selector: 'app-root', templateUrl: './app.component.html', styleUrls: ['./app.component.css'] }) export class AppComponent { userId = ''; currentUser = <any>{}; addUser() { const { userId } = this; axios.post('http://localhost:5200/users', { userId }) .then(() => { const tokenProvider = new Chatkit.TokenProvider({ url: 'http://localhost:5200/authenticate' }); const chatManager = new Chatkit.ChatManager({ instanceLocator: '<your chatkit instance locator>', userId, tokenProvider }); return chatManager .connect() .then(currentUser => { this.currentUser = currentUser; }); }) .catch(error => console.error(error)) } }
Replace <your chatkit instance locator> as appropriate.
When someone wants to use the app, we need them to provide their username before they can be connected.
We can do this with a simple form that will take a user ID, and on form submission, send it to the /users endpoint we created earlier so that a new Chatkit user can be created if one with that user id doesn’t exist.
Add user to room
Now that the user is connected to our Chatkit instance, we need to connect the user to a room and subscribe to new messages. We also need to display the users who are present in the room and their current status (online or offline).
Let’s modify the app.component.html file to look like this:
// client/src/app/app.component.html<div class="App"> <aside class="sidebar left-sidebar"> <section *ngIf="!currentUser.id" class="join-chat"> <h4>Join Chat</h4> <form (ngSubmit)="addUser()"> <input placeholder="Enter your username" type="text" name="userid" [(ngModel)]="userId" /> </form> </section> <section *ngIf="currentUser.id" class="room-members"> <h4>Room Users</h4> <ul class="user-list"> <li *ngFor="let user of roomUsers"> <span class="presence {{ user.presence.state }}"></span> <span>{{ user.name }}</span> </li> </ul> </section> </aside> <main class="chat-window"> <header class="chat-header"> <h4 *ngIf="!currentRoom.name; else roomName">Chat</h4> <ng-template #roomName> <h4>{{ currentRoom.name }}</h4> </ng-template> <span class="participants"></span> </header> <section class="chat-session"> <ul class="message-list"> <li class="user-message" *ngFor="let message of messages"> <span class="user-id">{{ message.senderId }}</span> <span>{{ message.text }}</span> </li> </ul> </section> </main> <aside class="sidebar right-sidebar"></aside> </div>
We’ve added three new blocks here. The .room-members section displays all the current members of the room and shows whether they are online or not, while the .chat-header displays the current room name or a generic “Chat” message if the user is not connected to a room. Finally, .chat-session is where messages for the room are displayed.
Change app.component.ts to look like this:
// client/src/app/app.component.tsimport { Component } from '@angular/core'; import Chatkit from '@pusher/chatkit-client'; import axios from 'axios'; @Component({ selector: 'app-root', templateUrl: './app.component.html', styleUrls: ['./app.component.css'] }) export class AppComponent { userId = ''; currentUser = <any>{}; messages = []; currentRoom = <any>{}; roomUsers = []; userRooms = []; connectToRoom(id) { this.messages = []; const { currentUser } = this; currentUser.subscribeToRoom({ roomId: `${id}`, messageLimit: 100, hooks: { onMessage: message => { this.messages.push(message); }, onPresenceChanged: () => { this.roomUsers = this.currentRoom.users.sort((a) => { if (a.presence.state === 'online') return -1; return 1; }); }, }, }) .then(currentRoom => { this.currentRoom = currentRoom; this.roomUsers = currentRoom.users; this.userRooms = currentUser.rooms; }); } addUser() { const { userId } = this; axios.post('http://localhost:5200/users', { userId }) .then(() => { const tokenProvider = new Chatkit.TokenProvider({ url: 'http://localhost:5200/authenticate' }); const chatManager = new Chatkit.ChatManager({ instanceLocator: '<your chatkit instance locator>', userId, tokenProvider }); return chatManager .connect() .then(currentUser => { this.currentUser = currentUser; this.connectToRoom('<your chatkit room id>'); }); }) .catch(error => console.error(error)) } }
Replace <your chatkit room id> with the ID of the room you created earlier. As you can see, once a user has been added to our Chatkit instance, we try to add them to a room using the connectToRoom() method.
In connectToRoom(), the subscribeToRoom method is used to add the current user to a chatroom with the ID you provided, and any existing messages in the room will be displayed depending on the number you set in messageLimit. Here, the most recent 100 messages in the room will be shown.
The onMessage hook is triggered when a new message is sent to the chatroom. We append the new message to the messages array so that the new message is displayed in the chat window. Likewise, the onPresenceChanged hook tells us when a member of the room comes online or goes offline so that we can update the status of the user on the sidebar.
Now, when you connect to Chatkit, the room name will be displayed in .chat-header while the room members will be displayed on the sidebar. You can add other users aside from the one you already created by refreshing the page and entering a new username in the Join Chat form.
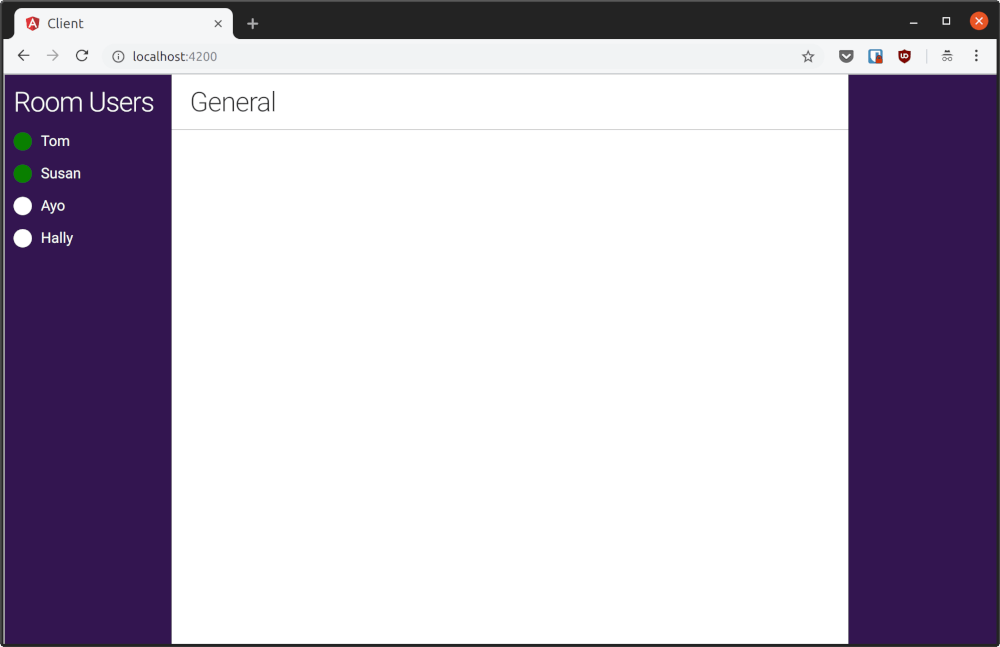
Because no new messages have been sent yet, nothing is displayed in .chat-session. Let’s change this by adding the ability to send messages to the app.
Sending messages
Let’s allow users to send messages by first creating a message form in app.component.html:
// client/src/app/app.component.html... <main class="chat-window"> <header class="chat-header"> <h4 *ngIf="!currentRoom.name; else roomName">Chat</h4> <ng-template #roomName> <h4>{{ currentRoom.name }}</h4> </ng-template> <span class="participants"></span> </header> <section class="chat-session"> <ul class="message-list"> <li class="user-message" *ngFor="let message of messages"> <span class="user-id">{{ message.senderId }}</span> <span>{{ message.text }}</span> </li> </ul> </section> <footer *ngIf="currentUser.id" class="chat-footer"> <form class="message-form" (ngSubmit)='sendMessage()'> <input class="message-input" placeholder="Type a message. Hit Enter to send" type="text" name="message" [(ngModel)]="newMessage" /> </form> </footer> </main> ...
Then update app.component.ts like this:
// client/src/app/app.component.ts... roomUsers = []; userRooms = []; newMessage = ''; connectToRoom(id) { this.messages = []; const { currentUser } = this; currentUser.subscribeToRoom({ roomId: `${id}`, messageLimit: 100, hooks: { onMessage: message => { this.messages.push(message); }, onPresenceChanged: () => { this.roomUsers = this.currentRoom.users.sort((a) => { if (a.presence.state === 'online') return -1; return 1; }); }, }, }) .then(currentRoom => { this.currentRoom = currentRoom; this.roomUsers = currentRoom.users; this.userRooms = currentUser.rooms; }); } sendMessage() { const { newMessage, currentUser, currentRoom } = this; if (newMessage.trim() === '') return; currentUser.sendMessage({ text: newMessage, roomId: `${currentRoom.id}`, }); this.newMessage = ''; } ...
When the .message-form is submitted, we access the currentUser and call sendMessage() on it. This sends the message to the chat room and, thanks to the onMessage hook, new messages are displayed on the screen instantly.
Create new rooms
Right now, we are limited to just the one room that was created in our Chatkit instance dashboard. Let’s make it possible for users to create new rooms right from the chat app. You can create both public and private rooms as you’ll see below.
Modify app.component.html like this:
// client/src/app/app.component.html... <aside class="sidebar right-sidebar"> <section class="room-section"> <section *ngIf="currentUser.id" class="user-rooms"> <h4>Rooms</h4> <ul class="room-list"> <li *ngFor="let room of userRooms"> <div [class.active]="room.id==currentRoom.id" (click)="connectToRoom(room.id)" class="room"> <span class="room-status" *ngIf="room.isPrivate; else publicRoom">🔒</span> <ng-template #publicRoom> <span>🌐</span> </ng-template> <span class="room-name">{{ room.name }}</span> </div> </li> </ul> </section> <section *ngIf="joinableRooms.length > 0" class="joinable-rooms"> <h4>Joinable rooms</h4> <ul class="room-list"> <li *ngFor="let room of joinableRooms"> <div class="room" (click)="joinRoom(room.id)"> <span class="room-status" *ngIf="room.isPrivate; else publicRoom">🔒</span> <ng-template #publicRoom> <span>🌐</span> </ng-template> <span class="room-name">{{ room.name }}</span> </div> </li> </ul> </section> </section> <section *ngIf="currentUser.id" class="create-room"> <form (ngSubmit)="createRoom()"> <input type="text" [(ngModel)]="newRoom.name" name="room-name" id="room-name" placeholder="Create a room"> <label for="is-private"> <input type="checkbox" [(ngModel)]="newRoom.isPrivate" name="is-private" id="is-private"> <span>Is this room private?</span> </label> </form> </section> </aside> ..
The .user-rooms section displays a list of rooms that the user belongs to. Public rooms are denoted with a globe emoji (🌐) in front of the room name while private rooms have a lock emoji instead. Under it, we have the .joinable-rooms section that shows the public rooms that the current user is able to join (but isn’t yet a member of). Finally, we have a form at the bottom of the right sidebar that allows the current user to create a new room.
Next, update app.component.ts to look like this:
// client/src/app/app.component.ts... userRooms = []; newMessage = ''; newRoom = { name: '', isPrivate: false }; joinableRooms = []; createRoom() { const { newRoom: { name, isPrivate }, currentUser } = this; if (name.trim() === '') return; currentUser.createRoom({ name, private: isPrivate, }).then(room => { this.connectToRoom(room.id); this.newRoom = { name: '', isPrivate: false, }; }) .catch(err => { console.log(`Error creating room ${err}`) }) } getJoinableRooms() { const { currentUser } = this; currentUser.getJoinableRooms() .then(rooms => { this.joinableRooms = rooms; }) .catch(err => { console.log(`Error getting joinable rooms: ${err}`) }) } joinRoom(id) { const { currentUser } = this; currentUser.joinRoom({ roomId: id }) .catch(err => { console.log(`Error joining room ${id}: ${err}`) }) } ... addUser() { const { userId } = this; axios.post('http://localhost:5200/users', { userId }) .then(() => { const tokenProvider = new Chatkit.TokenProvider({ url: 'http://localhost:5200/authenticate' }); const chatManager = new Chatkit.ChatManager({ instanceLocator: '<your chatkit instance locator>', userId, tokenProvider }); return chatManager .connect({ onAddedToRoom: room => { this.userRooms.push(room); this.getJoinableRooms(); }, }) .then(currentUser => { this.currentUser = currentUser; this.connectToRoom('<your chatkit room id>'); this.getJoinableRooms(); }); }) .catch(error => console.error(error)) } ...
The getJoinableRooms() method displays the joinable rooms for the current user on the right (if any), while the joinRoom() method allows the current user to join any room that is listed under Joinable Rooms with one click. createRoom() on the other hand, is invoked when the form at the bottom of the right sidebar is submitted. It creates a new room in our Chatkit instance and adds the current user to the room automatically.
Try it out. Connect a user to the app. Only one room will be listed under Rooms, but you can create more using the form on the bottom right. Create a few public and private rooms as shown in the screenshot below. You will be able to switch between the rooms by clicking on the room name.
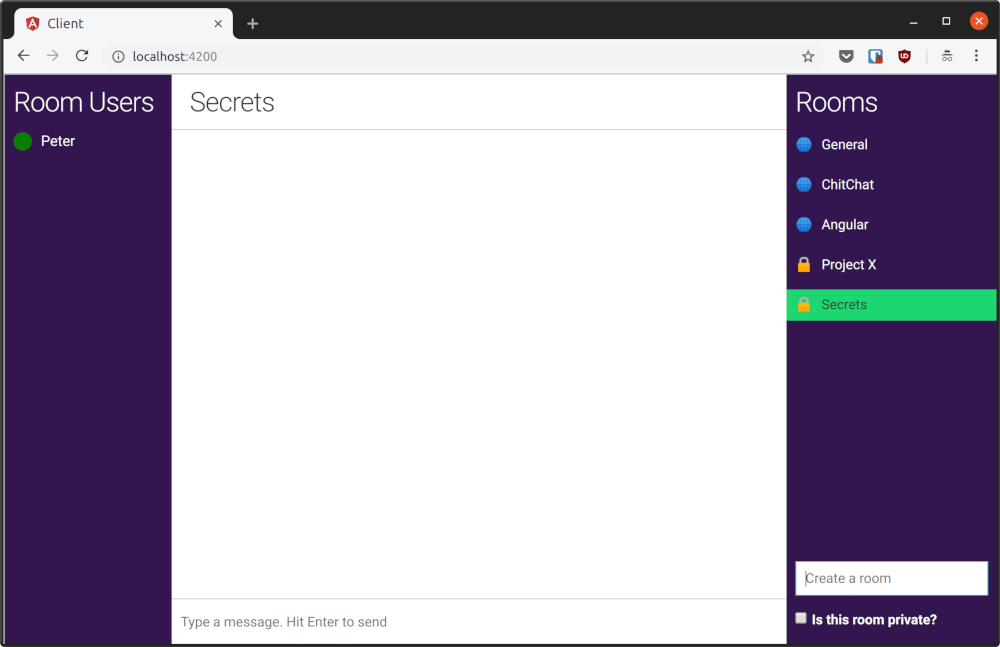
The current user (Peter in my case) does not have any joinable rooms, because he already belongs to all of them. Open the chat app in a new tab and login as another user. You will see that the user can join any of the public rooms that Peter created simply by clicking on any of them.

Add users to a private room
Private rooms are not listed under Joinable Rooms which means only the current members of the rooms can see them. Let’s finish up by making it possible for members of private rooms to add other users to the rooms.
Open up app.component.html and change it to look like this:
// client/src/app/app.component.html... <aside class="sidebar left-sidebar"> <section *ngIf="!currentUser.id" class="join-chat"> <h4>Join Chat</h4> <form (ngSubmit)="addUser()"> <input placeholder="Enter your username" type="text" name="userid" [(ngModel)]="userId" /> </form> </section> <section *ngIf="currentUser.id" class="room-members"> <h4>Room Users</h4> <ul class="user-list"> <li *ngFor="let user of roomUsers"> <span class="presence {{ user.presence.state }}"></span> <span>{{ user.name }}</span> </li> </ul> </section> <form *ngIf="currentRoom.isPrivate" (ngSubmit)="addUserToRoom()"> <label for="user-name">Add user to {{ currentRoom.name }}</label> <input type="text" class="newUser-input" [(ngModel)]="newUser" name="user-name" id="user-name" placeholder="Enter username"> </form> </aside> ...
Then update app.component.ts like this:
// client/src/app/app.component.ts
…
newRoom = {
name: ‘’,
isPrivate: false
};
joinableRooms = [];
newUser = ‘’;addUserToRoom() { const { newUser, currentUser, currentRoom } = this; currentUser.addUserToRoom({ userId: newUser, roomId: currentRoom.id }) .then((currentRoom) => { this.roomUsers = currentRoom.users; }) .catch(err => { console.log(`Error adding user: ${err}`); }); this.newUser = ''; } ...
A new form has been added to the bottom left. Once you enter a username and submit the form, the user will be added to the room and the room would be displayed under the users’ Rooms instantly, so that they can connect to the room and participate in conversation.
Wrap up
This concludes my tutorial. In this article, you built a complete chat application with public and private rooms without doing anything particularly complex since Chatkit does all the heavy lifting for us.
You can checkout other things Chatkit can do by viewing its extensive documentation. Don’t forget to grab the complete source code in this GitHub repository.
Originally published by Ayooluwa Isaiah at https://pusher.com
#angular #web-development