Introduction
In this article, I will walk you through that what is Amazon Cognito service and how you can use this for your user management, authentication, and authorization. I will create a simple web application using AngularJS with login/sign-up functionality, and I will showcase how easy it is to make it full fledge application with all user management functions handled using Amazon Cognito.
Prerequisites
This article assumes that you have a basic understanding of web application development. This article doesn’t require you to have advanced skills in using Angular or AWS, but having familiarity with these technologies will help you to get most out of this. Here is a list of tools technologies I have used in this article.
- NodeJs CLI.
- Angular JS.
- Visual Studio code.
- Amazon AWS console.
- Amazon Amplify CLI.
What Is Amazon Cognito?
Amazon Cognito is an AWS directory service provided by amazon for easy and fast web/mobile application development. This service helps you manage your authentication, authorization and user management functions so that you can focus on your application management rather than managing users and authentication.
Cognito service offers an auto-scaled sign on/sign up using your own user pool and provide easy integration with social identity providers like Google, Facebook, Amazon or you can integrate with your own identity provider using SAML 2.0.
Why Use Cognito?
Cognito offers sign in and sign-up to you as a platform service so that you can focus more on building your application features. Below are some of the features
- Cognito provides S3 benefits – Simple, Secure and Scalable.
- Low-cost directory service
- Easy-open id and SAML 2.0 based connectivity
- Federated access management
- Hosted UI to focus on application development
- Built-in integration with AWS resources for access control
- Encryption and multifactor authentication support
- All user management functions at ease, including, creation deletion, activation, deactivation, forget password flows, verification etc
Development Tools
To get started with the development of this application, we will need a code editor, I am using Visual Studio Code, as it is free, supports TypeScript syntax highlighting, and is easy to use, but you can use any source code editor to follow this article. We also need the node package manager to be available in your development environment and up to date.
We will be using AWS Amplify CLI to configuring AWS Cognito in our application, AWS Amplify is a utility provided by amazon to easily integrate javascript based applications and also provides utilities to automatically provision AWS backend using simple commands.
Functionality
In this application, I will be creating a login page which will be having a link to the user sign-up page. User sign-up page will collect user information and allow users to register with our backend Cognito service. We will be utilizing Cognito user pools for authentication, with configuration to trigger emails to the user for their verification, once user verifies him/herself then, he/she should be able to login to the application using our login page and then he will be redirected to our Home page displaying a sample message.
Getting Started
Now let’s start writing our application, open a terminal window, I assume at this point you already have node package manager installed on your machine and it is up to date.
Install Angular CLI
Type below command to install angular CLI:
npm install -g @angular/cli
Create a new angular application
Angular CLI allow you to create a new application by just typing a command and create a template web application, which you can modify and customize to serve your needs.
ng new cognito-demo-app
One you type above command it will ask you a few questions to customize your application.
Would you like to add Angular routing? Yes
Which stylesheet format would you like to use?
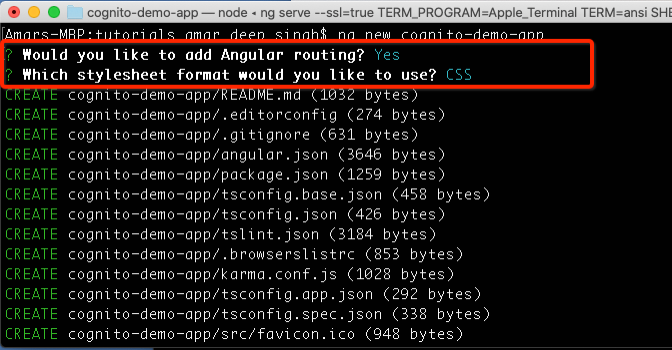
Answer these questions, as shown in the above image. Here, we are enabling routing in our application and using CSS to beautify our application. Once you hit enter this will create your application and add all angular and node dependencies, what you need to start the application.
Start the Angular Web Application
Now we have our application created so let’s go-to application directory using bellow command and start node server.
cd cognito-demo-app/
To start the node application type below command and hit enter, here we are staring our server in ssl mode, which ensures that our communication to backend services is happening through a secure channel.
#aws #cloud security #mobile development #authorization #oauth 2 #amazon web service #authenciation #cognito #angular 9 #amazon cognito
