How to Build a Simple Blog with Vuejs and Laravel
In this article, I’ll run you through how to implement multiple image upload feature with VueJS and Laravel while pretending to build a blog
SETUP
This tutorial assumes you already have a working LAMP setup, so we’ll just start off by scaffolding a new Laravel application. Open up your Terminal or any preferred terminal emulator, navigate into your preferred project directory and create a new Laravel project:

create new laravel application
or via composer:

you can also scaffold a new laravel project via composer
You should now have a new directory ( multi_upload ) that contains a fresh installation of Laravel.
Next, we’ll set up the database: Create a new database using any visual database design tool (MySQL workbench, SequelPro) or from the command line like so:
$ mysql -u username -p

$ CREATE DATABASE multi_upload;
Navigate into your project directory, copy the .env.example file into a .env file open up the .env file.

copy the .env.example file into a .env file
Replace the default database credentials with yours.
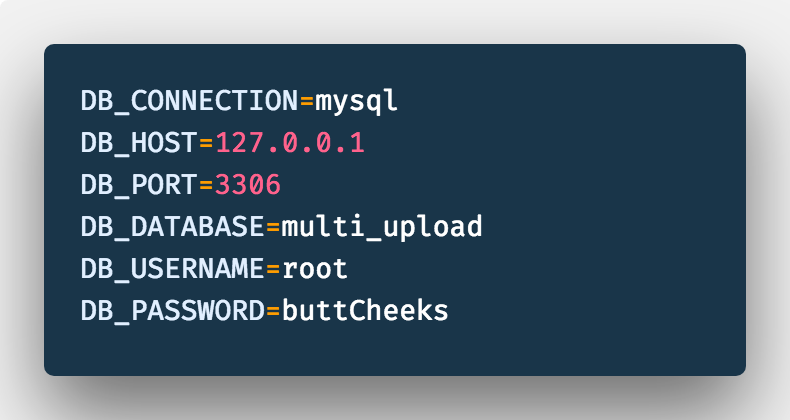
please ignore anything about butts…
Don’t forget to generate your application encryption key with
$ php artisan key:generate
Once we have the correct database credentials setup, we can scaffold Laravel’s user authentication.

scaffold user authentication and migrate
Models
You should have a working authentication system, but before we run a migration, let’s setup our models.
We’ll have a Post model with one or more images associated with it, and a PostImage model that is associated with a single post. We’ll also have many Posts associated with a Single User model.

create the models and their associated migrations
We’ll edit the Post migration file to include some fields. Open the project in your preferred code editor. If you’re using VsCode, simply open it up from the terminal:

you can do the same to open up sublime ( subl . )
Update the Post migration (database/migrations/create_posts……php_) file to contain these columns:
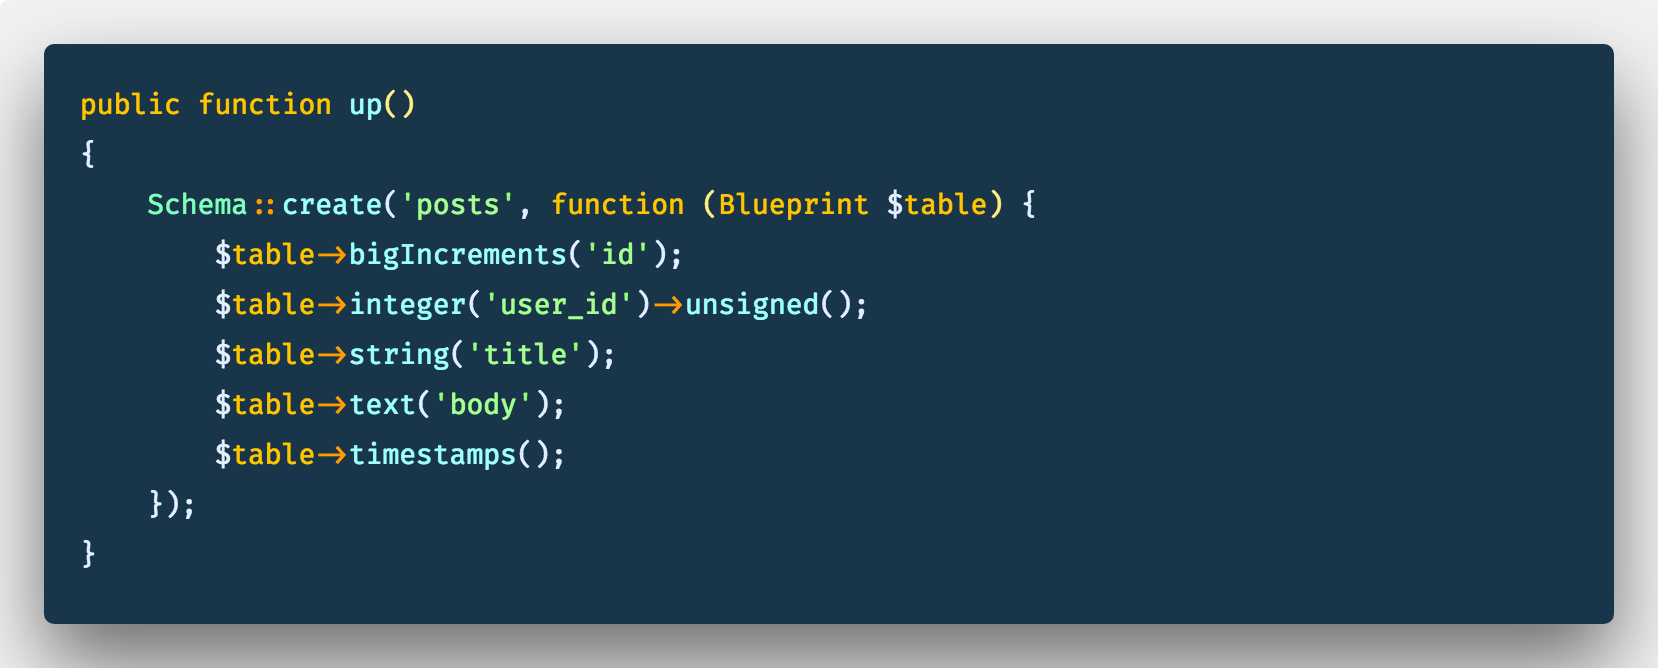
posts migration file
We’ll also update the PostImage migration file (database/migrations/create_posts_images……php) to contain the following columns:
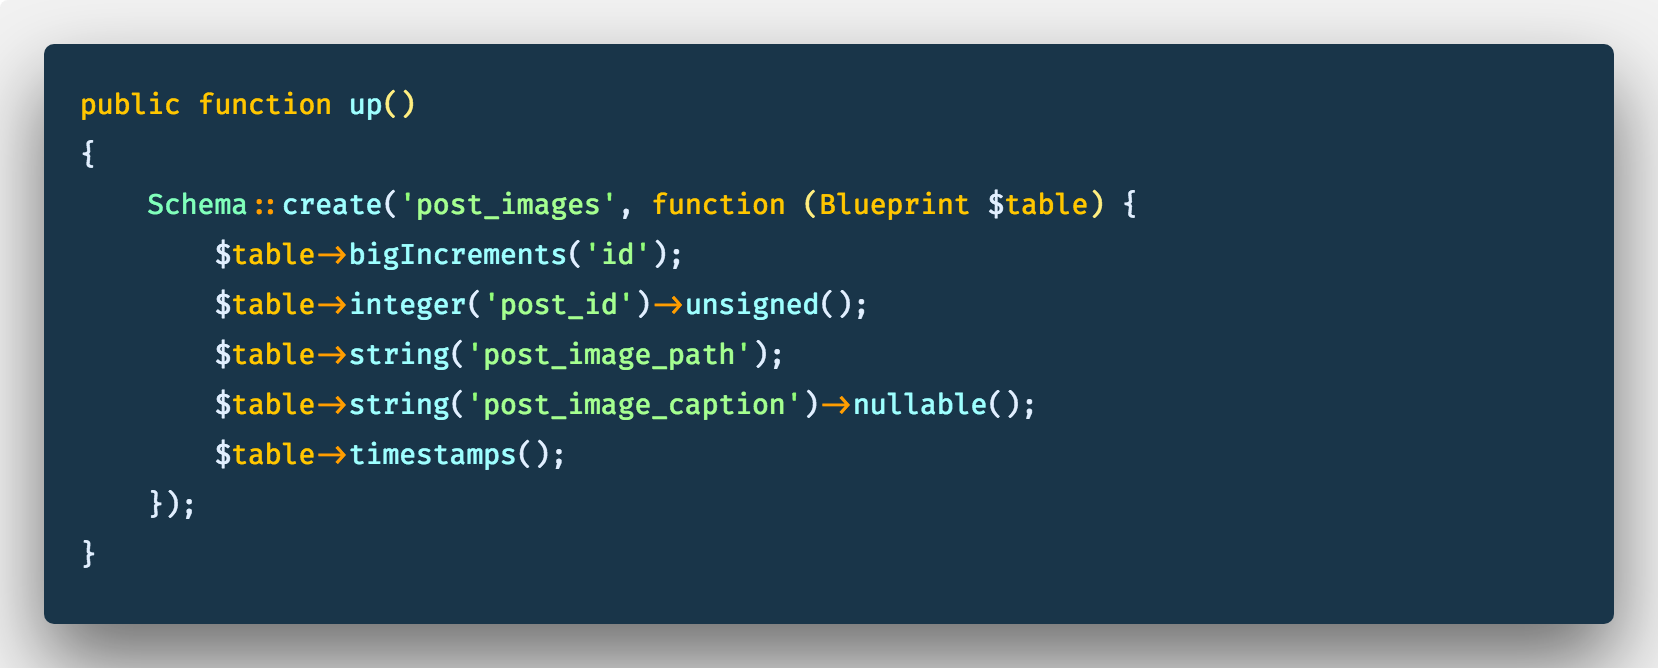
post images migration file
You can now run a fresh migration so all the changes made to table will reflect:
$ php artisan migrate:fresh
Relationships
Relationships can be really complicated…I know, good thing is, we’re not dealing with humans here, so it doesn’t have to be, 😅. like I explained earlier. The relationship is simple:
- A User has many Posts
- A Post can only belong to one User
- A Post has many Images
- An Image can only belong to one Post
Let’s create the first relationship between the User and the Post (A User has many Posts). in your App\User.php file, update the code to have the relationship.

App\User.php
We’ll also create the Post Model relationship to the User Model(A Post can only belong to one User) and also the relationship between the Post Model and the PostImage Model. We also want to include the fillable fields for the Post Model (while we’re here). In your App\Post.php add the author and post_images function to return the relationships**:**
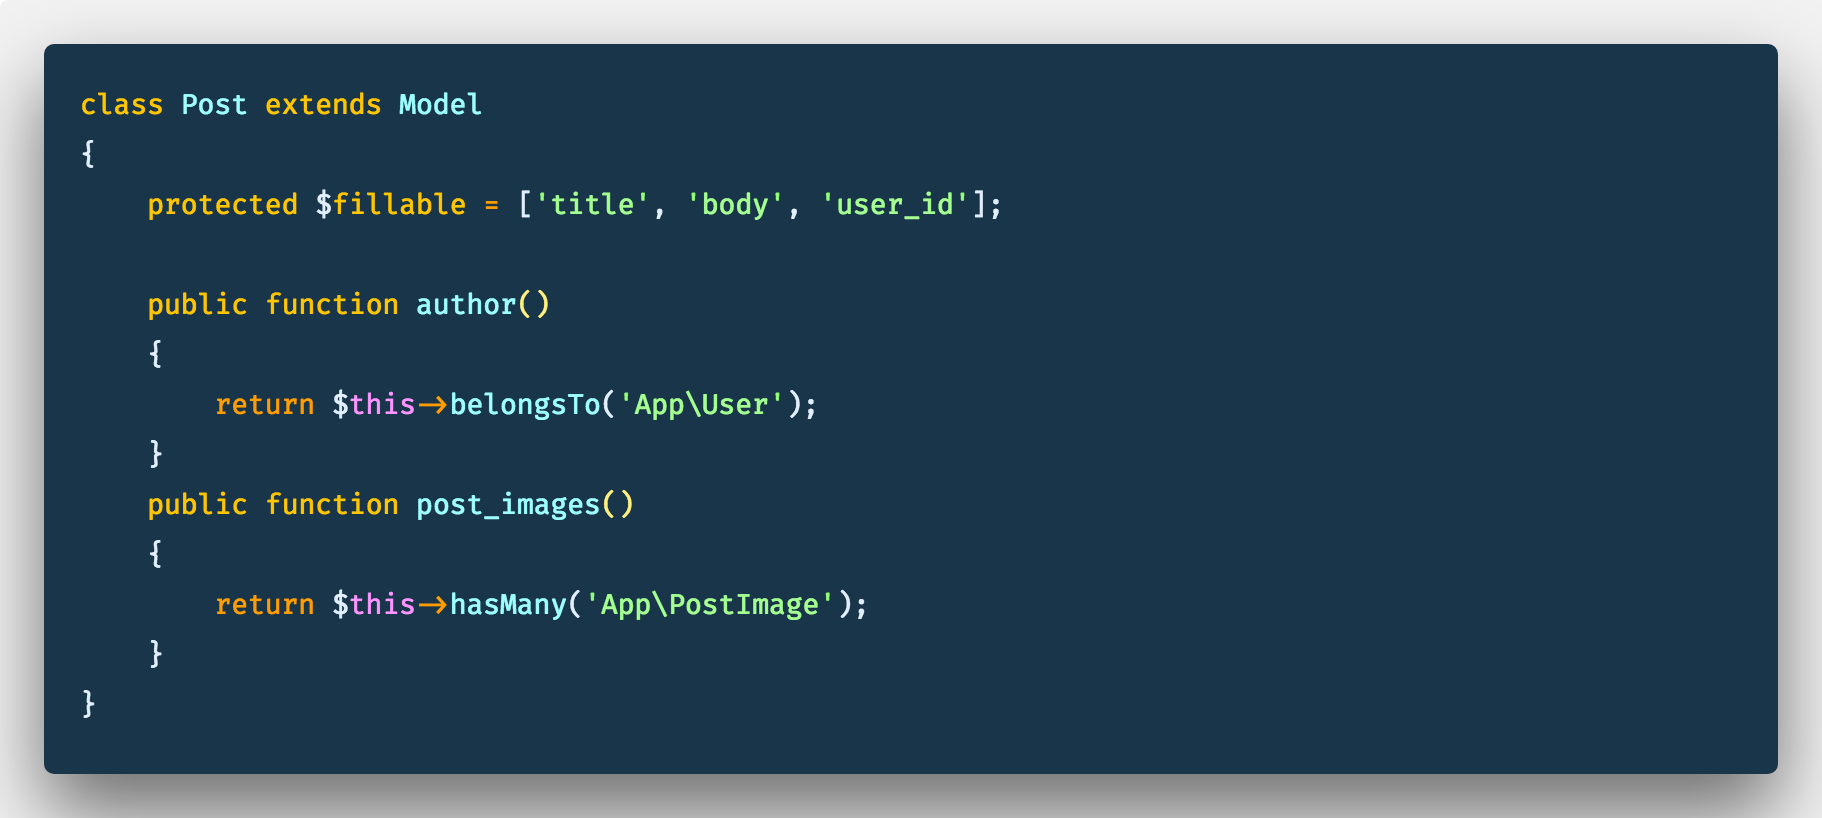
App\Post.php
Remember an Image can belong to only one post, we want to add this relationship in the PostImage Class, we also want to specify the fillable fields:

App\PostImage.php
Just before we start working on our controllers, we need to setup a separate disk for uploading our images. In our config/filesystem.php file, create a new object property called uploads under the disks field:
'uploads' => [
  'driver' => 'local',
  'root' => 'uploads',
  'url' => 'uploads',
],
Controller
We’ll need a controller to handle the creating and fetching of posts. we can easily make a new controller using laravel’s make:controller artisan command:
$ php artisan make:controller PostController
You should now have a PostController file in the app/Http/Controllers/ folder.
In our PostController.php, we’ll create two methods: one for fetching posts (getAllPosts) and the other of creating a new post (createPost). Let’s make sure we have all the necessary classes and facades we’ll be using imported at the top of the controller file.

app\Http\Controllers\PostController.php
Get All Posts
First we need to use eloquent’s eager loading to grab all the posts as well as the related images. This is possible because of the relationship we had earlier specified in the Post model. We’ll order the results by the date created in descending order so we get the most recent posts at the top.

Then return a json response with the queried posts.

Putting it all together:

Create Post
For the create post function, It’ll take an instance of the Request class as a parameter, why? cause like I said we’ll be making ajax requests to the backend and data from these requests are contained in this Request object. We’ll also grab all of the data we need from the request object:
- The post title
- The post content
- The array of images
- The currently authenticated user
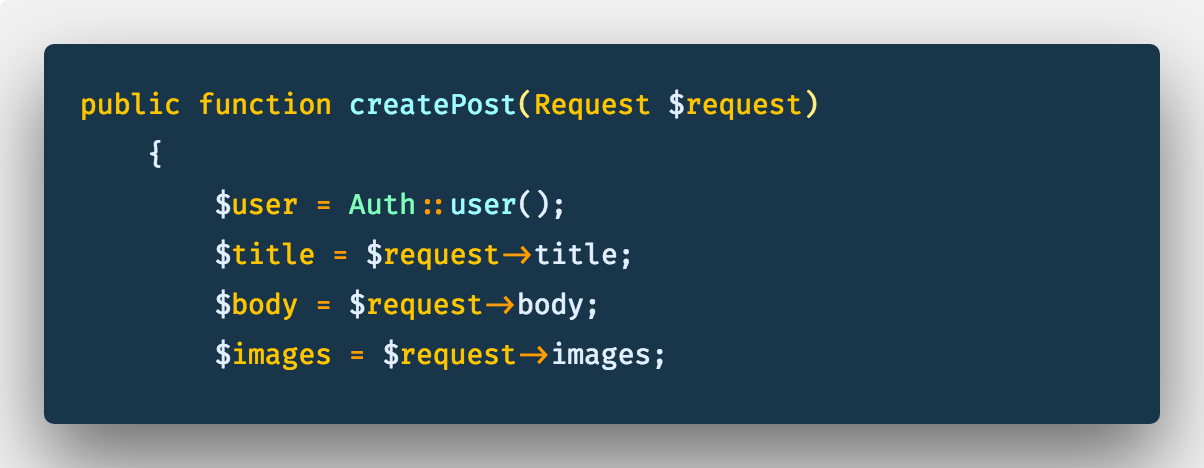
Next we’ll create a new post with the title, body and the user_id:

Next we’ll store each of the images first in a specific folder then into our database. By “specific folder” I mean a folder unique to each authenticated user and the created post. Something like this:
/uploads/grimesbuttom@butt.com/posts/1/skyscraper.png

Once the images have been stored, we return a json response to the frontend.

Putting it all together:
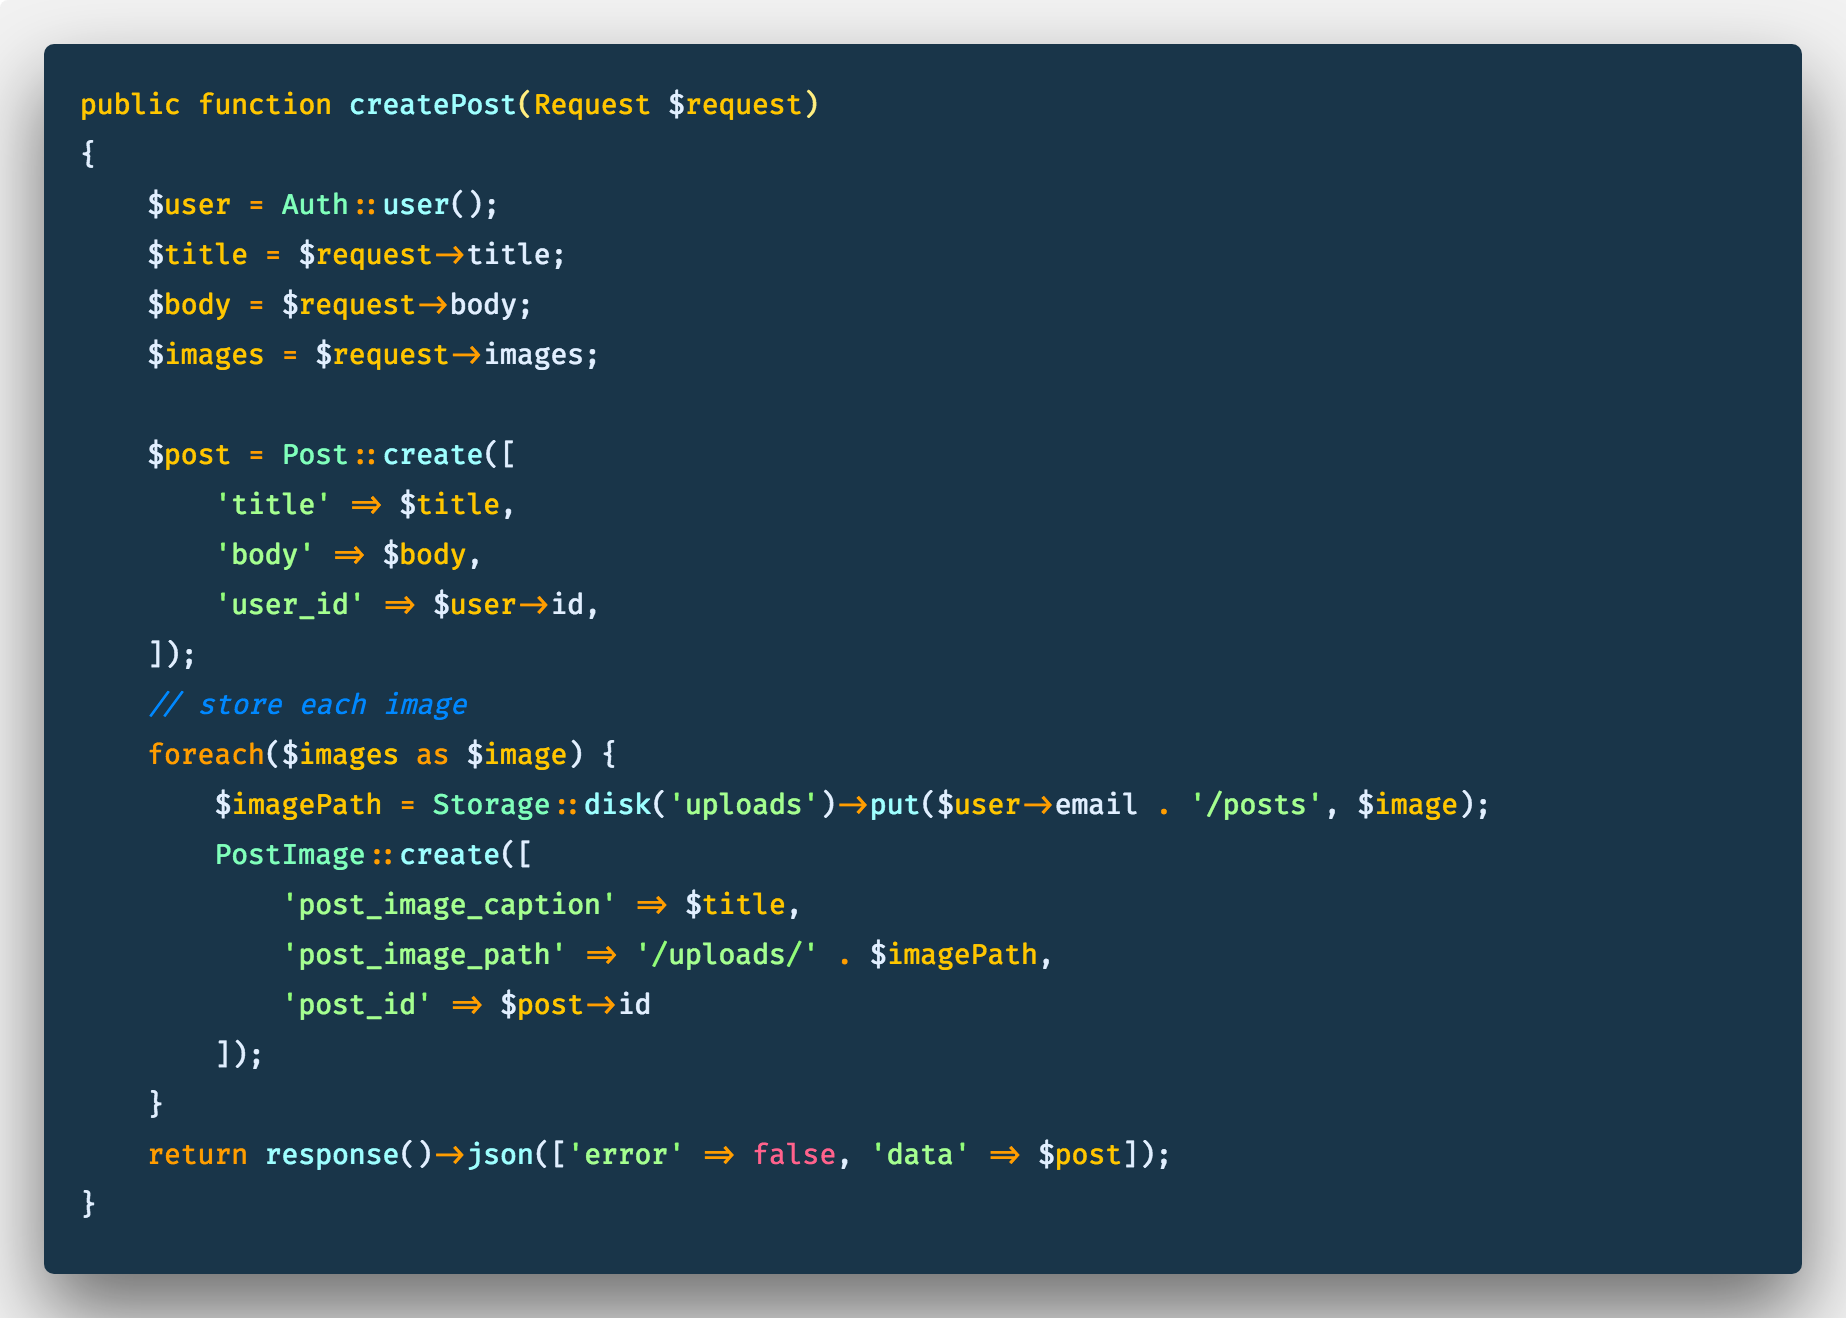
createPost function
Routes
For the web routes, we’ll create a route group that’ll use the web auth middleware. The route group will have two routes “get_all” and “create_post” — for getting all posts and creating new posts respectively.

web.php
Frontend ( blade )
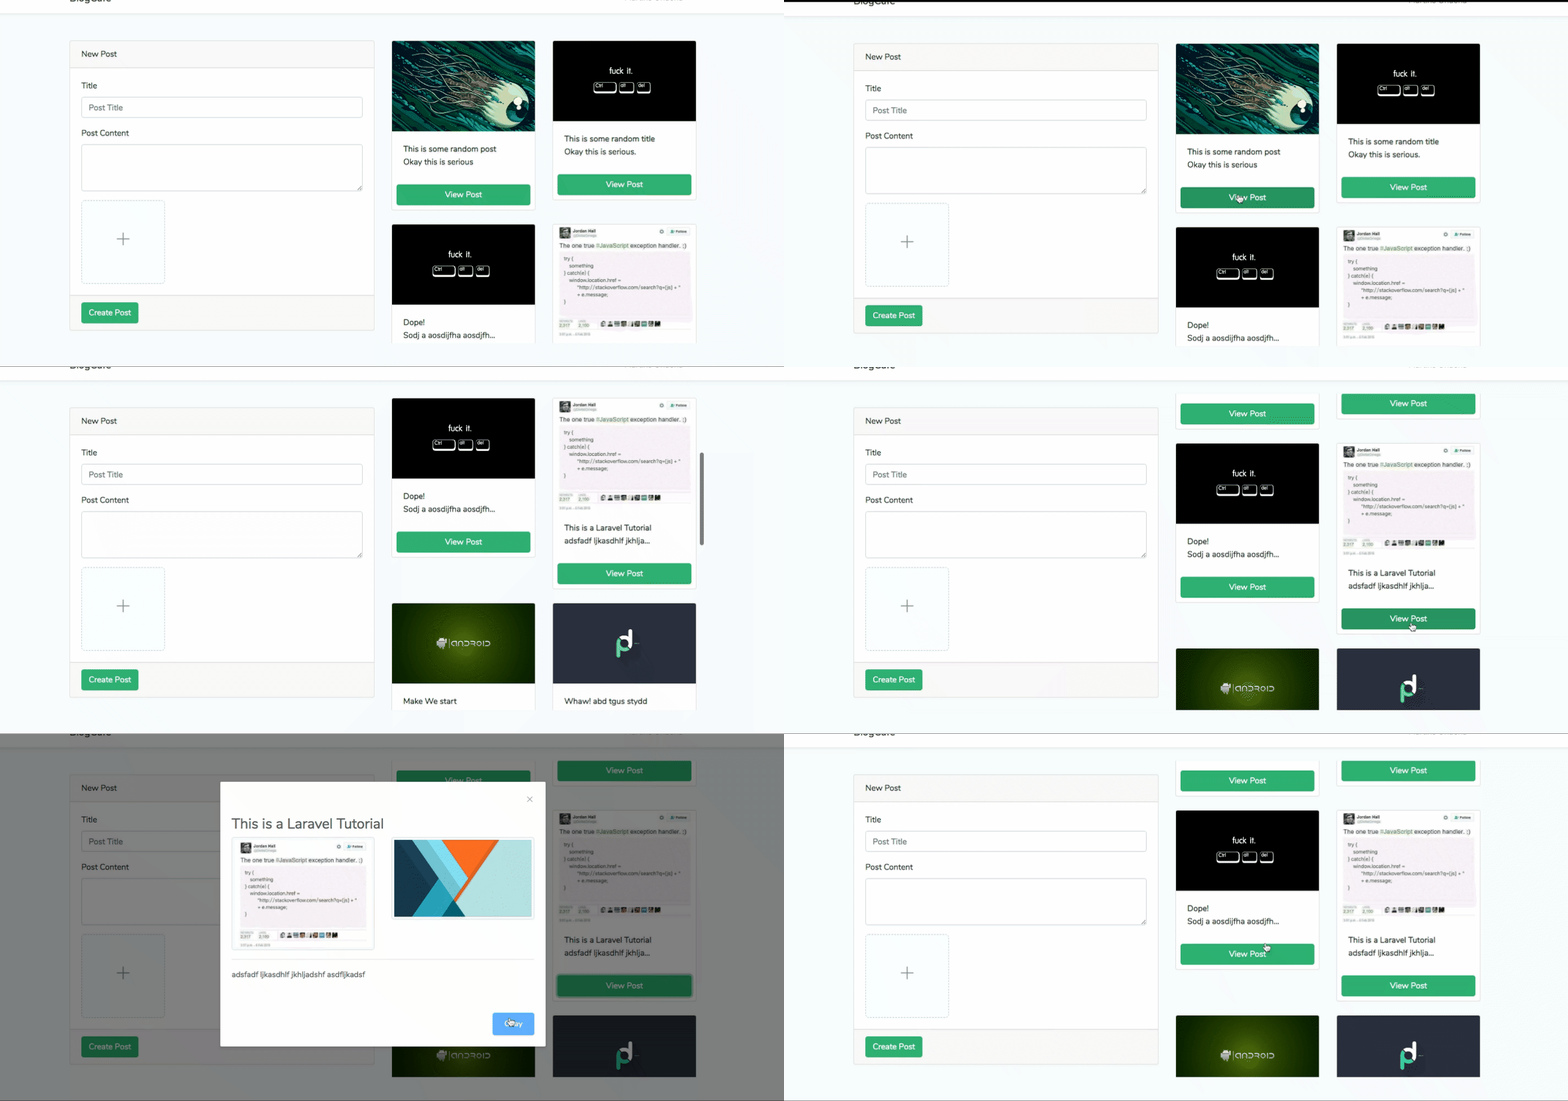
Let’s move over to the frontend and do a bit of work, first on the blade part. in our home.blade.php, we need to update the UI to use a 6x6 grid layout. The left grid will hold the create-post component, while the right grid will hold the list of posts. Incase you missed it earlier, this is what we’re going for:
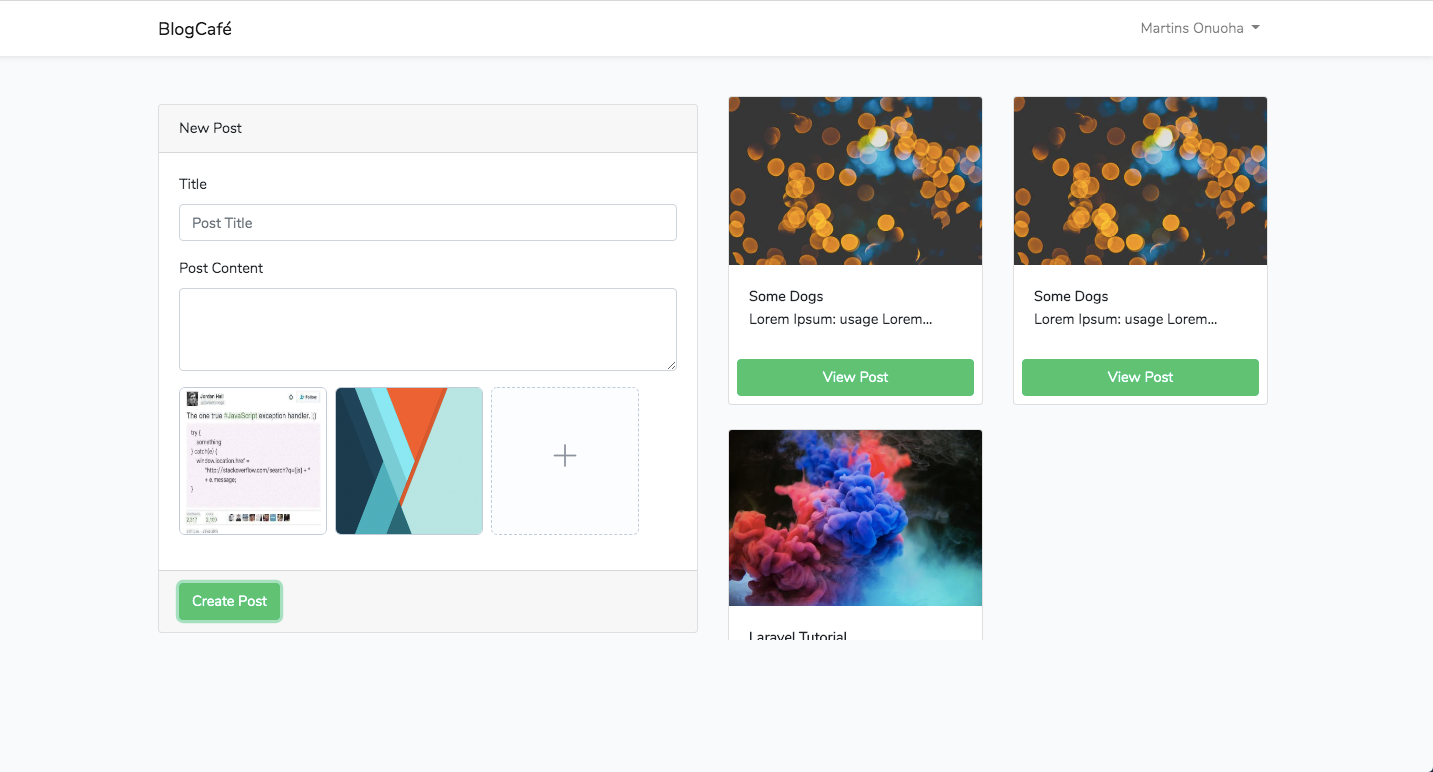
Let’s update our home.blade.php:
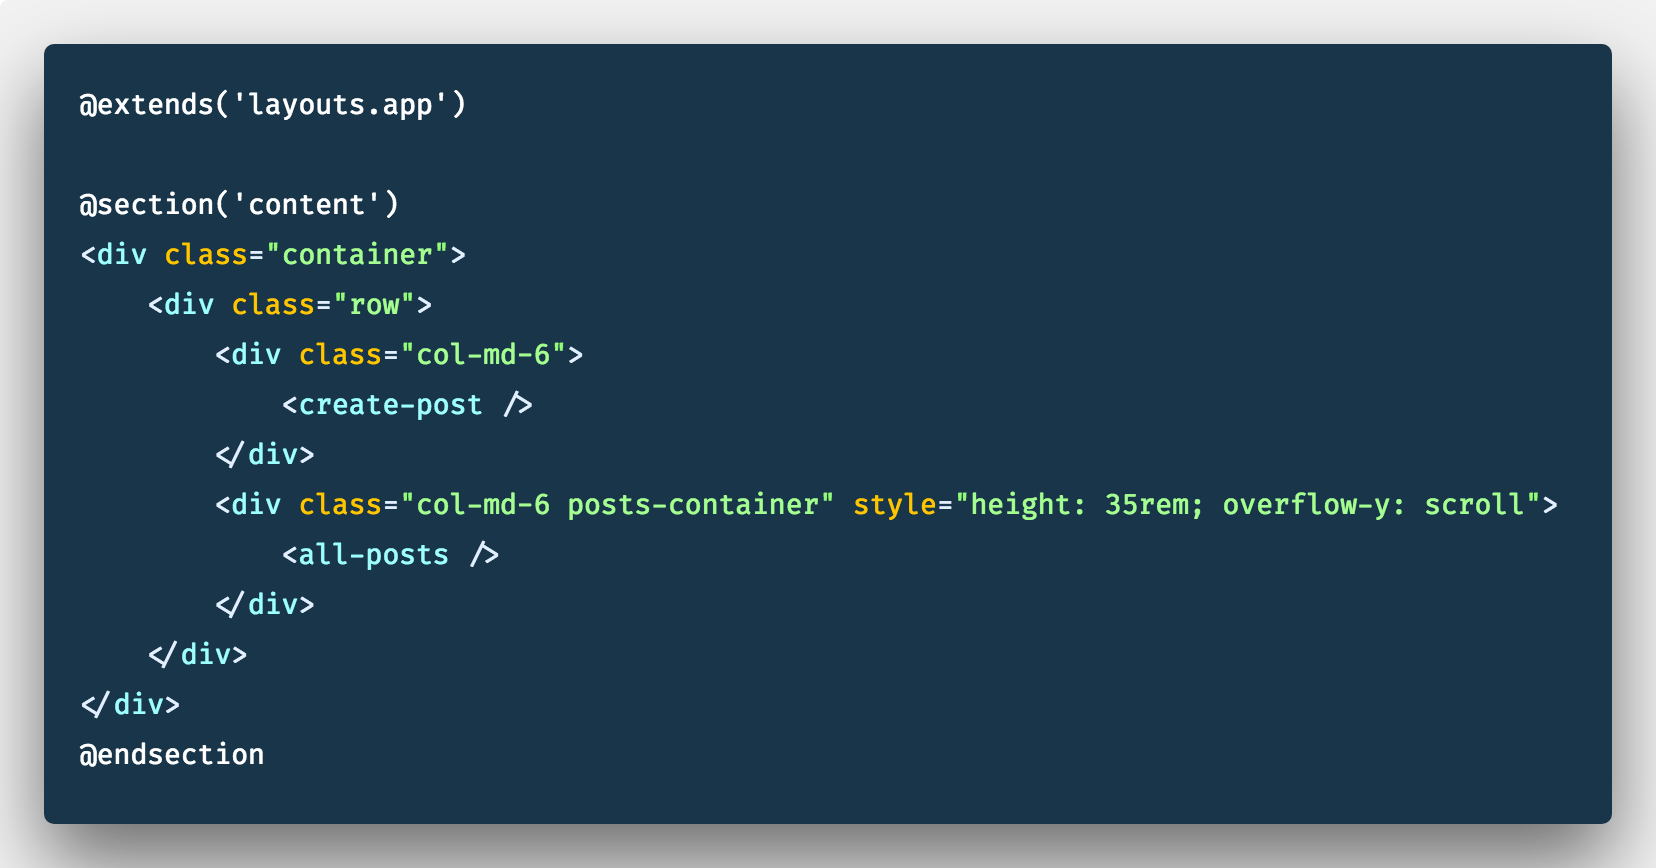
home.blade.php
We have our blade view setup properly, most of the work will go into the individual Vue components.
Components ( Vue )
Before we get started with the vue components, we need to setup our VueJs environment. Laravel already comes shipped with Vue, so we won’t have to do much work setting up (thank goodness!). We’ll first install all of the npm packages in our package.json file:
$ npm i
We’ll also need element-ui cause we need to use the dialog box and the upload component that comes with element. Why? cause it saves us more work that’s why ( and it’s neat too…no seriously…it is).
$ npm i element-ui -S
we’ll also be using vuex for state management.
$ npm i vuex -S
Once you all the necessary packages installed, we’ll setup our components, store and packages.
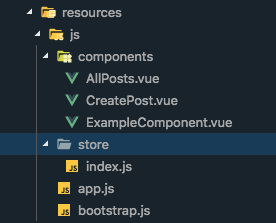
Create two new files CreatePost.vue and AllPosts.vue in resources/js/components. Also we’ll create a new folder called store in resources/js. In our store folder we’ll create an index.js file to setup our vuex store. Your directory should look something like this:
We’ll now register these new components in our resources/js/app.js file.

resources/js/app.js
In the same app.js file we want to setup our store and element-ui library. Update your app.js file like so:
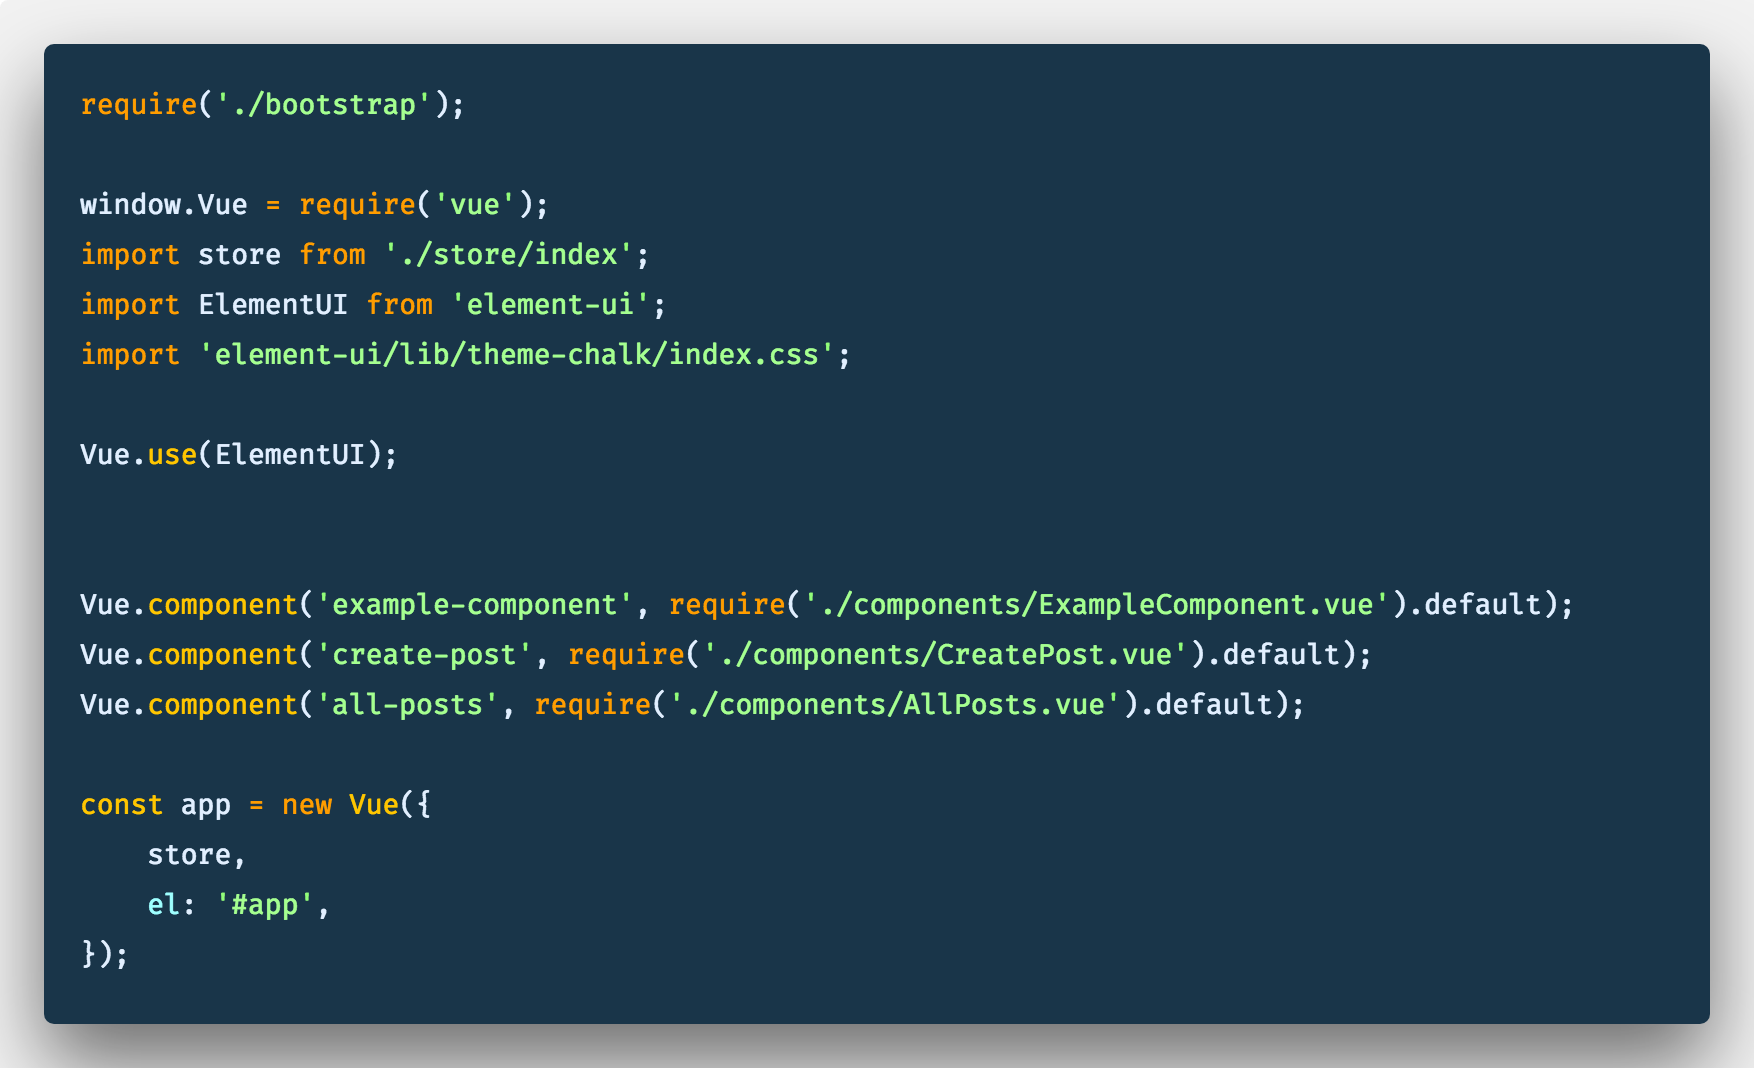
resources/js/app.js
Store
Let’s work on our store (to read more about vuex, go to the docs), we’ll setup a single mutation and action to handle fetching and updating the posts list. in our store/index.js file:
- We’ll import and use the Vuex module.
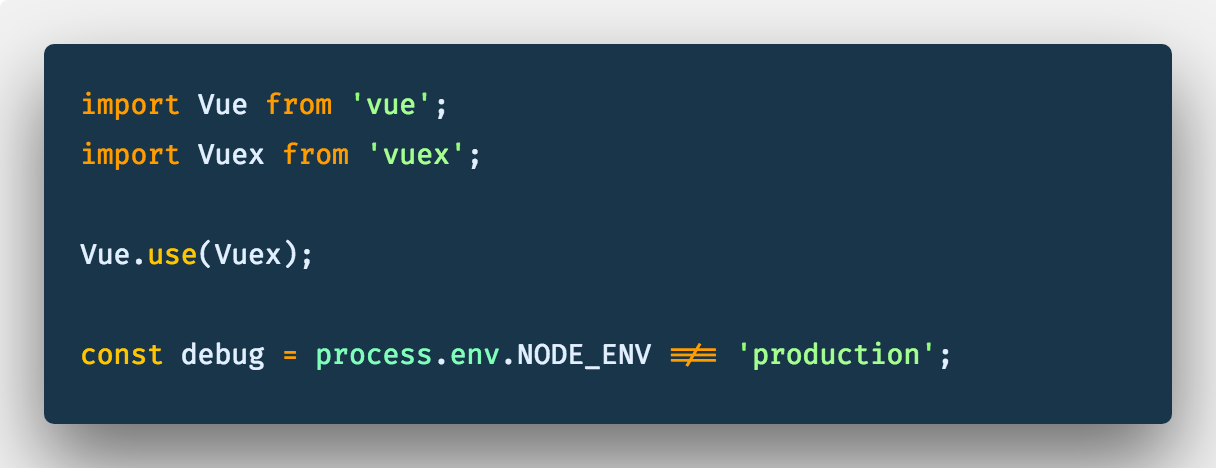
- Next we want setup our state object to hold the posts property ( an array of all posts ). We’ll then define an asynchronous getAllPosts action to handle the request to get all posts. And finally a setPosts mutation to update the posts property in our state.
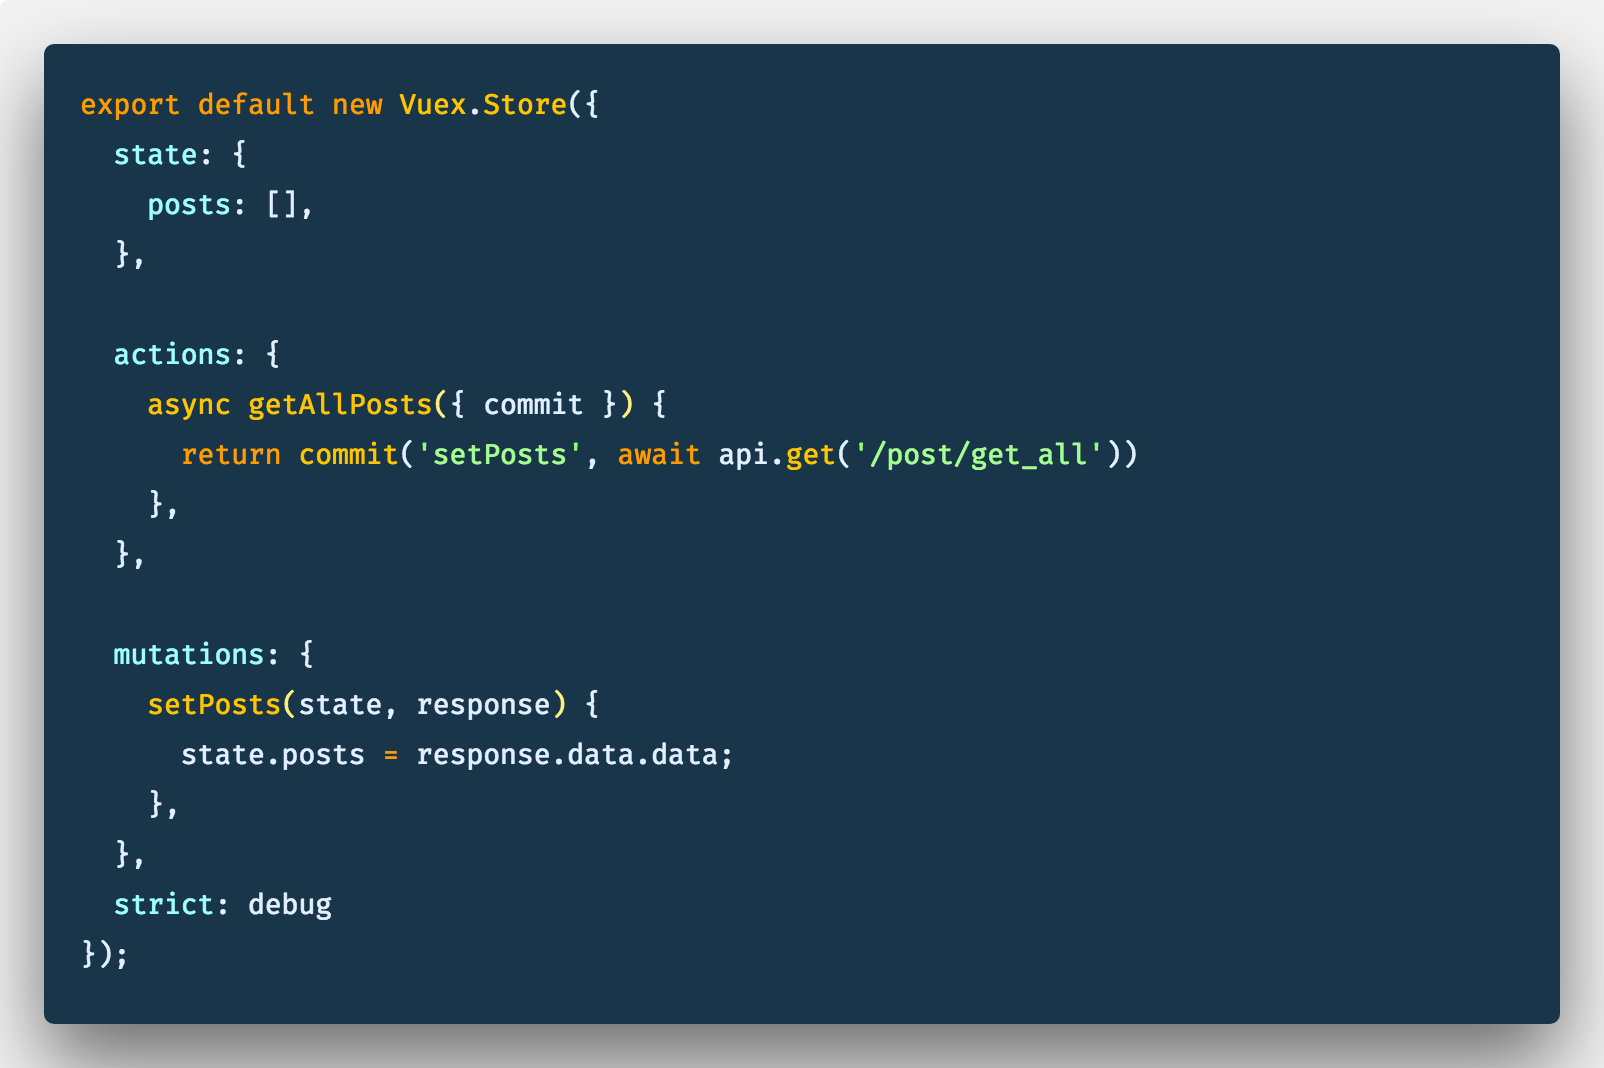
resources/js/store/index.js
Now that our store is all setup, we’ll move into the AppPosts.vue component to render all the created posts.
View Posts
We’ll render all the created posts in individual cards inside columns and use a dialog box to view individual post details ( this is where element-ui comes in handy ):
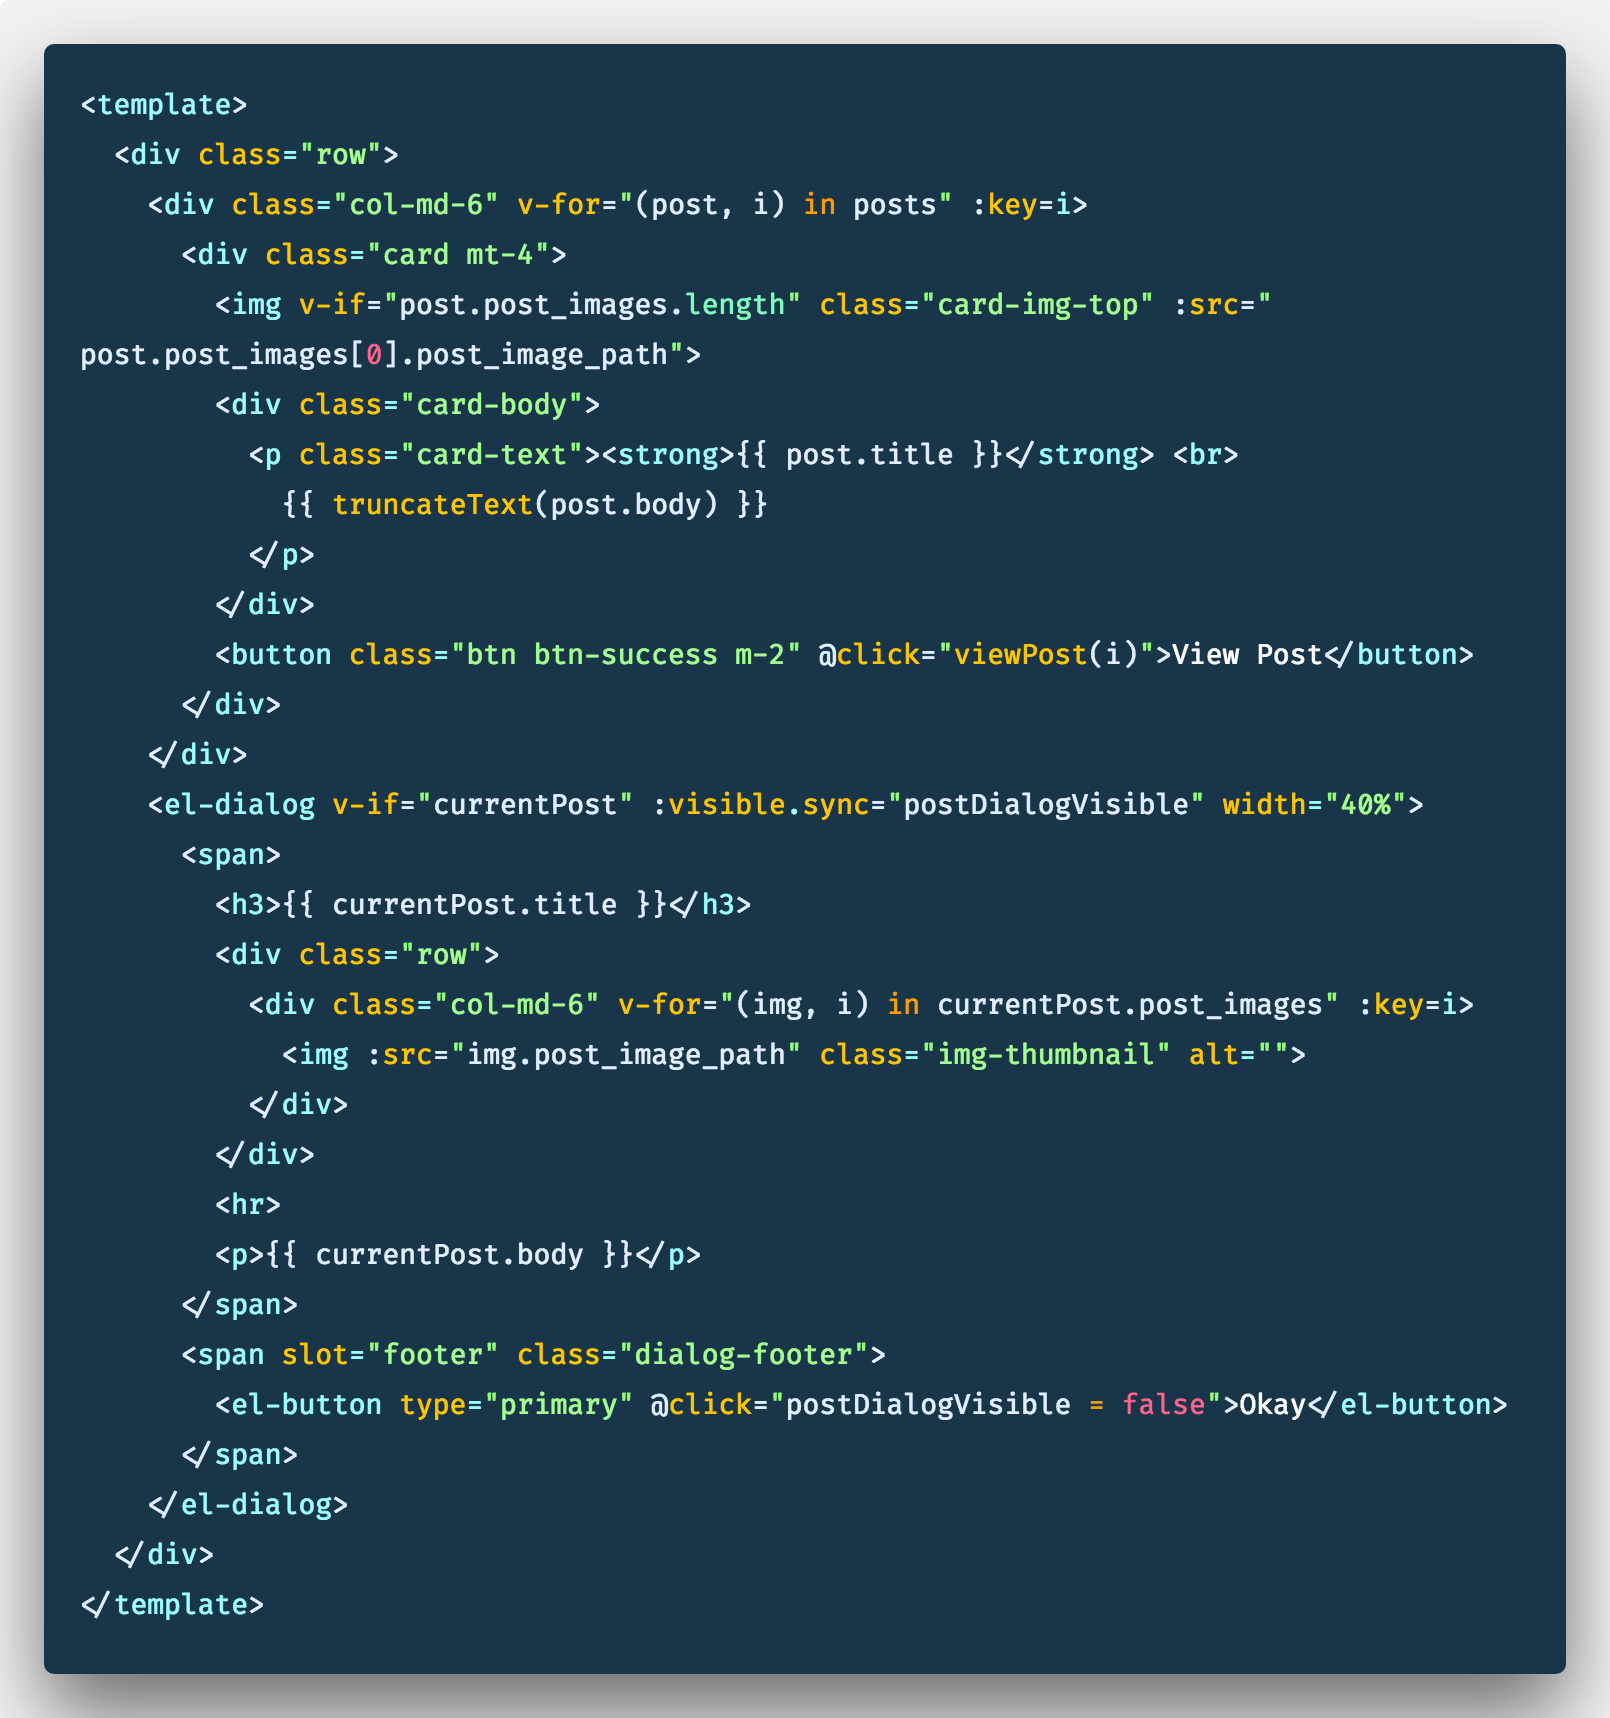
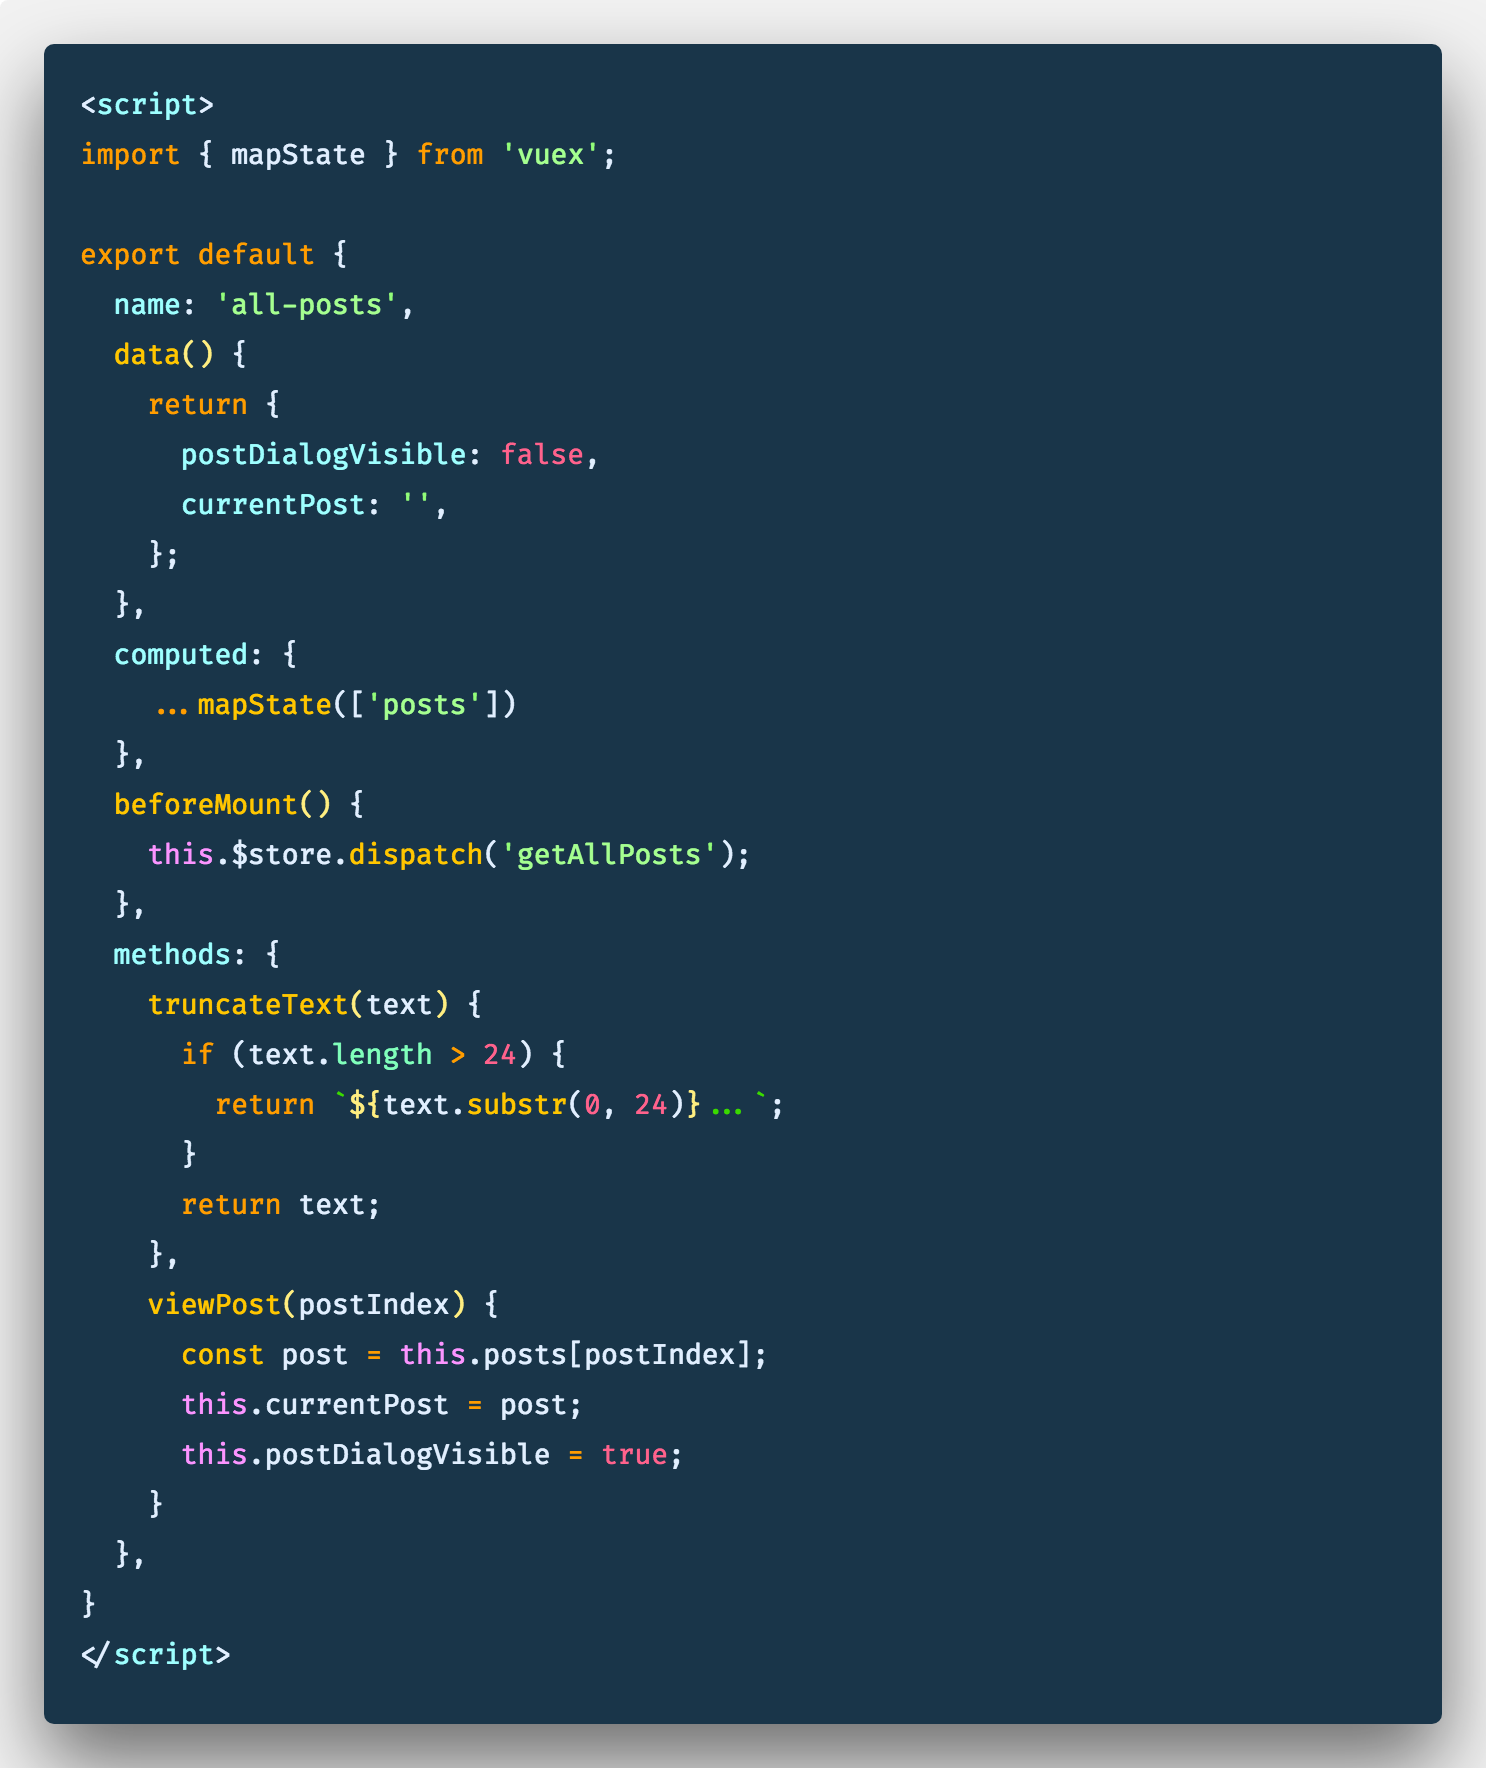
Next in our script section, we want to use VuexmapState helper which generates computed getter functions for us. We’ll pass a string array to mapState with the mapped posts property. We’ll also trigger the getAllPost action in a beforeMount hook using store.dispatch (Alternatively we can use the mapAction helper to grab the getAllPost action). We’ll define the helper function truncateText to truncate long post contents and one more function viewPost to view a post’s detail in a dialog box.
To bundle everything and watch our files for changes, we’ll run Laravel Mix:
$ npm run watch
You can start your laravel application with:
$ php artisan serve
Register a new user and be sure you can view your home page (ofcourse you might not see a lot on it yet).
I’ll go ahead to use Tinker to create some Post and related Post Images. Tinker allows you to interact with your entire Laravel application on the command line, including the Eloquent ORM. You can access the tinker interface with:
$ php artisan tinker
I won’t go into all the details about using tinker, but if everything works fine you should be able to create posts and images from the command line:
>>> $user = App\User::find(1)
>>> $post = App\Post::create([
        "title" => "Some blog post",
        "body" => "this is a random post about absolutely nothing"
        "user_id" => $user->id
    ])
>>> $postImage = App\PostImage::create([
        "post_image_caption" => $post->title,
        "post_image_path" => "https://skillsouq.com/wp-content/uploads/2014/10/background_01.jpg"
    ])
Create Posts
To Create a new post, we’ll need a form to take the post title, post content and post images. for the image upload we’ll be using element-ui’s upload component, this will help us handle and preview the files properly…It’s also has a better user experience (no seriously, it is…and I’m lazy).
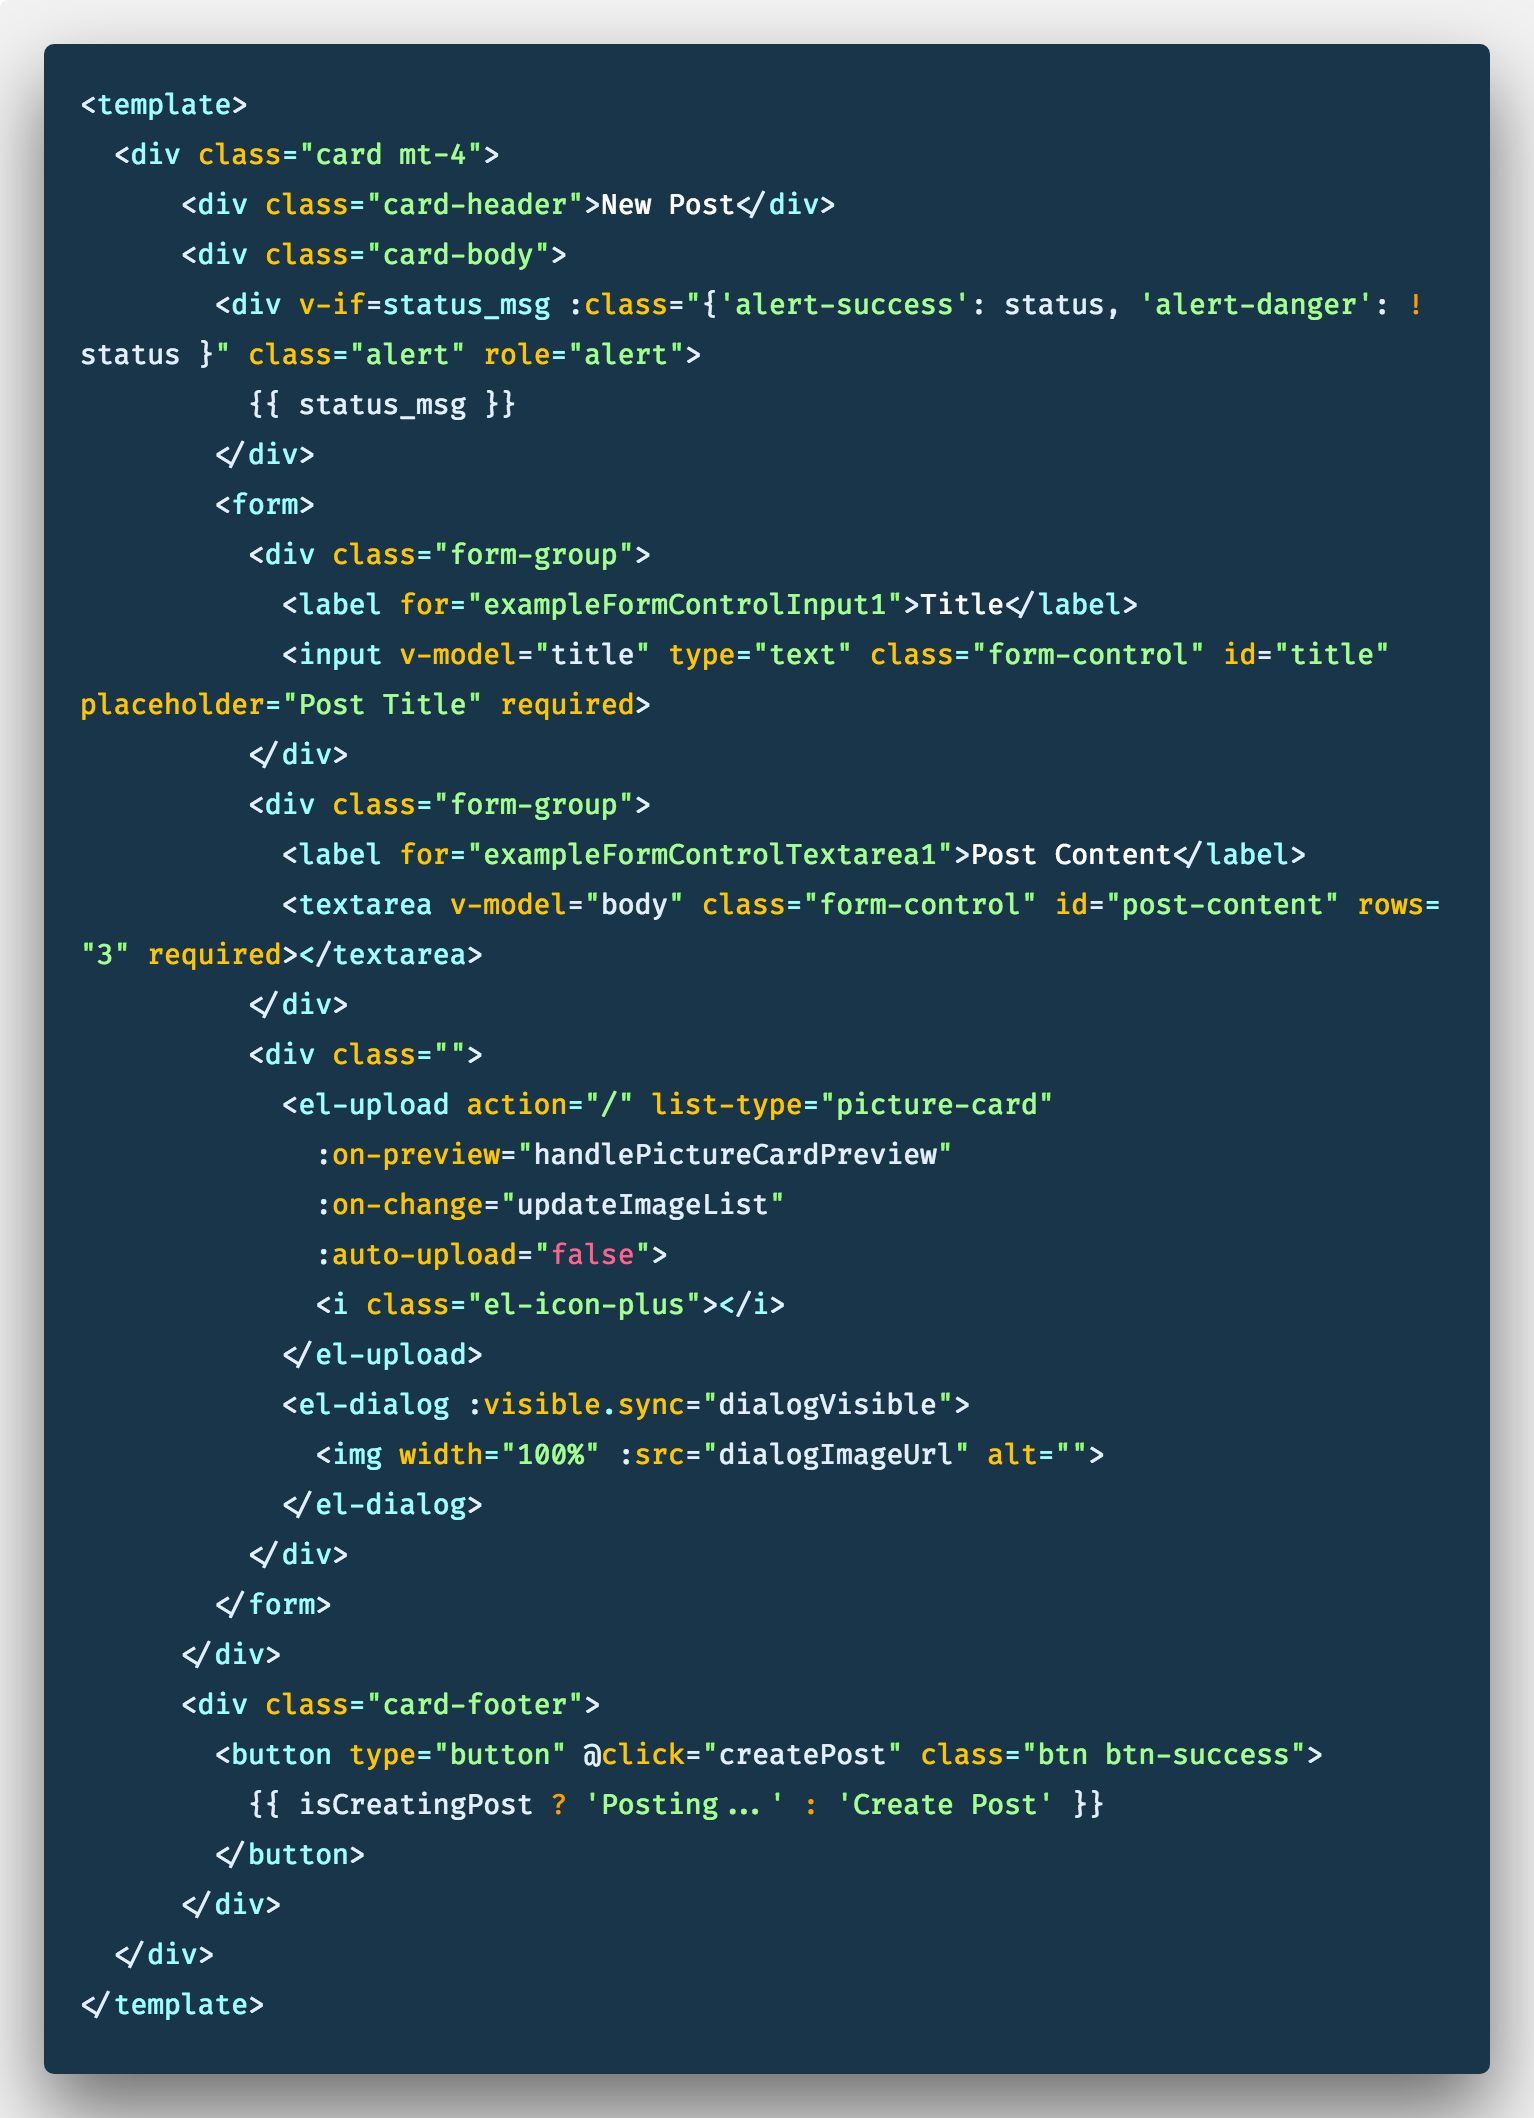
CreatePost.vue
We’ll add some styling to the upload component:
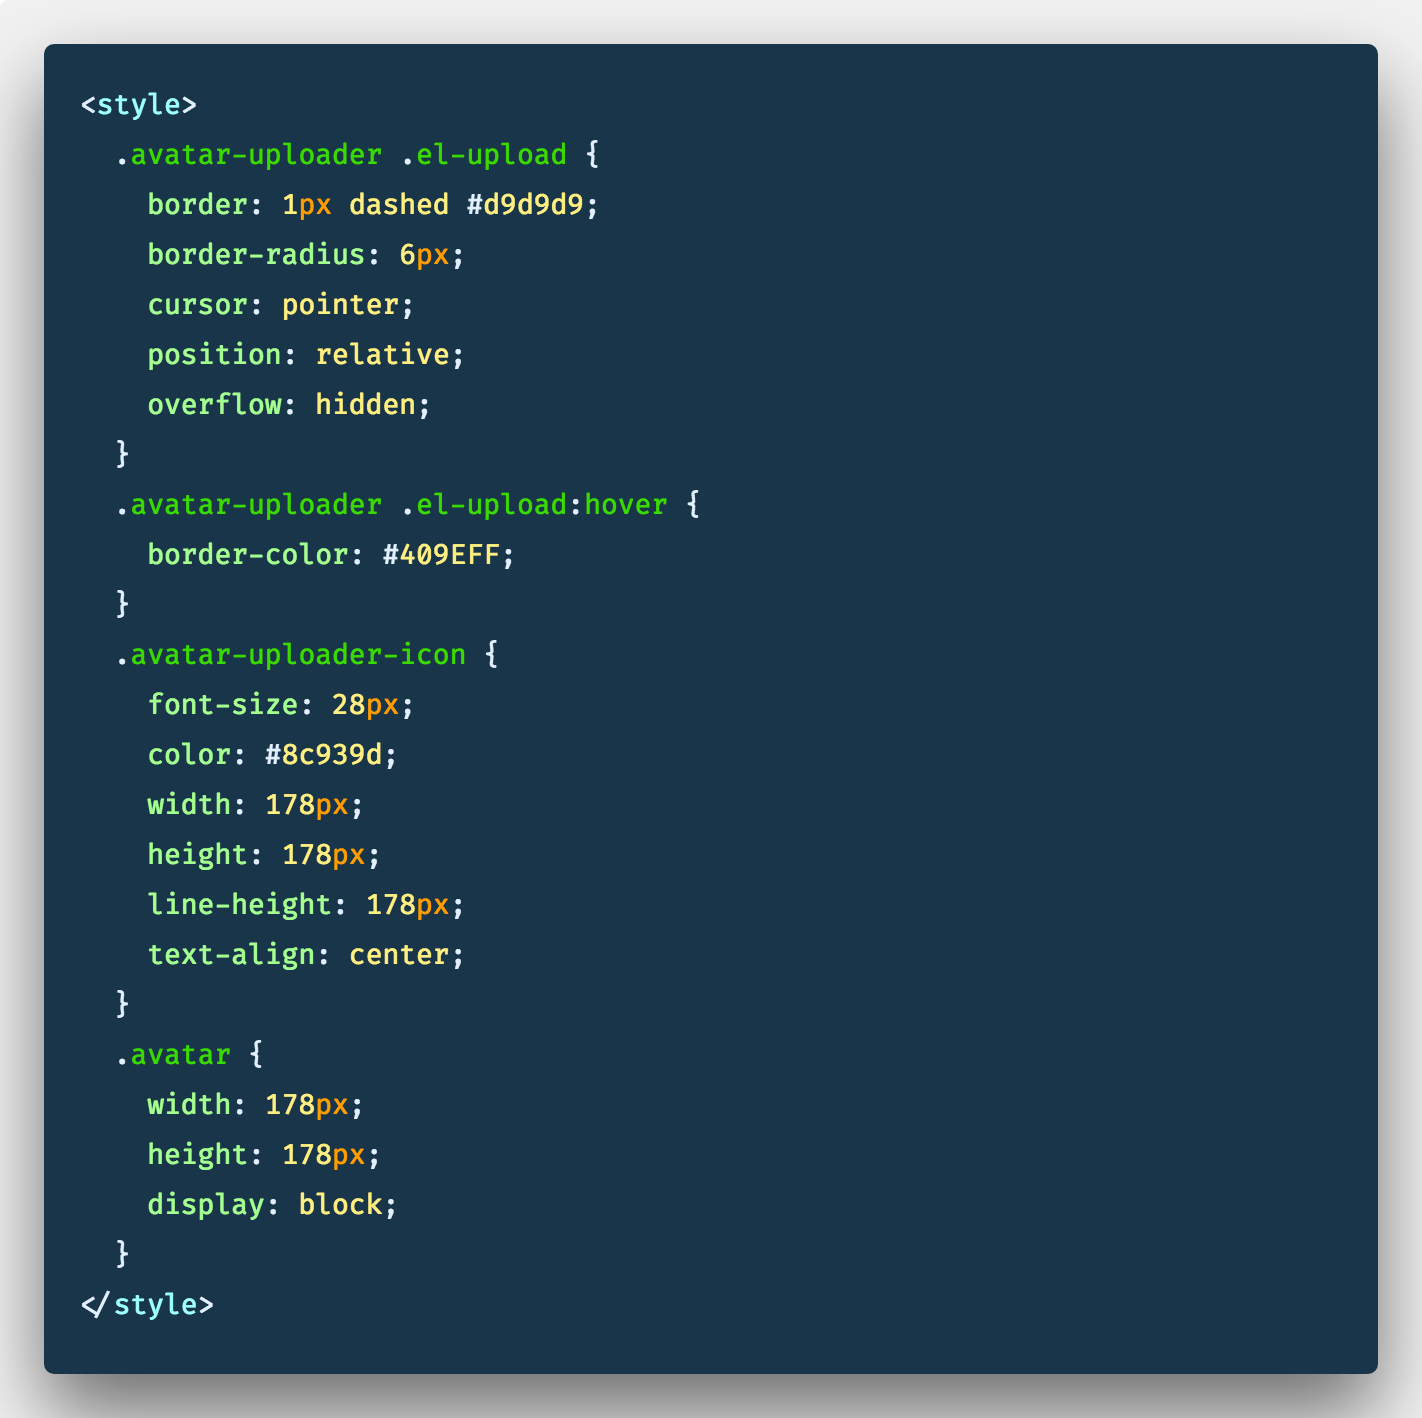
In our script area, we’ll import the mapAction helper which maps component methods to store.dispatch calls.

Next we’ll be needing these data properties:
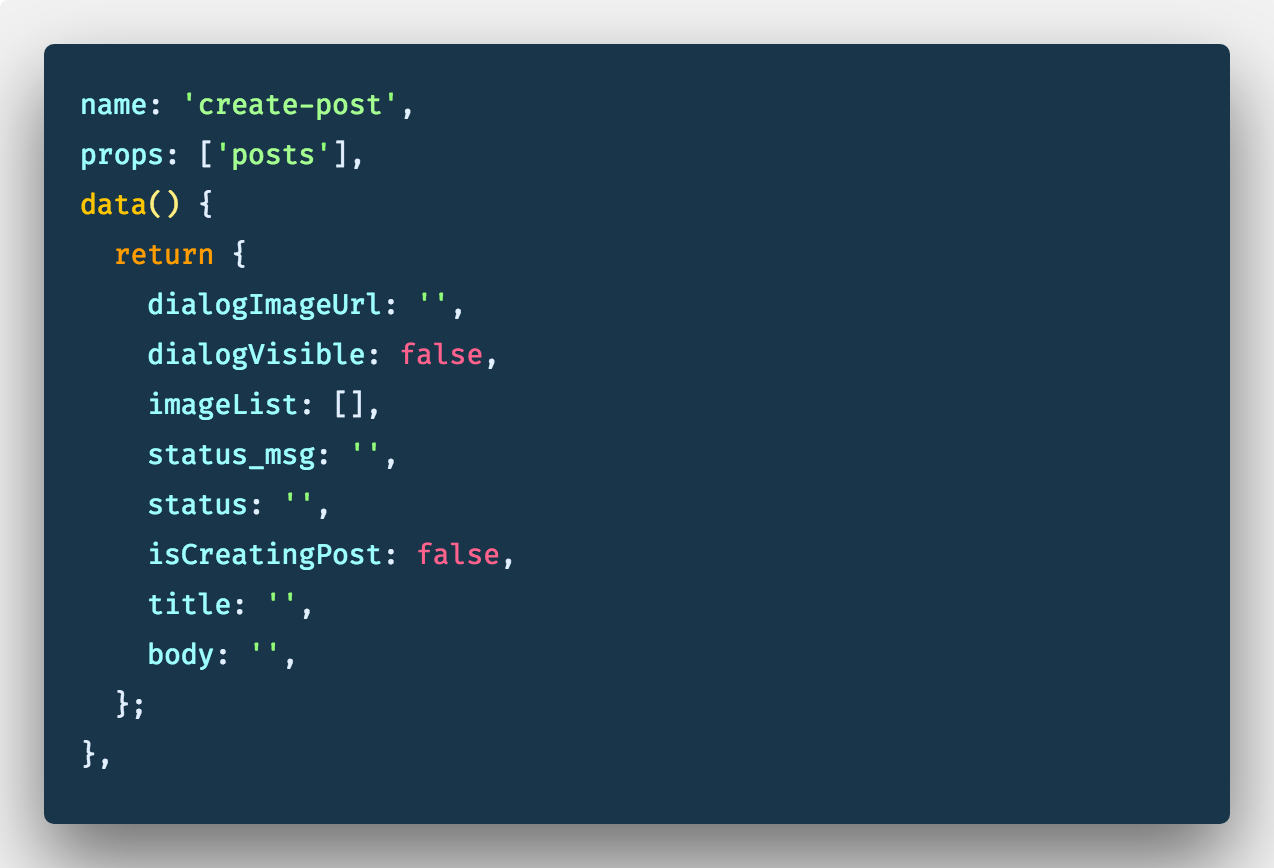
In our computed property, we’ll map the getAllPosts action we defined in our store to the component:

Next in our methods property we’ll need a couple of methods to handle image preview and update our image list.
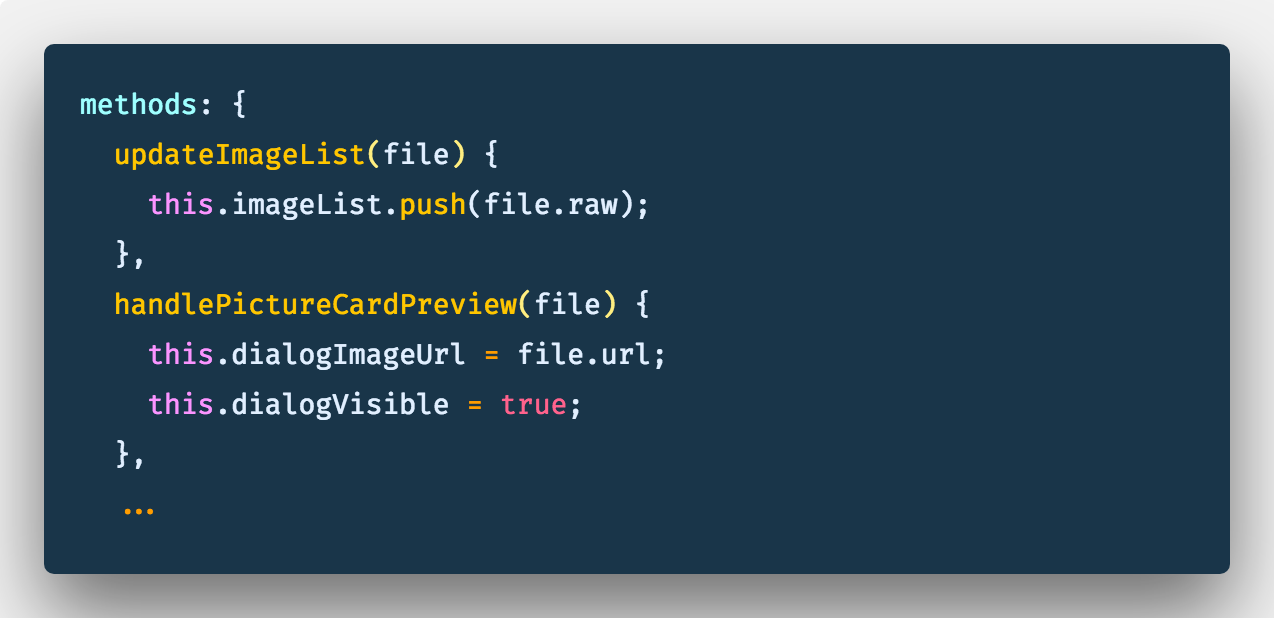
We’ll need another method to handle showing success and error notifications.
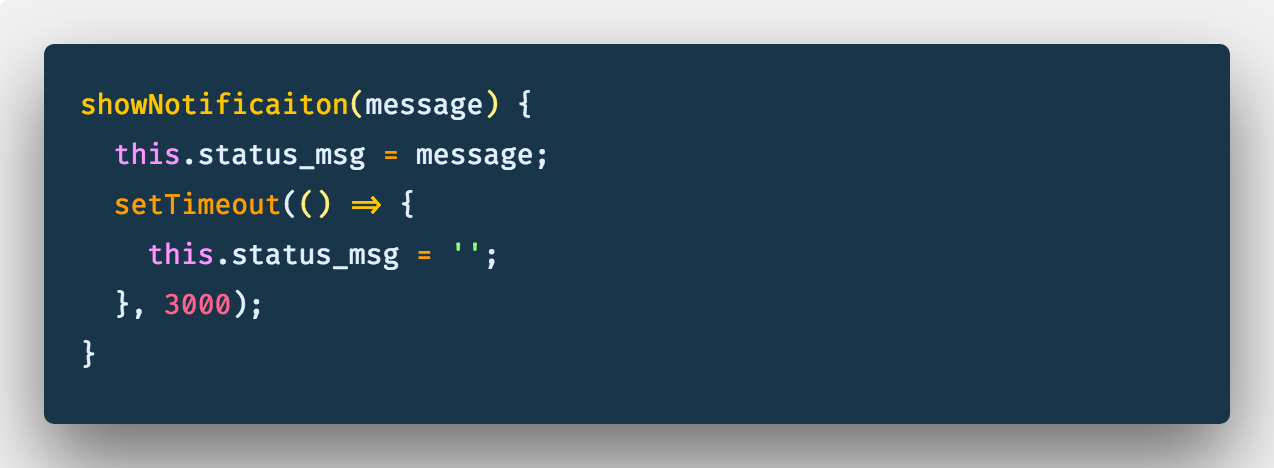
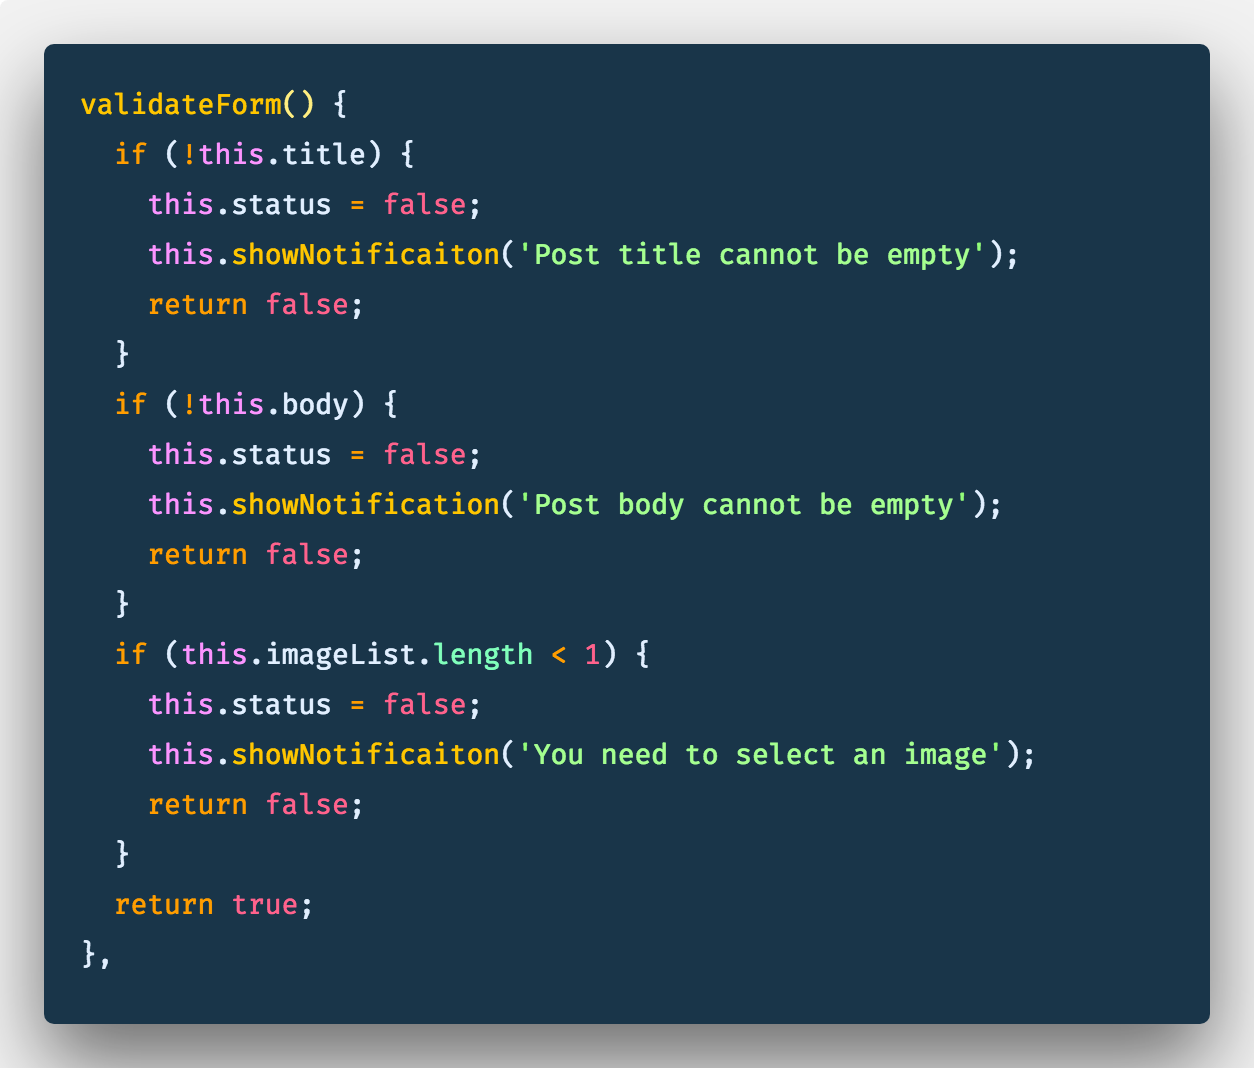
One more method to handle validation of our form…lol (you thought it was over, eh?)
And finally our createPost Method:
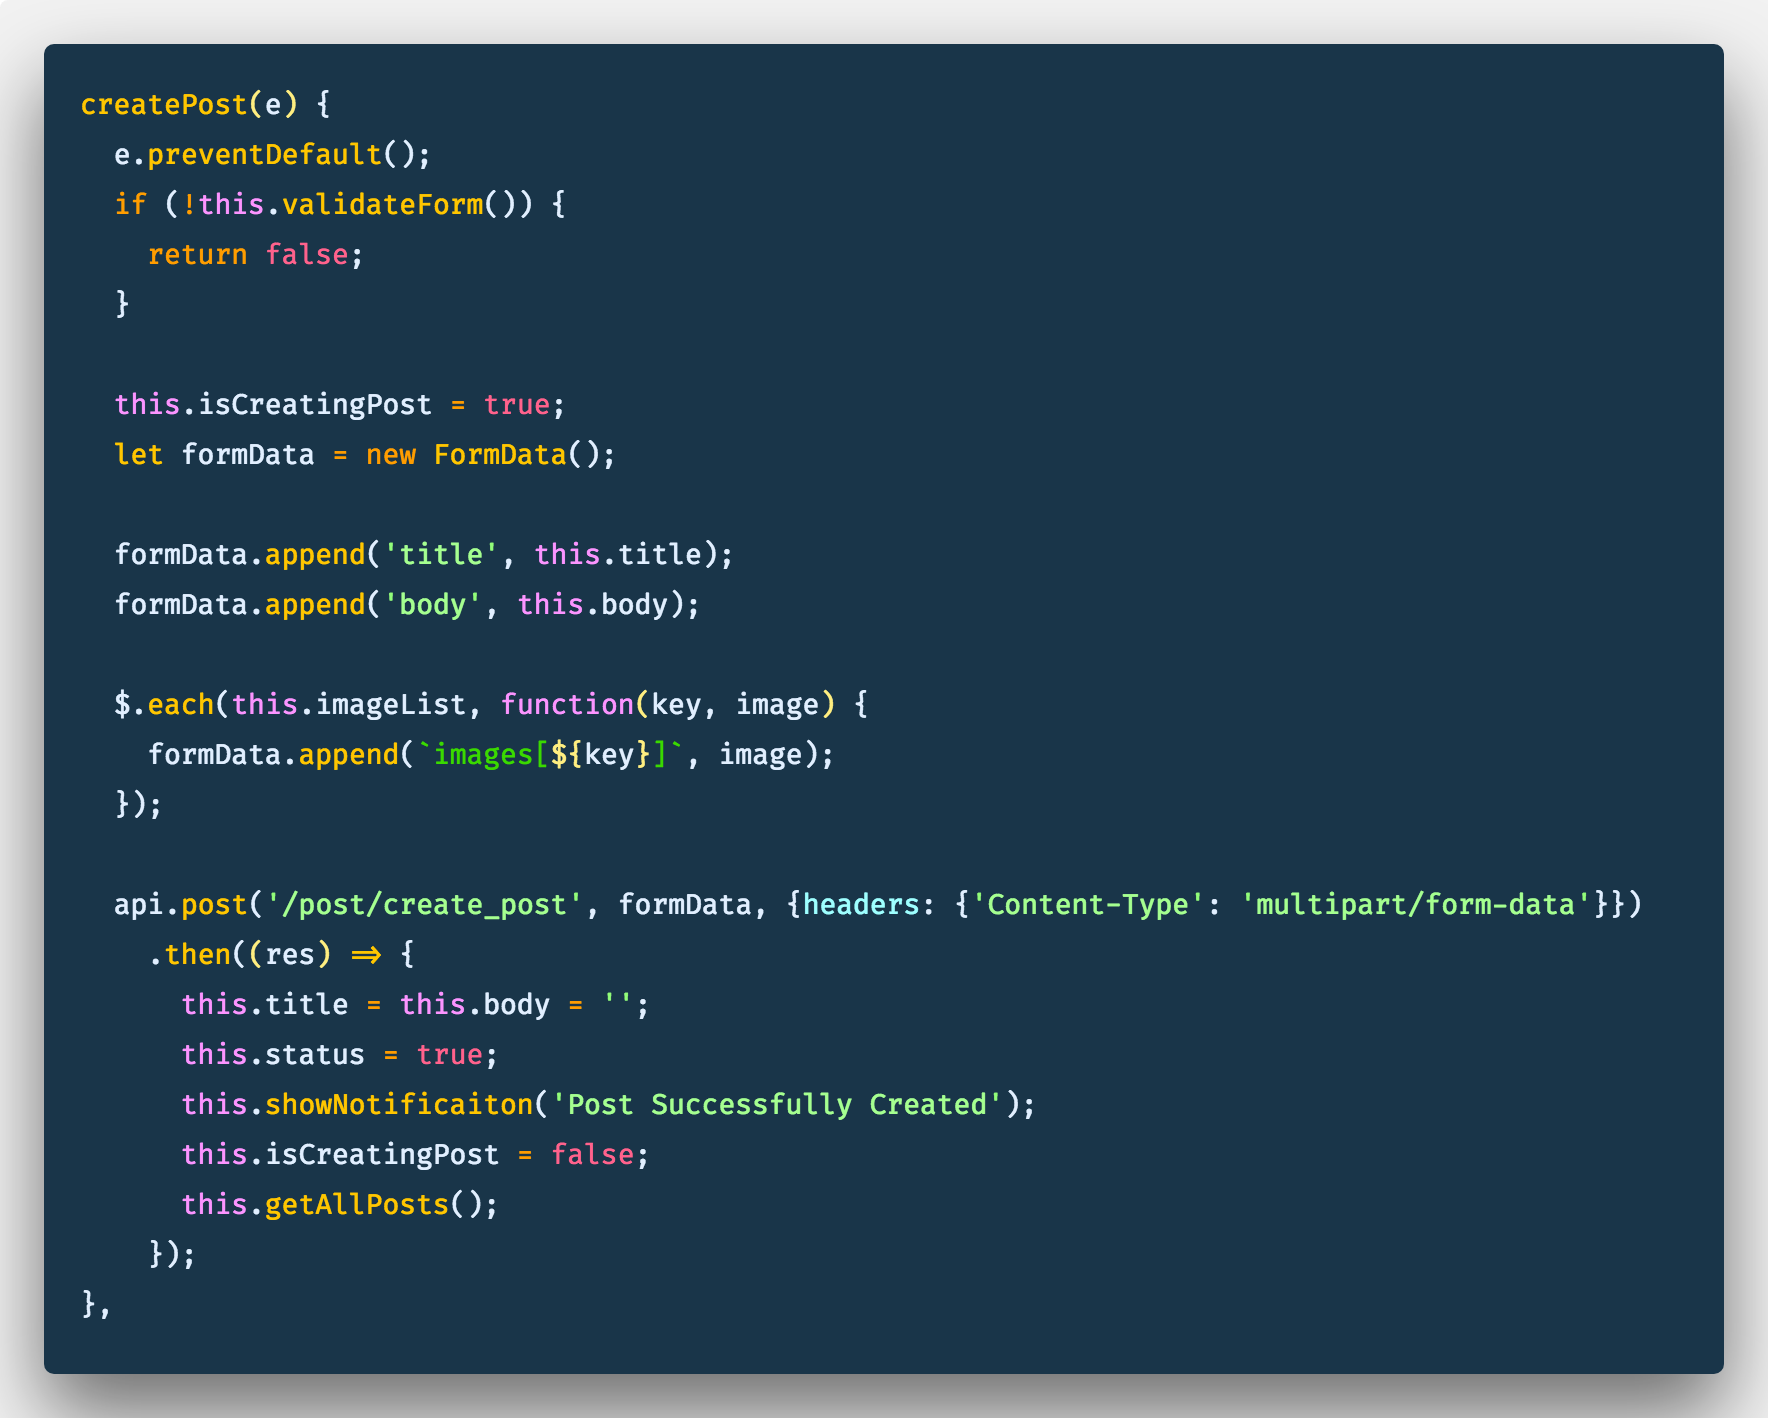
Because we need to sent image files to our api, we’re using the FormData class. The [**FormData**](https://developer.mozilla.org/en-US/docs/Web/API/FormData) interface provides a way to easily construct a set of key/value pairs representing form fields and their values. This is so our request looks like it’s coming from an actual form and allow Laravel read the image file properly.
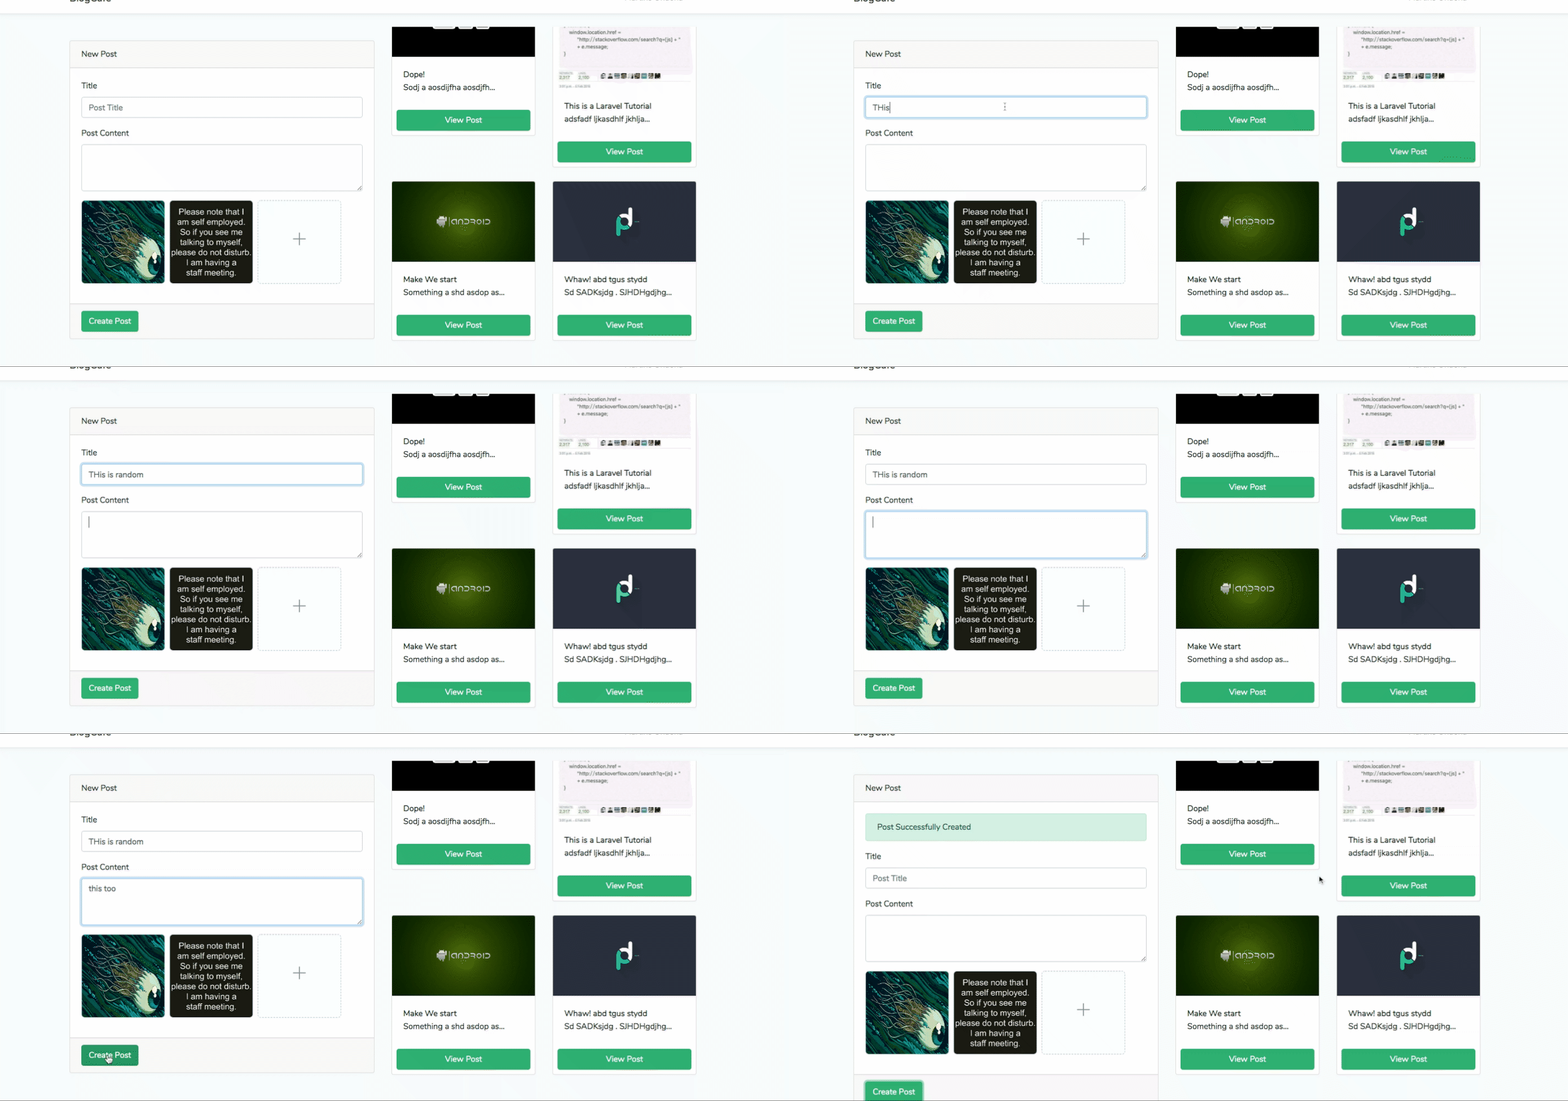
If all went well and the gods were with us, we should have it working as expected:
I know this was a long ride, hopefully you were able to make this work on your end.
Thank you for reading!
#laravel #vuejs #webdevelopment #programming
