How to create a Website using Nuxt.js and Contentful
As a frontend-developer, working with static-site-generators and serverless architecture is a joy, and with it, we can create very powerful and amazing applications which we can also server-side render
This article aims to give you a step by step guide for building a very basic website using Nuxtjs + Contentful — Including a simple Vuex example.
Find the full GIT repo here:
https://github.com/nickycdk/nuxt-contentful-example
Personally, my own website is running on a Nuxt/Contentful setup with Continuous deployment by connecting my GIT repo with Netlify, this combined with Contentful’s webhooks to rebuild your site automatically when publishing new content is just…. Awesome
What is Nuxt
If you’ve built Vue applications before, you’ve probably heard about NuxtJS, which is the equivalent to what NextJS is for React.
Nuxt is a framework that builds on top of Vue that simplifies the development of universal or single page Vue apps, which is great if you are building a website and want to make sure it can get indexed by Google.
What is Contentful:
Contentful is known as a headless CMS system, which means it is a API-First content-management-system from where you can create, manage and distribute content to any platform or device.
Learn much more about Contentful on their own website right here: https://www.contentful.com/
In this article you’ll learn how to build a very simple nuxt website that pulls data from Contentful. Once you’ve gotten a grasp of both and how you can use these two together, you can really start build powerful and amazing applications.
Nuxt Setup
Before we can start building, we need to install Nuxt. We’ll do that by using the VueCLI. If you haven’t installed this on your system before, you need to install it by using the terminal:
npm install -g vue-cli
Now you can use the VueCLI to setup a Nuxt project.
vue init nuxt/starter nuxt-contentful-demo
Follow the instructions and give the project a name, description and author.

When done, cd into the folder of you project and run
npm install
npm run dev
Beautiful 😊 We’re now one step closer and we have a foundation to build upon.
Contentful Setup
Go to Contentful and login with your username and password.
If you haven’t already got a user, you need to create one to be able to use Contentful. They have a free plan which you can use.
Once logged in, first thing we need to do is setup a new space for our website.
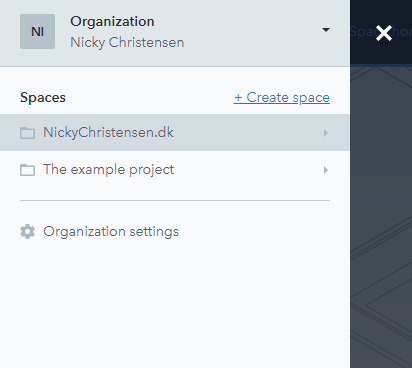
When you’re in Contentful, click on “Create space”
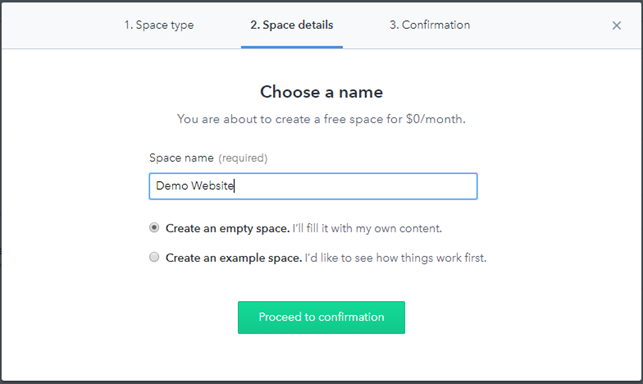
When creating a new space, we’ll need to fill in a few details.
Choose the free plan and give your space a name and confirm the creation.
Integrate Contentful into the Nuxt
When wanting to use Contentful in in Nuxt projects, we need to install the javascript SDK. We can do this by running the following command:
npm install --save contentful
When done installing, we can go to our project in our IDE, and create a new file under “plugins”. This will be basically be the file that are telling Nuxt to use contentful as a plugin, which enables us to easily fetch our data from Contentful.
Go ahead a create a new file:

const contentful = require('contentful');

// use default environment config for convenience
// these will be set via `env` property in nuxt.config.js

const config = {
  space: process.env.CTF_SPACE_ID,
  accessToken: process.env.CTF_CDA_ACCESS_TOKEN
};


// export `createClient` to use it in page components
module.exports = {
  createClient () {
    return contentful.createClient(config)
  }
}
As you might have noticed we are referencing some environment variables that we haven’t created yet.
const config = {
  space: process.env.CTF_SPACE_ID,
  accessToken: process.env.CTF_CDA_ACCESS_TOKEN
};
For this to work, we will need to create a new file “contentful.json”, which we’ll place in our root directory. This file will need to hold some configuration.
{
  "CTF_SPACE_ID": "YOURSPACEID",
  "CTF_CDA_ACCESS_TOKEN": "YOURACCESSTOKEN",
  "CTF_ENVIRONMENT": "master"
}
You can find these settings by navigating to > Settings > Api Keys in the Contentful dashboard
When done, save the file and go to the nuxt.config.js
We need to require the newly created config file and add a bit of code to our nuxt.config.js file
// ./nuxt.config.js
const config = require('./.contentful.json')

module.exports = {
  // ...
  env: {
    CTF_SPACE_ID: config.CTF_SPACE_ID,
    CTF_CDA_ACCESS_TOKEN: config.CTF_CDA_ACCESS_TOKEN,
    CTF_ENVIRONMENT: config.CTF_ENVIRONMENT
  }
  // ...
}
The env property is a way to define values that will be available when using process.env when the site is run in a node.js context.
Now that we’ve gotten all the basics setup for using Contentful, next step is to create some content, we can pull into our nuxt application.
Build content in Contentful
Before we can fetch content into the application, we need to create a content-type and some content. Start off by navigating to the tab: Content Model and setup a new content-type
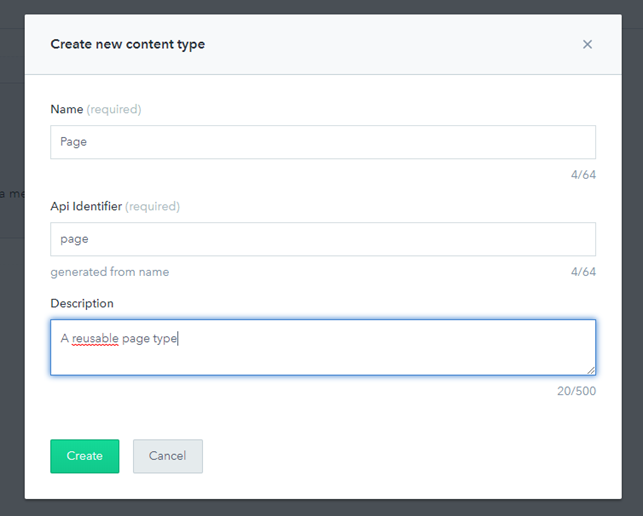
Once the content-type is created, we need to add some fields to it.
In this example, we’ll setup a very basic model with the following fields:
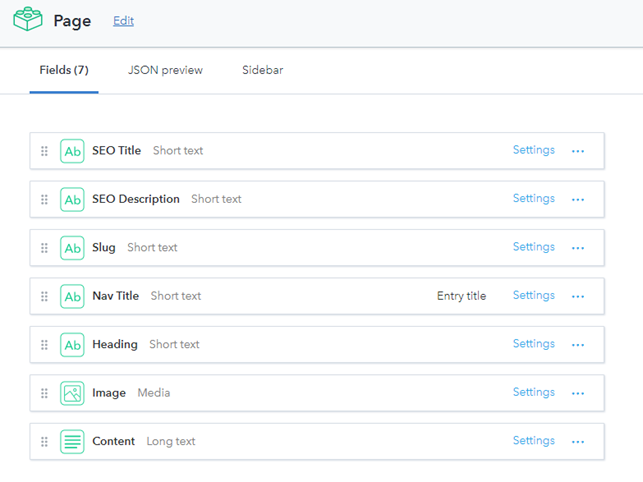
Next up, we’ll need a few pages. Go ahead and create some pages based on the content-type created. You can do this in the “Content” tab.
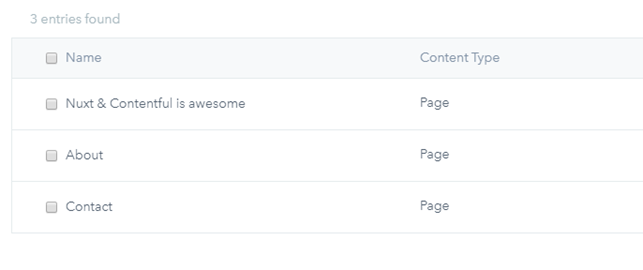
Awesome — Now we have some content created and we’re ready to do some more work in our code.
Creating the navigation
Our website needs a navigation so our users can navigate between pages. In the “Components” folder, create a new component called “Navigation”
// Navigation.vue
<template>
    <div class="navigation">
      <nav>
        <ul role="menu">
          <li v-for="(navItem, index) in pages" :key="index">
            <nuxt-link :to="'/' + navItem.fields.slug.trim()" role="menuitem">{{navItem.fields.navTitle}}</nuxt-link>
          </li>
        </ul>
      </nav>
    </div>
</template>

<script>
    export default {
        name: 'Navigation',
        props: {
          pages: {
            type: Array, // We expect an array of pages that we need for our navigation
            required: true
          }
        }
    }
</script>
Next, go to the folder “pages” and open up the index.vue file.
In this file we’ll need our navigation component to be included, so we can add it to the file.
//pages/index.vue
<template>
  <section class="container">
    <Navigation :navItems="pages" />
  </section>
</template>

<script>
  import Navigation from '../components/Navigation';
  export default {
    components: {
      Navigation
    }
  }
</script>
As you might notice, in the Navigation.vue, we are passing a prop called navItems with some data that doesn’t exist yet. To pass the pages down to the navigation component, we first need to fetch the data from Contentful
Fetch data from Contentful
First thing we need to do is, import the client from the contentful plugin, we created earlier in the plugins directory:
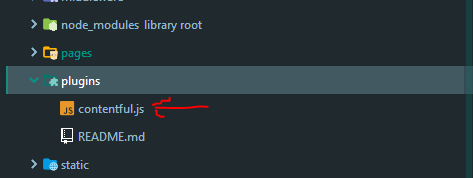
Add the following to the code:
import { createClient } from '../plugins/contentful';
const contentfulClient = createClient();
Next, we need to make use of the asyncData method. This allows us to fetch and render the data server-side. In this we’ll fetch all pages created in Contentful.
Interested in learning more about asyncData: https://nuxtjs.org/api/
//pages/index.vue
asyncData ({env}) {
      return Promise.all([
        // fetch all blog posts sorted by creation date
        contentfulClient.getEntries({
          'content_type': 'page',
          order: '-sys.createdAt'
        })
      ]).then(([pages]) => {
        // return data that should be available
        // in the template
        return {
          navItems: pages.items
        }
      }).catch(console.error)
}
What happens is, we start off by fetching all content created with the content-type of page ordered by date of creation.
When we have the data, we assign it to the property pages, which is also the prop data passed to our navigation component:
Your index.vue file should now resemble something like this:
<template>
  <section class="container">
    <Navigation />
    <div class="container__content">
      <h1>Please select a page you wish to view</h1>
      <p>This is a website for demo purposes of using Nuxt & Contentful together</p>
    </div>
  </section>
</template>
<script>
import Navigation from '../components/Navigation';
import {createClient} from '../plugins/contentful';
const contentfulClient = createClient();
export default {
    components: {
      Navigation
    },
    asyncData ({env}) {
      return Promise.all([
        // fetch all blog posts sorted by creation date
        contentfulClient.getEntries({
          'content_type': 'page',
          order: '-sys.createdAt'
        })
      ]).then(([pages]) => {
        // return data that should be available
        // in the template
        return {
          pages: pages.items
        }
      }).catch(console.error)
    }
  }
</script>
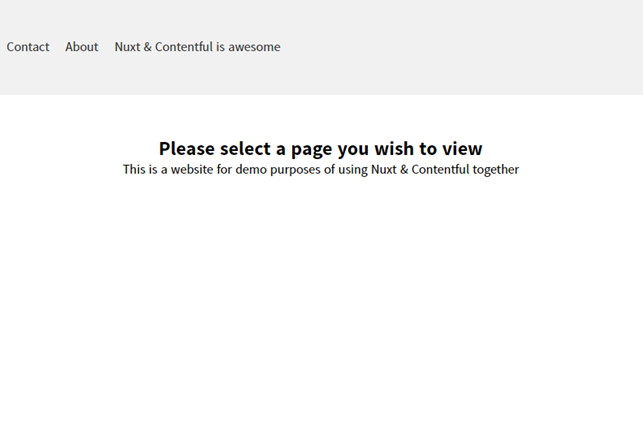
And your page something like this:
#nuxtjs #vue #javascript #Contentful
