Learning Android Application Development from scratch can be tricky sometimes for a newbie like myself. I am assuming that you are equipped with a complete Android Studio setup and have a fair idea about Android Activity and Markup language.
Let us create a Android Project with Empty Activity and follow the process. On completion, we are presented with two files:
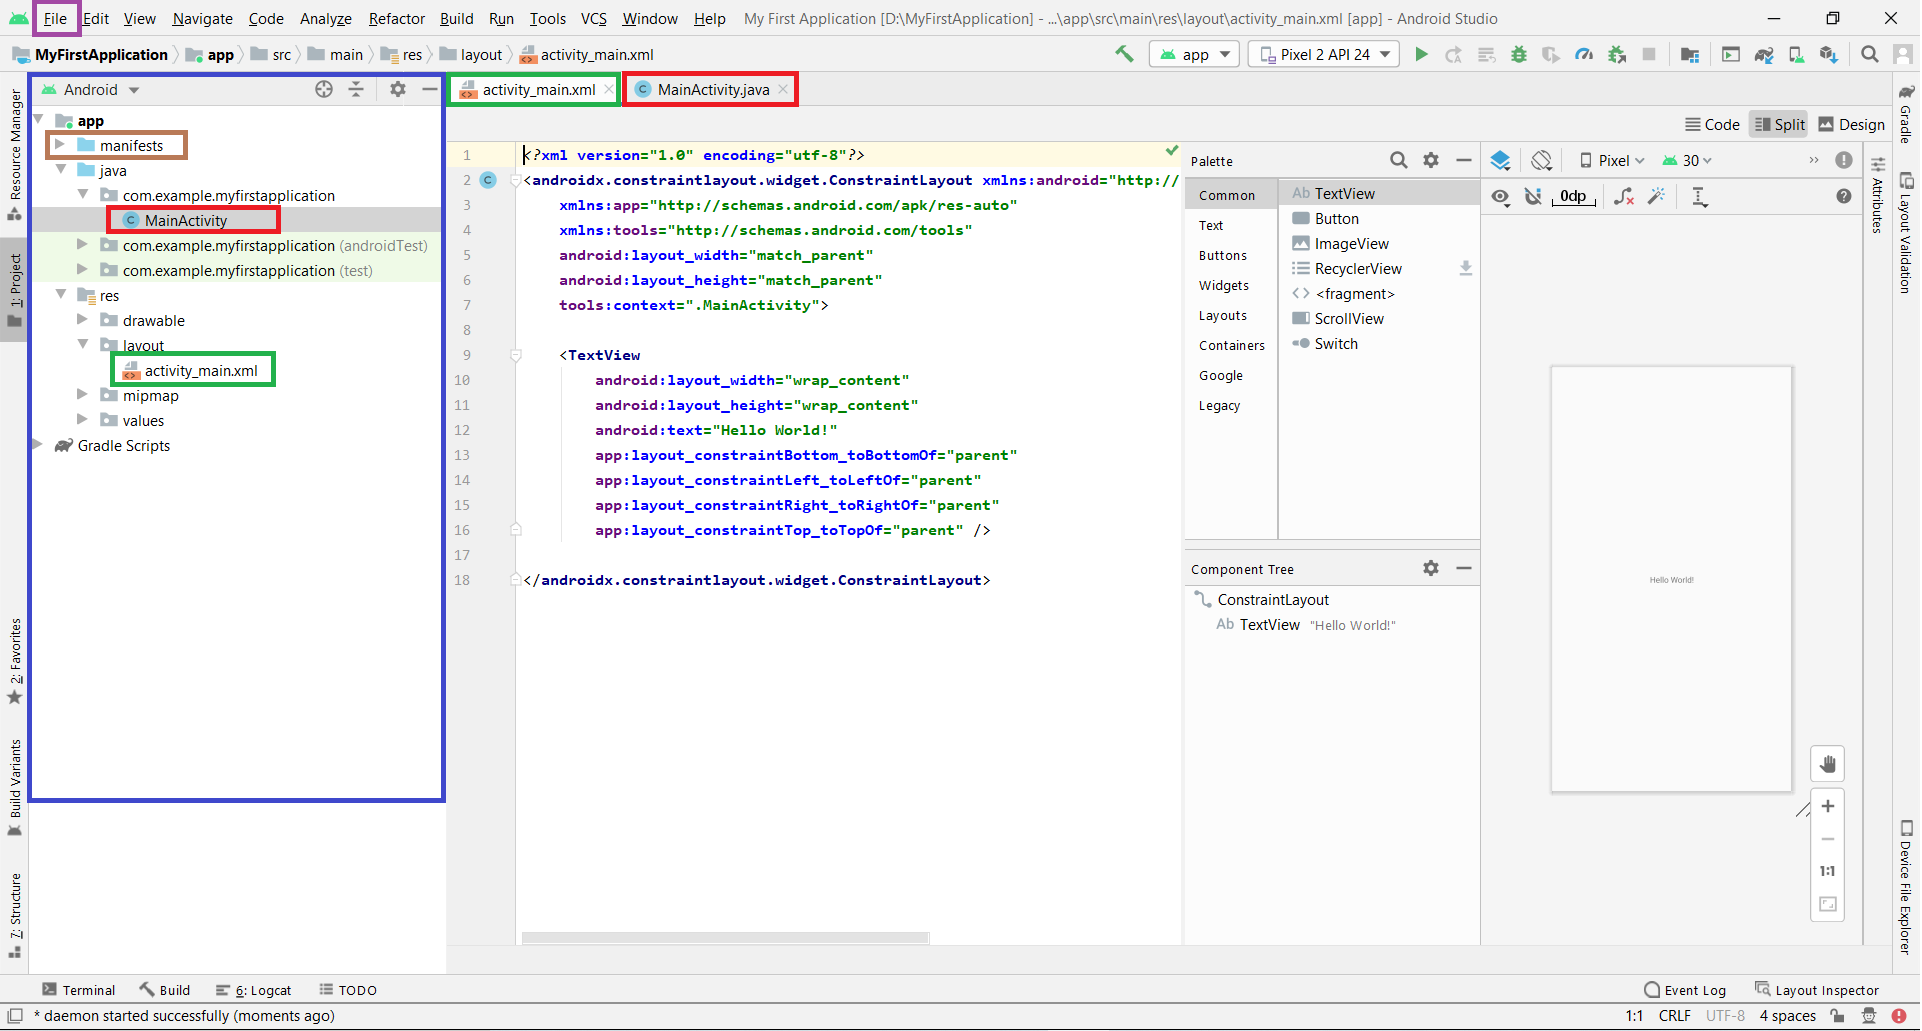
1. **MainActivity.java **(Red box in Fig 1)
2. **activity_main.xml **(Green box in Fig 1)
Just for curiosity, we delete both the files from the project folder, and now the project is broken.
Through this post, we’ll try to fix what’s broken and set up a new default activity without starting from scratch.

Fig 1: Default Layout before files were deleted
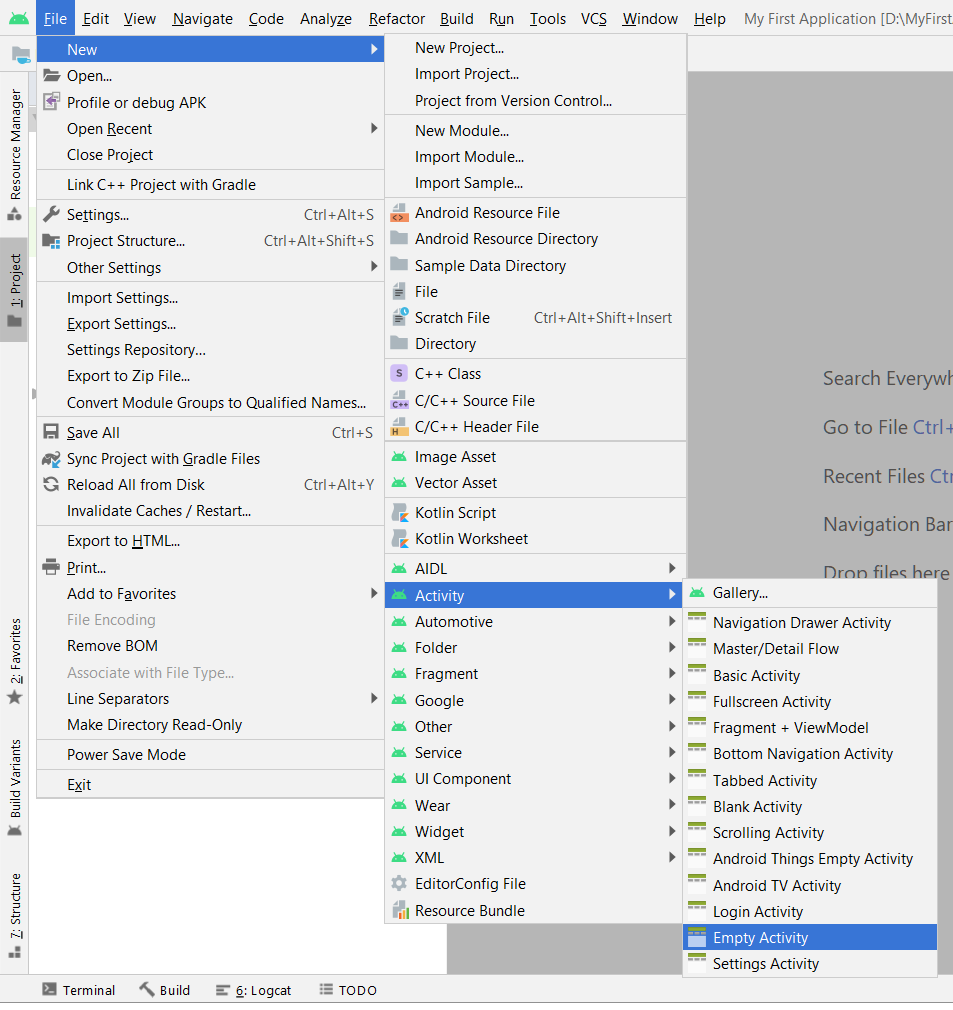
Before we go into the actual process of setting up the default activity, let’s look at how we can create an activity. It can either be created from the File tab section (purple box on the top left of Fig 1) or Project Manager window (blue box, i.e., the leftmost window of Fig 1). Given below are the two ways to create a new activity:
- Go to File tab > New > Activity > Empty Activity
- Right Click on App module > New > Activity > Empty Activity

#android #android-studio #android-app-development
