In this post, we are going to cover the basics of RxJS and how it integrates with React applications to manage state.
Build an authenticated React application using RxJS and the CSS framework, Tailwind.
We’ll build a demo app that presents GitHub user information. The app will be styled with TailwindCSS and secured with Auth0. We can get the code here.
Reactive Programming
Reactive programming can be found in many different platforms. Today we are going to be using the JavaScript implementation of it. If you were to visit the ReactiveX site, you would see that you can use reactive programming in a long list of languages. ReactiveX is a library to implement this paradigm in different languages. There’s RxPY for Python, RxPHP for PHP, or RxScala for, you guessed it, Scala. Each one is going to be catering to its language, but will each have the same idea behind it.
What is RxJS?
RxJS is a library for reactive programming. Cool, so what does that mean? In most applications, we have data flow. With RxJS we can have the data flow make more sense by implementing patterns like the Observer pattern and the Iterator pattern under the hood to make asynchronous programming easier to reason about. It handles the data coming in and then executes the task you assigned to it. No worries; if all of that sounded like too much to grasp, we’ll go over it.
In React, we have been using Redux or other methods to handle data flow. Let’s talk about what it would look like if we had RxJS take care of our data stream.
What can RxJS help you manage?
- Data flow
- Data stream
- State
- Among other things
Think of the RxJS library as something that is always listening for data using Observers and Observables. (More on those in a bit!)
Without reactive programming, you have to “wake up” the application: “Hey, there’s some new data, can you handle it for me?”. With RxJS, it’s saying: “What new data do you have for me? I’m ready!” RxJS is always listening.
How to Get Started with RxJS
In this post, we will briefly go over the basics of RxJS. Want to learn the high level updates to RxJS 5? Read this great post, RxJS 6: What’s new and what has changed? To dive deeper into RxJS, visit rxjs.dev or learnrxjs.io.
Let’s look at an example where RxJS would be useful. Imagine we had an application that has an input search box where the user types in a name to search for a user, post, etc. When the user clicks “Search”, they will get their results back. RxJS could be used to handle that flow.
RxJS will wait for that prompt to send back the user’s search results, creating an asynchronous event.
Key Concepts of RxJS - Observables, Observers, Operators
In RxJS we are going to use a couple of key concepts. We have:
- Observables
- Observers
- Operators
RxJS uses Observables to observe the data stream or array coming in and the Observers patiently wait for information from the Observable on how to give that data functionality.
Observables
If we were to head over to the RxJS documentation, we would see this definition:
A representation of any set of values over any amount of time. This is the most basic building block of RxJS. Source: RxJS
Let’s break that down.
The values that are being talked about could be data from an array or any stream of data. In any case, the Observables are there to handle all types of data streams. It’s the middle man in a sense. The data is sent through the Observable on its way to the Observer.
Observers
An Observer grabs the values from the Observable and then processes the data by using these three methods:
- next() - what is then called when it successfully runs
- error() - error handling if it doesn’t successfully run
- complete() - the process is done
In order for the Observer to receive the data from the Observable, we “subscribe” to the Observable. The subscribe method allows for the data to be pulled from the Observable and passed on to the Observer. Observers are simply a set of callbacks, one for each type of notification delivered by the Observable.
Operators
Operators are what we use to shape our data into what we need. By chaining Operators together, we are able to manipulate exactly what we need from the data coming into our app.
If we were to visit the official docs RxJS, we could see the large list of Operators that we could use. Some will look familiar or straightforward, like “map” or “filter”, others may need a little more explanation or understanding, like “exhaustMap”. If we were to dive into these, the docs explain what each one does and how to use it.
What We Will Build
Today we are going to be building an authenticated React app that uses the GitHub API. By “fetching” the API’s data, we are going to use that data stream and use reactive programming to handle that data. The user will be able to type in a GitHub username and the avator and username will be returned and displayed on the page.
Setting up our Auth0 credentials
Before we start building our app, let’s head over to Auth0.com to set up our application on our dashboard. Here we will get our clientID and other things we will need to make our app an authenticated on.
We are going to log into our Auth0 Dashboard. If you do not have an account, you can sign up for a free Auth0 account here or log into your already existing account.
Once at our Dashboard, we will want to follow these steps:
- Click on
+ Create Application - We will name our app
rxjs-react-app(or any other relatable name), chooseSingle Page Web Applications, and clickCreate. - Once created, click on
Settingsand we will see our list of items needed,Domain,Client ID, etc.
We will come back to this page, so keep your Auth0 dashboard available.
Setting up our application
Whichever operating system we are on, we are going to find our command line.
By navigating to the location we would like our app to be, we are going to run the following command:
npx create-react-app rxjs-react
Once the build is done we are going to navigate into that project by running this command:
cd rxjs-react
Within that, we can run the command:
npm start
We are now able to see our React application at <a href="http://locahost:3000" target="_blank">http://locahost:3000</a>.
Required libraries
We are going to need to install the following libraries:
auth0-js- to use the Auth0 productreact-router-dom- for routing purposes in our application
To get both of those installed, run this command:
npm install --save auth0-js react-router-dom
We will see those libraries added to the dependencies section in our package.json.
In the file src/index.js, we will need to use react-router-dom and then wrap <BrowserRouter> around our <App />. That file should now look like this:
// src/index.js

import React from 'react';
import ReactDOM from 'react-dom';
import './index.css';
import App from './App';
import * as serviceWorker from './serviceWorker';

import { BrowserRouter } from 'react-router-dom';

ReactDOM.render(
    <BrowserRouter>
        <App />
    </BrowserRouter>
    , document.getElementById('root'));

// If you want your app to work offline and load faster, you can change
// unregister() to register() below. Note this comes with some pitfalls.
// Learn more about service workers: https://bit.ly/CRA-PWA
serviceWorker.unregister();
Authentication Files
config.js file
Remember the credentials we have waiting for us in our Auth0 application? Let’s go ahead and grab those so we can start using them.
In our src folder, we are going to create a new folder, Auth. Within the new src/Auth folder, we are going to create a file named, config.js. Within that file, src/Auth/config.js we are going to want the following code:
// src/Auth/config.js

export const config = {
    clientID: 'YOUR_CLIENT_ID',
    domain: 'YOUR_AUTH0_DOMAIN.auth0.com',
    redirectUri: 'http://localhost:3000/callback'
};
By navigating back to our Auth0 Dashboard application, “rxjs-react-app” (or whichever name was used), go to the “Settings” tab and we will see “Client ID”, “Domain”, etc. Replace your values in the config.js file. If we were to scroll down, we will also see a place for “Allowed Callback URLs”. In that section, let’s put the URL, <a href="http://localhost:3000/callback" target="_blank">http://localhost:3000/callback</a>. In the section titled, “Allowed Logout URLs”, we will want to put the URL, <a href="http://localhost:3000" target="_blank">http://localhost:3000</a>. Be sure to save those changes by hitting the “Save Changes” button at the bottom.
In our .gitignore file, we will put config.js in the list. We want this information to not be pushed to GitHub.
Auth.js file
By using the information we just created for our Auth0 application, let’s create the file that will be using those credentials.
In our src/Auth folder, we are going to create a file, Auth.js.
Go ahead and grab this code and put it into that file:
// src/Auth/Auth.js

import auth0 from 'auth0-js';
import { config } from './config';

class Auth {
    auth0 = new auth0.WebAuth({
        domain: config.domain,
        clientID: config.clientID,
        redirectUri: config.redirectUri,
        responseType: 'id_token',
        scope: 'openid profile'
    });

    isAuthenticated() {
        return new Date().getTime() < this.expiresAt;
    }

    signIn() {
        this.auth0.authorize();
    }

    handleAuthentication() {
        return new Promise((resolve, reject) => {
            this.auth0.parseHash((err, authResult) => {
                if (err) return reject(err);
                if (!authResult || !authResult.idToken) {
                    return reject(err);
                }
                this.setSession(authResult);
                resolve();
            });
        })
    }

    setSession(authResult) {
        this.idToken = authResult.idToken;
        this.profile = authResult.idTokenPayload;
        // set the time that the id token will expire at
        this.expiresAt = authResult.idTokenPayload.exp * 1000;
    }

    signOut() {
        this.auth0.logout({
            returnTo: 'http://localhost:3000',
            clientID: config.clientID,
        });
    }

    silentAuth() {
        return new Promise((resolve, reject) => {
            this.auth0.checkSession({}, (err, authResult) => {
                if (err) return reject(err);
                this.setSession(authResult);
                resolve();
            });
        });
    }
}

const Auth0 = new Auth();

export default Auth0;
At the top of this file, we have imported our auth0-js library and our config.js file that has our Auth0 credentials.
We then establish what the domain, clientID, and redirectUri fields are.
With each function throughout the file, you will see authentication being set up. For example, if we were to look at the signIn() function, we see that we are using the auth0-js import to call on authorize(). Once this is used, it triggers the Auth0 product and allows the user to log into the application.
Styling Frontend with TailwindCSS
In our app today, we are going to be using the CSS framework, Tailwind. We won’t go over the specifics of Tailwind in this tutorial but definitely check them out. If we were to head over to the installation instructions, we would see that Tailwind can be installed two different ways:
- With the
linktag and the entire stylesheet (32kb) - Using NPM and configuring Tailwind to run via webpack and PostCSS
Today we’ll be using option #1, with the link tag since it’s the easiest for this demo. The NPM way is a bit more involved (you can see the instructions here), and it allows us to tree shake Tailwind so we get the smallest bundle size possible. We could even get Tailwind down to 1kb!
We are going to head over to our public/index.html file and insert the following link tag under the head tag:
// public/index.html

<head>

  // other code here

  <title>React App</title>

  // add this line
  <link href="https://cdn.jsdelivr.net/npm/tailwindcss/dist/tailwind.min.css" rel="stylesheet">
</head>
Now that we have Tailwind in our application, while we are building out our frontend components, we will be adding the styling as we go. In Tailwind, the styling is done within the HTML tag, like so:
<button class="py-6 px-8 text-3xl rounded shadow bg-yellow-lighter hover:bg-yellow-lightest text-yellow-darker">My Tailwind Button</button>
Our Frontend Components
In our /src folder, we are going to create a folder named Components. In there, we will begin to create our different components.
Callback component
Within the src/Components folder, let’s create a folder named Callback and within that, a file named Callback.js. So our path should be as follows: src/Components/Callback/Callback.js.
The code within that uses the handleAuthentication() function from our src/Auth/Auth.js file. We will run that function and then move the user onto the “Protected” route (which we will create soon).
If the user is experiencing a lag in their connection, they will see “Loading profile…” to assure them that the authentication process is, in fact, doing it’s job.
The code should be as follows:
//src/Components/Callback/Callback.js

import React, { Component } from 'react';
import { withRouter } from 'react-router-dom';
import Auth0 from '../../Auth/Auth';

class Callback extends Component {
    async componentDidMount() {
        await Auth0.handleAuthentication();
        this.props.history.replace('/protected');
    }

    render() {
        return (
            <p>Loading profile...</p>
        );
    }
}

export default withRouter(Callback);
Secured Route Component
In our src/Components folder, we are going to want to create another folder named SecuredRoute and within that, a file named SecuredRoute.js. Our path should look as follows: src/Components/SecuredRoute/SecuredRoute.js.
In this component, we are going to want to check that the authentication is still valid. By using the isAuthenticated() function from our Auth.js file, it will check the authentication status of the logged-in user.
// src/Components/SecuredRoute/SecuredRoutes.js

import React from 'react';
import { Route, withRouter } from 'react-router-dom';
import Auth0 from '../../Auth/Auth';

function SecuredRoute(props) {
    const { component: Component, path, checkingSession } = props;
    return (
        <Route path={path} render={() => {
            if (checkingSession) return <button onClick={() => Auth0.signIn()} className="py-6 px-8 text-3xl rounded shadow bg-yellow-lighter hover:bg-yellow-lightest text-yellow-darker">Log In Again</button>;
            if (!Auth0.isAuthenticated()) {
                Auth0.signIn();
                return <div></div>;
            }
            return <Component />
        }} />

    );
}

export default withRouter(SecuredRoute);
Public Component
In our application, we are going to have the users log in using Auth0’s authentication. The component that will be visible will have a simple login button. Again, we are going to be styling that button using Tailwind.
The button will call the signIn() function from the Auth file. The path for that file will be: src/Components/Public/Public.js. The code should look as follows:
// src/Components/Public/Public.js

import React, { Component } from 'react';
import Auth0 from '../../Auth/Auth';

class Public extends Component {
    render() {
        return (
            <div>
                <button onClick={() => Auth0.signIn()} className="py-6 px-8 text-3xl rounded shadow bg-yellow-lighter hover:bg-yellow-lightest text-yellow-darker">
                    Log In
                </button>
            </div>
        );
    }
}

export default Public;
App.js component
When we ran create-react-app, our file structure got an App.js file. Let’s go ahead and edit that file. This will help finalize our routes and our authentication. We will be able to use Tailwind here to edit the application as a whole.
The entire file should now look like this:
// src/App.js

import React, { Component } from "react";
import { Route, withRouter } from 'react-router-dom';
import auth0Client from './Auth/Auth';
import Public from './Components/Public/Public';
import Protected from './Components/Protected/Protected';
import Callback from './Components/Callback/Callback';
import SecuredRoute from './Components/SecuredRoute/SecuredRoute';

class App extends Component {
  state = {
    checkingSession: true,
  }

  async componentDidMount() {
    if (this.props.location.pathname === '/callback') {
      this.setState({ checkingSession: false });
      return;
    }
    try {
      await auth0Client.silentAuth();
      this.forceUpdate();
    } catch (err) {
      if (err.error !== 'login_required') console.log(err.error);
    }
    this.setState({ checkingSession: false });
  }

  render() {
    return (
      <div className="h-screen bg-blue-lighter text-center pt-10">
        <Route component={Public} path='/' exact />
        <Route component={Callback} path='/callback' />
        <SecuredRoute path='/protected'
          component={Protected}
          checkingSession={this.state.checkingSession} />
      </div>


    );
  }
}

export default withRouter(App);
If we take a look at the componentDidMount, we’ll see that while the user is logged in, it will be checking for its continuous authentication. By using silentAuth(), the app will ensure that the user’s credentials are still valid and check for the current session.
Protected Route Component
Now that we have all the authentication ready and the initial view is in place, let’s build the component that will be the protected route. Unless the user is logged in, they will not be able to view this component.
In this route we will be using RxJS, calling the GitHub API, and allowing the user to be able to log out and return to the initial view.
Within the src/Components file, we will create the following path: src/Components/Protected/Protected.js.
RxJS
The file will start off by using RxJS.
There are two different ways to write Observables in RxJS. We can choose either one, both are fine:
First way:
input$.pipe(
   // stuff here
);
Second way:
const myInput = pipe(
   // stuff here
);
We will be calling our Observable, “input”. On that we will be using two different functions.
.pipe
Thanks to RxJS 5.5, we can now use the “pipe” method on Observables. It takes a list of operators and then runs the data individually through each one. For example:
input$.pipe(
    debounceTime(3000)
);
We will be using the following methods:
debounceTime- waits a certain amount of time before displaying the data.filter- filters through the data.flatMap- an alias formergeMap, for multiple inner subscriptions to be active at one time.
We will have the code for these three methods below!###
.subscribe
Like we talked about earlier in the post, the subscribe method allows for the data to be pulled from the Observable and passed on to the Observer. We will look at the subscribe method that we will end up using. We are going to grab the user information and set it to the state in the component.
input$.subscribe(user => {
   this.setState({ user });
});
Our Protected component
The rest of the component will be fetching the GitHub API so that we can display it for the user. Again, we are going to be Tailwind for the styling.
With all the imports needed, the entire file should look like this:
// src/Component/Protected/Protected.js

import React, { Component } from 'react';
import { Subject, from } from 'rxjs';
import { filter, flatMap, debounceTime } from 'rxjs/operators';
import Auth0 from '../../Auth/Auth';

class Protected extends Component {
    input$ = new Subject();
    state = { message: '', user: null };

    componentDidMount() {
        this.input$
            .pipe(
                debounceTime(3000),
                filter(value => value.length > 3),
                flatMap(this.githubUser$)
            )
            .subscribe(user => {
                this.setState({ user });
            });
    }

    githubUser$ = username =>
        from((username = this.getGithubUser(username)));

    getGithubUser = username =>
        fetch(
            `https://api.github.com/users/${username}`
        ).then(res => res.json());

    render() {
        const { user } = this.state;

        return (
            <div>
                <p className="mb-10 text-xl">
                    Type in any GitHub username to view information
                </p>

                {user && (
                    <div className="mb-4">
                        <img src={user.avatar_url} alt="GitHub Avatar" width="200" className="shadow rounded mb-2" />
                        <h3 className="text-2xl text-blue-darker">{user.login}</h3>
                    </div>
                )}
                <input onChange={e => this.input$.next(e.target.value)} placeholder="GitHub Username Here" className="py-3 px-4 rounded shadow w-64" />
                <button onClick={() => Auth0.signOut()} className="mx-auto mt-5 p-2 text-xs block rounded bg-blue-lightest text-blue-darker hover:bg-blue-lightest">
                    Log Out
                </button>
            </div>
        );
    }
}

export default Protected;
Using our GitHub Search Application
We should now be able to log into the application and get authenticated. Once we visit our application we should see the following view:
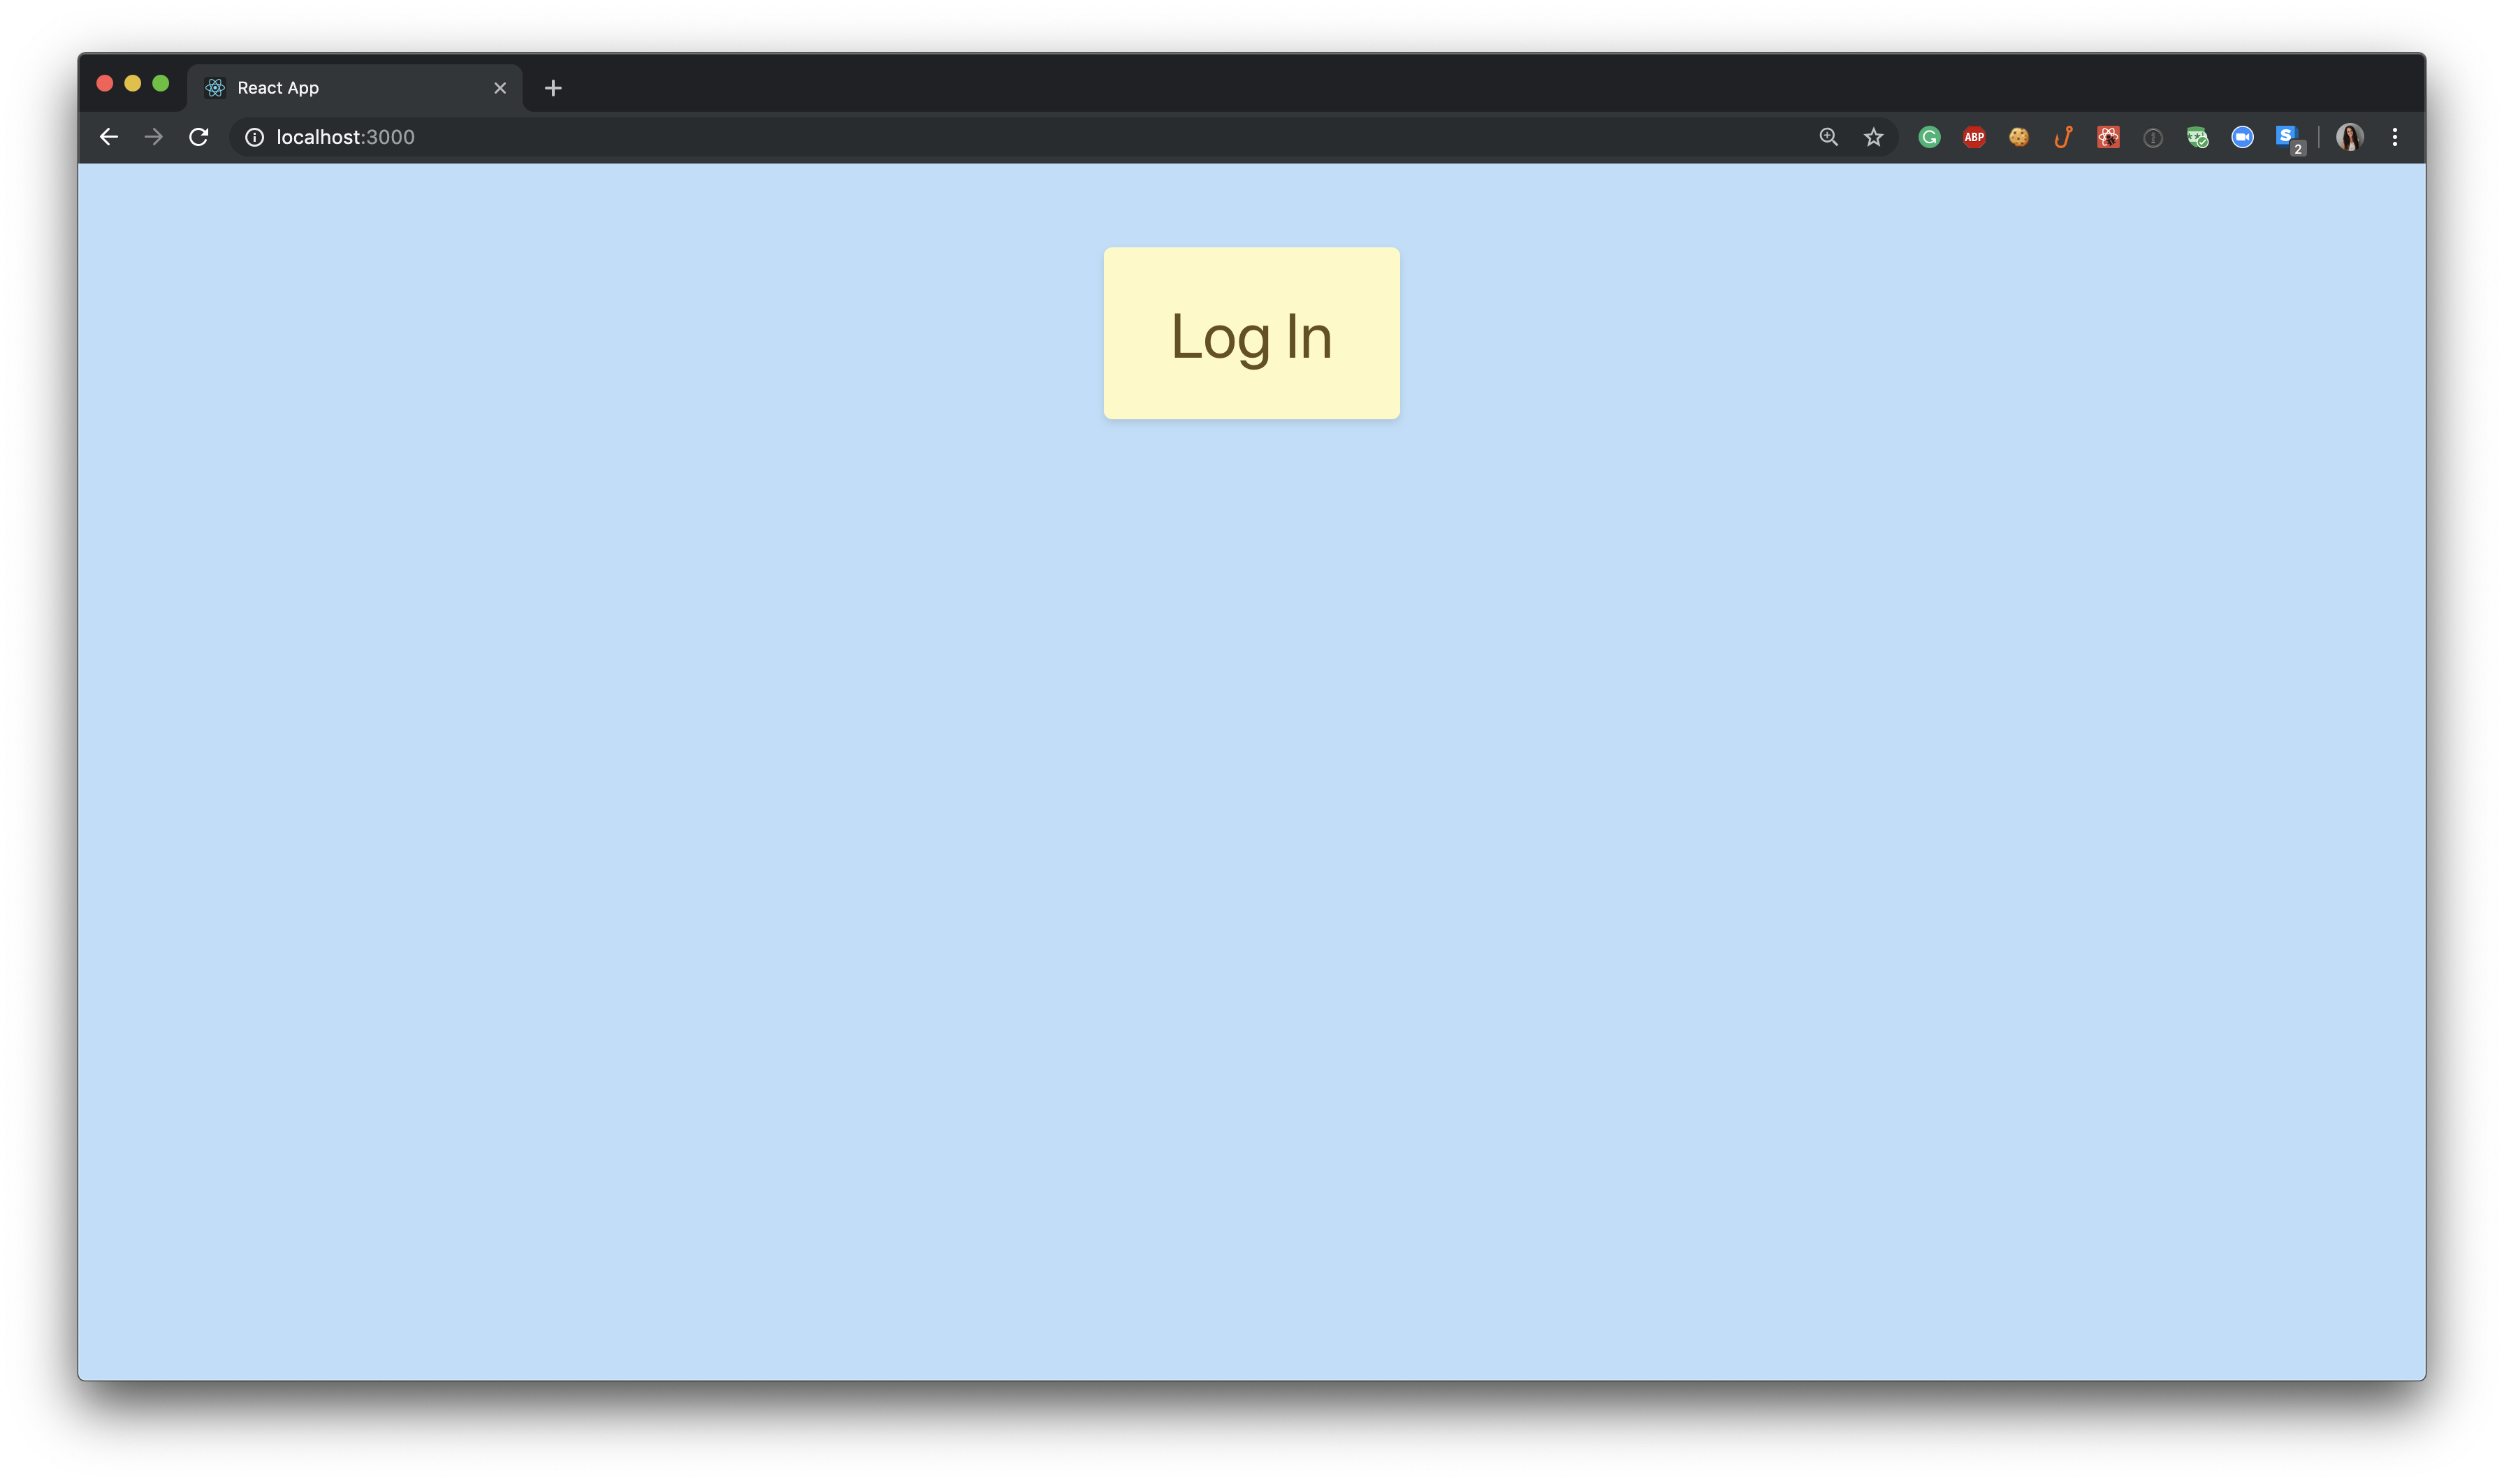
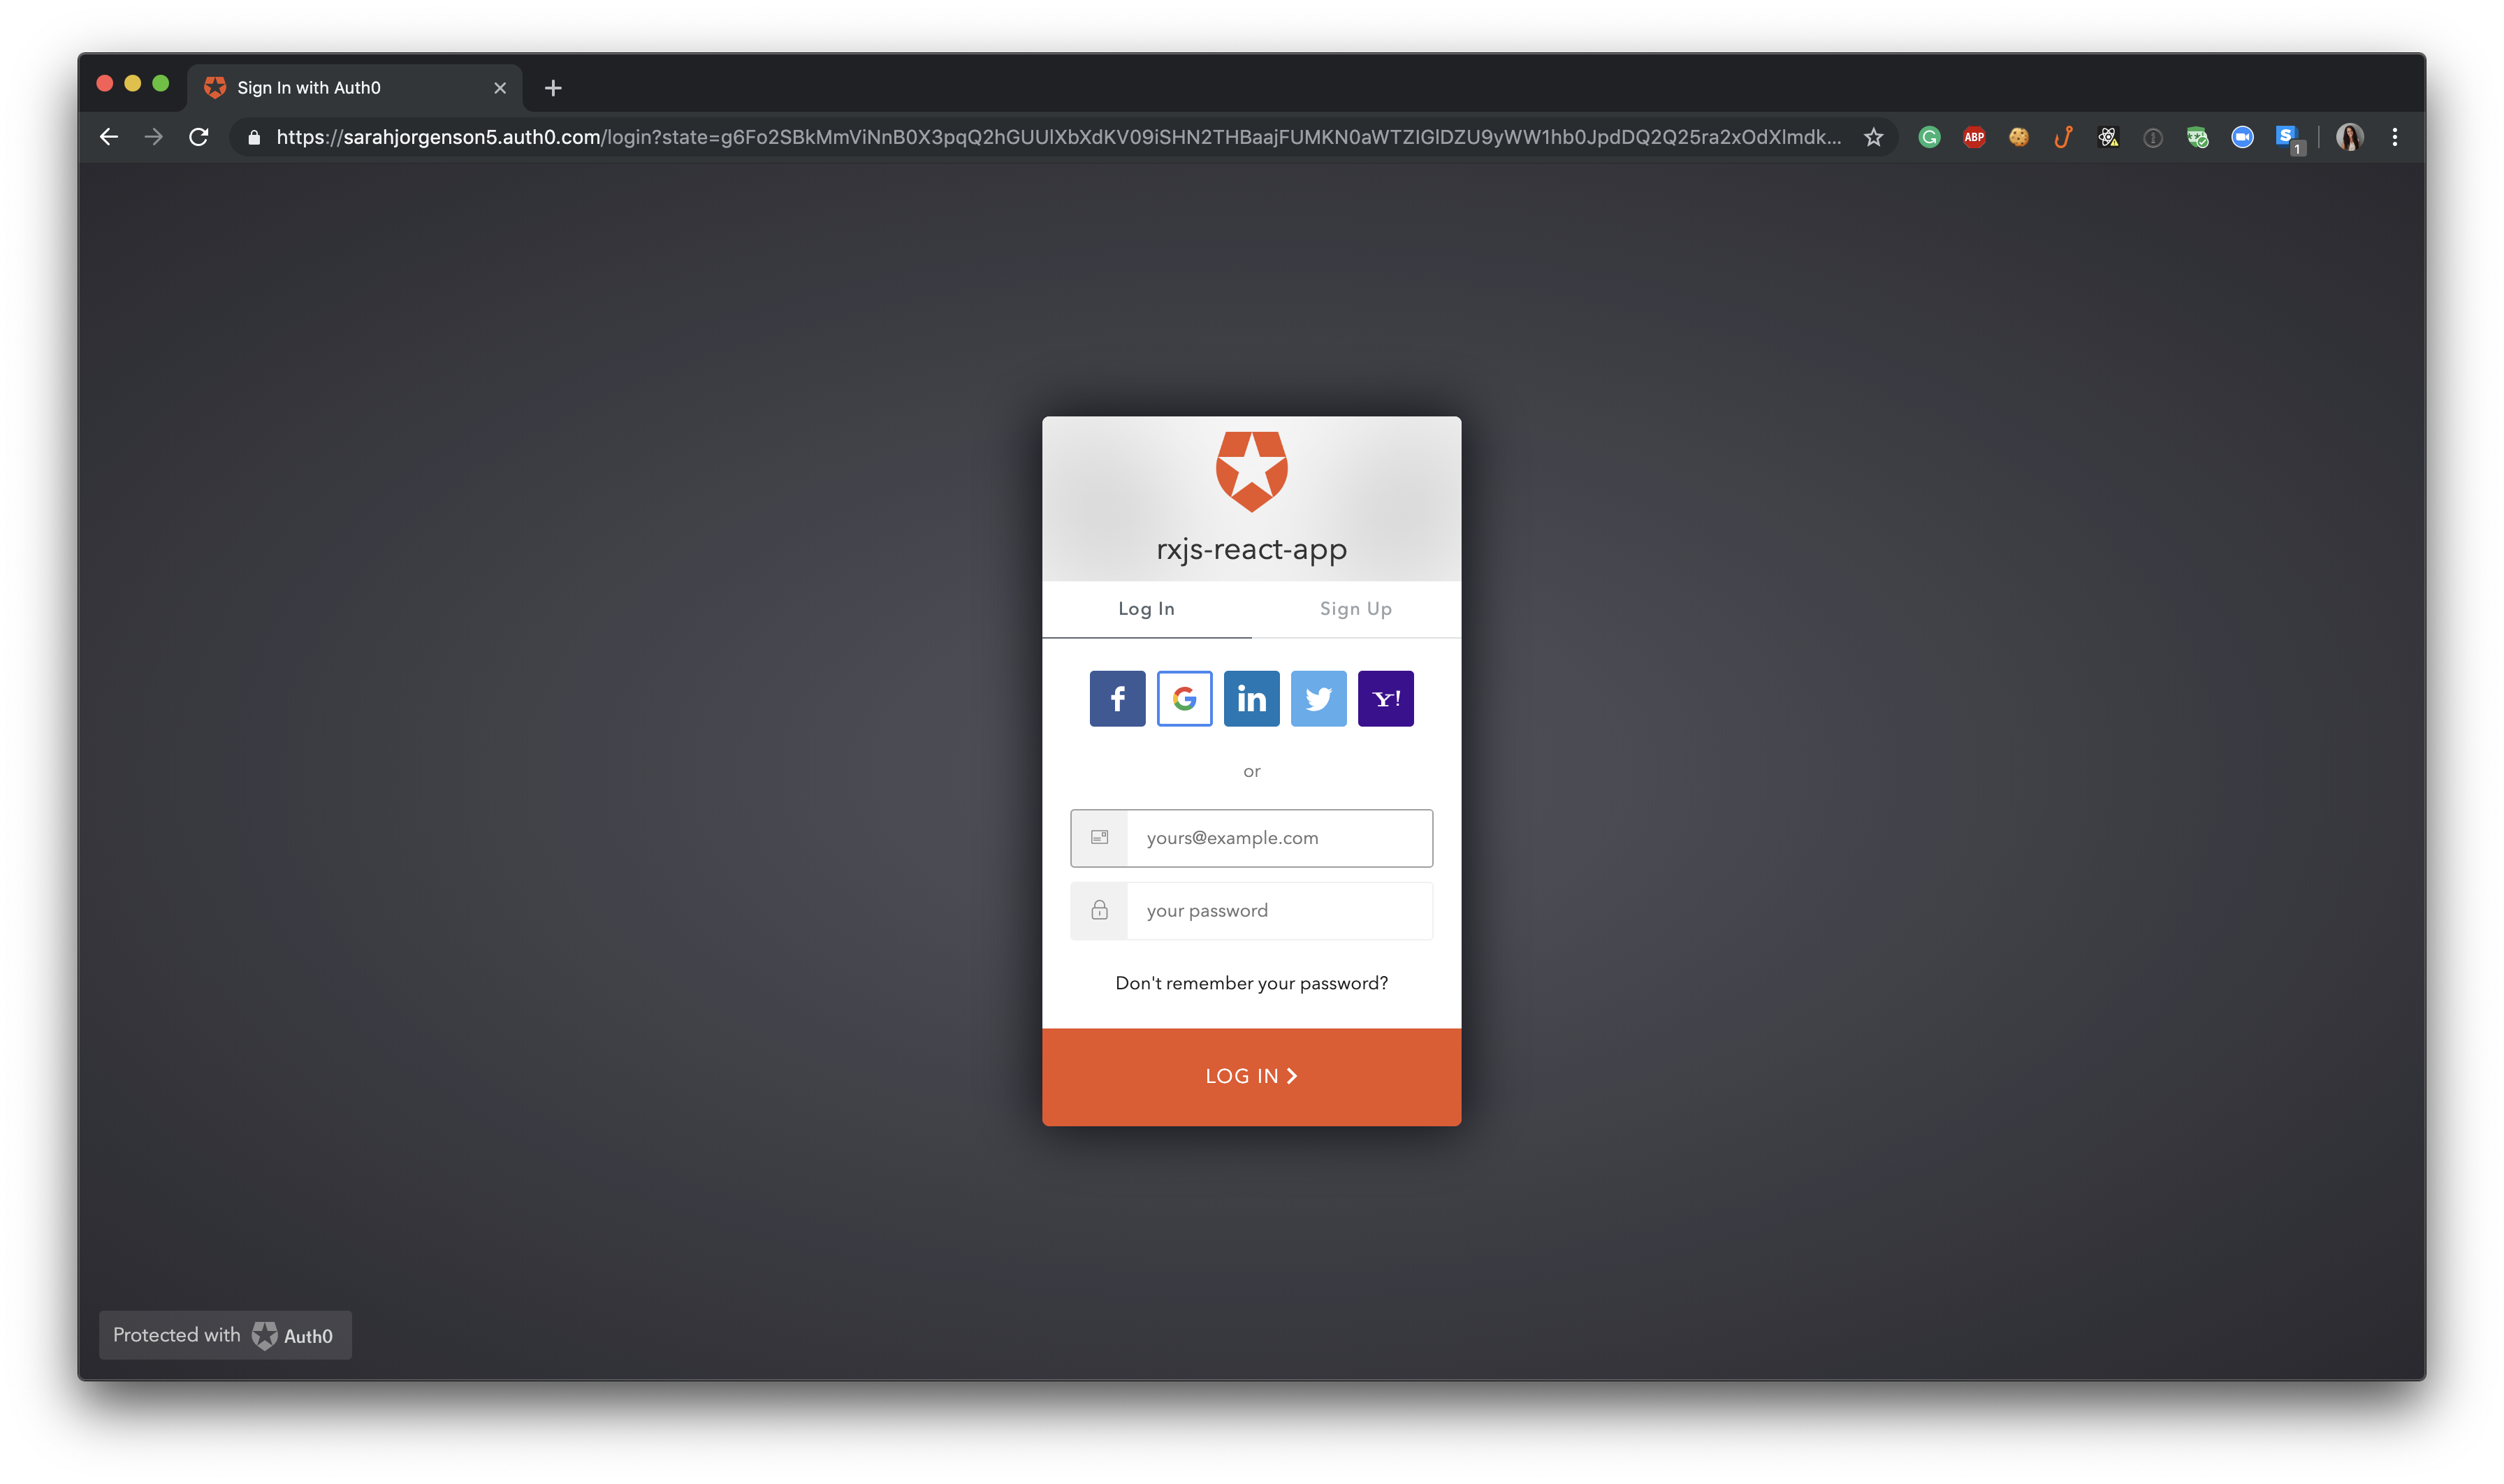
Once the user clicks the “Log In” button, they will be redirected to the Auth0 log in modal:
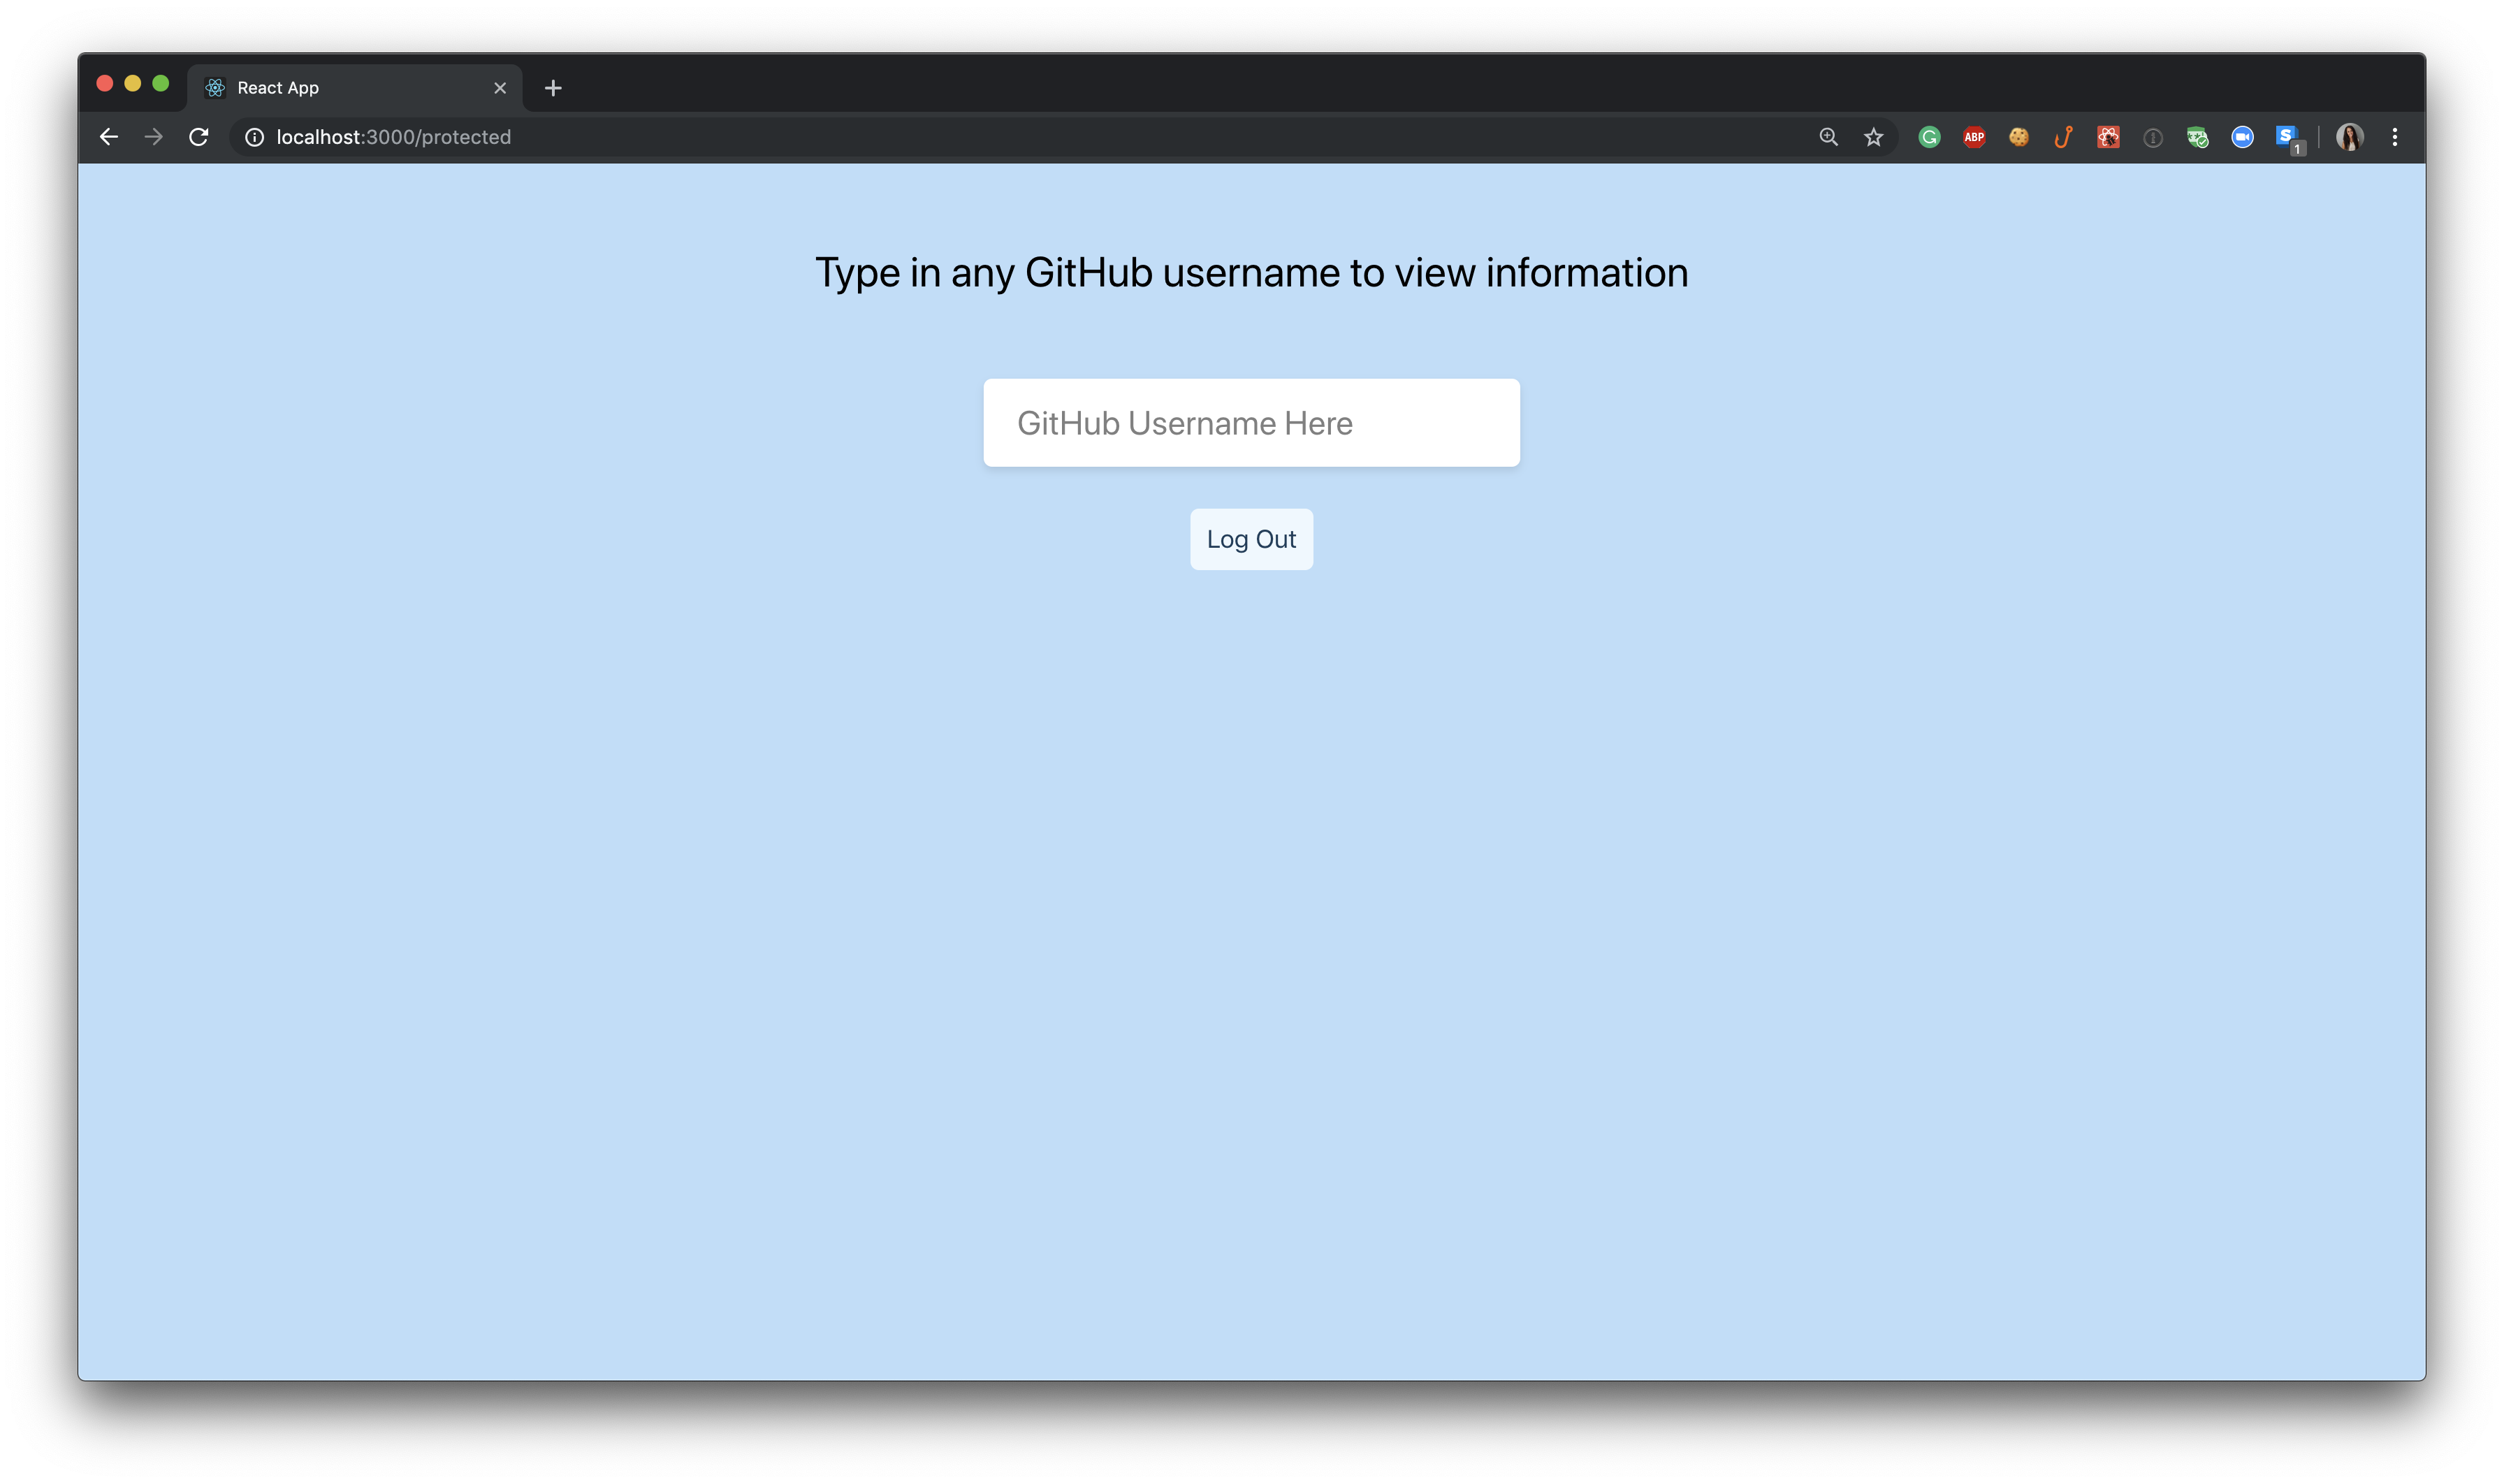
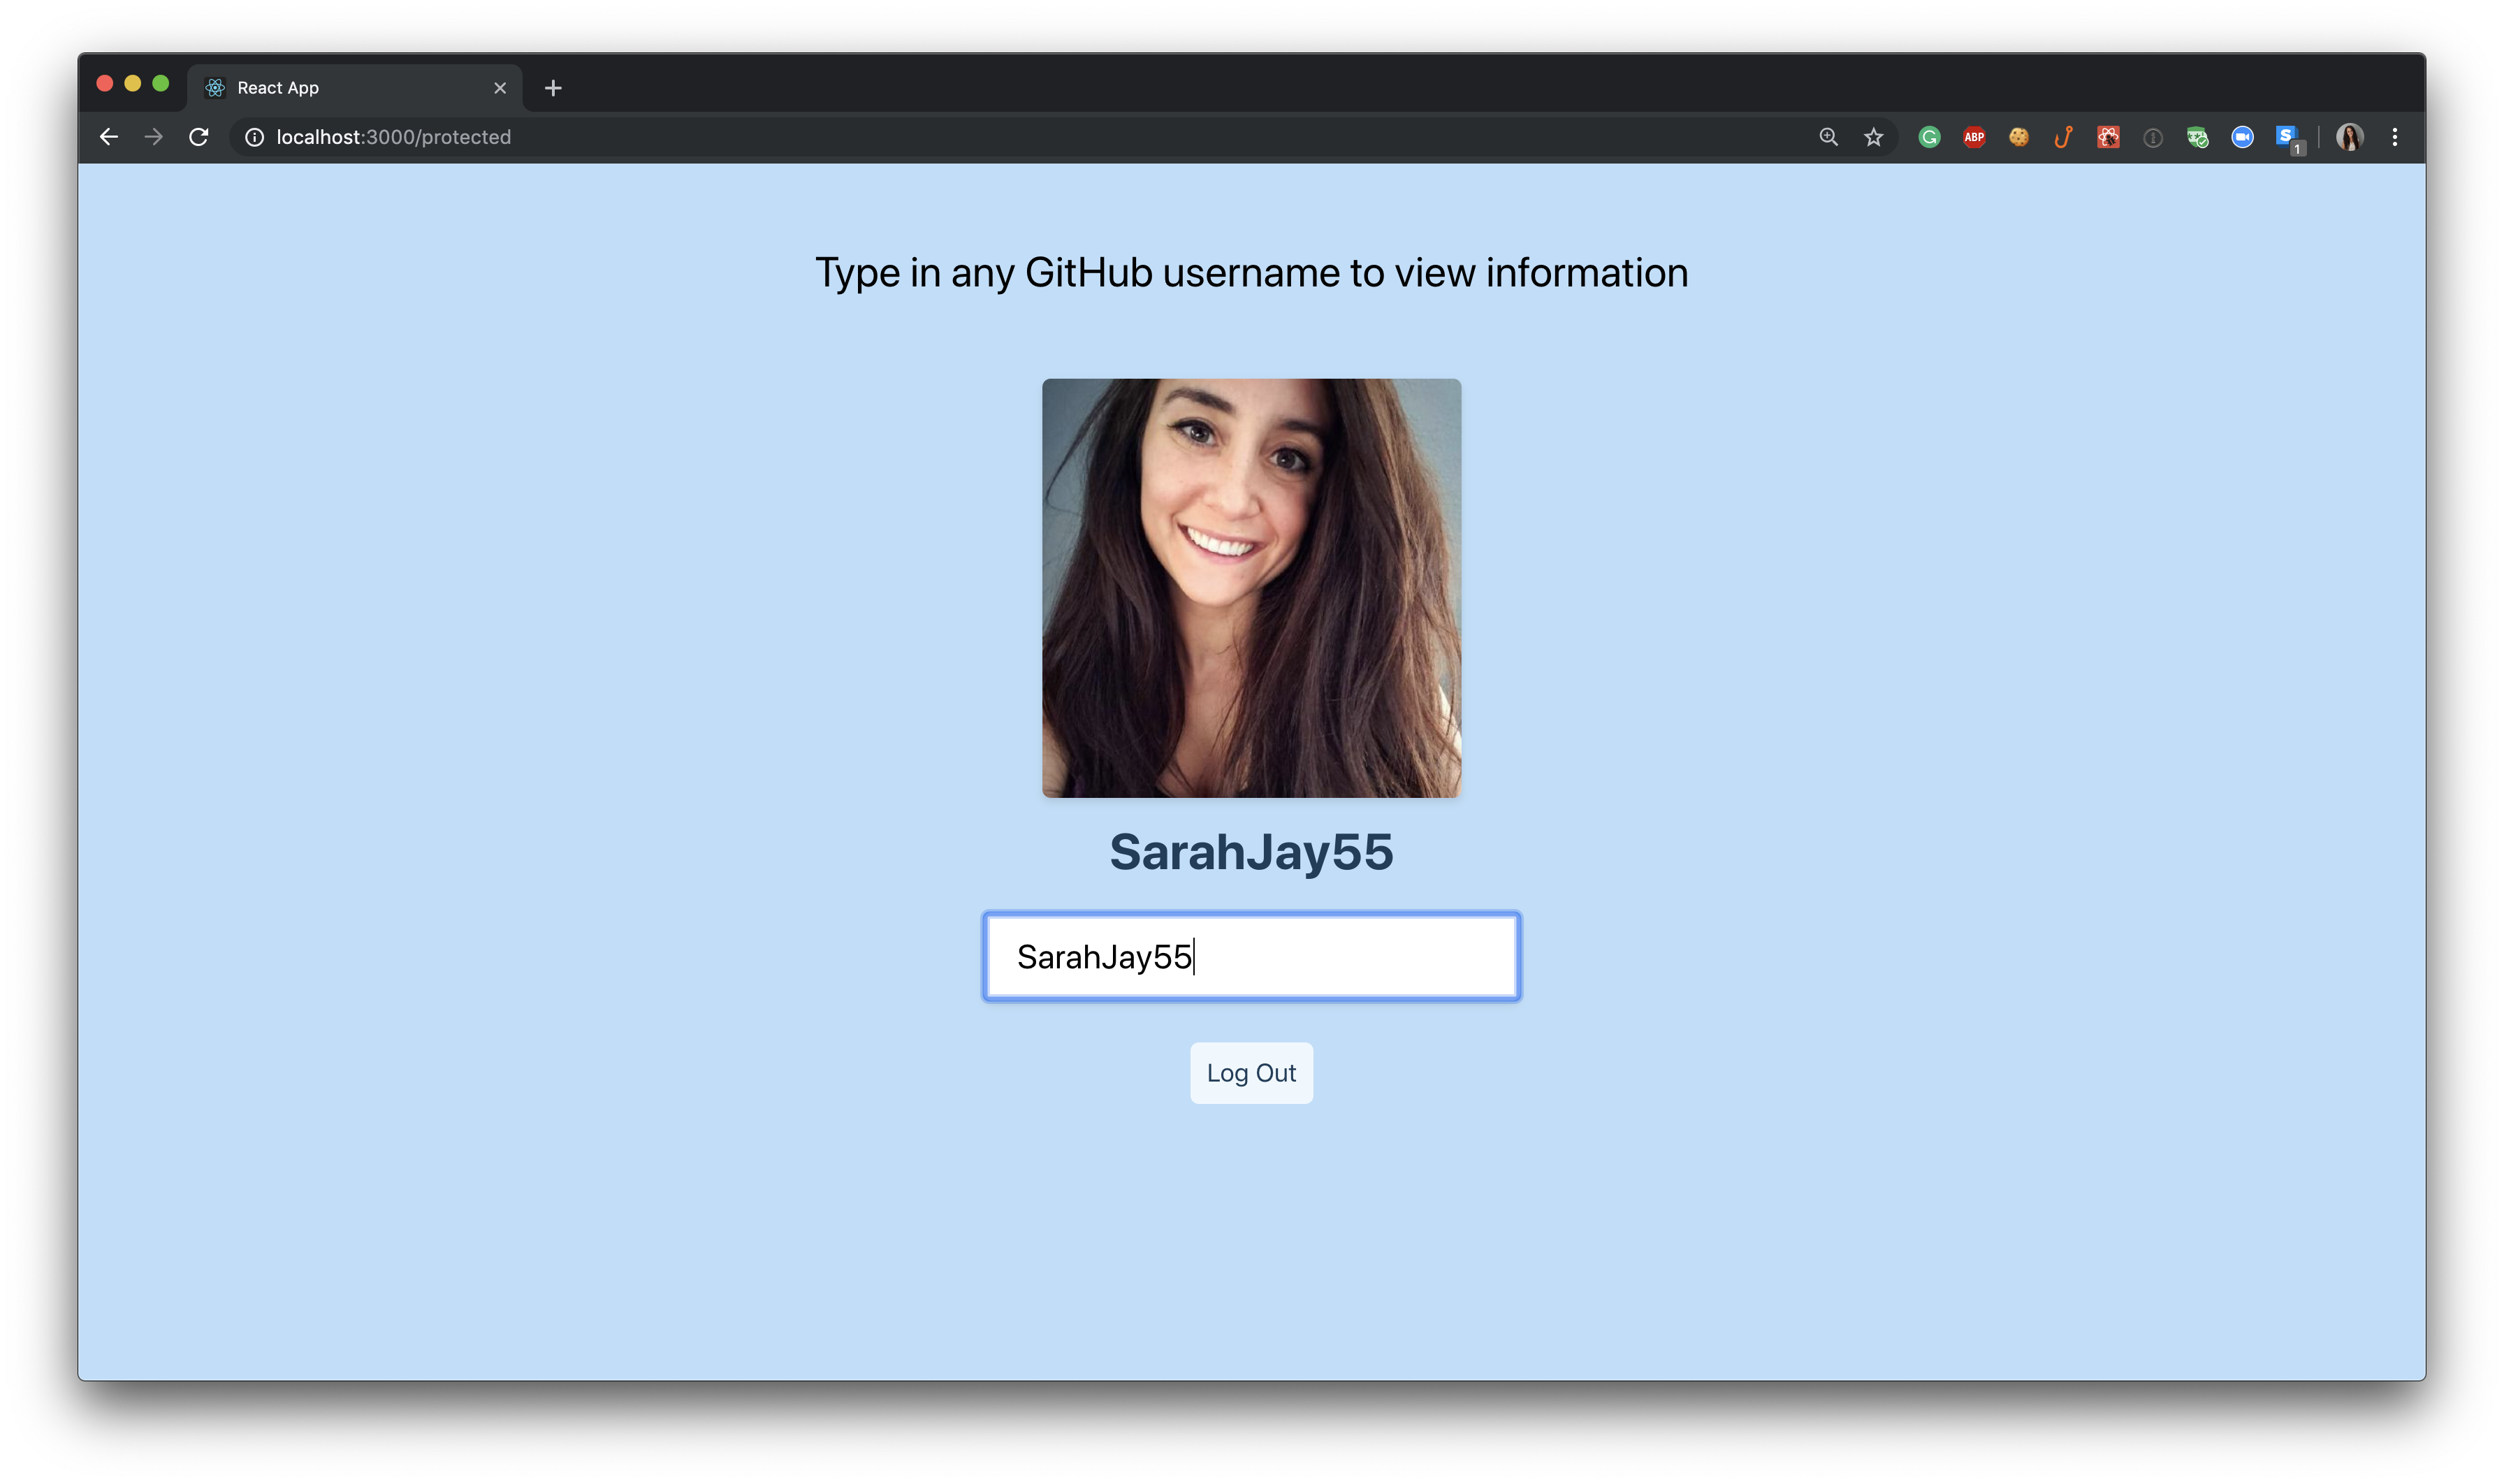
The protected view will have the input box where we will type in a GitHub username and, because of the debounceTime function, should see the user’s avatar and username displayed.
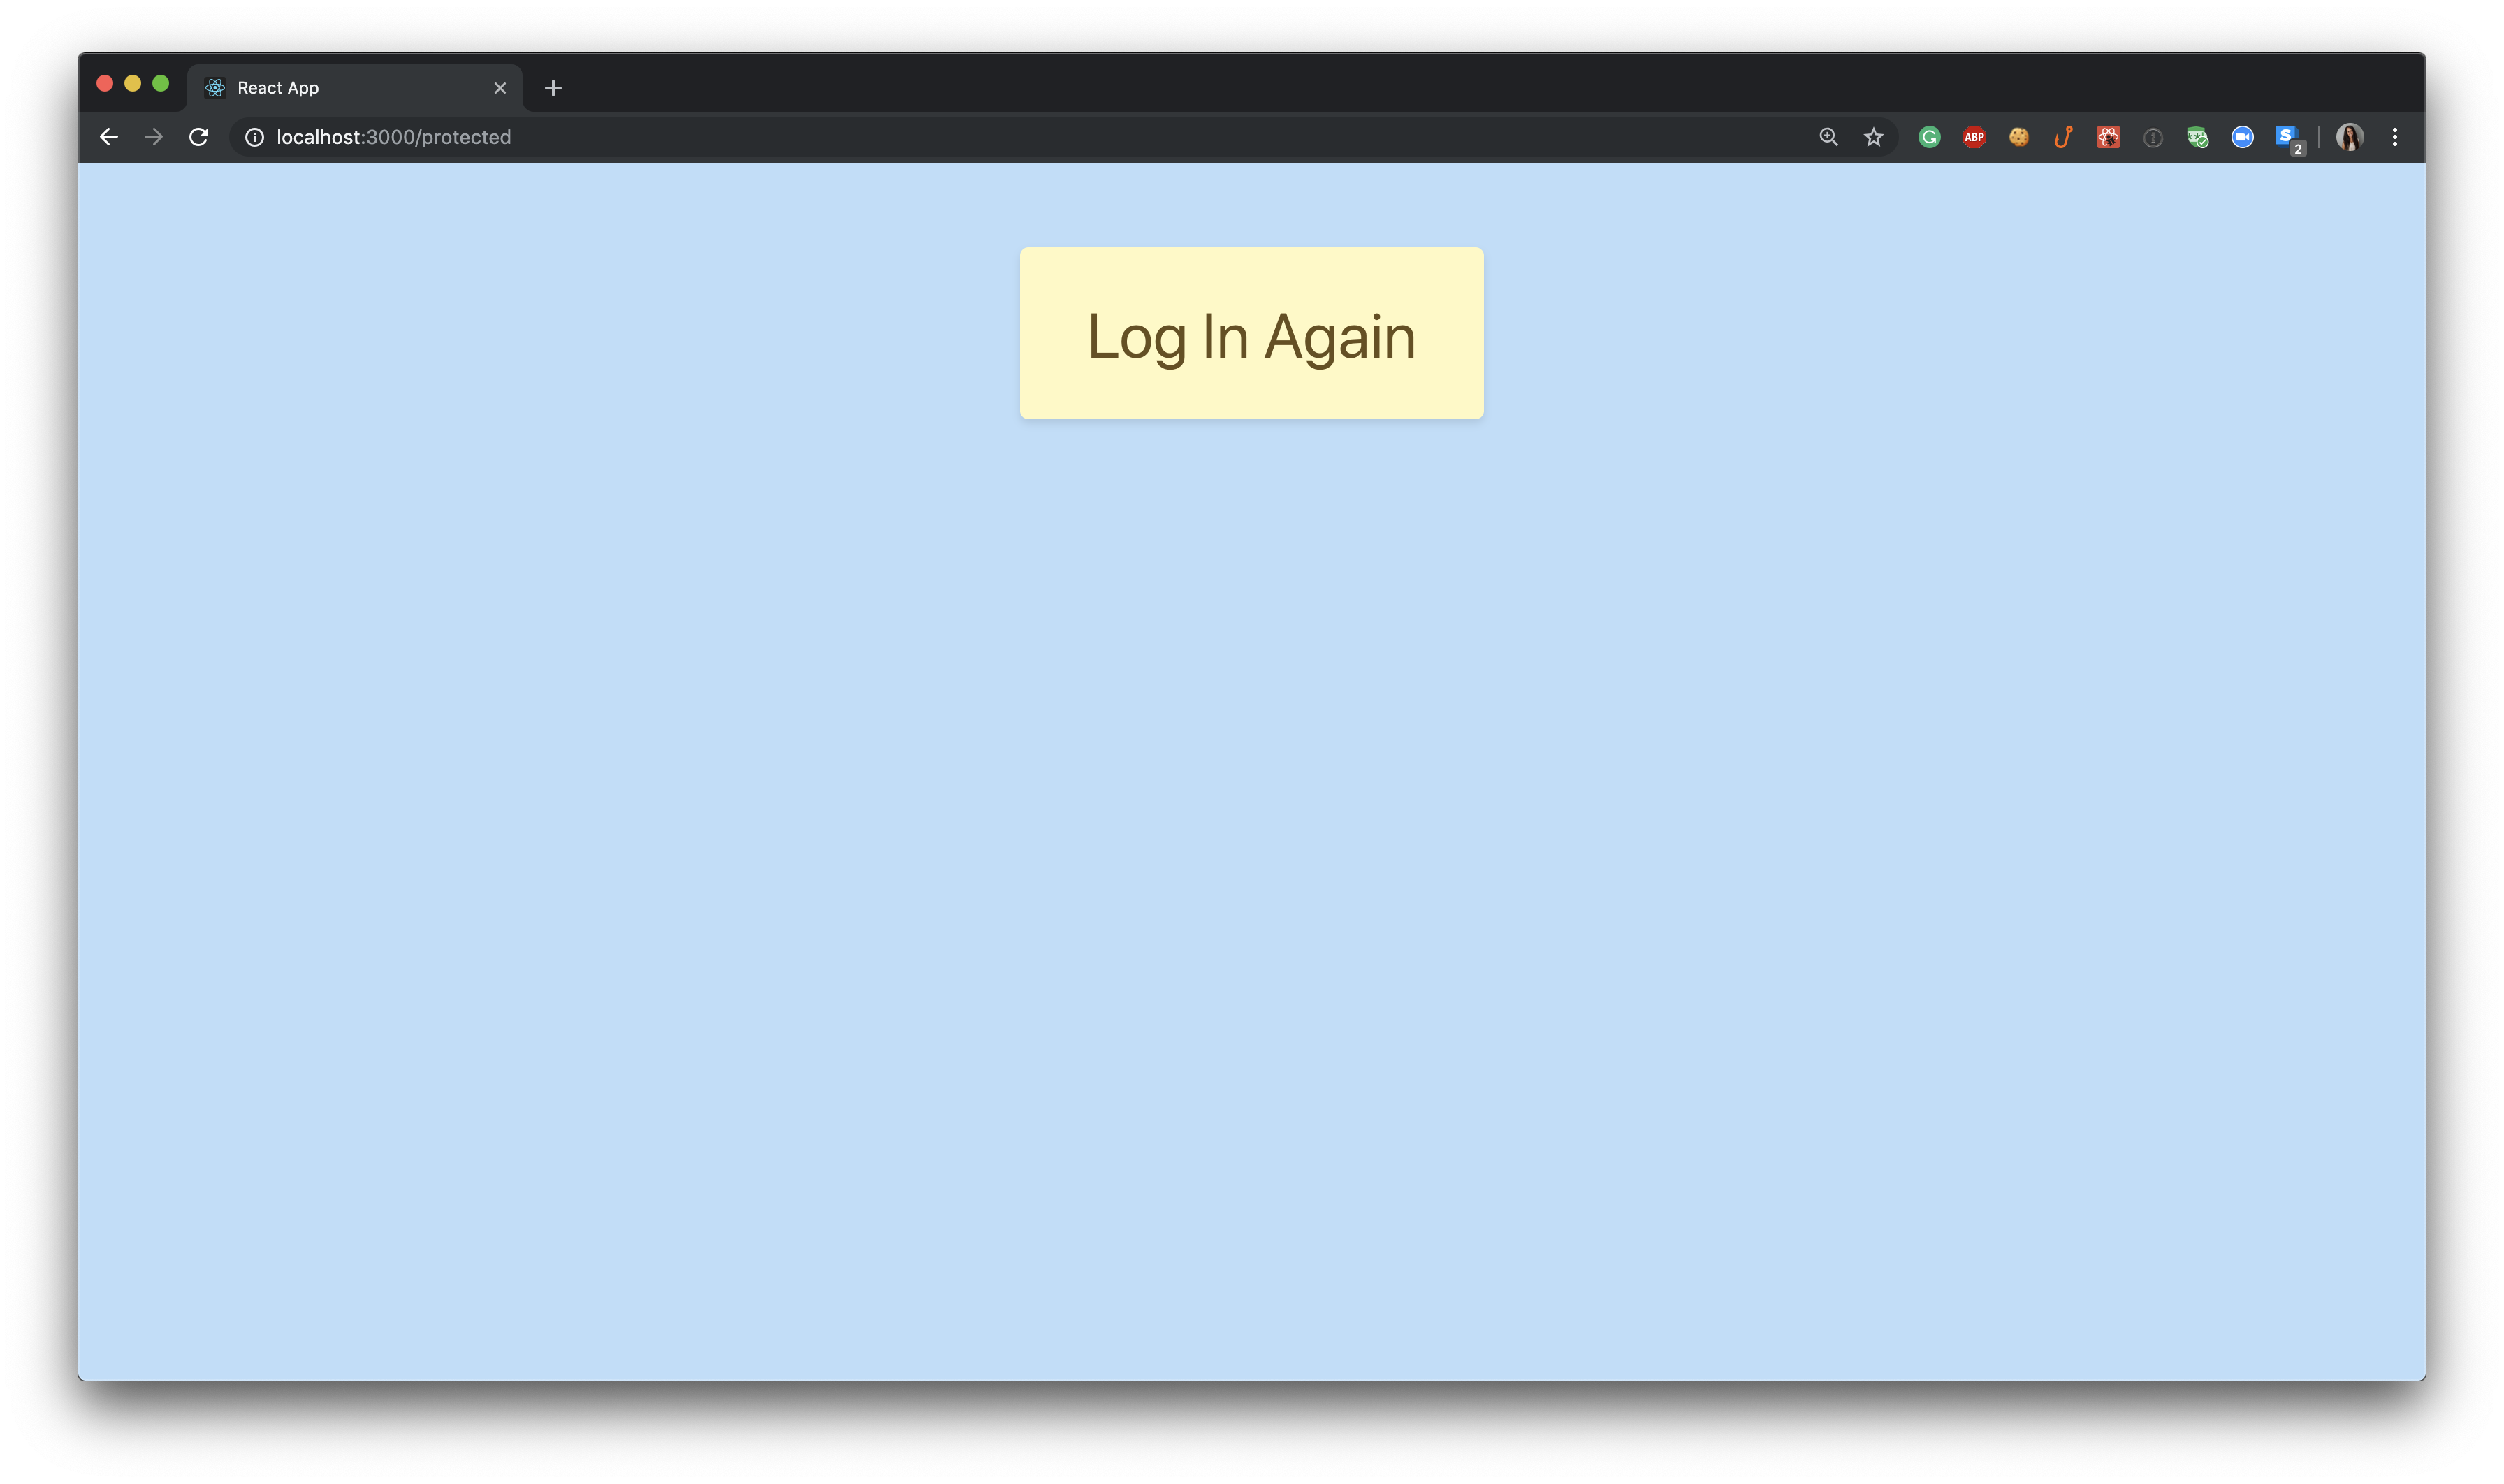
If the user were to time-out and authentication was lost, the user is directed to our “SecuredRoute” component and it offers an alter log in button.
If the user were to hit “Log Out” on the “Protected” route page, it would simply take them back to the initial view of the application.
Conclusion
We now have a React application that uses RxJS (final code found here)! Reactive programming allows for a better flow of data, especially when that data is a constant stream coming in.
There are so many different ways to handle data streams using RxJS. What are some of your favorite RxJS methods? Let us know in the comments below!
#reactjs #web-development