In this blog we will discuss the following:
- The need for data augmentation
- What is data augmentation
- A detailed explanation of data augmentation techniques with Keras
- Complete code Github link in the end
You might be wondering why I started first with the need for data augmentation rather than its meaning, but that’s the best way to learn anything quickly. So, let dive into Data Augmentation.
The need of Data Augmentation
Training DATA is the backbone of an entire Deep Learning project, more the data, more the features that can be extracted, and thus better the accuracy of the model. Deep Learning models are directly dependent on the amount of data, but it’s not always that we have sufficient data to train our images. This problem is best solved by data augmentation.
Data augmentation is an integral process in deep learning, as in deep learning we need large amounts of data and in some cases, it is not feasible to collect thousands or millions of images, so data augmentation comes to the rescue.
What is Data Augmentation?
Data Augmentation is the process of increasing the amount and diversity of data. Instead of collecting new data, we modify present data in such a way that the modification produces almost a new image. This does two jobs at a time:
- Increase the amount of data.
- Help expose our classifier to a wider variety of lighting, coloring, and different orientation situations so as to make our classifier more robust.
- Data Augmentation also helps to reduce the problem of overfitting. The reason is that, as we add more data, the model is unable to overfit all the samples, and is forced to generalize.
Steps to perform Data Augmentation
ImageDataGenerator
Keras provides us the class ImageDataGenerator that automatically performs data augmentations. ImageDataGenerator generates batches of image data with real-time data augmentation. The class takes in various arguments to modify the data.
Initial steps to perform Data Augmentation
Import all necessary Libraries
from numpy import expand_dims
from keras.preprocessing.image import load_img
from keras.preprocessing.image import img_to_array
from keras.preprocessing.image import ImageDataGenerator
import matplotlib.pyplot as plt
Loading the images with python
# load the image
img = load_img('sample_image.jpg')

#View the image
img.show()
# convert to numpy array
data = img_to_array(img)
# expand dimension to one sample
samples = expand_dims(data, 0)
Function to show image after augmentation
# Common function to view image

def showimage(datagen):
    # prepare iterator
    it = datagen.flow(samples, batch_size=1)
    # generate samples and plot
    for i in range(4):
        # define subplot
        plt.subplot(2, 2, i+1)
        # generate batch of images
        batch = it.next()
        # convert to unsigned integers for viewing
        image = batch[0].astype('uint8')
        # plot raw pixel data
        plt.imshow(image)
    # show the figure
    plt.show()
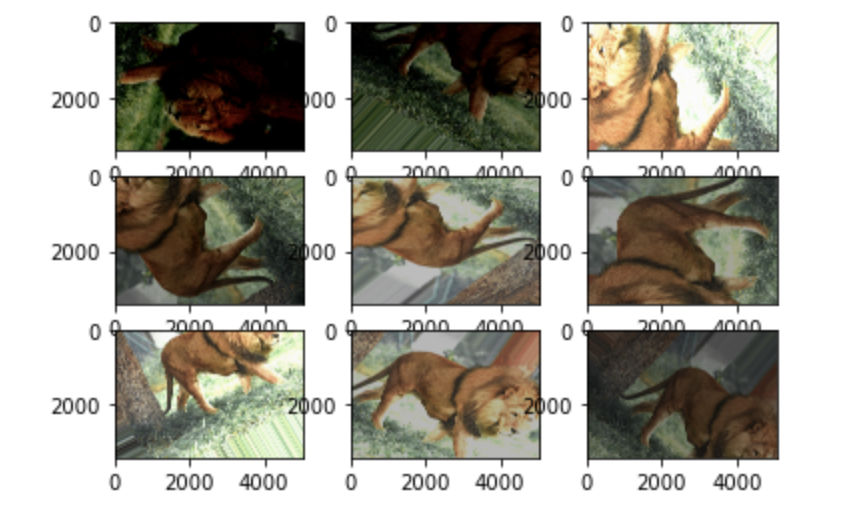
1. Vertical Shift
width_shift_range = [-225, 225]
A shift to an image means moving all pixels of the image in one direction, such as horizontally or vertically while keeping the image dimensions the same. This means that some of the pixels will be clipped off the image and there will be a region of the image where new pixel values will have to be specified.
We can perform width shift by passing the values between 0 to 1 i.e. in percentage or by specifying the pixels of shift. Here, I passed a tuple [min, max] values of pixels to define the shift.
#convolutional-neural-net #machine-learning #data-augmentation #deep-learning #artificial-intelligence #deep learning