How to Build Your Own React Component Library?
Component libraries are great resources when it comes to developing React-based applications. They allow you to logically group your components in a way that lets others in your team explore them and pick & choose the ones they need.
Mind you, there are quite a lot of libraries out there already for you to re-use. But if you’re working on your own custom components then keeping them inside your own library is definitely what you’ll want to do.
Worry not though, there are several options out there to help you in this task, so you don’t have to manually maintain a collection of possibly hundreds of components. And the best part? In this article, I’m going to tell you about three of them.
Bit
Bit is a tool and platform for component collaboration. It offers a quick and easy way to isolate, test and then export your components to a collection on bit.dev.

Components on bit.dev can be found using Bit’s search engine and rendered-live in Bit’s playground.

Out of the three ways to build your own React component library, Bit is the only one that offers a “natural” way to share your components with others.
Mind you, the library is just code, and you can publish it into a place such as Github (and package to NPM). That would definitely solve that problem, but you’d be hard-press to publish the entire library into a single repository or have (and manage) one for each component (that is, if you’re hoping to let your consumers pick and choose which ones to use).
So instead, you can use Bit.dev and have all your individual components published into a single catalog (essentially a components library) with minimum effort and have your consumers pick and choose which ones to import (either through NPM/Yarn or using Bit) with very little effort.
Installing Bit
Installing the Bit CLI tool is quite easy, simply execute the following command (assuming of course, you have npm installed):
$ npm install bit-bin --global
Using Bit
Once installed, you can join bit.dev and create a new collection, make sure you select its environment to be React and follow the steps described:
- Initialize the collection on your local folder
$ cd your-project-folder
$ bit login
$ bit init
Answer the required information and then start tracking the components in your library. This is assuming you have a similar folder structure to the previous examples, but feel free to use whatever structure you want (as long as they’re all on the same folder, you’ll have no issues).
2. Track components
$ bit add src/components/*
$ bit status
3. Configure the build step to be React. This step is required to create the distribution version of your components, which is of especial interest to the consumers interested in your components and for Bit’s platform, since it will also render them automatically for you.
$ bit import bit.envs/compilers/react --compiler
4. Finally, tag your components and export them so others can see them and use them.
$ bit tag --all 1.0.0
$ bit export <your-username>.<your-projects-name>
With that, your components are published and can be used by anyone using npm or yarn like this:
$ npm i @bit/<your-username>.<your-library-name>.<your-component-name>
Or using yarn:
$ yarn add @bit/<your-username>.<your-library-name>.<your-component-name>
create-react-library
When it comes to creating your own components library, this particular package brings a lot of power to your terminal.
With but a very simple npm installation, you can obtain a very powerful tool. And once installed, it’ll provide you with a very useful template for creating the entire library.

Some of the key features of this utility are:
- It integrates Jest for testing.
- It supports CSS modules
- It supports complicated peer dependencies
- It even has optional support for Typescript (if you’re one of those people, j/k)
Installation
Installing this package is extremely easy if you’re familiar with npm, just type the following:
$ npm install -g create-react-library
If for some reason, you’re not familiar with npm, you can check out how to install it over here.
Using create-react-library
Just like installation, usage of this package is very straightforward, all you need is a simple command. Once executed, it’ll ask a few questions and with that information, it’ll create the required template.
$ create-react-libary
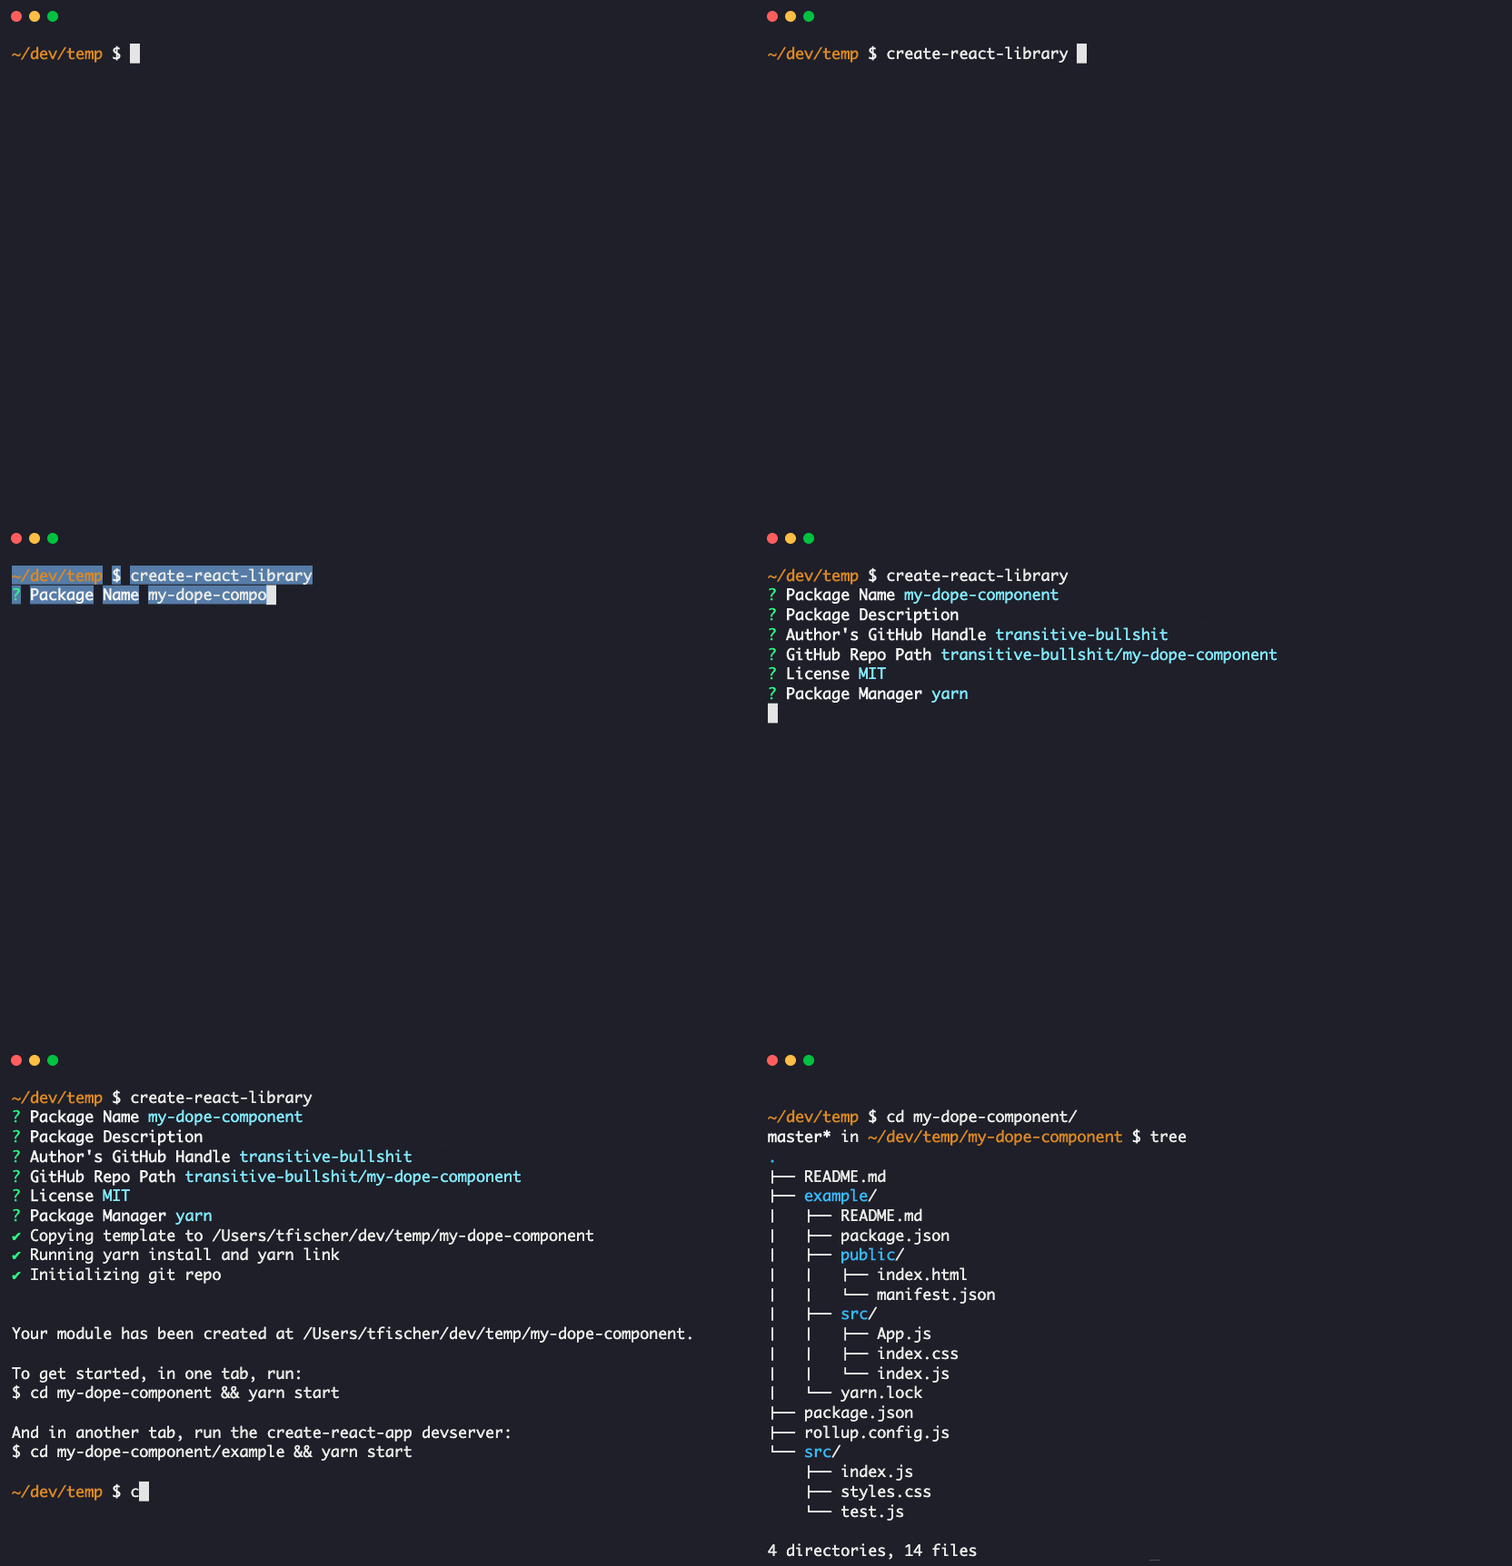
Yeap, that’s all you need because the actual details about the library you’re looking to create will be provided with the following questions:

Now, that created the folder my-personal-library and you can simply execute the following commands (in different tabs) in order to get the project started:
[Terminal 1]$ cd my-personal-project && npm start
[Terminal 2]$ cd my-personal-project/example && npm start
And you want the project to get started, because it’ll provide you with a web UI for you to test the components.
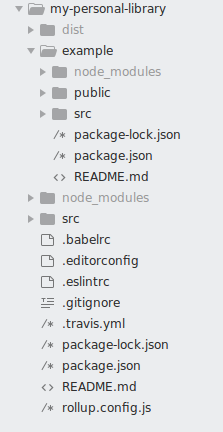
Here is what your folder should look like by the end of the above commands:

Just add your components into the src folder in order to; create your library and use the example folder to showcase them.
React Styleguidist and Emotion

If the above template filled with different files from the get-go was too much for you, this combo is the perfect alternative for you. Using these two tools (and maybe others to help you out with the development process) you can create your library from scratch!
The basic tech stack you’ll need for that is:
- React, because, well let’s say you’ll probably need it.
- Emotion will be what you use to style your components.
- Styleguidist to help you with the development of your components.
- And finally Rollup and Babel for bundling the library so you can later publish it.
You can potentially extend that stack with things like Jest if you wanted to add unit tests capabilities (which you should by the way).
Installation
The catch with this setup is that for you to gain total control over the code, you’ll be installing a few dependencies. But worry not my friend, lucky for you, the package ecosystem is great and it works like a charm, so it should just be a matter following these steps:
- Starting the project folder:
$ mkdir react-sample-components-library
$ cd react-sample-components-library
$ npm init -y
2. Installing dependencies:
$ npm install --save-dev react react-dom @emotion/core @emotion/styled
$ npm install --save-dev react-styleguidist webpack
$ npm install --save-dev babel-loader @babel/core @babel/preset-env @babel/preset-react
3. Basic configuration
After everything’s been installed, you should create the .babelrc file for and add the following into it:
{
   "presets": ["@babel/preset-env", "@babel/preset-react"]                       }
Finally, create the file styleguide.config.js at the root folder and add the following content:
module.exports = {
 webpackConfig: {
   module: {
     rules: [
     {
        test: /\.jsx?$/,
        exclude: /node_modules/,
        loader: "babel-loader"
     }
    ]
 }
},
};
Last, but certainly not least, add the following line to your package.json in order to configure the start command:
”start”: “styleguidist server”
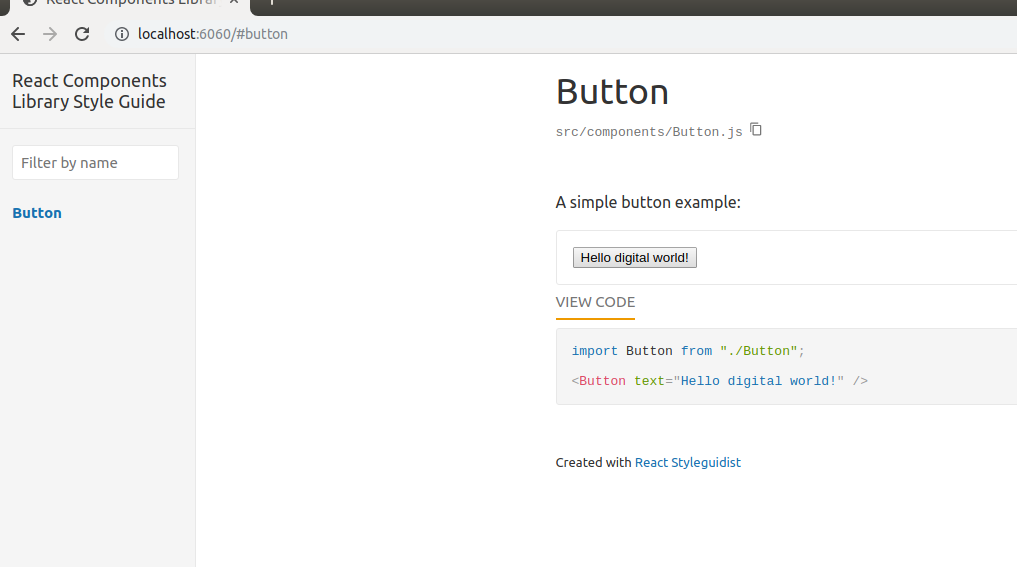
Now, you can simply write $ npm start and you’ll gain a web server on port 6060 where you can review your progress.
Adding components
With everything set up and configured, adding components into this library is actually quite easy. Just add the files to the src/components folder.
As an example, adding the following code into src/components/Button.js automatically adds it to the library.
import React from "react";

export default function Button({ text }) {
  return <button>{text}</button>;
}
And thanks to Styleguidist you can add a Button.md file into the same folder:
A very simple button.
```jsx
import Button from "./Button";                                               <Button text="We Salute You!" />

With the Markdown and the code, the above documentation is created once you restart the webserver.
Conclusion
React Component Libraries are definitely needed if you’re working on a team or hoping to make a cohesive group of components available for others to use. And as you’ve seen, there are plenty of options out there to help you create them.
But if you’re really interested in sharing them while you’re also working on improving them, IMHO, Bit is definitely the way to go, since it not only allows you to publish them but it also helps you keep improving them (i.e bug fixing and new features) with minimum effort.
Have you used any other tools to create your own react components libraries? Share them in the comments below, I’d love to know!
#react-js #react #javascript #web-development
