When I started to build my latest project — a platform for personalized job alerts — I found myself in a predicament.
I was planning to manage the delivery and support of the product over email so I didn’t need a very heavy app. All I needed was a landing page to explain the product and a subscription page where my customers could sign up. Sounds like a great match for nocode tools, right?
Unfortunately, no!
Shopify, Webflow, Squarespace, etc. are fantastic tools for selling physical goods like t-shirts and subscription boxes. They’re also great at selling digital goods where everyone gets the same thing like newsletters and e-books. But if you want to sell a digital product where each user gets something personalized (like alerts when their favorite companies post new jobs) then you’re out of luck.
All I needed was a basic landing page and a recurring billing checkout. But none of the big nocode tools could support that use case.
Luckily, there’s an easy way to DIY a bootstrapped SaaS checkout flow. Webflow’s embedded code blocks and Stripe’s client-only checkout to the rescue!
If you want a simple way to bootstrap your SaaS app then read on!
Requirements
To make a SaaS platform of your own you’ll need three things.
- A Stripe account (free is fine),
- A hosted Webflow account (starting at $15/mo right now); and
- The ability to copy and paste.
Building your platform
Stripe setup
Start with Stripe first. Register for a new account and complete your account setup. That includes connecting a bank account (you do want to get paid, don’t you?) and giving them a business address and phone number. You can use your personal information for now and update it once you’re ready to go live.
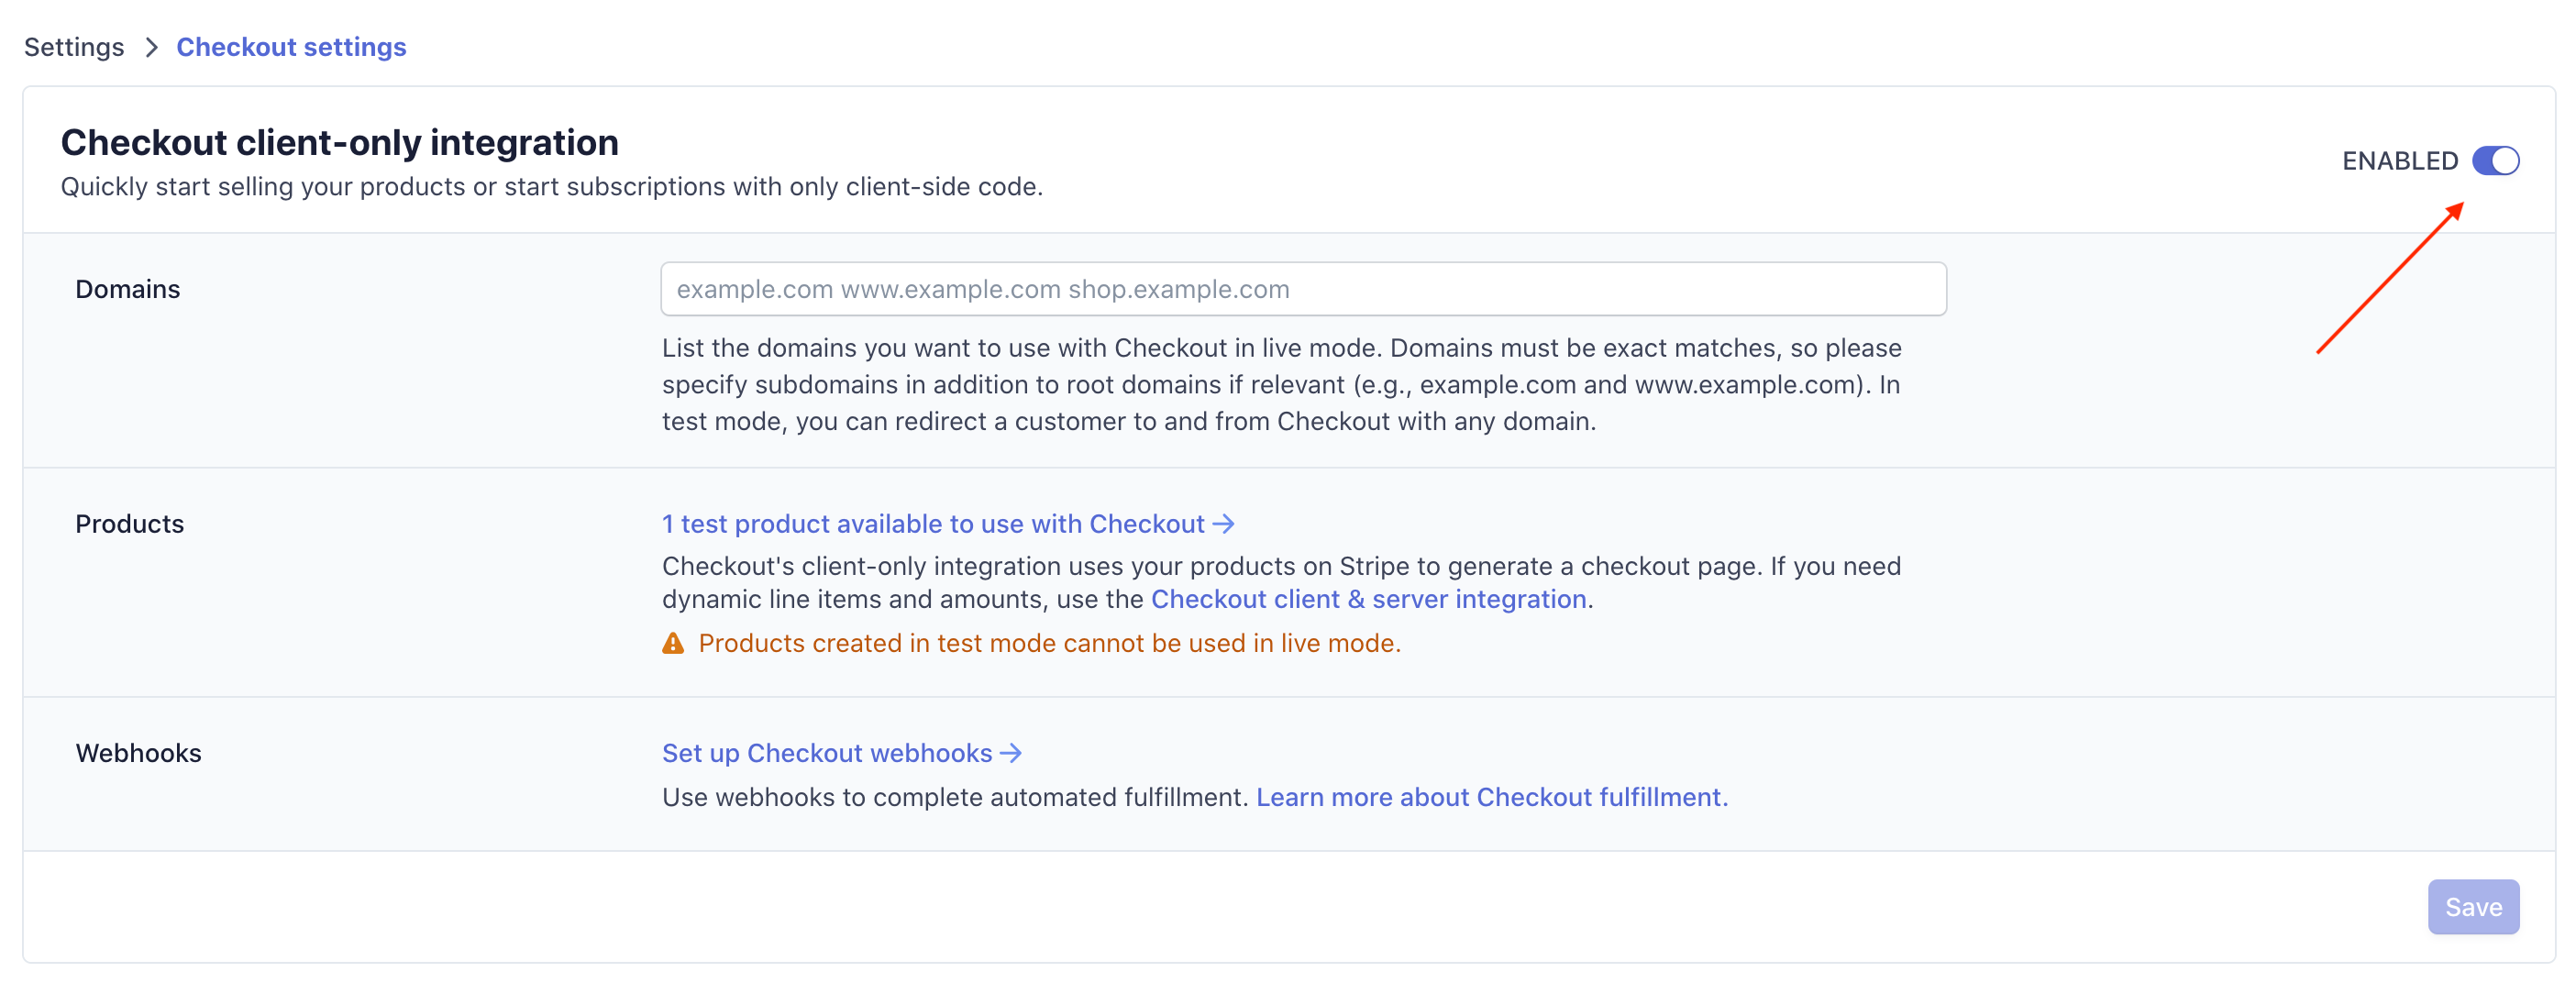
Enable checkout client-only integration
Once your account has been fully activated, go to the Settings page using the link in the sidebar. At the top of that page you’ll find an option for Checkout client-only integration. Enable it! This is the magic ingredient that lets us skip the back end development normally required for a Stripe integration.
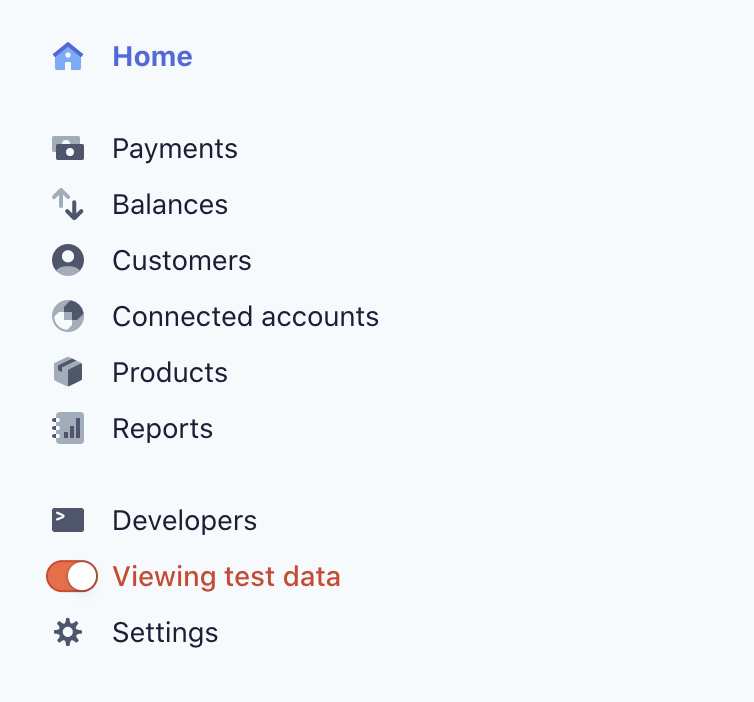
Activate test data
Next, head to your dashboard and look for the Viewing test data toggle on the sidebar. Turn it on. You should see a thin orange bar at the top of your screen with a tab that says TEST DATA. Once you’ve finished setting everything up you’ll switch into non-test mode. For now though — better safe than sorry.
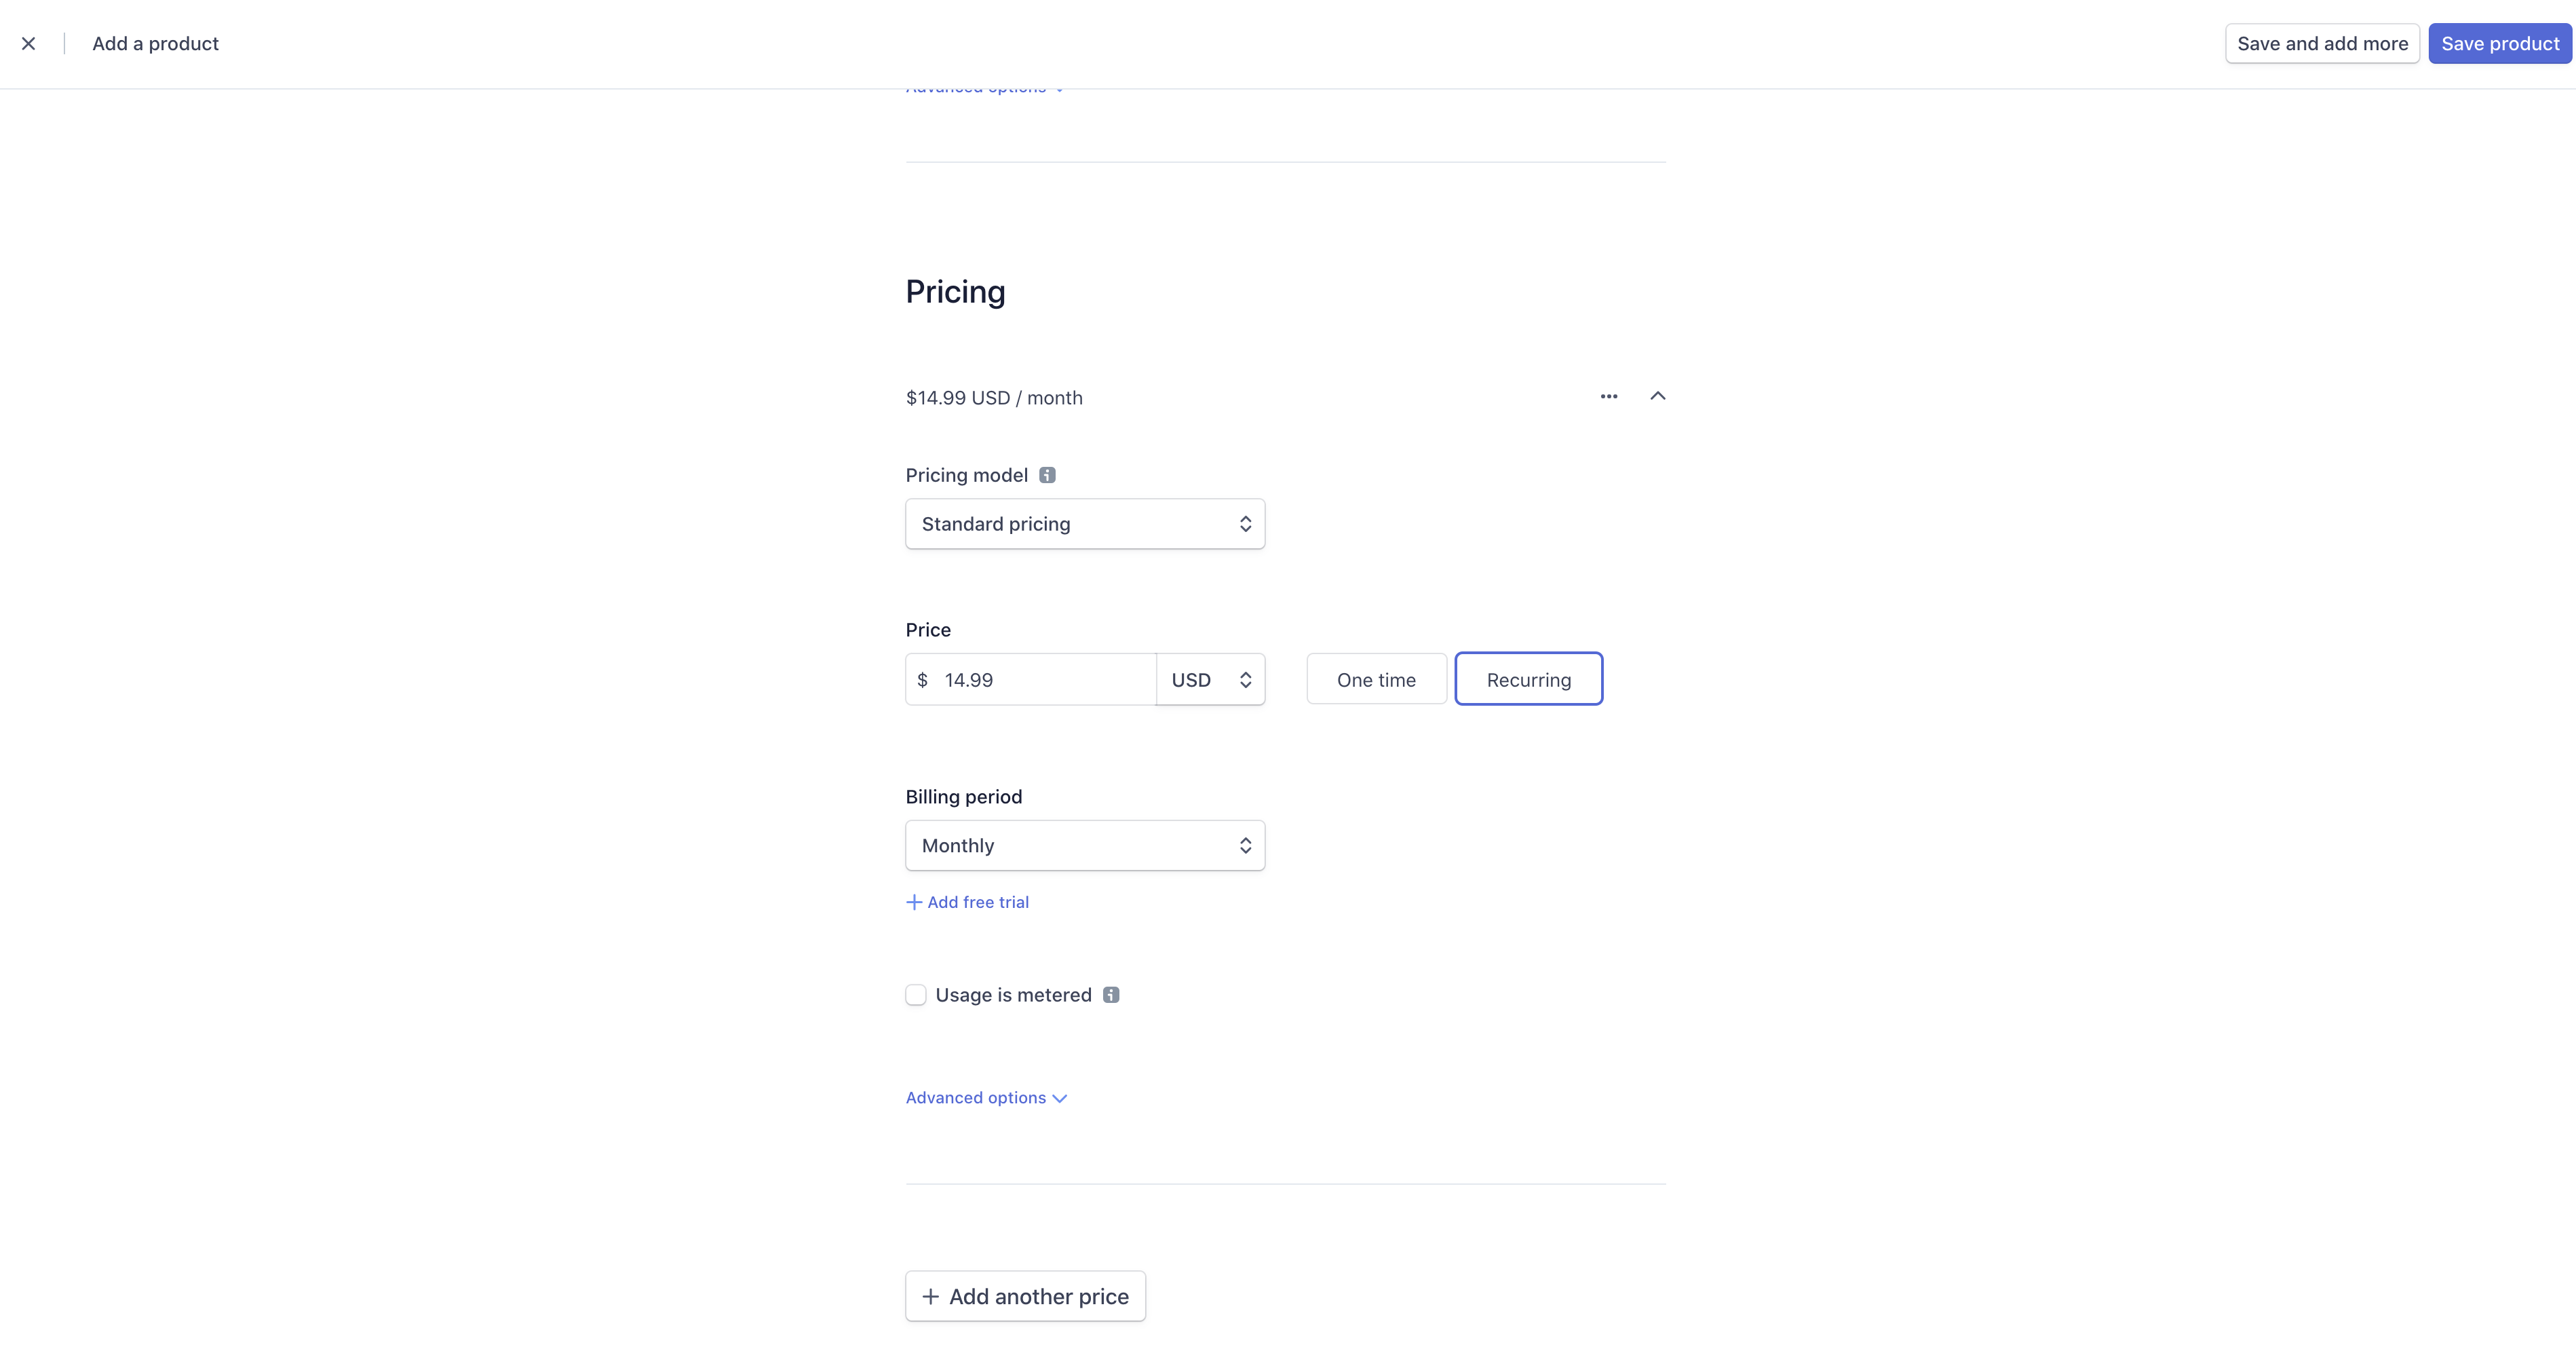
Adding a new product and pricing
#saas #bootstrap #no-code #startup #entrepreneurship