How to build WhatsApp bot with Node.js and Twilio
The bot will make use of Google search API such that we can search for anything on Google directly on WhatsApp.
Let’s get started
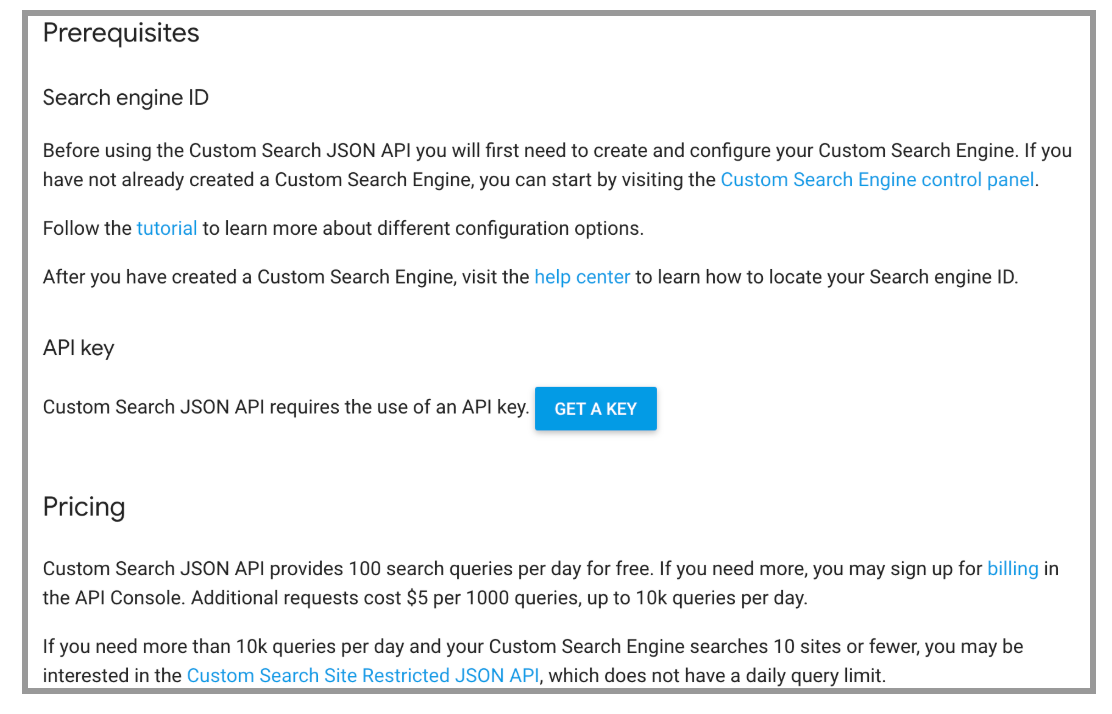
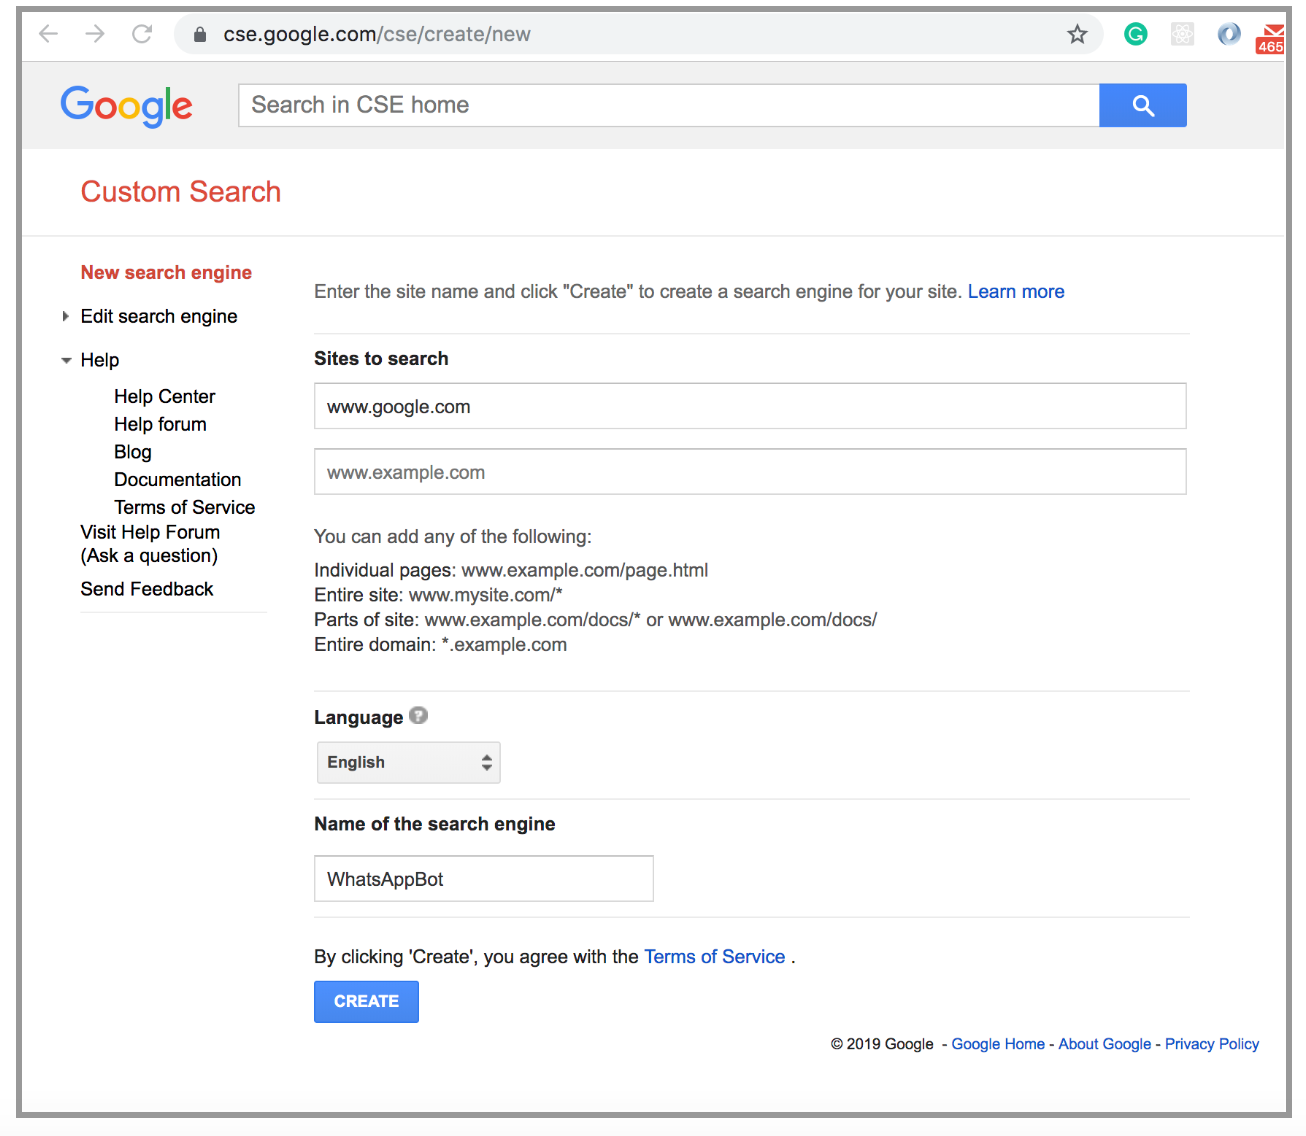
The first step is to create our custom Google search engine.
- Click on GET A KEY — create your project and copy your API key because you will need it later
- Click on add

- Enter the website you want to search and a name for it and click on create
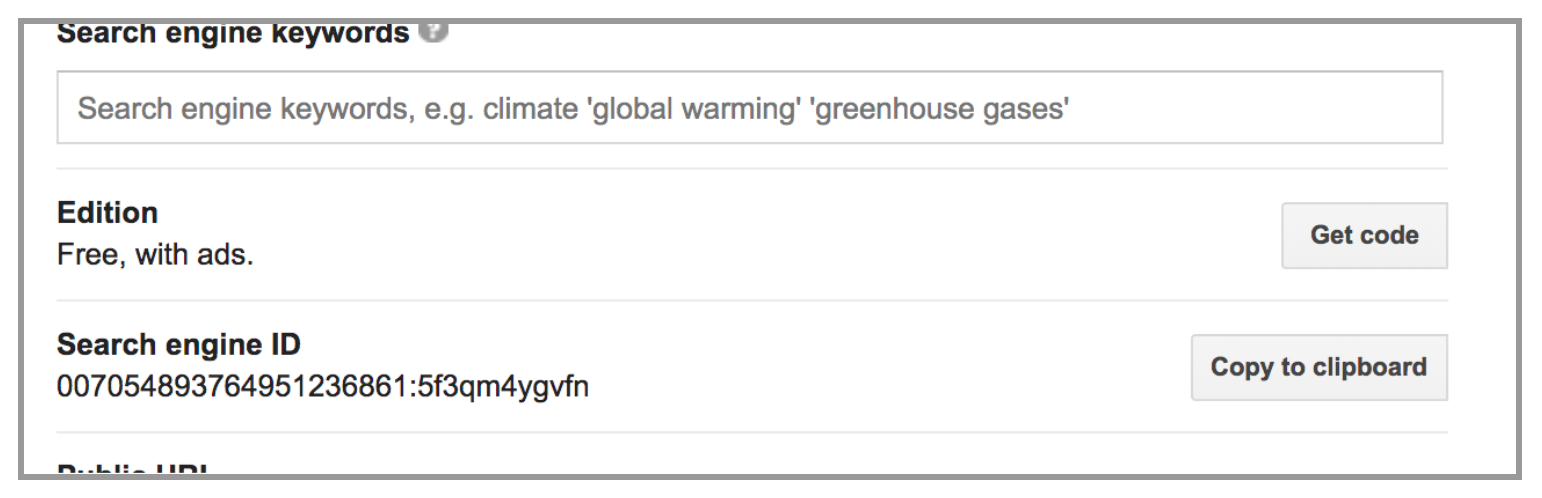
- Click on the control panel
- Note the Search engine ID, you will need it later
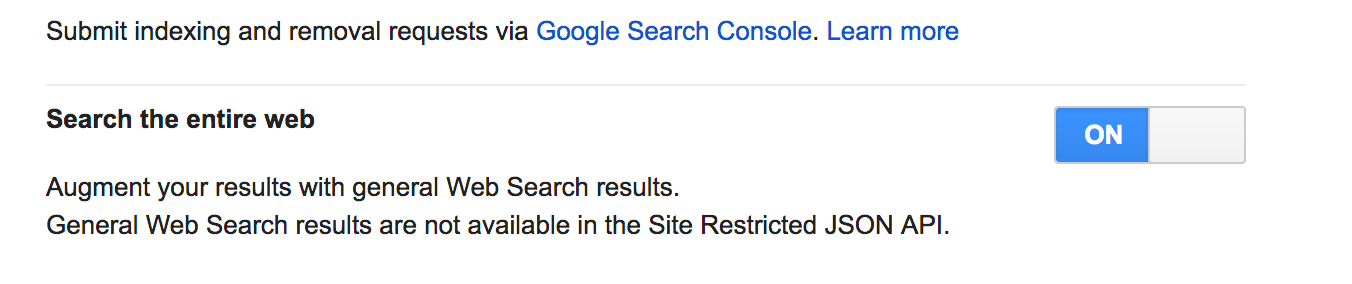
Switch the ‘search the entire web’ button to on, This will make your search more in-depth.
Setting up Twilio sandbox environment
- Create a Twilio account if you don’t already have one
- After creating and verifying your account, log into your account and click on console on the navbar
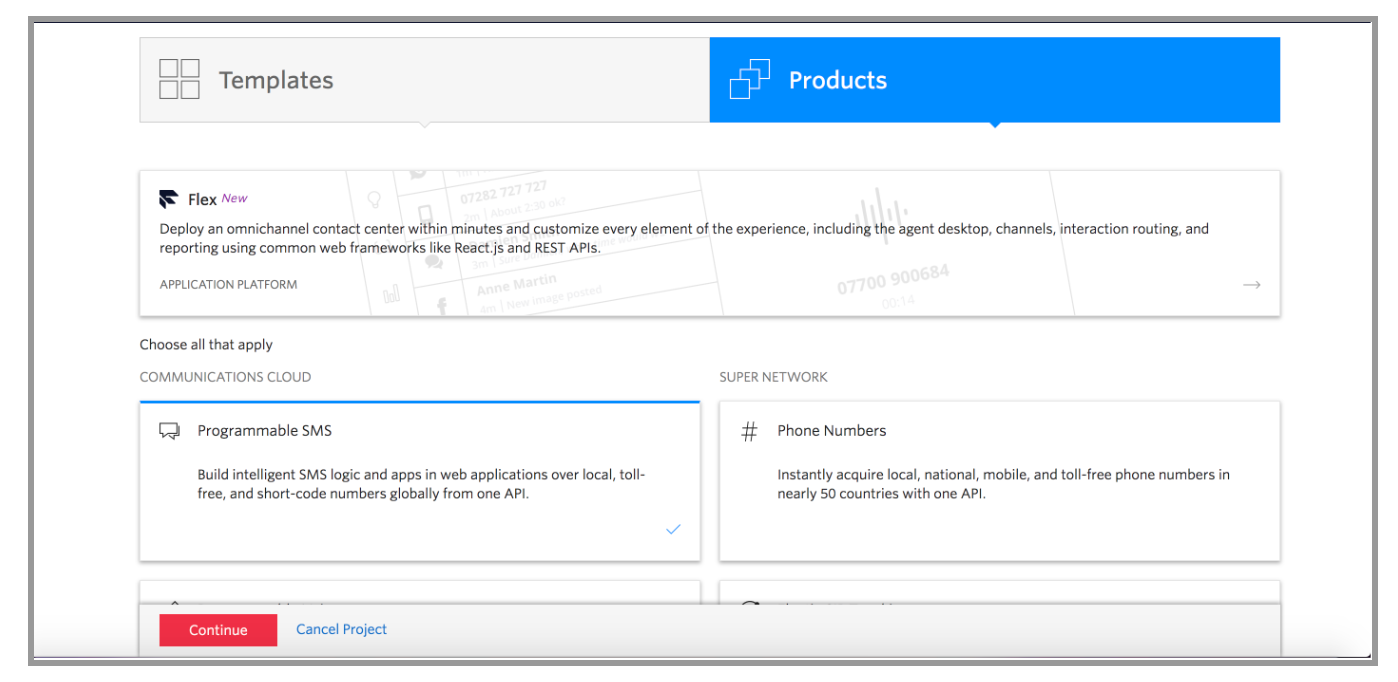
- Click on create a new project, select products > Programmable SMS and click on continue.
- Take note of your ACCOUNT SID and AUTH TOKEN

- Connect to your sandbox by sending a WhatsApp message to the Twilio number on the page.
Trust me this was the hardest part, now let’s get down to business.
Let's create a directory for our project.
On your terminal run mkdir whatsapp-bot or create a directory manually for the project.
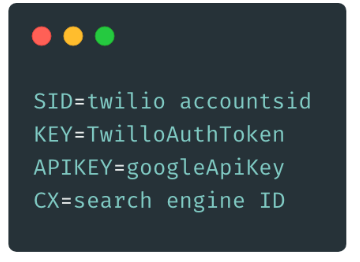
Create a .env file inside your project directory and put the following:
- ACCOUNT SID and AUTH TOKEN from Twilio
- Add your Google API key
- Your Search engine ID
Create your package.json with the following dependencies
{
  "name": "whatsapp-bot",
  "version": "1.0.0",
  "description": "A whatspp bot that uses twilio ",
  "main": "index.js",
  "scripts": {
    "start": "babel-node server/server.js",
    "test": "echo \"Error: no test specified\" && exit 1"
  },
  "author": "Ekpang Michael",
  "license": "ISC",
  "dependencies": {
    "cors": "2.8.5",
    "dotenv": "8.0.0",
    "express": "^4.16.3",
    "googleapis": "^42.0.0",
    "twilio": "^4.6.0"
  },
  "devDependencies": {
    "@babel/cli": "7.5.5",
    "@babel/core": "7.5.5",
    "@babel/node": "^7.5.5",
    "@babel/preset-env": "^7.5.5"
  },
  "engines": {
    "node": "8.x"
  }
}
create a .babelrc file and add this code.
{
  "presets": ["@babel/preset-env"]
}
Run npm install to install all your dependencies
Copy and paste this code inside server/server.js file
import express from 'express'; import cors from 'cors'; import v1Routes from './routes';const app = express();
const { PORT = 3000 } = process.env;
app.use(cors());
app.use(
express.urlencoded({
extended: false
})
);app.use(express.json());
app.use(v1Routes);// catch 404 and forward to error handler
app.use((req, res, next) => {
const err = new Error(‘Not Found’);
err.status = 404;
next(err);
});app.use((err, req, res, next) => {
res.status(err.status || 500).json({
errors: {
message: err.message
}
});
});app.listen(PORT, () => console.log(
App Listening on port ${PORT}));export default app;
Here we are just creating an express server that runs on port 3000.
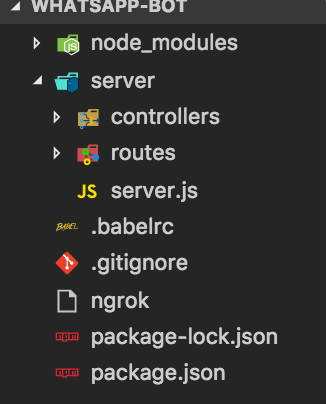
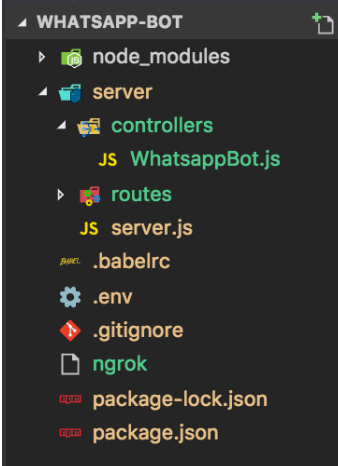
Your folder structure should look something like this
Run npm start to start the server, your app should start running on port 3000
Next let’s download ngrok. We need ngrok to make our local server publicly accessible on the internet.
- Unzip ngrok inside your directory
- Run ./ngrok http 3000 on another terminal
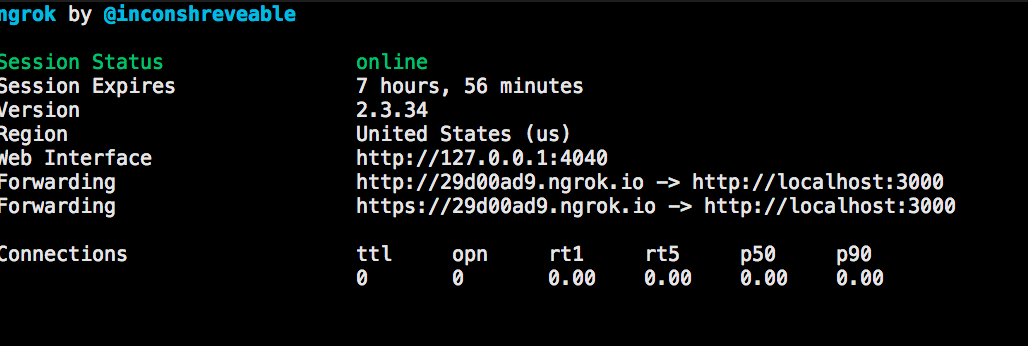
You should see ngrok started with status online.
- Copy the new ngrok server URL, Let’s go back to the WhatsApp Sandbox, and add it as our webhook URL.

Note the api/v1/incoming that is how our route will be structured
Next, create a WhatsappBot.js file inside the controllers folder
Your folder structure should be like this
Next, let’s import the Google API and Twilio libraries into our WhatsappBot.js
import { google } from ‘googleapis’;

import dotenv from ‘dotenv’;

import twilio from ‘twilio’;

dotenv.config();
Let’s load our environment variables and also initial our Twilio account by passing in our account id and auth token.
const {

SID: accountSid,

KEY: TwilloAuthToken,

APIKEY: googleApiKey,

CX: cx

} = process.env;
twilio(accountSid, TwilloAuthToken);

const { MessagingResponse } = twilio.twiml;

const customsearch = google.customsearch(‘v1’);
From the image below, we initialize the MessgingResponse object, we get the query the user is sending from req.body.Body, call the Google customsearch method and passing it our options parameter.
Then, get the first content from the search result and send back to the user.
class WhatsappBot {

/**
- @memberof WhatsappBot
- @param {object} req - Request sent to the route
- @param {object} res - Response sent from the controller
- @param {object} next - Error handler
- @returns {object} - object representing response message
*/
static async googleSearch(req, res, next) {
const twiml = new MessagingResponse();
const q = req.body.Body;
const options = { cx, q, auth: googleApiKey };
try {
  const result = await customsearch.cse.list(options);
  const firstResult = result.data.items[0];
  const searchData = firstResult.snippet;
  const link = firstResult.link;

  twiml.message(`${searchData} ${link}`);

  res.set('Content-Type', 'text/xml');

  return res.status(200).send(twiml.toString());
} catch (error) {
  return next(error);
}
}
}
See the complete code below
import { google } from ‘googleapis’;

import dotenv from ‘dotenv’;

import twilio from ‘twilio’;

dotenv.config();
const {

SID: accountSid,

KEY: TwilloAuthToken,

APIKEY: googleApiKey,

CX: cx

} = process.env;
twilio(accountSid, TwilloAuthToken);

const { MessagingResponse } = twilio.twiml;

const customsearch = google.customsearch(‘v1’);
/**
-
@class WhatsappBot
-
@description class will implement bot functionality
/
class WhatsappBot {
/*- @memberof WhatsappBot
- @param {object} req - Request sent to the route
- @param {object} res - Response sent from the controller
- @param {object} next - Error handler
- @returns {object} - object representing response message
*/
static async googleSearch(req, res, next) {
const twiml = new MessagingResponse();
const q = req.body.Body;
const options = { cx, q, auth: googleApiKey };
try {
const result = await customsearch.cse.list(options);
const firstResult = result.data.items[0];
const searchData = firstResult.snippet;
const link = firstResult.link;twiml.message(
${searchData} ${link});res.set(‘Content-Type’, ‘text/xml’);
return res.status(200).send(twiml.toString());
} catch (error) {
return next(error);
}
}
}
export default WhatsappBot;
Setup the route
- Create search.js file inside the route folder
Here we import the WhatsAppbot controller and set our post route
import { Router } from ‘express’;

import WhatsappBot from ‘…/controllers/WhatsappBot’;
const botRouter = Router();
botRouter.post(‘/incoming’, WhatsappBot.googleSearch);
export default botRouter;
- Create an index.js inside the route folder and import your search route
import { Router } from ‘express’;

import botRouter from ‘./search’;
const v1Router = Router();

v1Router.use(‘/api/v1’, botRouter);
export default v1Router;
Restart your server and try sending a message via WhatsApp to your endpoint.
If everything goes well you should get a response back

Congratulation you have just created your first WhatsApp bot, go ahead and explore.
#node-js #javascript #web-development #chatbot #api