This series is mainly about setting up your Raspberry Pi with a Jupyter Notebook server that you can access anywhere with open internet. And we are at the final chapter.
In the previous sessions, we have covered how to set up port forwarding or a cloud proxy server in order for you to connect to Raspberry Pi via SSH securely. And in my first article, I have also covered how TCP/IP handles different incoming traffic. Now that we know how to open up our Pi and access it via SSH, we could actually replicate the same idea. In a simple one-liner, Jupyter Notebook runs on HTTP (Which seems apparent since we all use our web browser to use Jupyter Notebook). Therefore, what we need to do is to simply open up a port for HTTP traffic from the Pi, and hook it up with the Jupyter Notebook application.
For the necessary prerequisite, go check out the article below that introduce cloud proxy server setup. I will assume that you already have a cloud proxy server registered at remote.in and are able to connect to your Pi via SSH. I want to highlight that many cloud proxy server providers offer free service for you to access your Raspberry Pi. Since you don’t really rent any server but hosting your own, the services from many providers in general are quite generous. So do check out other providers by yourself!
And we want to do this in the most secure way. That’s why this chapter will combine all the things we have learnt so far. Not only are we gonna expose a port on our Raspberry Pi, we are also going to connect the port/Jupyter Notebook app to the cloud proxy server. From the user point of view, nothing is different, they just need to visit another URL instead of the original IP address. But from the server point of view, this gives you great security. And it really matters, since I assume most of you set up your Pi at home, which means your home network will be exposed to attack if anything goes wrong.
Again, this is just for fun. Raspberry Pi doesn’t offer a lot of computing power. But imagine you got a NVIDIA computing box, then it might actually be a good idea to set up remote access. Besides, on the data science industry, using a linux server to do ML stuff is a norm right now. And learning how to set up one just gives your lot of edge and convenience over others.
You could definitely open up the public access to your notebook app via port forwarding. But its really dangerous to do so. Since jupyter notebook generally enables “jupyter magic”, which could create, alter and delete any file on your running os, anyone intentionally visit your jupyter notebook will impose great risk equal to a SSH access.
With all the BS cover, here is the list of steps. Let’s do this.
- Install Jupyter Notebook on raspberry pi.
- Add configuration and set up a password.
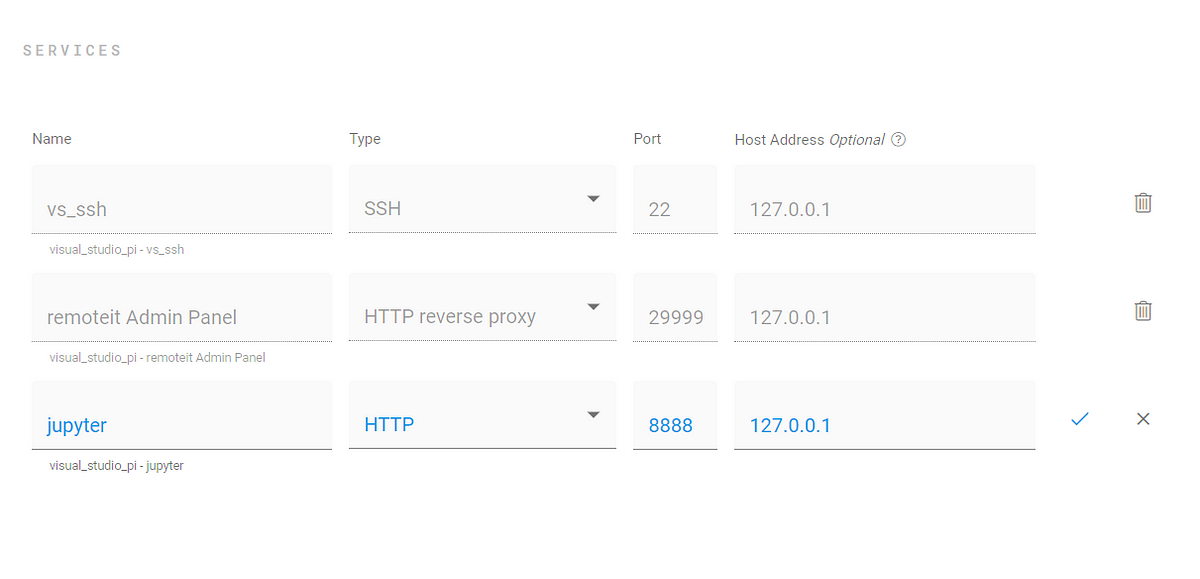
- Set up an application on cloud proxy server so that you could expose your Jupyter Notebook to open internet.
#cloud #jupyter-notebook #security #web #raspberry-pi