In this article, I will first walk you through building and verifying your own JWTs using the firebase/php-jwt package. Then I will show you how to create a machine-to-machine app in Okta, and use the Client Credentials Flow to get a JWT access token from your Okta server.
JSON Web Tokens (JWTs) have turned into the de-facto standard for stateless authentication of mobile apps, single-page web applications, and machine-to-machine communication. They have mostly superseded the traditional authentication method (server-side sessions) because of some key benefits:
- They are decentralized and portable (you can request a token from a dedicated service, and then use it with multiple backends)
- There is no need for server-side sessions - a JWT can contain all the required information about the user, and the information is protected against modification
- They perform well and can scale easily
Before you start working with JWTs, it’s important to understand that JWTs are encoded, and not encrypted - they do not hide the data contained inside, and the user can read it. You should not store any sensitive information inside a JWT.
There are a large number of libraries designed to help you work with JWTs in your application. In this article, I will first walk you through building and verifying your own JWTs using the firebase/php-jwt package. Then I will show you how to create a machine-to-machine app in Okta, and use the Client Credentials Flow to get a JWT access token from your Okta server.
The requirements for completing the examples are: Okta account (free), PHP, Composer, and openssl command line tools.
Why Okta?
Okta is an API service that allows you to create, edit, and securely store user accounts and user account data, and connect them with one or more applications. Register for a forever-free developer account, and when you’re done, come back to learn more about token authentication in PHP.
There are different authentication flows in Okta, depending on if the client application is public or private and if there is a user involved or the communication is machine-to-machine only. The Client Credentials Flow that you’ll implement is best suited for machine-to-machine communication where the client application is private (and can be trusted to hold a secret).
What Are JWTs?
JWTs are base64-encoded strings. They are self-contained and cryptographically signed, which means that their content can be inspected and verified. JWTs can be signed using either a shared secret (with the HMAC algorithm) or a public/private key pair using RSA or ECDSA. If a malicious user changes the token contents, the JWT will fail the verification.
The format of a JWT is: header.payload.signature
The header component contains information about the signing method. The payload component is the information about the user (also known as the ‘claims’ of the JWT). The signature is computed by the authentication server using the shared secret or the private key.
If you want to learn more about how to use JWTs securely, and how to build and verify them from scratch in PHP (without using any external libraries), you can check my previous article Create and Verify JWTs in PHP with OAuth 2.0
Using JWTs with OAuth 2.0 and OpenID Connect in PHP
Before explaining the role of JWTs in OAuth 2.0 and OpenID Connect, it’s important to clarify the concepts of authentication and authorization in information security.
Authentication means confirming that the user is who they claim to be. Authorization means proving that the authenticated user has the permission to do something in a system.
OpenID Connect is an authentication protocol, and OAuth 2.0 is an open standard for authorization. OpenID Connect uses ID tokens, and OAuth 2.0 uses access tokens. Together, they provide a complete framework for authentication and authorization of users (or machines) in web/mobile applications and servers.
OAuth 2.0 tokens do not have to be JWTs, but many implementations (including Okta) use JWTs because of their desirable properties.
OpenID Connect (OIDC) tokens, on the other hand, are always JWTs. Okta uses the public/private key pair signing method. The ID tokens are signed using private JSON Web Keys (JWK), the specification for which you can find here: JSON Web Key (JWK). You need to retrieve these keys and cache them on your server if you want to be able to verify Okta tokens (alternatively, you can ask Okta to verify tokens for you, but this requires an additional round trip to the authorization server).
The OIDC ID tokens include the following common claims:
- The
iss(issuer) claim matches the identifier of your Okta Authorization Server - The
aud(audience) claim should match the Client ID used to request the ID Token - The
iat(issued at time) claim indicates when this ID token was issued - The
exp(expiry time) claim is the time at which this token will expire - The
nonceclaim value should match whatever was passed when requesting the ID token
Creating and Verifying JWTs in PHP
You’ll use the firebase/php-jwt package to create and verify your own JWTs. I will also show you how to use base64 decoding to read the claims of the JWT and prove that it’s simply encoded, and not encrypted (reminder: do not store any sensitive information in a JWT).
Start by creating a new directory and initializing it as a new PHP project with a dependency on firebase/php-jwt:
composer require firebase/php-jwt
Next, create a private/public key pair using openssl on the command line:
openssl genrsa -out mykey.pem 1024
openssl rsa -in mykey.pem -pubout > mykey.pub
You’ll use these to sign and verify your JWTs.
Create a .gitignore file in the directory with the following contents so the key files and your .env file will not be added to the Git repository:
/vendor/
.env
mykey.pem
mykey.pub
Create a file bootstrap.php to load the vendor libraries:
<?php
require 'vendor/autoload.php';
Create a file jwt-generate.php:
<?php
require('./bootstrap.php');

use \Firebase\JWT\JWT;

$privateKey = file_get_contents('mykey.pem');

$token = array(
    "iss" => "http://example.org",
    "aud" => "http://example.com",
    "iat" => 1356999524,
    "nbf" => 1357000000
);

/**
 * IMPORTANT:
 * You must specify supported algorithms for your application. See
 * https://tools.ietf.org/html/draft-ietf-jose-json-web-algorithms-40
 * for a list of spec-compliant algorithms.
 */
$jwt = JWT::encode($token, $privateKey, 'RS256');

echo $jwt . "\n";
This code generates a JWT and prints it out. It uses the private key and the RS256 algorithm to sign it.
Run the code from the command line and you’ll see something like this:
php jwt-generate.php
eyJ0eXAiOiJKV1QiLCJhbGciOiJSUzI1NiJ9.eyJpc3MiOiJodHRwOlwvXC9leGFtcGxlLm9yZyIsImF1ZCI6Imh0dHA6XC9cL2V4YW1wbGUuY29tIiwiaWF0IjoxMzU2OTk5NTI0LCJuYmYiOjEzNTcwMDAwMDB9.m_RtU0biD_xRy0DUVH7QWoNaLRqLWZadzpYO7tKnYbMlcRw8gYzZ9xI4aUJFf5BnyzKHY1LKmBdcU_-jotiJOZ0Ro_kRvcEPQRuu3OgLgQPTdyFHPrBRzGnQAAgfUdyHl1mKIJqe2bjdkiGDx8ShXnn3VZxpXzQLEDrH51IKuFI
The next tool you’ll create is jwt-decode.php which accepts a JWT as an argument and returns the decoded claims (without using any keys, or even the JWT library):
jwt-decode.php
<?php
require('./bootstrap.php');

// read a JWT from the command line
if (! isset($argv[1])) {
    exit('Please provide a key to verify');
}

$jwt = $argv[1];

list($header, $payload, $signature) = explode(".", $jwt);

$plainHeader = base64_decode($header);
echo "Header:\n$plainHeader\n\n";

$plainPayload = base64_decode($payload);
echo "Payload:\n$plainPayload\n\n";
If you run it with the example key from the previous step, you’ll see an output like this:
php jwt-decode.php eyJ0eXAiOiJKV1QiLCJhbGciOiJSUzI1NiJ9.eyJpc3MiOiJodHRwOlwvXC9leGFtcGxlLm9yZyIsImF1ZCI6Imh0dHA6XC9cL2V4YW1wbGUuY29tIiwiaWF0IjoxMzU2OTk5NTI0LCJuYmYiOjEzNTcwMDAwMDB9.m_RtU0biD_xRy0DUVH7QWoNaLRqLWZadzpYO7tKnYbMlcRw8gYzZ9xI4aUJFf5BnyzKHY1LKmBdcU_-jotiJOZ0Ro_kRvcEPQRuu3OgLgQPTdyFHPrBRzGnQAAgfUdyHl1mKIJqe2bjdkiGDx8ShXnn3VZxpXzQLEDrH51IKuFI

Header:
{"typ":"JWT","alg":"RS256"}

Payload:
{"iss":"http://example.org","aud":"http://example.com","iat":1356999524,"nbf":1357000000}
This proves that all claims are freely readable without using any keys. The keys are used to verify the signature (using only the public key), which is the last tool you’ll build: jwt-verify.php
jwt-verify.php
<?php
require('./bootstrap.php');

use \Firebase\JWT\JWT;

$publicKey = file_get_contents('mykey.pub');

// read a JWT from the command line
if (! isset($argv[1])) {
    exit('Please provide a key to verify');
}

$jwt = $argv[1];

$decoded = JWT::decode($jwt, $publicKey, ['RS256']);

/*
 NOTE: This will now be an object instead of an associative array. To get
 an associative array, you will need to cast it as such:
*/
print_r((array) $decoded);
Again, run it from the command line with the token you generated:
php jwt-verify.php eyJ0eXAiOiJKV1QiLCJhbGciOiJSUzI1NiJ9.eyJpc3MiOiJodHRwOlwvXC9leGFtcGxlLm9yZyIsImF1ZCI6Imh0dHA6XC9cL2V4YW1wbGUuY29tIiwiaWF0IjoxMzU2OTk5NTI0LCJuYmYiOjEzNTcwMDAwMDB9.m_RtU0biD_xRy0DUVH7QWoNaLRqLWZadzpYO7tKnYbMlcRw8gYzZ9xI4aUJFf5BnyzKHY1LKmBdcU_-jotiJOZ0Ro_kRvcEPQRuu3OgLgQPTdyFHPrBRzGnQAAgfUdyHl1mKIJqe2bjdkiGDx8ShXnn3VZxpXzQLEDrH51IKuFI

Array
(
    [iss] => http://example.org
    [aud] => http://example.com
    [iat] => 1356999524
    [nbf] => 1357000000
)
Note that when verifying a real JWT, you must also make sure that it’s not expired or blacklisted. Also, make sure not to rely on the algorithm specified in the JWT, but use the same algorithm as the one used for signing the JWT! This is such an important topic that it requires some additional details in the next segment.
Security Attacks on the JWT Signing Algorithm in PHP
If you look closely at the JWT header, you’ll notice the alg field:
Header:
{
    "typ":"JWT",
    "alg":"RS256"
}
It specifies the algorithm used to sign the JWT. One special algorithm that all implementations of JWT must support is the ‘none’ algorithm (for no signature at all). If we modify the JWT to specify this algorithm, and the backend relies on this field for the verification, then the backend might accept our JWT as correctly signed even if we just made it up!
There is also another type of attack when relying on the algorithm specified in the JWT: if you switch the algorithm from RS256 (using public/private key pair) to HS256 (using hashing with a shared secret), the signature will be verified using the HS256 algorithm but with the public key as the secret (hint: check how jwt_verify.php works). Since the public key is known, you can correctly sign JWTs with it and they will be accepted.
You can learn more about these (and other) attacks by reading Attacking JWT authentication, or by watching Aaron Parecki’s presentation OAuth: When Things Go Wrong.
Conclusion: always use the same algorithm for signing and verifying JWTs. Disregard the algorithm specified in the JWT header.
Create a Machine-to-Machine Application in PHP and Verify JWTs
In this section, I’ll show you how to create a machine-to-machine Application in Okta and how to use the okta/jwt-verifier library to get JWT access tokens from your Okta authorization server through the Client Credentials Flow.
The Client Credentials Flow is best suited for machine-to-machine communication (where the client can be trusted to hold a secret). Here’s the documentation of the flow: Okta: Client Credentials Flow.
If you still haven’t created your forever-free Okta developer account, do it now and then continue with the tutorial.
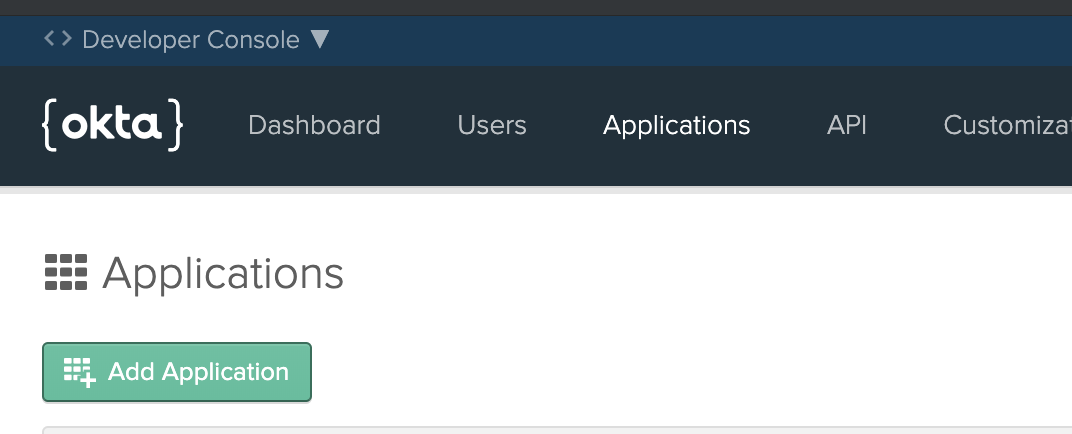
Log in and go to Applications, then click Add Application:

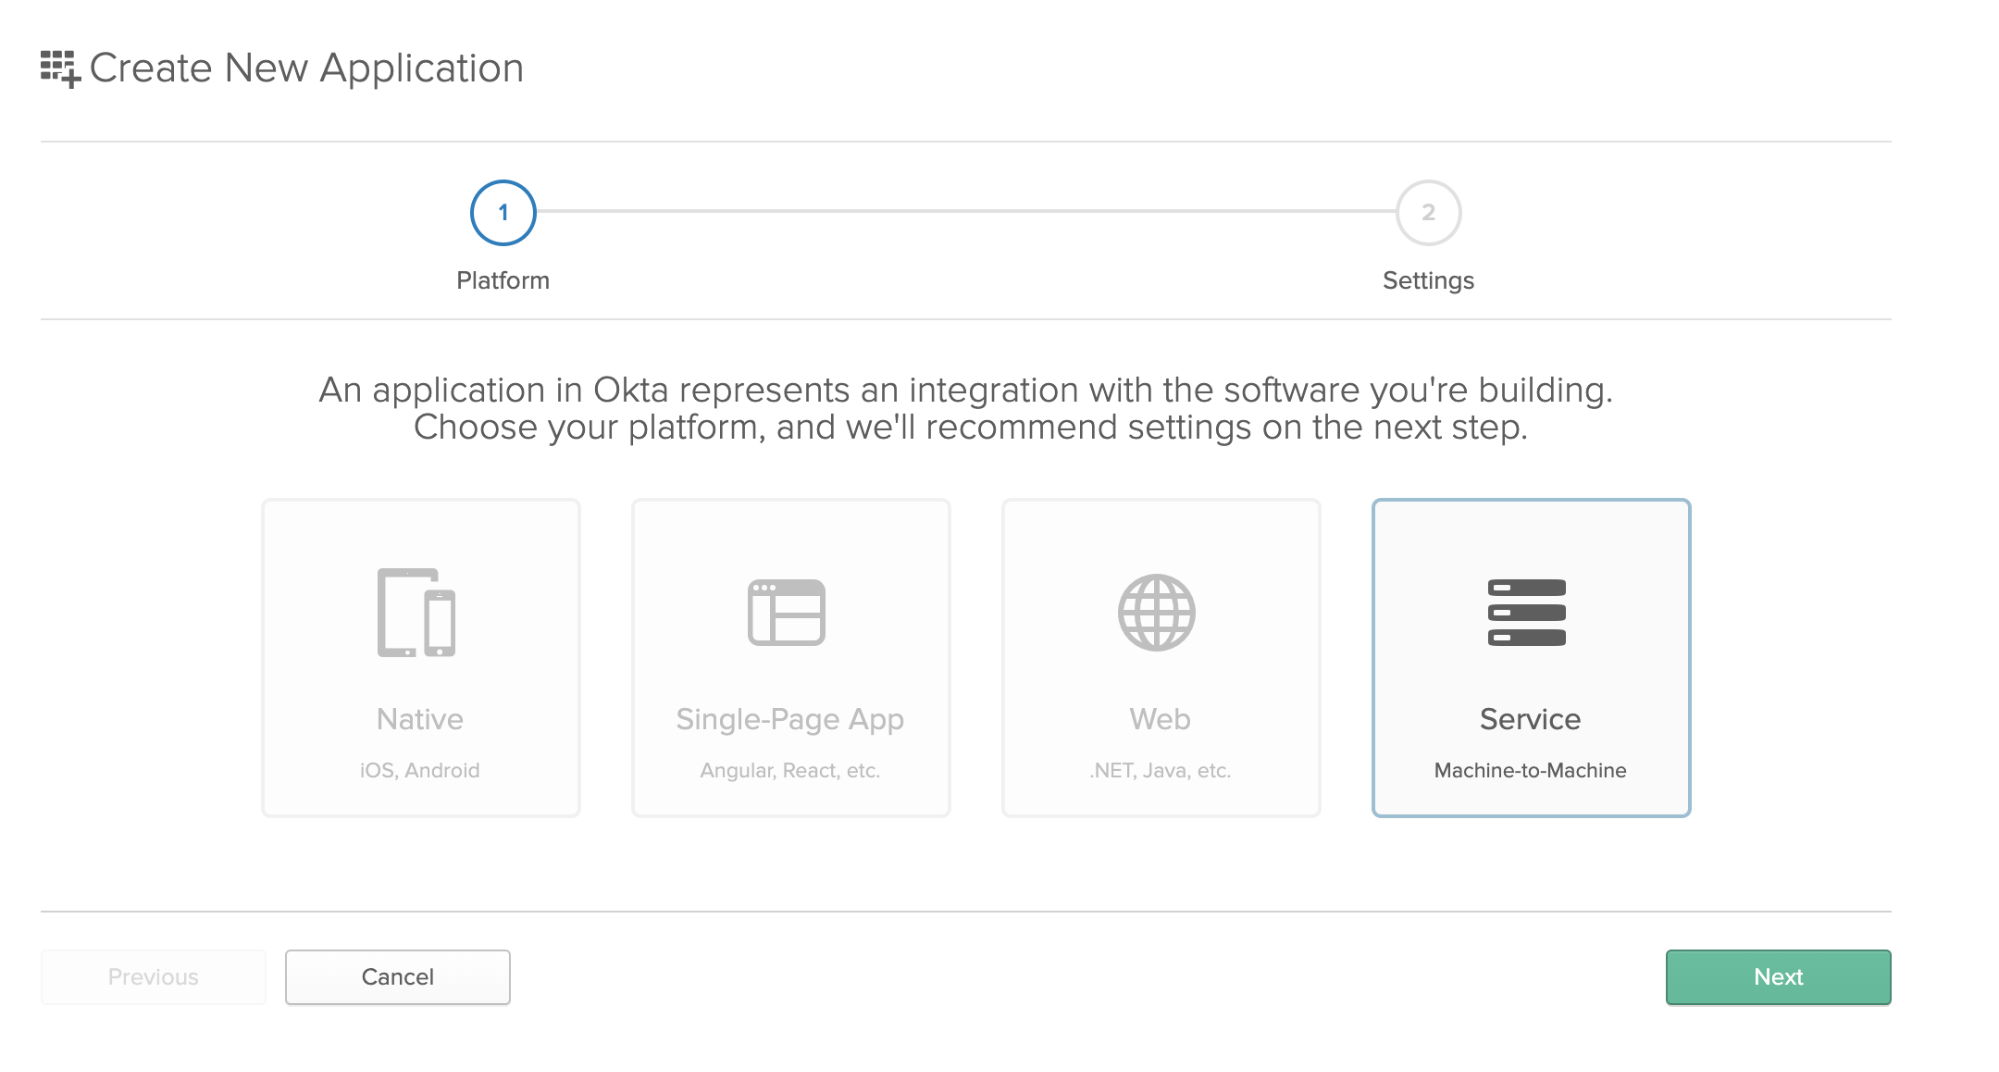
Select Service (Machine-to-Machine) and click Next:

Enter a title for your application and click Done. Take note of the values in the Client ID and Client secret fields that are displayed on the next screen, you’ll need them when building the app.
Before creating the application, there’s one more thing to configure in Okta: you need to create a scope for your application.
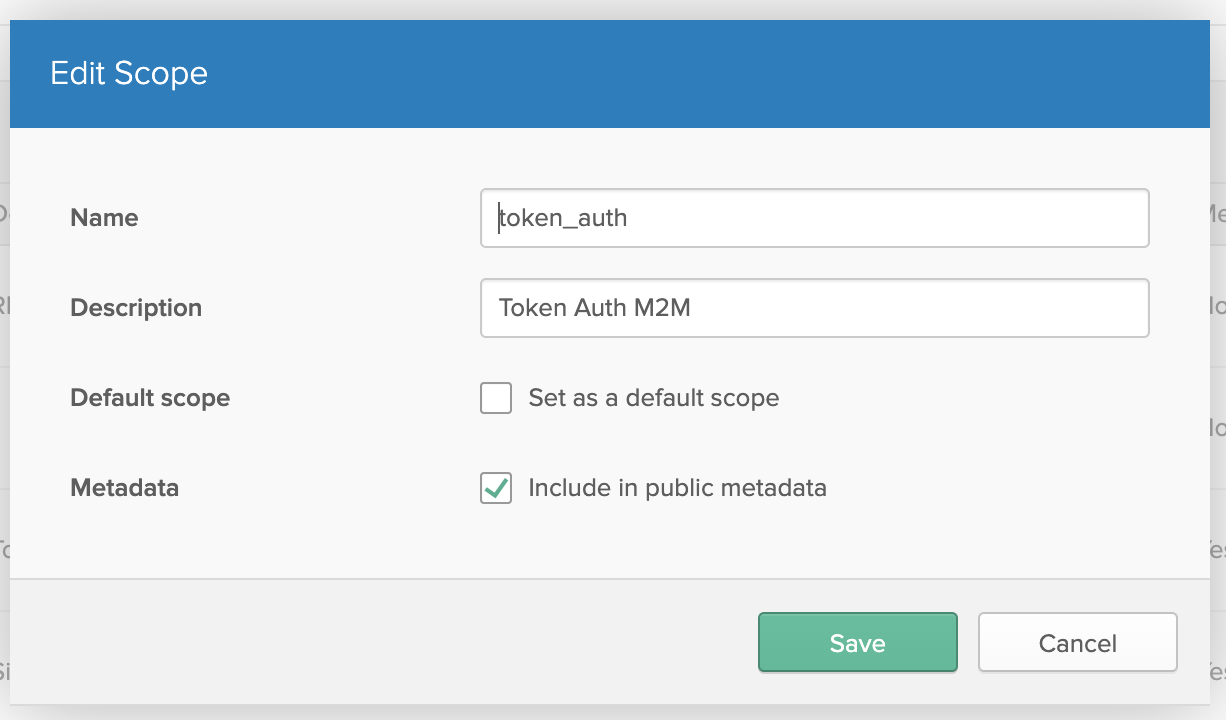
Go to Api > Authorization Servers, take note of the Issuer URI field (you will need it when configuring the app), and click on the default authorization server. Go to the Scopes tab and click Add Scope. Set up your scope like this:

You should’ve copied 4 values if you did everything correctly: Client Id, Client Secret, Issuer URI, and Scope (token_auth).
Use the Client Credentials Flow to Generate JWT Access Tokens in PHP
I’ll show you how to get an access token from your Okta authorization server for your machine-to-machine application, and how to verify a token (if received by a third party). We’ll use the okta/jwt-verifier library.
Start by creating a .env.example file like this:
CLIENT_ID=
CLIENT_SECRET=
ISSUER=
SCOPE=
Then copy it to .env (remember, this file should be in .gitignore so it’s not added to the repo) and fill in your details from the previous section.
You need to install the new dependencies. In addition to the okta/jwt-verifier library, you also need vlucas/phpdotenv so the app can read your .env file, and guzzlehttp/psr7 (required by Okta). You should already have firebase/php-jwt (another Okta requirement) from the previous example.
Run the following command:
composer require okta/jwt-verifier vlucas/phpdotenv guzzlehttp/psr7
Update the bootstrap.php file:
<?php
require 'vendor/autoload.php';
use Dotenv\Dotenv;

$dotenv = Dotenv::create(__DIR__);
$dotenv->load();
The first tool you’ll build is okta-jwt-get.php (used to request an access token from the Okta authorization server):
okta-jwt-get.php
<?php
require('./bootstrap.php');

echo "Obtaining token...";

// prepare the request
$uri = getenv('ISSUER') . '/v1/token';
$clientId = getenv('CLIENT_ID');
$clientSecret = getenv('CLIENT_SECRET');
$token = base64_encode("$clientId:$clientSecret");
$payload = http_build_query([
    'grant_type' => 'client_credentials',
    'scope'      => getenv('SCOPE')
]);

// build the curl request
$ch = curl_init();
curl_setopt($ch, CURLOPT_URL, $uri);
curl_setopt( $ch, CURLOPT_HTTPHEADER, [
    'Content-Type: application/x-www-form-urlencoded',
    "Authorization: Basic $token"
]);
curl_setopt($ch, CURLOPT_POST, 1);
curl_setopt($ch, CURLOPT_POSTFIELDS, $payload);
curl_setopt($ch, CURLOPT_RETURNTRANSFER, true);

// process and return the response
$response = curl_exec($ch);
$response = json_decode($response, true);
if (! isset($response['access_token'])
    || ! isset($response['token_type'])) {
    exit('failed, exiting.');
}

echo "success!\n";

// here's your token to use in API requests
print_r($response['access_token']);

echo "\n";
Run it from the command line, you should get output like this:
php okta-jwt-get.php

Obtaining token...success!
eyJraWQiOiJJekZFTW5QNjdDZzhobHBBelRzYmR5WnFvQlZsbzZSaklvaUpNc2EyVG9rIiwiYWxnIjoiUlMyNTYifQ.eyJ2ZXIiOjEsImp0aSI6IkFULjdjNENXclE0d2JyUktOVzZteURnN0M3S1RDLXBtVjU5MGVIWnFyblNhdDgiLCJpc3MiOiJodHRwczovL2Rldi0zNTQ2ODUub2t0YXByZXZpZXcuY29tL29hdXRoMi9kZWZhdWx0IiwiYXVkIjoiYXBpOi8vZGVmYXVsdCIsImlhdCI6MTU1NDcyNTg0OSwiZXhwIjoxNTU0NzI5NDQ5LCJjaWQiOiIwb2FrNmkwb3V3c1lNdmJJczBoNyIsInNjcCI6WyJ0b2tlbl9hdXRoIl0sInN1YiI6IjBvYWs2aTBvdXdzWU12YklzMGg3In0.MNKyJ6cuTQO-U3g7Jlg01T1CPtRGQ3sZEnS4hlWIz3KPk4Ff243rLx76yoeZ8tE-ge2mCDZDSZQ1nsYkEZ1jjJzT-4FjrY7uTRWDI2tjrjDOj1E7SHh3ukxNG7_JuuDZJJzKs7QxEA0LkExiRjfG3BsiCTMDtWjIsR0_5HKfOE_-hwkZi2dZC3KPI_RjSCLmfok-7juqpoD9Q_8sdjRtP3TOg9HzHhCf6kcZxx5To5rtahxWNJ6den7tslkIDxXuaVRiralUcgkTo1wzNu9cB3BO6piUSYecodaUIIO4LmSF8FdTy4lBMBedrr-T2mf5RIB63KR6GBptuy86eRVUSw
The second tool is okta-jwt-verify.php. It accepts an access token from the command line and verifies it.
okta-jwt-verify.php
<?php
require('./bootstrap.php');

if (! isset($argv[1])) {
    exit('Please provide a key to verify');
}

$jwt = $argv[1];

$jwtVerifier = (new \Okta\JwtVerifier\JwtVerifierBuilder())
    ->setAudience('api://default')
    ->setClientId(getenv('CLIENT_ID'))
    ->setIssuer(getenv('ISSUER'))
    ->build();

try {
    $jwt = $jwtVerifier->verify($jwt);
} catch (Exception $e) {
    exit($e->getMessage());
}

// Displays Claims as a JSON Object
print_r($jwt->toJson());

echo "\n";
Run it with the access token you just received, and you should see similar output:
php okta_jwt_verify.php eyJraWQiOiJJekZFTW5QNjdDZzhobHBBelRzYmR5WnFvQlZsbzZSaklvaUpNc2EyVG9rIiwiYWxnIjoiUlMyNTYifQ.eyJ2ZXIiOjEsImp0aSI6IkFULjdjNENXclE0d2JyUktOVzZteURnN0M3S1RDLXBtVjU5MGVIWnFyblNhdDgiLCJpc3MiOiJodHRwczovL2Rldi0zNTQ2ODUub2t0YXByZXZpZXcuY29tL29hdXRoMi9kZWZhdWx0IiwiYXVkIjoiYXBpOi8vZGVmYXVsdCIsImlhdCI6MTU1NDcyNTg0OSwiZXhwIjoxNTU0NzI5NDQ5LCJjaWQiOiIwb2FrNmkwb3V3c1lNdmJJczBoNyIsInNjcCI6WyJ0b2tlbl9hdXRoIl0sInN1YiI6IjBvYWs2aTBvdXdzWU12YklzMGg3In0.MNKyJ6cuTQO-U3g7Jlg01T1CPtRGQ3sZEnS4hlWIz3KPk4Ff243rLx76yoeZ8tE-ge2mCDZDSZQ1nsYkEZ1jjJzT-4FjrY7uTRWDI2tjrjDOj1E7SHh3ukxNG7_JuuDZJJzKs7QxEA0LkExiRjfG3BsiCTMDtWjIsR0_5HKfOE_-hwkZi2dZC3KPI_RjSCLmfok-7juqpoD9Q_8sdjRtP3TOg9HzHhCf6kcZxx5To5rtahxWNJ6den7tslkIDxXuaVRiralUcgkTo1wzNu9cB3BO6piUSYecodaUIIO4LmSF8FdTy4lBMBedrr-T2mf5RIB63KR6GBptuy86eRVUSw

stdClass Object
(
    [ver] => 1
    [jti] => AT.7c4CWrQ4wbrRKNW6myDg7C7KTC-pmV590eHZqrnSat8
    [iss] => https://dev-354685.oktapreview.com/oauth2/default
    [aud] => api://default
    [iat] => 1554725849
    [exp] => 1554729449
    [cid] => 0oak6i0ouwsYMvbIs0h7
    [scp] => Array
        (
            [0] => token_auth
        )

    [sub] => 0oak6i0ouwsYMvbIs0h7
)
If the token is invalid or expired, you will see an error message.
That’s the gist of JWTs and Okta’s Client Credentials Flow. There’s much more to learn about these topics though, check the resources in the next section to find some useful links for further exploration.
#php #laravel #web-development
