Flutter: Adding Bluetooth Functionality
This article will help you use Bluetooth functionality with Flutter.
Introduction:
There is little documentation to no documentation on using Bluetooth in Flutter. In this article, I will help you by demonstrating some basic concepts needed to implement Bluetooth functionality in your app.
Firstly, plugin/dependency we will be using in this app to add Bluetooth is “flutter_bluetooth_serial”, this plugin is implemented from another parent plugin called “flutter_blue”. This is a very new plugin, the only plugin for bluetooth available as of now. It contains a few bugs but trust me, this will surely get your job done for most basic projects.
Note: Before we go any further, it is worth mentioning that this plugin will only work for Android### Implementation:
Add this dependency in your “pubspec.yaml” file :
dependencies:
flutter_bluetooth_serial: ^0.0.4
In the “main.dart” file the base code of the app will look like this:
import 'package:flutter/material.dart';

void main() => runApp(MyApp());

class MyApp extends StatelessWidget {
  @override
  Widget build(BuildContext context) {
    return MaterialApp(
      title: 'Flutter Demo',
      theme: ThemeData(
        primarySwatch: Colors.blue,
      ),
      home: BluetoothApp(), // BluetoothApp() would be defined later
    );
  }
}
Now, let’s create a StatefulWidget called “BluetoothApp”. In _BluetoothAppState, we need to define some variables and a Key. We also have to get an instance of FlutterBluetoothSerial in this class. This class will allow us to control and retrieve Bluetooth information.
class BluetoothApp extends StatefulWidget {
  @override
  _BluetoothAppState createState() => _BluetoothAppState();
}

class _BluetoothAppState extends State<BluetoothApp> {
  // Initializing a global key, as it would help us in showing a SnackBar later
  final GlobalKey<ScaffoldState> _scaffoldKey = new GlobalKey<ScaffoldState>();
  // Get the instance of the bluetooth
  FlutterBluetoothSerial bluetooth = FlutterBluetoothSerial.instance;

  // Define some variables, which will be required later
  List<BluetoothDevice> _devicesList = [];
  BluetoothDevice _device;
  bool _connected = false;
  bool _pressed = false;

  @override
  Widget build(BuildContext context) {
    return Container(
      // We have to work on the UI in this part
    );
  }
}
Now, it’s time for implementing the critical portion of the app. We have to get the list of Paired Bluetooth devices and check whether the Bluetooth is connected. This is done asynchronously. We also have to create a list of devices, to be shown in the UI later.
These operations should be done in a “Future” method, which should be called from initState().
class _BluetoothAppState extends State<BluetoothApp> {
  ...

  @override
  void initState() {
    super.initState();
    bluetoothConnectionState();
  }

  // We are using async callback for using await
  Future<void> bluetoothConnectionState() async {
    List<BluetoothDevice> devices = [];

    // To get the list of paired devices
    try {
      devices = await bluetooth.getBondedDevices();
    } on PlatformException {
      print("Error");
    }

    // For knowing when bluetooth is connected and when disconnected
    bluetooth.onStateChanged().listen((state) {
      switch (state) {
        case FlutterBluetoothSerial.CONNECTED:
          setState(() {
            _connected = true;
            _pressed = false;
          });

          break;

        case FlutterBluetoothSerial.DISCONNECTED:
          setState(() {
            _connected = false;
            _pressed = false;
          });
          break;

        default:
          print(state);
          break;
      }
    });

    // It is an error to call [setState] unless [mounted] is true.
    if (!mounted) {
      return;
    }

    // Store the [devices] list in the [_devicesList] for accessing
    // the list outside this class
    setState(() {
      _devicesList = devices;
    });
  }

  @override
  Widget build(BuildContext context) {
    return Container(
      // We have to work on the UI in this part
    );
  }
}
Time to move on to the UI , the most beautiful part of Flutter coding. The code would be a little bit long but it would mostly contain easily readable code, if you are somewhat familiar with the Flutter Widgets. After completing this UI, we have to implement some methods.
...
@override
  Widget build(BuildContext context) {
    return MaterialApp(
      home: Scaffold(
        key: _scaffoldKey,
        appBar: AppBar(
          title: Text("Flutter Bluetooth"),
          backgroundColor: Colors.deepPurple,
        ),
        body: Container(
          // Defining a Column containing FOUR main Widgets wrapped with some padding:
          // 1. Text
          // 2. Row
          // 3. Card
          // 4. Text (wrapped with "Expanded" and "Padding")
          child: Column(
            mainAxisSize: MainAxisSize.max,
            children: <Widget>[
              Padding(
                padding: const EdgeInsets.only(top: 8.0),
                child: Text(
                  "PAIRED DEVICES",
                  style: TextStyle(fontSize: 24, color: Colors.blue),
                  textAlign: TextAlign.center,
                ),
              ),
              Padding(
                padding: const EdgeInsets.all(8.0),
                // Defining a Row containing THREE main Widgets:
                // 1. Text
                // 2. DropdownButton
                // 3. RaisedButton
                child: Row(
                  mainAxisAlignment: MainAxisAlignment.spaceBetween,
                  children: <Widget>[
                    Text(
                      'Device:',
                      style: TextStyle(
                        fontWeight: FontWeight.bold,
                      ),
                    ),
                    DropdownButton(
                      // To be implemented : _getDeviceItems()
                      items: _getDeviceItems(),
                      onChanged: (value) => setState(() => _device = value),
                      value: _device,
                    ),
                    RaisedButton(
                      onPressed:
                          // To be implemented : _disconnect and _connect
                          _pressed ? null : _connected ? _disconnect : _connect,
                      child: Text(_connected ? 'Disconnect' : 'Connect'),
                    ),
                  ],
                ),
              ),
              Padding(
                padding: const EdgeInsets.all(16.0),
                child: Card(
                  elevation: 4,
                  child: Padding(
                    padding: const EdgeInsets.all(8.0),
                    // Defining a Row containing THREE main Widgets:
                    // 1. Text (wrapped with "Expanded")
                    // 2. FlatButton
                    // 3. FlatButton
                    child: Row(
                      children: <Widget>[
                        Expanded(
                          child: Text(
                            "DEVICE 1",
                            style: TextStyle(
                              fontSize: 20,
                              color: Colors.green,
                            ),
                          ),
                        ),
                        FlatButton(
                          onPressed:
                              // To be implemented : _sendOnMessageToBluetooth()
                              _connected ? _sendOnMessageToBluetooth : null,
                          child: Text("ON"),
                        ),
                        FlatButton(
                          onPressed:
                              // To be implemented : _sendOffMessageToBluetooth()
                              _connected ? _sendOffMessageToBluetooth : null,
                          child: Text("OFF"),
                        ),
                      ],
                    ),
                  ),
                ),
              ),
              Expanded(
                child: Padding(
                  padding: const EdgeInsets.all(20),
                  child: Center(
                    child: Text(
                      "NOTE: If you cannot find the device in the list, "
                      "please turn on bluetooth and pair the device by "
                      "going to the bluetooth settings",
                      style: TextStyle(
                          fontSize: 15,
                          fontWeight: FontWeight.bold,
                          color: Colors.red),
                    ),
                  ),
                ),
              )
            ],
          ),
        ),
      ),
    );
}
So, now it’s time for implementing the remaining methods. At first let us start with the _getDeviceItems() method.
  ...
  // Create the List of devices to be shown in Dropdown Menu
  List<DropdownMenuItem<BluetoothDevice>> _getDeviceItems() {
    List<DropdownMenuItem<BluetoothDevice>> items = [];
    if (_devicesList.isEmpty) {
      items.add(DropdownMenuItem(
        child: Text('NONE'),
      ));
    } else {
      _devicesList.forEach((device) {
        items.add(DropdownMenuItem(
          child: Text(device.name),
          value: device,
        ));
      });
    }
    return items;
}
With the UI out of the way, we are left with four methods. For this example, we will be implementing the connect and disconnect methods. We’ll also implement a method to display a “SnackBar” to the user if there are no Bluetooth device is selected when the user tries to connect.
...
// Method to connect to bluetooth
  void _connect() {
    if (_device == null) {
      show('No device selected');
    } else {
      bluetooth.isConnected.then((isConnected) {
        if (!isConnected) {
          bluetooth
              .connect(_device)
              .timeout(Duration(seconds: 10))
              .catchError((error) {
            setState(() => _pressed = false);
          });
          setState(() => _pressed = true);
        }
      });
    }
  }

  // Method to disconnect bluetooth
  void _disconnect() {
    bluetooth.disconnect();
    setState(() => _pressed = true);
  }

  // Method to show a Snackbar,
  // taking message as the text
  Future show(
    String message, {
    Duration duration: const Duration(seconds: 3),
  }) async {
    await new Future.delayed(new Duration(milliseconds: 100));
    _scaffoldKey.currentState.showSnackBar(
      new SnackBar(
        content: new Text(
          message,
        ),
        duration: duration,
      ),
    );
  }
...
At this point, we are almost finished. We are now left with two methods, one for sending a message to turn on Bluetooth and the other for sending a message to turn off Bluetooth.
  ...
  // Method to send message,
  // for turning the bletooth device on
  void _sendOnMessageToBluetooth() {
    bluetooth.isConnected.then((isConnected) {
      if (isConnected) {
        bluetooth.write("1");
        show('Device Turned On');
      }
    });
  }

  // Method to send message,
  // for turning the bletooth device off
  void _sendOffMessageToBluetooth() {
    bluetooth.isConnected.then((isConnected) {
      if (isConnected) {
        bluetooth.write("0");
        show('Device Turned Off');
      }
    });
  }
...
That’s it! the Dart code required to make this work is now complete. That said, if we try running our app it will crash:
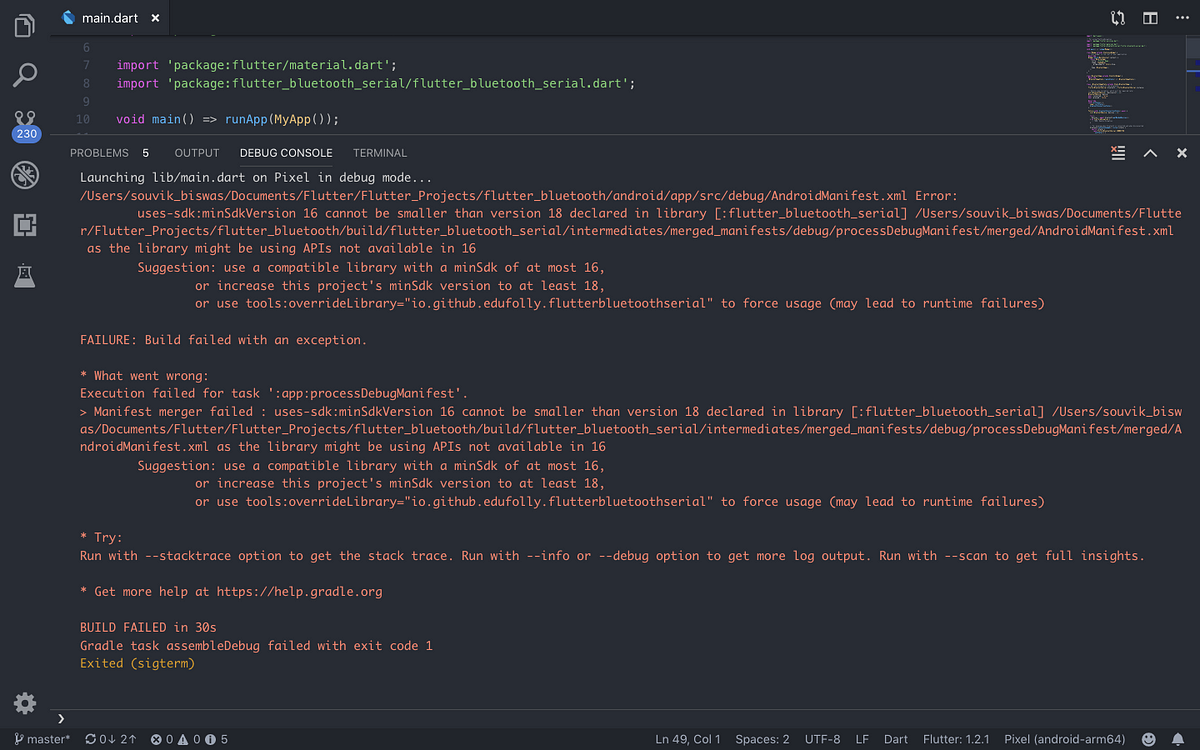
To fix this, we need to add the sdk to the AndroidManifest. Navigate to your project folder and follow these steps: android -> app -> src -> main -> AndroidManifest.xml
Add these two lines of code in your “AndroidManifest.xml” file :
<manifest ...
    <!-- Add this line (inside manifest tag) -->
    xmlns:tools="http://schemas.android.com/tools">

    <!-- and this line (outside manifest tag) -->
    <uses-sdk tools:overrideLibrary="io.github.edufolly.flutterbluetoothserial"/>
    ....

</manifest>
Conclusion:
As I said at the beginning of this article, this plugin contains some bugs and is still under development.
Below are some screenshots showing various phases. If the user doesn’t have permission, the first thing the user will see is a prompt to grant the app location access. This is completely normal, just click “Allow” and everything should be fine.
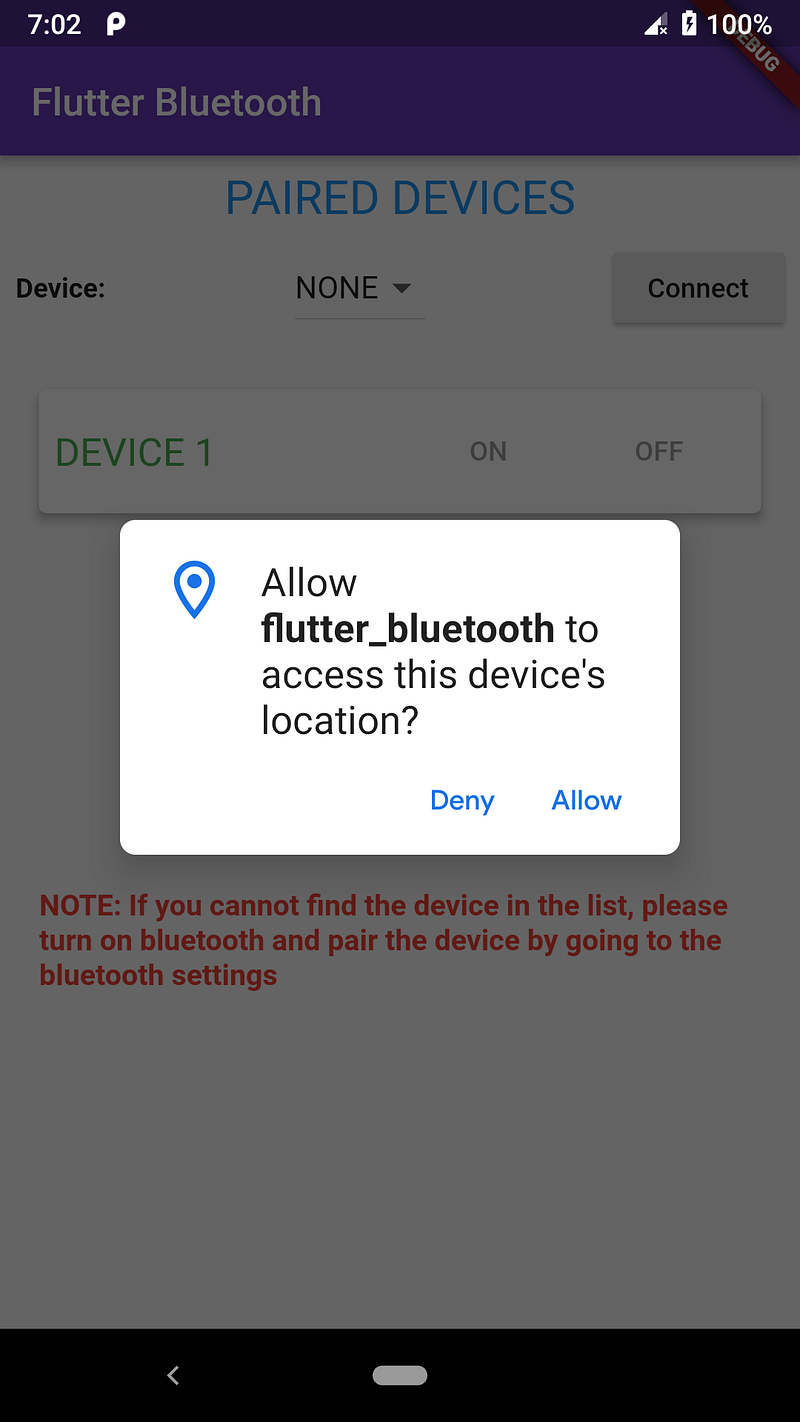
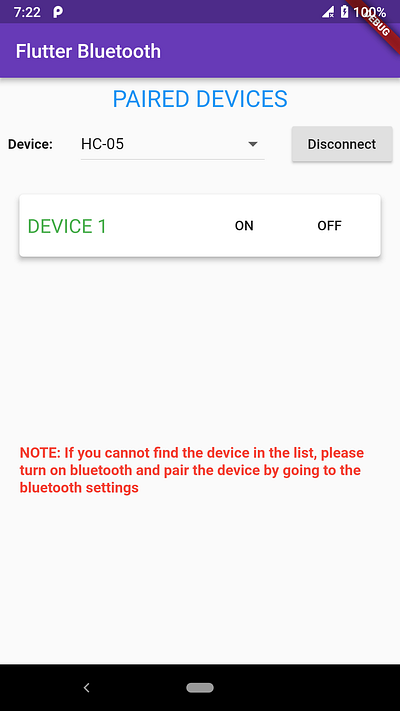
Screenshots:
You are free to modify the code to add more functionality to the app.
The GitHub repo link for this project is here
If you like this project, please give “Stars” in my GitHub repo. Thank you for reading, if you enjoyed the article make sure to show me some love by hitting that clap button!
Happy coding…
Learn More
☞ Getting started with Flutter
☞ Flutter Tutorial - Flight List UI Example In Flutter
☞ Let’s Develop a Mobile App in Flutter
☞ Mastering styled text in Flutter
☞ A Design Pattern for Flutter
☞ Weather App with “flutter_bloc”
☞ How to integrate your iOS Flutter App with Firebase on MacOS
☞ An introduction to Dart and Flutter
☞ Learn Flutter & Dart to Build iOS & Android Apps
☞ Flutter & Dart - The Complete Flutter App Development Course
☞ Dart and Flutter: The Complete Developer’s Guide
#flutter #mobile-apps #ios #android