Navigating around screens is essential when working with mobile apps. React Navigation is an awesome library that allows you to create different types of navigation experiences within your React Native project.
When I first started working with React Native, I thought it was a bit confusing how to navigate around screens. It was even more complicated because I wanted to use Typescript and most of the examples online where written using Javascript.
My purpose now is to show you what I have learned building several types of Navigators using Typescript so that you don’t get to suffer as I did at the beginning.
So let’s jump in and start configuring a basic Stack Navigator that will allow you to navigate between a Welcome a Login and a Signup screen as shown in the following wireframe,
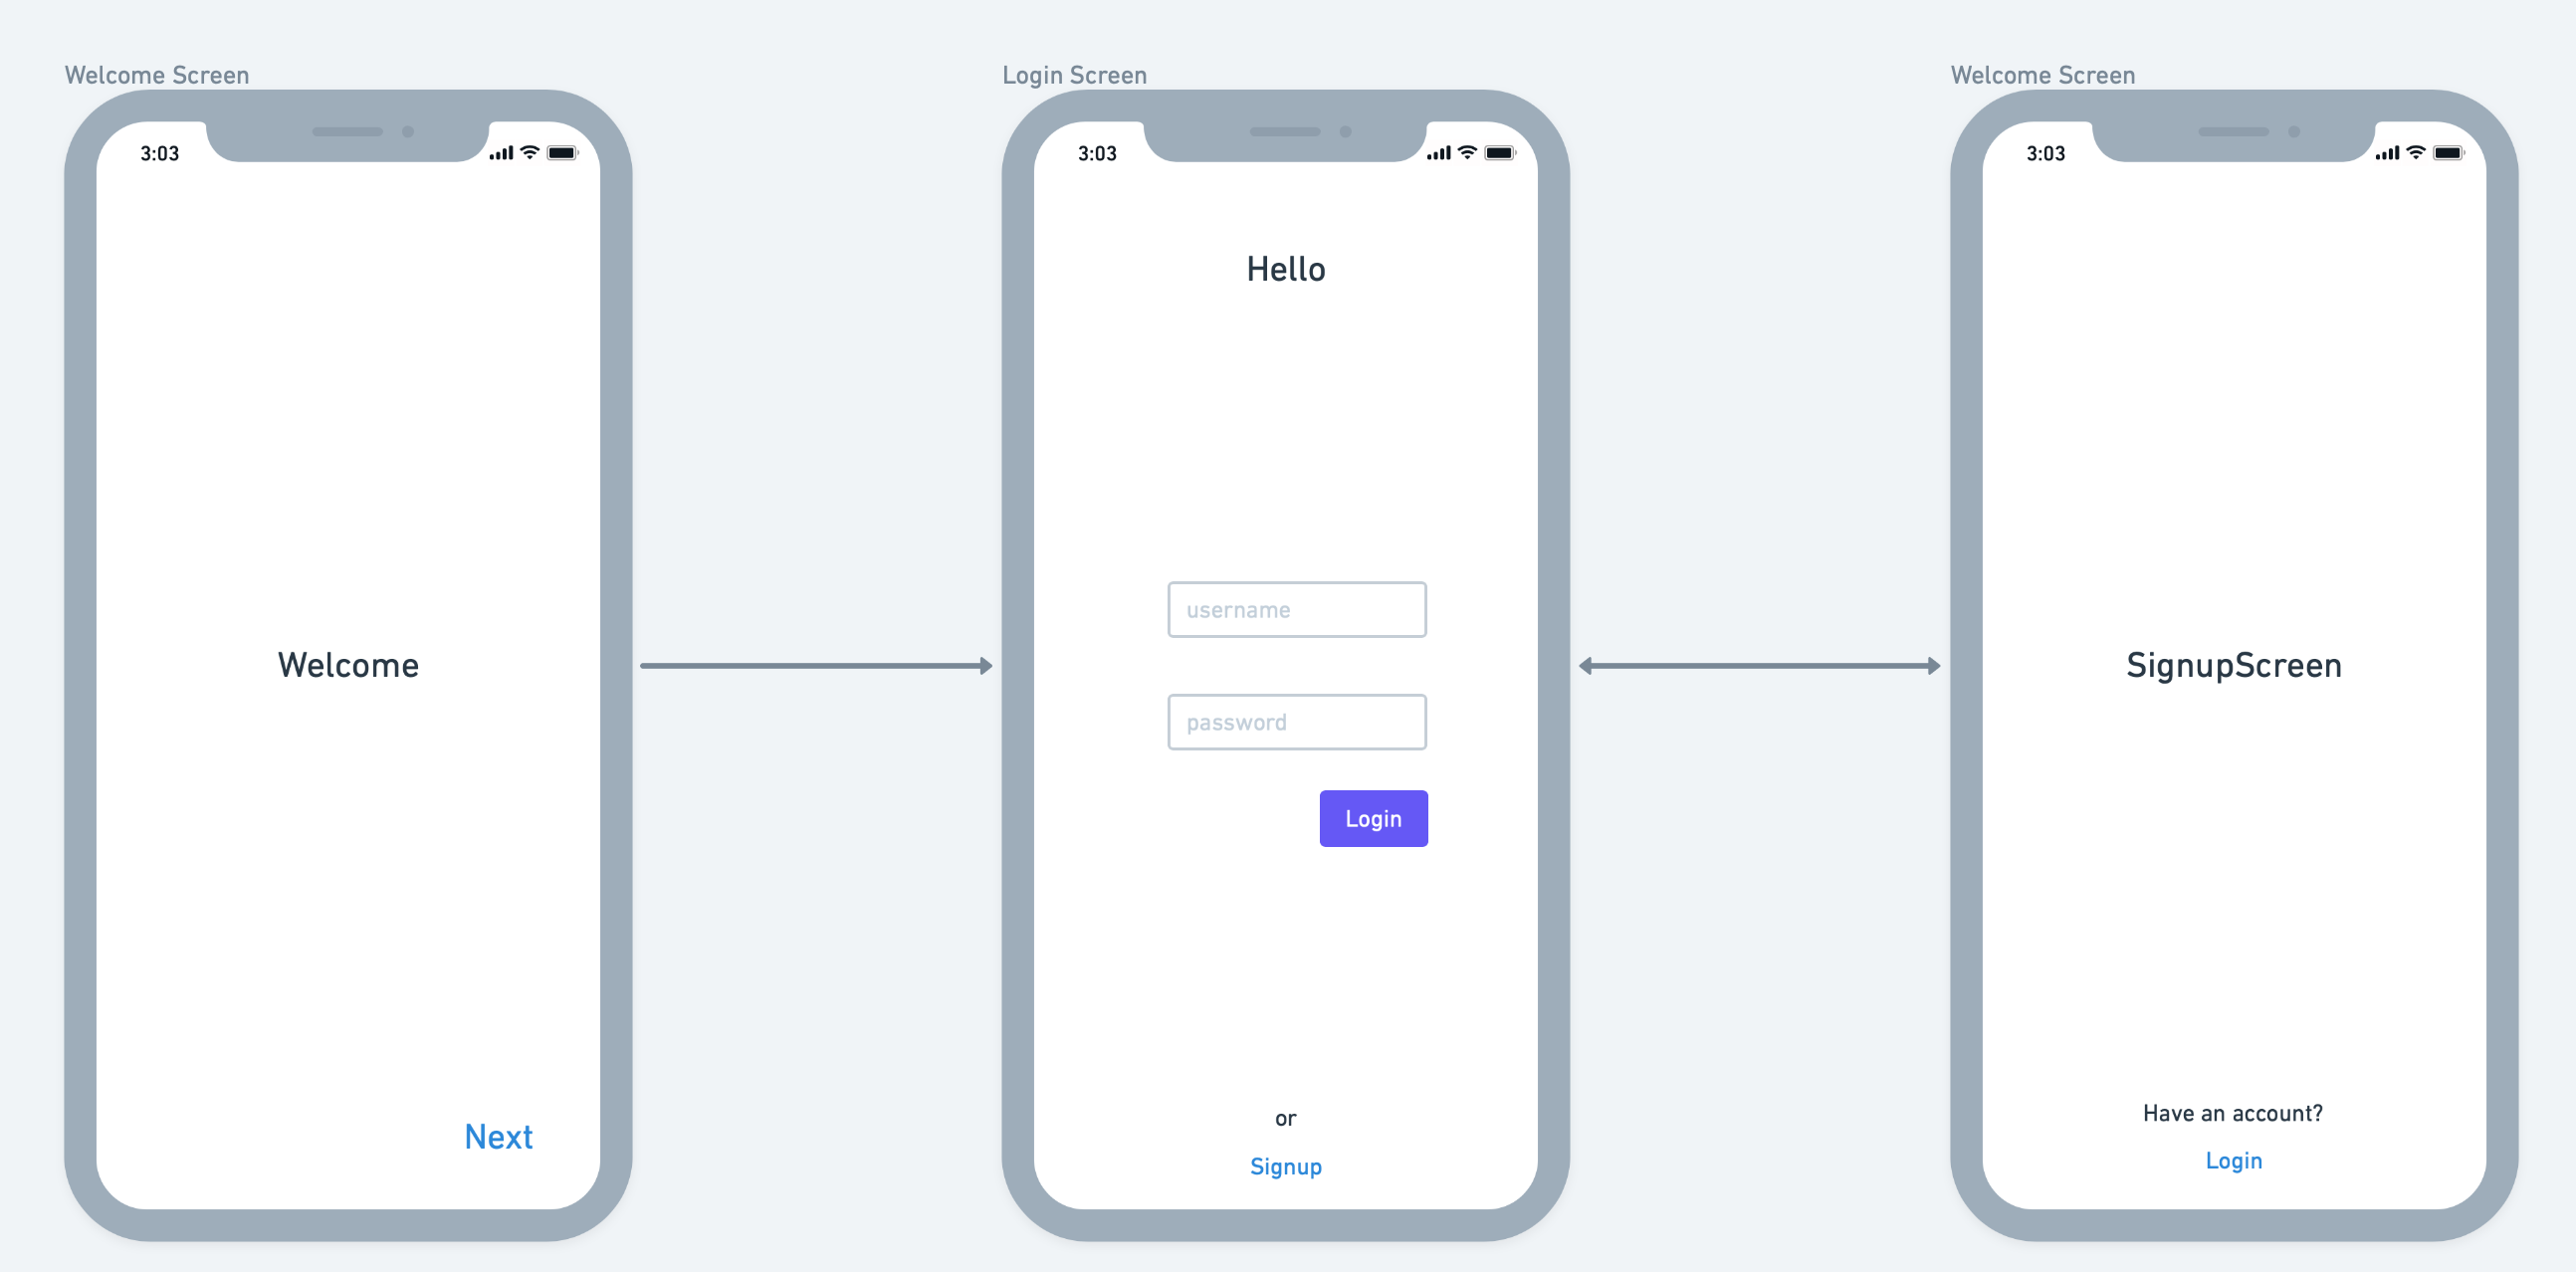
StackNavigatorExample Wireframe
Setup your project and React Navigation
Let’s start by creating an expo based project. Be sure to have expo installed on your machine. If you haven’t installed it yet, you can do it by running:
npm install -g expo-cli
Once installed let’s create a project by running the following command,
expo init StackNavigatorExample
Once expo finishes initializing your project you will have to install React Navigation and all the dependencies needed to make it work. So let’s do all that setup:
cdinto your project by runningcd StackNavigatorExample
2. Install React Navigation,
npm i @react-navigation/native
3. Install peer dependencies
expo install react-native-gesture-handler react-native-reanimated react-native-screens react-native-safe-area-context @react-native-community/masked-view
4. Install Stack Navigator from React Navigation
npm install @react-navigation/stack
5. Start coding!
Creating the Project Structure and our Navigator
Now that you have our project set up, you can proceed with creating all the screens that will be handled by the navigator. Let’s start by creating our project’s structure.
Let’s add the following directories to store each Screen:
src/screens/Auth/LoginScreensrc/screens/Auth/SignupScreensrc/screens/WelcomeScreen
Your project should look like this:

Now that you have this basic project structure let’s create the navigator. To modularize the project I’ll create a separate directory for all my navigators inside src/navigators/AuthFlowNavigator/index.tsx.
#programming #typescript #apps #mobile #react-native #react