Originally published by Gideon Onwuka at https://pusher.com
In this tutorial, I will walk you through how you can add a realtime subscription count down functionality to your Angular application.
In the app, we’ll have a page that displays the subscribers status, that is, the number of slots left. Then we will have another page for users to register themselves. Once the number of users that are registered is equal to the target of users that we want, then we close the registration in realtime.
At times, we need to present things to our users in a realtime manner so they know beforehand when things tend to happen. Consider that we are building an app where there are limited resources and we need maybe a limited amount of user. In such cases, It’s a better idea to let the user know what is happening in realtime. That is showing the user the slots that are remaining.
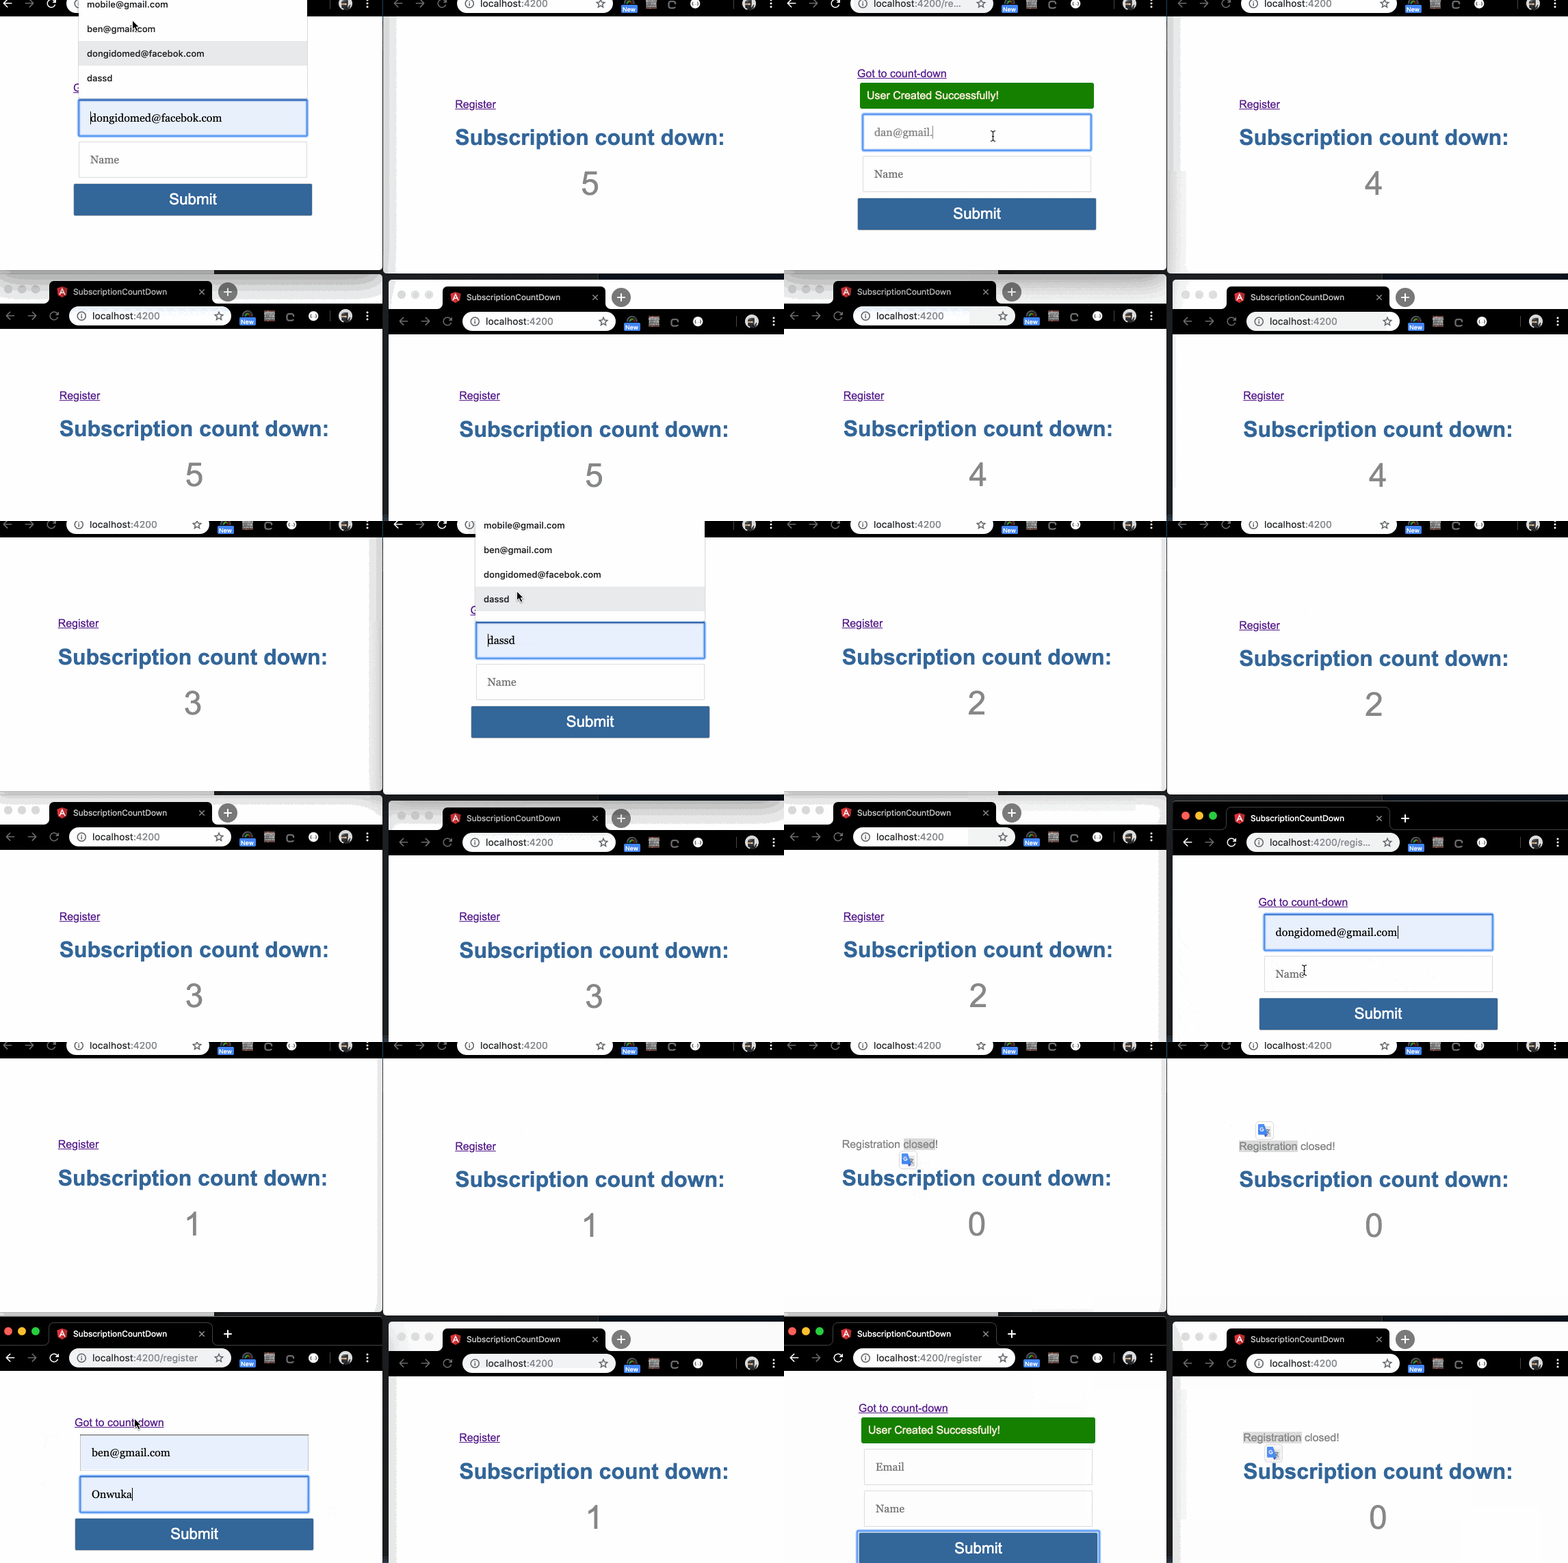
Here is a preview of what we are going to build:
Prerequisite
You are required to have a basic knowledge of the following technologies to be able to follow along with this tutorial comfortably:
- JavaScript
- Angular
- Node.js version 8.** or greater
- Channels for realtime functionality
- Express for the Node server
- TypeScript
Setting up
Let’s get your system ready. First check that you have Node installed by typing the below command in a terminal on your system:
$ node --version
The above command should print out the version of Node you have installed. If otherwise, you don’t have Node, visit the Node.js’s website and install the latest version of Node to your system.
Next, let’s install the Angular CLI. Angular provides a CLI that makes scaffolding of new Angular project and also working with Angular easier.
Install the Angular CLI globally to your system if you don’t have it installed already by executing the below command to a terminal on your system.
$ npm install -g @angular/cli
If that was successful, you should now have the Angular command available globally on your system as ng.
Now use the Angular CLI command to create a new Angular project:
$ ng new subscription-count-down
Choose yes for the prompt that asks if you Would like to add Angular routing and choose CSS for the stylesheet format. Then give it some minute to finalize the process.

Finally, cd into the newly created project and start up the app:
    $ cd subscription-count-down
    $ ng serve --open
The app should now be available at http://localhost:4200 displaying a default Angular page like below:
The src/app/app.component.ts file is the default component file that renders the page above.
Getting your Pusher keys
We’ll be using Channels’s pub/sub messaging feature to add realtime functionality to our app. The next thing we’ll do is to get our Channels API keys.
Head over to Channels website and create a free account if you don’t have one already. Once you are logged into your Dashboard, create a new app and get the API keys of the app.
The keys are in this format:
    appId=<appId>
    key=<key>
    secret=<secret>
    cluster=<cluster>
Take note of these keys because we’ll be making use of them soon.
Next, add the API key to the environment file so we can reference it from other files when we need it by replacing the content with below:
    // src/environments/environment.ts

    export const environment = {
      production: false,
      apiUrl: 'http://localhost:3000',
      PUSHER_API_KEY: '<PUSHER_API_KEY>',
      PUSHER_API_CLUSTER: '<PUSHER_APP_CLUSTER>'
    };
Make sure to replace <PUSHER_API_KEY> and <PUSHER_APP_CLUSTER> placeholders with your correct API details.
In the object file above, the apiUrl property is the URL where our Node server will be running on which we’ll be creating later on.
Finally, add the pusher client SDK to the Angular app:
$ npm install pusher-js
You should run the command while in the root folder of the project from a command line.## Creating the Node server
We need a server to be able to trigger events to Channels and also for creating and storing users. For the sake of brevity, we’ll use SQLite for our database. And we’ll be using Node for our server.
To set up a Node server, open up a new terminal, then run the following command in your terminal:
    # Create a new folder
    $ mkdir subscription-count-down-server

    # Navigate to the folder
    $ cd subscription-count-down-server

    # Create the Node entry file
    $ touch app.js

    # Create a package.js file
    $ touch package.json

    # Create the database file
    $ touch app.db

    # Create the environment file for holding sensitive data
    $ touch .env
These are the basic files we will need for the Node server.
Now add to the package.json file the necessary dependencies for the app:
    {
      "name": "count-down-server",
      "version": "1.0.0",
      "description": "Count Down Server",
      "main": "app.js",
      "scripts": {
        "test": "echo \"Error: no test specified\" && exit 1",
        "serve": "node app.js"
      },
      "keywords": [
        "Node",
        "Count-Down",
        "Pusher"
      ],
      "author": "Onwuka Gideon",
      "license": "ISC",
      "dependencies": {
        "body-parser": "^1.18.3",
        "cors": "^2.8.5",
        "dotenv": "^6.2.0",
        "express": "^4.16.4",
        "pusher": "^2.2.0",
        "sqlite3": "^4.0.6"
      }
    }
Next, add your Channels key to the .env file:
    PUSHER_APP_ID=<appId>
    PUSHER_APP_KEY=<key>
    PUSHER_APP_SECRET=<secret>
    PUSHER_APP_CLUSTER=<cluster>
Make sure to replace <appId>, <key>, <secret>, and <cluster> placeholders with your correct API details.
Now import the dependencies we added earlier to the app.js file:
    // app.js

    require('dotenv').config()

    const express = require('express')
    const cors = require('cors')
    const bodyParser = require('body-parser')
    const sqlite3 = require('sqlite3').verbose();
    const Pusher = require('pusher');
Then, set up express, which is a Node.js web application framework for building web apps.
    // app.js

    // [...]

    const app = express()
    const port = 3000

    app.use(cors())
    app.use(bodyParser.json());
    app.use(bodyParser.urlencoded({ extended: true }));

    app.get('/', (req, res) => res.status(200).send({msg: "Count down server!"}))

    app.listen(port, () => console.log(`Example app listening on port ${port}!`))

    // [...]
In the above code, we created a new route - / - which will render a JSON content once visited. We are only using it to test if express is working.
Now install the dependencies and start up the app:
    # Instal dependencies
    $ npm install

    # Start up the app
    $ npm run serve
If everything went well, the app should be accessible from http://localhost:3000/. If you visit the URL, you should get an output as below which shows that it works!
    {
      "msg": "Count down server!"
    }
Next, initialize the database:
    // app.js
    // [...]

    const db = new sqlite3.Database('./app.db', sqlite3.OPEN_READWRITE);

    db.run("CREATE TABLE IF NOT EXISTS subscriptions (email VARCHAR(90), name VARCHAR(90))")

    // [...]
The first line above opens a new SQLite connection. While the second line checks if the subscriptions table exists, if it does not exists, it will create it.
Next, initialize Pusher server SDK:
    // app.js

    // [...]

    const pusher = new Pusher({
        appId: process.env.PUSHER_APP_ID,
        key: process.env.PUSHER_APP_KEY,
        secret: process.env.PUSHER_APP_SECRET,
        cluster: process.env.PUSHER_APP_CLUSTER,
        encrypted: true
    });

    // [...]
Now create a new route that we can use to get the total number of users that have subscribed and the number of targets we want. The target is the maximum number of users that we want to be able to subscribe:
    // app.js

    // [...]

    app.get('/userCount', (req, res) => {
        db.each(`SELECT count(*) AS userCount FROM subscriptions`, (err, row) => {
            res.status(201).send({userCount: row.userCount, targetCount: 5})
        });
    })

    // [...]
Here, we hard-coded the targetCount to five. If the total number of registered user reaches five, no other user should be able to register again.
Next, create a new endpoint named addUser for adding new users:
    // app.js

    // [...]

    app.post('/addUser',  (req, res) => {
        const email = req.body.email;
        const name = req.body.name;

        db.run(`INSERT INTO subscriptions (name, email) values ('${name}', '${email}')`)

        db.serialize(function() {
            db.each(`SELECT count(*) AS userCount FROM subscriptions`, (err, row) => {
                res.status(201).send({userCount: row.userCount})
            });
        });
    })

    // [...]
Finally, create a new endpoint named /pusher/trigger for triggering events to Channels.
    // app.js

    // [...]

    app.post('/pusher/trigger', (req, res) => {
        const channel_name = req.body.channel_name;
        const event_name = req.body.event_name;
        const data = req.body.data;

        pusher.trigger(channel_name, event_name, data);

        res.status(200).send(data)
    })

    // [...]
To trigger events to Channels, we call the trigger method from the Pusher SDK passing along the name of the channel where we want to trigger the event to, the name of the event, and some data to pass along with the event.
Restart the server so the new changes will be picked up.
Creating the app client
Before we start building the app components, let’s create the service for our app. We’ll create two services - count-down service and pusher service. The count-down service will contain services for the entire component while the pusher service will contain services that are related to Channels, say we want to trigger event or listen to an event.
Creating our app service
In Angular, services are great ways of sharing information among classes that don’t know each other.
Now, create the count-down service using the Angular CLI command:
    # Make sure you are in the root folder of the project
    $ ng generate service count-down
You should now see a new file that is created named src/app/count-down.service.ts.
Inside the file, replace its content with the below code:
    // src/app/count-down.service.ts

    import { Injectable } from '@angular/core';
    import { HttpClient } from '@angular/common/http';
    import { Observable } from 'rxjs';

    import { environment } from '../environments/environment';

    interface userCount {
      userCount: number,
      targetCount: number
    }

    export interface userData {
      name: String;
      email: String;
    }

    @Injectable({
      providedIn: 'root'
    })
    export class CountDownService {

      constructor(private http: HttpClient) { }

      getUserCount (): Observable<userCount> {
        return this.http.get<userCount>(`${environment.apiUrl}/userCount`)
      }

      addNewUser (userData: userData): Observable<userData> {
        return this.http.post<userData>(`${environment.apiUrl}/addUser`, userData)
      }
    }
In the preceding code:
- JavaScript
- Angular
- Node.js version 8.** or greater
- Channels for realtime functionality
- Express for the Node server
- TypeScript
Pusher service
Next, create the Pusher service
$ ng generate service pusher
Now update the content of the service file:
    // src/app/pusher.service.ts

    import { Injectable } from '@angular/core';
    import Pusher from 'pusher-js';
    import { HttpClient } from '@angular/common/http';
    import { Observable } from 'rxjs';

    import { environment } from '../environments/environment';

    @Injectable({
      providedIn: 'root'
    })
    export class PusherService {

      pusher: any

      constructor(private http: HttpClient) {
        this.pusher = new Pusher(environment.PUSHER_API_KEY, {
          cluster: environment.PUSHER_API_CLUSTER,
          forceTLS: true
        });
      }

      subScribeToChannel(channelName: String, events: String[], cb: Function) {
        var channel = this.pusher.subscribe(channelName);

        events.forEach( event => {
          channel.bind(event, function(data) {
            cb(data)
          });
        })
      }

      triggerEvent(channelName: String, event: String, data: Object): Observable<Object> {
        return this.http.post(`${environment.apiUrl}/pusher/trigger`, {
          channel_name: channelName,
          event_name: event,
          data: data
        })
      }
    }
In the preceding code:
- JavaScript
- Angular
- Node.js version 8.** or greater
- Channels for realtime functionality
- Express for the Node server
- TypeScript
Now let’s build the client-facing part of the app which we are doing with Angular. We’ll divide the app into two components:
- JavaScript
- Angular
- Node.js version 8.** or greater
- Channels for realtime functionality
- Express for the Node server
- TypeScript
Before you can use the HttpClient, we need to import the Angular HttpClientModule. Import the HttpClientModule to the app.module.ts file:
    // src/app/app.module.ts

    [...]
    import { HttpClientModule } from '@angular/common/http';

      [...]
      imports: [
        [...]
        HttpClientModule,
        [...]
      ],

    [...]
CountDown component
Create the CountDown component using the Angular CLI command:
$ ng generate component count-down
The above command will create a new folder, src/app/count-down/, and generates the four files for the CountDownComponent.
The count-down.component.ts is the main component class, which includes the other three files to itself. This is the file that will contain the logic for the component.
All our markup definitions go inside the count-down.component.html file. CSS styles for the component will reside in the count-down.component.css file. If we need to write a test for the component, we can do that in the count-down.component.spec.ts file.
Update the route to render this component:
    // src/app/app-routing.module.ts

    // [...]

    import { CountDownComponent } from './count-down/count-down.component';

    const routes: Routes = [
      { path: '', component: CountDownComponent }
    ];

    // [...]
Next, remove the default rendered page and replace it with the below mark-up:
    <!-- src/app/app.component.html -->

    <div class="container">
      <div class="content">
        <router-outlet></router-outlet>
      </div>
    </div>
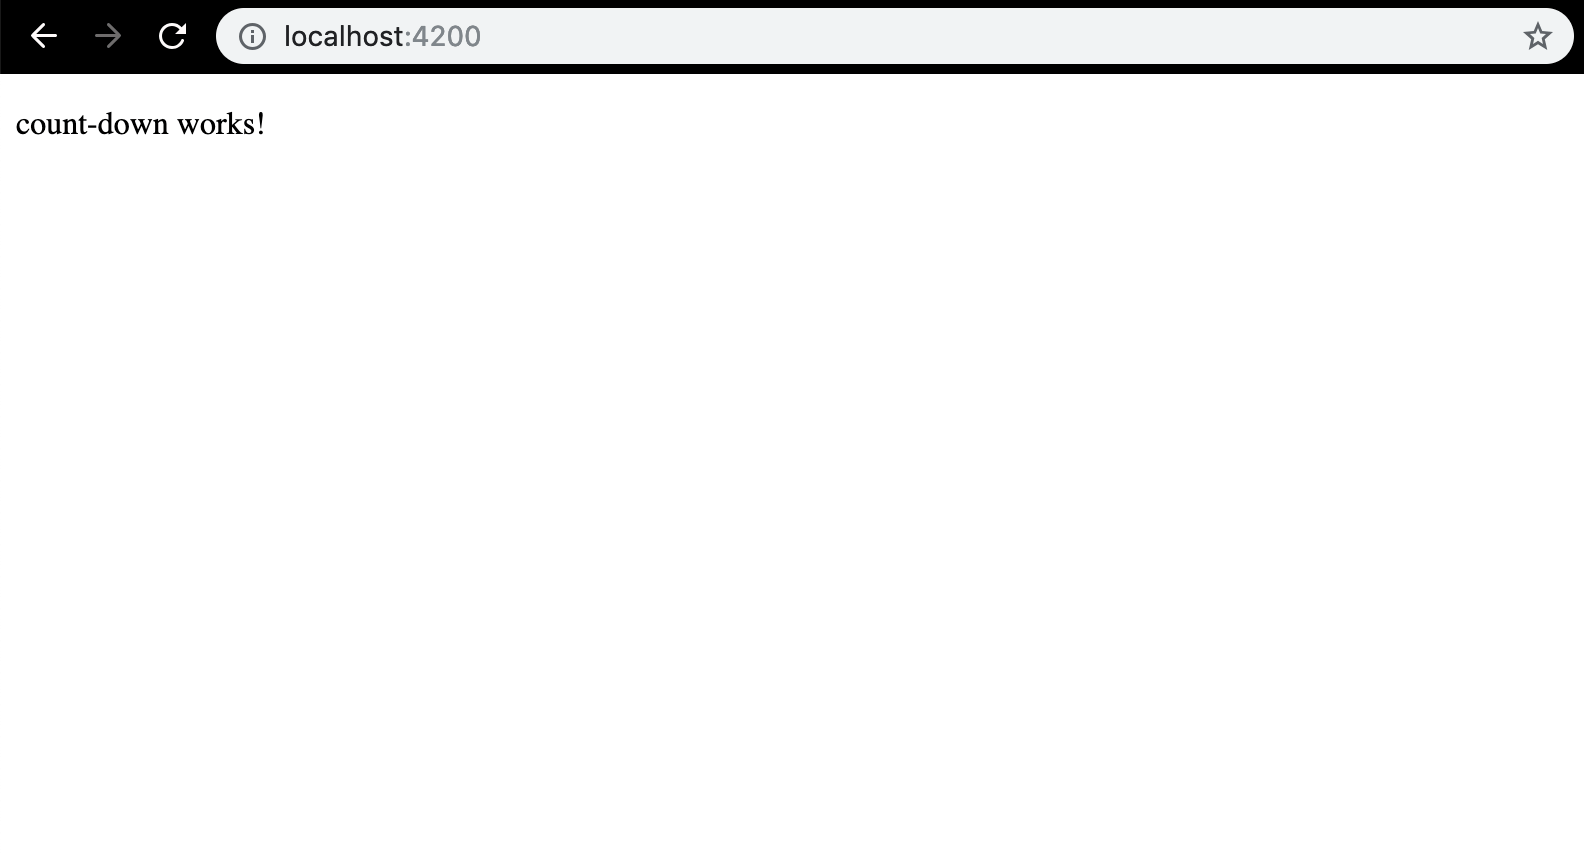
If you now reload the page, you see it renders the html file for the CountDown component:
Next, update the markup for the CountDown component:
    <!-- src/app/count-down/count-down.component.html -->

    <div>
        <div *ngIf="!countDown"> Registration closed! </div>
        <nav *ngIf="countDown">
          <a routerLink="/register">Register</a>
        </nav>
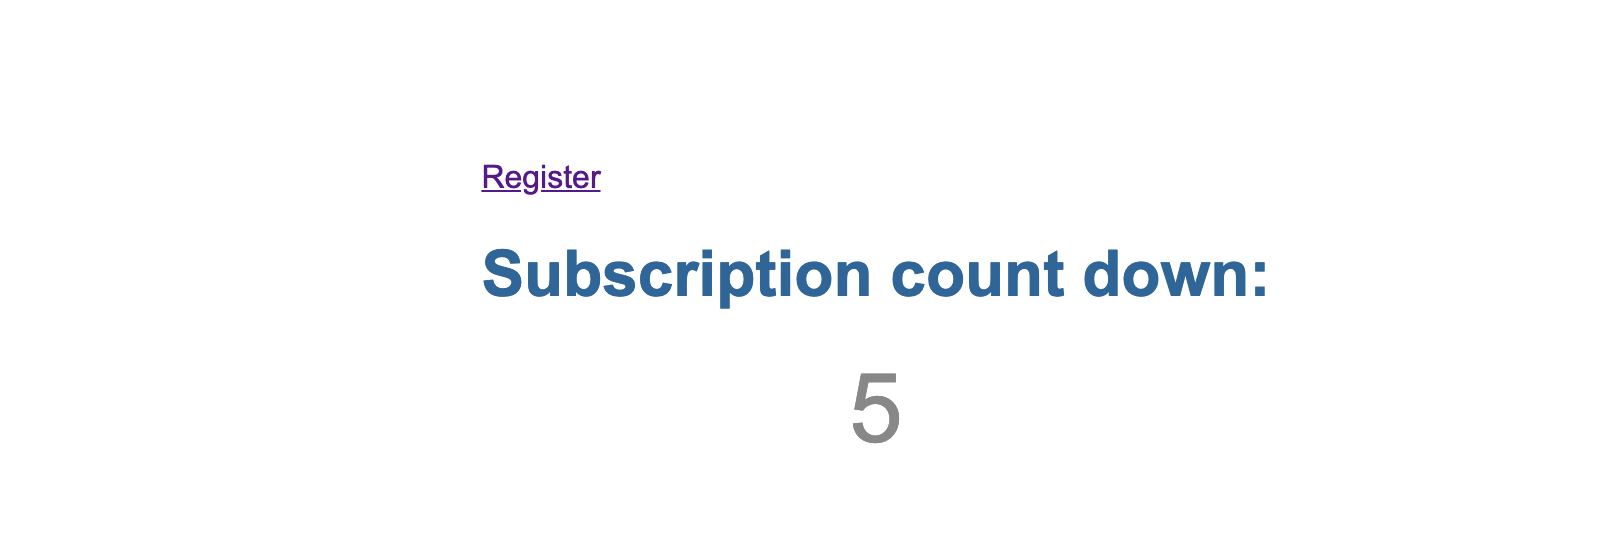
      <h1>Subscription count down:</h1>
      <div class="count-down"> {{ countDown }} </div>
    </div>
Now add some styling to the app:
    /* src/style.css */

    h1 {
        color: #369;
        font-family: Arial, Helvetica, sans-serif;
        font-size: 200%;
    }
    h2, h3 {
        color: #369;
        font-family: Arial, Helvetica, sans-serif;
        font-weight: lighter;
    }
    body {
        overflow: hidden;
    }
    body, input[type="text"], button {
        color: #888;
        font-family: Cambria, Georgia;
    }
    /* everywhere else */
    * {
        font-family: Arial, Helvetica, sans-serif;
    }
    .container {
        display: grid;
        height: 100vh;
        width: 100vw;
    }
    .content {
        align-self: center;
        justify-self: center;
    }
    .count-down {
        text-align: center;
        font-size: 300%;
    }
    .from-input {
        display: block;
        width: 300px;
        margin: 8px;
        padding: 15px;
        font-size: 100%;
    }
    .from-submit {
        background: #369;
        color: white;
        font-family: Arial, Helvetica, sans-serif;
        font-size: 140%;
        border-radius: 3px;
        width: 100%;
        padding: 10px;
    }
    .success-message {
        background: green;
        color: antiquewhite;
        padding: 10px;
        border-radius: 3px;
        margin: 4px;
    }
Reload the page to see how it looks now.
We have been able to render the CountDown component, but it does not show real data yet. And also it is showing “registration is closed!”. It should show that when the users registered is equal to the target users and otherwise show a registration form.
Now, let’s work on this component.
Import the two services we created earlier to the component file:
    // src/app/count-down/count-down.component.ts

    // [...]

    import { CountDownService } from '../count-down.service';
    import { PusherService } from '../pusher.service';

    // [...]
Notice that we are rendering the {{ countDown }} variable to the markup file, which does not have any effect because we have not defined the variable. This variable will hold the number of slots remaining.
Define the variable:
    // src/app/count-down/count-down.component.ts

    // [...]

    export class CountDownComponent implements OnInit {
      countDown: number;

    // [...]
Next, inject the services we imported to the component class so we can access them easily:
    // src/app/count-down.component.ts

    // [....]
      constructor(
        private countDownService: CountDownService,
        private pusherService: PusherService
      ) { }
    // [....]
Now we want to get the countDown value from the Node server when the page loads and also listen to new events when a new user subscribes.
    // src/app/count-down.component.ts

    // [....]
     ngOnInit() {
        this.countDownService.getUserCount()
          .subscribe(data => {
            this.countDown = data.targetCount - data.userCount
          });

        this.pusherService.subScribeToChannel('count-down', ['newSub'], (data) => {
          // console.log(data)
          this.countDown -= 1;
        });
      }
    // [....]
Now when the component is mounted, we call the getUserCount() function from the countDownService service to get the targetCount and userCount, which we then use to calculate the number of the slots that are remaining.
Then, we call the pusherService.subScribeToChannel() function to the count-down and start listening for a newSub event. Once there is a newSub event, we reduce the countDown value by one. And all this happens in realtime. Note that the channel name (‘count-down’) and event name (‘newSub’) can be anything you like. You only need to make sure that you trigger the same value on the Node server if you change it.
If you reload the page, you should see now that it shows the remaining slots and also a link where a user can register form.
Register component
We also need another component that renders the form for a user to subscribe.
Create the Register component using the Angular CLI command:
$ ng generate component register
Add a route that renders the Register component:
    // src/app/app-routing.module.ts
    [...]

    import { RegisterComponent } from './register/register.component';

    [...]
      const routes: Routes = [
        { path: 'register', component: RegisterComponent },
        { path: '', component: CountDownComponent}
      ];
    [...]
Now, if we visit http://localhost:4200/register, it should show the register page.
Next, import the two services we created earlier to the component file:
    // src/app/register/register.component.ts

    // [...]

    import { CountDownService, userData } from '../count-down.service';
    import { PusherService } from '../pusher.service';

    // [...]
Define the input form detail for two-way binding:
    // [...]

    export class RegisterComponent implements OnInit {
      userData: userData = {
        name: '',
        email: ''
      };

      userAdded: Boolean = false

    // [...]
The userData is the input we are expecting from the user as they fill the registration form. We’ll use userAdded Boolean to toggle between when to show the user a success message as the submit the form.
Next, inject the service we imported to the class:
    // src/app/register/register.component.ts

    // [....]
      constructor(
        private countDownService: CountDownService,
        private pusherService: PusherService
      ) { }
    // [....]
Next, add a function that will be called when a user clicks to submit the form:
    // [...]
      ngOnInit() {}

      addUser(): void {
        this.countDownService.addNewUser(this.userData)
          .subscribe( data => {
            this.userAdded = true
            this.userData = {name:'', email:''}
          })

        this.pusherService.triggerEvent('count-down', 'newSub', this.userData)
            .subscribe( data => {
              console.log(data)
            })
      }

    // [...]
In the function we created above, we call the addNewUser function from the countDownService to register the user. Then finally, we trigger an event to Channels so it notifies all connected user that a new user has just registered so that the count down number is updated.
Next, update the HTML mark up for the form:
    <!-- src/app/register/register.component.html -->
    <div>
      <nav>
        <a routerLink="/">Got to count-down</a>
      </nav>
      <div>
        <div class="success-message" *ngIf="userAdded"> User Created Successfully! </div>
        <form>
          <input
            type="text"
            class="from-input"
            placeholder="Email"
            [(ngModel)]="userData.email"
            name="email"
          />
          <input
            type="text"
            class="from-input"
            placeholder="Name"
            [(ngModel)]="userData.name"
            name="name"
          />
          <button class="from-submit" (click)="addUser()"> Submit </button>
        </form>
      </div>
    </div>
Finally, add the FormsModule, which is required when working with forms:
    // src/app/app.module.ts

    [...]
    import { FormsModule } from '@angular/forms';

      [...]
      imports: [
        [...]
        FormsModule,
        [...]
      ],

    [...]
And that is it! Let’s test what we have built:
- JavaScript
- Angular
- Node.js version 8.** or greater
- Channels for realtime functionality
- Express for the Node server
- TypeScript
Conclusion
In this tutorial, we have learned how to add realtime functionality to our Angular apps by building a subscription count down app. There are other use-cases where this same approach can be applied to. Feel free to them explore with the knowledge that you have gained.
You can get the complete code of the app on GitHub.
This article was originally published at https://pusher.com/tutorials/live-countdown-angular
#angular #node-js #javascript
