In this article, we look at how you can properly setup and configure your new Mac for MEAN Stack Development. Note that this is just one of the many ways, although this has been a tried and tested one, and has worked pretty well for me.
The Basics: System Update
This part, although pretty obvious, is in fact one of the most important parts of setting up your system. Ensure that your OS and other system software are updated to the latest version. This bit of the setup process is fairly easy too. Assuming that you are running macOS Mojave, follow these steps to get everything up to date:
- Choose System Preferences from the Apple () menu, then click Software Update to check for updates.
- If any updates are available, click the Update Now button to install them. Or click ”More info” to see details about each update and select specific updates to install.
- When Software Update says that your Mac is up to date, macOS and all of its apps are also up to date.
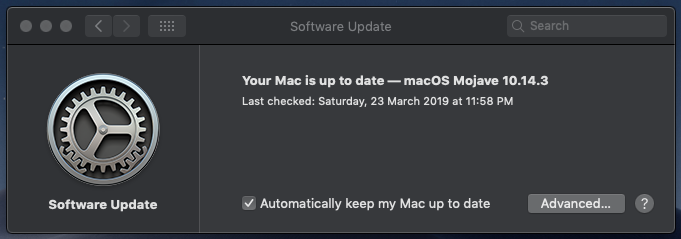
To automatically install macOS updates in the future, including apps downloaded from the App Store, select ”Automatically keep my Mac up to date”. Personally, I recommend this since it will help keep your ssytem up to date even if you forget to check for updates regularly.
Time for Node
Now that your system is up to date, it is time to get the tools for development up and ready and the most fundamental one you will need are Node and the Node Pachkage Manager(NPM). The ’N’ in MEAN(or MERN, for that matter), is the Javascript runtime over which all our Angular and React applications run. NPM meanwhile is a great tool that will help you to — you guessed it right, maange the multitude of packaged you’ll require and work with. There is more than one way to setup Node on your system. but the first thing to do is check if your system by any chance already ahs an installation of Node. This can be done as follows:
- Open the Terminal
- Enter
node -v - If you have Node on your system, it will show the version
- Update to the latest version using
npm i -g npm. If you get a bunch ofcheckPermissionswarnings, you should run the command as the superuser like this:sudo npm i -g npm

Assuming that you do not have Node already installed, proceed with one of the following methods:
The Installer
If you wish to go old school and keep it simple and neat, this is the way for you.
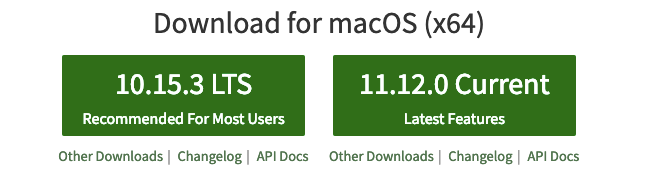
- Go to https://nodejs.org/
- On this page, under normal circumstances, you’ll be presented with links to the installer. You have two options here: the Current version, and the Long Term Support(LTS) version. While both are mostly same, the Current Version will have a few newer features although it may have bugs, in comparison to the LTS.
- Download the installer, locate it in your Finder and install Node on your system by following the on-screen instructions.
- Once done, verify the installation by running
node -vonce again. You should get a version number now.
The Homebrew way
If you prefer installing Node through the Terminal, then Homebrew is what you’ll need. As stated on their website(https://brew.sh/), Homebrew is ‘teh missing package manager for macOS’. Basically, they make the process of installing stuff as simple as running a line of command or two. What’s more, they also do away with requiring us to affix sudo with the commands we run in installations etc.
First, you need to install Homebrew and this can be done by running the following command on Termnal:
/usr/bin/ruby -e "$(curl -fsSL https://raw.githubusercontent.com/Homebrew/install/master/install)"

Note that you may have to install Xcode to ensure that Homebrew works properly. SO if you are prompted to do so, go to the App Store and install Xcode. This might seem like a lot to go through while we can easily install Node through the Terminal. But as a developer, there will come a time sooner than later when you’ll realise that installing Homebrew was a good decision.
Once Homebrew installation completes, all you have to do is run the following command to install Node:
brew install node
And you’re done. Just to be sure, run node -v to verify that the things are in order.
So far, so good? Cool, it gets better.
On to the Database
Now that Node is in place, let’s setup the ‘M’ of MEAN, MongoDB on your system. Here again, you have two ways to go.
Install and Run MongoDB with Homebrew
- Open the Terminal app and type
brew update. - After updating Homebrew
brew install mongodb - After downloading Mongo, create the “db” directory. This is where the Mongo data files will live. You can create the directory in the default location by running
mkdir -p /data/db - Make sure that the
<strong>/data/db</strong>directory has the right permissions by runningsudo chown -R `id -un` /data/db - Run the Mongo daemon, in one of your terminal windows run
mongod. This should start the Mongo server. - Run the Mongo shell, with the Mongo daemon running in one terminal, type
mongoin another terminal window. This will run the Mongo shell which is an application to access data in MongoDB. - To exit the Mongo shell run
quit() - To stop the Mongo daemon hit
ctrl-c
Install and Run MongoDB by Downloading it Manually
- **Go to the MongoDB website’s **download section and download the correct version of MongoDB.
- After downloading Mongo move the gzipped tar file (the file with the extension .tgz that you downloaded) to the folder where you want Mongo installed. In this case, we’ll say that we want Mongo to live in our home folder, and so the commands might look something like this:
<em>mv mongodb-osx-x86_64-3.0.7.tgz ~/</em>><em>cd Downloads</em>><em>mv mongodb-osx-x86_64-3.0.7.tgz ~/</em>*cd ~/
tar -zxvf mongodb-osx-x86_64-3.0.7.tgz > mv mongodb-osx-x86_64-3.0.7 mongodb- Create the directory where Mongo will store data, create the “db” directory. ou can create the directory in the default location by running
mkdir -p /data/db - Make sure that the
<strong>/data/db</strong>directory has the right permissions by runningsudo chown -R `id -un` /data/db - Run the Mongo daemon, in one terminal window run
~/mongodb/bin/mongod. This will start the Mongo server. - Run the Mongo shell, with the Mongo daemon running in one terminal, type
~/mongodb/bin/mongoin another terminal window. This will run the Mongo shell which is an application to access data in MongoDB. - To exit the Mongo shell run
quit() - To stop the Mongo daemon hit
ctrl-c
If you neatly did either iof the above, then your local MongoDb should be good to go.
And then there is Angular
Right now, we have got an updated system, Node, NPm and MongoDB all setup and ready. Finally, it is time for Angular, the powerful javascript framework that completes the MEAN Stack and is making beautiful Single Page Applications a reality.
In comparison to what we have had till now, installing Angular is fairly easy. Open Terminal and run
sudo npm i -g @angular/cli
Enter your password, wait for the process to complete and voila! You are all set to get cracking or rather, developing.
Don’t forget Express
What is MEAN without the ‘E’? Express is the Node.js framework that has made Node.js one of the most preferred server-side languages over the past few years. While Express.js in itself is wprth an entire blog, I will keep this down to setting up Express in your project and that is as simple as running the following code in your project’s Node directory:
npm i express --save
A few more things
While you now have all the runtimes and frameworks ready, there’s more to setting up a system for development than that.
The Text Editor
This may sound silly but for any developer, the right text editor is what sets the right tone and mood to get the proverbial creative juices flowing. True, even something as measly as Notepad(or Notepad++) can do the trick. So can the ‘further along evolution-line’ alternatives like Sublime or Atom. But I strongly prefer Visual Studio Code. Why ?
- It’s customizable
- Easy Debugging
- Extensions
- Git Integration
- Integrated terminal
- Intellisense
- Theming and more…
In short, VS Code is as good as an editor gets, or has gotten till date. It’s absolutely free and you can get it from https://code.visualstudio.com/
I’ll talk in detail about VS Code in another article.
Chrome DevTools
As someone who has been developing on Angular for some time now, I can tell you first hand that you are going to get a lot of what I call ‘white-screen errors’ — just like that, all you’ll get on the browser will be a blank white page, irrespective of how many lines of code or number of components you have in there. More often than not, this is a result of an unexpected closing tag in the HTML or even worse, a typo in the HTML. This is where the Console comes to rescue — kinda. It shows you a ‘Template Parse Error: Unexpected closing tag ’ or something similar, allowing us to fix the error with relative ease.
Chrome DevTools is a set of web developer tools built directly into the Google Chrome browser. DevTools can help you edit pages on-the-fly and diagnose problems quickly, which ultimately helps you build better websites, faster. The main tools that come with this are:
- Device Mode is a one-stop solution to evaluate how responsive your website or application works across devices
- Elements Panel allows you to examine the page in terms of the elements and styles that make it up, letting you tinker around and try out stuff rather than updating the code for every small change and waiting for the page to render again
- Console Panel, where you get the log of all the processes going on as well as the output of various
console.log()statements - Network Panel where you can view all the requests and responses from and to your application
- And much more…
So you see, Safari is a great browser, no arguments there. But if you are a developer and are not using Googlr Chrome and Chrome DevTools, you are missing out on a lot.
nodemon
Node.js development can get really irksome when for every small change you make in the code, you ahve to stop the running server and start it over, again. This is where nodemon becomes a lifesaver.

nodemon is a tool that helps develop node.js based applications by automatically restarting the node application when file changes in the directory are detected.
nodemon does not require any additional changes to your code or method of development. nodemon is a replacement wrapper for node, to use nodemon replace the word node on the command line when executing your script. You can install nodemon on your system by running the following command:
npm i -g nodemon
Alright, those are the bare minimum things you need and/or should have to get up and running with MEAN Stack development on your new Mac. Remember — this is just the way I do it. Somebody else might do it differently and that could be a better approach too. So keep looking out for more things and stay ahead of the curve.
Thanks for reading ❤
#mongodb #express #node-js #angular