10 Steps to Set Up Your Python Project for Success
In this guide we’ll walk through adding tests and integrations to speed development and improve code quality and consistency. If don’t have a basic working Python package, check out my guide to building one and then meet right back here.
Cool. Here’s our ten-step plan for this article:
- Install Black
- Create .pycache
- Install pytest
- Create Tests
- Sign up for Travis CI and Configure
- Create .travis.yaml
- Test Travis CI
- Add Code Coverage
- Add Coveralls
- Add PyUp
This guide is for macOS with Python 3.7. Everything works as of early 2019, but things change fast.
We’ve got work to do. Let’s hop to it! 🐸
Step 1: Install Black

Your package code should follows common style conventions. Black is a Python package that automatically formats your code for you so that it meet PEP 8. Black is relatively new and already has over a million downloads. Using it has quickly become a best practice in Python coding. Here’s a good guide to Black.
I’m using Atom for my editor, so I added the Python-Black package to Atom _— _install info is here. Now Atom will reformat your code when you save your file.
While we’re at it, let’s add Black to the development environment for our collaborators. Eventually, anyone who works on the project will adhere to the same style guide, or else their pull request won’t be accepted. 😦
Add black==18.9b0 to the next empty line of requirements_dev.txt and run pip install -r requirements_dev.txt.
Black makes 88 characters the default max line length. Some guides and programs require 79 characters, e.g. Sphinx style guide. In the Black Atom, package you can set the max length.
Now that we’re set up to save time writing code, let’s save time pushing our app to PyPI.
Step 2: Create .pypirc
When we use twine to push our builds to TestPyPI and PyPI we need to enter our login info manually. See my previous article if you aren’t familiar with twine. Let’s automate that process.
Twine will look or a file named .pypirc in our home directory. It will grab our url, login, and password when uploading our file.
Create your .pypirc file in your home directory with:
touch ~/.pypirc
Add the following contents to your .pypirc file:
[distutils]
index-servers =
    pypi
    testpypi

[testpypi]
repository: https://test.pypi.org/legacy
username = your_username
password = your_pypitest_password

[pypi]
username = your_username
password = your_pypi_password
Replace with your username and passwords. Make sure to save this file in your home directory and not your current working directory. If you want to make sure other users are on your machine can’t access this file, you can change its permissions from the command line:
chmod 600 ~/.pypirc
Now you can upload your package to TestPyPI with the following command:
twine upload -r testpypi dist/*
Upload to the real PyPI with this command:
twine upload dist/*
No more usernames and passwords to enter. Isn’t that nice? 😄
Now let’s add some tests to make sure our package works.
Step 3: Install and Configure pytest
Pytest is the most popular easy-to-use library for testing your Python code. In this example, we’ll add simple tests to our project. Here’s a nice pytest intro tutorial, if you want to go deeper.
Add pytest to your requirements_dev.txt file with
pytest==4.3.0
Run pip install requirements_dev.txt
Then run the following so that pytest can find your package:
pip install -e .
If you deactivate your virtual environment, you’ll need to run both pip commands again to run your tests.

Step 4: Create Tests
Add a tests folder in the top level of your project. Add a file inside it calledtest_your_package_name.py. My file is named test_notebookc.py. Starting the file with test_ makes it automatically discoverable by pytest.
In test_notebookc.py I added the following test to check whether the correct name prints as part of the function output. Modify to fit your own file and function names.
"""Tests for `notebookc` package."""
import pytest
from notebookc import notebookc


def test_convert(capsys):
    """Correct my_name argument prints"""
    notebookc.convert("Jill")
    captured = capsys.readouterr()
    assert "Jall" in captured.out
What’s going on here?
We first import our module. Then we create a function with test_my_function_name. This naming convention is helpful for other people and the code coverage package we’ll add soon.
Then we call our function, convert, with “Jill” as the argument. Then we capture the output. As a reminder, our convert function is extremely basic — it takes the parameter my_name and outputs a line:
print(f”I’ll convert a notebook for you some day, {my_name}.”)
Pytest checks to see if the string “Jall” is in the output. It shouldn’t be present, because we passed in “Jill”. See the pytest documentation on capturing output here.
Run your test by entering pytest on the command line. Your test should fail with red text.
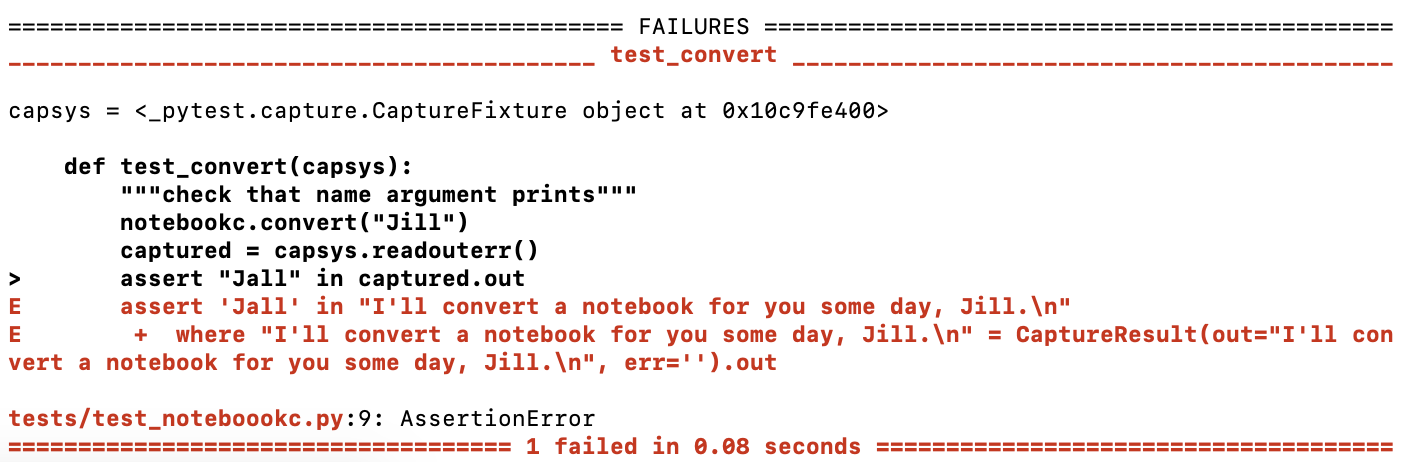
It’s good practice to make sure your tests fail when they should. Don’t just write them so they are green right away. Otherwise, your tests might not be testing what you think they are. 😉
After we have a failing test we can change our expected output from Jall to Jill, and our tests should pass in green.

Yep, all good. Now we have a test that ensures that when someone passes a string value to our function, that string is printed.
Let’s add a test to check that only a string has been passed to our function. If anything other than a string is passed, then a TypeError should be raised. Here’s a good guide on exceptions and error handling in Python.
When we write the test before we write the code that makes the test pass, we’re doing test-driven development (TDD). TDD is a proven method to write code with fewer errors. Here’s a nice article on TDD.
Let’s try something different this time. As an exercise, add your own test and code to ensure only a string can be passed as the argument to convert(). Hint: integers, lists, and dicts get type-converted to strings. Follow me on Twitter @discdiver and I’ll post the solution there.
After we have passing tests we are ready to integrate our package with a CI service.
Step 5: Sign up for Travis CI and Configure
Travis CI is a “hosted, distributed continuous integration service used to build and test software projects”. It was recently acquired by Idera. There are other CI options, but Travis CI is popular, free for open-source, and well-documented.
Travis CI makes it easier to ensure that only code that passes your tests and standards is integrated into your project. Learn more about Travis CI here and more about continuous integration here.
Sign up for an account at https://travis-ci.org/. Click on the Review and add your authorized organizations link from your Travis CI profile page. You’ll be prompted for your GitHub password. Click Grant next to your organization access.
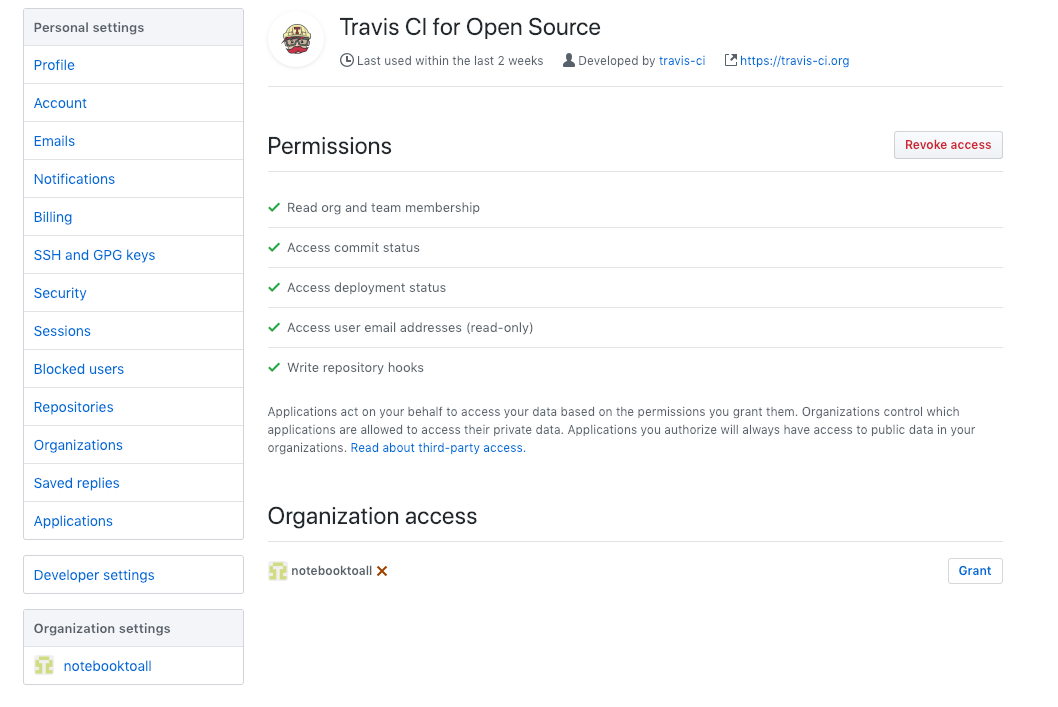
I had to sync my account for notebooktoall to show as an organization and for the notebookc repository to appear. It often takes a minute or more for data to start flowing. Then toggle your repo to on.

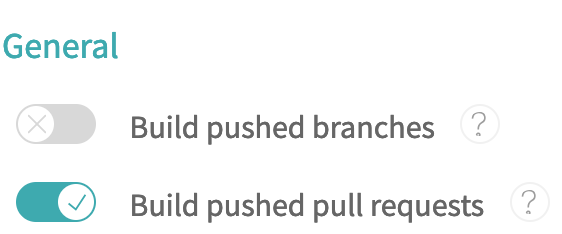
Click on settings. You can choose whether you want Travis to build on pushed pull requests and/or on pushed branches.
Now we need to configure a file locally so that Travis will build for each pull request.
Step 6: Create .travis.yml
In the top level of your project folder, add a .travis.yml file with these contents:
dist: xenial
language: python
python: 3.7.2
install:
  - pip install -r requirements_dev.txt
  - pip install -e .
script:
  - pytest
dist: xenial is needed to specify that Travis should use Ubuntu Xenial 16.04 for its virtual environment. Xenial must be specified for testing Python 3.7 code. More info here.
Different versions of Python can be specified for testing. We’ll get into that topic in a future article. Follow me to make sure you don’t miss it!
The install section ensures our packages for development are installed. pip install -e . installs your package as a wheel into Travis’s virtual environment. Then Travis will find your package when it runs pytest.
Step 7: Test Travis CI
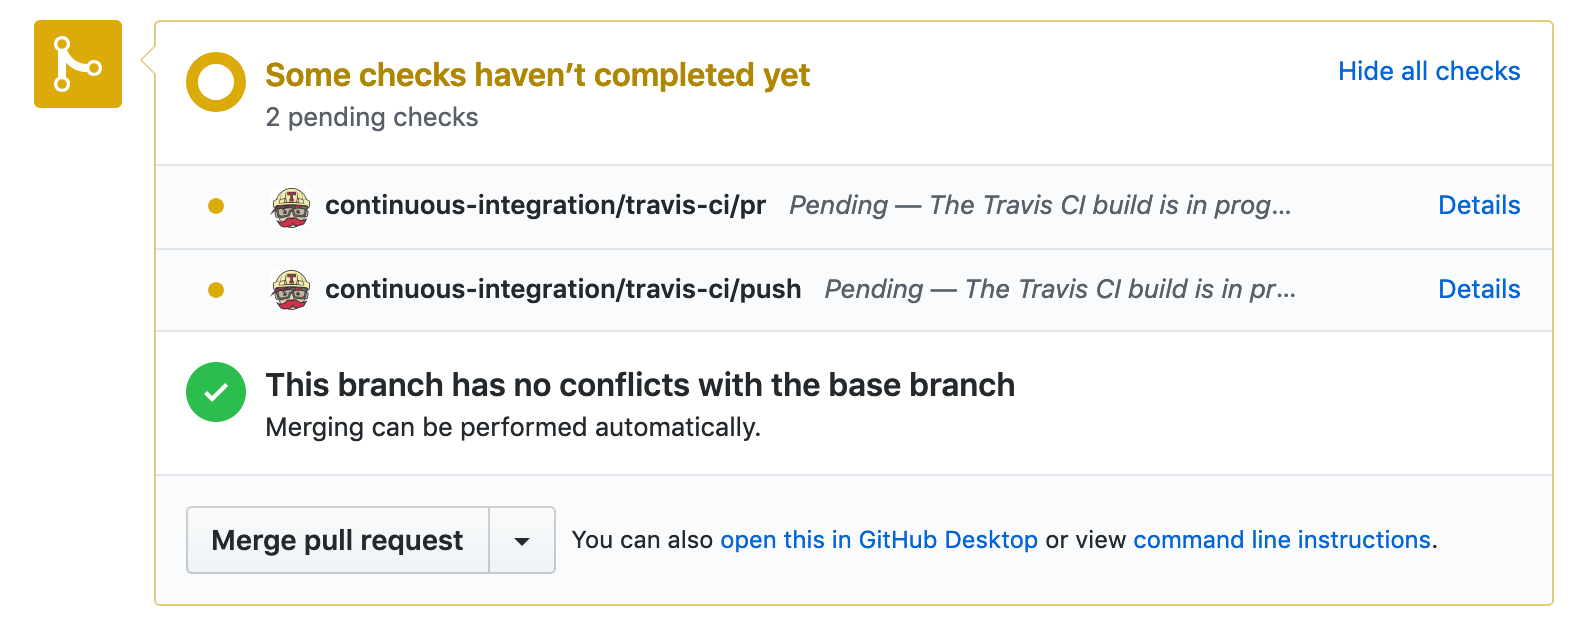
Commit your changes, push to GitHub, make a PR. Travis should start to run automatically within a few seconds.
Here’s what Travis is doing.
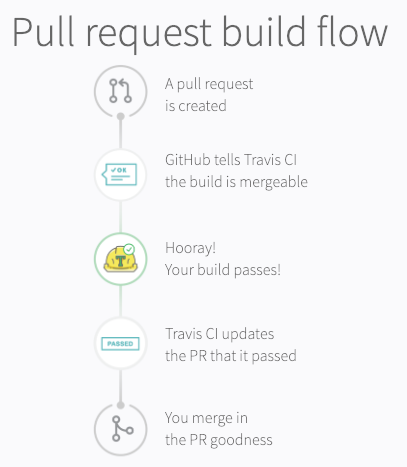
Travis will tell you if your PR fails.
Note that if a pull request fails, you can push to the same branch and Travis automatically reruns.
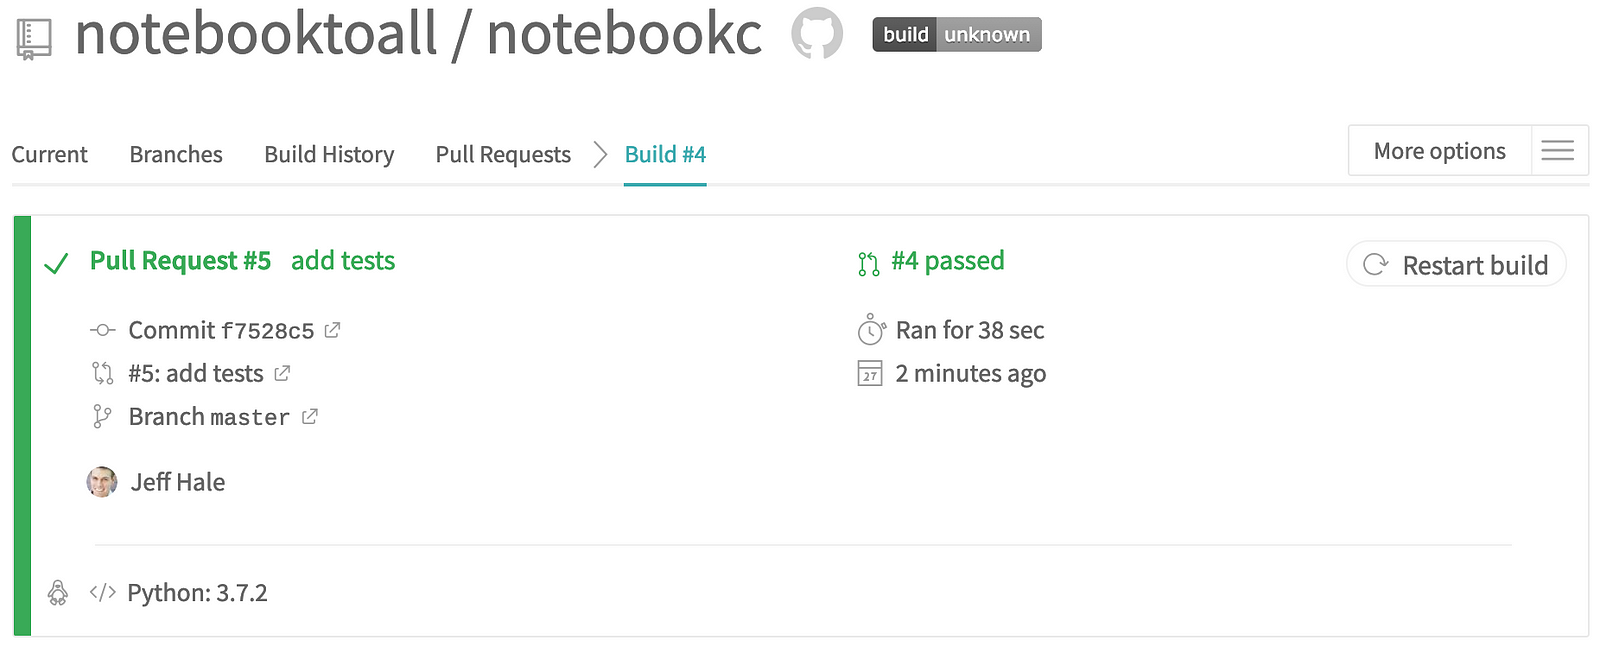
Go to your repo’s page on Travis and have a look around. There’s lots of info on Travis about your builds. You’ll probably be visiting this site a good bit in the future trying to figure out why your build didn’t pass. 😄
Assuming everything is green, you’re good to go!
If you don’t see any red or green, click on the More options menu and select Requests from the dropdown. If you see red, have a look at the error messages. If you see the error Build config file is required, then Travis isn’t finding your .travis.yml file on GitHub. Make sure it’s in your GitHub repo. 😉
Travis sends you emails to let you know when a build fails and when a failed build has been fixed.
Remember that you can keep pushing your commits to an open PR and Travis will rerun automatically.
Let’s see just how much of our code has test coverage.
Step 8: Add Code Coverage
A code coverage report shows you what percentage of your code has at least some test coverage. We’ll add the pytest-cov package to create a report.
Add the following line to requirements_dev.txt:
pytest-cov==2.6.1
Run with pytest --cov=my_project_name
My output of pytest --cov=notebookc looks like this:
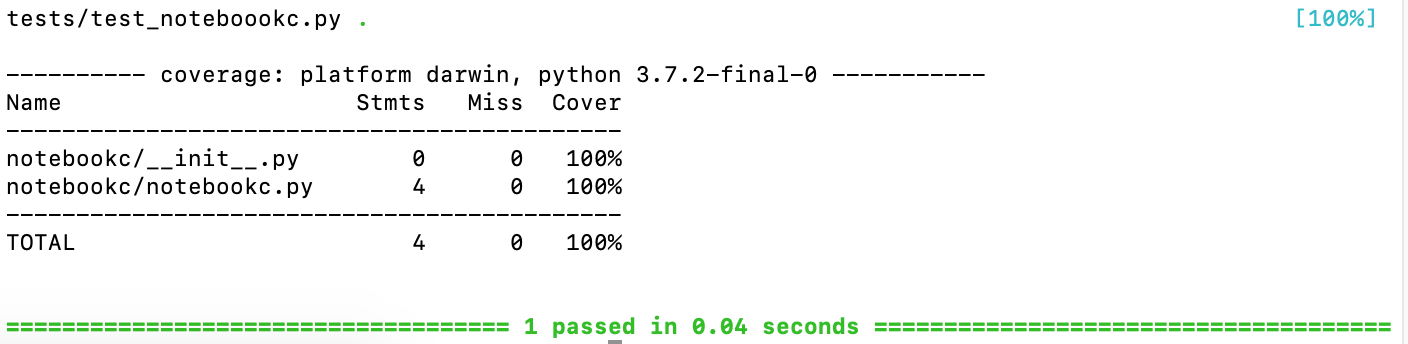
Sweet, all our code is covered! When you only have a few lines that’s not a high bar. 😄 But we don’t need to tell the world that — let’s show them that we’ve got coverage!
Step 9: Add Coveralls
Coveralls provides a history of your code coverage for all the world to see.

Head over to https://coveralls.io/ and signup for an account using your GitHub credentials. Add your organization and toggle on your repo when it appears.
In requirements_dev.txt add coveralls==1.6.0. Your requirements_dev.txt should now look like this:
pip==19.0.3
wheel==0.33.0
twine==1.13.0
pytest==4.3.0
pytest-cov==2.6.1
coveralls==1.6.0
Alter your .travis.yml file so it looks like the following (substituting your package name):
dist: xenial
language: python
python: 3.7.2
install:
  — pip install -r requirements_dev.txt
  — pip install -e .
script:
  — pytest --cov=my_package_name
after_success:
  — coveralls
Now when Travis builds your project, it will install the necessary packages, run your tests, and create a coverage report. Then it sends the coverage report to coveralls.
Commit, push to GitHub, and watch the magic happen. It can take a few minutes for your coverage report to flow, so be patient.
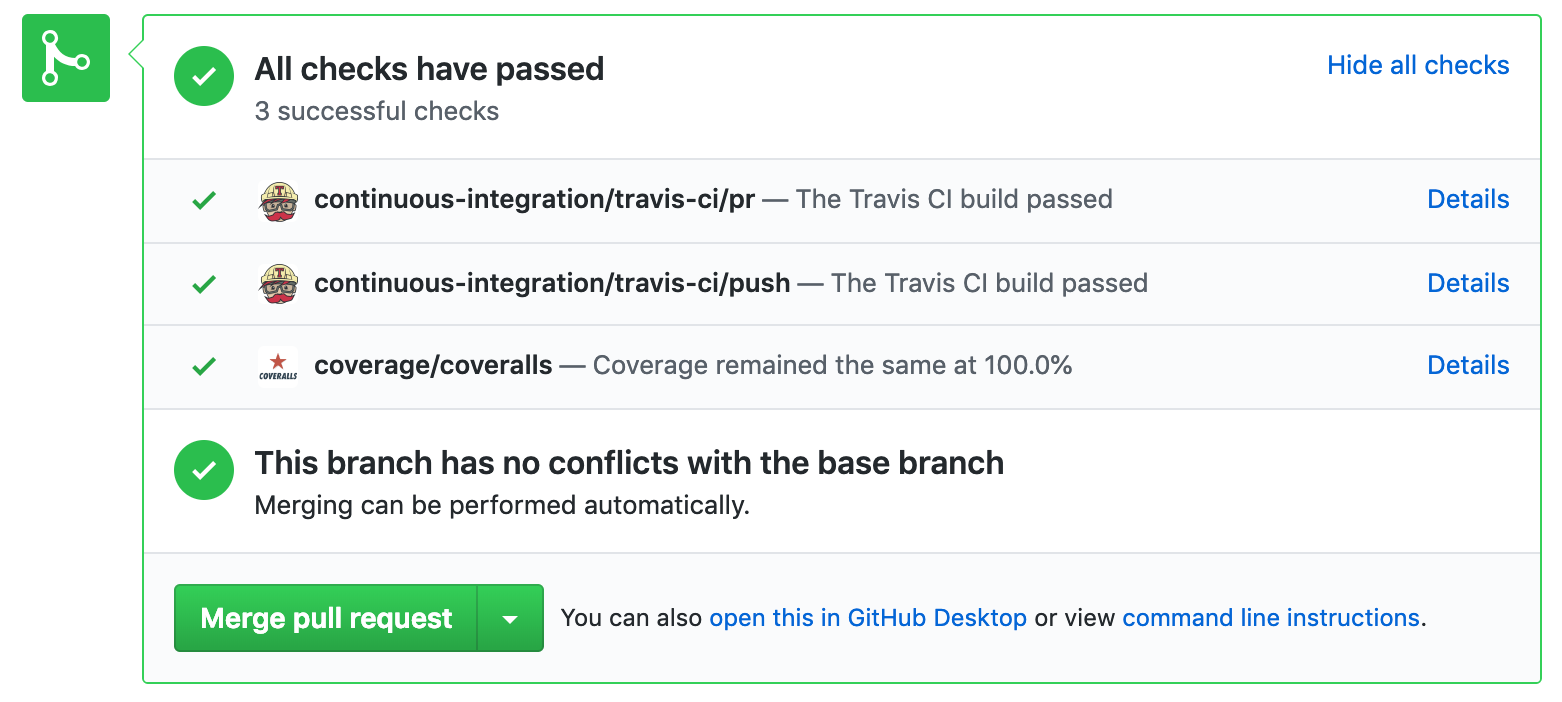
Now coveralls shows in your PR checks. Cool!
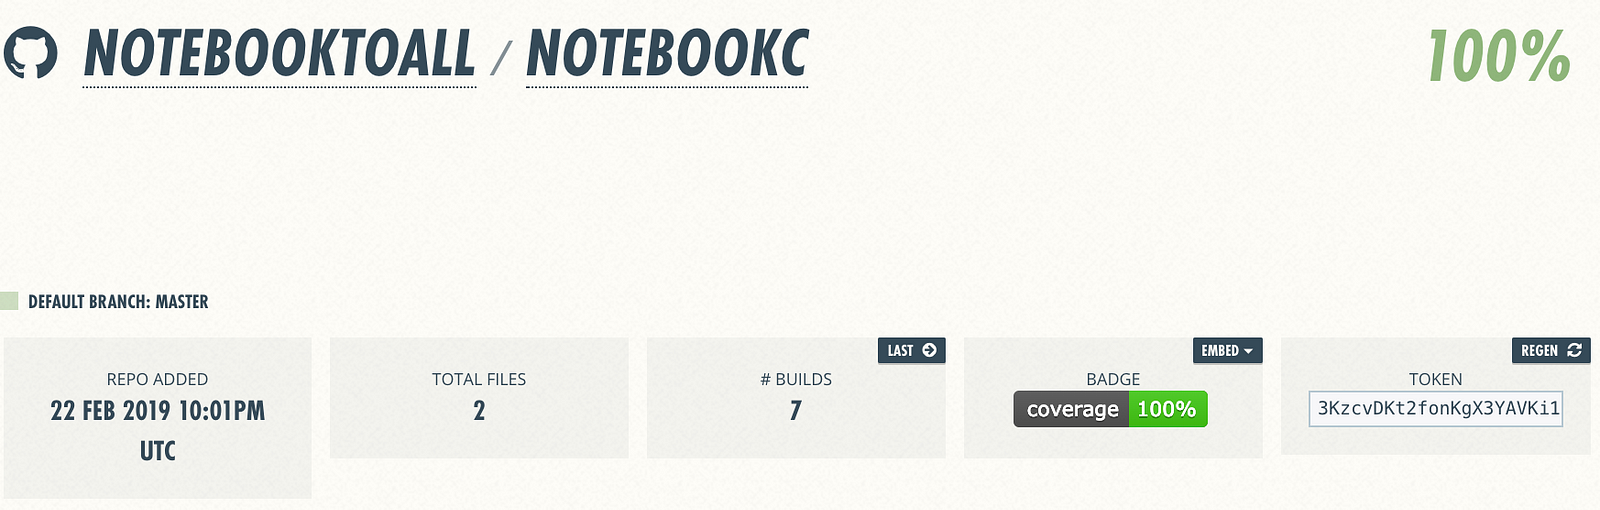
Over on the Coveralls webpage, we should show 100% coverage.
Alright, let’s add one more tool to our belt.
Step 10: Add PyUp
PyUp.io lets you know when package dependencies are out of date or have security vulnerabilities. It automatically makes a pull request to update the package on GitHub.
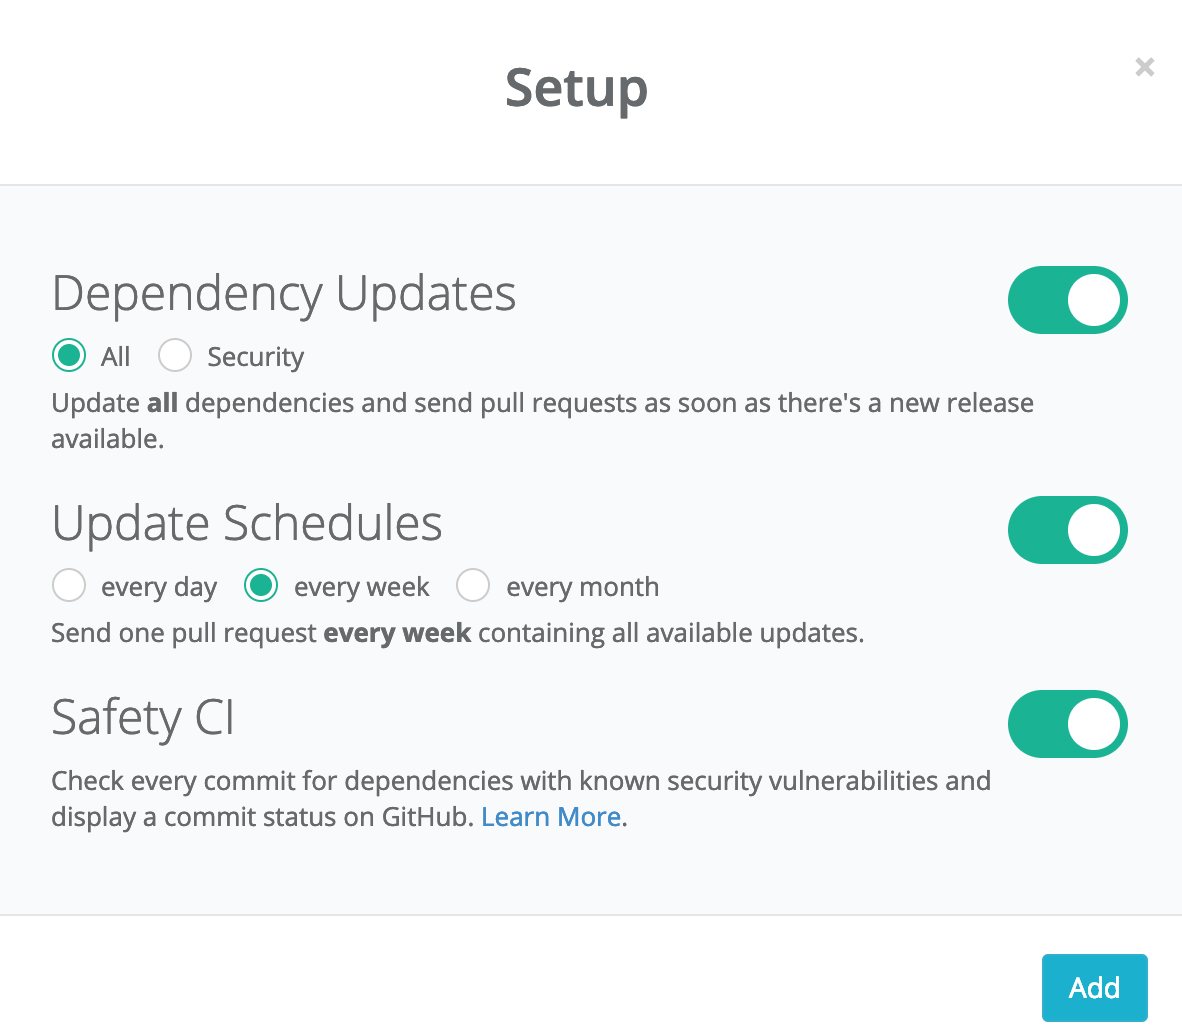
Go to https://pyup.io/, register through GitHub, and connect your organization.
When you add your repo, I suggest you toggle your update schedule to every week. Then you won’t get lots of pull requests if you have a bunch of package dependencies.
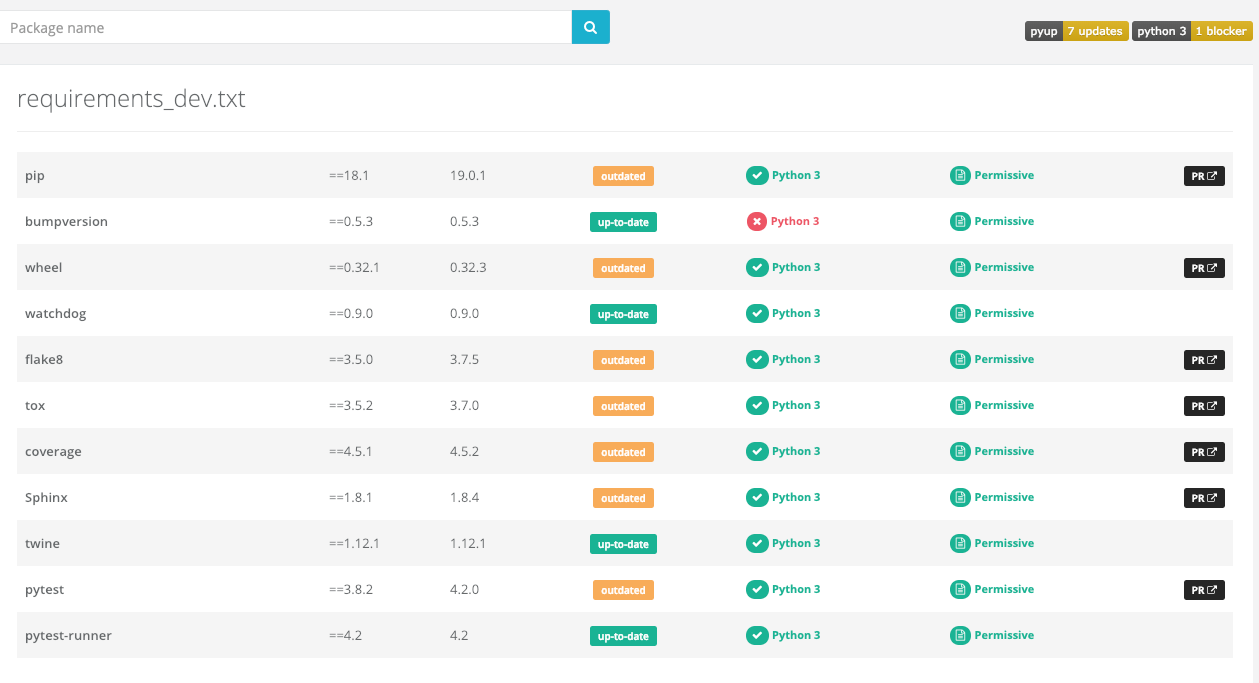
Here’s an example of a repository on PyUp that shows some out of date packages.
Now you’ll know when a package is updated — and knowing is half the battle. Automated pull requests must be the other half, right? 😏
Wrap
In this article you’ve learned how to add and configure Black, pytest, Travis CI, Coveralls, and PyUp. We’ve set the stage for more secure code with more consistent style. That’s pretty sweet!
In a future article we’ll look at how to configure and build your docs with Read The Docs, add badges, manage releases, and more. Follow me to make sure you don’t miss it.
I hope you found this guide useful. If you did, please share it on your favorite social media channels so others can find it too. 👏
Learn More
☞ Learn Programming with Python Step by Step
☞ Complete Python: Go from zero to hero in Python
☞ An A-Z of useful Python tricks
☞ A Complete Machine Learning Project Walk-Through in Python
☞ Learning Python: From Zero to Hero
☞ Introduction to PyTorch and Machine Learning
☞ Python Tutorial for Beginners (2019) - Learn Python for Machine Learning and Web Development
☞ Build Your First Open Source Python Project
☞ Master Python through building real-world applications
☞ Complete Python Bootcamp: Go from zero to hero in Python 3
☞ Machine Learning A-Z™: Hands-On Python & R In Data Science
☞ Python and Django Full Stack Web Developer Bootcamp
Thanks for reading!
#python