A beginner’s guide to Kubernetes Architecture
Kubernetes is an open-source container orchestration engine for automating deployment, scaling, and management of containerized applications. In this post, we will go through the architecture of Kubernetes for beginners and what are the different options to get started for beginners.
- Kubernetes Architecture
- Different Options To Get Started
- Minikube
- Kubernetes Dashboard
- How To Deploy In Cluster
- Some Examples
- Summary
- Conclusion
Kubernetes Architecture
Kubernetes is the orchestration platform for the containerized applications. It follows the declarative configuration which defines the desired state of the applications and Kubernetes work hard to maintain that state throughout the lifecycle.
It’s very important for anyone to understand the architecture of the Kubernetes before getting started. Let’s dive into the architecture principles of this tool.
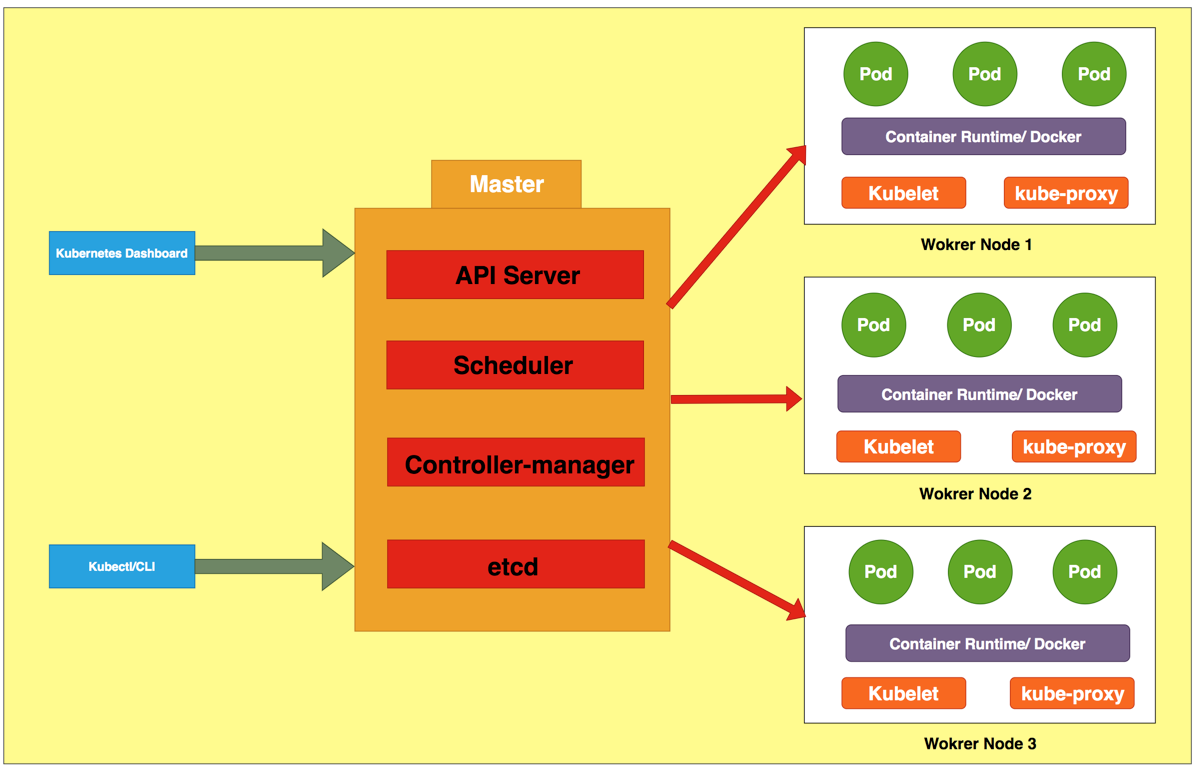
If you look at the above diagram, we have master nodes and worker nodes. Worker nodes are managed by the master. The worker node has the following services to be able to run the container applications in the pods.
- Kubelet
- Kube-proxy
- container runtime
Kubelet
This is the most important service in the Kubernetes which is responsible for the execution of the container execution layer. Without kubelet, Kubernetes is just REST API backed by key-value store. Kubernetes executes isolated container application by default. containers are not only isolated from each other and they are also isolated from the underlying host system. This is critical to decoupling the management of individual applications from each other and from management of the underlying cluster physical/virtual infrastructure.
API admission control may reject pods or add additional scheduling constraints to them, but Kubelet is the final arbiter of what pods can and cannot run on a given node, not the schedulers or DaemonSets.
Kube-proxy
This provides an abstraction layer for the group of pods in the node under a common access policy, for example, load balancer. Every node implements Kube-proxy which provides the virtual IP address for the clients to access the dynamic set of pods. This provides a highly available load balancing solution with low-performance overhead.
container runtime
This is responsible for running the container such as Docker, rkt, containerd
The main components of the master nodes are as follows
- API Server
- Scheduler
- Controller-manager
- etcd
API Server
This is the basis for all the communication in the cluster. All the components in the cluster communicate through this. It exposes the kubernetes API.
Scheduler
The scheduler is responsible for assigning applications or kubernetes objects to the worker node. It is responsible for placing the pods on the nodes based on the resource requirements.
Controller-manager
This maintains the cluster such as node failures, maintaining the correct amount of pods, for example, if you deploy the application with 3 replicas, it makes sure that there are three pods running at any particular point of time.
etcd
This is the key value store that stores the cluster configuration. If you want to back up the cluster, all you need to save is this key value distributed store.
Different Options To Get Started
Once you understand the basic principles and architecture of kubernetes there are different options to get started or start practicing kubernetes. We can build a single node cluster and multi-node cluster. Here are these options.
Minikube
Minikube is a tool that runs a single-node Kubernetes cluster in a virtual machine on your personal computer. If you want to practice and deploy kubernetes objects on your laptop, this is a great tool. The only problem with this is that it has only one node which is master. You don’t get to experience the multi-node deployments of kubernetes. But, this is a great starting tool to get used to kubernetes. Here are the instructions on how to install it on your laptop.
katacoda
You can actually run kubernetes scenarios right out of the box in the interactive browser-based terminal. You can just sign in and start working on these scenarios.
[]Google Kubernetes Engine(https://cloud.google.com/kubernetes-engine/docs/concepts/kubernetes-engine-overview “”)
Google Kubernetes Engine provides a managed environment for deploying, managing, and scaling your containerized applications using Google infrastructure. You can create a free tier account and you can start a multi-node cluster right away and start working on it.
Microsoft Azure Kubernetes Service
The fully managed Azure Kubernetes Service (AKS) makes deploying and managing containerized applications easy. It offers serverless Kubernetes, an integrated continuous integration and continuous delivery (CI/CD) experience, and enterprise-grade security and governance. You can create a free tier account and start with this right away.
Amazon Elastic Kubernetes Service
Amazon Elastic Kubernetes Service (Amazon EKS) makes it easy to deploy, manage, and scale containerized applications using Kubernetes on AWS. You can create a free tier account with AWS and start working.
Minikube
Minikube is a tool that runs a single-node Kubernetes cluster in a virtual machine on your personal computer. In this Section, we install Minikube, any other prerequisites and test some commands with kubectl.
These are all the required things to run Minikube on your laptop.
- Set up Kubectl
- Install VirtualBox
- Install Minikube
The first thing we need is to install and set up kubectl. Here are the instructions from kubernetes official docs. Once you install that one based on your OS check the version with the YAML format with this commandkubectl version --client -o yaml. Since we didn’t install minikube yet we are checking only client version. If you are seeing this you are good to go.

VirtualBox is the next thing we need to install. When we start minikube, it actually runs in the VirtualBox. You can follow the Installing VirtualBox section of the below article or you can follow official docs here.
Now it’s time to install Minikube on your laptop. Follow these instructions.
Once installed, test the version and start it with these commands minikube version and minikube start

You can check the version of kubectl to get the server version along with the client. Let’s test with some commands.
// get component status
kubectl get componentstatus// get nodes. you get only master node since minikube is single node // cluster
kubectl get nodeskubectl get pods
Kubernetes Dashboard
Kubernetes dashboard is a web-based UI that can be used to deploy containerized applications into kubernetes cluster, troubleshoot applications and manage resources in the cluster. You can also get the complete view of resources or objects deployed in the cluster. You can also create the deployment using the deployment wizard.
Kubernetes Dashboard UI is not installed by default. We have to use the following command to install it.
kubectl apply -f https://raw.githubusercontent.com/kubernetes/dashboard/v2.0.0-beta1/aio/deploy/recommended.yaml

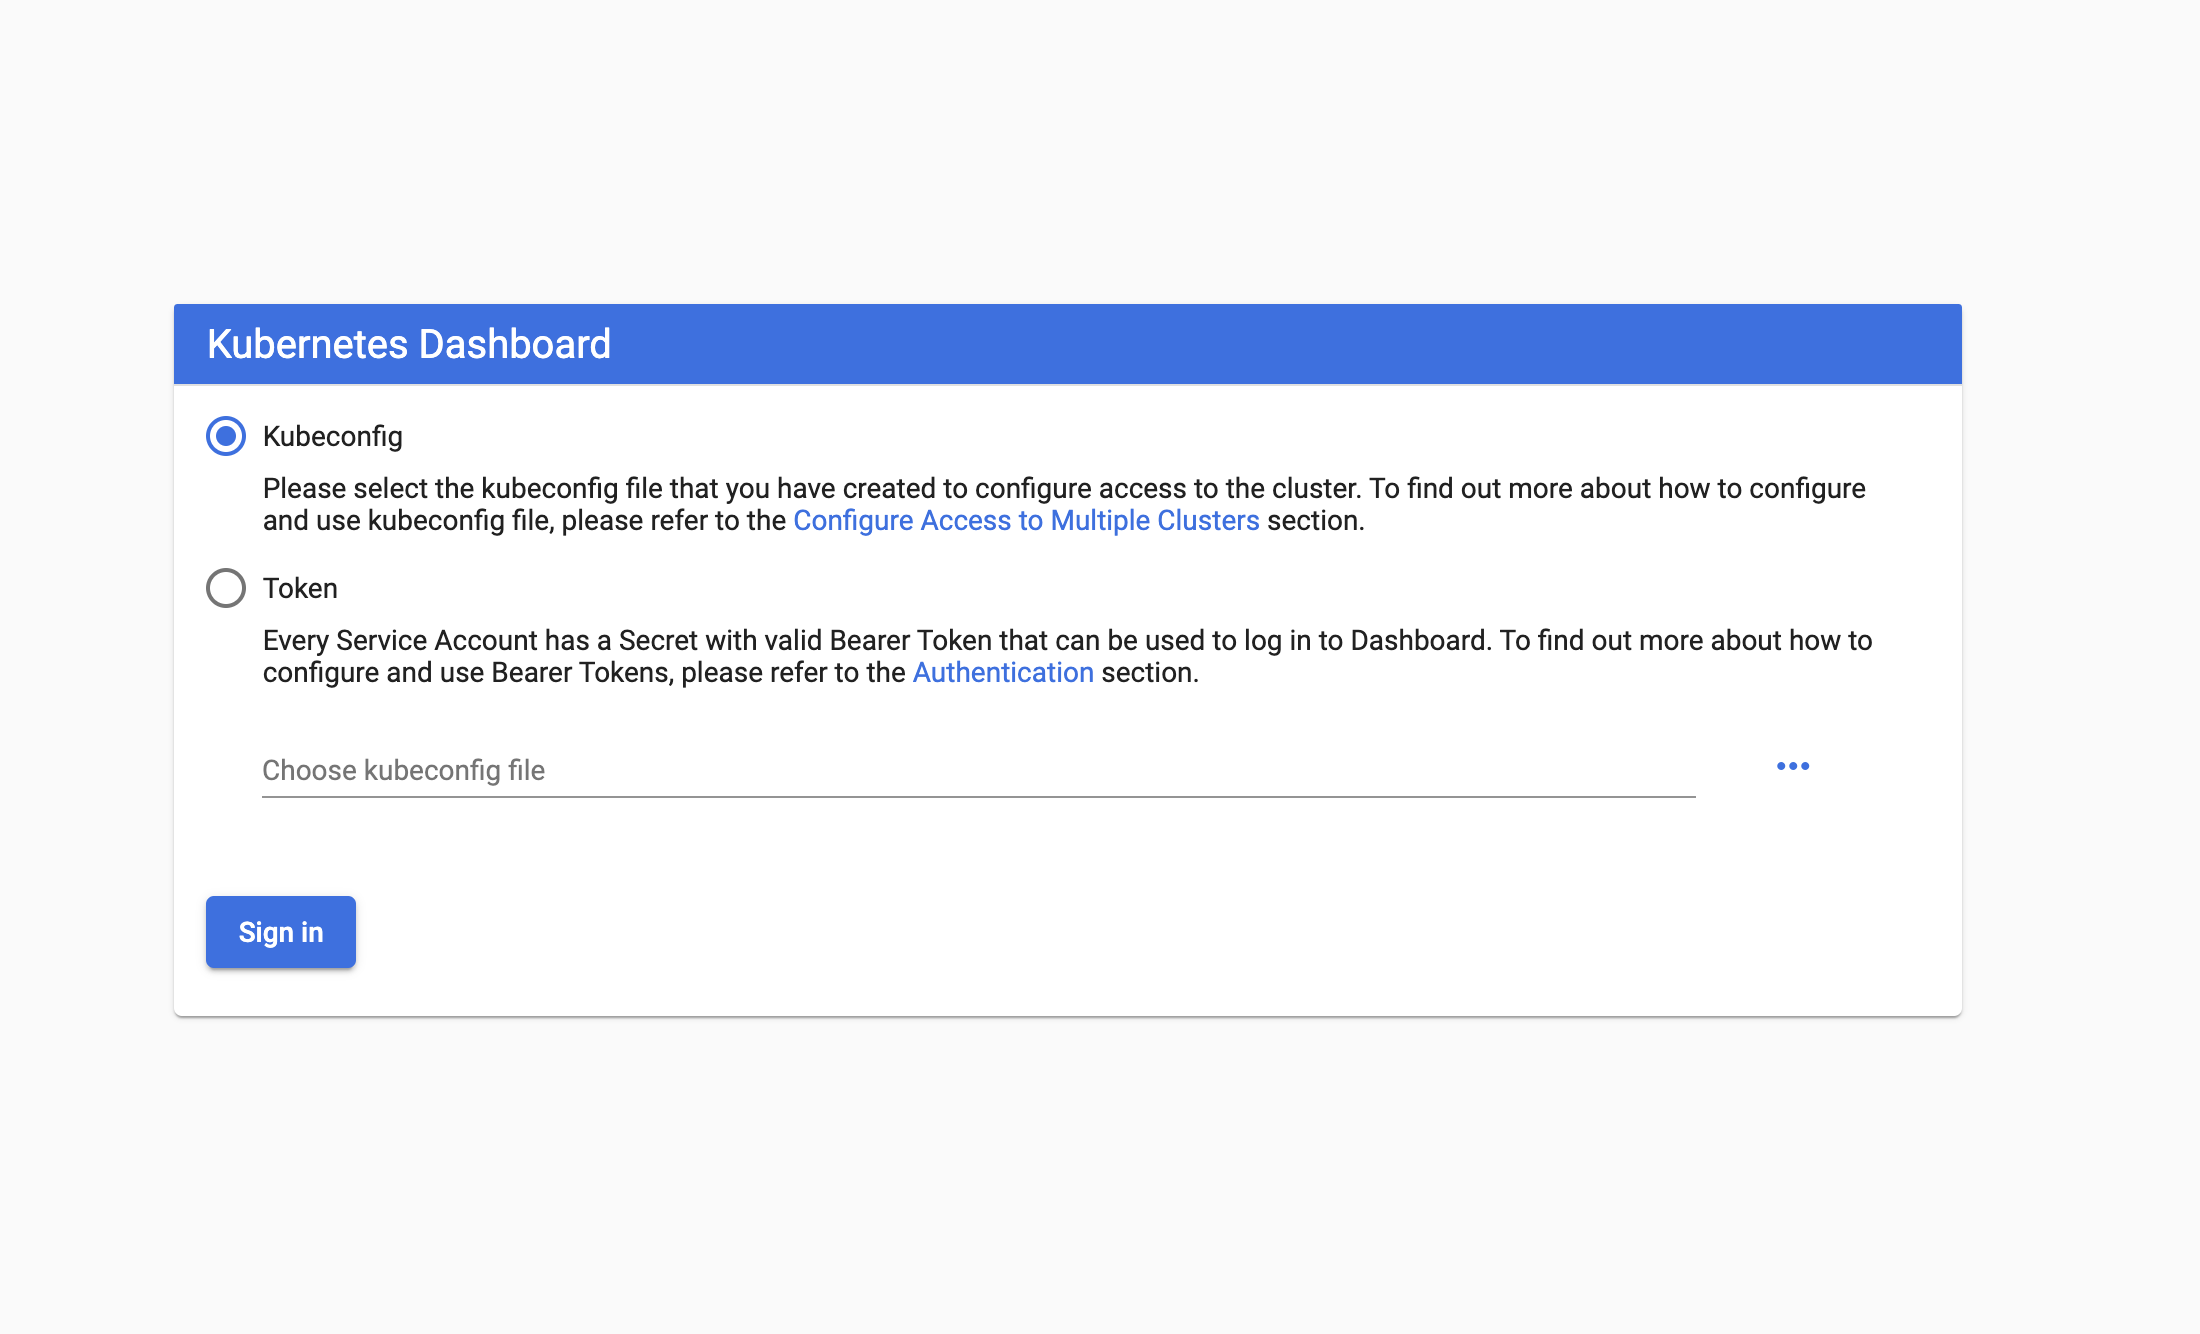
Once installed, we need to run this commandkubectl proxy so that the dashboard is available at this location. When you first hit this URL, you will see the below screen.
There are two ways to access the dashboard one is to create a service account and another way is to use a kubeconfig file. Let’s use the token to sign into the dashboard.
You need to follow the documentation here to create a token. Once you create the token, you can sign in with the token. Here is the dashboard view. I have some objects already in the cluster. Here is the kubernetes dashboard to view all the objects in the cluster in the UI.
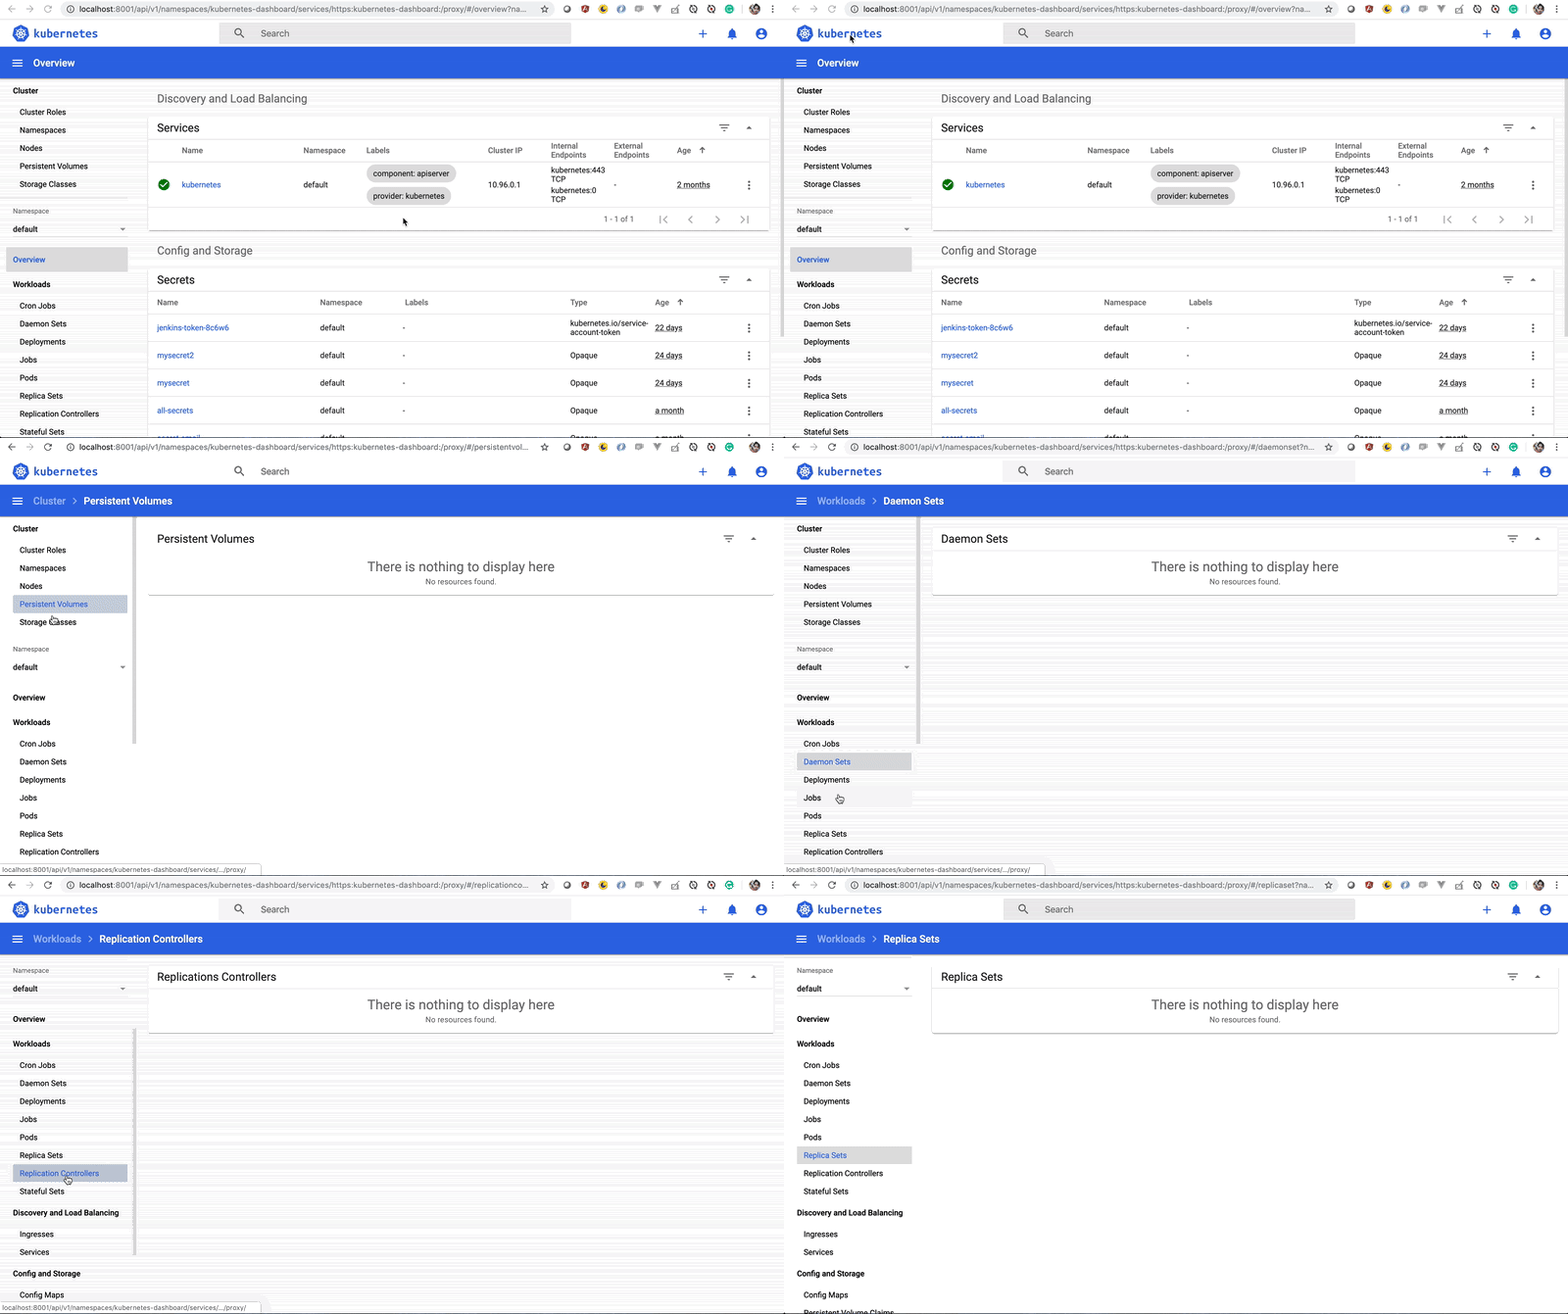
The token expires after a certain amount of time. When it does, generate the token again with the below command and sign in again.
kubectl -n kubernetes-dashboard describe secret $(kubectl -n kubernetes-dashboard get secret | grep admin-user | awk '{print $1}')
How To Deploy In Cluster
You create objects in the cluster by feeding YAML or json file into the API server. The YAML file is converted to JSON format before submitted to the API server.
We use kubectl to create and update objects in the cluster. Kubectl create just creates the object in the cluster and kubectl apply creates and updates the objects in the cluster. This is the recommended way of managing Kubernetes applications on production.
Here is an example of kubernetes object pod creating and updating with the YAML file.
apiVersion: v1
kind: Pod
metadata:
  creationTimestamp: null
  labels:
    run: nginx
  name: nginx
spec:
  containers:
  - image: nginx
    name: nginx
    resources: {}
  dnsPolicy: ClusterFirst
  restartPolicy: Never
status: {}
// raw file of the above
kubectl create -f https://gist.githubusercontent.com/bbachi/bcdcfaab157d6461b64cd64d50d9890a/raw/2062d7c17f6c07473309fa7508f8fba46d16944d/nginx-pod.yaml// verify the pod is created
kubectl get po
You can create the same nginx pod with the kubectl run command. This command is limited and you can’t pass all the specifications with this command.
kubectl run nginx --image=nginx --restart=Never
Here is the complete cheat sheet of the kubectl.
Some Examples
Let’s create some objects in the cluster.
Pods
In the above section, we have created a pod. If you notice the kubernetes dashboard, you can actually see this pod in the pod section of the workloads.

Deployments
Let’s create a deployment of nginx with 10 replicas. Here is the file
apiVersion: apps/v1
kind: Deployment
metadata:
  creationTimestamp: null
  labels:
    app: nginx-web
  name: nginx-web
spec:
  replicas: 10
  selector:
    matchLabels:
      app: nginx-web
  strategy: {}
  template:
    metadata:
      creationTimestamp: null
      labels:
        app: nginx-web
    spec:
      containers:
      - image: nginx
        name: nginx
        resources: {}
status: {}
// create this object
kubectl apply -f https://gist.githubusercontent.com/bbachi/4eef188f8687e82fb8e570e6ae1ca405/raw/e1eae137150ff713c02ddd66db4acde7b5ffff69/nginx-web.yaml// get deploy, replicasets and pods
kubectl get deploy
kubectl get rs
kubectl get po
Services
Let’s create a service for this deployment. A Service is n abstract way to expose an application running on a set of pods as a network service.
kubectl expose deploy nginx-web --port=80// get service
kubectl get svc
CronJob
Cron jobs are useful for creating periodic and recurring tasks, like running backups or sending emails. Cron jobs can also schedule individual tasks for a specific time, such as if you want to schedule a job for a low activity period.
Let’ s create one from the official doc here.
kubectl create -f https://k8s.io/examples/application/job/cronjob.yamlkubectl get cj
Let’s look again at the kubernetes dashboard to see all these objects.
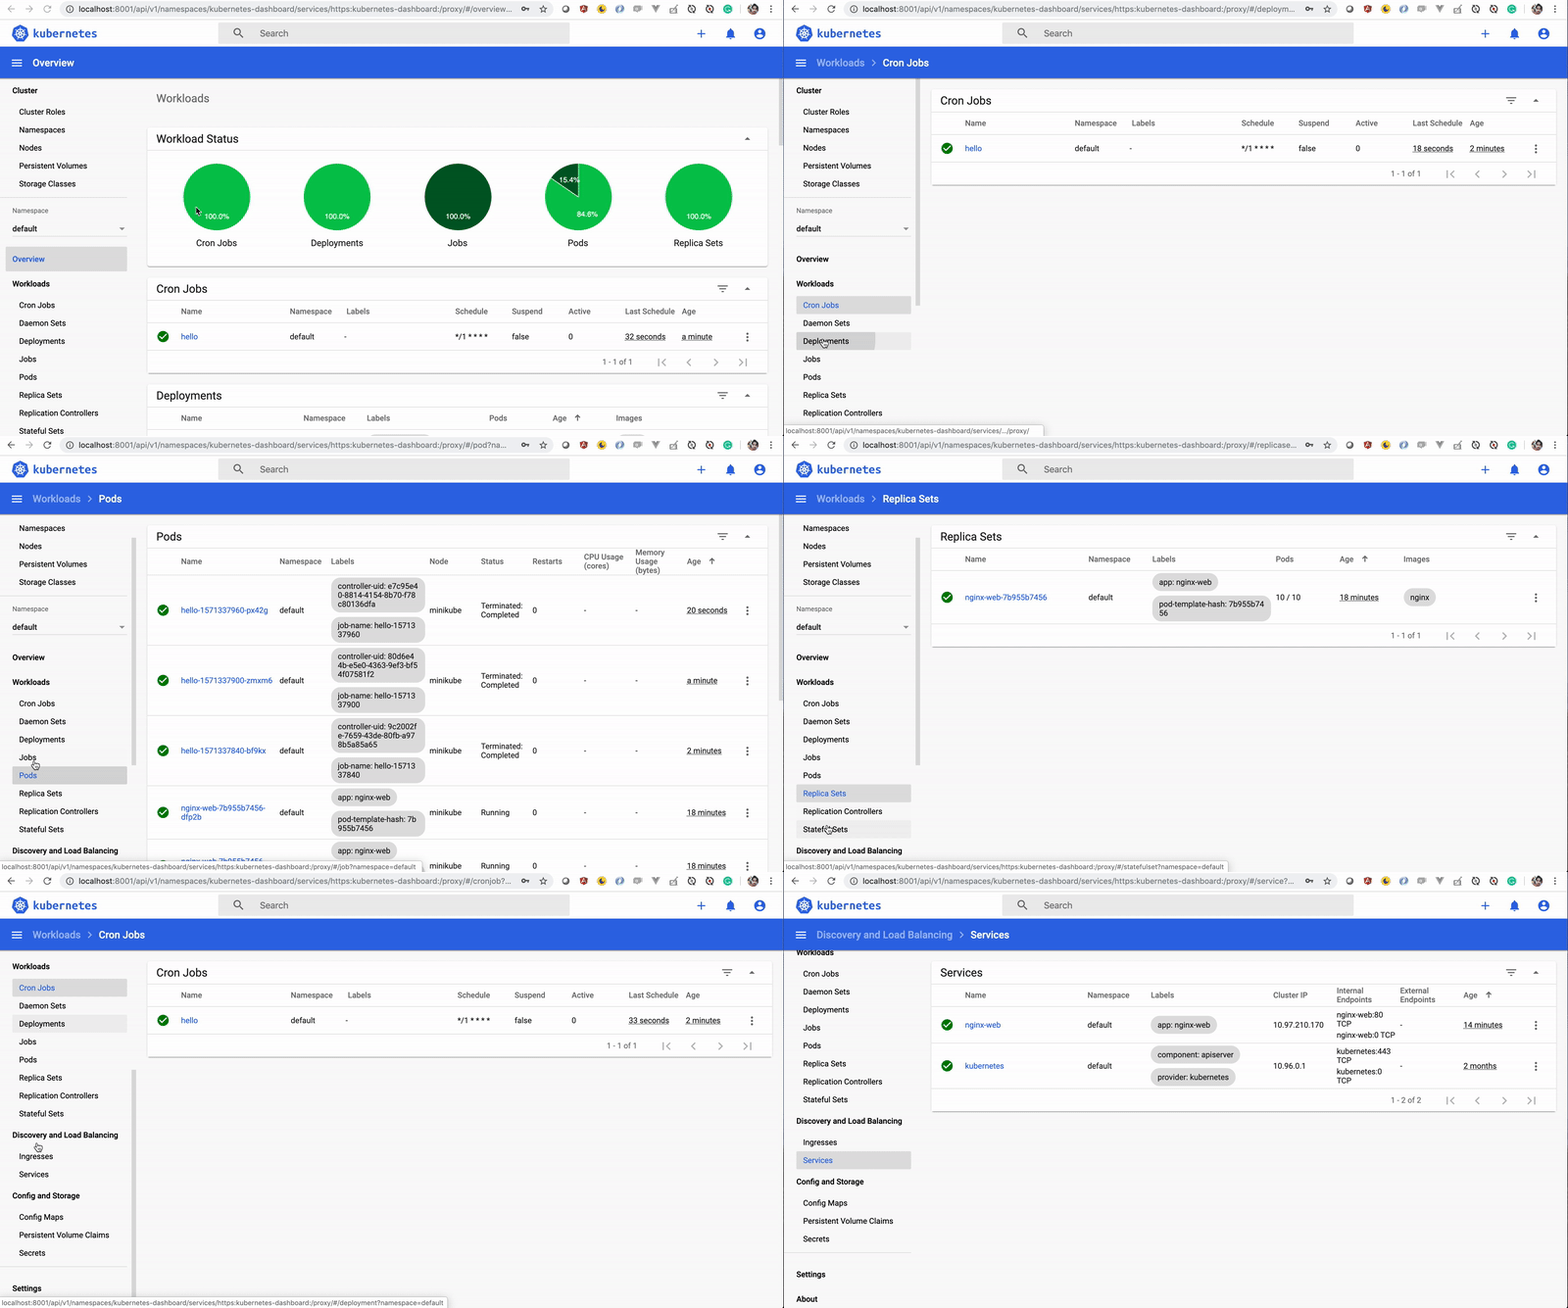
Let’s clean up the cluster by deleting all the objects in the cluster.
kubectl delete cj hello
kubectl delete deploy nginx-web
kubectl delete svc nginx-web
kubectl delete po nginx
Summary
- Kubernetes is an open-source container orchestration engine for automating deployment, scaling, and management of containerized applications.
- It’s very important to get to know the kubernetes architecture before diving into actual deployment with it
- We have master nodes and worker nodes in the cluster.
- Every master node contains these components: API server, Scheduler, controller-manager and etc.
- Every worker node contains these components: Kube-proxy, kubelet, and container runtime
- You can run multiple master nodes for the high available cluster
- There are different options to get hands-on with kubernetes: katacoda. minikube, managed kubernetes services from the major cloud providers
- Kubernetes dashboard is the web interface where you can view, edit and, delete objects in the cluster.
- Kubernetes dashboard is not installed by default.
- Kubectl apply is the recommended way to create/deploy objects in the production cluster
- You create objects in the cluster by feeding YAML or json file into the API server. The YAML file is converted to JSON format before submitted to the API server.
- Kubectl run is another way to create objects but it is limited because we can’t specify all the specs as options.
Conclusion
Kubernetes is the future of deployment. A lot of fortune 500 companies have already moved and some are transitioning now. So, it is here to stay. I would recommend start using this and get familiar as soon as possible.
#Kubernetes #devops
