Build a chat app with Go
In this article, you’ll learn how to build a chat app with Go (Golang) programming.
Communication is an important part of the society we live in. Over the years, the forms of communication available have changed and have been refined to be both far-reaching and fast. With communication today, we can talk to people who are on the other side of the globe in an instant.
To power this sort of communication, there are some platforms that allow instant messaging such as Facebook, Twitter, Slack.
In this application, we will consider how to build a realtime chat application using Go, JavaScript.
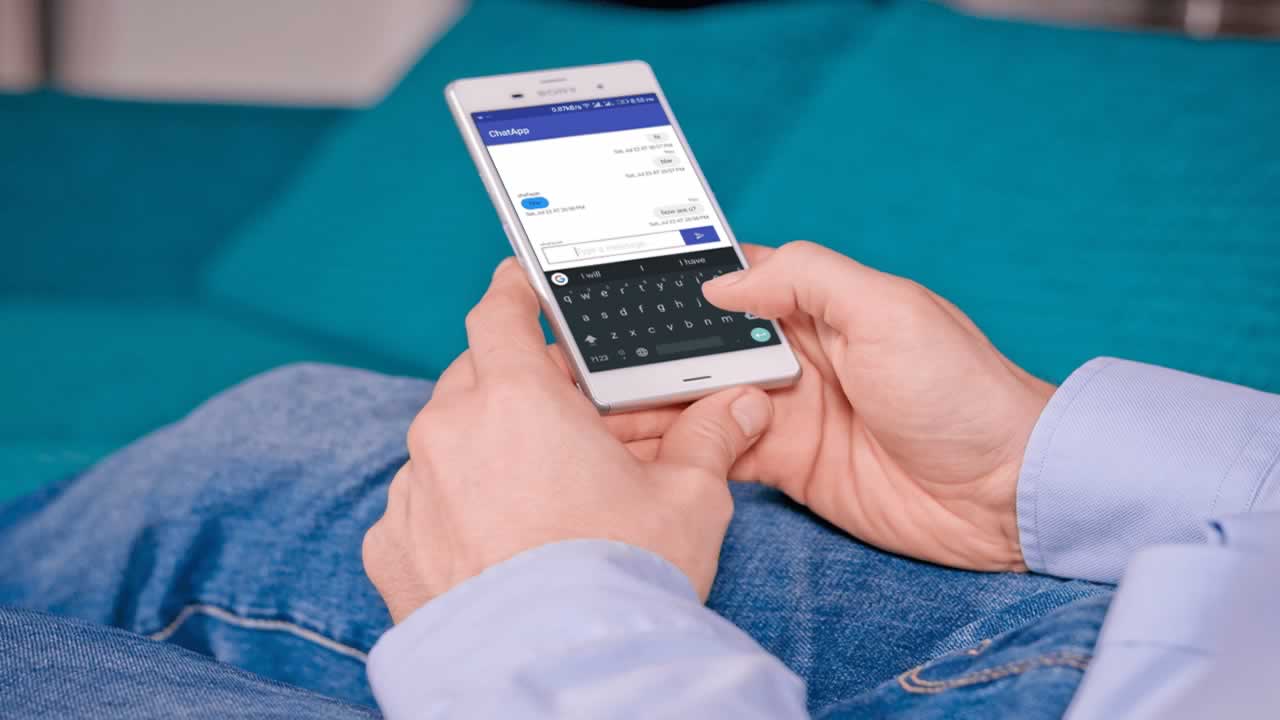
Here’s a demo of the final application:

Prerequisites
To follow along with this article, you will need the following:
- An IDE of your choice like Visual Studio Code.
- Go (version >= 0.10.x) installed on your computer. Here’s how you can install Go.
- Basic knowledge of the Go programming language.
- Basic knowledge of JavaScript.
Once you have all the above requirements, we can proceed.
Skip the next section if you have already signed up with Pusher and created an application.## Setting up Pusher
The realtime feature of this chat app will depend on Pusher Channels so you need to create an account here if you don’t already have one. After signing up, you will be asked to create a new application. Do so.
Enabling client events
We need to enable the Pusher application to trigger events from the client-side (browser) of the chat app. This is important because it is with this feature that users will be able to send private messages without hitting the backend server. Follow the steps below to activate client events from the dashboard:
- An IDE of your choice like Visual Studio Code.
- Go (version >= 0.10.x) installed on your computer. Here’s how you can install Go.
- Basic knowledge of the Go programming language.
- Basic knowledge of JavaScript.

- An IDE of your choice like Visual Studio Code.
- Go (version >= 0.10.x) installed on your computer. Here’s how you can install Go.
- Basic knowledge of the Go programming language.
- Basic knowledge of JavaScript.
Setting up the codebase
Let’s write the terminal commands to create a new folder in the src directory that is located in the $GOPATH, this folder will be the root directory for this project:
    $ cd $GOPATH/src
    $ mkdir go-pusher-chat-app
    $ cd go-pusher-chat-app
In this folder, we will create the main Go file which will be the entry point for the application and call it chat.go. We also need to install the Go Pusher library that we will reference in the chat.go file.
Run the following code in the terminal to pull in the Go Pusher package:
$ go get github.com/pusher/pusher-http-go
Skip the next section if you have already signed up with Pusher and created an application.
Open thechat.gofile in your IDE and paste the following code:
    // File: ./chat.go
    package main

    import (
        "encoding/json"
        "fmt"
        "io/ioutil"
        "log"
        "net/http"

        pusher "github.com/pusher/pusher-http-go"
    )

    var client = pusher.Client{
        AppId:   "PUSHER_APP_ID",
        Key:     "PUSHER_APP_KEY",
        Secret:  "PUSHER_APP_SECRET",
        Cluster: "PUSHER_APP_CLUSTER",
        Secure:  true,
    }

    type user struct {
        Name  string `json:"name" xml:"name" form:"name" query:"name"`
        Email string `json:"email" xml:"email" form:"email" query:"email"`
    }

    func main() {
        http.Handle("/", http.FileServer(http.Dir("./public")))

        http.HandleFunc("/new/user", registerNewUser)
        http.HandleFunc("/pusher/auth", pusherAuth)

        log.Fatal(http.ListenAndServe(":8090", nil))
    }
Skip the next section if you have already signed up with Pusher and created an application.
In the code above, we first imported a list of packages then registered a new Pusher client with the credentials from the app we created earlier on the dashboard.
Next, we defined a user struct and included extra definitions to its properties so that Go knows how to handle incoming payloads and bind their various structures with a new instance of the user struct.
Lastly, in the main function, we registered three endpoints:
- An IDE of your choice like Visual Studio Code.
- Go (version >= 0.10.x) installed on your computer. Here’s how you can install Go.
- Basic knowledge of the Go programming language.
- Basic knowledge of JavaScript.
Each of the last two endpoints has an associated handler function that we will define below. Add the following code to the chat.go file before the main function:
    // File: ./chat.go

    // [...]

    func registerNewUser(rw http.ResponseWriter, req *http.Request) {
        body, err := ioutil.ReadAll(req.Body)
        if err != nil {
            panic(err)
        }

        var newUser user

        err = json.Unmarshal(body, &newUser)
        if err != nil {
            panic(err)
        }

        client.Trigger("update", "new-user", newUser)

        json.NewEncoder(rw).Encode(newUser)
    }

    func pusherAuth(res http.ResponseWriter, req *http.Request) {
        params, _ := ioutil.ReadAll(req.Body)
        response, err := client.AuthenticatePrivateChannel(params)
        if err != nil {
            panic(err)
        }

        fmt.Fprintf(res, string(response))
    }

    // [...]
In the registerNewUser function, we trigger a Pusher event, new-user, on the public channel update, so that the new user’s details are sent to the subscribed clients.
The syntax for triggering a Pusher event over a public channel in Go is:
client.Trigger(channel, event, data)
Building the frontend
Let’s create the public folder in the root directory of our project because this is where all of the static files will live:
$ mkdir public
Next, we will navigate into the public folder and create two sub-folders to hold our CSS and JavaScript files:
    $ cd public
    $ mkdir css js
Lastly, create an index.html file in the root of the public folder. This is where we will write the markup for our application.
Open the index.html file and update it with the following code:
<!-- File: ./public/index.html -->
<!DOCTYPE html>
<html lang="en">
<head>
<meta charset="utf-8">
<meta name="viewport" content="width=device-width, initial-scale=1">
<title>Chat with friends in realtime</title>
<link rel="stylesheet" href="https://maxcdn.bootstrapcdn.com/bootstrap/4.0.0-beta.2/css/bootstrap.min.css">
<link rel="stylesheet" href="./css/app.css" >
</head>
<body>
<header>
<nav class="navbar navbar-expand-md navbar-dark fixed-top bg-dark">
<a class="navbar-brand" href="#">Welcome</a>
</nav>
</header>
<div class="container-fluid">
<div class="row" id="mainrow">
<nav class="col-sm-3 col-md-2 d-none d-sm-block bg-light sidebar">
<ul class="nav nav-pills flex-column" id="rooms">
</ul>
</nav>
<main role="main" class="col-sm-9 ml-sm-auto col-md-10 pt-3" id="registerScreen">
<h3 style="text-align: center">Type in your details to chat</h3>
<hr/>
<div class="chat" style="margin-bottom:150px">
<p> </p>
<form id="loginScreenForm">
<div class="form-group">
<input type="text" class="form-control" id="fullname" placeholder="Name" required>
</div>
<div class="form-group">
<input type="email" class="form-control" id="email" placeholder="Email Address" required>
</div>
<button type="submit" class="btn btn-block btn-primary">Submit</button>
</form>
</div>
</main>
<main role="main" class="col-sm-9 ml-sm-auto col-md-10 pt-3" style="display: none" id="main">
<h1>Chats</h1>
<p>👈 Select a chat to load the messages</p>
<p> </p>
<div class="chat" style="margin-bottom:150px">
<h5 id="room-title"></h5>
<p> </p>
<div class="response">
<form id="replyMessage">
<div class="form-group">
<input type="text" placeholder="Enter Message" class="form-control" name="message" />
</div>
</form>
</div>
<div class="table-responsive">
<table class="table table-striped">
<tbody id="chat-msgs">
</tbody>
</table>
</div>
</main>
</div>
</div>
<script src="https://js.pusher.com/4.0/pusher.min.js"></script>
<script src="https://code.jquery.com/jquery-3.2.1.slim.min.js"></script>
<script src="https://cdnjs.cloudflare.com/ajax/libs/popper.js/1.12.3/umd/popper.min.js"></script>
<script src="https://maxcdn.bootstrapcdn.com/bootstrap/4.0.0-beta.2/js/bootstrap.min.js"></script>
<script src="https://cdnjs.cloudflare.com/ajax/libs/axios/0.18.0/axios.min.js"></script>
<script type="text/javascript" src="./js/app.js"></script>
</body>
</html>
Above we have the HTML for the home page. Let’s add some styling. Create a new file app.css in the public/css directory and add the following code:
    /* File: ./public/css.app.css */
    body {
        padding-top: 3.5rem;
    }
    h1 {
        padding-bottom: 9px;
        margin-bottom: 20px;
        border-bottom: 1px solid #eee;
    }
    .chat {
        max-width: 80%;
        margin: 0 auto;
    }
    .sidebar {
        position: fixed;
        top: 51px;
        bottom: 0;
        left: 0;
        z-index: 1000;
        padding: 20px 0;
        overflow-x: hidden;
        overflow-y: auto;
        border-right: 1px solid #eee;
    }
    .sidebar .nav {
        margin-bottom: 20px;
    }
    .sidebar .nav-item {
        width: 100%;
    }
    .sidebar .nav-item + .nav-item {
        margin-left: 0;
    }
    .sidebar .nav-link {
        border-radius: 0;
    }
    .placeholders {
        padding-bottom: 3rem;
    }
    .placeholder img {
        padding-top: 1.5rem;
        padding-bottom: 1.5rem;
    }
    tr .sender {
        font-size: 12px;
        font-weight: 600;
    }
    tr .sender span {
        color: #676767;
    }
    .response {
        display: none;
    }
Next, let’s write the JavaScript for the application. Create a new app.js file in the public/js directory and add the following code:
    // File: ./public/js/app.js
    (function () {
        var pusher = new Pusher('PUSHER_APP_KEY', {
            authEndpoint: '/pusher/auth',
            cluster: 'PUSHER_APP_CLUSTER',
            encrypted: true
        });

        let chat = {
            name: undefined,
            email: undefined,
            endUserName: undefined,
            currentRoom: undefined,
            currentChannel: undefined,
            subscribedChannels: [],
            subscribedUsers: []
        }

        var publicChannel = pusher.subscribe('update');

        const chatBody = $(document)
        const chatRoomsList = $('#rooms')
        const chatReplyMessage = $('#replyMessage')

        const helpers = {
            clearChatMessages: () => {
                $('#chat-msgs').html('')
            },

            displayChatMessage: (message) => {
                if (message.email === chat.email) {
                    $('#chat-msgs').prepend(
                        `<tr>
                            <td>
                                <div class="sender">${message.sender} @ <span class="date">${message.createdAt}</span></div>
                                <div class="message">${message.text}</div>
                            </td>
                        </tr>`
                    )
                }
            },

            loadChatRoom: evt => {
                chat.currentRoom = evt.target.dataset.roomId
                chat.currentChannel = evt.target.dataset.channelId
                chat.endUserName =  evt.target.dataset.userName
                if (chat.currentRoom !== undefined) {
                    $('.response').show()
                    $('#room-title').text('Write a message to ' + evt.target.dataset.userName+ '.')
                }

                evt.preventDefault()
                helpers.clearChatMessages()
            },

            replyMessage: evt => {
                evt.preventDefault()

                let createdAt = new Date().toLocaleString()
                let message = $('#replyMessage input').val().trim()
                let event = 'client-' + chat.currentRoom

                chat.subscribedChannels[chat.currentChannel].trigger(event, {
                    'sender': chat.name,
                    'email': chat.currentRoom,
                    'text': message,
                    'createdAt': createdAt
                });

                $('#chat-msgs').prepend(
                    `<tr>
                        <td>
                            <div class="sender">
                                ${chat.name} @ <span class="date">${createdAt}</span>
                            </div>
                            <div class="message">${message}</div>
                        </td>
                    </tr>`
                )

                $('#replyMessage input').val('')
            },

            LogIntoChatSession: function (evt) {
                const name  = $('#fullname').val().trim()
                const email = $('#email').val().trim().toLowerCase()

                chat.name = name;
                chat.email = email;

                chatBody.find('#loginScreenForm input, #loginScreenForm button').attr('disabled', true)

                let validName = (name !== '' && name.length >= 3)
                let validEmail = (email !== '' && email.length >= 5)

                if (validName && validEmail) {
                    axios.post('/new/user', {name, email}).then(res => {
                        chatBody.find('#registerScreen').css("display", "none");
                        chatBody.find('#main').css("display", "block");

                        chat.myChannel = pusher.subscribe('private-' + res.data.email)
                        chat.myChannel.bind('client-' + chat.email, data => {
                            helpers.displayChatMessage(data)
                        })
                    })
                } else {
                    alert('Enter a valid name and email.')
                }

                evt.preventDefault()
            }
        }

        publicChannel.bind('new-user', function(data) {
            if (data.email != chat.email){
                chat.subscribedChannels.push(pusher.subscribe('private-' + data.email));
                chat.subscribedUsers.push(data);

                $('#rooms').html("");

                chat.subscribedUsers.forEach((user, index) => {
                    $('#rooms').append(
                        `<li class="nav-item"><a data-room-id="${user.email}" data-user-name="${user.name}" data-channel-id="${index}" class="nav-link" href="#">${user.name}</a></li>`
                    )
                })
            }
        })

        chatReplyMessage.on('submit', helpers.replyMessage)
        chatRoomsList.on('click', 'li', helpers.loadChatRoom)
        chatBody.find('#loginScreenForm').on('submit', helpers.LogIntoChatSession)
    }());
In the script above, we instantiated the Pusher object (replace the PUSHER_APP_* keys with the credentials on your Pusher dashboard).
Next, we define some helper methods that will help us interact with the chat window and with the backend API. Some of the methods defined in the helpers object are:
- An IDE of your choice like Visual Studio Code.
- Go (version >= 0.10.x) installed on your computer. Here’s how you can install Go.
- Basic knowledge of the Go programming language.
- Basic knowledge of JavaScript.
After defining the helpers object, we bind to the new-user event on the publicChannel. In the callback, we subscribe to private channels so the communication is secure.
At the bottom of the script, we register all the event listeners and start the chat session.
Running the application
To test the chat app, we can start the Go backend server with this command:
$ go run chat.go
To see the app in action, we will visit this address, http://127.0.0.1:8090, on a web browser in multiple windows and test the instant messaging features.
Here’s a demo of the chat app:
Conclusion
In this tutorial, we have learned how to leverage the Pusher SDK in creating a chat application powered by a Go backend server.
The source code for this tutorial is available on GitHub.
Learn More
☞ Fullstack Vue App with Node, Express and MongoDB
☞ Build a Basic CRUD App with Laravel and Angular
☞ Golang Tutorial: Learn Golang by Examples
☞ Build a Video Chat App with ASP.NET Core, Angular
☞ A guide to Golang e-commerce
☞ Create and use private rooms in an Angular 7 chat app with Chatkit
☞ Getting started with Flutter
☞ Android Studio for beginners
☞ Building a mobile chat app with Nest.js and Ionic 4
☞ Creating an iOS app with user presence using Node.js and Swift
☞ Flutter Tutorial - Flight List UI Example In Flutter
☞ Go: The Complete Developer’s Guide (Golang)
☞ Learn How To Code: Google’s Go (golang) Programming Language
#go