An Ecommerce Web Application Built with Next.js, MERN Stack, and Stripe Payment System
MY NOTES WHEN BUILDING THIS WEB APP
PROJECT SETUP
- Download the starter project directory from https://github.com/reedbarger/react-reserve
- Install and update the project dependencies by running:
npm install- then
npm update
- To start up Next.js server and the project, run:
npm run dev
WORKING WITH REACT + NEXT.JS
1. Create App Layout Component, Build Header Component
- The Layout component is wrapped around the
<Component />in _app.js file. This will override the default App.js and the layout defined in the Layout component will persist on every page - Include the Semantic-UI-React stylesheet in Layout.js file
- The Layout component renders the HeadContent, Header Components, and children components
- All the contents inside the Layout component will be rendered on every page. For example, the Header component which contains the navbar will be rendered on every page
- The Header component contains the navbar menu with links that takes user to that particular page
- Use Link component provided by Next.js to create the links
import Link from 'next/link';
- Write a condition that check whether the user is currently logged in or not
- If user not logged in, show the Login and Signup links and hide the Create link
- If user is logged in, show the Account link and Logout button
- Use Semantic UI to style the Header component
- Use Link component provided by Next.js to create the links
2. Get Route Data From useRouter Hook, Create Active Links
-
Since we’re using a function component, Next provides a React useRouter() hook that gives us information from our router
-
import { useRouter } from 'next/router' -
When execute, it will return a router object:
const router = useRouter() -
We can get information about what path we’re on from the router object by using the property
router.pathname -
We can use this information to set the navbar menu item to be active when a user is on that particular route
-
In Header.js file:
- Write an isActive function that checks whether the given route matches with
router.pathname. Return true or false - If it is matched, apply the
activeproperty to that navbar menu item
import { useRouter } from 'next/router'; function Header() { // When execute, userRouter hook returns a router object const router = useRouter(); const user = false; // Check if the given route matches with router.pathname // router.pathname gives information about the route the user is on function isActive(route) { // return true or false return route === router.pathname; } // Apply active style to menu item if the function returns true <Menu.Item header active={isActive('/')}> } - Write an isActive function that checks whether the given route matches with
3. Visualize Route Changes with Progress Bar
-
It’s always good to display to the users visually what’s taking place within the application
-
We’re going to display a progress bar when loading a new page or when fetching data
-
Install nprogress package:
npm i nprogress -
Next.js provides us with a
Routerobject fromnext/router. In this object, we have access to when the route changes. We can write a function that starts the progress bar when the route changes, end the progress bar when route change is complete or encounter error -
In Header.js file:
- Import the Router object from
next/router - Import nProgress
- Outside and above the Header component:
- write a function that starts the progress bar when route change starts
- Write a function that ends the progress bar when route change ends
- write a function that ends the progress bar when an error occurs during route change
import Router, { useRouter } from 'next/router'; import nProgress from 'nprogress'; Router.onRouteChangeStart = () => nProgress.start(); Router.onRouteChangeComplete = () => nProgress.done(); Router.onRouteChangeError = () => nProgress.done(); - Import the Router object from
-
Style the progress bar in static/nprogress.css file and include the stylesheet in Layout.js file
CREATING API WITH NODE + NEXT SERVER
1. Node + Next Server with API Routes
-
In our home page in pages/index.js file, when the page loads (when the Home component mounts), we want to fetch the products with API and display them on the page
-
Whenever our application is interacting with the outside world, such as fetching data from the database, we can use React’s useEffect() hook. Inside this hook, we can call a function that makes an API request
-
We will use axios, a tool to help make API requests
-
APIs, in the purest sense, are routes. And routes are simple functions. So in order to create routes, we create basic functions
-
In Next.js v.9 and newer, Next introduces API Routes. Any file (regular JS file) that is inside the
pagesdirectory Next.js will create a route for it. So we can create an api folder inside thepagesdirectory that contains the route-name JS files and Next.js will automatically create the api routes for those files -
For example, if we want to make a get request to ‘/api/products’ endpoint, we can just create a products.js file inside the pages/api folder. Then in this products.js file, we can write a function that sends a response with the data back to the client
-
Another thing to note is that the port that the API request runs on is the same port that the client makes the request. By running on the same port, we can avoid CORS (cross-origin resource sharing) errors
-
In pages/index.js file:
- It’s important that functions and components created inside pages directory is export default
import { Fragment, useEffect } from 'react'; import axios from 'axios'; function Home() { // useEffect hook accepts 2 arguments // 1st arg is the effect function // Run code inside this function to interact w / outside world // 2nd arg is dependencies array useEffect(() => { getProducts(); }, []); // axios.get() method returns a promise // so make the getProduct function an async function // the response we get back is in response.data object async function getProducts() { const url = 'http://localhost:3000/api/products'; const res = await axios.get(url); const { data } = res; } return <Fragment>home</Fragment>; } export default Home; -
In pages/api/products.js file:
- It’s important that functions and components created inside pages directory is export default
- On every request made, we have access to the request(req) and response(res) objects
import products from '../../static/products.json';

export default (req, res) => {
  res.status(200).json(products);
};
2. Fetching Data on the Server with getInitialProps
-
With client-side rendering, we would have to wait for the component to mount before we can fetch data. With Next.js, we can fetch data before the component mounts
-
We do this using Next’s
getInitialPropsfunction- This is an async function
- This function fetches data on a server
- Returns with the response data as an object
- We can pass this object as props to our component
- Also note that this object props will be merged with existing props
-
Now, in order to pass the response data object coming from an API request as props to a component, we need to setup the
<Component />in our custom _app.js file to receive pageProps, data object made available as props prior to the component mounts -
In pages/_app.js file:
import App from 'next/app'; import Layout from '../components/_App/Layout'; class MyApp extends App { static async getInitialProps({ Component, ctx }) { let pageProps = {}; // first check to see if there exists an initial props of a given component // if there is, execute the function that accepts context object as an argument // this is an async operation // assign the result to pageProps object if (Component.getInitialProps) { pageProps = await Component.getInitialProps(ctx); } return { pageProps }; } // destructure pageProps objects that's returned from getInitialProps funct // the <Component /> is the component of each page // each page component now has access to the pageProps object render() { const { Component, pageProps } = this.props; return ( <Layout> <Component {...pageProps} /> </Layout> ); } } export default MyApp; -
In pages/index.js file:
import React, { Fragment, useEffect } from 'react'; import axios from 'axios'; function Home({ products }) { console.log(products); return <Fragment>home</Fragment>; } // Fetch data and return response data as props object // This props object can be passed to a component prior to the component mounts // It's an async function // NOTE: getServerSideProps does the same thing as getInitialProps function export async function getServerSideProps() { // fetch data on server const url = 'http://localhost:3000/api/products'; const response = await axios.get(url); // return response data as an object // note: this object will be merged with existing props return { props: { products: response.data } }; }; export default Home; -
The getInitialProps method:
- Docs: https://nextjs.org/docs/api-reference/data-fetching/getInitialProps
getInitialPropsenables server-side rendering in a page and allows you to do initial data population, it means sending the page with the data already populated from the server. This is especially useful for SEO- NOTE:
getInitialPropsis deprecated. If using Next.js 9.3 or newer, it’s recommended to usegetStaticPropsorgetServerSidePropsinstead ofgetInitialProps - These new data fetching methods allow you to have a granular choice between static generation and server-side rendering
- Static generation vs. server-side rendering: https://nextjs.org/docs/basic-features/pages
-
Two forms of pre-rendering for Next.js:
- Static Generation (Recommended): The HTML is generated at build time and will be reused on each request. To make a page use Static Generation, either export the page component, or export
getStaticProps(andgetStaticPathsif necessary). It’s great for pages that can be pre-rendered ahead of a user’s request. You can also use it with Client-side Rendering to bring in additional data - Server-side Rendering: The HTML is generated on each request. To make a page use Server-side Rendering, export
getServerSideProps. Because Server-side Rendering results in slower performance than Static Generation, use this only if absolutely necessary
- Static Generation (Recommended): The HTML is generated at build time and will be reused on each request. To make a page use Static Generation, either export the page component, or export
USING MONGODB WITH ATLAS
1. Configure Mongo Atlas, Connect to Database
-
MongoDB Atlas: https://www.mongodb.com/cloud
-
Mongo Atlas is a cloud database service that can host our MongoDB database on a remote server
-
Once signed in to MongoDB Cloud, create a new project and choose the free tier. Name it FurnitureBoutique
-
Then create a new cluster and give the cluster a name: FurnitureBoutique
-
Connecting the database to our application:
- First, we want to whitelist our connection IP address
- From the project cluster dashboard, click on the Connect button
- We want to allow our IP address be accessed anywhere. This will prevent potential errors in the future when we deploy our app in production. Problems like database denying access to our application due to the IP address we’re trying to connect from
- To do so, click on the Network Access on the left menu under Security. Then click the Allow Access From Anywhere button
- Second, create a root database user
- Create a user name and password
- Third step is choose a connection method
- Select the Connect your application option
- Then what we want is the srv string. Copy the path to the clipboard
- We just need to replace the username and password that we created for the root user earlier
- First, we want to whitelist our connection IP address
-
Connect to database:
-
In next.config.js file:
- All of our environment variables are stored in this file
MONGO_SRV: "<insert mongodb-srv path here>"- Replace the password and dbname
- Must restart the server
-
In utils/connectDb.js file:
- In order to connect to the database we’re going to use Mongoose package
- We use Mongoose quite a lot when working with database
- Install Mongoose:
npm i mongoose - Write a connectDB function that connects our application to the database
import mongoose from 'mongoose'; const connection = {}; // Connect to database async function connectDB() { // If there is already a connection to db, just return // No need to make a new connection if (connection.isConnected) { // Use existing database connection console.log('Using existing connection'); return; } // Use new database connection when connecting for 1st time // 1st arg is the mongo-srv path that mongo generated for our db cluster // The 2nd arg is options object. Theses are deprecation warnings // mongoose.connect() returns a promise // What we get back from this is a reference to our database const db = await mongoose.connect(process.env.MONGO_SRV, { useCreateIndex: true, useFindAndModify: false, useNewUrlParser: true, useUnifiedTopology: true }); console.log('DB Connected'); connection.isConnected = db.connections[0].readyState; } export default connectDB; -
Call the connectDB function in routes:
-
Finally, import and execute the connectDB function in the request routes files which are in the pages/api folder
-
Must restart the server
-
For example, import and execute the function in pages/api/products.js file
- Execute the connectDB function at the very top and outside of the request route function
import connectDB from '../../utils/connectDb';

// Execute the connectDB function to connect to MongoDB
connectDB();
-
-
If we’re successfully connected to MongoDB, we should be able to see “DB Connected” logged in the console
-
Lastly, add the next.config.js file to the .gitignore file
2. Create Products Collection, Model Product Data
-
Create products collection MongoDB by importing our static products data:
- On MongoBD project dashboard page, click on the Command Line Tools menu item at the top
- In the Data Import and Export Tools section, copy the script for ‘mongoimport’
- In the terminal at the root of the project, paste in the script and specify the collection information
- In our example, we want to import our static products json data into MongoDB Atlas
- We’ll call our collection products, type is json, provide the path to the data file, and add the --jsonArray flag
- Use npx before the script
npx mongoimport --uri mongodb+srv://<USERNAME>:<PASSWORD>@furnitureboutique.pikdk.mongodb.net/<DATABASE> --collection products --type json --file ./static/products.json --jsonArray- If successful, we’ll be able to see our products collection in MongoDB
-
Model Product data:
-
We use Mongoose package to connect our application to the database. Now we will use Mongoose as ORM (Object Relational Mapper). It’s a tool that’s going to specify what each document must have for it to be added to a collection. What it must have in terms of properties and the corresponding data types and other conditions
-
An alternative word for a model is a schema
-
To create a Product model, we first need to define the product schema which contains the required fields and then call
mongoose.model()to create a new model based on the schema we define -
In models/Product.js file:
- Use mongoose to create a new schema by using
new mongoose.Schema() - This method takes an object as an argument and on this object we can specify all of the fields that a given document must have
- The return result from this method we’ll save to a variable ProductSchema
- We’ll use the npm package shortid to generate unique ids
- Install shortid:
npm i shortid - Generate a unique id by calling
shortid.generate() - Call mongoose.model() method to create a new model
- 1st arg is the name of the model
- 2nd arg is the schema
- We also want to check if the Product model already exists in our connected database. If it does, use the existing model. If it doesn’t, then create the Product model
import mongoose from 'mongoose'; import shortid from 'shortid'; const { String, Number } = mongoose.Schema.Types; const ProductSchema = new mongoose.Schema({ name: { type: String, required: true }, price: { type: Number, required: true }, sku: { type: String, unique: true, default: shortid.generate() }, description: { type: String, required: true }, mediaUrl: { type: String, required: true } }); export default mongoose.models.Product || mongoose.model('Product', ProductSchema); - Use mongoose to create a new schema by using
-
-
Fetch Products From Mongo Database:
-
In pages/api/products.js file:
- Import the Product model and call the find() method on Product to retrieve the products from db
- This is an async operation, so make the route function an async function
import Product from '../../models/Product';
import connectDB from '../../utils/connectDb';

// Execute the connectDB function to connect to MongoDB
connectDB();

export default async (req, res) => {
  const products = await Product.find();
  res.status(200).json(products);
};
-
-
Now when we make a request to
/api/productsendpoint, we should get back the products array coming from the MongoDB database
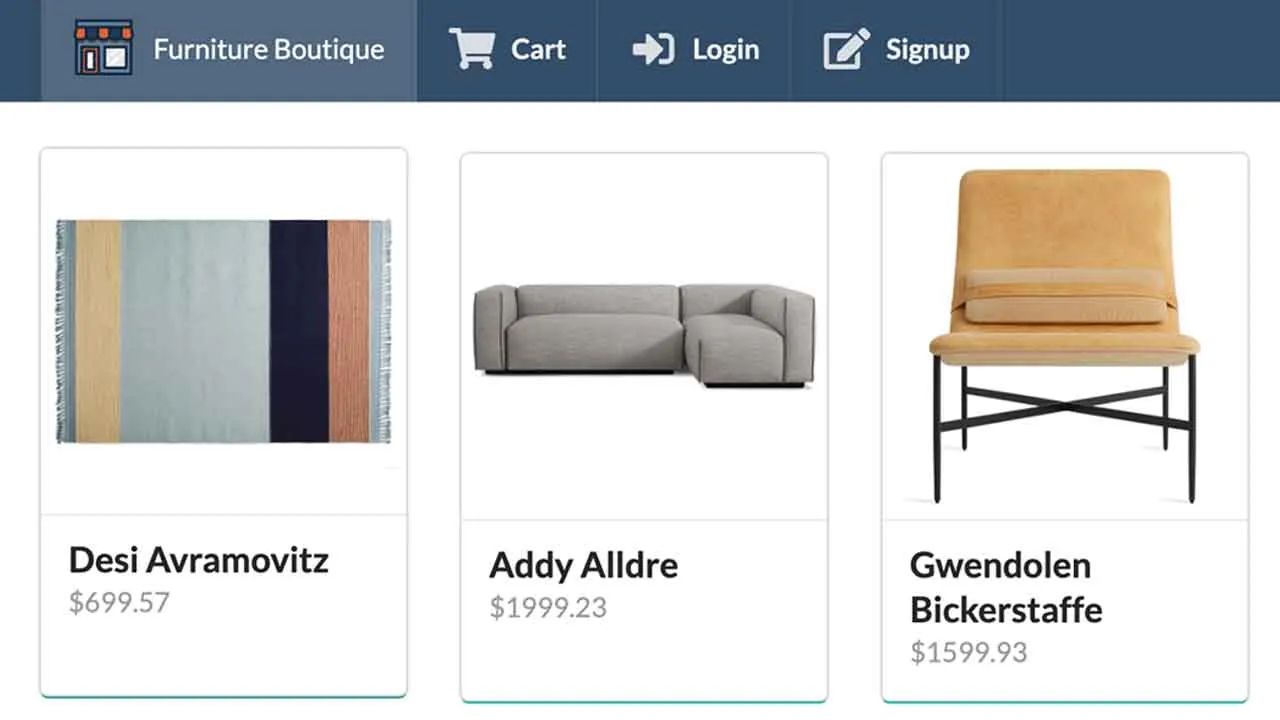
3. Build Product Cards, Make Components Responsive
-
Semantic UI Card: https://react.semantic-ui.com/views/card/
-
We’ll use Semantic UI Card component to style the products on our home page
-
The pages/index.js file renders the ProductList.js component
- Pass the products array as props to ProductList component
import ProductList from '../components/Index/ProductList'; function Home({ products }) { // console.log(products); return <ProductList products={products} />; } -
In components/Index/ProductList.js file
- Destructure the products props
- Write a mapProductsToItems function that maps over the products array and returns a new array of product objects
- This product object defines keys and values that we can use to render the product in the Semantic UI Card component
- In the Card component, specify the number of items per row
- Add the stackable attribute to the
<Card.Group />component so the items will stack on top of each other on smaller size screens - Do the same thing for the navbar menu items in Header.js component:
<Menu fluid inverted id='menu' stackable>
import { Card } from 'semantic-ui-react';

function ProductList({ products }) {
  function mapProductsToItems(products) {
    return products.map((product) => ({
      header: product.name,
      image: product.mediaUrl,
      meta: `$${product.price}`,
      color: 'teal',
      fluid: true,
      childKey: product._id,
      href: `/product?_id=${product._id}`
    }));
  }

  return (
    <Card.Group
      stackable
      itemsPerRow='3'
      centered
      items={mapProductsToItems(products)}
    />
  );
}

export default ProductList;
FETCHING APP DATA FROM API
1. Get Product By Id
-
When we click on a product, we want to direct user to the product detail page. We make an API request to get the product by its id
-
In Next.js, we’re able to fetch data before the component mounts. So we can make use of Next’s getInitialProps function to fetch the data
-
In pages/product.js file:
- getInitialProps function automatically receives the context object as an argument
- One of the properties in context object is query. We can use query string to get the product id to make the request
- This function returns the response data object which we can pass to our Product component as props
import axios from 'axios'; function Product({ product }) { console.log(product); return <p>product</p>; } Product.getInitialProps = async ({ query: { _id } }) => { const url = 'http://localhost:3000/api/product'; const payload = { params: { _id } }; const response = await axios.get(url, payload); return { product: response.data }; }; export default Product; -
Now let’s create the API endpoint/route for the endpoint we defined in pages/product.js page
-
In pages/api/product.js file:
- Import the Product model and call the findOne() method on Product
- The findOne() method is like a filter method. We want to filter by the _id property
import Product from '../../models/Product';

export default async (req, res) => {
  // req.query is an object
  const { _id } = req.query;
  const product = await Product.findOne({ _id });
  res.status(200).json(product);
};
2. Style Product Detail Page
-
We will use three components to create and style the product detail page
-
In components/Product folder:
- ProductSummary.js - renders the AddProductToCart.js component
- ProductAttributes.js
- AddProductToCart.js
-
In pages/product.js file:
- The product route page renders the ProductSummary.js and ProductAttributes components
- Each component receives the product object as props
// Spreading the product object as props using the object spread operator <Fragment> <ProductSummary {...product} /> <ProductAttributes {...product} /> </Fragment> -
In components/Product/ProductSummary.js file:
- Destructure only the keys needed from the product object props
import { Item, Label } from 'semantic-ui-react'; import AddProductToCart from './AddProductToCart'; function ProductSummary({ _id, name, mediaUrl, sku, price }) { return ( <Item.Group> <Item> <Item.Image size='medium' src={mediaUrl} /> <Item.Content> <Item.Header>{name}</Item.Header> <Item.Description> <p>${price}</p> <Label>SKU: {sku}</Label> </Item.Description> <Item.Extra> <AddProductToCart productId={_id} /> </Item.Extra> </Item.Content> </Item> </Item.Group> ); } export default ProductSummary; -
In components/Product/ProductAttributes.js file:
- Destructure only the keys needed from the product object props
import { Button, Header } from 'semantic-ui-react'; function ProductAttributes({ description }) { return ( <> <Header as='h3'>About this product</Header> <p>{description}</p> <Button icon='trash alternate outline' color='red' content='Delete Product' /> </> ); } export default ProductAttributes; -
In components/Product/AddProductToCart.js file:
import { Input } from 'semantic-ui-react';

function AddProductToCart(productId) {
  return (
    <Input
      type='number'
      min='1'
      placeholder='Quantity'
      value={1}
      action={{
        color: 'orange',
        content: 'Add to Cart',
        icon: 'plus cart'
      }}
    />
  );
}

export default AddProductToCart;
3. Base URL Helper
-
When we fetch data in a development environment, we make request to
http:localhost:3000on local server. And when we’re in production, we’re going to use the deployment URL -
Let’s write a base URL helper function that detects whether we’re in a production or development environment. We can dynamically determine this whether that’s the case or not with the help of a environment variable
-
In utils/baseUrl.js file:
const baseUrl = process.env.NODE_ENV === 'production' ? 'https://deployment-url.now.sh' : 'http://localhost:3000'; export default baseUrl; -
Then wherever we use a URL to fetch data, we can replace the base URL with our baseUrl helper to generate the base URL dynamically
-
In pages/index.js and pages/product.js files:
- Import the baseUrl helper function
- For the url variable, use template literal and interpolate the baseUrl variable
import baseUrl from '../utils/baseUrl';

const url = `${baseUrl}/api/products`;
ADDING CRUD FUNCTIONALITY, UPLOADING IMAGE FILES
1. Delete A Product Functionality
-
When a user clicks on the Delete Product button, we want to display a modal asking the user to confirm the product deletion
-
The modal contains the cancel button and Delete button
-
To implement the modal functionality, we want to create a state for the modal to keep track of modal state in our application. We can use React useState() hook
-
When the Cancel button is clicked, we just want to close the modal, setting the modal state to false
-
When the Delete button is clicked, we want to make a delete API request to backend and delete the product based on id. Then redirect user to products index page
-
Client-side: make a delete product request to /product endpoint:
-
In components/Product/ProductAttributes.js file:
- Use Semantic UI Modal component to make the modal
- Use React useState() to create the modal state. Default value is set to false
- When the Delete Product button is clicked, set modal state to true
- When Cancel button is clicked, set modal state to false. This will close the modal
- Use useRouter hook from Next to redirect
- Write a handleDelete function that makes a delete API request using axios to delete the product based on id
import React, { Fragment, useState } from 'react'; import { useRouter } from 'next/router'; import { Button, Header, Modal } from 'semantic-ui-react'; import axios from 'axios'; import baseUrl from '../../utils/baseUrl'; function ProductAttributes({ description, _id }) { const [modal, setModal] = useState(false); const router = useRouter(); async function handleDelete() { const url = `${baseUrl}/api/product`; const payload = { params: { _id } }; await axios.delete(url, payload); // redirect to home page after delete product router.push('/'); } return ( <Fragment> <Header as='h3'>About this product</Header> <p>{description}</p> <Button icon='trash alternate outline' color='red' content='Delete Product' onClick={() => setModal(true)} /> <Modal open={modal} dimmer='blurring'> <Modal.Header>Confirm Delete</Modal.Header> <Modal.Content> <p>Are you sure you want to delete this product?</p> </Modal.Content> <Modal.Actions> <Button content='Cancel' onClick={() => setModal(false)} /> <Button negative icon='trash' labelPosition='right' content='Delete' onClick={handleDelete} /> </Modal.Actions> </Modal> </Fragment> ); } export default ProductAttributes; -
Server-side: create route handler to delete product request
-
In pages/api/product.js file:
- In the api routes for product, we want to be able to handle different types of requests such as create, read, update, and delete
- For each request, we have access to the request and response objects. Using
req.method, we can figure out what type of request it is - And based on the type of request, we can write the appropriate type of route handler to handle the request
- We can use the switch statement to handle different types of requests
- For now, we have a get and delete requests of a product
import Product from '../../models/Product';

export default async (req, res) => {
  switch (req.method) {
    case 'GET':
      await handleGetRequest(req, res);
      break;
    case 'DELETE':
      await handleDeleteRequest(req, res);
      break;
    default:
      res.status(405).send(`Method ${req.method} not allowed`); //405 means error with request
      break;
  }
};

async function handleGetRequest(req, res) {
  const { _id } = req.query;
  const product = await Product.findOne({ _id });
  res.status(200).json(product);
}

async function handleDeleteRequest(req, res) {
  const { _id } = req.query;
  await Product.findOneAndDelete({ _id });
  // status code 204 means success and no content is sent back
  res.status(204).json({});
}
2. Building the Create Product Form
-
Let’s build out the Create New Product form on the /create route (pages/create.js file) that enables user to create a product. They can provide product name, price, description, a product image, and upload a product image
-
When the user uploads a file image, we want to display a preview of the image they just uploaded
-
Once the user submitted the form, we can display a success message and clear the form input fields
-
In pages/create.js file:
import { Fragment, useState } from 'react';
import {
  Form, Input, TextArea, Button, Image, Header, Message, Icon } from 'semantic-ui-react';

const INITIAL_PRODUCT = {
  name: '',
  price: '',
  media: '',
  description: ''
};

function CreateProduct() {
  const [product, setProduct] = useState(INITIAL_PRODUCT);
  const [mediaPreview, setMediaPreview] = useState('');
  const [success, setSuccess] = useState(false);

  function handleChange(event) {
    const { name, value, files } = event.target;
    if (name === 'media') {
      setProduct((prevState) => ({ ...prevState, media: files[0] }));
      // Display preview of uploaded image
      setMediaPreview(window.URL.createObjectURL(files[0]));
    } else {
      // Pass in the updater function to setProduct function
      // Spread in the previous state object into the new state object
      setProduct((prevState) => ({ ...prevState, [name]: value }));
    }
  }

  function handleSubmit(event) {
    event.preventDefault();
    console.log(product);
    // Empty the input fields after form submit
    setProduct(INITIAL_PRODUCT);
    // Display the success message to the user
    setSuccess(true);
  }

  return (
    <Fragment>
      <Header as='h2' block>
        <Icon name='add' color='orange' />
        Create New Product
      </Header>
      <Form success={success} onSubmit={handleSubmit}>
        <Message
          success
          icon='check'
          header='Success!'
          content='Your product has been posted'
        />
        <Form.Group widths='equal'>
          <Form.Field
            control={Input}
            name='name'
            label='Name'
            placeholder='Name'
            value={product.name}
            onChange={handleChange}
          />
          <Form.Field
            control={Input}
            name='price'
            label='Price'
            placeholder='Price'
            min='0.00'
            step='0.01'
            type='number'
            value={product.price}
            onChange={handleChange}
          />
          <Form.Field
            control={Input}
            name='media'
            type='file'
            label='Media'
            accept='image/*'
            content='Select Image'
            onChange={handleChange}
          />
        </Form.Group>
        <Image src={mediaPreview} rounded centered size='small' />
        <Form.Field
          control={TextArea}
          name='description'
          label='Description'
          placeholder='Description'
          value={product.description}
          onChange={handleChange}
        />
        <Form.Field
          control={Button}
          color='blue'
          icon='pencil alternate'
          content='Submit'
          type='submit'
        />
      </Form>
    </Fragment>
  );
}

export default CreateProduct;
3. Upload Product Image, Post Product
-
Create Cloudinary account, create upload preset:
- Cloudinary website: https://cloudinary.com/
- Signup for a Cloudinary account
- On the Dashboard page, make note of the Cloud name and the API Base URL. We will need them
- We can specify image upload preset by going to Settings -> Upload tab
- Scroll down to the Upload presets section:
- Click the Add upload preset link
- Give the upload preset a name. We will use this name in our code
- Set the Signing Mode to Unsigned
- Specify the folder name. The images will be uploaded to this folder
- Select Upload Manipulations on the left menu:
- In Incoming Transformation section, click on Edit
- Here, we can change the size and quality of the image
- Don’t forget to hit the Save button to save the preset
-
Creating a new product consists of two steps:
- First, take the image file and upload it to Cloudinary media storage service. What we get back is the image URL that we can store in our database
- Second, take the image URL and the rest of product data stored in the state, make a request to an API endpoint to store the product in the database
- Then display the new product within our app
-
In pages/create.js file:
- When the form is submitting, we want to let the user know that their request is processing by showing a loading icon and disable the submit button
import axios from 'axios'; import baseUrl from '../utils/baseUrl'; const [loading, setLoading] = useState(false); async function handleImageUpload() { // Using form data constructor to get data from the form const data = new FormData(); data.append('file', product.media); data.append('upload_preset', 'furnitureboutique'); data.append('cloud_name', 'sungnga'); const response = await axios.post(process.env.CLOUDINARY_URL, data); const mediaUrl = response.data.url; return mediaUrl; } async function handleSubmit(event) { event.preventDefault(); setLoading(true); const mediaUrl = await handleImageUpload(); // console.log(mediaUrl) const url = `${baseUrl}/api/product`; const { name, price, description } = product; const payload = { name, description, price, mediaUrl }; const response = await axios.post(url, payload); console.log(response); setLoading(false); // Clear the form input fields after submit setProduct(INITIAL_PRODUCT); // Show the success message setSuccess(true); } -
In pages/api/product.js file:
- Before adding a product to db, make sure we’re connected to the database
- Create a POST request route handler that adds a new product to the database
- Add a case for POST method and write a handlePostRequest method to handle the request
import connectDB from '../../utils/connectDb';

connectDB();

case 'POST':
  await handlePostRequest(req, res);
  break;

async function handlePostRequest(req, res) {
  // The payload info sent on request by the client is accessible in req.body object
  const { name, price, description, mediaUrl } = req.body;
  // Check to see if the value for all the input fields is provided
  if (!name || !price || !description || !mediaUrl) {
    // status code 422 means the user hasn't provided the necessary info
    return res.status(422).send('Product missing one or more fields');
  }
  // Create a product instance from the Product model
  const newProduct = await new Product({ name, price, description, mediaUrl });
  // Save the product to db
  newProduct.save();
  // status code 201 means a resource is created
  res.status(201).json(newProduct);
}
HANDLING ERRORS ON THE CLIENT AND SERVER
1. Prevent, Catch Errors on Client and Server Sides
-
A general guideline when taking care of problems within our app is we want to try to prevent errors on the client side before they can take place on the server side
-
Prevent users from submitting empty product input fields:
-
As the current state of our app it’s possible to submit a product form without all its fields filled out and this would naturally cause an error on the server
-
A solution is we can disable the Submit button if one of the fields is empty
-
In pages/create.js file:
- Create a disabled state using useState() hook and set the default value to true
- Pass the disabled state to the disabled property of the Submit button. This will disable the button by default
- Then use useEffect() hook to update the
disabledstate when there’s a change to theproductstate - We want to check whether the input field is empty or not. Only when the fields are not empty will we enable the Submit button
// Disable the Submit button. By default, it's disabled const [disabled, setDiasbled] = useState(true); // Whenever the product state changes, run the useEffect function useEffect(() => { // The Object.values() method returns an array of values of the object passed in // The every() method takes a callback and loops through the values array // For every element in every() method, call the Boolean method on it // The Boolean method will return true or false if the element is empty or not const isProduct = Object.values(product).every((el) => Boolean(el)); isProduct ? setDiasbled(false) : setDiasbled(true); }, [product]); <Form.Field control={Button} disabled={disabled || loading} color='blue' icon='pencil alternate' content='Submit' type='submit' /> - Create a disabled state using useState() hook and set the default value to true
-
-
Handle errors on client-side when making request to image upload and request to product endpoint:
-
A common pattern used to catch errors in asynchronous functions in executing promises is the try/catch block
- In the
tryblock is the code we try to run - In there’s an error, the
catchblock can catch the error. The catch block automatically receives the error and we can decide what to do with the error - In the
finallyblock is where we want run a piece of code no matter what the outcome is
- In the
-
There are different types of errors we might get back and instead of console logging the error, we can display an error message to the user
-
Let’s write a separate function that displays an error message based on the type of error returned from the promise
-
In utils/catchErrors.js file:
// 1st arg is the error received from the catch block that gets passed down to this function // 2nd arg is a callback function that receives the errorMsg as an argument function catchErrors(error, displayError) { let errorMsg; if (error.response) { // The request was made and the server response with a status code // that is not in the range of 2xx errorMsg = error.response.data; console.error('Error response', errorMsg); // For Cloudingary image uploads if (error.response.data.error) { errorMsg = error.response.data.error.message; } } else if (error.request) { // The request was made, but no response was received errorMsg = error.request; console.error('Error request', errorMsg); } else { // Something else happened in making the request that triggered an error errorMsg = error.message; console.error('Error message', errorMsg); } displayError(errorMsg); } export default catchErrors; -
Then use the catchErrors function in the catch block in the handleSubmit function and display the error message to the user. This is handling errors when user submits a product form to create a new product
-
In pages/create.js file:
- Create an error state and initialize its value to an empty string
- Use try/catch/finally block in the handleSubmit function
- Import and call the catchErrors function in the catch block
- Lastly, check error state to see if there’s an error
- If there is, use Semantic UI Message component to render the error message in the Form component
import catchErrors from '../utils/catchErrors'; const [error, setError] = useState(''); async function handleSubmit(event) { try { event.preventDefault(); setLoading(true); const mediaUrl = await handleImageUpload(); // console.log(mediaUrl) const url = `${baseUrl}/api/product`; const { name, price, description } = product; // Triggering an error for testing // const payload = { name: '', description, price, mediaUrl }; const payload = { name, description, price, mediaUrl }; const response = await axios.post(url, payload); console.log(response); // Clear the form input fields after submit setProduct(INITIAL_PRODUCT); // Show the success message setSuccess(true); } catch (error) { // 1st arg is the error received from the promise // 2nd arg is the function to update the error state catchErrors(error, setError); // console.error('ERROR!!', error) } finally { // At the end of handleSubmit, set loading state to false. Loading icon will go away setLoading(false); } } // Display the error message to the user // Boolean(error) returns true or false. Error is the error state <Form loading={loading} error={Boolean(error)} success={success} onSubmit={handleSubmit} > <Message error header='Oops!' content={error} /> </Form> -
Handling errors on server side:
-
On the server side, we want to try to figure out all the potential causes of errors and give the client as much information to resolve the error on their own
-
If there are some errors that we don’t know about, we want to back a status code and a message about the error as well
-
Use try/catch block in async functions to catch the error returned from the promise
-
In pages/api/product.js file:
async function handlePostRequest(req, res) {
  // The payload info sent on request by the client is accessible in req.body object
  const { name, price, description, mediaUrl } = req.body;
  try {
    // Check to see if the value for all the input fields is provided
    if (!name || !price || !description || !mediaUrl) {
      // status code 422 means the user hasn't provided the necessary info
      return res.status(422).send('Product missing one or more fields');
    }
    // Create a product instance from the Product model
    const newProduct = await new Product({
      name,
      price,
      description,
      mediaUrl
    });
    // Save the product to db
    newProduct.save();
    // status code 201 means a resource is created
    res.status(201).json(newProduct);
  } catch (error) {
    console.error(error);
    res.status(500).send('Server error in creating product');
  }
}
2. Structure Cart Page
-
The cart page route consists of a section that displays a list of products in their shopping cart and a section that displays the subtotal and a checkout button
-
In pages/cart.js file:
- The cart route renders the CartItemList and CartSummary components
import { Segment } from 'semantic-ui-react'; import CartItemList from '../components/Cart/CartItemList'; import CartSummary from '../components/Cart/CartSummary'; function Cart() { return ( <Segment> <CartItemList /> <CartSummary /> </Segment> ); } export default Cart; -
In components/Cart/CartItemList.js file:
- Use Semantic UI to style this component
- If the shopping cart is empty and the user has signed in, show the View Product button
- If shopping cart is empty and user is not logged in, show the Login button
import { Header, Segment, Icon, Button } from 'semantic-ui-react'; function CartItemList() { const user = false; return ( <Segment secondary color='teal' inverted textAlign='center'> <Header icon> <Icon name='shopping basket' /> No products in your cart. Add some! </Header> <div> {user ? ( <Button color='orange'>View Products</Button> ) : ( <Button color='blue'>Login to Add Products</Button> )} </div> </Segment> ); } export default CartItemList; -
In components/Cart/CartSummary.js file:
- Use Semantic UI to style this component
import { Fragment } from 'react';
import { Segment, Button, Divider } from 'semantic-ui-react';

function CartSummary() {
  return (
    <Fragment>
      <Divider />
      <Segment clearing size='large'>
        <strong>Subtotal:</strong> $0.00
        <Button icon='cart' color='teal' floated='right' content='Checkout' />
      </Segment>
    </Fragment>
  );
}

export default CartSummary;
AUTHENTICATING USERS WITH JWT + COOKIES
1. Build Login and Signup Forms
-
Both the Login and Signup forms have very similar functionality as the Create New Product form
-
The Signup form has input fields of name, email, and password and a submit button
-
The Login form has input fields of name and password and a submit button
-
We use states using useEffect hooks to keep track of various aspects of the forms
- Create a user state to store the input values the user enters in the form
- Create a disabled state to disable the Submit button if the values for all fields are not provided
- Create a loading state to display a loading icon letting the user know that the form is processing
- Create an error state so that we can display an error message if something went wrong
-
In pages/signup.js file:
import { Fragment, useState, useEffect } from 'react';
import { Button, Form, Icon, Message, Segment } from 'semantic-ui-react';
import Link from 'next/link';
import catchErrors from '../utils/catchErrors';

const INITIAL_USER = {
  name: '',
  email: '',
  password: ''
};

function Signup() {
  const [user, setUser] = useState(INITIAL_USER);
  const [disabled, setDisabled] = useState(true);
  const [loading, setLoading] = useState(false);
  const [error, setError] = useState('');

  useEffect(() => {
    const isUser = Object.values(user).every((el) => Boolean(el));
    isUser ? setDisabled(false) : setDisabled(true);
  }, [user]);

  function handleChange(event) {
    const { name, value } = event.target;
    setUser((prevState) => ({ ...prevState, [name]: value }));
  }

  async function handleSubmit(event) {
    event.preventDefault();
    try {
      setLoading(true);
      setError('');
      console.log(user);
      // make request to signup user
    } catch (error) {
      catchErrors(error, setError);
    } finally {
      setLoading(false);
    }
  }

  return (
    //the rest of the code...
  )
2. Model User, Signup User with JWT and Cookies
-
When a user signs up by submitting the Signup form, we want to create a new user and store it in a users collection in the database. We want to create a User model that defines what a user document would look like
-
If a new user is successfully created, what’s returned to the client from the server is a jsonwebtoken. We then use this token to set a cookie in the browser so that we can identify this client as an authenticated user
-
Client-side: make a request to signup user endpoint:
-
In pages/signup.js file:
- Import axios and baseUrl helper
- Call axios.post() method to make the request to signup user
- 1st arg is the request endpoint
- 2nd arg is the payload which contains the user data
- This is an async operation
import axios from 'axios'; import baseUrl from '../utils/baseUrl'; // make request to signup user const url = `${baseUrl}/api/signup` // Spread in the user data coming from user state const payload = { ...user } // What's returned from the request is a token in response.data object const response = await axios.post(url, payload) -
Create User model:
-
In models/User.js file:
import mongoose from 'mongoose'; const { String } = mongoose.Schema.Types; const UserSchema = new mongoose.Schema( { name: { type: String, required: true }, email: { type: String, required: true, unique: true }, password: { type: String, required: true, select: false }, role: { type: String, required: true, default: 'user', enum: ['user', 'admin', 'root'] //the role field can only accept one of these three values } }, { timestamps: true } ); export default mongoose.models.User || mongoose.model('User', UserSchema); -
Server-side: create signup route handler to signup user with JWT:
-
In pages/api/signup.js file:
- Import bcrypt package to hash user’s password
- Import connectDB to connect to our database
- Import User model to create a user instance
- Import jwt jsonwebtoken to generate a token
import bcrypt from 'bcrypt'; import jwt from 'jsonwebtoken'; import connectDB from '../../utils/connectDb'; import User from '../../models/User'; connectDB(); export default async (req, res) => { const { name, email, password } = req.body; try { // 1) Check to see if the user already exists in the db const user = await User.findOne({ email }); if (use) { return res.status(422).send(`User already exist with email ${email}`); } // 2) --if not, hash their password const hash = await bcrypt.hash(password, 10); // 3) Create user const newUser = await new User({ name, email, password: hash }); newUser.save(); console.log(newUser); // 4) Create token for the new user // A token expires after a certain period of time const token = jwt.sign({ userId: newUser._id }, process.env.JWT_SECRET, { expiresIn: '7d' }); // 5) Send back token res.status(201).json(token); } catch (error) { console.error(error); res.status(500).send('Error signup user. Please try again later'); } }; -
Store the JWT token in the browser as a cookie:
-
Make a request to our signup endpoint -> get the token back on the client -> use a function to put the token in our browser as a cookie that can be accessed on the client or server
-
In utils/auth.js file:
- Import js-cookie
- Write a handleLogin helper function that sets a cookie based on the given token
import cookie from 'js-cookie'; import Router from 'next/router'; export function handleLogin(token) { // 1st arg is the key. We'll call it token // 2nd arg is the value, the given token cookie.set('token', token); // Redirect to the account route Router.push('/account'); } -
In pages/signup.js file:
- Import the handleLogin helper function
- Once we get the token back from the request, call the helper function and pass in the token as an argument
- This will set a cookie in the browser for this particular token
- Once handleSubmit is completed, a new user is successfully created, and a cookie is added to the browser, this helper function redirects user to the account page
import { handleLogin } from '../utils/auth';

async function handleSubmit(event) {
  event.preventDefault();
  try {
    setLoading(true);
    setError('');
    // make request to signup user
    const url = `${baseUrl}/api/signup`;
    // Spread in the user data coming from user state
    const payload = { ...user };
    // What's returned from the request is a token in response.data object
    const response = await axios.post(url, payload);
    // Set cookie in the browser
    handleLogin(response.data);
  } catch (error) {
    catchErrors(error, setError);
  } finally {
    setLoading(false);
  }
}
3. Validate POST Content on Server Side
-
Right now users can enter anything they want in the input fields when they sign up. We want to set some constraints on the name, email, and password fields. We want to validate on the server side the values that are provided on the request body and then send an error back to the client and display it to users if it doesn’t meet the conditions that we set
-
We’re going to use a tool called validator to help us validate forms
-
Import validator:
npm i validator -
In pages/api/signup.js file:
- Add validation to name, email, and password
import isEmail from 'validator/lib/isEmail';
import isLength from 'validator/lib/isLength';

if (!isLength(name, { min: 3, max: 10 })) {
  return res.status(422).send('Name must be 3-10 characters long');
} else if (!isLength(password, { min: 6 })) {
  return res.status(422).send('Password must be at least 6 characters');
} else if (!isEmail(email)) {
  return res.status(422).send('Email must be valid');
}
4. Add Login Functionality
-
Client-side: make a request to login user endpoint
-
In pages/login.js file:
- Import axios and baseUrl helper
- Call axios.post() method to make the request to login user
import axios from 'axios'; import baseUrl from '../utils/baseUrl'; const url = `${baseUrl}/api/login`; // Spread in user object, which come from user state const payload = { ...user }; // What's returned from the request is a token in response.data object const response = await axios.post(url, payload); -
Server-side: create login user route handler with JWT
-
In pages/api/login.js file:
- Use the try/catch block to handle the login user route request
import bcrypt from 'bcrypt'; import jwt from 'jsonwebtoken'; import connectDB from '../../utils/connectDb'; import User from '../../models/User'; // Connect to the database connectDB(); export default async (req, res) => { const { email, password } = req.body; try { // 1) Check to see if a user exists with the provided email // In User schema, we exclude password by default // But here, we want to select the password when finding a user in the db const user = await User.findOne({ email }).select('+password'); // 2) --if not, return error if (!user) { return res.status(404).send('No user exists with that email'); } // 3) Check to see if users' password matches the one in db // 1st arg is the password the user provided // 2nd arg is the password in the db // returns true or false const passwordsMatch = await bcrypt.compare(password, user.password); // 4) --if so, generate a token if (passwordsMatch) { const token = jwt.sign({ userId: user._id }, process.env.JWT_SECRET, { expiresIn: '7d' }); res.status(200).json(token); } else { res.status(401).send('Passwords do not match'); //401 means not authenticated } // 5) Send that token to the client } catch (error) { console.error(error); res.status(500).send('Error logging in user'); } }; -
Store the JWT token in the browser as a cookie:
-
Once the client receives the token from the server, we want to use a function to put the token in our browser as a cookie that can be accessed on the client or server
-
In pages/login.js file:
- Import the handleLogin helper function
- Once we get the token back from the request, call the helper function and pass in the token as an argument
- This will set a cookie in the browser for this particular token
- Once handleSubmit is completed, the user is successfully logged in, and a cookie is added to the browser, this helper function redirects user to the account page
import { handleLogin } from '../utils/auth';

async function handleSubmit(event) {
  event.preventDefault();
  try {
    setLoading(true);
    setError('');
    // make request to signup user
    const url = `${baseUrl}/api/login`;
    // Spread in use object, which comes from user state
    const payload = { ...user };
    // What's returned from the request is a token in response.data object
    const response = await axios.post(url, payload);
    // Set cookie in the browser
    handleLogin(response.data);
  } catch (error) {
    catchErrors(error, setError);
  } finally {
    setLoading(false);
  }
}
5. Create User Cart Upon Signup
-
After a user sign up and when we create a document for them in the database, we need to link the user document with a cart document in the database
-
So first we need to build a Cart model to define what a cart document has
- One of the fields of the cart document is the user field
- The value for this user field is the ObjectId of a user, a reference id to a user document in MongoDB
- Whenever a new document is created in a collection, Mongoose automatically generates a _id for it. We can use ObjectId to reference other documents in a given document. MongoDB then uses an action called populate on that id to expand the data into the document
- So when we create a new cart document, we can associate a user document by its ObjectId
-
Create a Cart model:
-
In models/Cart.js file:
import mongoose from 'mongoose'; const { ObjectId, Number } = mongoose.Schema.Types; const CartSchema = new mongoose.Schema({ user: { type: ObjectId, ref: 'User' //referencing the User model }, products: [ { quantity: { type: Number, default: 1 }, product: { type: ObjectId, ref: 'Product' //referencing the Product model } } ] }); export default mongoose.models.Cart || mongoose.model('Cart', CartSchema); -
Create a cart for new user upon signup:
-
In pages/api/signup.js file:
- Import Cart model
- Before generating a token for the new user, create a cart for them. Save the new cart instance to the db
import Cart from '../../models/Cart'; const cart = await new Cart({ user: newUser._id }); cart.save(); -
Now in MongoBD, when a new user document is created a cart document is also created that has a user field associated with the user ObjectId
AUTHORIZATION AND PROTECTING CONTENT
1. Get Current User from Token, Protect Auth Routes
-
Install nookies:
npm i nookies -
Once a user signup or login to our application they can see different parts of the app depending on permission that they have
-
On our custom App page(_app.js file) we have a
getInitialPropsmethod that gets called for each of our page components. This App component is executed on the server and it’s executed before anything else. ThegetInitialPropsmethod in this custom App component gets executed when page changes -
So this is the ideal place to fetch our user’s data from token and pass it down to each of our page components and the page layout as props
-
Client-side: get user’s account data from token:
-
In pages/_app.js file:
- From the context object we’re able to information about the request and response because the App component is being executed on the server
- And with that we’ll be able to get all of the cookies
- We’re going to use a package called nookies that’s going to allow us to take the context object and get from it all of the cookies, so that we can use that to make a request to send back the user to our app
- Import the parseCookies function from nookies
- Call parseCookies() and pass in context object as an argument. What we get back is cookies object
- In this cookies object is the token property that we want. So we can destructure token from cookies
- So now after we execute
getInitialPropsfor each page component, we can check to see if the current user has a token - If no token, they are not an authenticated user. Hence they should not be able to access certain pages
- Write an if statement that checks if current user is unauthenticated (no token) and if they are on a protected route (such as /create or /account), redirect the user using the redirectUser helper function
- Import redirectUser helper function
- If current user is authenticated (with token), make a request to get the user’s account data from token
- Use the try/catch block since we’re making a request to an end point
- The payload we provide is a little different. When it comes to providing a token, we’re not going to pass it on a request body. If we need to provide a jsonwebtoken(jwt) for authorization, what we’re providing is what’s known as an authorization headers
- So within the payload object, we’re going to include an object call
headers. This headers has a property calledAuthorizationand it’s going to be set totokenthat we’re getting from cookies object - Import axios and baseUrl helper
- Then specify a url and use axios to make a GET request
- If the request is successful, what we get back is the user object from the database. Assign this user to pageProps.user
- Pass the pageProps object as props to each page components and Layout component. Now every page routes has access to this user data
import { parseCookies } from 'nookies'; import { redirectUser } from '../utils/auth'; import axios from 'axios'; import baseUrl from '../utils/baseUrl'; // App component is executed on the server and is executed before anything else class MyApp extends App { // We have access to request and response from context object static async getInitialProps({ Component, ctx }) { // What's returned from parseCookies is cookies object // Destructure the token property from it const { token } = parseCookies(ctx); let pageProps = {}; // first check to see if there exists an initial props of a given component // if there is, execute the function that accepts context object as an argument // this is an async operation // assign the result to pageProps object if (Component.getInitialProps) { // Execute getInitalProps for each page component pageProps = await Component.getInitialProps(ctx); } // Check to see if current user has a token if (!token) { const isProtectedRoute = ctx.pathname === '/account' || ctx.pathname === '/create'; // If user is unauthenticated and is on a protected route, redirect user to login page if (isProtectedRoute) { redirectUser(ctx, '/login'); } } else { // Make a request to get the user's account data from token try { const payload = { headers: { Authorization: token } }; const url = `${baseUrl}/api/account`; const response = await axios.get(url, payload); const user = response.data; // Pass the user to the pageProps user object // The pageProps will then pass to every page components and Layout component pageProps.user = user; } catch (error) { console.error('Error getting current user', error); } } // console.log(pageProps.user) return { pageProps }; } // destructure pageProps object that's returned from getInitialProps function // the <Component /> is the component of each page // each page component now has access to the pageProps object render() { const { Component, pageProps } = this.props; return ( <Layout {...pageProps}> <Component {...pageProps} /> </Layout> ); } } -
In utils/auth.js file:
- Write a redirectUser helper function that redirects the user on the server or on client side
- This function accepts two arguments
- 1st arg is the context object. Also have access to req and res objects of context
- 2nd arg is the location - the path to redirect to
export function redirectUser(ctx, location) { // If we have access to context, the request is on the server // If we get a request on the server, redirect on the server if (ctx.req) { // Redirecting on the server with Node ctx.res.writeHead(302, { Location: location }); // To stop writing to this response ctx.res.end(); } else { // Redirect on the client Router.push(location); } } - Write a redirectUser helper function that redirects the user on the server or on client side
-
Server-side: create user account route handler:
-
In pages/api/account.js file:
- Since we want to get a user, we’re going to interact with the User model. Import User model
- Import connectDB helper since we need to connect to the db
- Import jwt
- First thing is check to see the authorization headers is provided with the request
- If there isn’t, we want to return early. If there is, then we have a token that we can use to verify the user
- Use the jwt.verify() method to verify the provided token
import jwt from 'jsonwebtoken'; import User from '../../models/User'; import connectDB from '../../utils/connectDb'; connectDB(); export default async (req, res) => { // Check if authorization headers is provided with the request // If not, we want to return early` if (!('authorization' in req.headers)) { return res.status(401).send('No authorization token'); //401 means not permitted } try { // jwt.verify() method verifies the token // 1st arg is the provided token // 2nd arg is the jwt secret which we use to sign the token // what's returned is an object. Destructure the userId property from it const { userId } = jwt.verify( req.headers.authorization, process.env.JWT_SECRET ); // Use the returned userId to find a user in the database const user = await User.findOne({ _id: userId }); if (user) { // If user is found, return the user to the client res.send(200).json(user); } else { res.status(404).send('User not found'); } } catch (error) { res.status(403).send('Invalid token'); //403 means forbidden action } }; -
In components/_App/Layout.js component, receive and destructure the user props. Pass down the user props to the Header component
-
In components/_App/Header.js component, receive and destructure the user props
-
Now when an unauthenticated user tries to visit the /account or /create routes, they will be redirected to login page
-
If a user is successfully logged in, they will be able to see and access the Create and Account links in the navbar
2. Handle Invalid Auth Tokens
-
If the user’s token has been expired or has been tampered with or somehow malfunctioned, we want to delete the invalid token and redirect user to login page so they can login again
-
In page/_app.js file:
- Import destroyCookie function from nookies
- In the catch block, call the destroyCookie method to delete the invalid token
- Then call the redirectUser helper method to redirect user to login page
import { parseCookies, destroyCookie } from 'nookies';

catch (error) {
  console.error('Error getting current user', error);
  // 1) Throw out invalid token
  destroyCookie(ctx, 'token')
  // 2) Redirect to login route
  redirectUser(ctx, '/login')
}
3. Protect Admin Routes, Hide Protected Content
-
Users may have permission to certain pages depending on their role. For example, a user with the role of “user” does not have permission to create a product. Only admin users and root users have permission to create route. So for regular users, the Create link in the navbar will be hidden
-
In page/_app.js file:
- If a user is not an admin or root user and is on /create route, redirect them to home page
const response = await axios.get(url, payload); const user = response.data; const isRoot = user.role === 'root'; const isAdmin = user.role === 'admin'; // If authenticated, but not of role 'admin' or 'root', redirect from '/create/' page const isNotPermitted = !(isRoot || isAdmin) && ctx.pathname === '/create'; if (isNotPermitted) { redirectUser(ctx, '/'); } -
In components/_App/Header.js file:
- Only admin or root users get to see the Create link in Menu.Item navbar
const isRoot = user && user.role === 'root'; const isAdmin = user && user.role === 'admin'; const isRootOrAdmin = isRoot || isAdmin; {isRootOrAdmin && ( <Link href='/create'> <Menu.Item header active={isActive('/create')}> <Icon name='add square' size='large' /> Create </Menu.Item> </Link> )} -
Also, a regular user does not have permission to delete a product. So the Delete Product button will be hidden
-
In components/Product/ProductAttributes.js file
- Destructure user props which receives from the Product parent component
- Only reveal the Delete Product button and the Modal component to admin or root users
const isRoot = user && user.role === 'root';
const isAdmin = user && user.role === 'admin';
const isRootOrAdmin = isRoot || isAdmin;

{isRootOrAdmin && (
  <Fragment>
    <Button
      icon='trash alternate outline'
      color='red'
      content='Delete Product'
      onClick={() => setModal(true)}
    />
    <Modal open={modal} dimmer='blurring'>
    ...
)}
4. Logout User
-
In utils/auth.js file:
- Write a handleLogout function that logs out a user
- Call the cookie.remove() method to remove the token from cookie
- Then redirect user to login route
import cookie from 'js-cookie'; export function handleLogout() { cookie.remove('token'); Router.push('/login'); } -
In components/_App/Header.js file:
- Import the handleLogout function
- Execute the handleLogout function on onClick event for Logout button
import { handleLogout } from '../../utils/auth';

<Menu.Item onClick={handleLogout} header>
  <Icon name='sign out' size='large' />
  Logout
</Menu.Item>
5. Universal Logout Using LocalStorage
-
When a user logs out of our application, we want to log them out everywhere, not just one browser window. We can perform a universal logout using localStorage
-
In utils/auth.js file:
- In the handleLogout function, store the key “logout” in localStorage
export function handleLogout() { cookie.remove('token'); window.localStorage.setItem('logout', Date.now()); Router.push('/login'); } -
What this does is our custom App component(_app.js) is going to detect a change in localStorage
-
In pages/_app.js file:
- Use componentDidMount function to listen for event changes in localStorage
import Router from 'next/router';

  componentDidMount() {
  	window.addEventListener('storage', this.syncLogout);
  }

  syncLogout = (event) => {
  if (event.key === 'logout') {
    // console.log('Logged out from storage')
  		Router.push('/login');
  	}
  };
CART MANAGEMENT AND CHECKOUT
1. Fetch User Cart
-
Let’s fetch the user’s cart in the database on the cart route. When the cart page loads, use getInitialProps function to make an api request to get cart data and display it on the cart page
-
In pages/cart.js file:
- Import parseCookies function, axios, and baseUrl helper
- First, get the user’s token by calling parseCookies() method
- Then check to see if there’s a token
- If there isn’t, the user is not authenticated and we can return early
- Set the products to an empty array
- If there is a token, we can provide that token to make a request to backend to get the user’s cart data
- Use getInitialProps function to make the request
- If it’s successful, we get back a products array from cart object
- Return it as a products object
- Pass the products object as props to the Cart component
import { parseCookies } from 'nookies'; import axios from 'axios'; import baseUrl from '../utils/baseUrl'; function Cart({ products }) { // console.log(products) return ( <Segment> <CartItemList /> <CartSummary /> </Segment> ); } Cart.getInitialProps = async (ctx) => { // Destructure token property from the returned cookies object const { token } = parseCookies(ctx); // First check to see if user is authenticated // --if not, set products to an empty array and return early if (!token) { return { products: [] }; } const url = `${baseUrl}/api/cart`; const payload = { headers: { Authorization: token } }; const response = await axios.get(url, payload); return { products: response.data }; }; export default Cart; -
In pages/api/cart.js file:
- Create a user cart route handler that fetch cart data based on userId and return to the client just the products array
import jwt from 'jsonwebtoken';
import connectDB from '../../utils/connectDb';
import Cart from '../../models/Cart';

connectDB();

export default async (req, res) => {
  // Check if a token is provided with the request
  if (!('authorization' in req.headers)) {
    return res.status(401).send('No authorization token');
  }
  try {
    // Verify the provided token
    const { userId } = jwt.verify(
      req.headers.authorization,
      process.env.JWT_SECRET
    );
    const cart = await Cart.findOne({ user: userId }).populate({
      path: 'products.product',
      model: 'Product'
    });
    // Send back just the products array from cart
    res.status(200).json(cart.products);
  } catch (error) {
    console.error(error);
    res.status(403).send('Please login again');
  }
};
2. Add Products to Cart Functionality
-
Implement functionality that allows user to add a product to cart:
-
In components/Product/AddProductToCart.js file:
- Enable user to change quantity of the product
- Create a state for quantity and initialize its value to 1
- If user is not logged in, show the Sign Up to Purchase button
- When this button is clicked, it will direct user to signup page
- Use useRouter hook to re-route user to signup route
- If the user is logged in, show the Add to Cart button
- When this button is clicked, the handleAddProductToCart function is executed
- Write a handleAddProductToCart function that adds the product to the products array in carts collection in the database
- Since we’re adding a product, use a PUT request with axios. And since this is an async operation, use try/catch block
- The payload we need to provide to this request is the quantity and productId
- We also want to provide the user’s token as authorization headers
- We can get the token in cookie by calling the
cookie.get()method
- We can get the token in cookie by calling the
- Create a loading state that displays the loading icon when the product is being added to cart
- Create a success state and initialize it to false
- Once the product has been added to cart, set success state to true and display in the action button ‘Item Added!’
- We only want to display this ‘Item Added!’ button (success state set to true) for about 3 seconds. Then make the ‘Add to Cart’ button visible again
- We can use React useEffect() hook to keep track of the success state If success is set to true, after 3 seconds set success to false by calling setTimeout() method
import { useState, useEffect } from 'react'; import { Input } from 'semantic-ui-react'; import { useRouter } from 'next/router'; import axios from 'axios'; import baseUrl from '../../utils/baseUrl'; import catchErrors from '../../utils/catchErrors'; import cookie from 'js-cookie'; function AddProductToCart({ productId, user }) { const [quantity, setQuantity] = useState(1); const [loading, setLoading] = useState(false); const [success, setSuccess] = useState(false); const router = useRouter(); useEffect(() => { let timeout; if (success) { timeout = setTimeout(() => setSuccess(false), 3000); } return () => { // This is a global function clearTimeout(timeout); }; }, [success]); async function handleAddProductToCart() { try { setLoading(true); const url = `${baseUrl}/api/cart`; const payload = { quantity, productId }; // Get the token from cookie const token = cookie.get('token'); // Provide the token as auth headers const headers = { headers: { Authorization: token } }; await axios.put(url, payload, headers); setSuccess(true); } catch (error) { catchErrors(error, window.alert); } finally { setLoading(false); } } return ( <Input loading={loading} onChange={(event) => setQuantity(Number(event.target.value))} type='number' min='1' placeholder='Quantity' value={quantity} action={ user && success ? { color: 'blue', content: 'Item Added!', icon: 'plus cart', disabled: true } : user ? { color: 'orange', content: 'Add to Cart', icon: 'plus cart', loading, disabled: loading, onClick: handleAddProductToCart } : { color: 'blue', content: 'Sign Up to Purchase', icon: 'signup', onClick: () => router.push('/signup') } } /> ); } export default AddProductToCart; -
Server-side: handle add product to cart route:
-
In pages/api/cart.js file:
- Since we’re handling different types of requests, use the switch statement
- Write a handlePutRequest function that adds the product to cart
- Use a try/catch block since this is an async function
- If product doesn’t already exist in cart, add product to cart
- If product already exists in cart, update its quantity
- No need to send anything back to client
import mongoose from 'mongoose';
const { ObjectId } = mongoose.Types;

export default async (req, res) => {
  switch (req.method) {
    case 'GET':
      await handleGetRequest(req, res);
      break;
    case 'PUT':
      await handlePutRequest(req, res);
      break;
    default:
      res.status(405).send(`Method ${req.method} not allowed`);
      break;
  }
};

async function handlePutRequest(req, res) {
  const { productId, quantity } = req.body;

  if (!('authorization' in req.headers)) {
    return res.status(401).send('No authorization token');
  }
  try {
    const { userId } = jwt.verify(
      req.headers.authorization,
      process.env.JWT_SECRET
    );
    // Get user cart based on userId
    const cart = await Cart.findOne({ user: userId });
    // Check if product already exists in cart
    // Use mongoose's ObjectId() method to convert string productId to objectIds
    // Returns true or false
    const productExists = cart.products.some((doc) =>
      ObjectId(productId).equals(doc.product)
    );
    // If so, increment quantity (by number provided to request)
    // 1st arg is specifying what we want to update
    // 2nd arg is how we want to update it
    // In mongoDB $inc is the increment operator. The $ is the index in the array
    // And then provide the path to the property we want to increment
    if (productExists) {
      await Cart.findOneAndUpdate(
        { _id: cart._id, 'products.product': productId },
        { $inc: { 'products.$.quantity': quantity } }
      );
    } else {
      // If not, add new product with given quantity
      // Use the $addToSet operator to ensure there won't be any duplicated product add
      const newProduct = { quantity, product: productId };
      await Cart.findOneAndUpdate(
        { _id: cart._id },
        { $addToSet: { products: newProduct } }
      );
    }
    res.status(200).send('Cart updated');
  } catch (error) {
    console.error(error);
    res.status(403).send('Please login again');
  }
}
3. Style Cart Products
-
Now that users can add products to their cart, we want to display a summary of those added products in their cart route/page with a list
-
In pages/cart.js file:
- Pass the user and products props down to the CartItemList child component
<CartItemList user={user} products={products} />
-
In components/Cart/CartItemList.js file:
- If there’s no product in user’s cart, display the cart is empty with one of two buttons
- If user is logged in, show the ‘View Products’ button
- If user is not logged in, show the ‘Login to Purchase’ button
- Write a mapCartProductsToItems function that maps over the products array and render each product
- For each product item, display the product name, quantity, price, product image, and a remove product button
- Since this is a function component, we can use useRouter() hook to redirect to other pages
import { Header, Segment, Icon, Button, Item } from 'semantic-ui-react'; import { useRouter } from 'next/router'; function CartItemList({ products, user }) { const router = useRouter(); function mapCartProductsToItems(products) { return products.map((p) => ({ childKey: p.product._id, header: ( <Item.Header as='a' onClick={() => router.push(`/product?_id=${p.product._id}`)} > {p.product.name} </Item.Header> ), image: p.product.mediaUrl, meta: `${p.quantity} x $${p.product.price}`, fluid: 'true', extra: ( <Button basic icon='remove' floated='right' onClick={() => console.log(p.product._id)} /> ) })); } if (products.length === 0) { return ( <Segment secondary color='teal' inverted textAlign='center'> <Header icon> <Icon name='shopping basket' /> No products in your cart. Add some! </Header> <div> {user ? ( <Button onClick={() => router.push('/')} color='orange'> View Products </Button> ) : ( <Button onClick={() => router.push('/login')} color='blue'> Login to Add Products </Button> )} </div> </Segment> ); } return <Item.Group divided items={mapCartProductsToItems(products)} />; } export default CartItemList; - If there’s no product in user’s cart, display the cart is empty with one of two buttons
4. Calculate Cart Total
-
In pages/cart.js file:
- Pass the products props down to the CartSummary child component
<CartSummary products={products} />
-
In components/Cart/CartSummary.js file:
- Import useState and useEffect hooks
- If the Subtotal is 0, we want to disable the Checkout button
- Create a state that keeps track whether the cart is empty or not. Call it isCartEmpty and initialize it to false
- Use useEffect() hook to keep track of changes in products array
- If the length of products array is equal to 0, set isCartEmpty state to true
- And this will disable the Checkout button
- Import the calculateCartTotal helper function
- Create states for cartAmount and stripeAmount. Set its initial value to 0
- Execute the calculateCartTotal helper function inside useEffect() hook because we want this function to run when products array changes
- Pass in the products array as an argument
- It returns an object of cartTotal and stripeTotal
- In the useEffect() hook, set the cartAmount and stripeAmount states to the cartTotal and stripeTotal respectively
- Render the total from cartAmount state in the Subtotal section
import { Fragment, useState, useEffect } from 'react'; import { Segment, Button, Divider } from 'semantic-ui-react'; import calculateCartTotal from '../../utils/calculateCartTotal'; function CartSummary({ products }) { const [isCartEmpty, setIsCartEmpty] = useState(false); const [cartAmount, setCartAmount] = useState(0); const [stripeAmount, setStripeAmount] = useState(0); useEffect(() => { const { cartTotal, stripeTotal } = calculateCartTotal(products); setCartAmount(cartTotal); setStripeAmount(stripeTotal); setIsCartEmpty(products.length === 0); }, [products]); return ( <Fragment> <Divider /> <Segment clearing size='large'> <strong>Subtotal:</strong> ${cartAmount} <Button icon='cart' disabled={isCartEmpty} color='teal' floated='right' content='Checkout' /> </Segment> </Fragment> ); } export default CartSummary; -
In utils/calculateCartTotal.js file:
- Write a calculateCartTotal helper function that adds up the total price of products in cart
function calculateCartTotal(products) {
  const total = products.reduce((accum, el) => {
    accum += el.product.price * el.quantity;
    return accum;
  }, 0);
  // Trick to remove any rounding errors, multiply by 100 then divide by 100
  // To make sure it rounds to two decimal places
  const cartTotal = ((total * 100) / 100).toFixed(2);
  const stripeTotal = Number((total * 100).toFixed(2));

  return { cartTotal, stripeTotal };
}

export default calculateCartTotal;
5. Removing Cart Products
-
To delete a product from cart, we need to make a delete request for our cart endpoint
-
In pages/cart.js file:
- Import cookie from js-cookie
- Create a cartProducts state that keeps track of the products in cart. Initialize it to products array
- Write a handleRemoveFromCart function that makes a request to delete a product in cart in the database based on productId
- This function accepts productId as an argument
- Make a DELETE request to the cart endpoint using axios
- The payload provided to the request has the productId and token
- Once we get back the response, call setCartProducts to update the cartProducts state
- We want to pass the products in cartProducts state as props to the CartItemList and CartSummary child components
- Pass down the handleRemoveFromCart function as props to CartItemList child component
import axios from 'axios'; import baseUrl from '../utils/baseUrl'; import cookie from 'js-cookie'; function Cart({ products, user }) { const [cartProducts, setCartProducts] = useState(products); async function handleRemoveFromCart(productId) { const url = `${baseUrl}/api/cart`; const token = cookie.get('token'); const payload = { params: { productId }, headers: { Authorization: token } }; const response = await axios.delete(url, payload); setCartProducts(response.data); } return ( <Segment> <CartItemList handleRemoveFromCart={handleRemoveFromCart} user={user} products={cartProducts} /> <CartSummary products={cartProducts} /> </Segment> ); } -
In pages/api/cart.js file:
- Create a delete cart product route handler that deletes a product in cart based on productId
- Return the updated products array from carts collection to the client
case 'DELETE': await handleDeleteRequest(req, res); break; async function handleDeleteRequest(req, res) { // Get productId from query string const { productId } = req.query; if (!('authorization' in req.headers)) { return res.status(401).send('No authorization token'); } try { const { userId } = jwt.verify( req.headers.authorization, process.env.JWT_SECRET ); const cart = await Cart.findOneAndUpdate( { user: userId }, { $pull: { products: { product: productId } } }, { new: true } ).populate({ path: 'products.product', model: 'Product' }); res.status(200).json(cart.products); } catch (error) { console.error(error); res.status(403).send('Please login again'); } } -
In components/Cart/CartItemList.js file:
- Destructure the handleRemoveFromCart function from Cart parent component
- When the Remove button is clicked, call the handleRemoveFromCart function and pass in the product id as an argument
onClick={() => handleRemoveFromCart(p.product._id)}
6. Checkout Customer Cart with Stripe Payment
-
Install react-stripe-checkout and stripe:
npm i react-stripe-checkout stripe -
Now we want users to be able to checkout their cart. They will provide their email, shipping info, and payment info. Once that is done, Stripe is going to approve their purchase and we can show a success message and clear out their cart
-
Setup Stripe account:
- Signup for a Stripe account
- On the Dashboard page, click on Get your test API keys
- Copy the Publishable key and paste it into the stripeKey property in CartSummary.js file
- Copy the secret key and paste in the
STRIPE_SECRET_KEYenv variable in next.config.js file
-
Client-side: make an api request to checkout cart with Stripe:
-
In pages/cart.js file:
- Import catchErrors helper function
- Create a success and loading states and initialize both to false
- Write a handleCheckout method that handles the payment
- This method takes paymentData as a parameter
- Use try/catch/finally block
- We’re going to try to make an api request to /api/checkout endpoint
- It’s a POST request method using axios and pass in the url, payload, and headers as arguments
- Once the payment process is completed, set the success state to true
- In handling errors, call the catchErrors method and display the error in alert window
- In finally block, set loading state back to false
- Show the loading spinner during the process of checking out the user’s cart
- Pass down the cartProducts and the success states as props to the CartItemList child component
- Pass down the handleCheckout function and success state as props to the CartSummary child component
import cookie from 'js-cookie'; import axios from 'axios'; import baseUrl from '../utils/baseUrl'; import catchErrors from '../utils/catchErrors'; function Cart({ products, user }) { const [cartProducts, setCartProducts] = useState(products); const [success, setSuccess] = useState(false); const [loading, setLoading] = useState(false); async function handleCheckout(paymentData) { try { setLoading(true); const url = `${baseUrl}/api/checkout`; const token = cookie.get('token'); const payload = { paymentData }; const headers = { headers: { Authorization: token } }; await axios.post(url, payload, headers); setSuccess(true); } catch (error) { catchErrors(error, window.alert); } finally { setLoading(false); } } return ( <Segment loading={loading}> <CartItemList handleRemoveFromCart={handleRemoveFromCart} user={user} products={cartProducts} success={success} /> <CartSummary products={cartProducts} handleCheckout={handleCheckout} success={success} /> </Segment> ); } -
In components/Cart/CartSummary.js file:
- Import the StripeCheckout component from react-stripe-checkout
- Wrap the StripeCheckout component around the Checkout button
- Then provide the properties for the StripeCheckout component
- Destructure the handleCheckout and success props passed from Cart parent component
- When the Pay button is clicked, the handleCheckout method is executed in the cart page route
- This is done by setting the token property to handleCheckout:
token={handleCheckout}
- This is done by setting the token property to handleCheckout:
- Disable the Checkout button after a successful purchase
import StripeCheckout from 'react-stripe-checkout'; <StripeCheckout name='Furniture Boutique' amount={stripeAmount} image={products.length > 0 ? products[0].product.mediaUrl : ''} currency='USD' shippingAddress={true} billingAddress={true} zipCode={true} stripeKey='stripe-publishable-key' token={handleCheckout} triggerEvent='onClick' > <Button icon='cart' disabled={isCartEmpty || success} color='teal' floated='right' content='Checkout' /> </StripeCheckout> -
In components/Cart/CartItemList.js file:
- Destructure the success props passed from Cart parent component
- Write an if statement that checks if success state is true
- If it is, render a success message to user
if (success) { return ( <Message success header='Success!' content='Your order and payment has been accepted' icon='star outline' /> ); } -
Server-side: create cart checkout route handler:
-
In pages/api/checkout.js file:
import Stripe from 'stripe'; import { v4 as uuidv4 } from 'uuid'; import jwt from 'jsonwebtoken'; import Cart from '../../models/Cart'; import Order from '../../models/Order'; import calculateCartTotal from '../../utils/calculateCartTotal'; const stripe = Stripe(process.env.STRIPE_SECRET_KEY); export default async (req, res) => { const { paymentData } = req.body; try { // 1) Verify and get user id from token const { userId } = jwt.verify( req.headers.authorization, process.env.JWT_SECRET ); // 2) Find cart based on user id, populate it const cart = await Cart.findOne({ user: userId }).populate({ path: 'products.product', model: 'Product' }); // 3) Calculate cart totals again from cart products const { cartTotal, stripeTotal } = calculateCartTotal(cart.products); // 4) Get email from payment data, see if email linked with existing Stripe customer const prevCustomer = await stripe.customers.list({ email: paymentData.email, limit: 1 }); const isExistingCustomer = prevCustomer.data.length > 0; // 5) If not existing customer, create them based on their email let newCustomer; if (!isExistingCustomer) { newCustomer = await stripe.customers.create({ email: paymentData.email, source: paymentData.id }); } const customer = (isExistingCustomer && prevCustomer.data[0].id) || newCustomer.id; // 6) Create charge with total, send receipt email const charge = await stripe.charges.create( { currency: 'usd', amount: stripeTotal, receipt_email: paymentData.email, customer, description: `Checkout | ${paymentData.email} | ${paymentData.id}` }, { idempotencyKey: uuidv4() } ); // 7) Add order data to database await new Order({ user: userId, email: paymentData.email, total: cartTotal, products: cart.products }).save(); // 8) Clear products in cart await Cart.findOneAndUpdate({ _id: cart._id }, { $set: { products: [] } }); // 9) Send back success (200) response res.status(200).send('Checkout successful'); } catch (error) { console.error(error); res.status(500).send('Error processing charge'); } }; -
Define Order Model:
-
The Order model is similar to the Cart model except it also includes the email and total fields and a timestamps for when the order was created
-
In models/Order.js file:
import mongoose from 'mongoose';

const { ObjectId, Number } = mongoose.Schema.Types;

const OrderSchema = new mongoose.Schema(
  {
    user: {
      type: ObjectId,
      ref: 'User' //referencing the User model
    },
    products: [
      {
        quantity: {
          type: Number,
          default: 1
        },
        product: {
          type: ObjectId,
          ref: 'Product' //referencing the Product model
        }
      }
    ],
    email: {
      type: String,
      required: true
    },
    total: {
      type: Number,
      required: true
    }
  },
  {
    timestamps: true
  }
);

export default mongoose.models.Order || mongoose.model('Order', OrderSchema);
PAGINATION AND MANAGING USER ROLES
1. Add Pagination for Product List
-
Let’s divide up our product list into multiple pages instead of having them all in a single page
-
Client-side: make request to /products endpoint with page query params
-
In pages/index.js file:
- Instead of making a request to /api/products endpoint, we want to configure our request on a query string with page information. For example, fetch products of page 2 or page 3, etc.
- To access the query string in a request, the getInitialProps function automatically receives context object as an argument. In context, there’s a query property that we can use to include query string
- Create a payload object that contains the query string params of page and size
- Pass the payload object along with the url as args to the axios GET request method
- The response.data object that comes back contains the products array and totalPage
- In the Home component, destructure the products and totalPage props
- Import the ProductPagination component and render this component on the Home component
- Pass the totalPages as props to the ProductPagination child component
import ProductPagination from '../components/Index/ProductPagination'; // Destructure products and totalPages props from getServerSideProps function function Home({ products, totalPages }) { return ( <Fragment> <ProductList products={products} /> <ProductPagination totalPages={totalPages} /> </Fragment> ); } export async function getServerSideProps(ctx) { // console.log(ctx.query) // Check to see if page query is available const page = ctx.query.page ? ctx.query.page : '1'; // size is the number of products on a page const size = 9; // fetch data on server const url = `${baseUrl}/api/products`; // params is query string params const payload = { params: { page, size } }; const response = await axios.get(url, payload); // The return response.data object contains products array and totalPages // note: this object will be merged with existing props return { props: response.data }; } -
In components/Index/ProductPagination.js file:
- Import useRouter hook from next/router
- Destructure totalPages props received from Home parent component
- Use Semantic UI Pagination component to render the pagination
- Use Next’s router to redirect to activePage
import { useRouter } from 'next/router'; import { Container, Pagination } from 'semantic-ui-react'; function ProductPagination({ totalPages }) { const router = useRouter(); return ( <Container textAlign='center' style={{ margin: '2em' }}> <Pagination defaultActivePage={1} totalPages={totalPages} onPageChange={(event, data) => { // console.log(data) data.activePage === 1 ? router.push('/') : router.push(`/?page=${data.activePage}`); }} /> </Container> ); } export default ProductPagination; -
Server-side: Create route handler to products with page query endpoint:
-
In pages/api/products.js file:
- Destructure page and size query string params from req.query
- Note that these params received in string format. We need to convert them into numbers
- We want to fetch products based on pageNum on the query string and the number of product on a page based on pageSize
- We also want to know the totalDocs(products) in the products collection by calling the Product.countDocuments() method on Product
- We use that to calculate the totalPages
- Finally, we return the products array based on the page string query and the totalPages to the client
export default async (req, res) => {
  const { page, size } = req.query;
  // Convert query string values to numbers
  const pageNum = Number(page);
  const pageSize = Number(size);
  let products = [];
  const totalDocs = await Product.countDocuments();
  const totalPages = Math.ceil(totalDocs / pageSize);
  if (pageNum === 1) {
    // limit the number of products getting back from db by pageSize
    products = await Product.find().limit(pageSize);
  } else {
    const skips = pageSize * (pageNum - 1);
    products = await Product.find().skip(skips).limit(pageSize);
  }
  // const products = await Product.find();
  res.status(200).json({ products, totalPages });
};
2. Create Account Header, Order History
-
The account route/page displays the user’s account header (their name, email, joined date), order history, and user permissions
-
Client-side: make request to /orders endpoint to get orders data:
-
In pages/account.js file:
- The Account component renders the AccountHeader and AccountOrders components. Import of these child components
- All components in our application have access to user props because of our custom App component
- Use the spread object operator to spread the user properties to the AccountHeader child component
- Next, we want to populate the user’s order history on the account page when the account route loads
- Call the getInitialProps function to make a request to fetch orders data.
- Import parseCookies function from nookies
- Call parseCookies() function to get the token from cookie
- We’ll send the headers authorization of the token as a payload object
- The request endpoint we want to make is /api/orders
- We’ll make a GET request with axios and pass in the url and payload
- What we get back from the response.data object is the orders object props
- In the Account component, receive and destructure the orders props
- Pass the orders as props to the AccountOrders child component. This way, it can render the orders
import { Fragment } from 'react'; import AccountHeader from '../components/Account/AccountHeader'; import AccountOrders from '../components/Account/AccountOrders'; import axios from 'axios'; import baseUrl from '../utils/baseUrl'; import { parseCookies } from 'nookies'; function Account({ user, orders }) { return ( <Fragment> <AccountHeader {...user} /> <AccountOrders orders={orders} /> </Fragment> ); } Account.getInitialProps = async (ctx) => { const { token } = parseCookies(ctx); if (!token) { return { orders: [] }; } const payload = { headers: { Authorization: token } }; const url = `${baseUrl}/api/orders`; const response = await axios.get(url, payload); // The response.data object contains orders object props return response.data; }; export default Account; -
In components/Account/AccountHeader.js file:
- Destructure role, name, email, and createdAt properties of user object props
- Display the user’s name, email, their role, and when they joined
import { Header, Icon, Segment, Label } from 'semantic-ui-react'; function AccountHeader({ role, name, email, createdAt }) { return ( <Segment secondary inverted color='violet'> <Label color='teal' size='large' ribbon icon='privacy' content={role} style={{ textTransform: 'capitalize' }} /> <Header inverted textAlign='center' as='h1' icon> <Icon name='user' /> {name} <Header.Subheader>{email}</Header.Subheader> <Header.Subheader>Joined {createdAt}</Header.Subheader> </Header> </Segment> ); } export default AccountHeader; -
In components/Account/AccountOrders.js file:
- Receive and destructure the orders props from Account parent component
- Render the orders and style them with Semantic UI
- First check to see if there’s any orders
- If there isn’t, display No past order text and a button that takes user to product list
- If there is, display the order history in Semantic UI Accordion
- Create a mapOrdersToPanels function that loops over the orders array and display each order into the accordion panel
import { Fragment } from 'react'; import { Header, Accordion, Label, Segment, Icon, Button, List, Image } from 'semantic-ui-react'; import { useRouter } from 'next/router'; function AccountOrders({ orders }) { const router = useRouter(); function mapOrdersToPanels(orders) { return orders.map((order) => ({ key: order._id, title: { content: <Label color='blue' content={order.createdAt} /> }, content: { content: ( <Fragment> <List.Header as='h3'> Total: ${order.total} <Label content={order.email} icon='mail' basic horizontal style={{ marginLeft: '1em' }} /> </List.Header> <List> {order.products.map((p) => ( <List.Item key={p._id}> <Image avatar src={p.product.mediaUrl} /> <List.Content> <List.Header>{p.product.name}</List.Header> <List.Description> {p.quantity} x ${p.product.price} </List.Description> </List.Content> <List.Content floated='right'> <Label tag color='red' size='tiny'> {p.product.sku} </Label> </List.Content> </List.Item> ))} </List> </Fragment> ) } })); } return ( <Fragment> <Header as='h2'> <Icon name='folder open' /> Order History </Header> {orders.length === 0 ? ( <Segment inverted tertiary color='grey' textAlign='center'> <Header icon> <Icon name='copy outline' /> No past orders </Header> <div> <Button onClick={() => router.push('/')} color='orange'> View Products </Button> </div> </Segment> ) : ( <Accordion fluid styled exclusive={false} panels={mapOrdersToPanels(orders)} /> )} </Fragment> ); } export default AccountOrders; -
Server-side: Create route handler for orders request:
-
In pages/api/orders.js file:
- Import jwt, connectDB helper function, Order model
- First we need to call jwt.verify() method to verify the provided token. What’s returned from the token is the userId
- We can find the orders based on the userId using the Order.find() method. After finding the orders, chain on the .populate() method to populate the products in the orders
- Note that we’re returning orders object props back to client, instead of orders array
import jwt from 'jsonwebtoken';
import Order from '../../models/Order';
import connectDb from '../../utils/connectDb';

connectDb();

export default async (req, res) => {
  try {
    // jwt.verify() method verifies the token
    // 1st arg is the provided token
    // 2nd arg is the jwt secret which we use to sign the token
    // what's returned is an object. Destructure the userId property from it
    const { userId } = jwt.verify(
      req.headers.authorization,
      process.env.JWT_SECRET
    );
    const orders = await Order.find({ user: userId }).populate({
      path: 'products.product',
      model: 'Product'
    });
    // The .find() method returns an orders array. But we want to return orders object back to client
    res.status(203).json({ orders });
  } catch (error) {
    console.error(error);
    res.status(403).send('Please login again');
  }
};
3. Create Root User, Add User Permissions
-
Up until this point we haven’t given user other roles other than the ‘user’ role. This is the default value they’re given when they signup
-
A root user can manage admin and regular users roles. They have access to the User Permissions panel to change users’ roles in the database
- There’s only one root user and this user is going to have access to the database
- We can change the root user’s role manually in MongoDB website in the users collection since this is going to be done just once
-
Admin users can create and delete products within our application
-
Regular users don’t have permission to create or delete products. They can add or delete products in their cart, make purchase and view their account
-
Client-side: make request to /users endpoint to get users data:
-
In pages/account.js file:
- Import the AccountPermissions component
- In the Account component, only render the AccountPermissions component if the user.role is equal to root
import AccountPermissions from '../components/Account/AccountPermissions'; {user.role === 'root' && <AccountPermissions currentUserId={user._id} />} -
In components/Account/AccountPermission.js file:
- This component renders the User Permissions panel within the Account page
- Create a users state and initialize it to an empty array
- Create a getUsers function that makes a request to get users in the db and stores it in users state
- The request endpoint we’ll be making is /users
- The payload object contains the headers authorization of the token
- What’s returned from the response.data object is an array of users, except the root user
- Call setUsers() method to update the users state with this users array
- Use useEffect() hook to execute the getUsers function. We want the AccountPermissions component to re-render whenever there’s a change in users state
- Once we get back the array of users from the database we can display the users in the User Permissions section in a table format
- Import the necessary Semantic UI elements to create the table
- Map over the users array to display each user in the table
- Create a UserPermission component outside and below the AccountPermissions component
- This component renders each user table row and cells and a toggle checkbox
import { useState, useEffect } from 'react'; import { Header, Checkbox, Table, Icon } from 'semantic-ui-react'; import axios from 'axios'; import cookie from 'js-cookie'; import baseUrl from '../../utils/baseUrl'; function AccountPermissions() { const [users, setUsers] = useState([]); useEffect(() => { getUsers(); }, []); async function getUsers() { const url = `${baseUrl}/api/users`; const token = cookie.get('token'); const payload = { headers: { Authorization: token } }; const response = await axios.get(url, payload); // console.log(response.data) setUsers(response.data); } return ( <div style={{ margin: '2em 0' }}> <Header as='h2'> <Icon name='settings' /> User Permissions </Header> <Table compact celled definition> <Table.Header> <Table.Row> <Table.HeaderCell /> <Table.HeaderCell>Name</Table.HeaderCell> <Table.HeaderCell>Email</Table.HeaderCell> <Table.HeaderCell>Joined</Table.HeaderCell> <Table.HeaderCell>Updated</Table.HeaderCell> <Table.HeaderCell>Role</Table.HeaderCell> </Table.Row> </Table.Header> <Table.Body> {users.map((user) => ( <UserPermission key={user._id} user={user} /> ))} </Table.Body> </Table> </div> ); } function UserPermission({ user }) { return ( <Table.Row> <Table.Cell collapsing> <Checkbox toggle /> </Table.Cell> <Table.Cell>{user.name}</Table.Cell> <Table.Cell>{user.email}</Table.Cell> <Table.Cell>{user.createdAt}</Table.Cell> <Table.Cell>{user.updatedAt}</Table.Cell> <Table.Cell>{user.role}</Table.Cell> </Table.Row> ); } export default AccountPermissions; -
Server-side: create route handler to users request:
-
In pages/api/users.js file:
- Import jwt, User model, connectDb helper function
- First, call jwt.verify() method to verify the provided token. What’s returned is the userId. This userId is the root user
- Call the User.find() method to get every user in the users collection database, except the root user itself
- Use the
$neoperator to exclude the root user - What’s returned is an array of users
- Use the
- Return back to the client the array of users
import jwt from 'jsonwebtoken';
import User from '../../models/User';
import connectDb from '../../utils/connectDb';

connectDb();

export default async (req, res) => {
  try {
    // jwt.verify() method verifies the token
    // 1st arg is the provided token
    // 2nd arg is the jwt secret which we use to sign the token
    // what's returned is an object. Destructure the userId property from it
    const { userId } = jwt.verify(
      req.headers.authorization,
      process.env.JWT_SECRET
    );
    // Get every user in the users collection, EXCEPT for our self - the root user
    // $ne is not equal to operator
    // Filter out the user _id that is not equal to the userId
    const users = await User.find({ _id: { $ne: userId } });
    res.status(200).json(users);
  } catch (error) {
    console.error(error);
    res.status(403).send('Please login again');
  }
};
4. Change User Roles, Permissions
-
Next we want to enable the root user to dynamically change the users roles by toggling the checkbox next to the user
-
To do this, we want to keep track of a user state in the UserPermission component. Whenever the user’s role changes on the client-side(the root uses makes the change), we want to make a request to an endpoint to change the user’s role in the database
-
In components/Account/AccountPermission.js file and inside the UserPermission component:
- Create an admin state and initialize it to user.role of admin
- Then in the user’s role table cell, check if the admin state is set to ‘admin’. If it is, render ‘admin’ else render ‘user’
- For the toggle checkbox cell,
- when it is clicked(onChange event), toggle its opposite by executing the handleChangePermission function
- add a
checkedproperty and set it to admin state, where the checkbox is checked when admin state is true
- Write a handleChangePermission function that calls the setAdmin() method to set the previous state to its opposite
- Now when the checkbox is clicked it should toggle the user’s role between admin and user
function UserPermission({ user }) { const [admin, setAdmin] = useState(user.role === 'admin'); function handleChangePermission() { setAdmin((prevState) => !prevState); } return ( <Table.Row> <Table.Cell collapsing> <Checkbox checked={admin} toggle onChange={handleChangePermission} /> </Table.Cell> <Table.Cell>{user.name}</Table.Cell> <Table.Cell>{user.email}</Table.Cell> <Table.Cell>{user.createdAt}</Table.Cell> <Table.Cell>{user.updatedAt}</Table.Cell> <Table.Cell>{admin ? 'admin' : 'user'}</Table.Cell> </Table.Row> ); } -
Once the user’s role is changed (by updating the admin state), we want to make a request to backend to update the user’s role in the database
-
Client-side: make request to /account endpoint to update user’s role:
-
In components/Account/AccountPermission.js file and in UserPermission component:
- Use useEffect hook to re-render the component when the admin state changes
- However, we don’t want useEffect hook to run when the component first mounts. We want useEffect to run only when admin state changes. To do this, we first call useRef() hook and initialize the value to true. Then inside useEffect hook, change its current value to false and return early. This way, useEffect hook will run any code after it
- In our case, we want useEffect to execute the updatePermission function when admin state changes
- Write an updatePermission function that makes a request to /account endpoint to update the user’s role based on user id
function UserPermission({ user }) { const [admin, setAdmin] = useState(user.role === 'admin'); const isFirstRun = useRef(true); // We only want useEffect to run when admin state changes, not when the component first mounts useEffect(() => { // The current property is whatever value we initialize when calling useRef() hook if (isFirstRun.current) { isFirstRun.current = false; return; } updatePermission(); }, [admin]); function handleChangePermission() { setAdmin((prevState) => !prevState); } // Make request to update user's role based on user id in the db async function updatePermission() { const url = `${baseUrl}/api/account`; const payload = { _id: user._id, role: admin ? 'admin' : 'user' }; // Use put method to update the db await axios.put(url, payload); } return ( ... ) } -
Server-side: create a route to handle account update request:
-
In pages/api/account.js file:
- Now that we have more than one type of requests we want to use the switch statement to handle multiple types
- Write a handlePutRequest function that updates a user’s role field in the users collection
- Use findOneAndUpdate() method on User model. Find by user id and update the role field
- Send back a status code along with a message
export default async (req, res) => {
  switch (req.method) {
    case 'GET':
      await handleGetRequest(req, res);
      break;
    case 'PUT':
      await handlePutRequest(req, res);
      break;
    default:
      res.status(405).send(`Method ${req.method} not allowed`);
      break;
  }
};

async function handlePutRequest(req, res) {
  const { _id, role } = req.body;
  // Find user by its id
  // Update the role field with the role data
  await User.findOneAndUpdate({ _id }, { role });
  res.status(203).send('User updated');
}
POLISHING OUR APP
1. Sorting in Mongoose, MongoDB
-
In MongoDB, we can sort a set of documents after a given query (such as the find method) by chaining on the .sort() method
-
Sort order history by descending order with most recent order listed first
-
Sort the users in User Permissions panel by their roles, ascending order. Admin users listed first
-
In pages/api/orders.js file:
- After the .find() operation on Order model, chain on the .sort() method
- Then pass in an object to specify createAt field that we want to filter by and set it to ‘asc’ or ‘desc’
const orders = await Order.find({ user: userId }) .sort({ createdAt: 'desc' }) .populate({ path: 'products.product', model: 'Product' }); -
In pages/api/users.js file:
- After the .find() operation on User model, chain on the .sort() method
- Then in the object specify the role field and set it to ‘asc’. Admin users will be listed first before regular users
const users = await User.find({ _id: { $ne: userId } }).sort({ role: 'asc' });
2. Formatting Dates
-
Let’s format all of the dates in a user-friendly readable format. We can achieve this by writing a utility function and pass in our dates to the function
-
In utils/formatDate.js file:
- Write a formatDate function to format a date. This function takes a date as a parameter
export default function formatDate(date) { return new Date(date).toLocaleDateString('en-US'); } -
Import and use the formatDate function on our dates in AccountHeader.js, AccountOrders.js, and AccountPermissions.js components
- Example:
<Table.Cell>{formatDate(user.createdAt)}</Table.Cell>
- Example:
3. Cascade Delete upon Document Removal
-
A cascade delete is when you delete a given document, you want to remove all the places where you have references
-
For example, when we delete a product, we want to remove the product in all carts
-
In pages/api/product.js file:
- Import the Cart model
- In handleDeleteRequest function:
- Call the .updateMany() method on Cart model
- Provide it an object to specify the filter and what we want to update
- Use the
$pulloperator to pull the product by id in the products array
async function handleDeleteRequest(req, res) {
  try {
    const { _id } = req.query;
    // 1) Delete product by id
    await Product.findOneAndDelete({ _id });
    // 2) Remove product from all carts, referenced as 'product'
    await Cart.updateMany(
      // The reference we want to remove from all cart documents
      { 'products.product': _id },
      // The pull operator pulls the product by id from products array
      { $pull: { products: { product: _id } } }
    );
    // status code 204 means success and no content is sent back
    res.status(204).json({});
  } catch (error) {
    console.error(error);
    res.status(500).send('Error deleting product');
  }
}
PRODUCTION DEPLOYMENT TO VERCEL
-
Setup a vercel account:
- The company that makes Next.js also has a deployment service called vercel
- vercel website: https://vercel.com/
- Signup for an account
- Install globally to use vercel cli:
sudo npm i -g vercel - Login to vercel account in cli:
vercel login - Provide email and verify the login from your email account
-
Configure the vercel.json file:
-
In vercel.json file:
- Provide the environment variables
{
  "env": {
    "MONGO_SRV": "<insert-mongo-srv>",
    "JWT_SECRET": "<insert-jwt-secret>",
    "CLOUDINARY_URL": "<insert-cloudinary-url>",
    "STRIPE_SECRET_KEY": "<insert-stripe-secret-key>"
  }
}
-
-
Configure production base URL:
-
In utils/baseUrl.js file:
- Provide the production url for making requests
const baseUrl =
  process.env.NODE_ENV === 'production'
    ? 'https://furnitureboutique.vercel.app'
    : 'http://localhost:3000';

export default baseUrl;
-
-
Deploying our app to vercel:
- Run in the terminal:
vercel - Follow the instruction prompts for setting up the project
- Run in the terminal:
-
To deploy to production:
- Run:
vercel --prod
- Run:
-
Link to Furniture Boutique app:
PRODUCTION DEPLOYMENT TO HEROKU
-
Create a project on Heroku:
- In project root directory, use Heroku CLI login to Heroku:
heroku login - Once successfully logged in, create a project. Run:
heroku create furnitureboutique - Link to Furniture Boutique app is provided: https://furnitureboutique.herokuapp.com/
- In project root directory, use Heroku CLI login to Heroku:
-
Configure production base URL:
-
In utils/baseUrl.js file:
- Provide the production url for making requests
const baseUrl =
  process.env.NODE_ENV === 'production'
    ? 'https://furnitureboutique.herokuapp.com'
    : 'http://localhost:3000';

export default baseUrl;
-
-
Configure run script in package.json file:
- Specify the start script exactly as shown
"scripts": { "dev": "next", "start": "next start -p $PORT", "build": "next build" } -
Deploy to Heroku:
- Add all files to Git:
git add . - To commit:
git commit -m "Initial commit" - Push to Heroku:
git push heroku main - To restart Heroku app:
heroku restart
- Add all files to Git:
-
Commit changes to Heroku repo:
- Make sure there’s a heroku remote:
git remote -v - Git add, git commit with a message, and push to
git push heroku main
- Make sure there’s a heroku remote:
Furniture Boutique websites:
- Heroku: https://furnitureboutique.herokuapp.com/
- Localhost: http://localhost:3000
- Product images are stored on Cloudinary storage
- Cloud database is stored on MongoBD Atlas. Project name is FurnitureBoutique
RESOURCES
- Next.js docs: https://nextjs.org/docs/getting-started
- Semantic UI docs: https://react.semantic-ui.com/
- Stripe docs: https://stripe.com/docs/payments/checkout/migration
- Vercel app deployment service: https://vercel.com/
NPM PACKAGES USED IN THIS PROJECT
- react, react-dom
- next
- mongoose (interact with MongoDB Atlas)
- semantic-ui-react (styling our app)
- nprogress (progress bar)
- bcrypt (hash password)
- jsonwebtoken (generate a token for user)
- js-cookie (generate a cookie)
- nookies (get cookies)
- npm i stripe react-stripe-checkout (checkout with stripe)
Download Details:
Author: sungnga
Demo: https://furnitureboutique.herokuapp.com/
Source Code: https://github.com/sungnga/nextjs-furniture-boutique-app
#react #nextjs #javascript #next