This tutorial outlines the steps to add Touch ID and Face ID to your iOS app.
Step 1: Create a new project
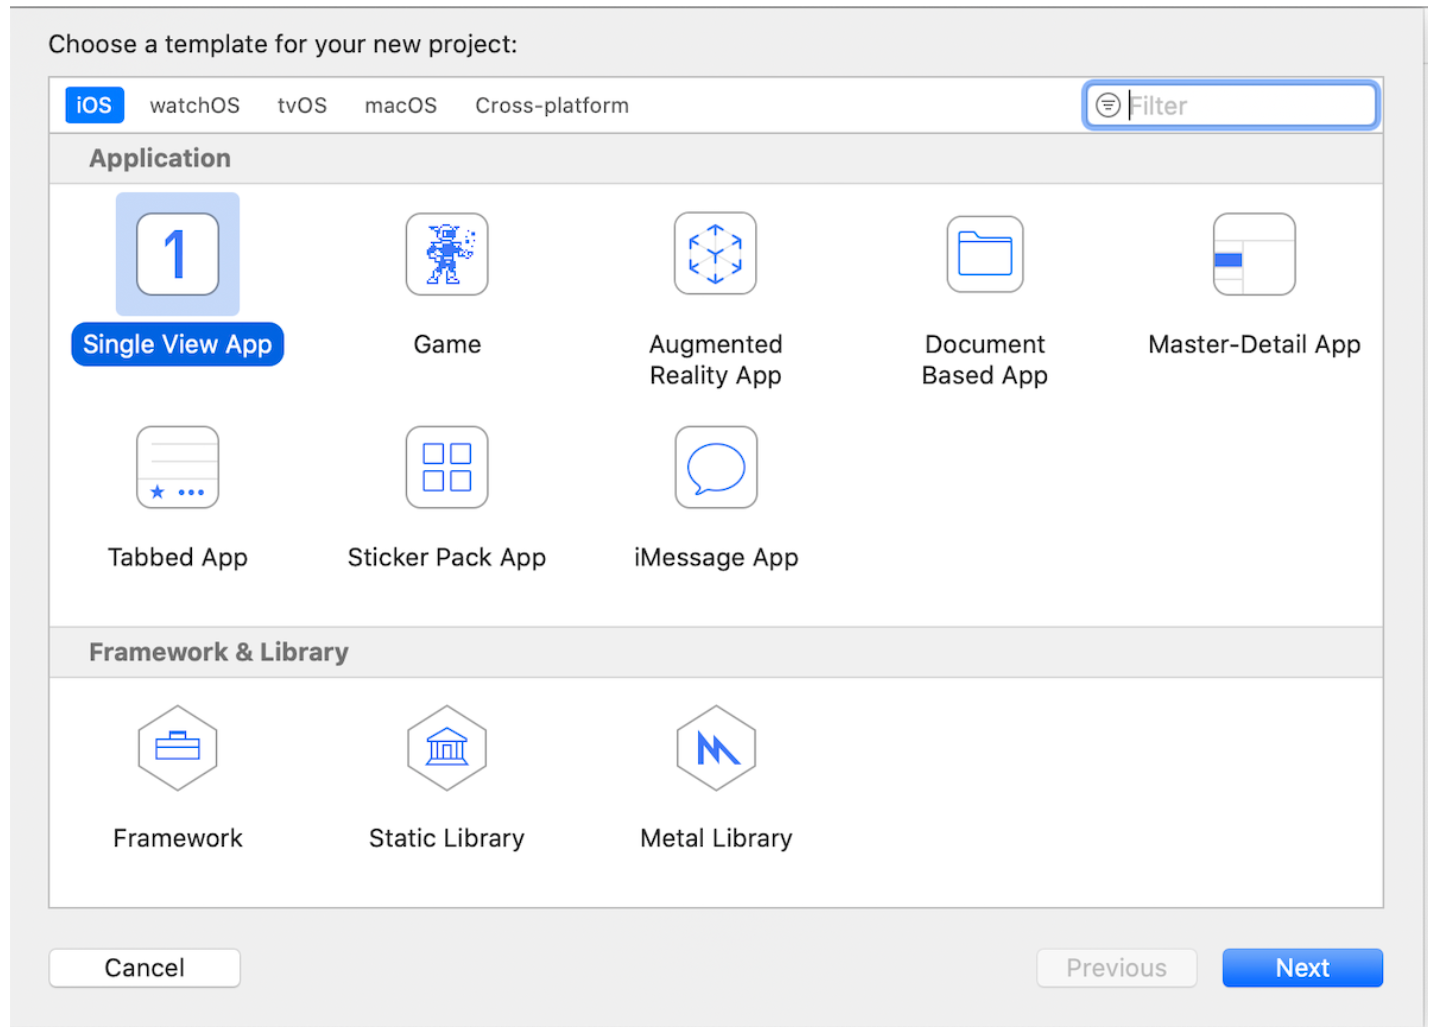
Open the XCode and single view app and give a product name as ‘TouchIDProtectedApp’ and select the location where you want to save the app.
Step 2: Add UI elements
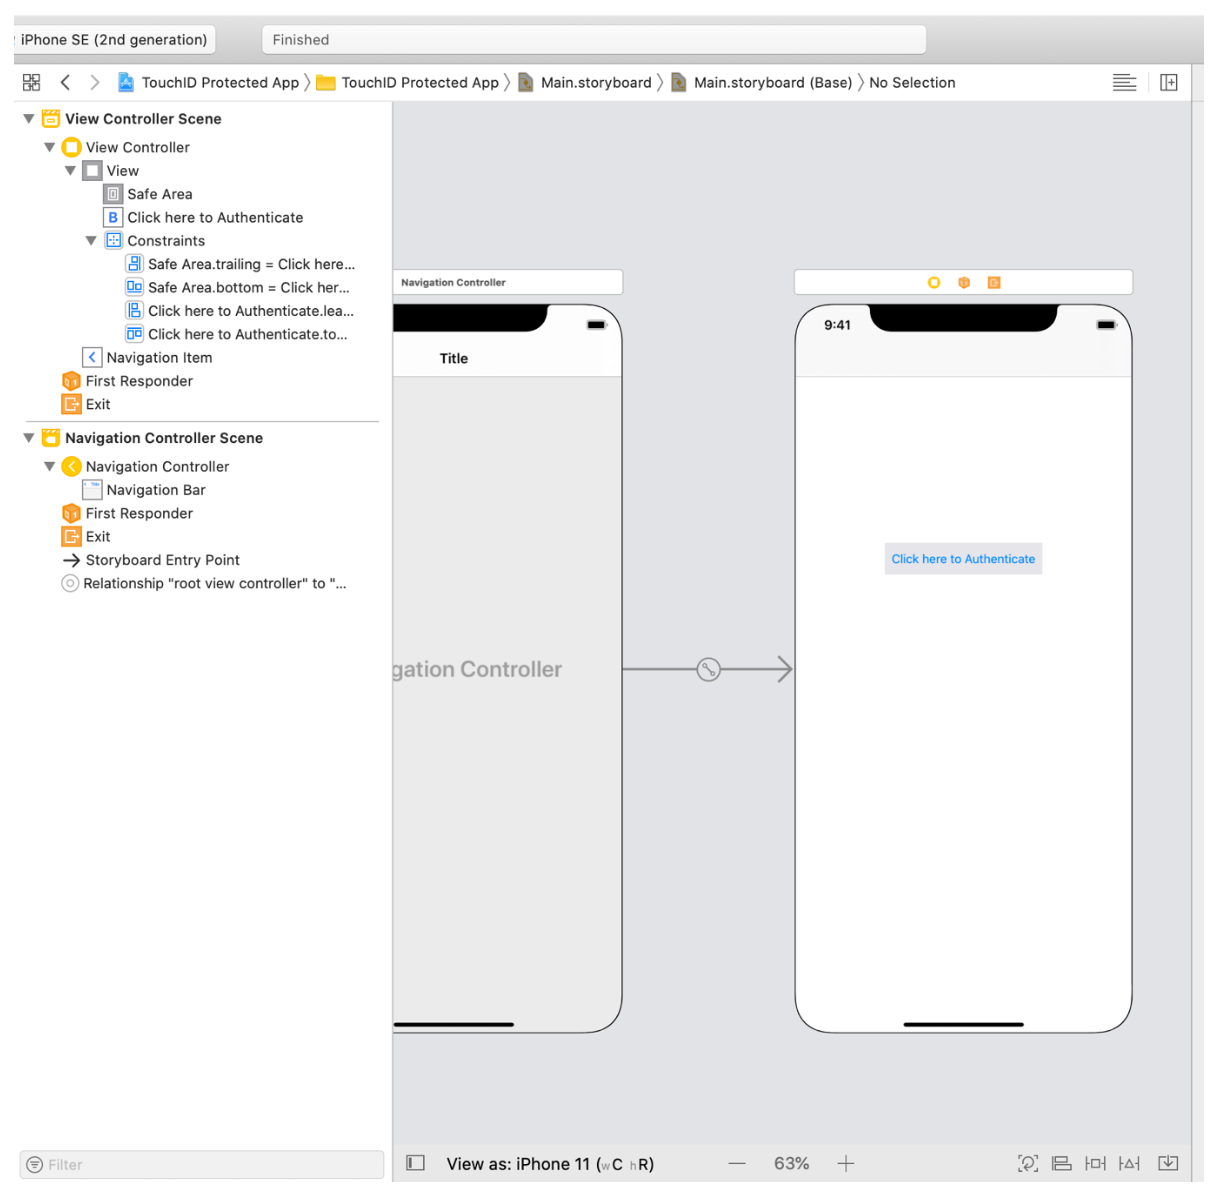
- Click on the bottom right button on the below screenshot, which will allow you to add a navigation controller to the main ViewController of the app.
- Add a button object to the storyboard from the UI element list and change the button text to ‘Click here to Authenticate’.
- If needed, edit the button properties (optional).
Step 3: Create button Action and Add the properties
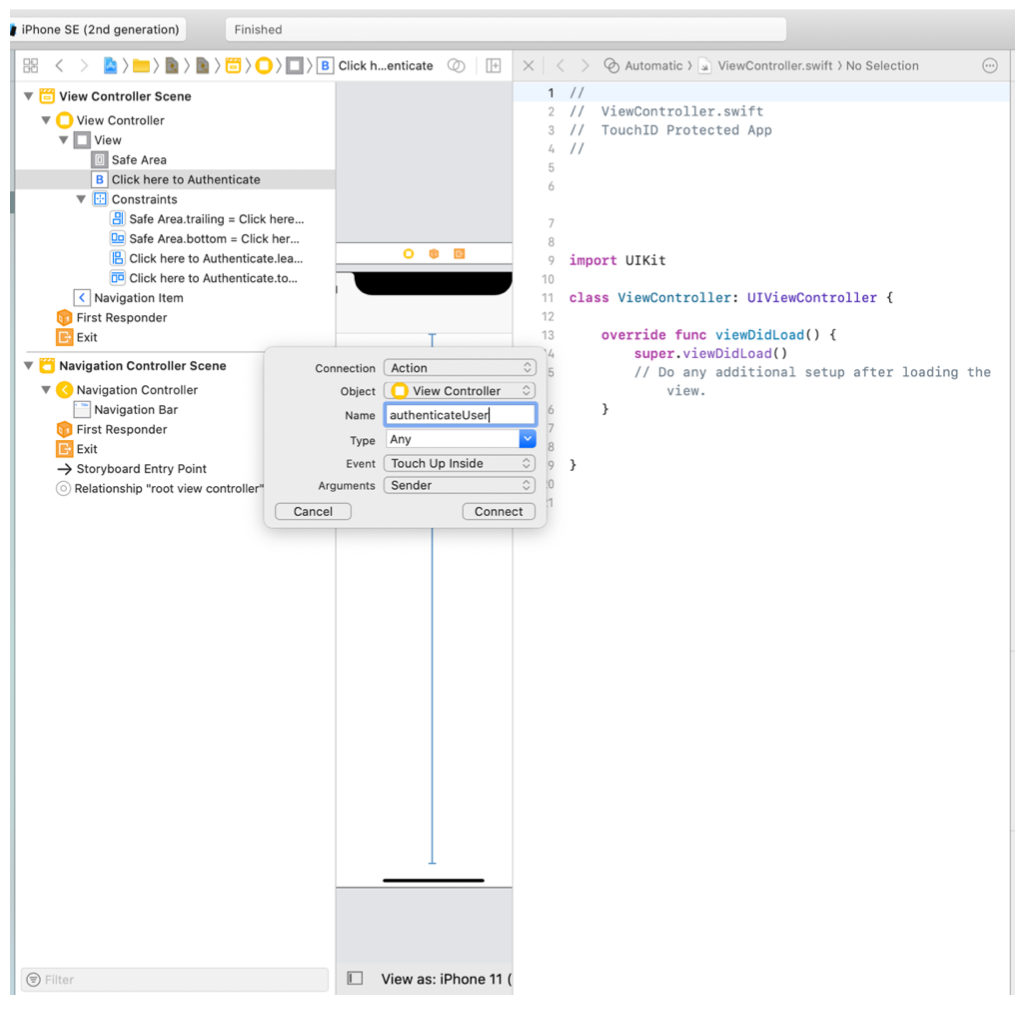
- As shown in the below screenshot, add the action of the button created in step 2 to the viewController (Make sure that the connection is Action).
- Use the name: ‘verification’
- Select Event as ‘Touch Inside’
#face-id #touch-id #swift #ios-app-development #xcode
2.25 GEEK