Two-Factor Authentication for SSH Ubuntu
Originally published by Ankit Jain at https://blog.bitsrc.io
Two Factor Authentication (2FA) is a two-step verification or more appropriately two-step authentication method. A user provides two different authentication factors to verify themselves to protect the resources that he can access. Two Factor Authentication adds an additional layer of Security to our Single Factor Authentication (SFA) in which the user only needs to provide a password or passcode.
Two Factor Authentication method is almost used by everyone to increase the security and make it difficult for the attackers to gain access to the user’s account because knowing the user’s password alone is not enough for completing the authentication process.
Why Two Factor Authentication?
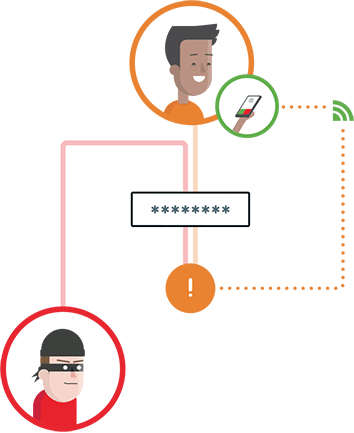
As I said earlier, it is required to make the authentication more secure as the password is not enough to gain access to the user’s account. We also need to complete the additional authentication step which is only known to the verified user. There is a term called Out-of-Band Authentication (OOBA)

Source: Out-of-Band Authentication
Out-of-Band Authentication refers to 2FA in which we conduct the second step authentication over the different network from the primary network/channel. This is because in case a hacker is able to intercept our requests over the primary network, he will have our username and password but as we have added an additional layer of security which is on some other network that he doesn’t have any access, he won’t be able to access user’s resources.
Types of Authentication Methods
Authentication is generally of Three types
- Something we know:
- It is something that we know or memorise like passwords, passcodes, security questions etc.
- Something we have
- It refers to hardware-based authentication like codes sent to a mobile device via SMS, authentication via a voice channel, codes sent to a mobile app via push notifications, U2F etc.
- Something we are
- It refers to biometric authentication like fingerprints, iris scan etc.
Two Factor Authentication for SSH
2FA for SSH is generally used in Enterprises where we need to follow high-security measures to keep our data safe and secure or in case we are heavily dealing with some critical user information which needs to be kept safe. In such scenarios, we increase the level of security by adding another layer in Secure Shell (SSH).
For implementing 2FA in Linux distributions, we need to make some changes in the Pluggable Authentication Modules (PAM). We are using Duo as a third party service for 2FA. We can also use any other third party service like Google Authenticator etc.
Prerequisites
- Ubuntu machine with an SSH key and firewall enabled. (Recommend VMs for testing)
- Duo Keys (integration key, secret key, and API hostname).
- Log in to the Duo Admin Account and click Protect an Application under Applications and locate UNIX Application in the applications list. Click Protect this Application to get your integration key, secret key, and API hostname. See Getting Started for help.
Setup
Let’s set up 2FA for ssh in ubuntu using Duo. During SSH, the client tries to connect with the server at port 22 for which the client has to pass either key-based or password-based authentication. During this whole process, we pass the flow to the PAM modules through which we extend this authentication process and add another level of authentication in which the client verifies themselves.
For using the PAM module, we need the pam_duo binary to authenticate using Duo.
Install pam_duo
pam_duo binary requires some Openssl headers and libraries and other libraries like libpam during compilation.
sudo apt-get install autoconf libtool libpam-dev libssl-dev
After installing the required dependencies, let’s build and install pam_duo
Follow these steps
- Download and extract the latest version of
duo_unix(checksum)
$ wget https://dl.duosecurity.com/duo_unix-latest.tar.gz$ tar zxf duo_unix-latest.tar.gz
$ cd duo_unix-1.11.2
2. Build and install the pam_duo
./configure --with-pam --prefix=/tmp && sudo make install
3. Let’s create a pam_duo.conf file for setting up duo configuration.
# /etc/duo/pam_duo.conf[duo]; Duo integration key
ikey =
; Duo secret key
skey =
; Duo API host
host =
We can also add additional options to configure our pam_duo, Read them in Duo Configuration Options for all available settings.
4. For using pam_duo with public key authentication, we need to make changes in the ssh daemon sshd_config file (usually in /etc/ssh).
PubkeyAuthentication yesPasswordAuthentication no
AuthenticationMethods publickey,keyboard-interactive
UsePAM yes
ChallengeResponseAuthentication yes
UseDNS no
5. Now, we need to add our binary i.e pam_duo.so which we have generated in the step-1 in/etc/pam.d/sshd file.
# @include common-authauth [success=1 default=ignore] /lib64/security/pam_duo.so
auth requisite pam_deny.so
auth required pam_permit.so
We have commented the common-auth file that contains some other PAM modules like pam_unix.so, pam_deny.so and pam_permit.so that checks for password-based authentication if configured.
6. Restart the SSH service to apply the updated configuration.
systemctl restart sshd
Test our 2FA
Let’s try to SSH localhost to check whether everything is working properly or not before logging out the system else we will get locked and won’t able to SSH again in case anything gets wrong.
# keygen$ ssh-keygen -t rsa$ cat ~/.ssh/id_rsa.pub >> authorized_keys
$ ssh localhost
For the very first time, we will get an output as shown in the image below, asking us to enroll at the given URL so as we can set up our device for 2FA.

ssh localhost
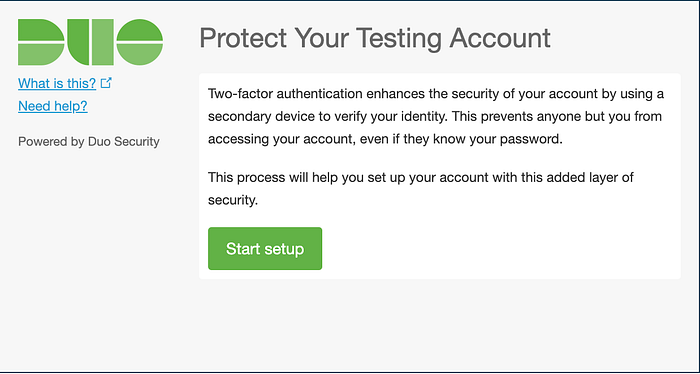
On opening the link, we will get this page where we have to follow the instructions and proceed with our setup.

I have added my phone for the 2FA for which I need to install the Duo app where I will get push notifications. We can add other devices like a tablet, landline, touch Id etc. Once we complete the setup, we are good to SSH again to test our 2FA. Let’s try again

ssh localhost
Choose your authentication method and approve the request using your enrolled device to log in the system.
Demo
I have created a GitHub repo with 2FA configured using Ubuntu Vagrant machine.
Follow the steps
1. Install dependencies
VirtualBox 4.3.10 or greater.Vagrant 1.6.3 or greater.
2. Clone this project and get it running!
$ git clone https://github.com/ankitjain28may/pam_duo_linux$ cd pam_duo_linux/ubuntu
3. Visit the Duo Admin Panel and create a “Unix” integration if you don’t have one already.
4. Copy your ikey, skey, and api_host into the duo.env file
mv duo.env.example duo.env
5. Open Vagrantfile and change ./install.sh ankit to whatever username you want -> ./install.sh username.
6. Run this commands-
# To craete a ubuntu VM$ vagrant up # First time
$ vagrant ssh# create keys and try local ssh so as you can enroll your device
$ sudo su - username
$ ssh-keygen -t rsa
$ cat ~/.ssh/id_rsa.pub >> authorized_keys
$ ssh localhost# SSH in VM
$ ssh username@localhost -p 2222
Note: In case you are facing issues while SSH using username, open Vagrantfile and add this-
config.ssh.username = ‘username’ # Now SSH again$ vagrant ssh
Read more about pam_duo from its docs: Duo Unix — Two-Factor Authentication for SSH with PAM Support (pam_duo)
Conclusion
In this post, we first understand the Two Factor Authentication (2FA) and why do we need it and types of the authentication methods. We learn about the implementation of 2FA using Duo in ubuntu. Duo has its own advantage like we can manage users, devices from Duo Admin panel and many more. The code is available in this Github Repo.
Thanks for reading ❤
If you liked this post, share it with all of your programming buddies!
Follow us on Facebook | Twitter
#security #web-development #web-service #ubuntu
