HTML、CSS、JavaScript を使用してタグの追加入力ボックスを作成する方法
このチュートリアルでは、HTML CSS と JavaScript でタグの追加入力ボックスを作成する方法を説明しました。このタグ入力では、タグを追加または削除できます。これは純粋な JavaScript プロジェクトです。気に入っていただければ幸いです。
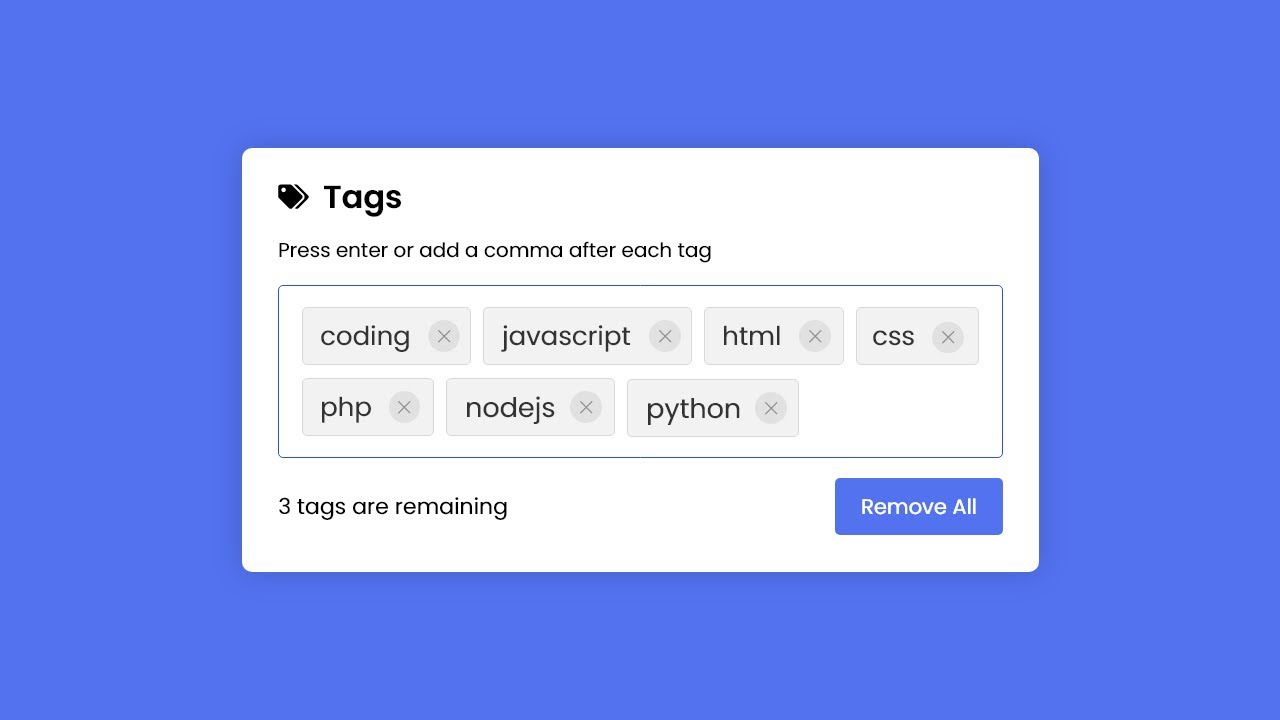
HTML、CSS、JavaScript を使用してタグの追加入力ボックスを作成するには、HTML、CSS、JavaScript ファイルの 3 つのファイルを作成する必要があります。これらのファイルを作成したら、指定されたコードをファイルに貼り付けるだけです。
ソースコード:
HTMLファイル
<!DOCTYPE html>
<html lang="en" dir="ltr">
  <head>
    <meta charset="utf-8">
    <title>Add Tags Input Box</title>
    <link rel="stylesheet" href="style.css">
    <meta name="viewport" content="width=device-width, initial-scale=1.0">
    <!-- Unicons CDN Link for Icons -->
    <link rel="stylesheet" href="https://unicons.iconscout.com/release/v4.0.0/css/thinline.css">
  </head>
  <body>
    <div class="wrapper">
      <div class="title">
        <img src="tag.svg" alt="icon">
        <h2>Tags</h2>
      </div>
      <div class="content">
        <p>Press enter or add a comma after each tag</p>
        <ul><input type="text" spellcheck="false"></ul>
      </div>
      <div class="details">
        <p><span>10</span> tags are remaining</p>
        <button>Remove All</button>
      </div>
    </div>
    <script src="script.js"></script>
  </body>
</html>
CSS ファイル:
/* Import Google Font - Poppins */
@import url('https://fonts.googleapis.com/css2?family=Poppins:wght@400;500;600;700&display=swap');
*{
  margin: 0;
  padding: 0;
  box-sizing: border-box;
  font-family: 'Poppins', sans-serif;
}
body{
  display: flex;
  align-items: center;
  justify-content: center;
  min-height: 100vh;
  background: #5372F0;
}
::selection{
  color: #fff;
  background: #5372F0;
}
.wrapper{
  width: 496px;
  background: #fff;
  border-radius: 10px;
  padding: 18px 25px 20px;
  box-shadow: 0 0 30px rgba(0,0,0,0.06);
}
.wrapper :where(.title, li, li i, .details){
  display: flex;
  align-items: center;
}
.title img{
  max-width: 21px;
}
.title h2{
  font-size: 21px;
  font-weight: 600;
  margin-left: 8px;
}
.wrapper .content{
  margin: 10px 0;
}
.content p{
  font-size: 15px;
}
.content ul{
  display: flex;
  flex-wrap: wrap;
  padding: 7px;
  margin: 12px 0;
  border-radius: 5px;
  border: 1px solid #a6a6a6;
}
.content ul  li{
  color: #333;
  margin: 4px 3px;
  list-style: none;
  border-radius: 5px;
  background: #F2F2F2;
  padding: 5px 8px 5px 10px;
  border: 1px solid #e3e1e1;
}
.content ul li i{
  height: 20px;
  width: 20px;
  color: #808080;
  margin-left: 8px;
  font-size: 12px;
  cursor: pointer;
  border-radius: 50%;
  background: #dfdfdf;
  justify-content: center;
}
.content ul input{
  flex: 1;
  padding: 5px;
  border: none;
  outline: none;
  font-size: 16px;
}
.wrapper .details{
  justify-content: space-between;
}
.details button{
  border: none;
  outline: none;
  color: #fff;
  font-size: 14px;
  cursor: pointer;
  padding: 9px 15px;
  border-radius: 5px;
  background: #5372F0;
  transition: background 0.3s ease;
}
.details button:hover{
  background: #2c52ed;
}
JavaScript ファイル:
const ul = document.querySelector("ul"),
input = document.querySelector("input"),
tagNumb = document.querySelector(".details span");

let maxTags = 10,
tags = ["coding", "nepal"];

countTags();
createTag();

function countTags(){
    input.focus();
    tagNumb.innerText = maxTags - tags.length;
}

function createTag(){
    ul.querySelectorAll("li").forEach(li => li.remove());
    tags.slice().reverse().forEach(tag =>{
        let liTag = `<li>${tag} <i class="uit uit-multiply" onclick="remove(this, '${tag}')"></i></li>`;
        ul.insertAdjacentHTML("afterbegin", liTag);
    });
    countTags();
}

function remove(element, tag){
    let index  = tags.indexOf(tag);
    tags = [...tags.slice(0, index), ...tags.slice(index + 1)];
    element.parentElement.remove();
    countTags();
}

function addTag(e){
    if(e.key == "Enter"){
        let tag = e.target.value.replace(/\s+/g, ' ');
        if(tag.length > 1 && !tags.includes(tag)){
            if(tags.length < 10){
                tag.split(',').forEach(tag => {
                    tags.push(tag);
                    createTag();
                });
            }
        }
        e.target.value = "";
    }
}

input.addEventListener("keyup", addTag);

const removeBtn = document.querySelector(".details button");
removeBtn.addEventListener("click", () =>{
    tags.length = 0;
    ul.querySelectorAll("li").forEach(li => li.remove());
    countTags();
});
これで、HTML CSS と JavaScript でタグの追加入力ボックスが正常に作成されました。
1.55 GEEK