Manually deploying a Nuxt project is pretty easy when teams are small. However, as projects and teams grow, they usually turn to continuous integration and deployment (CI/CD) in their DevOps to automate their testing and deployment. This is when deployments — and the setup of deployments — can get complicated.
In this article, we’ll look at how to easily set up an automated CI/CD system for a Nuxt project using Heroku and CircleCI. We’ll walk through all the details, from setting up your GitHub repository to automating your tests to pushing your code changes. Then we’ll look at some suggested next steps.
What Is Nuxt.js?
First, here’s a little background on Nuxt and why developers might choose it as part of their stack.
When Vue was first released, developers fell in love. With its simple template syntax and component structure, Vue makes it easy to spin up beautiful single-page applications (SPAs) with ease.
However, developers soon realized SEO was a problem. Since SPAs are deployed as a shell and the content isn’t inserted until runtime, developers learned it could be difficult for search engines to accurately index the contents. Because of this, developers needed a solution for handling server-side rendering (SSR) of their Vue applications.
Enter Nuxt.
Nuxt is an open-source framework that combines all of the oft-used Vue libraries, bundling in Vue Router, Vuex, and Vue server-side rendering (SSR), to provide Vue.js developers with the architecture for a smoother development experience. With Nuxt, developers can get an SEO-friendly Vue application (with SSR) up and running within minutes.
Our Sample Project
Now let’s look at our sample project and deployment setup. For this project, we’ll be using GitHub as our repository, Heroku as our host, and CircleCI as our CI/CD tool.
Heroku is a PaaS solution that makes it easy to deploy and manage apps. CircleCI provides cloud-based CI/CD, running automated jobs in containers as soon as the project code is pushed to GitHub. These jobs perform tests, send success or failure notifications, and then deploy built applications to cloud-service environments.
In the end, we want our outcome to be: When we push our master branch to GitHub, an automated process will run all of our tests and then (if all the tests pass) deploy the application to Heroku.
To that end, I’ll take you through the following steps:
1\. Set up a GitHub repository
2\. Create a basic Nuxt application
3\. Create the tests for our Nuxt application
4\. Manually deploy the Nuxt application to Heroku
5\. Set up automated testing with CircleCI
6\. Set up atuomated deployment to Heroku
Sound pretty simple? It will be. Let’s go!
1. Set Up a GitHub Repository
This tutorial requires an account with GitHub. A basic GitHub Free account will be sufficient.
We’ll set up a GitHub repository to house our project code. Later, we’ll connect our GitHub account with our CircleCI account. Whenever we push code to GitHub, this action will trigger a webhook to notify CircleCI to begin the CI/CD automation process.
On the “Your Repositories” page in GitHub, click on the “New” repository button.
Choose any name you’d like for this private repository. For this tutorial, we’ll call our repository my-heroku-nuxt-app.
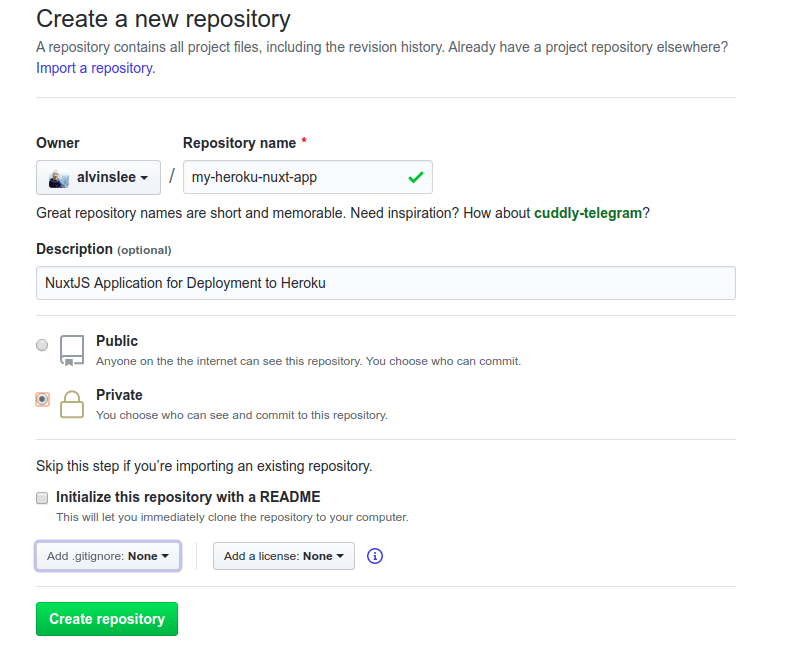
Click on “Create repository” to finish up. Then, clone the repository onto your local machine. In the command below, make sure to use your own GitHub username. Notice we’re cloning the empty repository into a folder called app.
~/$ git clone git@github.com:[GITHUB USERNAME]/my-heroku-nuxt-app.git app
Cloning into 'my-heroku-nuxt-app'...
warning: You appear to have cloned an empty repository.
Excellent. Now that we have our app folder, let’s fill it up with a shiny, new Nuxt application.
#nuxtjs #devops #continuous-integration #programming #heroku