Angular 17 模板:带有验证示例的驱动表单
了解如何在 Angular 17 中创建具有验证和提交功能的模板驱动表单。本教程涵盖表单创建、验证规则和错误处理的基础知识。
Angular 17 中模板驱动表单的步骤
- 第 1 步: 创建 Angular 17 项目
- 第 2 步:更新组件 ts 文件
- 第 3 步: 使用 ngModel 构建表单
- 运行角度应用程序
您需要按照以下步骤在 Angular 17 中创建模板驱动的表单。
第 1 步:创建 Angular 17 项目
首先,为此演示创建一个新的 Angular 应用程序。如果您已经创建了一个应用程序,则无需启动新的 Angular 17 应用程序。
ng new my-new-app第2步:更新组件ts文件
从“@angular/forms”导入必要的模块,包括 FormsModule 和 ReactiveFormsModule;库,在 app.component.ts 文件中。
src/app/app.component.ts
import { Component } from '@angular/core';
import { CommonModule } from '@angular/common';
import { RouterOutlet } from '@angular/router';

import { FormsModule } from '@angular/forms';

@Component({
  selector: 'app-root',
  standalone: true,
  imports: [CommonModule, RouterOutlet, FormsModule],
  templateUrl: './app.component.html',
  styleUrls: ['./app.component.css']
})
export class AppComponent {
  title = 'firstApp';

  submit(form:any){
    var firstName = form.firstName;
    console.log(firstName);

    var lastName = form.lastName;
    console.log(lastName);

    var comment = form.comment;
    console.log(comment);
  }

}
第 3 步:使用 ngModel 构建表单
使用 ngModel 实现 HTML 表单。 Bootstrap 类已应用于样式设计。
我在此表单上使用了引导类。如果您想添加,也请点击此链接:将 Bootstrap 5 安装到 Angular 17。
src/app/app.component.html
<h1>Template Driven Forms Validation in Angular 17 Example - ItSolutionStuff.com</h1>

<form #contactForm="ngForm" (ngSubmit)="submit(contactForm.value)">

  <div class="form-group">
      <label for="firstName">First Name</label>
      <input required minlength="3" maxlength="10" ngModel name="firstName" type="text" #firstName="ngModel" class="form-control" id="firstName">
      <div class="alert alert-danger" *ngIf="firstName.touched && !firstName.valid">
          <div *ngIf="firstName.errors && firstName.errors['required']">First Name is required.</div>
          <div *ngIf="firstName.errors && firstName.errors['minlength']">First Name is minimum {{ firstName.errors && firstName.errors['minlength'].requiredLength }} character.</div>
          <div *ngIf="firstName.errors && firstName.errors['maxlength']">First Name is maximum 10 character.</div>
      </div>
  </div>

  <div class="form-group">
      <label for="lastName">Last Name</label>
      <input required ngModel name="lastName" type="text" #lastName="ngModel" class="form-control" id="lastName">
      <div class="alert alert-danger" *ngIf="lastName.touched && !lastName.valid">
          Last Name is required.
      </div>
  </div>

  <div class="form-group">
      <label for="comment">Comment</label>
      <textarea required ngModel #comment="ngModel" name="comment" id="comment" cols="30" rows="10" class="form-control"></textarea>
      <div class="alert alert-danger" *ngIf="comment.touched && !comment.valid">
          Comment is required.
      </div>
  </div>

  <button class="btn btn-primary" type="submit" [class.disabled]="!contactForm.valid">Submit</button>

</form>
运行角度应用程序:
所有必需的步骤都已完成,现在您必须输入以下命令并按 Enter 运行 Angular 应用程序:
ng serve现在,转到您的 Web 浏览器,输入给定的 URL 并查看应用程序输出:
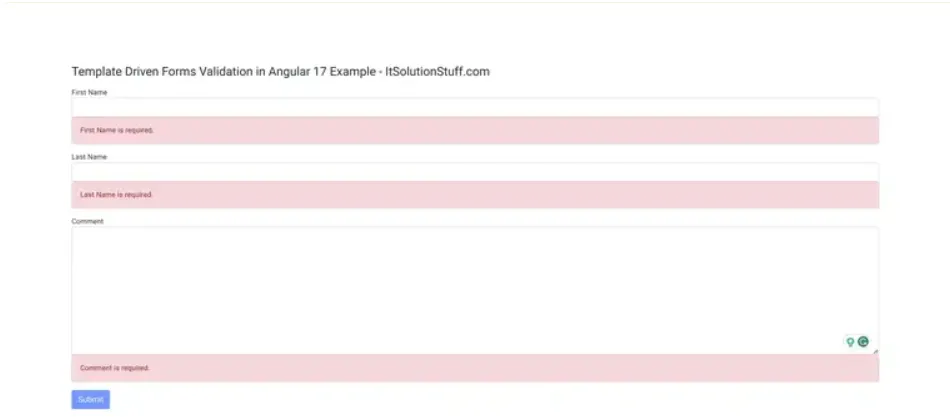
http://localhost:4200输出:
现在您可以看到布局,如下图所示:

1.50 GEEK