How do I Log into my TP-Link extender IP?
TP-Link WiFi extenders are valuable devices that help boost your wireless network’s coverage area, ensuring a strong and reliable connection throughout your home or office. To configure and manage your TP-Link extender, you’ll need to access its web interface via its IP address. In this blog post, we’ll walk you through the process of TP Link Extender Login IP address step-by-step guide.
Step 1: Connect to Your TP-Link Extender
Before you can access the extender’s web interface, ensure that you are connected to its WiFi network. Locate the WiFi network name (SSID) and password on the label of your extender. Connect your computer or mobile device to this network.
Step 2: Find the Extender’s IP Address
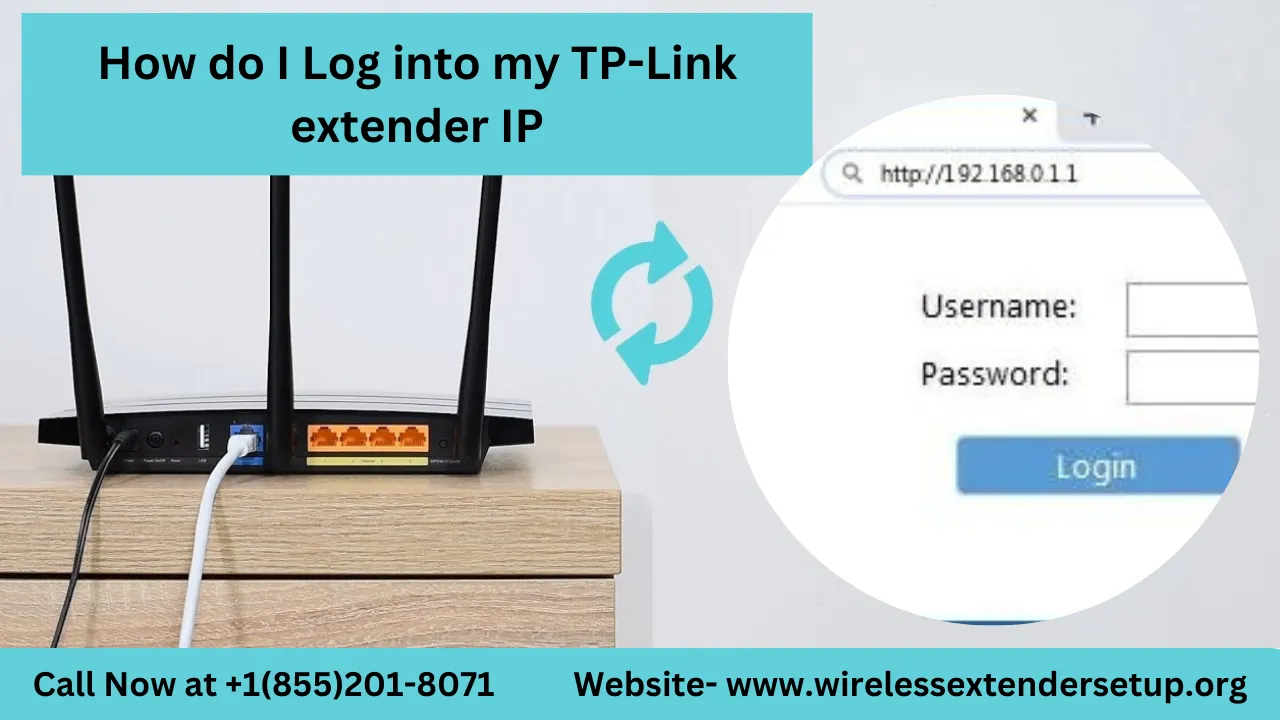
Open a web browser on your connected device. In the address bar, type the default IP address of the TP-Link extenders. Common TP-Link extender IP addresses include:
If these addresses don’t work, consult your extender’s user manual or packaging for the correct IP address. It’s crucial to ensure your device is connected to the extender’s network before attempting to access the IP.
Step 3: Enter Login Credentials
Once you’ve entered the extender’s IP address, press “Enter” or “Return” on your keyboard. This action should take you to the login page of your TP-Link extender’s web interface. You’ll be prompted to enter your login credentials.
By default, TP-Link extender login credentials are often as follows:
- Username: admin
- Password: admin
If you’ve previously changed these credentials for security purposes, use the updated username and password. If you can’t recall your custom credentials, consider performing a factory reset on the extender by pressing and holding the reset button for about 10 seconds (consult the manual for exact instructions).
Step 4: Access the Web Interface
After entering the correct login credentials, click “Login” or press “Enter.” This will grant you access to the TP-Link extender’s web interface, where you can configure and manage various settings.
Step 5: Configure Your Extender
Within the web interface, you can configure your TP-Link extender according to your preferences. Common settings you can adjust include:
- Wireless network name (SSID) and password
- Security settings (e.g., WPA2 encryption)
- Extender mode (e.g., Range Extender, Access Point)
- Firmware updates
Make any necessary changes to improve your network’s performance or security. Remember to save your settings after making adjustments.
Conclusion
Logging into your TP-Link extender’s IP address is a fundamental step in managing and optimizing your WiFi network’s coverage and performance. By following the steps outlined in this guide, you can easily access the web interface and tailor your extender’s settings to your specific needs. If you encounter any issues during this TP Link Extender Login process then contact our customer support for assistance.
Source Link: https://www.wirelessextendersetup.org/tp-link-wifi-extender-login/