In this article, you will learn how to work with Rasa framework and make human-like conversational chatbots.
What is Rasa?? Why Rasa??
Rasa is an easy to customize open source framework, which makes creating chatbots a very simple task for beginners. A full stack of bot-building tools is provided when you use Rasa. Unlike Dialogue-flow, a small understanding of any one programming language is required. When it was previously known as the Rasa Stack (when they started), there were separate libraries for Rasa NLU, the framework’s natural language understanding component, and Rasa Core, which is the dialogue engine. Now, these two components coexist under the Rasa umbrella, although you can still use Rasa NLU on its own, if you prefer.
Many big firms and companies like Adobe, BMW, Airbus, ENGIE, HCA Healthcare and Orange use Rasa NLU.
Now, enough of _getting to know _about Rasa. Let’s start building our Weather chatbot.
To collect the weather data,we have to use an API, because weather is not a static entity, keeps on changing. So we can use any open source weather API provider. Here, I chose the OpenWeatherMap for it’s simplicity. You have to just sign-in into the site and then in the API keys section an API key is provided to access their data.

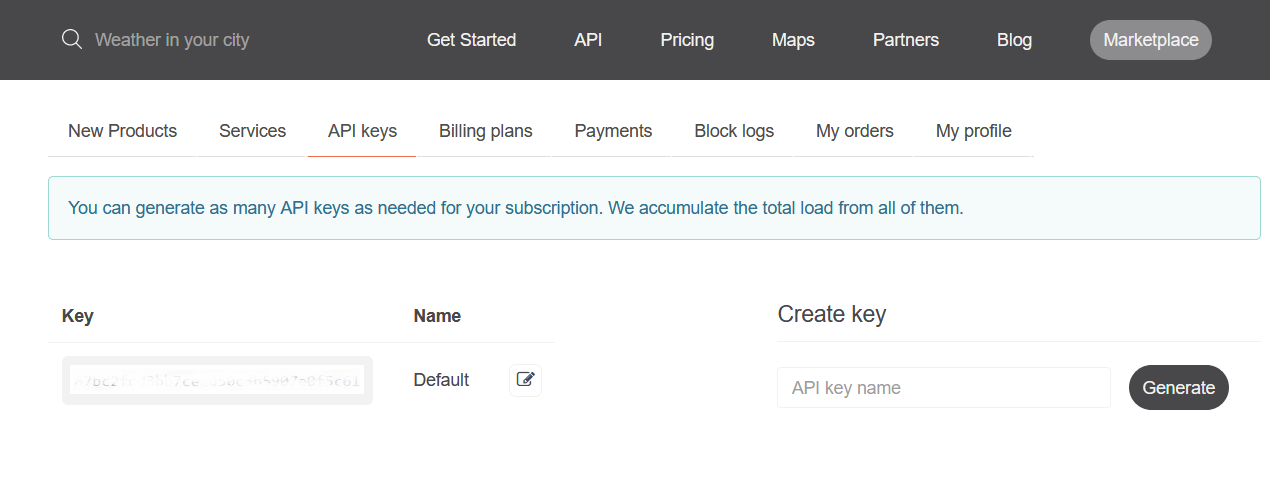
Weather API Key
Now that we are set with the API, we can start with the Rasa setup.
Rasa has too many dependencies, so instead of messing up our _base environment, _we can create a separate virtual environment for Rasa. To create the virtual environment, open the command prompt or if you use anaconda prompt it will be much better.
For command prompt:
$ python3 -m venv /path/to/new/virtual/environment

For anaconda prompt:
$ conda create -n RasaEnv python=3.7.6
After creating this virtual environment, we have to switch from base to virtual environment. Here, I’m using anaconda because it’s simple.
$ source ./venv/bin/activate

OR
$ conda activate RasaEnv
Now install the packages ujson, tensorflow using conda. As of now conda does not have rasa libraries, so we will have to use pip for Rasa installation. We don’t have to worry about these libraries they are just to make the installation a little bit easier.
$ pip install rasa

After installation completes, check the version using
$ rasa --version
Create a separate folder for working with Rasa, so that they are easy to manage. The next step is to create a model of Rasa project structure and then edit to our needs from the inside.
$ rasa init --no-prompt
The rasa init command creates all the files that a Rasa project needs and trains a simple bot on some sample data. If you leave out the --no-prompt flag you will be asked some questions about how you want your project to be set up. This creates the following files:
.
├── actions.py
├── config.yml
├── credentials.yml
├── data
│   ├── nlu.md
│   └── stories.md
├── domain.yml
├── endpoints.yml
└── models
    └── <timestamp>.tar.gz
We are mainly going to use only 3 major files, the nlu.md, stories.md and domain.yml. We do not need to disturb other files. Just forget about them and leave them hanging in there. Use any code editor for easy handling of these files, I prefer Visual Studio Code (VS Code).
#rasa-nlu #conversational-ai #chatbot-development #chatbot #rasa