Let’s build a modern blog with Vue, Nuxt, and Prismic
Let’s build a modern blog with Vue, Nuxt, and Prismic.
I chose Vue and Nuxt because they’re fun to work with. They’re easy to start with, offer plenty of essential features out of the box, and provide good performance.
Nuxt is a Vue framework for server-side rendering. It’s a tool in the Vue ecosystem, that you can use to build server-rendered apps from scratch, without being bothered by the underlying complexities of rendering a JavaScript app to a server.
Why Nuxt?

Nuxt.js is an implementation of what we call a universal application.
It became famous with React, but is currently getting more and more popular for many client-side libraries, such as Angular, Vue.js, etc.
A universal application is a kind of application that renders your component on the server-side.
Nuxt.js offers a simple way to first retrieve your asynchronous data from any data source, and then render it and send it to the browser as HTML.
In terms of SEO, the Google bot crawler will get the rendered content and indexes it properly. In addition to that, the fact that your content can be pre-rendered, and ready to be served, increases the speed of your website. In that way, it also improves your SEO.
The Nuxt ecosystem is a never-ending stream of handy tools and packages.
Fast Rendering Ensured by Virtual DOM and Minimal Load Time
Vue.js is only ~30 KB gzipped with the core module, the router and Vuex.
A minimal footprint offers short load time, meaning higher speed for users and better ranking on the speed criterium for the Google crawler.
Virtual DOM
Vue.js also took inspiration from ReactJS, by implementing a virtual DOM under the hood since version 2.0. A virtual DOM is basically a way to generate a version of the DOM in memory, each time you change a state and compare it to the actual DOM, so you can update only the part that needs to be updated instead of re-rendering everything.
Benchmarking
Vue.js offers some really good overall performance, as you can see on the following benchmarks:
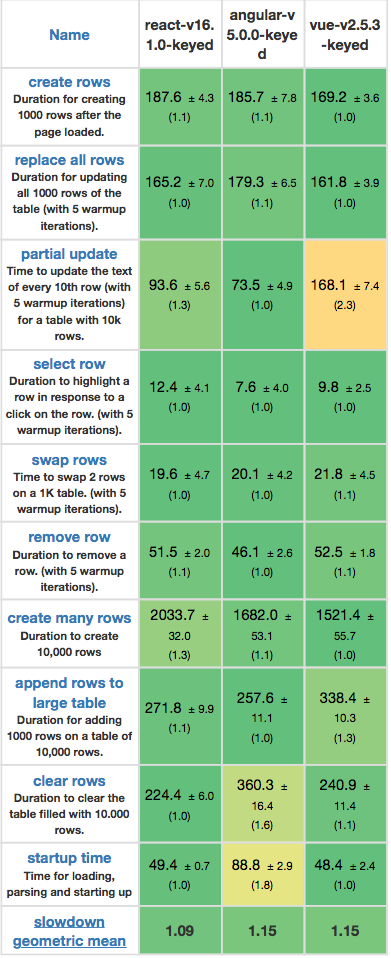
Source: third-party benchmarks by Stefan Krause
Duration in milliseconds ± standard deviation (Slowdown = Duration).
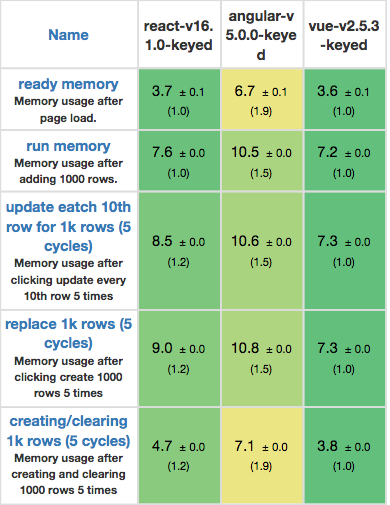
Source: third-party benchmarks by Stefan Krause
Memory allocation in MB.
What Is Prismic and Why Is It Relevant?
Prismic is a headless CMS. This means you edit your templates on your own server, but the back end runs on the cloud. This presents a few advantages such as being able to use an API to feed your content into external apps.
Imagine that you built a blog, not for yourself, but for someone else who is not a developer, so they can edit their content. You want to have full control over the layout (built with Vue), but you don’t want to go over the tedious process of deploying, every time a new file for a new blog post is created.
This is where including a headless content management system (CMS) into your app is useful — so you don’t have to deal with that.

The Difference Between a Headless CMS and Vanilla CMS
A traditional CMS like Wordpress would provide the editing tools for managing content. But, it also would assume full control of the front end of your website. The way the content is displayed is largely defined in a CMS.
Headless content management systems, or headless CMS, are a back end only content management system, built from the ground up as a content repository, that makes content accessible via a RESTful API, for display on any device.
I chose Prismic as my headless CMS — it’s super simple to set up and has great features out of the box.
Why I Chose Prismic
- Easy to setup. It took me only a couple of hours to set up the environment and push to production.
- Live preview mode. This allows editors to preview their content on their website and apps — whether it’s in a draft, or scheduled to be published later. This allows marketing teams, for example, to have a full preview of their website for a specific date and time. This can be extremely useful to manage upcoming blog releases, and preview edits.
- Slices. Slices are reusable components. Enabling slices in your template will allow writers to choose between adding a text section, an image, or a quote in the piece of content they are creating. It gives writers the freedom to compose a blog post by alternating and ordering as many of these choices/content blocks as they want/need.
- Simple and comprehensive documentation.
- Strong community, e.g Google, New Relic, Ebay, etc., are using Prismic.
- Friendly free tier.
Start Setting Up Prismic
Head over to the Prismic website and create a new user.
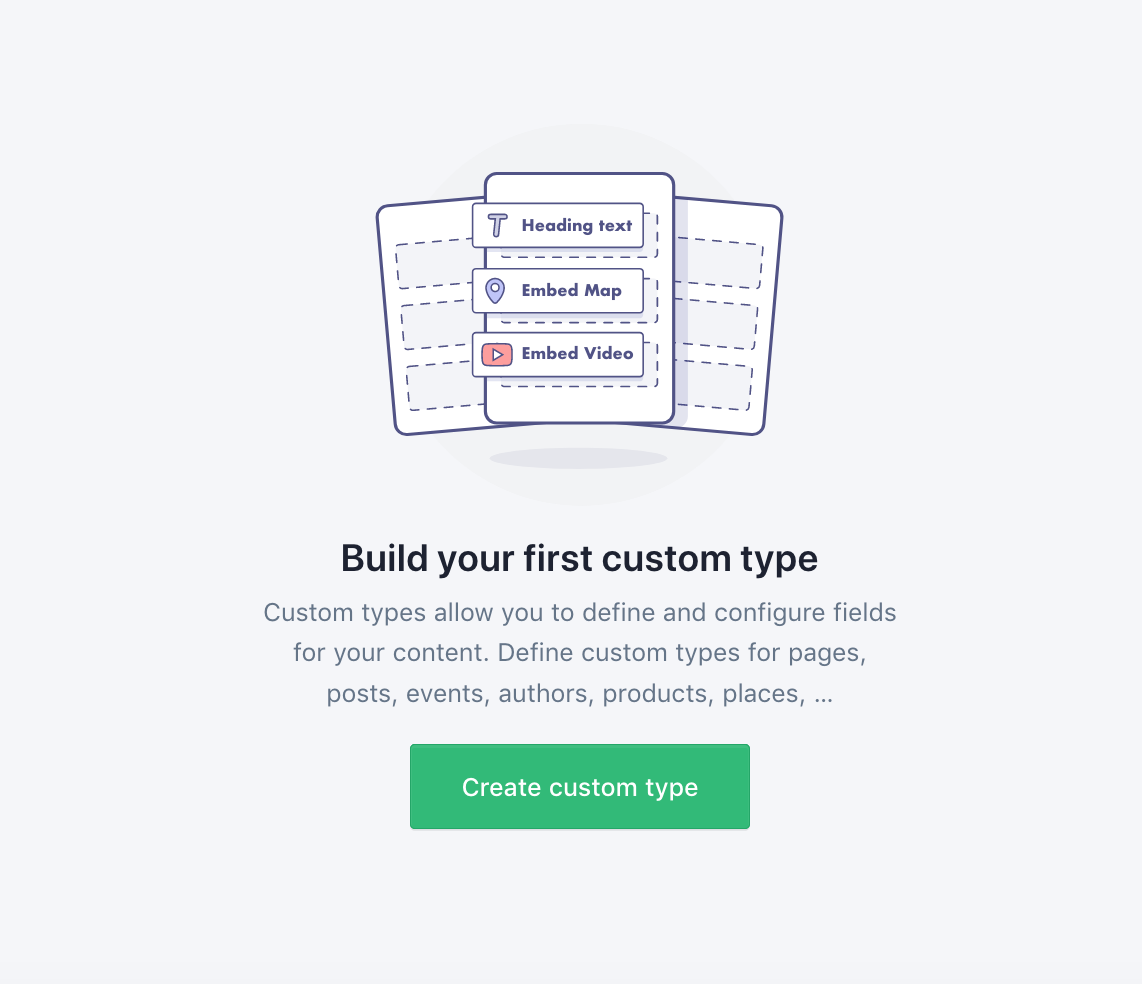
After creating a new user on Prismic, we should see something like this:
Building our Custom Type
Custom Types are models of content that we setup for our marketing or writing team. The marketing team will fill them with content (text, images, etc.), and we’ll be able to retrieve this content through Prismic’s API.
There are two kinds of Custom Types — the Single Type and the Repeatable Type.
- The Single Type is used for pages where there is only one instance (a home page, a pricing page, an about us page).
- Repeatable Custom Types are templates, used in more than one document (ie. blog post pages, product pages, landing pages for your website).
We want a blog post. In fact we want many blog posts, so it should be a Repeatable Type.
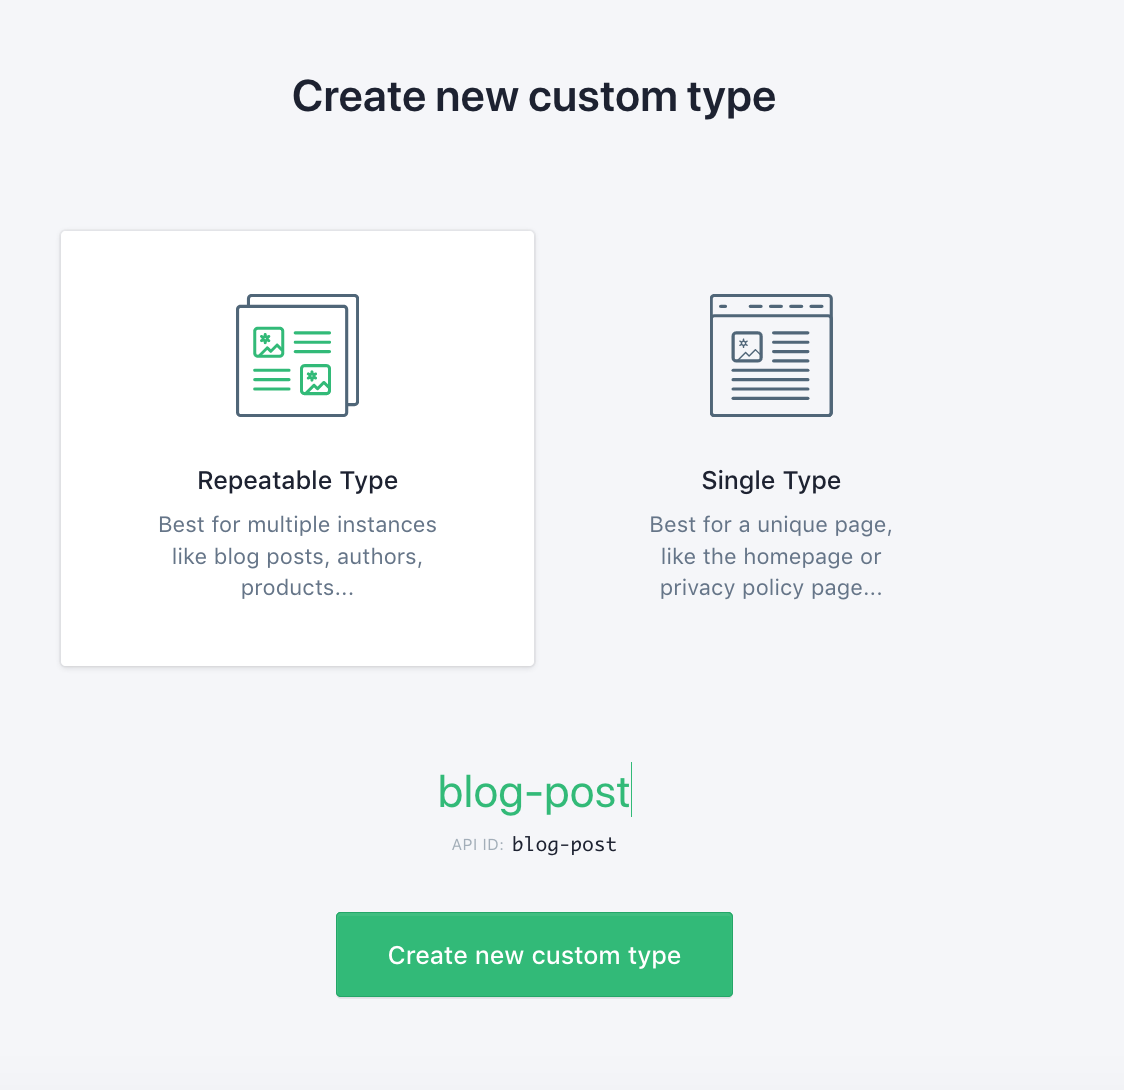
Choosing the Type
Creating a Repeatable Type Blog Post
We should be in the content builder now. Prismic gives us a lot of options to choose from. If you look on the right, you should see a sidebar with lots of options — images, titles, content related, and SEO options.
Let’s build a reusable blog post with the Prismic builder. Our blog will include a title and a body.
Start by adding the following fields:
- UID field
- Title field
- Rich text field
Each time you add a field you can define formatting options for it. The UID field is a unique identifier that can be used specifically to create SEO and user-friendly website URLs.
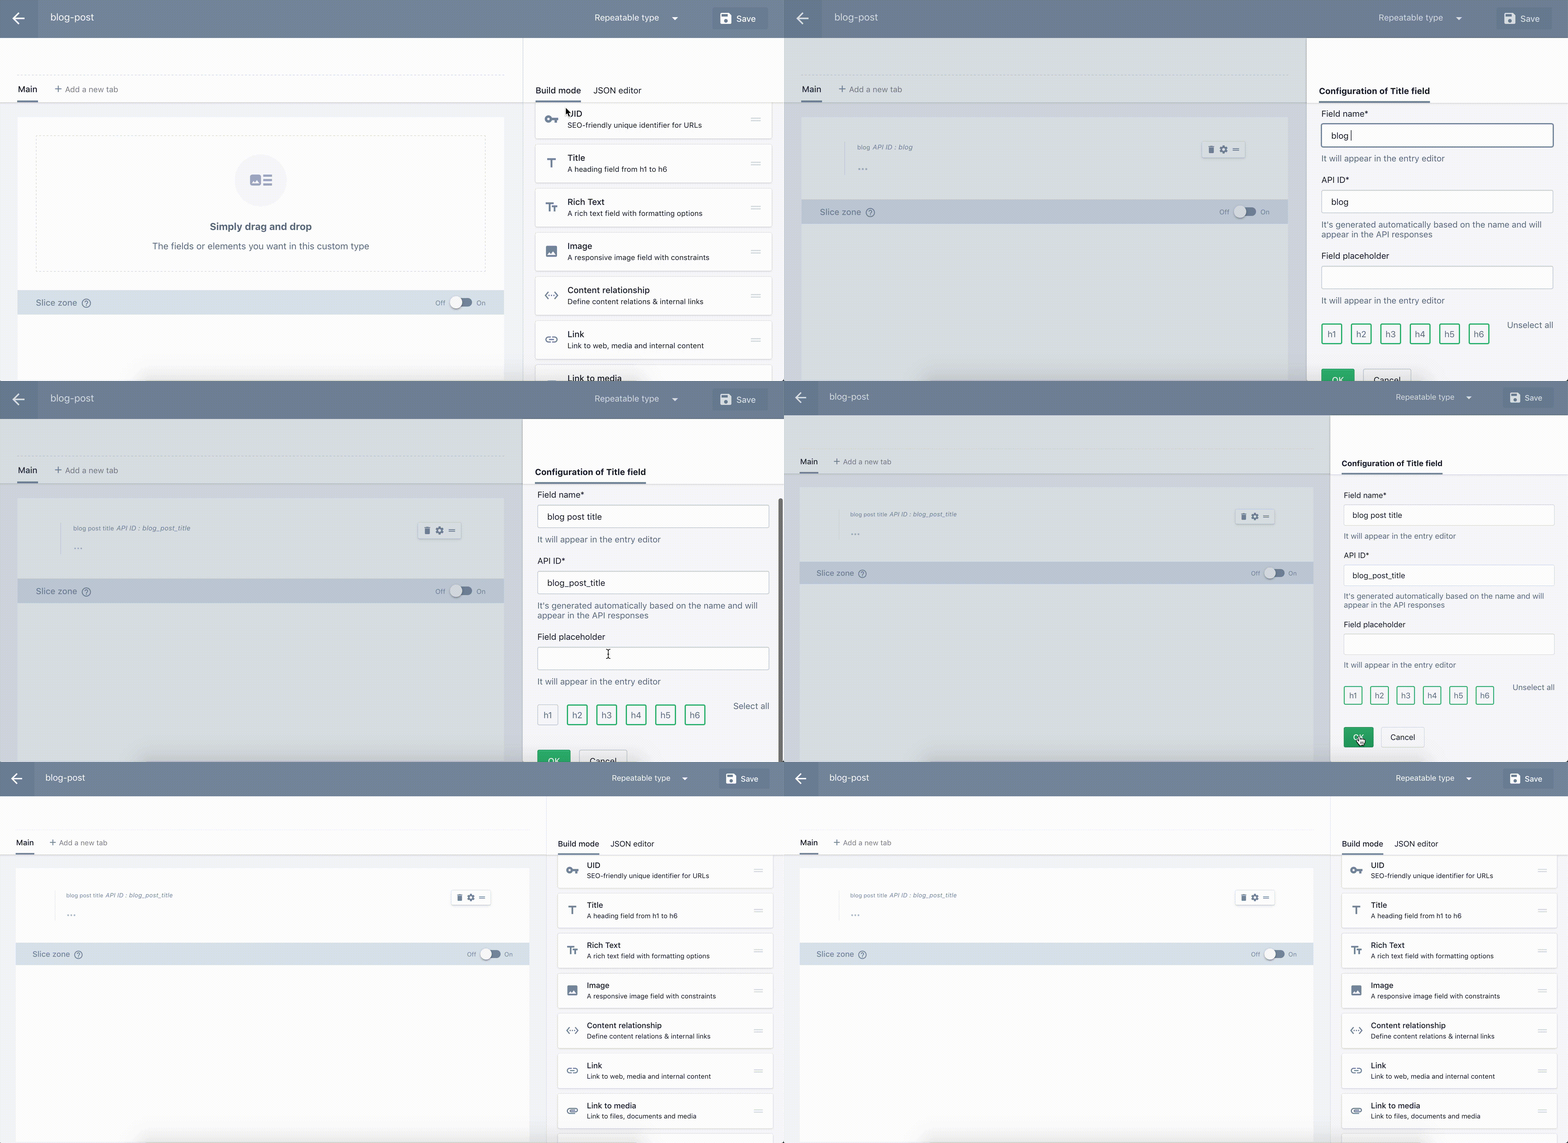
Creating our blog post title
Don’t forget to save our progress!
Make sure you have the following fields for the blog post:
uidblog_post_titleblog_content
So far, we have the layout for our reusable blog post.

Custom types menu
Time to create a blog post. Head over to the content tab on the left.

Content tab
This will take us to the blog layout we built earlier. Insert the desired text for the **uid**, **post_title**, **blog_content**blocks**.**
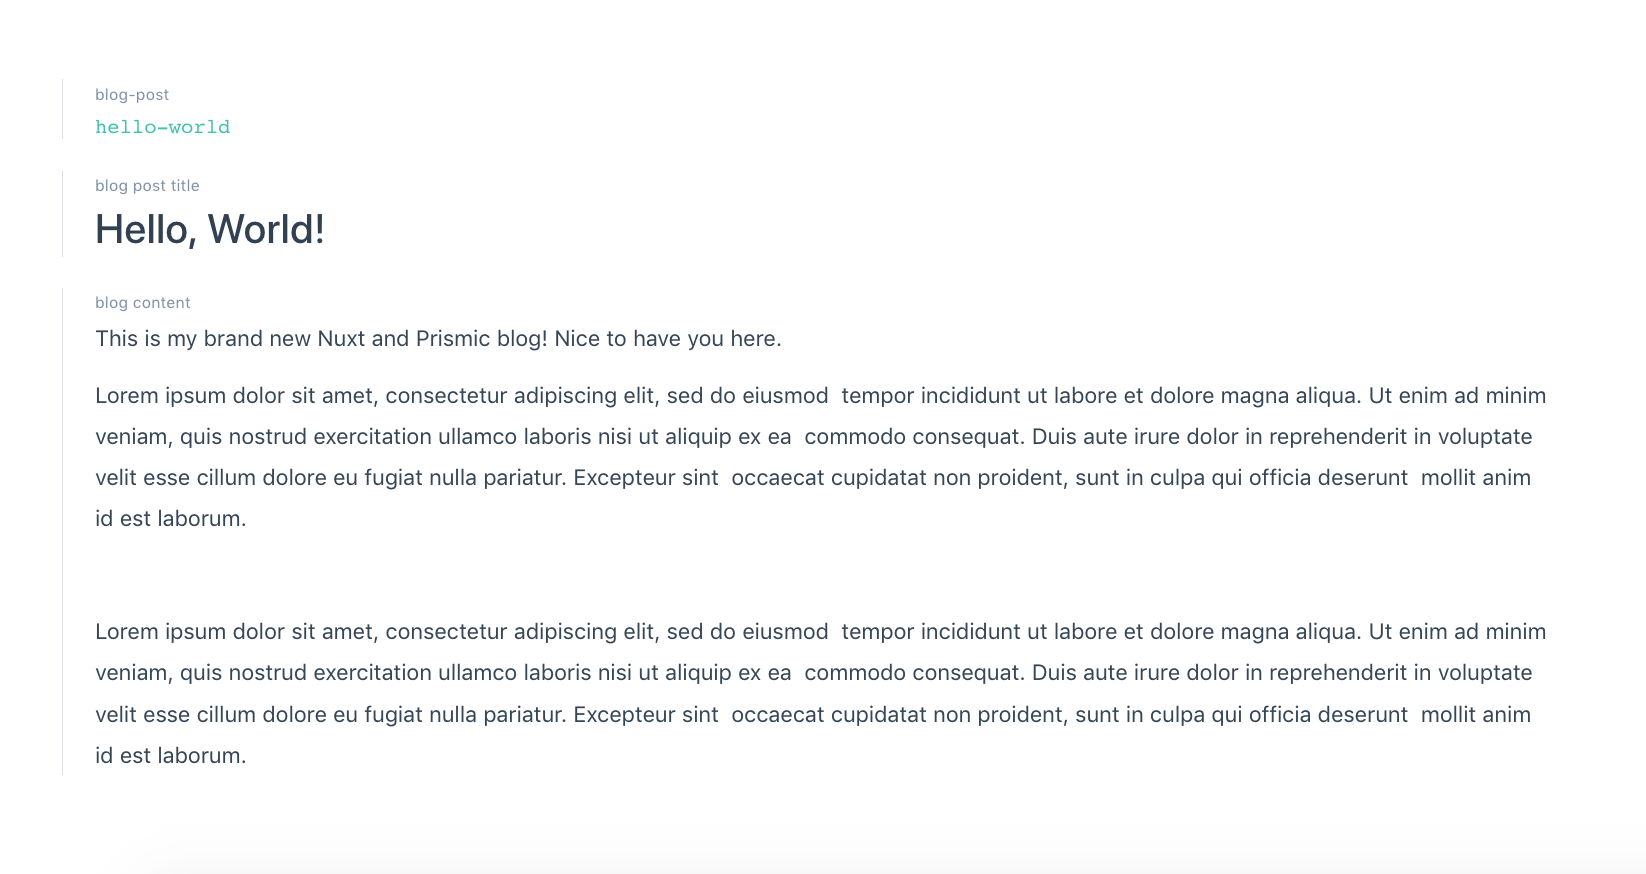
Building our page with Prismic layout builder
Great! We have our blog post set up now. Look at the top right; we should see a save button. Clicking this saves our progress. After saving we can publish our content. Publishing the content makes it available, via the API, for consumption by the our front end.
Starting a New Nuxt Project
Open your terminal and run this command. Make sure you have npx installed (shipped by default with npm +5.2.0).
$ npx create-nuxt-app vue-nuxt-prismic-blog
The Nuxt installer conveniently asks us for our preferences and creates the project.
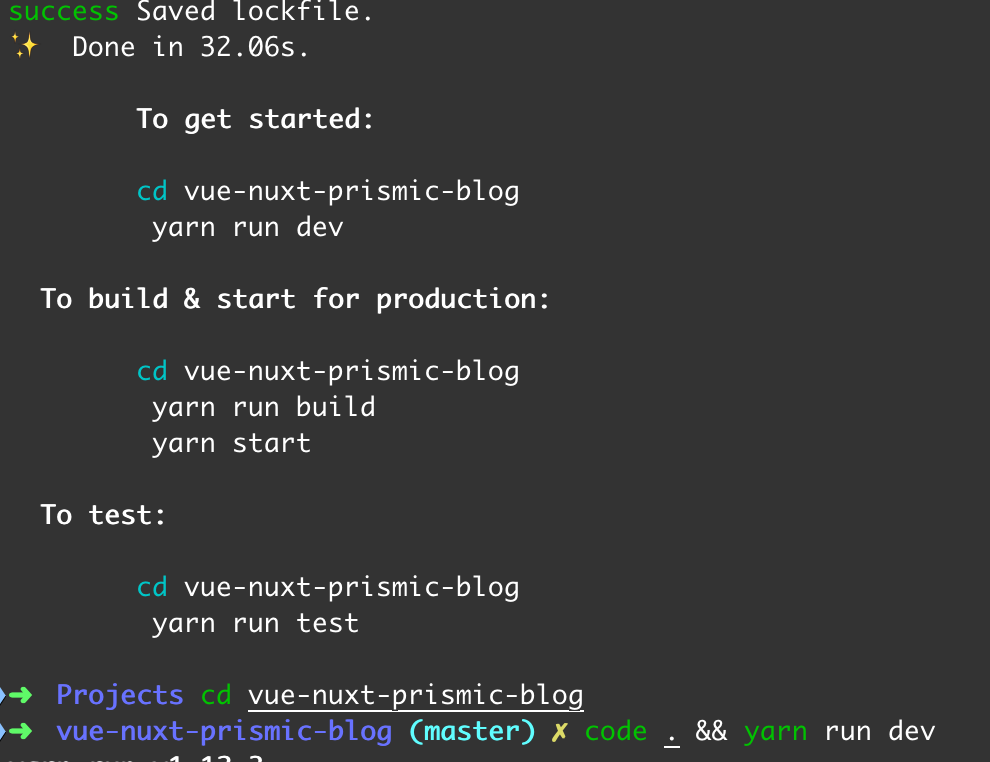
We should end up with a project structure like below:
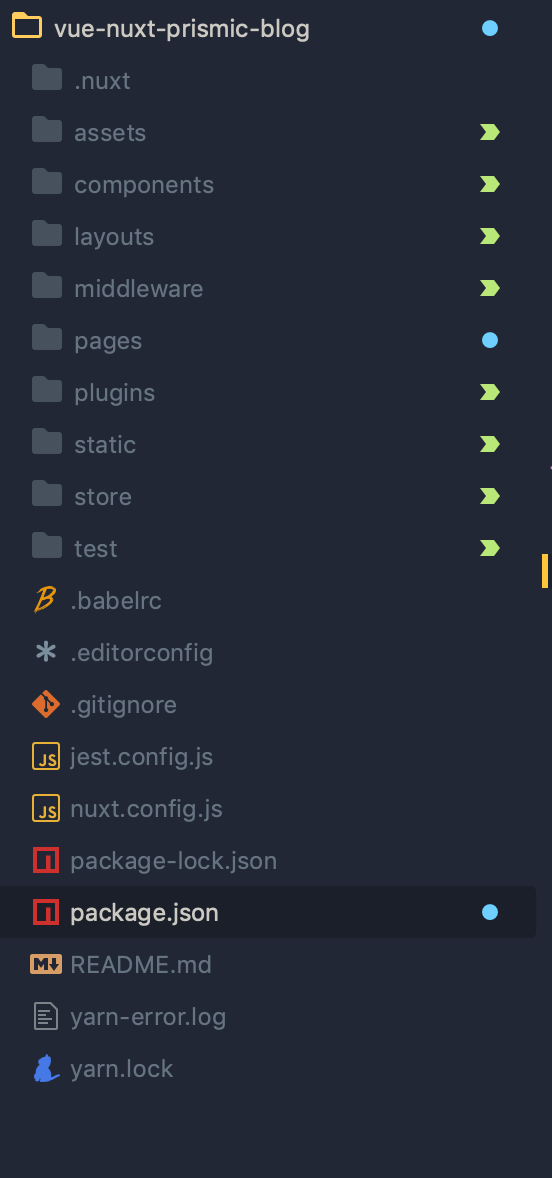
Nuxt project structure
Let’s build our blog now. We need to fetch the blog content from Prismic. Luckily, Prismic gives us plenty of handy tools.
Installing the Prismic JavaSCript packages
The prismic-javascript package includes many utilities, including fetching from our API. The prismic-dom gives us helper functions to render markup.
Prismic NPM package — https://www.npmjs.com/package/prismic-javascript
Let’s create the prismic.config.js file in our root directory. This is where we’ll place our Prismic related configuration.
export default {
  apiEndpoint: "https://indrek-blog.cdn.prismic.io/api/v2",
}
prismic.config.js
Note: Make sure you use the API endpoint associated with your blog.
Open the pages/index.vue file and import the Prismic library with our config.
<script>
import Prismic from "prismic-javascript";
import PrismicDom from "prismic-dom" //importing the Dom
import PrismicConfig from "./../prismic.config.js";
export default {
  async asyncData() {
    const api = await Prismic.getApi(PrismicConfig.apiEndpoint);
    let blog_post = {};
    const results = await api.query(
      Prismic.Predicates.at("document.type", "blog-post"),
      { lang: "en-us" } //This is a Prismic query option
    );
    blog_post = results.results[0]
  }
};
</script>
index.vue
pages/index.vue
First, we initialize our API with the endpoint. Then, we query the API to return our blog post. We can specify the language and document type.
The Prismic API is promise based, which means we can call the API and chain promises. Hurray for promises. We can also use the async/await syntax to resolve promises.

Prismic response
All we need to do is render the markup now.
<template>
  <section class="blog-post">
    <h1 class="title">{{ header }}</h1>
    <p class="paragraph">{{ content }}</p>
  </section>
</template>

<script>
import Prismic from "prismic-javascript";
import PrismicDom from "prismic-dom" //importing the Dom
import PrismicConfig from "./../prismic.config.js";
export default {
  async asyncData() {
    const api = await Prismic.getApi(PrismicConfig.apiEndpoint);
    let blog_post = {};
    const results = await api.query(
      Prismic.Predicates.at("document.type", "blog-post"),
      { lang: "en-us" } //This is a Prismic query option
    );
    blog_post = results.results[0];
    const header = PrismicDom.RichText.asText(blog_post.data.blog_post_title);
    const content = PrismicDom.RichText.asText(blog_post.data.blog_content);
    return {
        blog_post,
        header,
        content
    };
  }
};
</script>
index.vue
There you go. We’ve successfully fetched our blog post from the Prismic API.
To apply the styles — grab a copy and place it in the style section of the Vue component:
<template>
  <section class="blog-post">
    <h1 class="title">{{ header }}</h1>
    <p class="paragraph">{{ content }}</p>
  </section>
</template>

<script>
import Prismic from "prismic-javascript";
import PrismicDom from "prismic-dom" //importing the Dom
import PrismicConfig from "./../prismic.config.js";
export default {
  async asyncData() {
    const api = await Prismic.getApi(PrismicConfig.apiEndpoint);
    let blog_post = {};
    const results = await api.query(
      Prismic.Predicates.at("document.type", "blog-post"),
      { lang: "en-us" } //This is a Prismic query option
    );
    blog_post = results.results[0];
    const header = PrismicDom.RichText.asText(blog_post.data.blog_post_title);
    const content = PrismicDom.RichText.asText(blog_post.data.blog_content);
    return {
        blog_post,
        header,
        content
    };
  }
};
</script>

<style scoped>
.blog-post {
  margin: 25px 0;
  padding: 0 100px;
  width: 100%;
  display: flex;
  justify-content: center;
  flex-direction: column;
  align-items: center;
}
.title {
  margin: 50px 0;
}
p {
  color: #000;
  margin: 15px 0 5px;
  max-width: 450px;
  line-height: 1.44;
}
</style>
index.vue
If we open our app, this is what we should see.
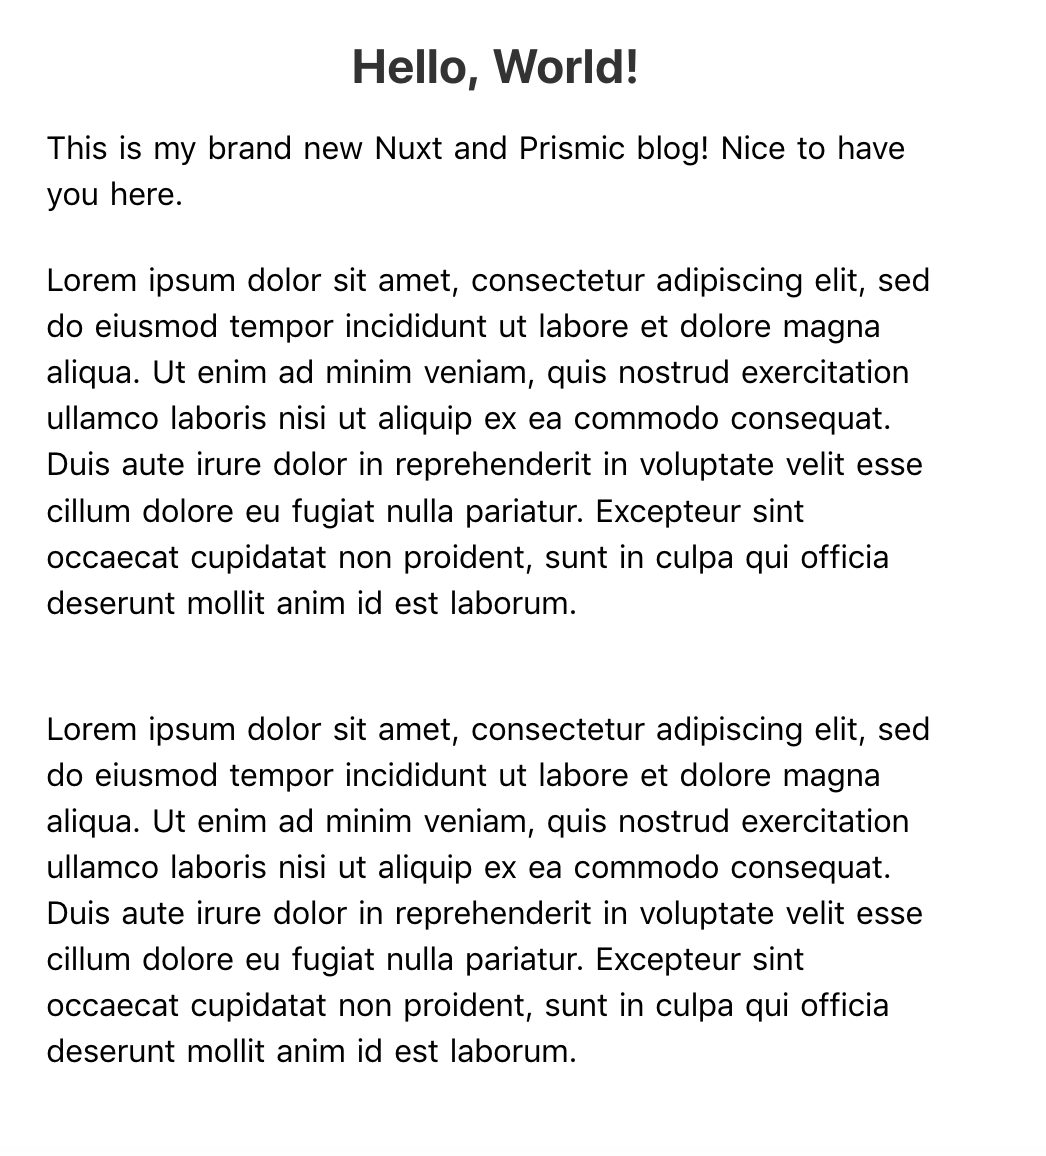
End result
Voilà! We have a modern server-side rendered blog, built with Nuxt and Prismic.
We barely scratched the surface. We can do a lot more with Nuxt and Prismic. My favorite Prismic features are Slices and Live Preview. I encourage you to check them out!
Slices will allow you to create dynamic pages with richer content, and Live preview will allow you to instantly preview your edits on your webpage.

For example, in this project, we worked on only one post. If we had created lots of posts in Prismic, however, then one really great thing about Nuxt.js is that it automatically creates routes for you.
Behind the scenes, it still uses Vue Router for this, but you don’t need to create a route config manually anymore. Instead, you create your routing using a folder structure — inside the pages folder. But you can read all about that in the official docs on routing in Nuxt.js.
If you’re thinking about launching your blog, the “Master Content Strategy” book helped me tremendously with putting together a solid blogging strategy.
Thanks for reading!
#vuejs #nuxtjs #Prismic
