In this step-by-step guide, we are demonstrating exact steps of how Client ID Enforcement Policy can be applied in Mule4 using Autodiscovery and API Manager.
Prerequisites
- Must know how to write RAML and publishing it to Exchange
- Must be familiar with Anypoint Studio
- Must be familiar with Anypoint Platform
There are five parts in this tutorial. After completing all of these parts, we will end up having a Client ID Enforcement Policy implemented on the API.
- Designing API Specifications using Design Center
- Application implementation using Anypoint Studio
- Creating an API using API Manager
- Requesting Access to the API using Exchange
- Applying a Policy using API Manager
Details of each part are given below.
Designing API Specifications Using Design Center
Create RAML in Design Center with a single Get resource and a client-id-enforcement trait
Client-id-enforcement trait includes client_id and client_secret to be filled in headers of request.
YAML
1
#%RAML 1.0
2
title: client-id-enforcement-project
3
description: client-id-enforcement-project
4
version: v1
5
baseUri: https://localhost/{version}
6
protocols: [ HTTP, HTTPS ]
7
mediaType: application/json
8
documentation:
9
- title: client-id-enforcement-project documentation
10
content: some documentation
11
12
traits:
13
client-id-required:
14
headers:
15
client_id:
16
type: string
17
description: Client ID provided by API Manager
18
required: true
19
client_secret:
20
type: string
21
description: Client Secret provided by API Manager
22
required: true
23
24
/getCustomer:
25
get:
26
is: client-id-required
27
description: |
28
Get Customer by passing customer_id
29
queryParameters:
30
customer_id:
31
displayName: customer_id
32
type: integer
33
description: Customer ID
34
example: 12345
35
required: true
36
responses:
37
200:
38
body:
39
application/json:
40
400:
41
body:
42
application/json:
43
500:
44
body:
45
application/json:
46
Publish that RAML in Exchange.

Application Implementation Using Anypoint Studio
Create a project/implementation in Studio by importing the RAML from Exchange.
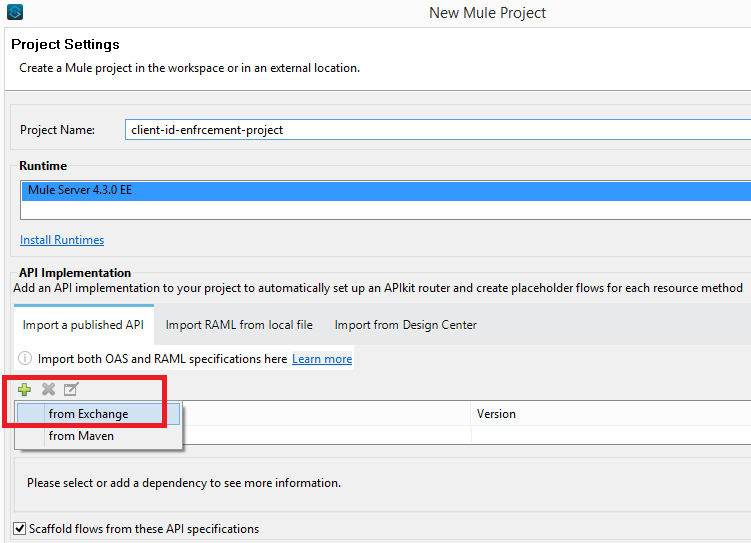
As you have imported the RAML from Exchange, you will see that after creating the project, the API specifications will be added as a zip file in project libraries rather than the API folder in project resources.
If you have imported the RAML from Design Center, you will see that after creating the project, the API specifications will be added inside the api folder in project resources.
Its a best design practice to import the RAML from Exchange rather than Design Center. In this manner, we are enforcing the user to only edit the RAML through Design Center… it will not make any discrepancy in RAML versions on Studio and Design Center.
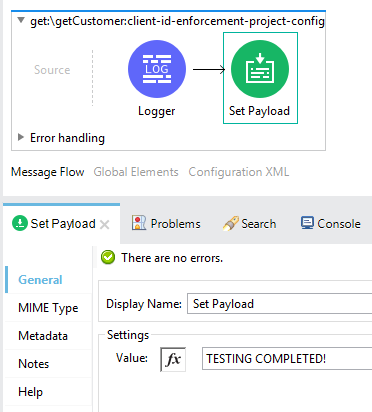
Now we need to implement the flow so that it returns something on Postman.
Execute it on localhost to confirm that we are getting expected outcome on postman if we pass dummy client_id, client_secret in request headers otherwise we get Bad Request.
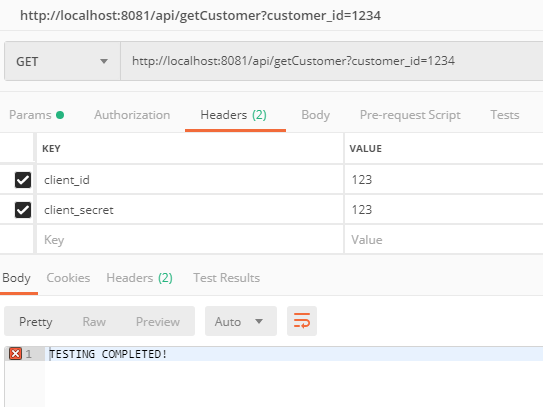
We are getting expected payload when we pass dummy client_id and client_secret.
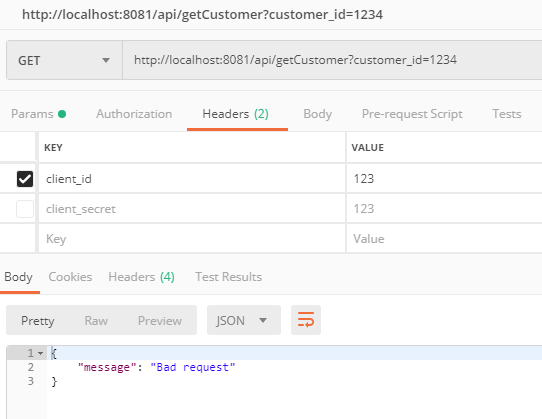 We are getting expected 400 bad request when we don’t pass dummy client_id or client_secret
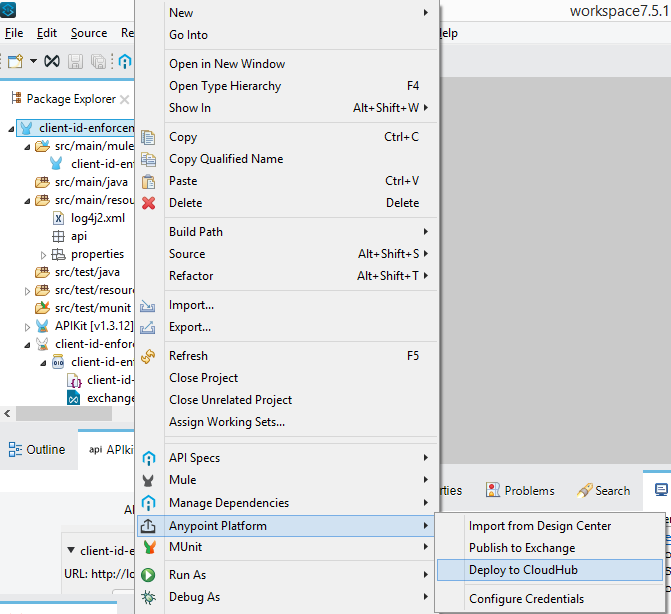
Deploy the project/implementation in Cloudhub by either uploading the exported jar file, or by deploying the project directly from Anypoint Studio.
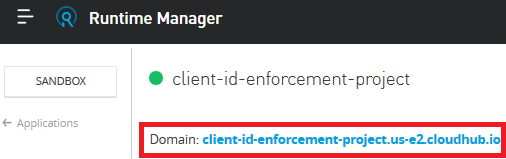
Confirm that the application is now listed under Runtime Manager. Click on it and copy the Domain link as highlighted below.
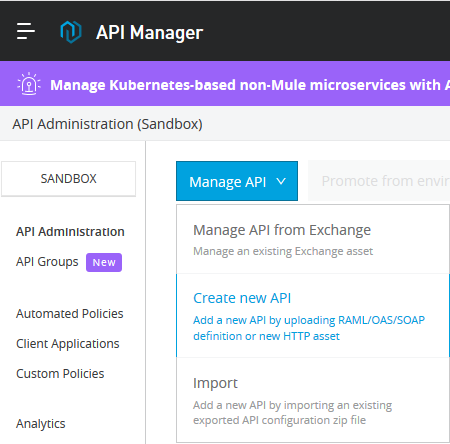
Creating an API Using API Manager
In API Manager, click on Manage API and then click on Create new API.
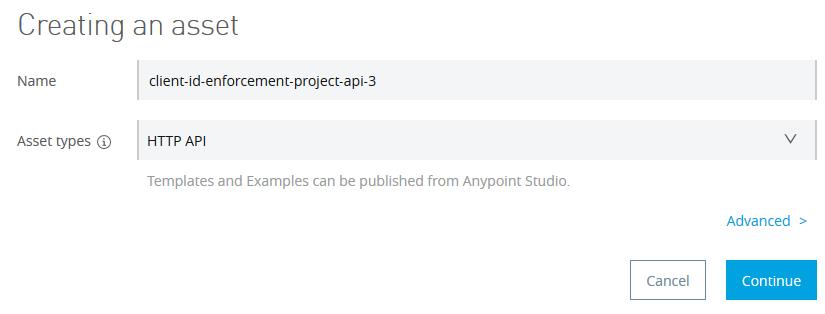
Provide some name of your choice and select HTTP API in Asset types as follow. Leave the advance settings as it is and click Continue.
On the next page, select the options as follows and then click Save.
Note: Select Endpoint with Proxy in case you would like to implement the new API as Proxy API.
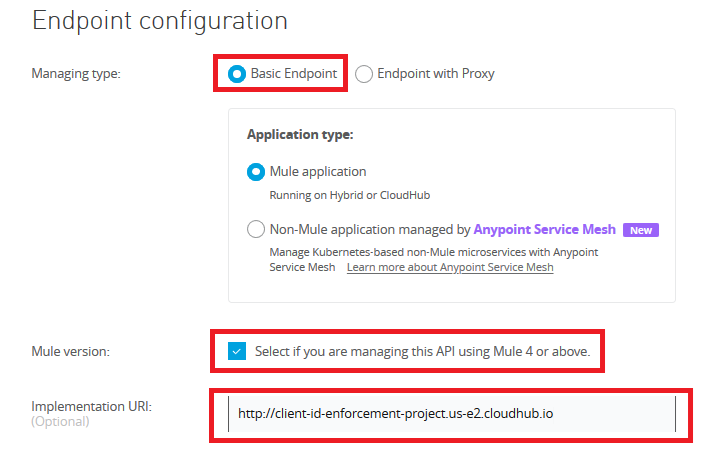
Implementation URL would be the Domain link we have just copied from the above step.
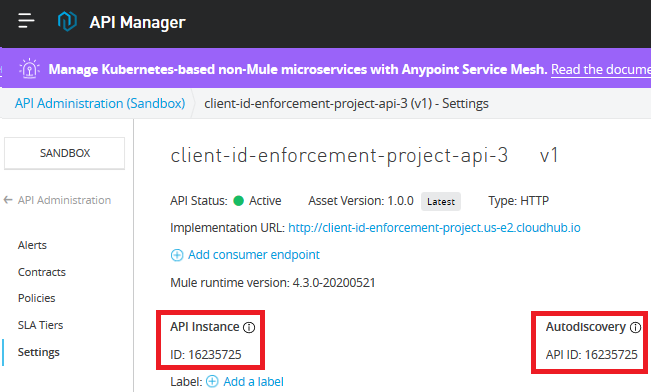
Confirm that the status of the new API that we just have created is ‘unregistered’ now.
Inside API Manager, click on the API version underneath the API name to open its details and then copy the Autodiscovery API ID.
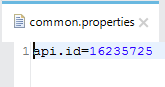
Paste it in the Studio project’s properties files with the name api.id.
Now refer it in the Autodiscovery config. Also select the main flow in Autodiscovery config.

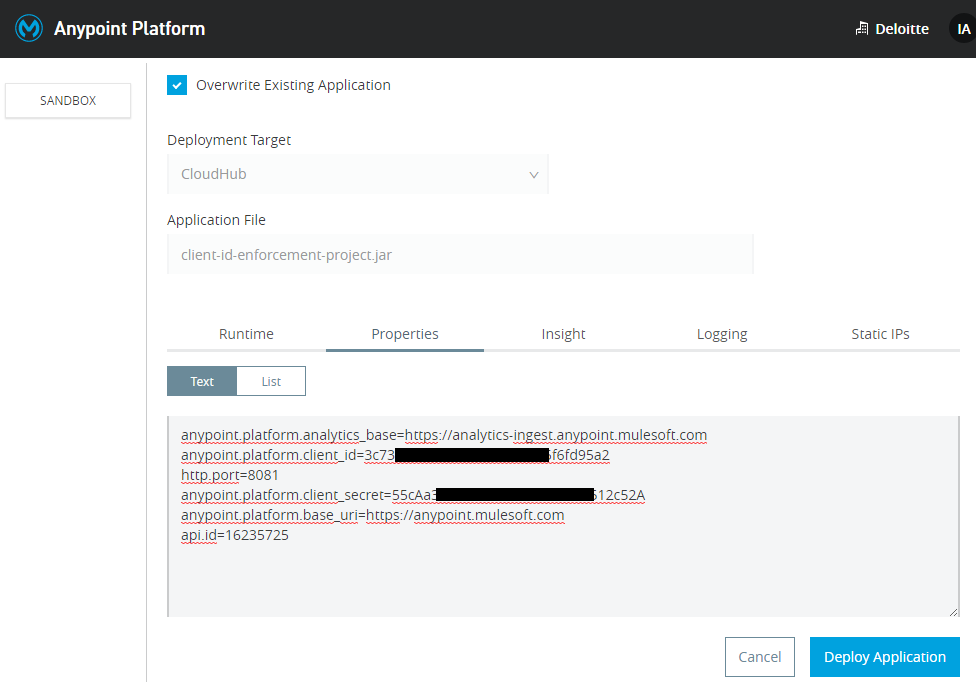
Once again deploy the project/implementation to cloudhub. But this time, we also need to make it sure that either at the time of deployment (i.e. if we are deploying via Anypoint Studio) or after the deployment in application settings (i.e. if we are uploading the jar file to Runtime Manager), we include below-mentioned properties in the properties tab.
#deployment #mule 4 #raml #anypoint platform #cloudhub #api manager