Continuous Integration is the practice of integrating code regularly with the main development branch. You can see the need for this when you look at huge projects like SciPy with currently 274 open pull requests (PRs). This means 274 different new features, bug fixes or other improvements want to be added. The maintainers likely don’t know the contributors in person. While there is no way around looking at the contributed change, there is a good solution to make sure things are not horribly wrong: Unit Tests.
Running the test suite for all of those pull requests costs quite a bit of time. The quicker the maintainers can see if the PR has issues and what the issues are, the better.
The solution is a Continuous Integration Pipeline. The CI Pipeline is code which is automatically executed. Usually, there are several steps in the pipeline, like (1) unit testing with pytest (2) linting with tools like flake8 or pylint (3) type checking with mypy (4) manual review. There is an automatically generated comment which lets the maintainers and the contributor know about the status of the pipeline steps.
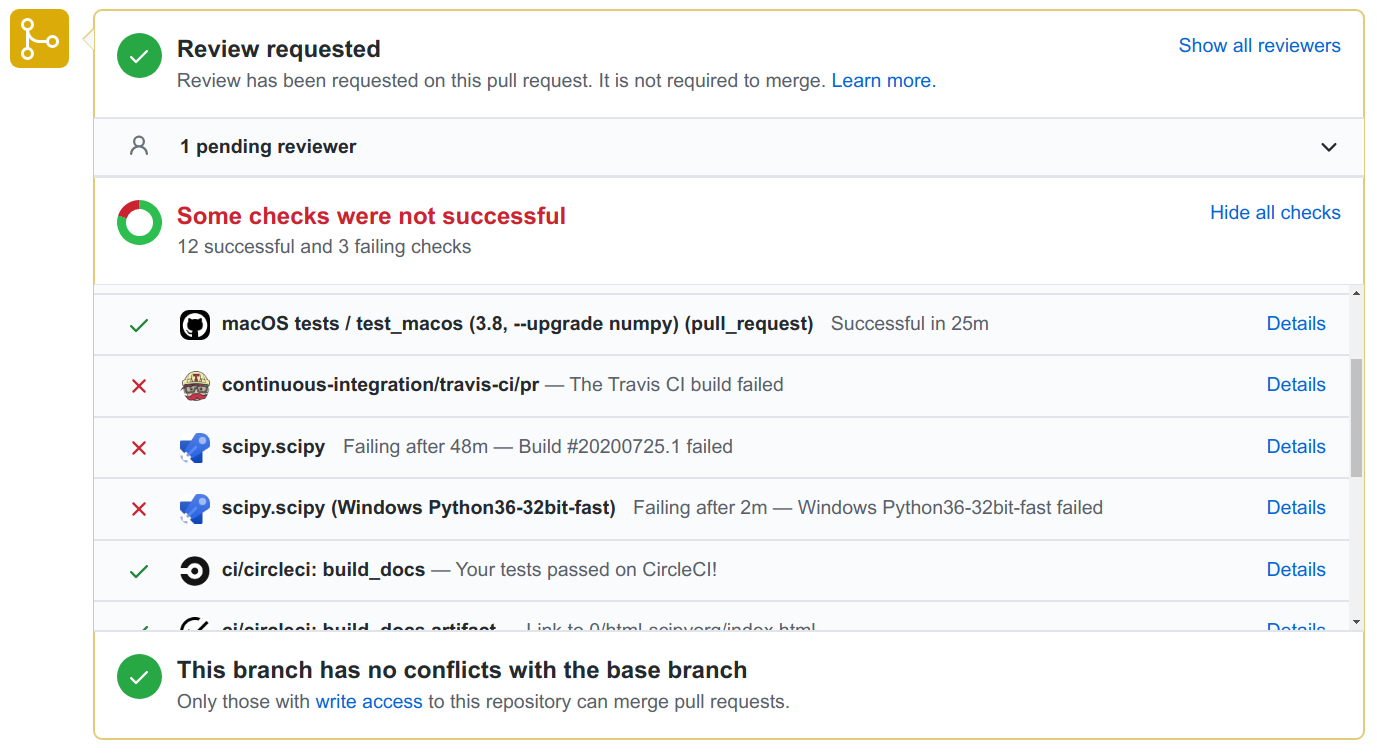
Automatic feedback given by Github Actions, Travis, Azure Pipelines and Circle CI. Some of the steps fail, some succeed. The steps have links so that the maintainers can look at the details. Screenshot taken by Martin Thoma.
In the following article, I will show you how to run unit tests automatically with various different CI Services such as Github Actions, Azure Pipelines, TravisCI and CircleCI.
Travis CI
Travis CI was founded in 2011 and is the first CI service I’ve used. It is configured via a .travis.yml file
I’ve almost always used it with the following script with minor variations:
language: python
	python:
	  - 3.6
	  - 3.7
	  - 3.8
	install:
	  - pip install coveralls tox-travis
	script:
	  - tox
	after_success:
	  - coveralls
The [tox-travis](https://github.com/tox-dev/tox-travis) package is awesome. I just made sure tox is working and then Travis worked as well. If you want a refresher about tox, have a look at the previous article in this series.
The configuration file looks for sure less scary than the one of Github Actions. The interface of Travis is also pretty and clean:
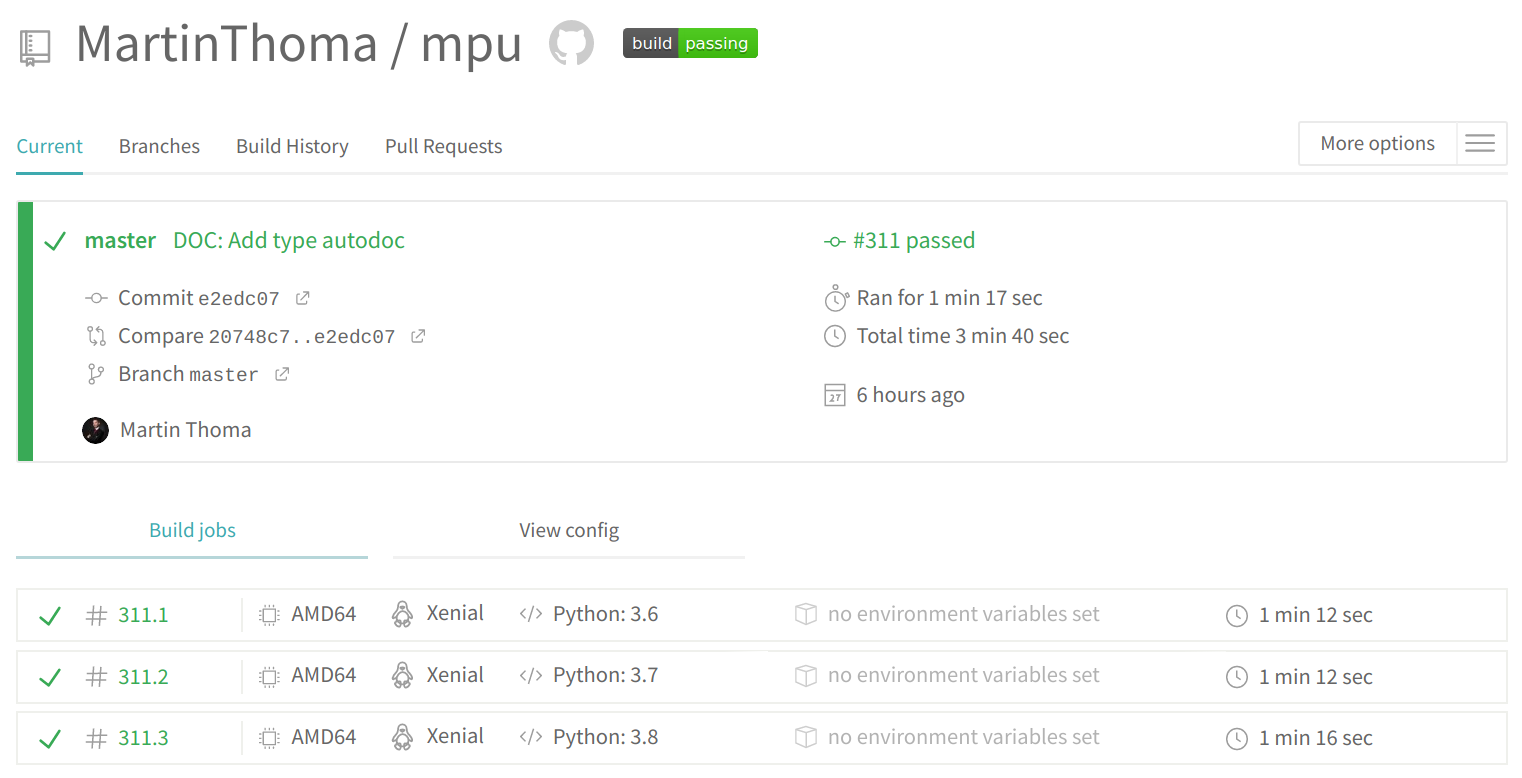
Web Interface of Travis. Screenshot taken by Martin Thoma
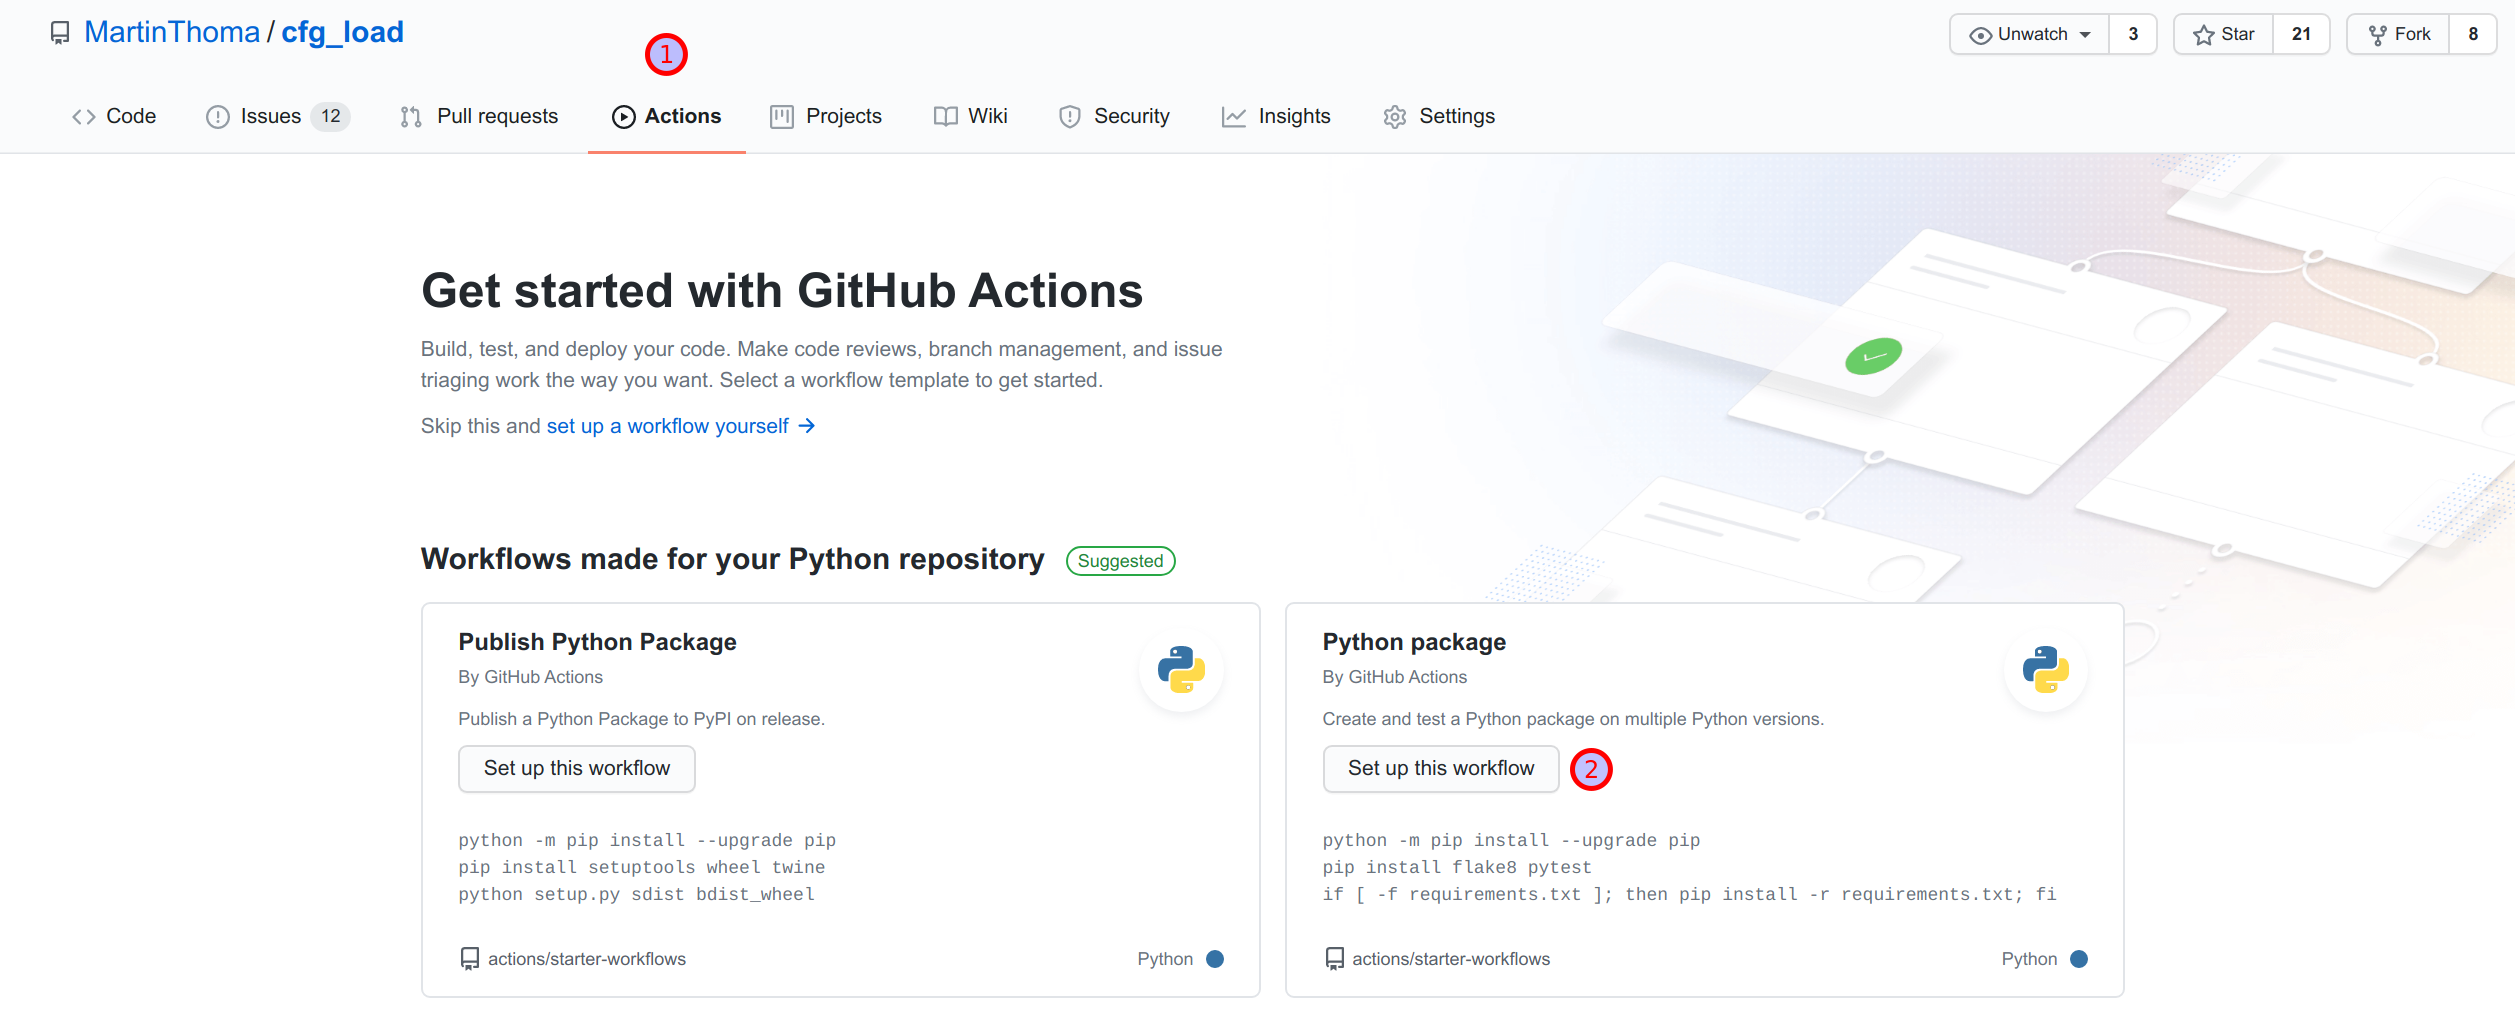
Github Actions
Github Actions is the CI/CD solution integrated into Github. It was released in November 2019 and thus is the most recently released service. The main advantage it has over the others is the integration into Github. You can create a new action by clicking on the offered tabs:
Screenshot taken by Martin Thoma
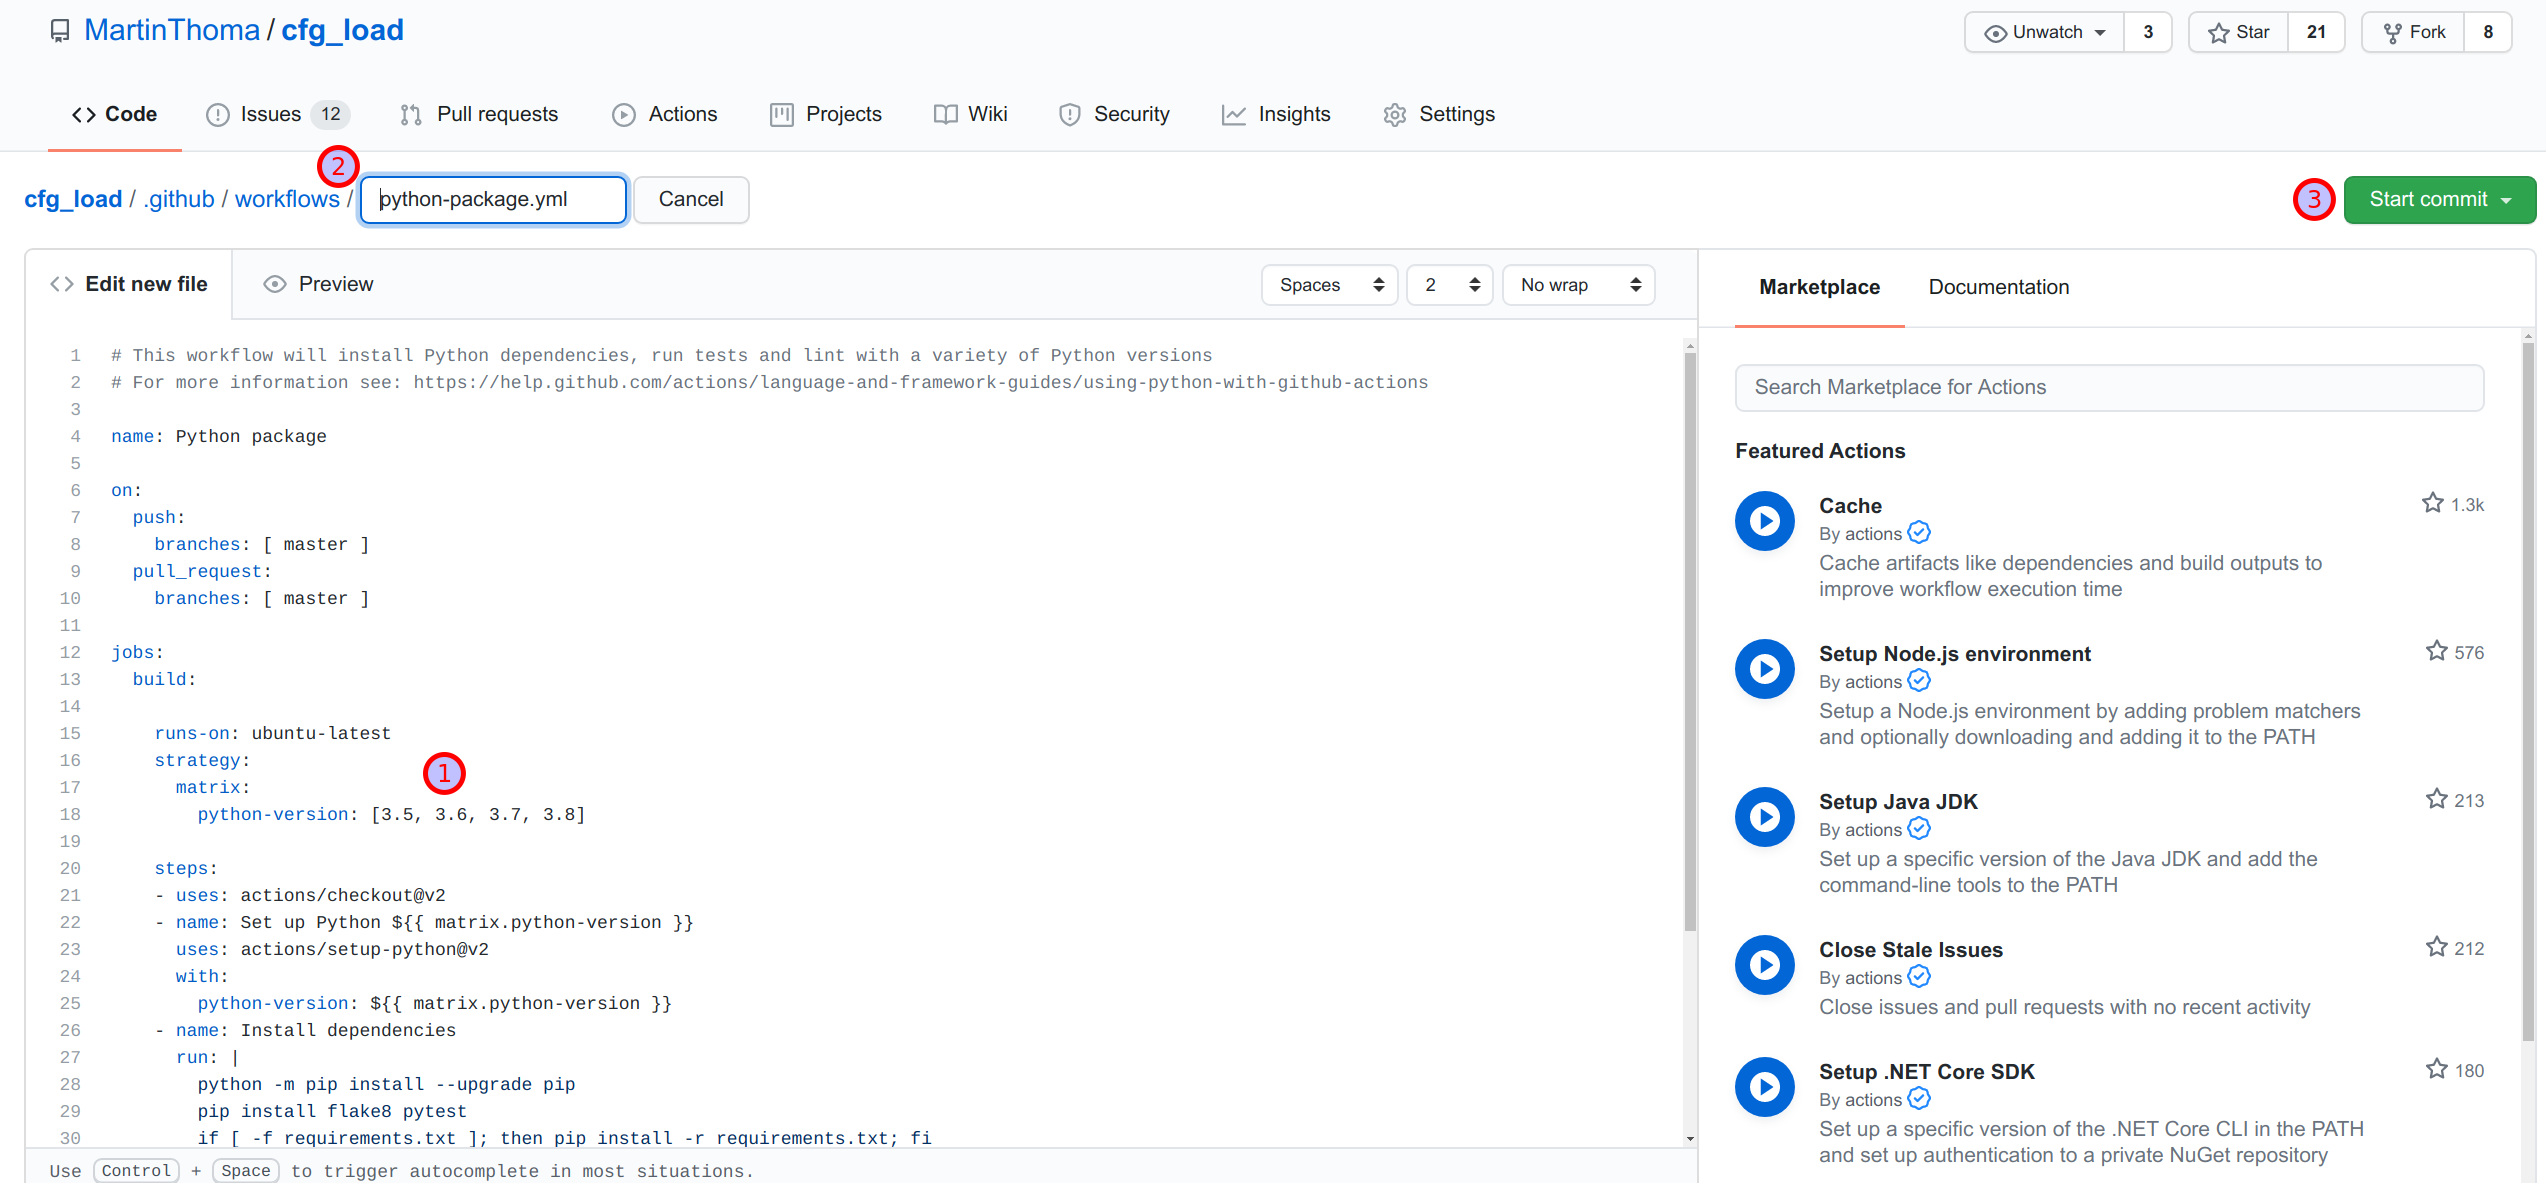
The defaults are ok, but you might want to adjust a few things in the file. For example, I don’t support any Python version older than 3.6 in my private projects. I also want to install the dependencies from my requirements.txt . If you want to adjust the file name, you can do it. Commit when it looks fine.
Screenshot taken by Martin Thoma
Finally, you can see the nice green check mark indicating that the run was successful.

Screenshot taken by Martin Thoma
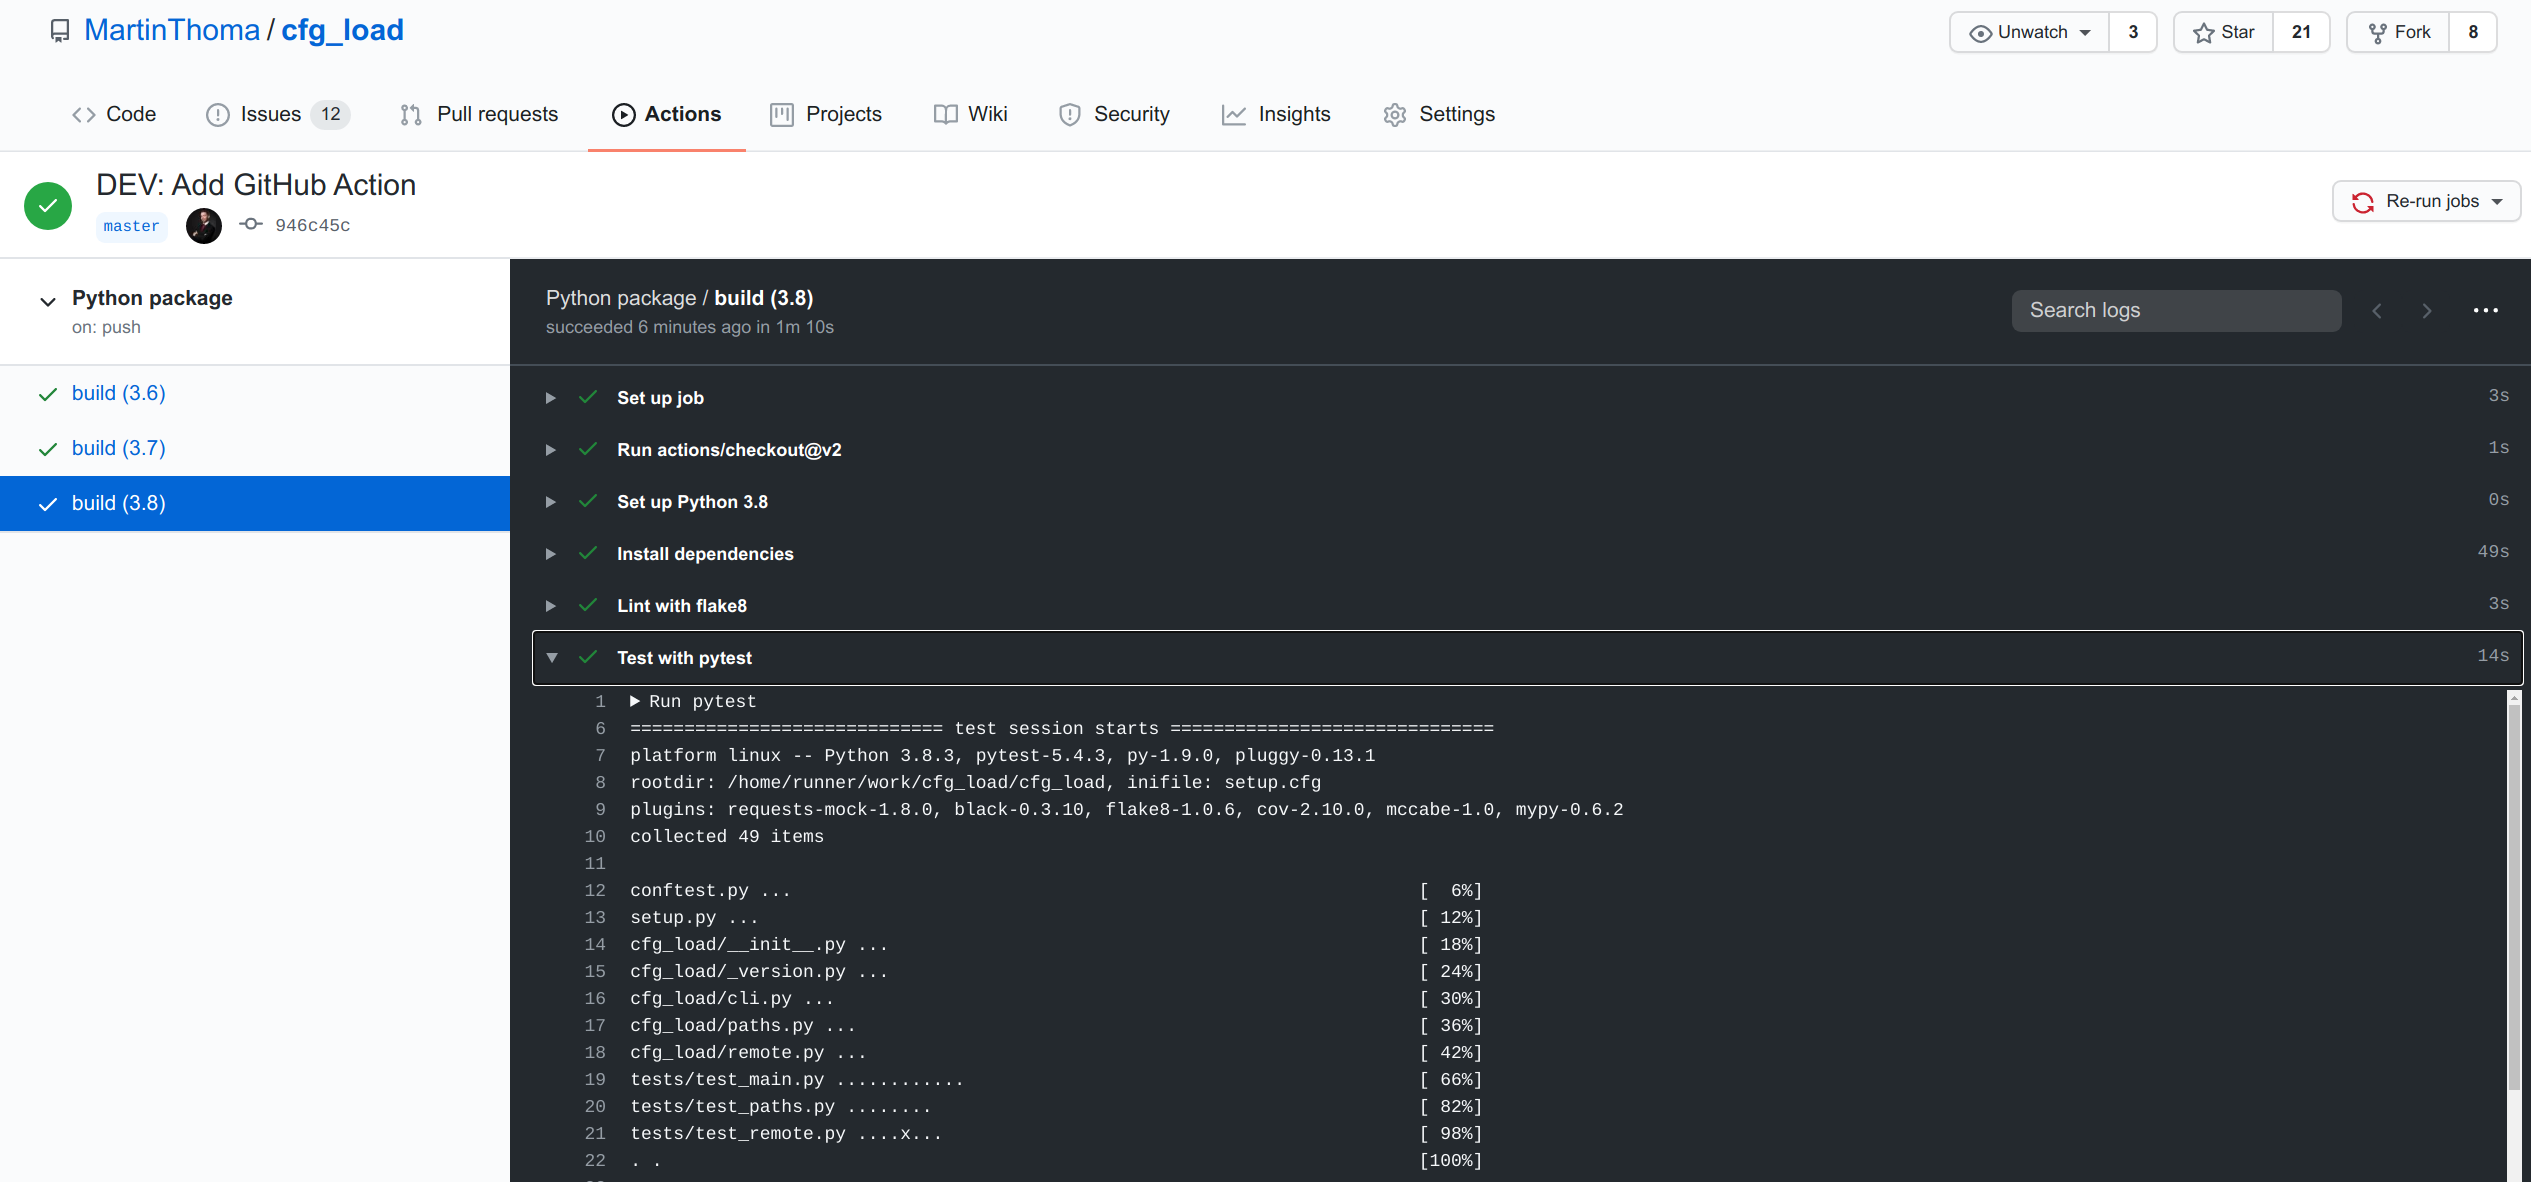
You can also click on the Actions tab and inspect the last run:
#python #devops #continuous-integration #software-development #test-automation