Create QR Code in Vue.js
This tutorial will explain how to create a dynamic QR code generator with VueJS. Create a dynamic QR code generator in the Vue framework that allows you to better brand and customize codes for users.
One way or another, we’ve all come across a square with some scrambled maze-like pattern that redirects or shows a link to a new page once we scan them. We’re talking about something like this:

Does this ring a bell? I bet it does. The image above is a static QR, and we know that because of its classic black code and white background. On the other hand, a dynamic QR code is flexible. It means we can change the shape, color, and information of the image without generating a new code.
Brands’ identities include colors, shapes, and logos. Thus, a static QR code does not represent a brand as much if they were to use a dynamic QR code.
This tutorial will show how to create a dynamic QR code generator using the Vue JavaScript framework. We’ll cover the following:
- Setting up the Vue project
- Adding user input
- Customizing the QR code
- Adding the logo component
- Passing data to the parent component
- Creating the QR code display
- Finalizing and running the project
- Hosting on Netlify
Prerequisites
This tutorial explains the process of building a dynamic QR code generator in Vue. Thus, it requires the reader to have the following:
- Working knowledge of basic JavaScript
- Visual Studio Code or a terminal and code editor available
- Node or Yarn for package installation
- Some coffee
Setting up the Vue project
The following sections will cover setting up the Vue project, creating the QR code component, and customizing the QR code.
We will begin by heading to our terminal and creating a new directory using this command:
mkdir <directory name>Then, we’ll change into the created directory with this command:
cd <directory name>Next, we need to install the Vue CLI. To do that, we will use the Node package manager (npm) from Node.js. Head to our terminal and use the command below to add the Vue CLI globally:
npm install -g @vue/cliFor this tutorial, we will use a pre-built template and make slight augmentations to the template. These augmentations will be adding user input, customizations (color, scale, mask pattern), a logo (image), and displaying the QR code using all the components.
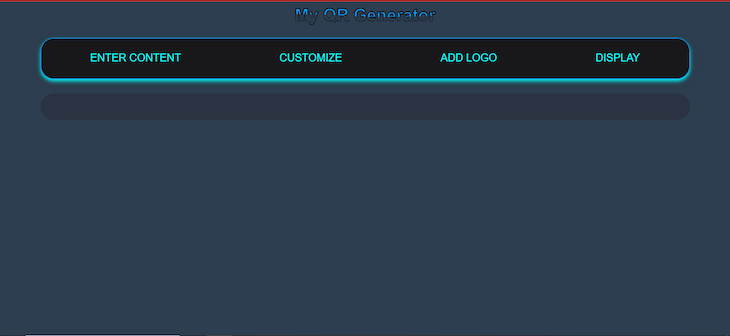
This tutorial will provide a ready-made UI template and demonstrate how to build some specific features needed for a dynamic QR generator. We will download the GitHub repository containing the code to use this template. Once we have done that, we will install the QR code package using the command below in our terminal:
npm i @chenfengyuan/vue-qrcodeThe command will add the @chenfengyuan/vue-qrcode package to our Node module. The package will come in handy as it will use all the components we will show in the following sections to display a dynamic QR code. Here is how the template looks when we run the npm run serve command:
Adding user input
To add user input, we will head to the ContentOne.vue file and create a required input element with the v-model, InputData. v-model creates a two-way binding between the input and a data property called InputData. We will also add the @input attribute, the event listener that calls the handleInput method when the input value changes.
We will start by defining the component in the script section by exporting a default object that defines the component name, which we will set as ContentOne. We will also create a data method that returns an object with a single property, InputData, which is set to an empty string.
Finally, we will create the methods property that contains the handleInput method created in the input element. This handleInput method takes two arguments, emitEvent and value, and emits a custom event with the name emitEvent and a value of value:
<template>
  <div>
    <input type="text" name="" required v-model="InputData" @input="handleInput('input-value', InputData)">
    <label>Enter Content</label>
  </div>
</template>
<script>
export default {
  name: "ContentOne",
  data() {
    return {
      InputData: ''
    }
  },
  methods: {
    handleInput(emitEvent, value) {
      this.$emit(emitEvent, value)
    }
  }
}
</script>
Thus, we have a component that allows us to input text and emits a custom event with the input value whenever the input changes.
Customizing the QR code
This section will create a user input that changes the QR code’s color, scale (size), and pattern.
We will start by creating a new file called ContentTwo.vue and create four input elements; colors (light and dark), mask pattern, and scale. We will also create their associate v-model bindings to component data properties such as hexCode, hexCode2, MaskPattern, and Scale.
Similar to the code in the ContentOne.vue file, the inputs also have event listeners that emit custom events such as input-value2, input-value3, input-value4, and input-value5 when their values change.
The script section contains an export default object that defines the component. The component has an emits property that lists the custom events that can be emitted. It also has data, methods, and handleInput methods (for the color inputs) similar to the previous component. The handleMPInput and handleScaleInput methods are specific to this component and handle emitting events for the MaskPattern and Scale inputs, respectively:
<template>
  <div class="gradient-input">
    <div>
      <input type="color" v-model="hexCode" @input="handleInput('input-value2', hexCode)">
      <input type="text" v-model="hexCode" @input="handleInput('input-value2', hexCode)">
    </div>
    <div>
      <input type="color" v-model="hexCode2" @input="handleInput('input-value3', hexCode2)">
      <input type="text" v-model="hexCode2" @input="handleInput('input-value3', hexCode2)">
    </div>
    <div>
      <label>MaskPattern:</label>
      <input type="number" v-model.number="MaskPattern" min="0"
        @input="handleMPInput('input-value4', MaskPattern)" /><span>px</span>
    </div>
    <div>
      <label>Scale: </label>
      <input type="number" v-model.number="Scale" min="0"
        @input="handleScaleInput('input-value5', Scale)" /><span>px</span>
    </div>
  </div>
</template>
<script>
export default {
  name: "ContentTwo",
  emits: ['input-value2', 'input-value3', 'input-value4', 'input-value5'],
  data() {
    return {
      hexCode: '#000000',
      hexCode2: '#ffffff',
      MaskPattern: 0,
      Scale: 4,
    }
  },
  methods: {
    handleInput(emitEvent, value) {
      this.$emit(emitEvent, value)
    },
    handleMPInput(emitEvent, value) {
      this.$emit(emitEvent, value)
    },
    handleScaleInput(emitEvent, value) {
      this.$emit(emitEvent, value)
    }
  }
}
</script>
Adding the logo component
Now, we’ll explore how to create a component that implements a file uploader and image select feature. We allow users to drag and drop or select a file through a file picker. We validate the file to ensure it’s an image with one of the following extensions: .jpeg, .jpg, and .png. If the file is valid, we read it and store its data as Data URL in a list. If the file is invalid, we show an error message and reset it after two seconds.
Thus, we will create another file called ContentThree.vue. Within it, we will create a div element with the class drag-area that acts as the drag-and-drop area and a button element that triggers the file picker when clicked. We will add a ref attribute in both div and button to access their DOM elements in our JavaScript code. We’ll also create a hidden file input element with a ref input.
We will also create an image element using the v-for attribute to loop through the list that stores the Data URL. We will create a @click attribute linked to the selectImage method within the image element. Lastly, we will create a class attribute that checks if the data property selectedIndex is equal to index:
<template>
    <div class="drag-area" ref="dropArea">
        <div class="icon"><i class="fas fa-cloud-upload-alt"></i></div>
        <header ref="dragText">Drag & Drop to Upload File</header>
        <span>OR</span>
        <button @click="openFilePicker">Browse File</button>
        <input type="file" hidden ref="input" multiple />
    </div>
    <div class="images-container">
        <img v-for="(imgSrc, index) in imgSrcList" :src="imgSrc" width="120" height="120" :key="index"
            @click="selectImage(imgSrc, index)" :class="{ thumbnail: selectedIndex === index }" />
    </div>
</template>
In the script tag, we will create the export default object and define a data property that will return the list to store the file Data URL and a selectedIndex key with the value -1. Next, we will create the computed property, selectedImage, that returns the currently selected image. We will then create the selectImage method within the method property of the export default object.
The selectImage method updates the selectedIndex and emits an event with the selected image. We will also create another method openFilePicker, which triggers the hidden file input to open the file picker:
<script>
export default {
    data() {
        return {
            imgSrcList: [],
            selectedIndex: -1
        }
    },
    computed: {
        selectedImage() {
            return this.imgSrcList[this.selectedIndex];
        }
    },
    methods: {
        selectImage(selectedImage, index) {
            this.selectedIndex = index;
            this.$emit('Selected', selectedImage);
            console.log(this.imgSrcList)
        },
        openFilePicker() {
            this.$refs.input.click()
        },
    }
}
Then, we’ll create some event handlers, such as:
handleFileChange: handles thechangeevent of the file inputhandleDragOver: handles thedragoverevent of the drag-and-drop areahandleDragLeave: handles thedragleaveevent of the drag-and-drop areahandleDrop: to handle the drop event of the drag-and-drop area
Finally, we create a mounted lifecycle hook and add event listeners to the drag-and-drop area, the file input, and the handle of their corresponding events:
<script>
export default {
    // data property
    // computed property
    methods: {
        // do something

        handleFileChange(event) {
            let file = event.target.files[0]
            let validExtensions = ["image/jpeg", "image/jpg", "image/png"
            ];
            let fileType = file.type
            if (validExtensions.includes(fileType)) {
                let fileReader = new FileReader();
                fileReader.onload = (e) => {
                    this.imgSrcList.push(e.target.result)
                    console.log(fileReader.result);
                    this.$refs.dropArea.classList.remove("active");
                    this.$refs.dragText.textContent = "The file is successfully uploaded."
                    setTimeout(() => {
                        this.$refs.dragText.textContent = "Drag & Drop to Upload File"
                    }, 2000)
                }
                fileReader.readAsDataURL(file);
                this.openFilePicker();
            } else {
                this.$refs.dropArea.classList.remove("active");
                this.$refs.dragText.textContent = "This is not an valid file!"
                setTimeout(() => {
                    this.$refs.dragText.textContent = "Drag & Drop to Upload File"
                }, 2000)
            }
        },
        handleDragOver(event) {
            event.preventDefault();
            this.$refs.dropArea.classList.add("active");
            this.$refs.dragText.textContent = "Release to Upload File";
        },
        handleDragLeave() {
            this.$refs.dropArea.classList.remove("active");
            this.$refs.dragText.textContent = "Drag & Drop to Upload File";
        },
        handleDrop(event) {
            event.preventDefault();
            let file = event.dataTransfer.files[0];
            this.handleFileChange({ target: { files: [file] } });
        },
    },
    mounted() {
        this.$nextTick(() => {
            this.$refs.dropArea.addEventListener("dragover", this.handleDragOver);
            this.$refs.dropArea.addEventListener("dragleave", this.handleDragLeave);
            this.$refs.dropArea.addEventListener("drop", this.handleDrop);
            this.$refs.input.addEventListener("change", this.handleFileChange);
        });
    }
}
</script>
Passing data to the parent component
Before we can use the QR code component, we need to be able to access data from the three separate components we created earlier. They are all emitting events; thus, we will have to access them in the parent component and send them from the parent component to the QR code display component.
So, let’s head back to the ParentComponent.vue file and add the ContentOne, ContentTwo, ContentThree, and DisplayArea components to the template’s first, second, and third div elements.
We will also attach a v-on attribute to the ContentOne and ContentTwo components. The v-on attribute is a Vue.js directive that listens to events; in this case, all the events emitted so far. For the events emitted by the ContentThree component, we will use the @selected attribute instead, as it only emits a selected event. Then, we will pass the data property objects to the DisplayArea component:
<template>
  <div>
    <ul>
      <li v-for="item in items" @click="showContent(item)" :key="item.id" :class="{ active: item === selectedItem }">{{
        item.title
      }}</li>
    </ul>
    <div class="content" v-show="selectedItem === items[0]">
      <ContentOne v-on:input-value="updateValue" />
    </div>
    <div class="content" v-show="selectedItem === items[1]">
      <ContentTwo v-on:input-value2="updateValue2" v-on:input-value3="updateValue3" v-on:input-value4="updateValue4"
        v-on:input-value5="updateValue5" />
    </div>
    <div class="content" v-show="selectedItem === items[2]">
      <ContentThree @selected="setSelectedImage" />
    </div>
    <div class="content" v-show="selectedItem === items[3]">
      <DisplayArea :InputData="InputData" :InputData2="InputData2" :InputData3="InputData3" :hexCode="hexCode"
:hexCode2="hexCode2" :selectedImage="selectedImage" />
    </div>
  </div>
</template>
In the script element, we will create the export default object and pass the following data property: InputData: ' ', hexCode: ' ', hexCode2: ' ', InputData2: ' ', InputData3: ' ' and selectedImage: ' '. We will then call the methods attached to the v-on and @selected attribute to update the corresponding data property:
<script>
import ContentOne from './Content/ContentOne.vue';
import ContentTwo from './Content/ContentTwo.vue';
import ContentThree from './Content/ContentThree.vue';
import DisplayArea from './Content/DisplayArea.vue';

export default {
  name: 'HelloWorld',
  components: {
    ContentOne,
    ContentTwo,
    ContentThree,
    DisplayArea
  },
  data() {
    return {
      InputData: '',
      hexCode: '',
      hexCode2: '',
      InputData2: '',
      InputData3: '',
      selectedImage: '',
      items: [
        { title: 'ENTER CONTENT' },
        { title: 'CUSTOMIZE' },
        { title: 'ADD LOGO' },
        { title: 'DISPLAY' },
      ],
      selectedItem: null
    }
  },
  methods: {
    updateValue(value) {
      this.InputData = value
    },
    updateValue2(value) {
      this.hexCode = value
    },
    updateValue3(value) {
      this.hexCode2 = value
    },
    updateValue4(value) {
      this.InputData2 = value
    },
    updateValue5(value) {
      this.InputData3 = value
    },
    setSelectedImage(selectedImage) {
      this.selectedImage = selectedImage;
    },
    showContent(item) {
      this.selectedItem = item
    },
  },
  emits: ['Selected']
}
</script>
Basically, the code above passes data from three child components to the parent component. That data is then moved from the parent component to another child component, the DisplayArea component.
Creating the QR code display
Now, we will create another file called DisplayArea.vue (the DisplayArea component) and using the @chenfengyuan/vue-qrcode library, we will call the vue-qrcode element and set the ref, value, and option attributes to qrcode, hello, and options respectively. We will also call all the props from the parent component to use them as parameters in the button element.
The button element contains a method that equates the current data property with the events passed from each component. Here is the code below:
<template>
    <vue-qrcode ref="qrcode" :value="hello" :options="options"></vue-qrcode>
    <div class="container"> <button
            v-on:click="getinput(InputData, hexCode, hexCode2, InputData2, InputData3, selectedImage, this.$refs.qrcode.$el)"><span>Generate
                code</span></button>
                </div>
</template>

<script>
import VueQrcode from '@chenfengyuan/vue-qrcode'
export default {
    components: { VueQrcode },
    props: ['InputData', 'hexCode', 'hexCode2', 'InputData2', 'InputData3', 'selectedImage'],
    data() {
        return {
            hello: "hello",
            options: {
                maskPattern: 7,
                scale: 4,
                color: {
                    dark: '#000000',
                    light: '#ffffff',
                },
                margin: 0
            }
        }
    },
    methods: {
        getinput(InputData, hexCode, hexCode2, InputData2, InputData3, selectedImage, canvas) {
            try {
                if (!InputData) throw new Error("InputData is not defined")
                const context = canvas.getContext('2d');
                const image = new Image();
                image.src = selectedImage;
                image.crossorigin = 'anonymous';
                image.onload = () => {
                    const coverage = 0.15;
                    const width = Math.round(canvas.width * coverage);
                    const x = (canvas.width - width) / 2;
                    console.log(canvas.width)
                    this.drawImage(context, image, x, x, width, width);
                };
                this.hello = InputData
                this.options.maskPattern = InputData2
                this.options.scale = InputData3
                this.options.color.dark = hexCode
                this.options.color.light = hexCode2
            } catch (error) {
                console.log(error)
            }
        },
        drawImage(context, image, x, y, width, height, radius = 4) {
            context.shadowOffsetX = 0;
            context.shadowOffsetY = 2;
            context.shadowBlur = 4;
            context.shadowColor = '#00000040';
            context.lineWidth = 8;
            context.beginPath();
            context.moveTo(x + radius, y);
            context.arcTo(x + width, y, x + width, y + height, radius);
            context.arcTo(x + width, y + height, x, y + height, radius);
            context.arcTo(x, y + height, x, y, radius);
            context.arcTo(x, y, x + width, y, radius);
            context.closePath();
            context.strokeStyle = '#fff';
            context.stroke();
            context.clip();
            context.fillStyle = '#fff';
            context.fillRect(x, x, width, height);
            context.drawImage(image, x, x, width, height);
        },
    }
}
</script>
Finalizing the project
Now that we are done, let’s run the code and see the result:
Additional feature
Earlier, we set one of the inputs as required. That means we will get an error every time its field is empty. To combat that, let’s create a paragraph element with a ref attribute and set a condition that if the error is Input data is not defined, it should show a notification rather than break the code:
<template>
    // Qr code component
    <p ref="DisplayError"></p>
    // button contianer
</template>

<script>
import VueQrcode from '@chenfengyuan/vue-qrcode'
export default {
    methods: {
        getinput(InputData, hexCode, hexCode2, InputData2, InputData3, selectedImage, canvas) {
            try {
               // do something
                // onReady()
            } catch (error) {
                if (error.message === 'InputData is not defined') {
                    this.$refs.DisplayError.textContent = "Input is empty"
                    setTimeout(() => {
                        this.$refs.DisplayError.textContent = ""
                    }, 2000)
                    console.log("error: no input text")
                } else {
                    console.log(error)
                    this.error = error.message
                }
            }
        },
    }
}
</script>
Hosting on Netlify
Netlify is a platform that lets you build and deploy applications and dynamic websites. To use it to deploy our project, follow the steps below:
- In our local device, we will run the build command
npm run build. Doing this creates adistdirectory - Next, we will create a new project in Netlify. Go to the Netlify website and create a new account
- After creating a new account, we will answer the questions from Netlify and be on the home page
- On the home page, we will click Add a new site and select Deploy manually from the drop-down menu
- Then, drag and drop the dist directory into it, and we are done!
Check out our app hosted on Netlify.
Conclusion
This article shows how to bind input and images to a QR code and host our project on Netlify. A dynamic QR code generator has a variety of potential uses, such as marketing and event management. Future developments for the generator could include adding more customization options, integrating with a database, and improving the user experience.
Thanks for reading, and happy coding!
Source: https://blog.logrocket.com
#vue #vuejs