In this tutorial, we’re going to develop an application for Android and iOS with NativeScript.
I am a huge fan of NativeScript and have been for a long time. While HERE doesn’t currently offer an official NativeScript SDK for building Android and iOS applications, it shouldn’t stop you from using HERE with NativeScript because most APIs can be accessed over HTTP.
A few months ago, I had written a tutorial around using the HERE Weather API with Angular which many of you found very useful. To make this tutorial mobile friendly, I thought NativeScript would be a great candidate.
In this tutorial, we’re going to expand what we saw in the web version and take it to Android and iOS with NativeScript.
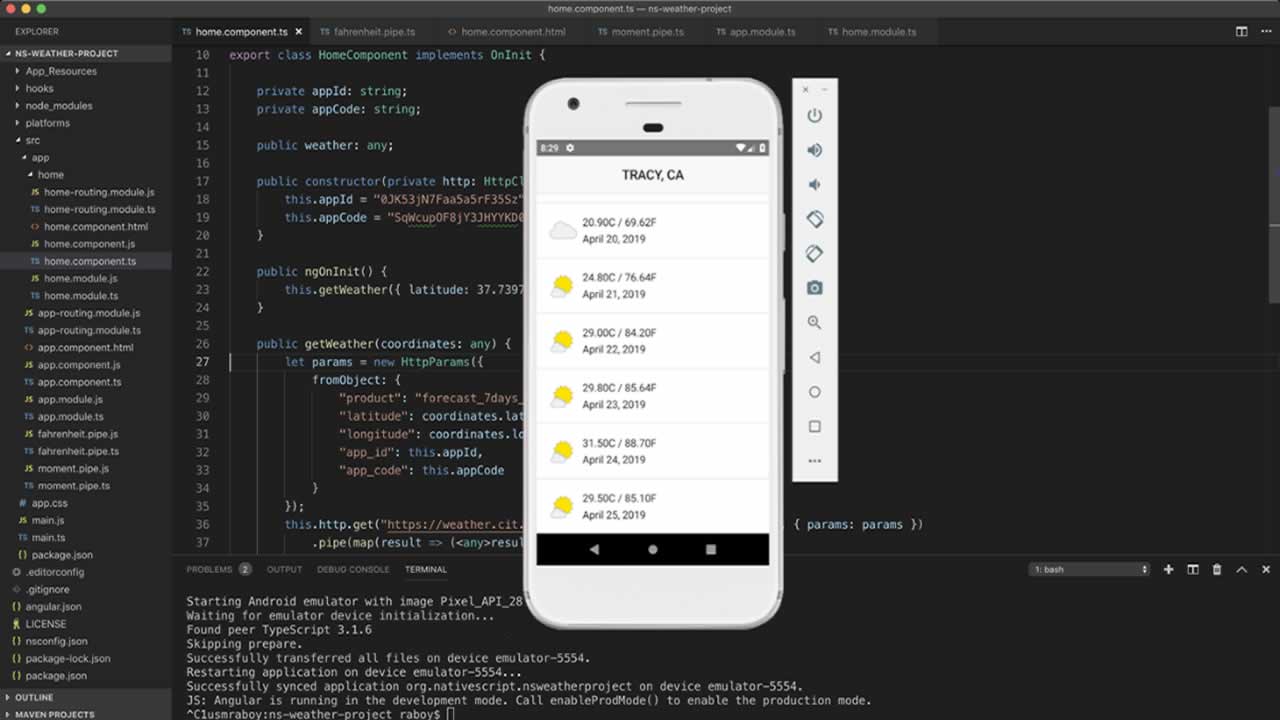
To get an idea of what we hope to accomplish, take a look at the following image:
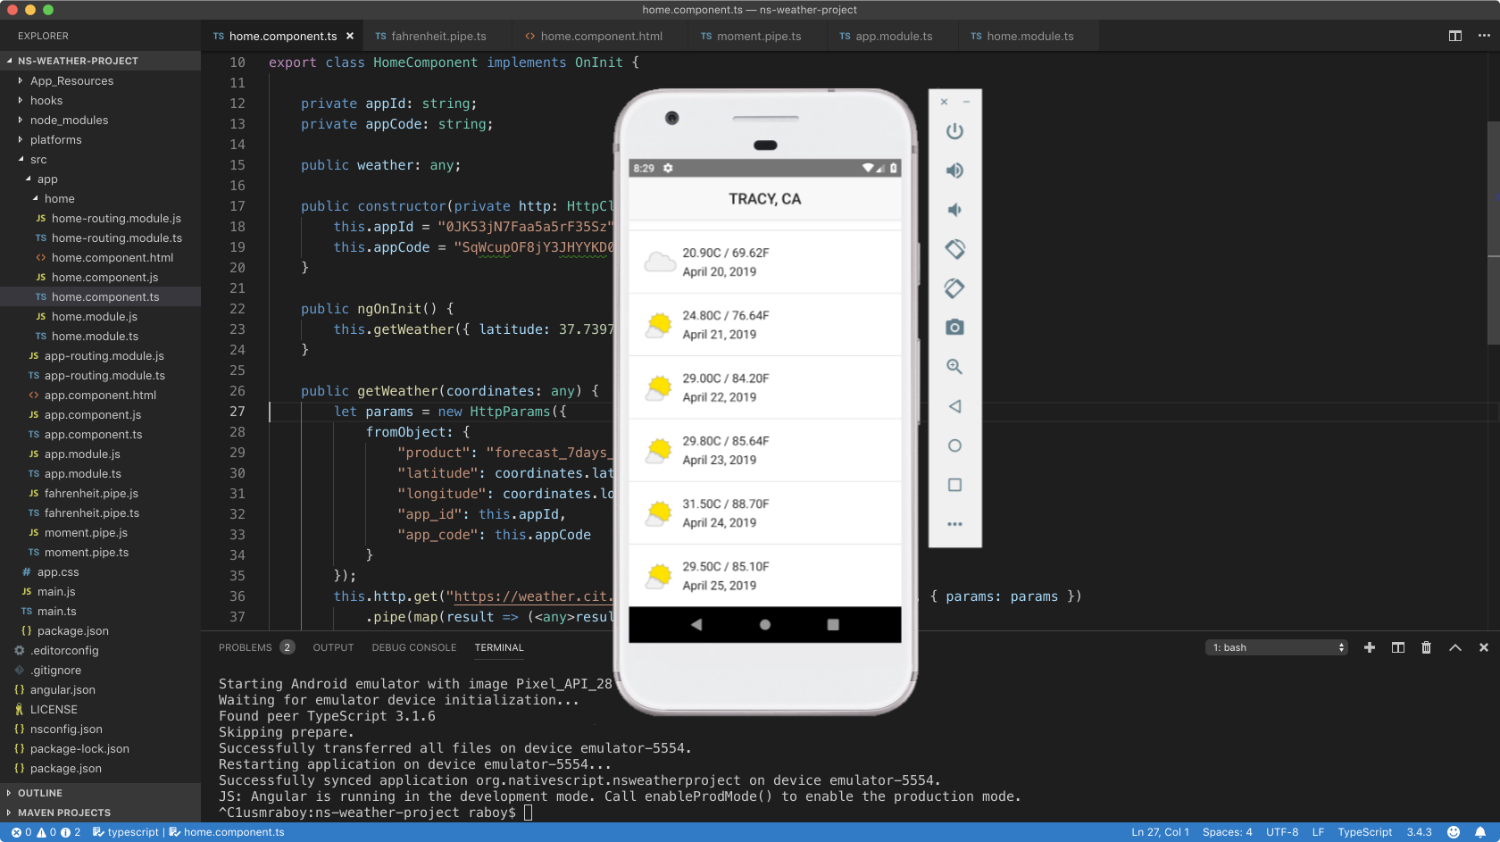
Nothing too fancy is happening in the above picture. We are collecting the 7 day forecast and displaying it in a list with the appropriate weather icons. All of this data, including the icon, is returned as part of the API response.
To proceed with this tutorial, you will need to have NativeScript and Angular CLI installed and properly configured, along with a HERE Developer Portal account.
Create a New NativeScript With Angular Project
Assuming you’ve got NativeScript ready to go, we can create a new Angular templated project for use with this project. From the command line, execute the following command:
tns create here-weather-project --template tns-template-blank-ng
Since we’ll be using HTTP to communicate with REST APIs, we won’t need to install any special plugins. As we reach a certain point in the tutorial we will install a JavaScript library for time conversions, but it isn’t necessary for our project and can wait.
Request Weather Forecast Information From the HERE Weather API
To be successful with the HERE Weather API, we’ll need to make use of the the Angular HttpClient module. To do this, we need to make some changes to the project’s src/app/app.module.ts file:
import { NgModule, NO_ERRORS_SCHEMA } from "@angular/core";
import { NativeScriptModule } from "nativescript-angular/nativescript.module";
import { HttpClientModule } from '@angular/common/http';
import { AppRoutingModule } from "./app-routing.module";
import { AppComponent } from "./app.component";
@NgModule({
    bootstrap: [
        AppComponent
    ],
    imports: [
        NativeScriptModule,
        AppRoutingModule,
        HttpClientModule
    ],
    declarations: [
        AppComponent
    ],
    schemas: [
        NO_ERRORS_SCHEMA
    ]
})
export class AppModule { }
In the above code, notice that the HttpClientModule was imported and then added to the imports array of the @NgModule block. With it added, we can start using it in our components and services.
To keep this example simple, we will not be creating any new services or components. We’re going to leverage the HomeComponent that should already exist as part of the NativeScript template.
Open the project’s src/app/home/home.component.ts file and include the following:
import { Component, OnInit } from "@angular/core";
import { HttpClient, HttpParams } from '@angular/common/http';
import { map } from 'rxjs/operators';
@Component({
    moduleId: module.id,
    selector: "home",
    templateUrl: "./home.component.html"
})
export class HomeComponent implements OnInit {
    private appId: string;
    private appCode: string;
    public weather: any;
    public constructor(private http: HttpClient) { }
    public ngOnInit() { }
    public getWeather(coordinates: any) { }
}
Because we know we’ll be using the HttpClient class, we need to import it along with the HttpParams class. We then need to start configuring each of our methods.
In the constructor method, we inject the HttpClient, but we also need to define our HERE application tokens:
public constructor(private http: HttpClient) {
    this.appId = "HERE-APP-ID";
    this.appCode = "HERE-APP-CODE";
}
Make sure to replace the actual tokens with those found in your HERE Developer Portal account. With the tokens defined, let’s start creating the HTTP request to the HERE Weather API.
Within the file, make the getWeather method look like the following:
public getWeather(coordinates: any) {
    let params = new HttpParams({
        fromObject: {
            "product": "forecast_7days_simple",
            "latitude": coordinates.latitude,
            "longitude": coordinates.longitude,
            "app_id": this.appId,
            "app_code": this.appCode
        }
    });
    this.http.get("https://weather.cit.api.here.com/weather/1.0/report.json", { params: params })
        .pipe(map(result => (<any>result).dailyForecasts.forecastLocation))
        .subscribe(result => {
            this.weather = result.forecast;
        }, error => {
            console.error(error);
        });
}
The above code is where the magic happens. After being provided a set of latitude and longitude coordinates, we can construct the request with the parameters found in the documentation. These parameters also include our application tokens.
With the parameters properly formatted, we can make the request and store the response in the weathervariable. In our scenario, we only care about the forecastLocation information. There are plenty of other parameters and response data to look at as part of the HERE Weather API.
To execute this function when the component initializes, we can make use of the ngOnInit method:
public ngOnInit() {
    this.getWeather({ latitude: 37.7397, longitude: -121.4252 });
}
In the above example, we are requesting weather information for Tracy, CA. As of now we aren’t displaying the information, only obtaining it. To display it, we can visit the project’s src/app/home/home.component.html file:
<ActionBar class="action-bar">
    <Label class="action-bar-title" text="TRACY, CA"></Label>
</ActionBar>
<GridLayout class="page">
    <ListView [items]="weather" class="list-group">
        <ng-template let-forecast="item">
            <GridLayout class="list-group-item" rows="auto, auto" columns="50, *">
                <Image [src]="forecast.iconLink" rowSpan="2" row="0" col="0"></Image>
                <Label text="{{ forecast.highTemperature }}C" row="0" col="1" class="p-x-5"></Label>
                <Label text="{{ forecast.utcTime }}" row="1" col="1" class="p-x-5"></Label>
            </GridLayout>
        </ng-template>
    </ListView>
</GridLayout>
The above XML will create a nicely formatted list of data. The data will include the image, the temperature in Celsius, and the time. However, the time won’t be formatted and the we may be more interested in Fahrenheit format for the temperature.
This is where we can start formatting our data.
Change the Response Format With Angular Pipes
There are plenty of ways to format our data, but in Angular, it might be best to create a pipe for our needs. We can actually create two pipes, one for the Fahrenheit conversion and one for the time formatting.
To do this, execute the following commands from within your project:
ng g pipe fahrenheit
ng g pipe moment
The above commands will create two pipes. As you might have noticed, we’ll be using Moment.js for our time conversions. This means we need to install it like mentioned earlier in the tutorial. To do this, execute the following from the command line:
npm install moment --save
We’re going to start with our Celsius to Fahrenheit conversion. Open the project’s src/app/fahrenheit.pipe.ts file and include the following:
import { Pipe, PipeTransform } from '@angular/core';
@Pipe({
    name: 'fahrenheit'
})
export class FahrenheitPipe implements PipeTransform {
    public transform(value: any, args?: any): any {
        return ((value * (9 / 5)) + 32).toFixed(2);
    }
}
We’re using a standard formula during our transformation to make this possible. Before we try to use this pipe, let’s finish the MomentPipe as well. Open the project’s src/app/moment.pipe.ts and include the following:
import { Pipe, PipeTransform } from '@angular/core';
import * as moment from "moment";
@Pipe({
name: 'moment'
})
export class MomentPipe implements PipeTransform {
    public transform(value: any, args?: any): any {
        return moment(value).format("MMMM DD, YYYY");
    }
}
There is one more step that must be taken before we can actually use the FahrenheitPipe and MomentPipepipes. We need to include them as part of our module. However, we aren’t going to include them to our project’s src/app/app.module.ts file. If any reference to these pipes exist there, go ahead and remove them. Instead, we’re going to add them to the project’s src/app/home/home.module.ts file like so:
import { NgModule, NO_ERRORS_SCHEMA } from "@angular/core";
import { NativeScriptCommonModule } from "nativescript-angular/common";
import { HomeRoutingModule } from "./home-routing.module";
import { HomeComponent } from "./home.component";
import { FahrenheitPipe } from '../fahrenheit.pipe';
import { MomentPipe } from '../moment.pipe';
@NgModule({
    imports: [
        NativeScriptCommonModule,
        HomeRoutingModule
    ],
    declarations: [
        HomeComponent,
        FahrenheitPipe,
        MomentPipe
    ],
    schemas: [
        NO_ERRORS_SCHEMA
    ]
})
export class HomeModule { }
At this point in time we can actually use the two pipes in our application. Go back into the project’s src/app/home/home.component.html file so we can make a small adjustment.
Take note of the following:
<GridLayout class="list-group-item" rows="auto, auto" columns="50, *">
    <Image [src]="forecast.iconLink" rowSpan="2" row="0" col="0"></Image>
    <Label text="{{ forecast.highTemperature }}C / {{ forecast.highTemperature | fahrenheit }}F" row="0" col="1" class="p-x-5"></Label>
    <Label text="{{ forecast.utcTime | moment }}" row="1" col="1" class="p-x-5"></Label>
</GridLayout>
In our GridLayout we are now piping the data returned from the API into the FahrenheitPipe and MomentPipepipes.
Again, not entirely necessary, but helpful long term for larger projects.
Conclusion
You just saw how to use the HERE Weather API in your NativeScript with Angular project. The HERE Weather API is much more involved than just a 7 day forecast, but for the simplicity of the example, that is the only data we decided to work with.
This tutorial was a followup to the weather with Angular tutorial I had written prior which was strictly for the web.
#angular #ios #mobile-apps