With the release of SwiftUI 2 and iOS 14, we now have access to a new view called ScrollViewReader that exposes an object called ScrollViewProxy. What this allows us to do is programmatically control where a user is scrolled to in a view — and send users to a specific spot in your long view.
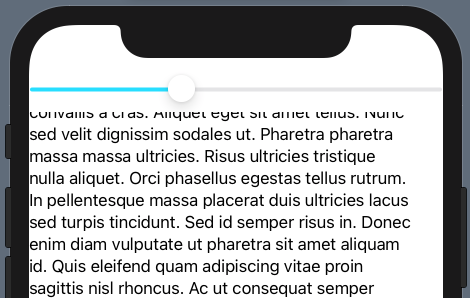
To test this out, I wanted to create a custom scroll control using a slider to determine where the user was in the ScrollView. The user would be able to drag the slider, which controls where the user is.
Fortunately, the new views in SwiftUI 2 allow us to do this.
The scroll view controlled by a slider
To get this to work, we first need to create some state that can be our source of truth for the current scroll position. Both scroll position and the slider value use CGFloat.
@State var scrollPosition: CGFloat = 0.0
We will use this to keep the slider and the scroll position in sync.
Next, let’s add the views we need to replicate the example.
VStack {
	    Slider(value: $scrollPosition)
	    ScrollView {
	        ScrollViewReader { scrollProxy in
	            Text(text)
	                .id("text")
	                .padding()
	                .onChange(of: scrollPosition) { newScrollPosition in
	                    scrollProxy.scrollTo("text", anchor: UnitPoint(x: 0, y: newScrollPosition))
	                }
	        }
	    }
	}
Let’s unpack this:
- On line 2, pass our
scrollPositionbinding to our Slider value. - On line 3, add our ScrollView and embed the rest of our content within this.
- On line 4, add our ScrollViewReader. This is a new view in SwiftUI 2 (coming in iOS 14) which allows us to programmatically scroll to a particular position within the ScrollView. This allows us to define a callback function with a ScrollViewProxy, which gives us access to the
scrollTomethod. More on that in a second… - On lines 5 and 6, we’re defining the text view, and then giving it an id. We need this id to be able to identify the view later on when we use
scrollTo. - On line 8 we’re using the new onChange method, also introduced in SwiftUI 2. This allows us to listen for changes, and define a callback to be ran everytime this value changes. We’re listening for changes of
scrollPosition, as defined on line 2 and is set by our slider, which then gives us access to the new value within the callback. I’ve defined this asnewScrollPosition. - On line 9 we actually use the
scrollTomethod.scrollTotakes two arguments, the first one is the id of the item we want to scroll to. In this case, I’m passing it the id “text”, which is the same id we gave to our text view on line 6. If you have multiple items within your scroll view (for example a list), you can scroll to a particular item using this argument. The second argument is optional, and allows you to scroll to a particular position within the item itself. - This is defined in the type
UnitPoint(), which has two values,xandy. Both of these values take aCGFloat, with a number between 0.0 and 1.0 determining how far along we want to scroll to. In this case, we’re going to leavexas 0 because we don’t want to scroll horizontally. We’re then going to setyto the value ofnewScrollPosition.
So, every time scrollPosition is updated, the onChange callback is called where newScrollPosition contains the new value. scrollTo is then called with this new value, causing the text view scroll position to move. The newScrollPosition will be a value of between 0.0 and 1.0 from the slider, and UnitPoint() also describes where the view is scrolled to relative to the length of the view between 0.0 and 1.0, so they match up perfectly.
#ios #scrollview #swift #swiftui #ios-app-development