I’ve created a very simple way to face match two images using HTML5 and JavaScript. You upload the verification picture you’d like to use, take a snapshot from the video streaming from your camera/webcam, then use a face matching API to retrieve the results. Simple.
What You’ll Need:
- A Webcam/Camera
- Free Face Recognition API Key
- Web Server
Before We Begin
Create a Directory For This Project
This directory will be where we put all the files.
Create a Local Web Server
In order to have full control of images, a web server is required otherwise we’d be getting a tainted canvas security error. There are several ways to do this and I’ve listed below how to do it with Python.
Python
- Install Python
- Open Command Prompt
- Enter
cd C:/DIRECTORY_LOCATION & py -m http.server 8000
You should be able to access the directory through http://localhost:8000
Get Your Free API Key
We’re going to be using Facesoft’s face recognition API. Quickly sign up here to access your free API key so you can get unlimited API calls with up to two requests per minute.
Once you’ve logged in, your API key will be visible in the dashboard area.
1. Setup
Create these three files:
- index.html
- style.css
- verify.js
Next right click and save the files below into that directory. These image files will be the default images for uploaded and verification pics.
SAVE AS “defaultupload.png”

SAVE AS “defaultphoto.png”
2. The HTML
Layout
Copy and paste the layout code below into your “index.html” file. This gives us our framework and design with the help of bootstrap.
<!DOCTYPE html>
<html lang="en">
<head>
  <!-- Required meta tags -->
  <meta charset="utf-8">
  <meta name="viewport" content="width=device-width, initial-scale=1, shrink-to-fit=no">
<!-- Bootstrap CSS -->
  <link rel="stylesheet" href="https://stackpath.bootstrapcdn.com/bootstrap/4.3.1/css/bootstrap.min.css" integrity="sha384-ggOyR0iXCbMQv3Xipma34MD+dH/1fQ784/j6cY/iJTQUOhcWr7x9JvoRxT2MZw1T" crossorigin="anonymous">
<!-- Style CSS -->
  <link rel="stylesheet" href="style.css">
<title>Face Verification</title>
</head>
<body>
  <!-- Page Content -->
  <div class="container">
    <div class="row">
      <div class="col-lg-12 text-center">
        <h1 class="mt-5">Face Verification</h1>
        <p class="lead">Quick and simple face verification using HTML5 and JavaScript</p>
      </div>
    </div>
    <!-- INSERT NEXT CODE HERE -->
  </div>
<!-- Verify JS -->
 <script src="verify.js"></script>
<!-- jQuery first, then Popper.js, then Bootstrap JS -->
  <script src="https://code.jquery.com/jquery-3.3.1.slim.min.js" integrity="sha384-q8i/X+965DzO0rT7abK41JStQIAqVgRVzpbzo5smXKp4YfRvH+8abtTE1Pi6jizo" crossorigin="anonymous"></script>
  <script src="https://cdnjs.cloudflare.com/ajax/libs/popper.js/1.14.7/umd/popper.min.js" integrity="sha384-UO2eT0CpHqdSJQ6hJty5KVphtPhzWj9WO1clHTMGa3JDZwrnQq4sF86dIHNDz0W1" crossorigin="anonymous"></script>
  <script src="https://stackpath.bootstrapcdn.com/bootstrap/4.3.1/js/bootstrap.min.js" integrity="sha384-JjSmVgyd0p3pXB1rRibZUAYoIIy6OrQ6VrjIEaFf/nJGzIxFDsf4x0xIM+B07jRM" crossorigin="anonymous"></script>
</body>
</html>
Images, Canvases & Buttons
We’re now creating a row and having three columns for the verification photo, the video stream, and the photo taken from the video stream. Add the code below right after the row.
Check for “INSERT NEXT CODE HERE” tag in previous code.
<div class="row justify-content-md-center">
  <div class="col-lg-4 text-center">
    <p><strong>Verification Photo</strong></p>
      <!-- Canvas For Uploaded Image -->
      <canvas id="uploadCanvas" width="300"  height="300"></canvas>
      <!-- Default Canvas Image -->
      <img src="defaultupload.png" id="uploadedPhoto" alt="upload"/>
      <!-- Upload Image Input & Upload Photo Button -->
      <input type="file" name="image-upload" accept="image/png, image/jpeg">
      <button id="upload" type="button" class="btn btn-outline-primary btn-lg">Upload Photo</button>
  </div>
  <div class="col-lg-4 text-center">
    <p><strong>Video</strong></p>
    <!-- Camera -->
    <div class="camera-container">
      <video id="video" width="100%" height="300" autoplay="true">
      </video>
    </div>
    <!-- Take Photo Button -->
    <button id="capture" type="button" class="btn btn-outline-primary btn-lg">Take Photo</button>
  </div>
  <div class="col-lg-4 text-center">
    <p><strong>Photo Taken</strong></p>

    <!-- Canvas For Capture Taken -->
    <canvas id="captureCanvas" width="300"  height="300"></canvas>
    <!-- Default Canvas Image -->
    <img src="defaultphoto.png" id="capturedPhoto" alt="capture" />
    <!-- Verify Photos Button -->
    <button id="verify" type="button" class="btn btn-outline-success btn-lg">Verify Photo</button>
  </div>
</div>
<!-- INSERT NEXT CODE HERE -->
API Response and Warnings
The code we’re going to add is to display the match result, score percentage, errors and warnings. Right under the last code we added, add the code below.
<div class="row">
  <div class="col-lg-12 text-center">
    <!-- API Match Result & API Percentage Score -->
    <h2 id="match" class="mt-5"></h2>
    <p id="score" class="lead"></p>
  </div>
  <div class="col-lg-12 text-center">
    <!-- Error & Warning Alerts -->
    <div class="alert alert-danger" id="errorAlert"></div>
    <div class="alert alert-warning" id="warningAlert"></div>
  </div>
</div>
3. The CSS
Add the code below to your style.css file.
.camera-container {
  max-width: 100%;
  border: 1px solid black;
}
.verification-image {
  width: 300px;
  height: auto;
  max-width: 100%;
}
.btn {
  margin-top: 10px;
}
#captureCanvas, #uploadCanvas {
  display: none;
}
input[name="image-upload"] {
  display: none;
}
#errorAlert, #warningAlert {
  display: none;
}
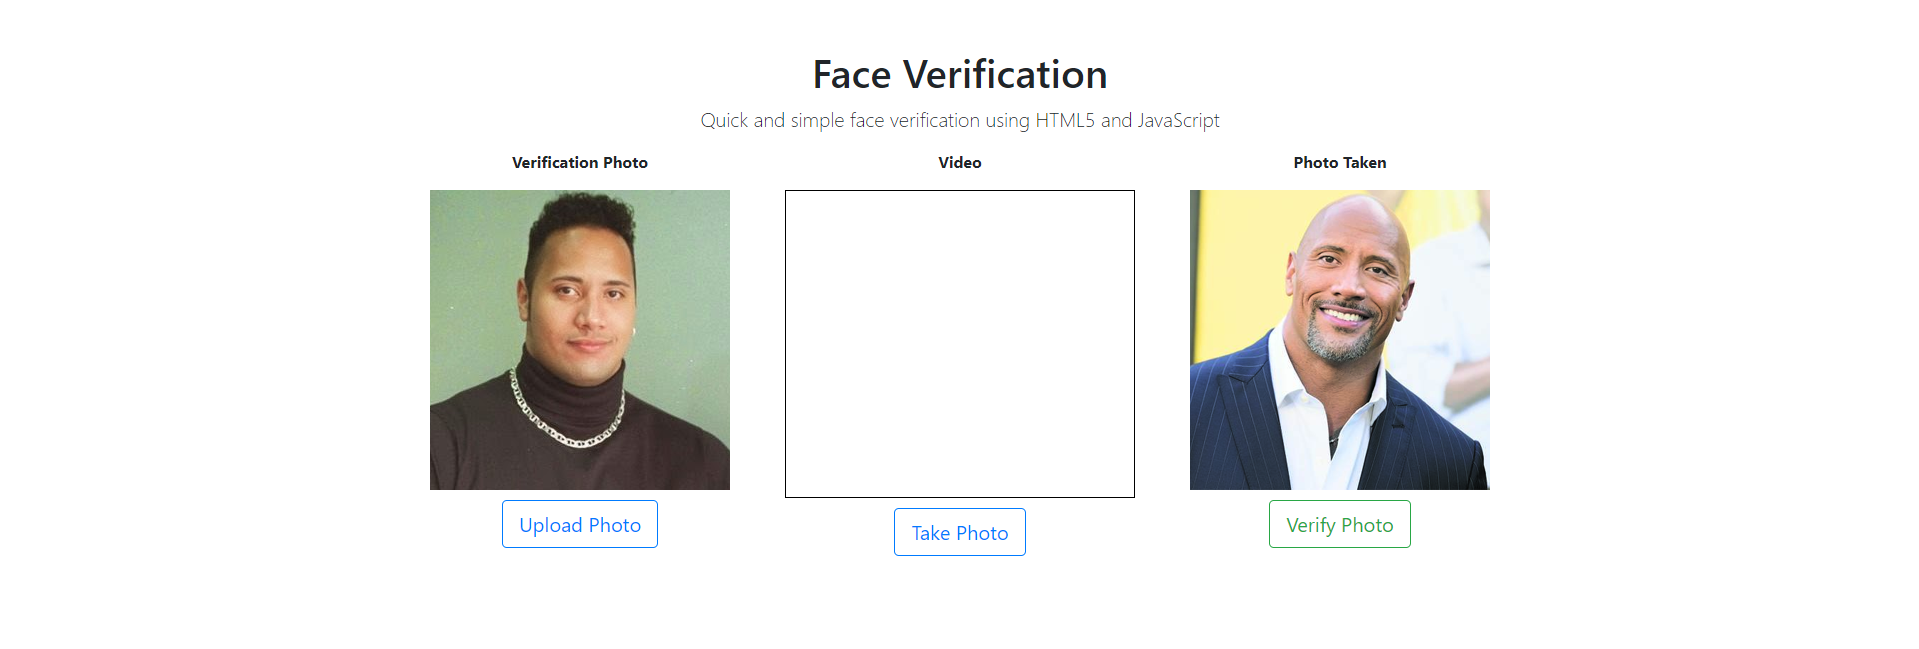
We’ve set the image upload input to display none as we’ll be triggering it using the upload button. Also, the IDs for the canvases have been set to display none so the default images are initially displayed.
Here is what your screen should look like:
4. The JavaScript
document.addEventListener("DOMContentLoaded", function() {
});
In the verify.js file we want to start off by adding an event listener that will run after the page loads. Every code we enter should be inside this function.
Variables
var video = document.getElementById('video'),
captureCanvas = document.getElementById('captureCanvas'),
uploadCanvas = document.getElementById('uploadCanvas'),
captureContext = captureCanvas.getContext('2d'),
uploadContext = uploadCanvas.getContext('2d'),
uploadedPhoto = document.getElementById('uploadedPhoto'),
capturedPhoto = document.getElementById('capturedPhoto'),
imageUploadInput = document.querySelector('[name="image-upload"]'),
apiKey = 'INSERT_YOUR_FACESOFT_API_KEY',
errorAlert = document.getElementById('errorAlert'), AlertwarningAlert = document.getElementById('warningAlert'),
matchText = document.getElementById('match'),
scoreText = document.getElementById('score');
The variables are:
- IDs for the video element, canvases, photos & API response
- Selector for image input
- Canvas contexts
- API key
Video Stream
Here is a very simple code to access your webcam/camera and stream it into the video element. Add underneath variables.
// Stream Camera To Video Element
if(navigator.mediaDevices.getUserMedia){
  navigator.mediaDevices.getUserMedia({ video: true })
  .then(function(stream) {
    video.srcObject = stream;
  }).catch(function(error) {
    console.log(error)
  })
}
If you refresh your page, this is what you’ll see:
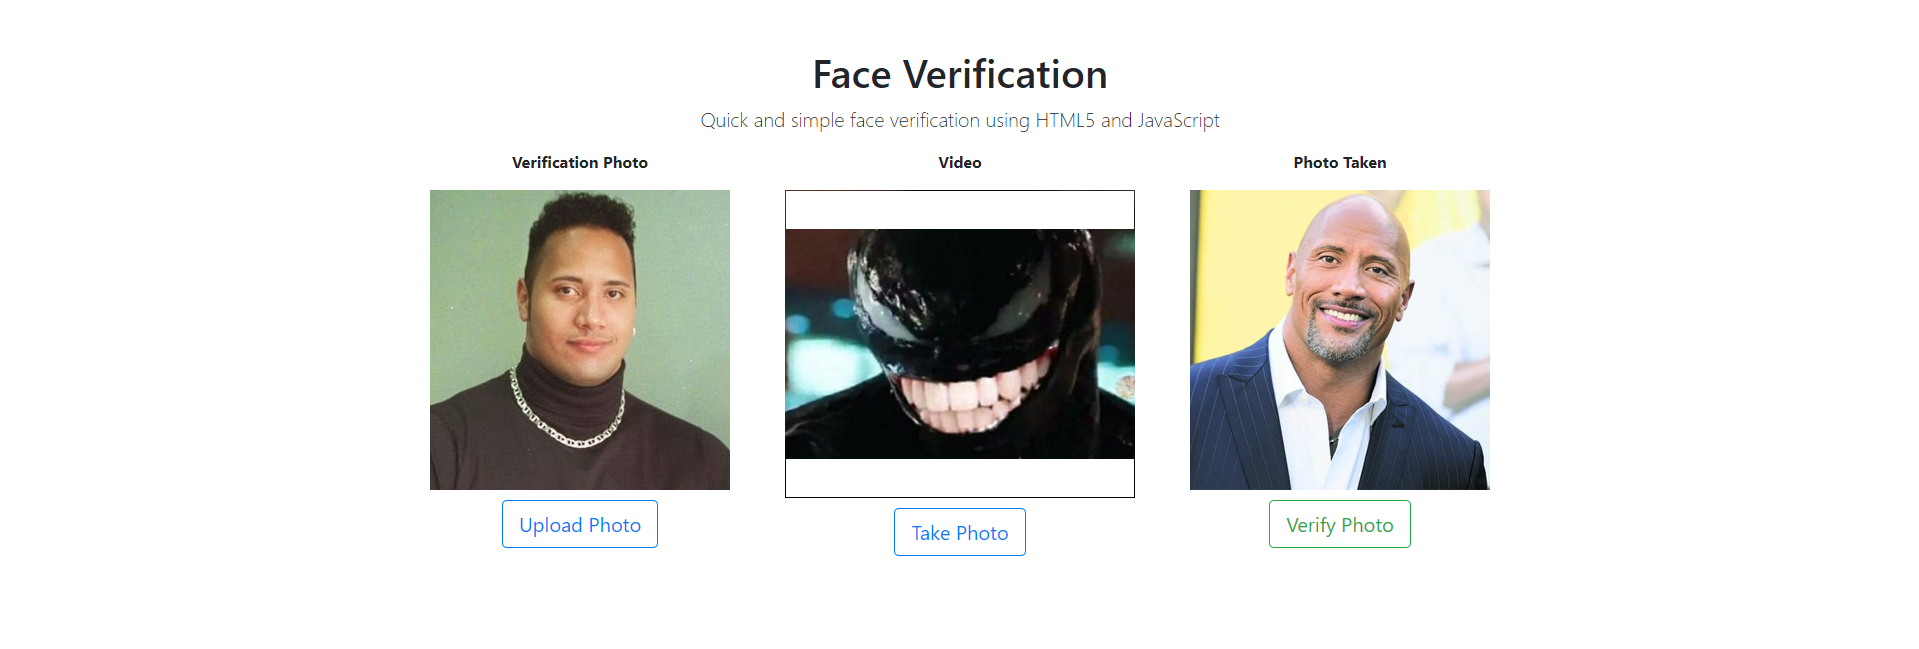
:D
Function 1: Set Photo To Canvas
// Set Photo To Canvas Function
function setImageToCanvas(image, id, canvas, context, width=image.width, height=image.height) {
  var ratio = width / height;
  var newWidth = canvas.width;
  var newHeight = newWidth / ratio;
  if (newHeight > canvas.height) {
    newHeight = canvas.height;
    newWidth = newHeight * ratio;
  }
  context.clearRect(0, 0, canvas.width, canvas.height);
  context.drawImage(image, 0, 0, newWidth, newHeight);
  id.setAttribute('src', canvas.toDataURL('image/png'));
}
In this function, we take in the image, id, canvas, context, width and height. We take in the width and height because to get the dimensions of the video, we must use video.videoWidth & video.videoHeight.
We also get the aspect ratio of the image so that when we assign an image, it fits right into the canvas. The rest of the code clears the canvas and draws the new image into the canvas.
Function 2: Verify If The Photos Match By Sending Them To The API.
// Facesoft Face Match API Function
function verifyImages(image1, image2, callback){
  var params = {
    image1: image1,
    image2: image2,
  }
  var xhr = new XMLHttpRequest();
  xhr.open("POST", "https://api.facesoft.io/v1/face/match");
  xhr.setRequestHeader("apikey", apiKey);
  xhr.setRequestHeader("Content-Type", "application/json;charset=UTF-8");
  xhr.onload = function(){
    callback(xhr.response);
  }
  xhr.send(JSON.stringify(params));
}
In this function we make an XMLHttpRequest to the face match API endpoint. We’ve added the API key for authorisation and content type into the header. For the body we’re passing in an object containing the two images.
Now we’re done with functions :)
Upload Photo Button Click Event
// On Upload Photo Button Click
document.getElementById('upload').addEventListener('click', function(){
  imageUploadInput.click();
})
This click event listener for the upload button triggers a click for the image input.
Image Upload Input Change Event
// On Uploaded Photo Change
imageUploadInput.addEventListener('change', function(){
  // Get File Extension
  var ext = imageUploadInput.files[0]['name'].substring(imageUploadInput.files[0]['name'].lastIndexOf('.') + 1).toLowerCase();
  // If File Exists & Image
  if (imageUploadInput.files && imageUploadInput.files[0] && (ext == "png" || ext == "jpeg" || ext == "jpg")) {
    // Set Photo To Canvas
    var reader = new FileReader();
    reader.onload = function (e) {
      var img = new Image();
      img.src = event.target.result;
      img.onload = function() {
      setImageToCanvas(img, uploadedPhoto, uploadCanvas, uploadContext);
      }
    }
    reader.readAsDataURL(imageUploadInput.files[0]);
  }
})
In this change event listener, we retrieve the file extension and perform an if statement to check if there is an image file in the input. Then we use FileReader to load the image onto the canvas.
Take Photo Button Click Event
// On Take Photo Button Click
document.getElementById('capture').addEventListener('click', function(){
  setImageToCanvas(video, capturedPhoto, captureCanvas, captureContext, video.videoWidth, video.videoHeight);
})
This event listener now executes the set image to canvas to capture a still frame from the video and assign it into a canvas.
Verify Photo Button Click Event
// On Verify Photo Button Click
document.getElementById('verify').addEventListener('click', function(){
  // Remove Results & Alerts
  errorAlert.style.display = "none";
  warningAlert.style.display = "none";
  matchText.innerHTML = "";
  scoreText.innerHTML = "";
  // Get Base64
  var image1 = captureCanvas.toDataURL().split(',')[1];
  var image2 = uploadCanvas.toDataURL().split(',')[1];
  // Verify if images are of the same person
  verifyImages(image1, image2, function(response){
    if(response){
      var obj = JSON.parse(response);

      // If Warning Message

      if(obj.message){
        errorAlert.style.display = "none";
        warningAlert.style.display = "block";
        warningAlert.innerHTML = obj.message;
        matchText.innerHTML = "";
        scoreText.innerHTML = "";
      }
      // If Error
      else if(obj.error){
        errorAlert.style.display = "block";
        errorAlert.innerHTML = obj.error;
        warningAlert.style.display = "none";
        matchText.innerHTML = "";
        scoreText.innerHTML = "";
      }
      // If Valid
      else{
        errorAlert.style.display = "none";
        warningAlert.style.display = "none";
        matchText.innerHTML = obj.match;
        scoreText.innerHTML = (obj.score*100).toFixed(2)+"% Score";
      }
    }
  })
})
In this event, we first hide the error/warning alerts and remove any text from the match result and score percentage.
We then get the base64 of the images from the canvases and use the split method to only get the part without “ data:image/png;base64” so the API won’t return an error.
Lastly, we call the verify images function to send the data to the API and our response will be an object either containing the results, an error, or a message.
Final Code
// Set Default Images For Uploaded & Captured Photo
setImageToCanvas(uploadedPhoto, uploadedPhoto, uploadCanvas, uploadContext);
setImageToCanvas(capturedPhoto, capturedPhoto, captureCanvas, captureContext);
This will allow us to verify the default images by assigning them to their canvas.
5. The Rock vs Dwayne Johnson
If you click verify we shall now see if the API can tell the difference between The Rock at a young age and Dwayne Johnson we usually see in films…
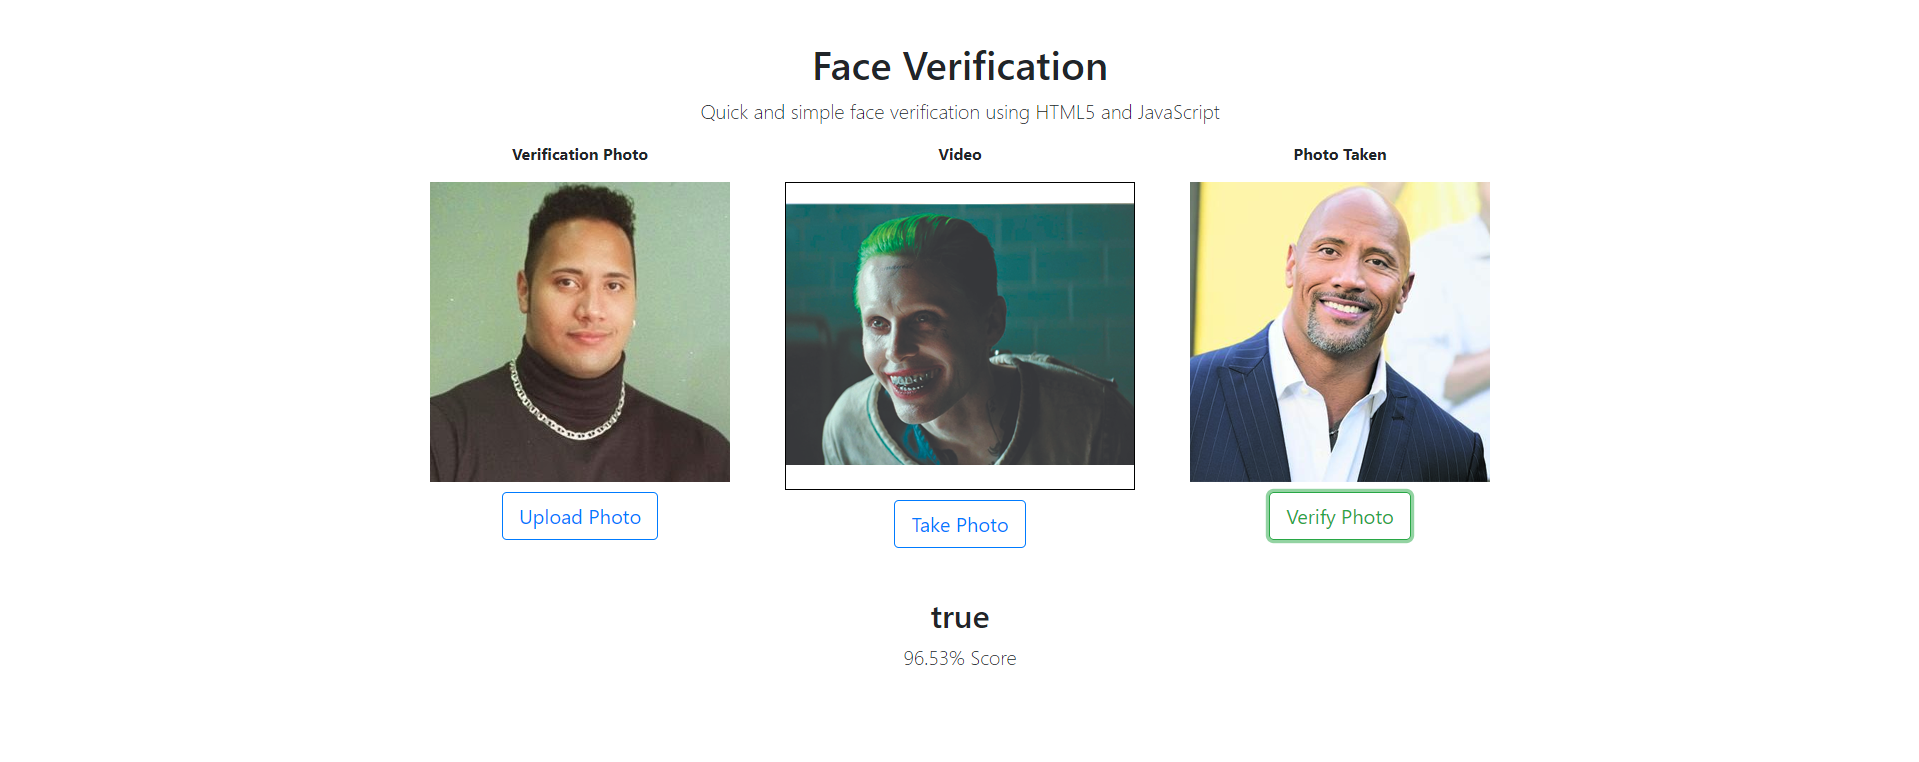
The API correctly identifies the 2 as the same with a 96.53% match score!
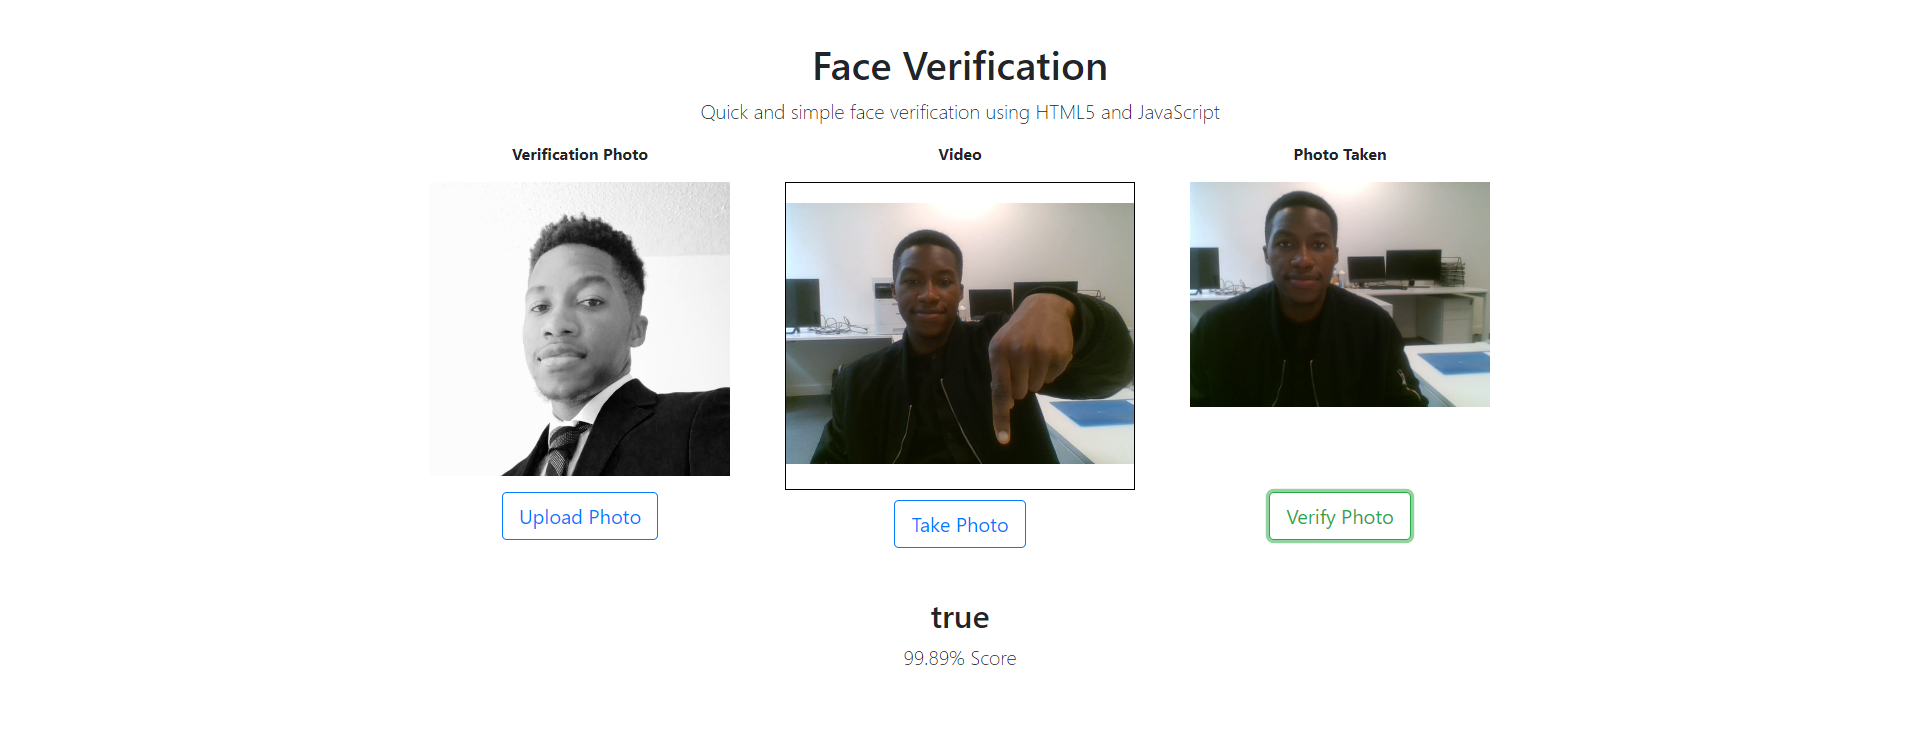
Upload, Capture, Verify
In Closing
You should now be able to think of better, secure and more complex ways to implement face matching such as logging in, 2FA, authorisation, payments etc.
Accuracy & Reliability?
The results for the best face recognition algorithm in the world came out. The algorithm we’re using came in the top 10 beating Toshiba, Microsoft & VisionLabs, and came 2nd worldwide in the wild image test (detection at difficult angles).
#javascript #html5