Flutter — Visual Studio Code Shortcuts for Fast and Efficient
It is a well known fact that keyboard shortcuts can help us a lot while developing, especially when you have a lot of code to go through and you have to find the opening and closing brackets or insert a new widget or remove one. Time is precious and I find these shortcuts help me a lot in coding in flutter. I became a fan of VS Code mainly because it’s so light weight and opens much faster than other IDEs I have worked with and have a ton of features and customizations along with extensions which can do wonders (This is just my personal opinion).
If you use Android Studio and IntelliJ in Windows, I would recommend you to read this great article or if you use mac you can check out this article.
First of all I hope you have Dart and Flutter Extensions enabled, if not you can get them from here : Dart and Flutter.
Now let’s jump into the shortcuts and see what all wonders we can do.
Keyboard Shortcut List
Firstly, I will provide you the shortcut to get all the shortcuts.
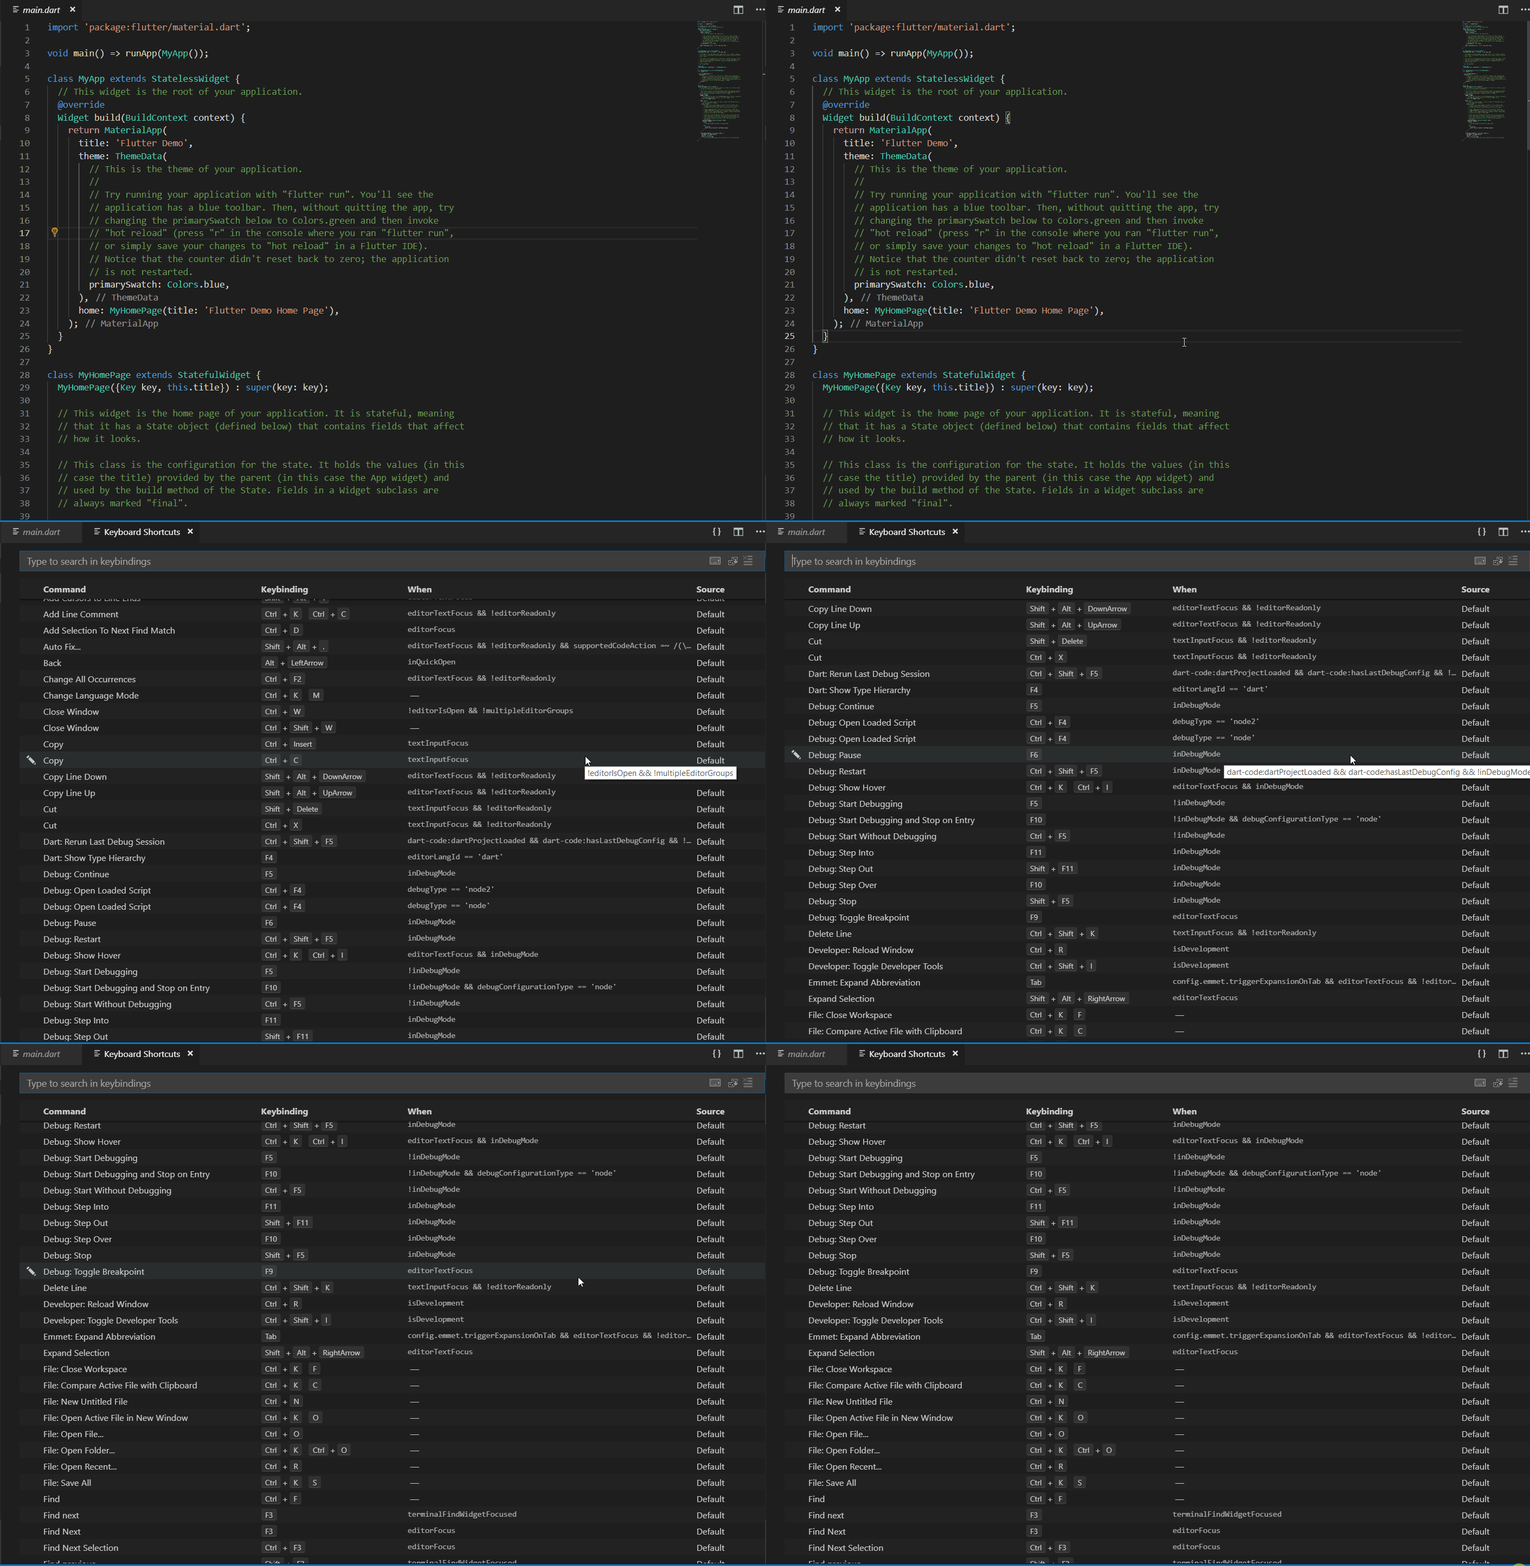
I won’t be able to explain all the default shortcuts in this article since the list is huge. You can find the list of default keyboard shortcuts and also search for shortcuts by using CTRL+K+S as seen below:
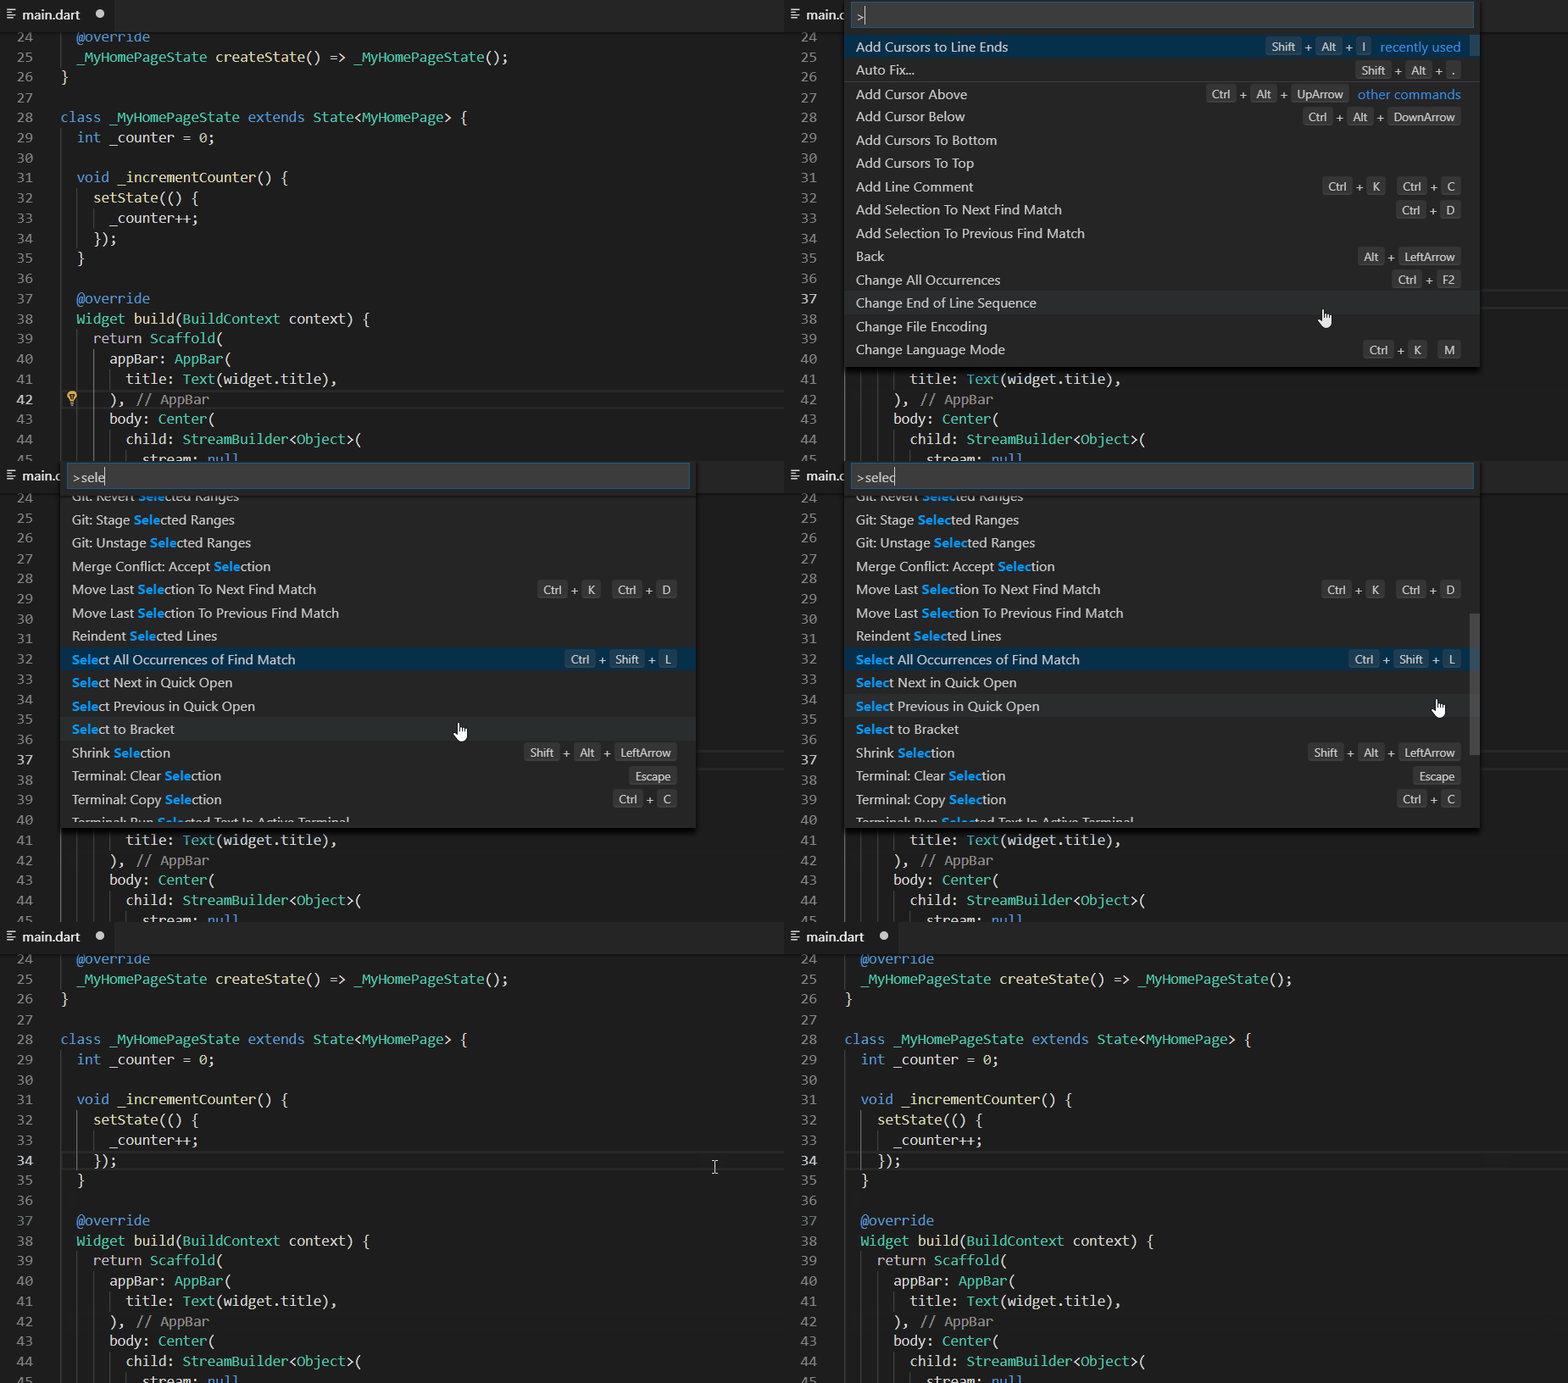
Or you can also use Ctrl+Shift+P to Show Command Palette with the recently used commands or also to search commands.
Or you can take a printout of all the default VS Code keyboard shortcuts from here. You can get the official dart custom shortcut list from here and flutter vs code extension documentation.
Code Assist or Code Completion
While coding, this is one of the important tools especially for beginners or if you get stuck somewhere and want to check for options, you can use Ctrl+Space to get a list of curated code completion options.

Quick Fix or the Magic Wand
For faster development in flutter you can use the quick fix tool with is Ctrl+. , it helps in fixing the code with some additional requirements without messing with your code or your widget structure and giving you less headache of manually correcting everything. Let’s see some of the examples
Quick Fix Options
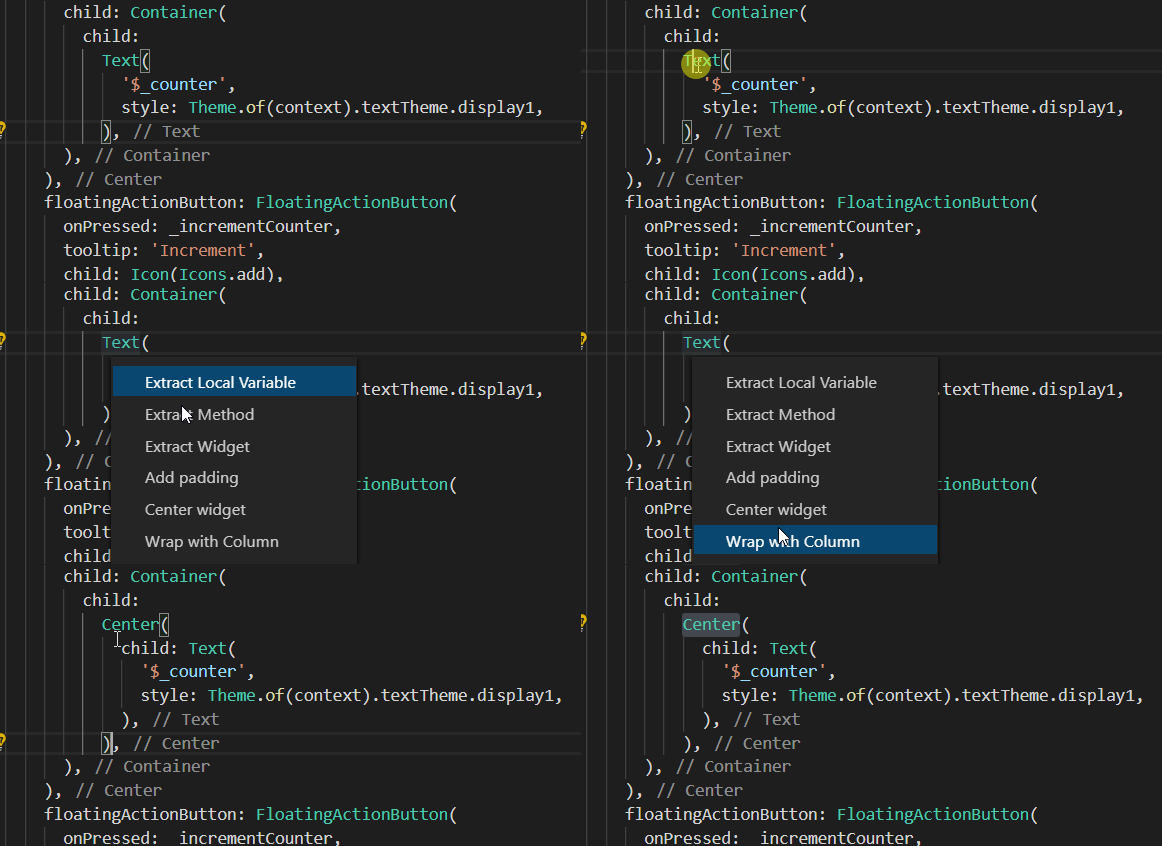
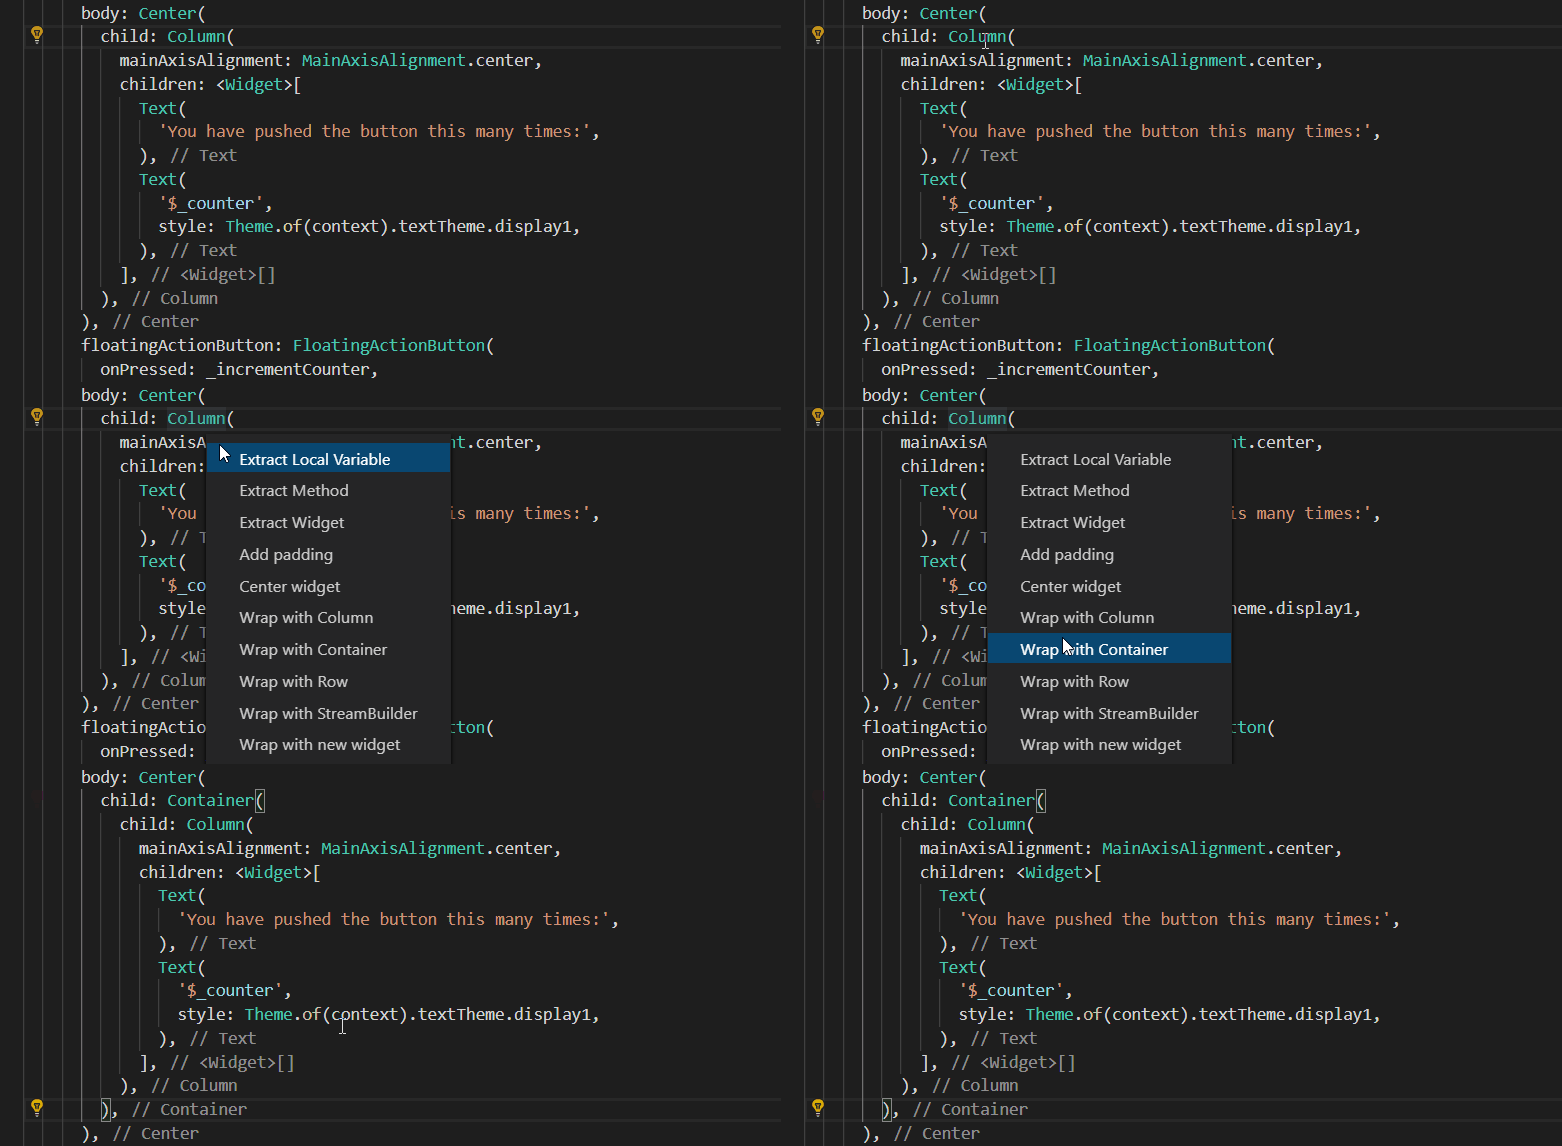
As you can see below, when on any widget you can click Ctrl+. to find the quick fix options.
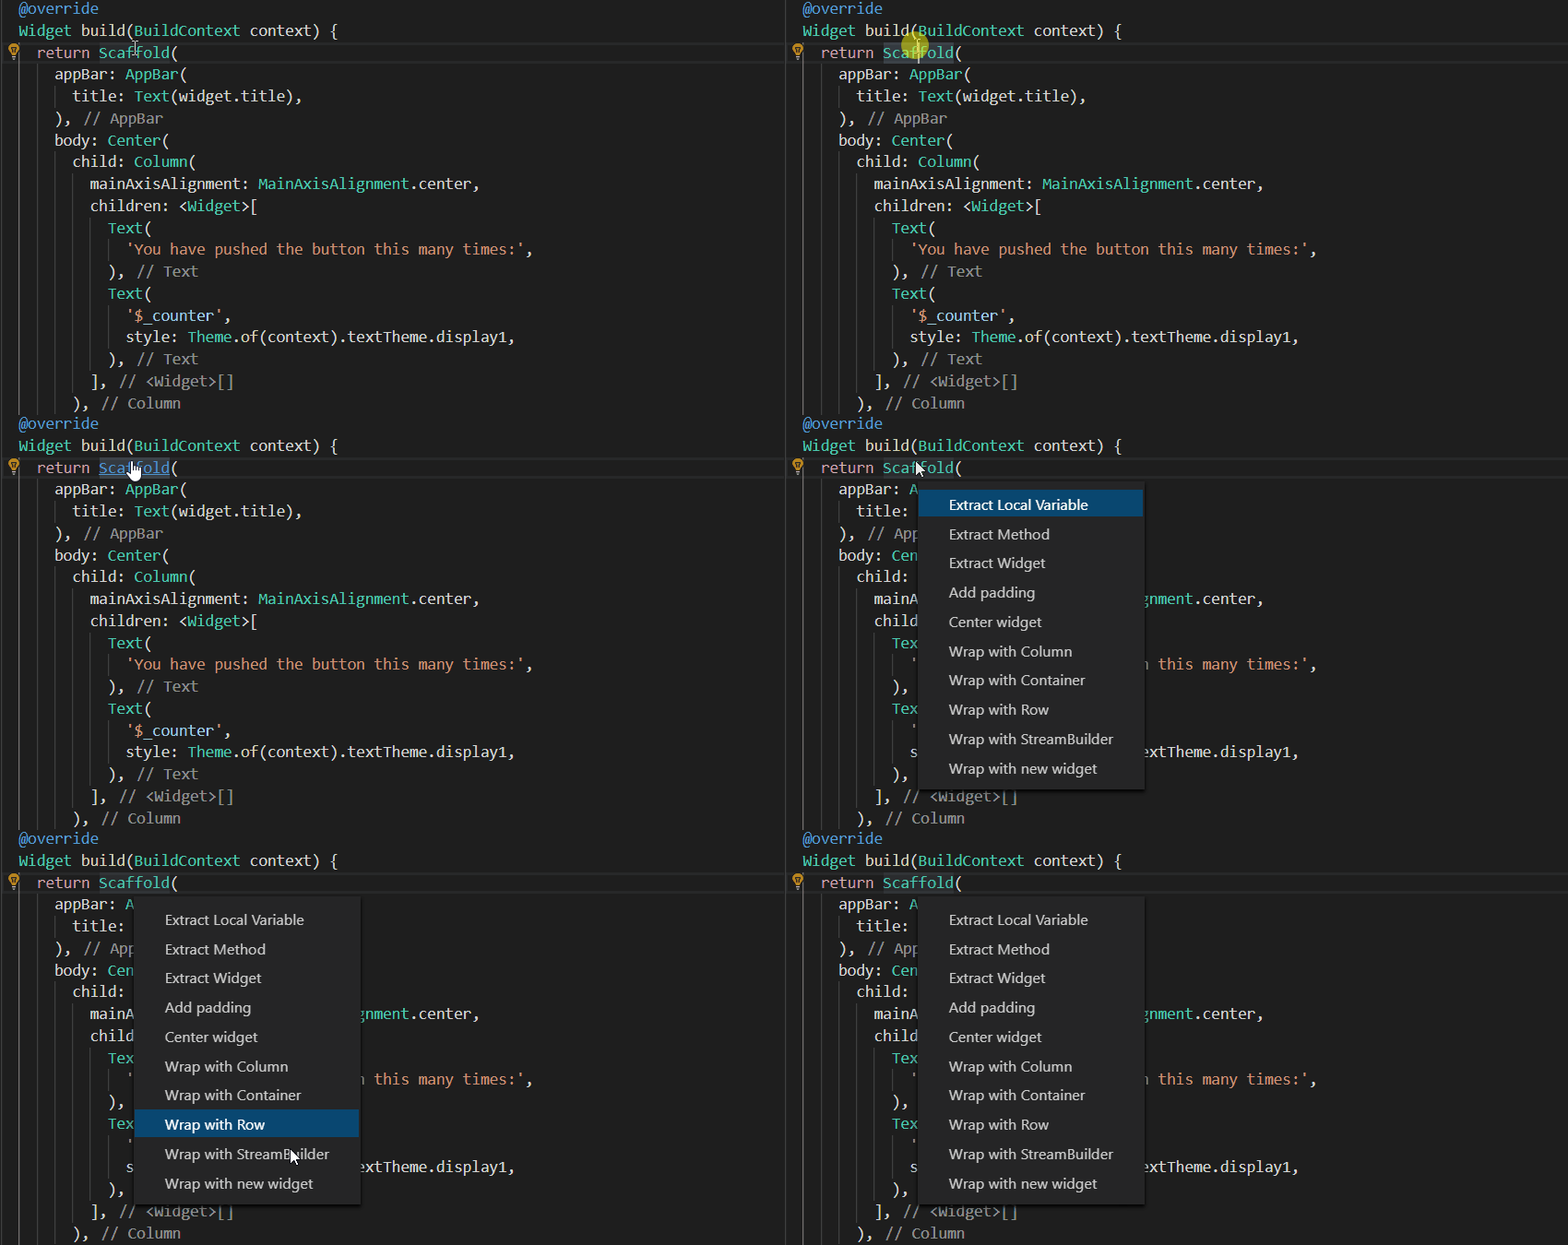
Let’s explore the menu items one by one :
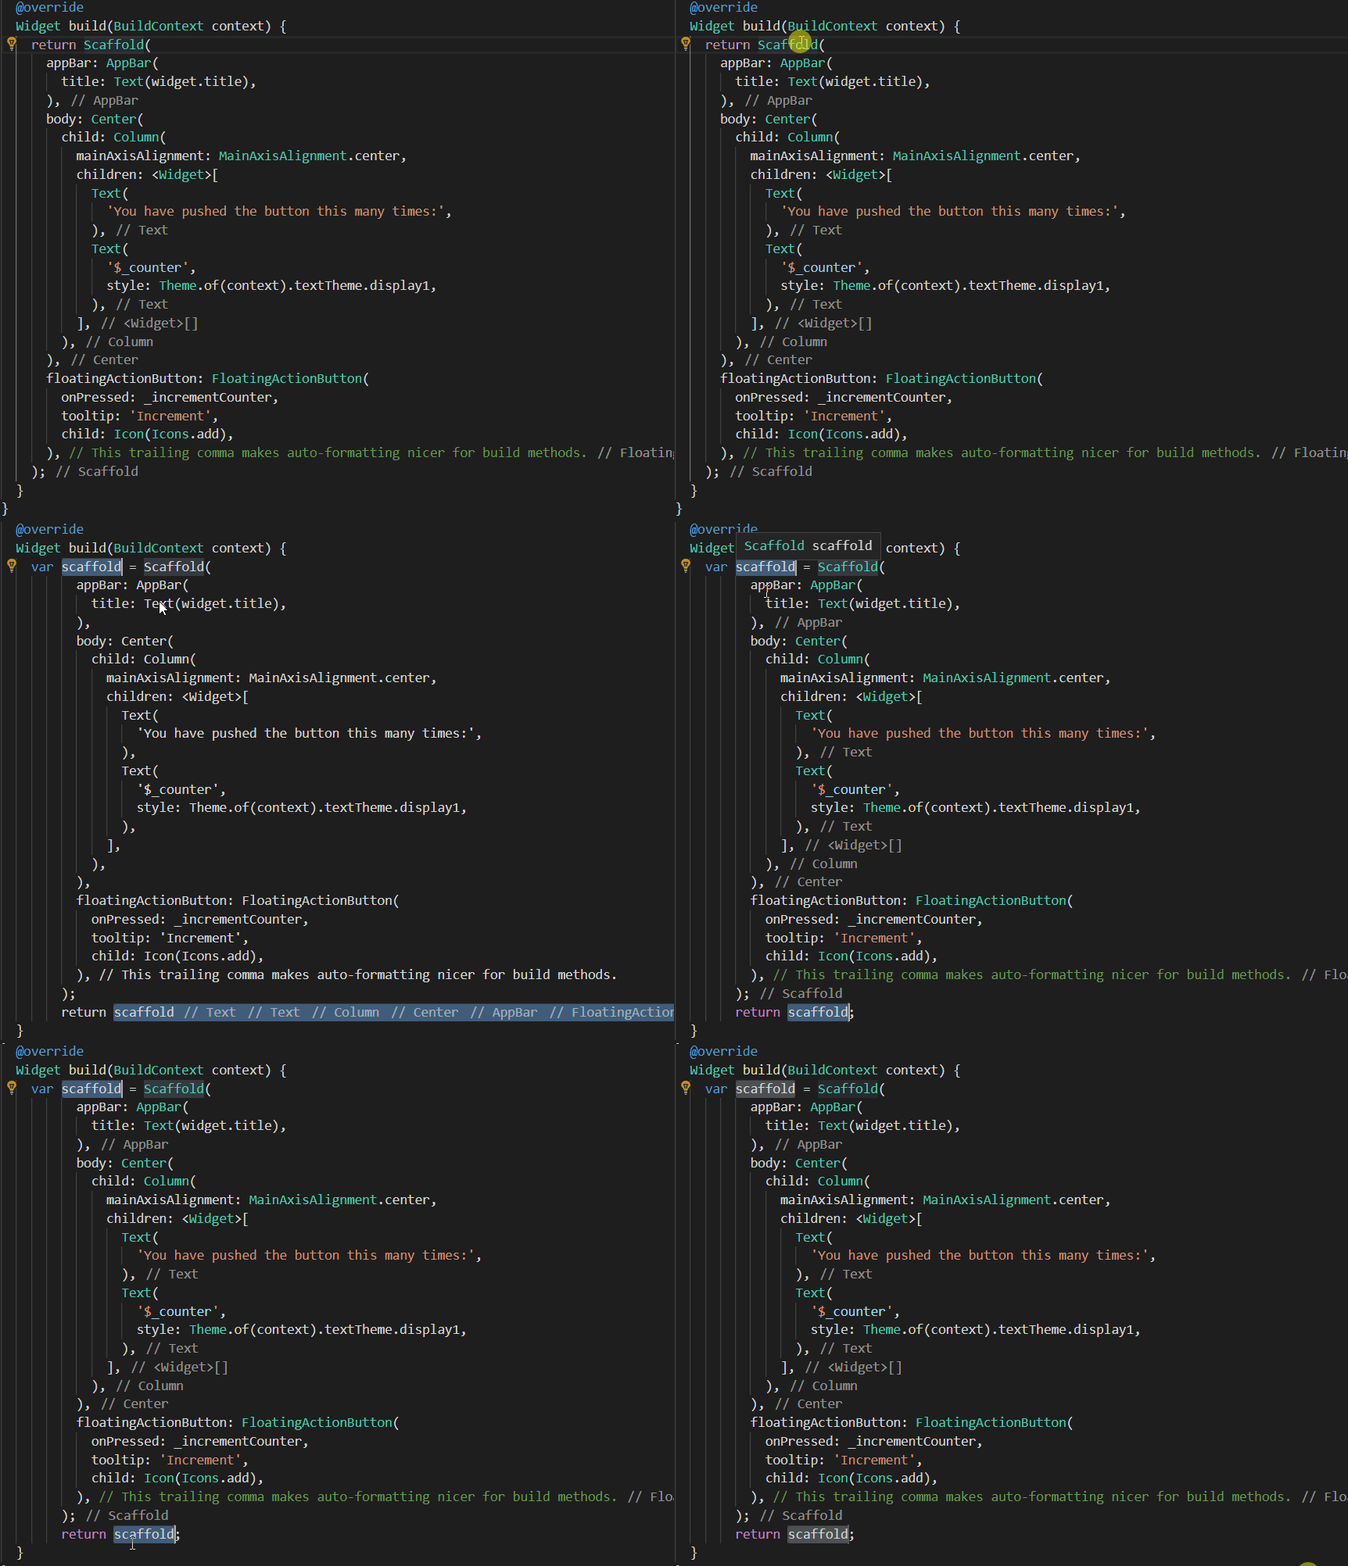
1. Extract Local variable
You can extract an existing widget and make it a local variable and magically the widget will be replaced by the variable, wherever it is used.
2. Extract Method
What if you have got a lot of code and you want to split it to different methods. It would even given you a generated name for whatever code you want to split.
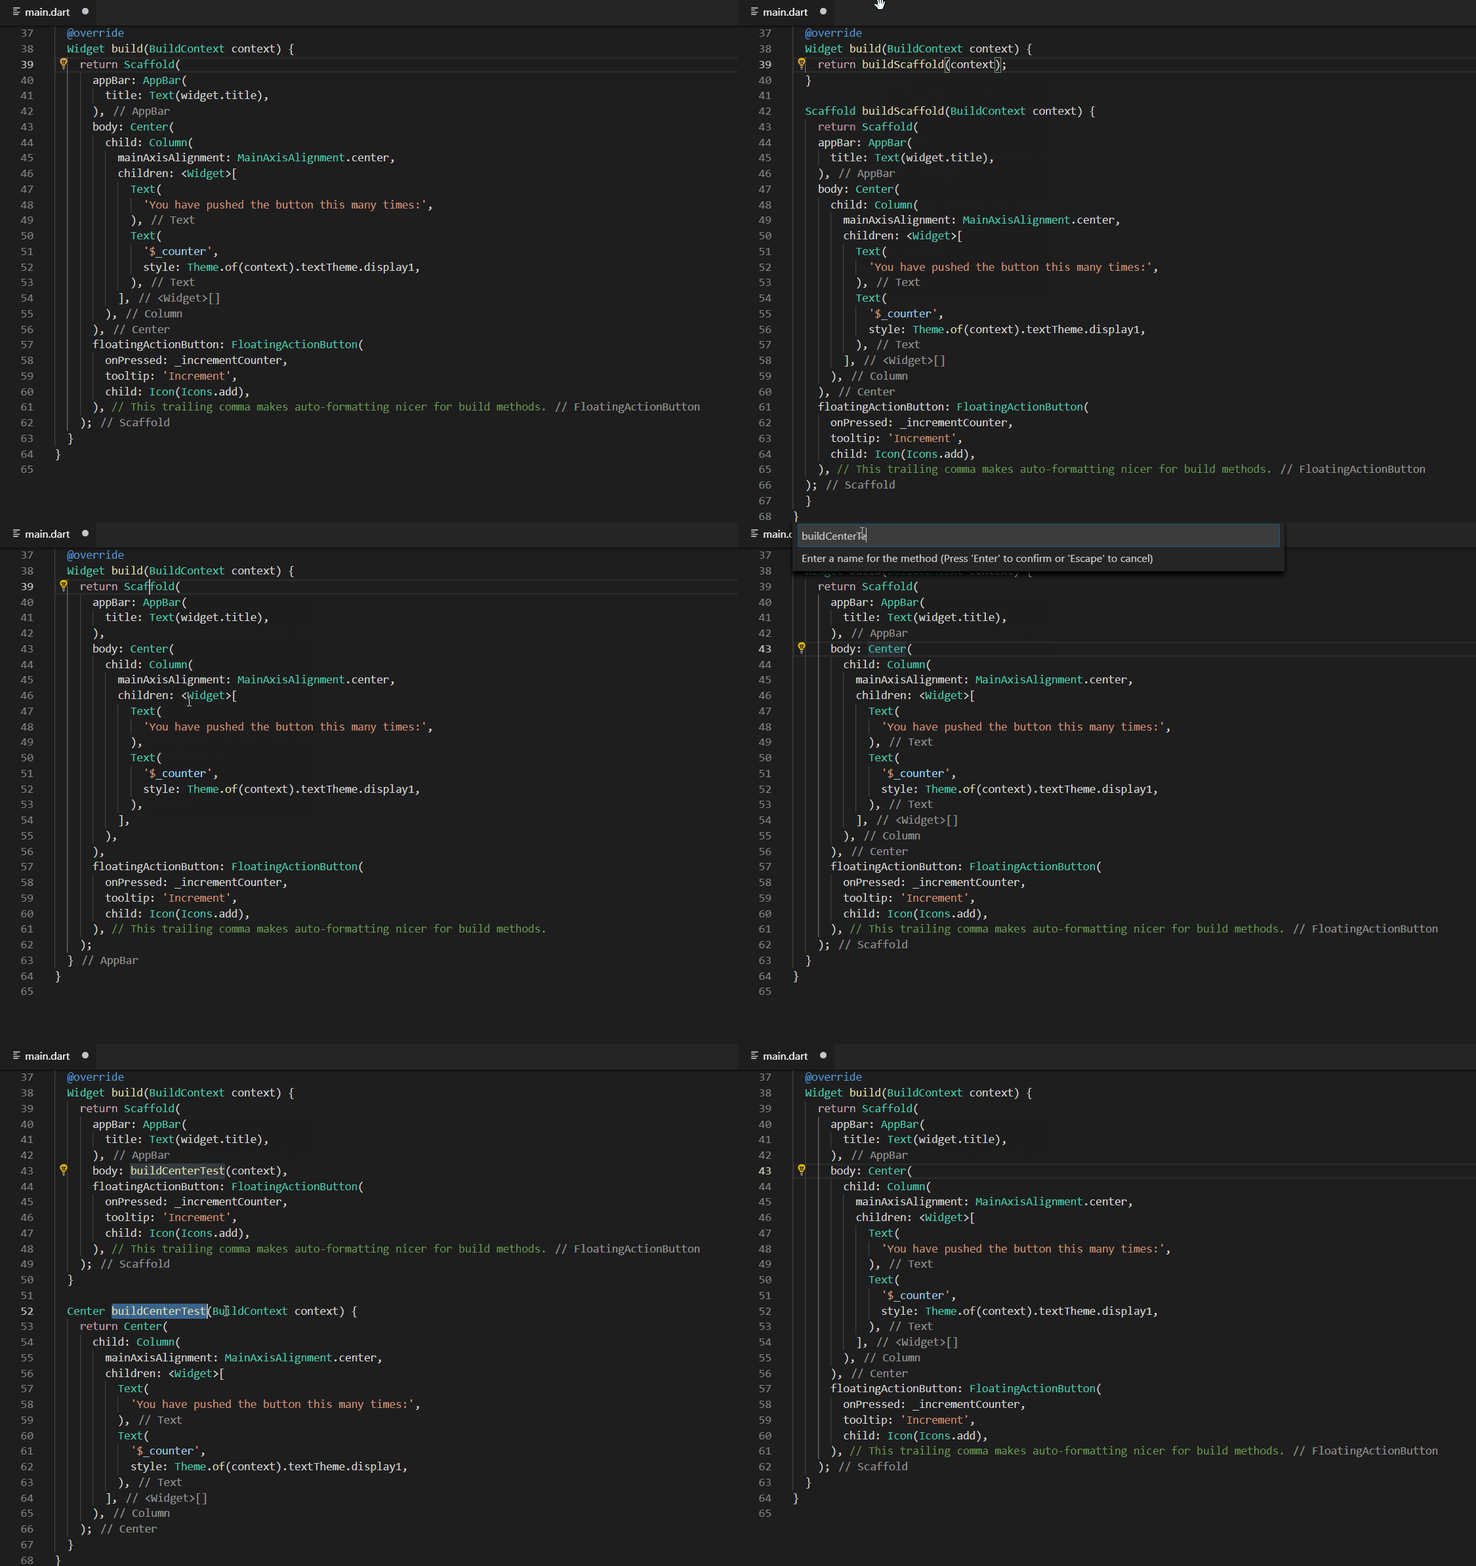
But I would advice against splitting widgets to methods, instead you should create a new class as it has a lot of impact on performance, you could refer this article to know in depth why widgets should not be split into methods. You can do this easily using the next menu.
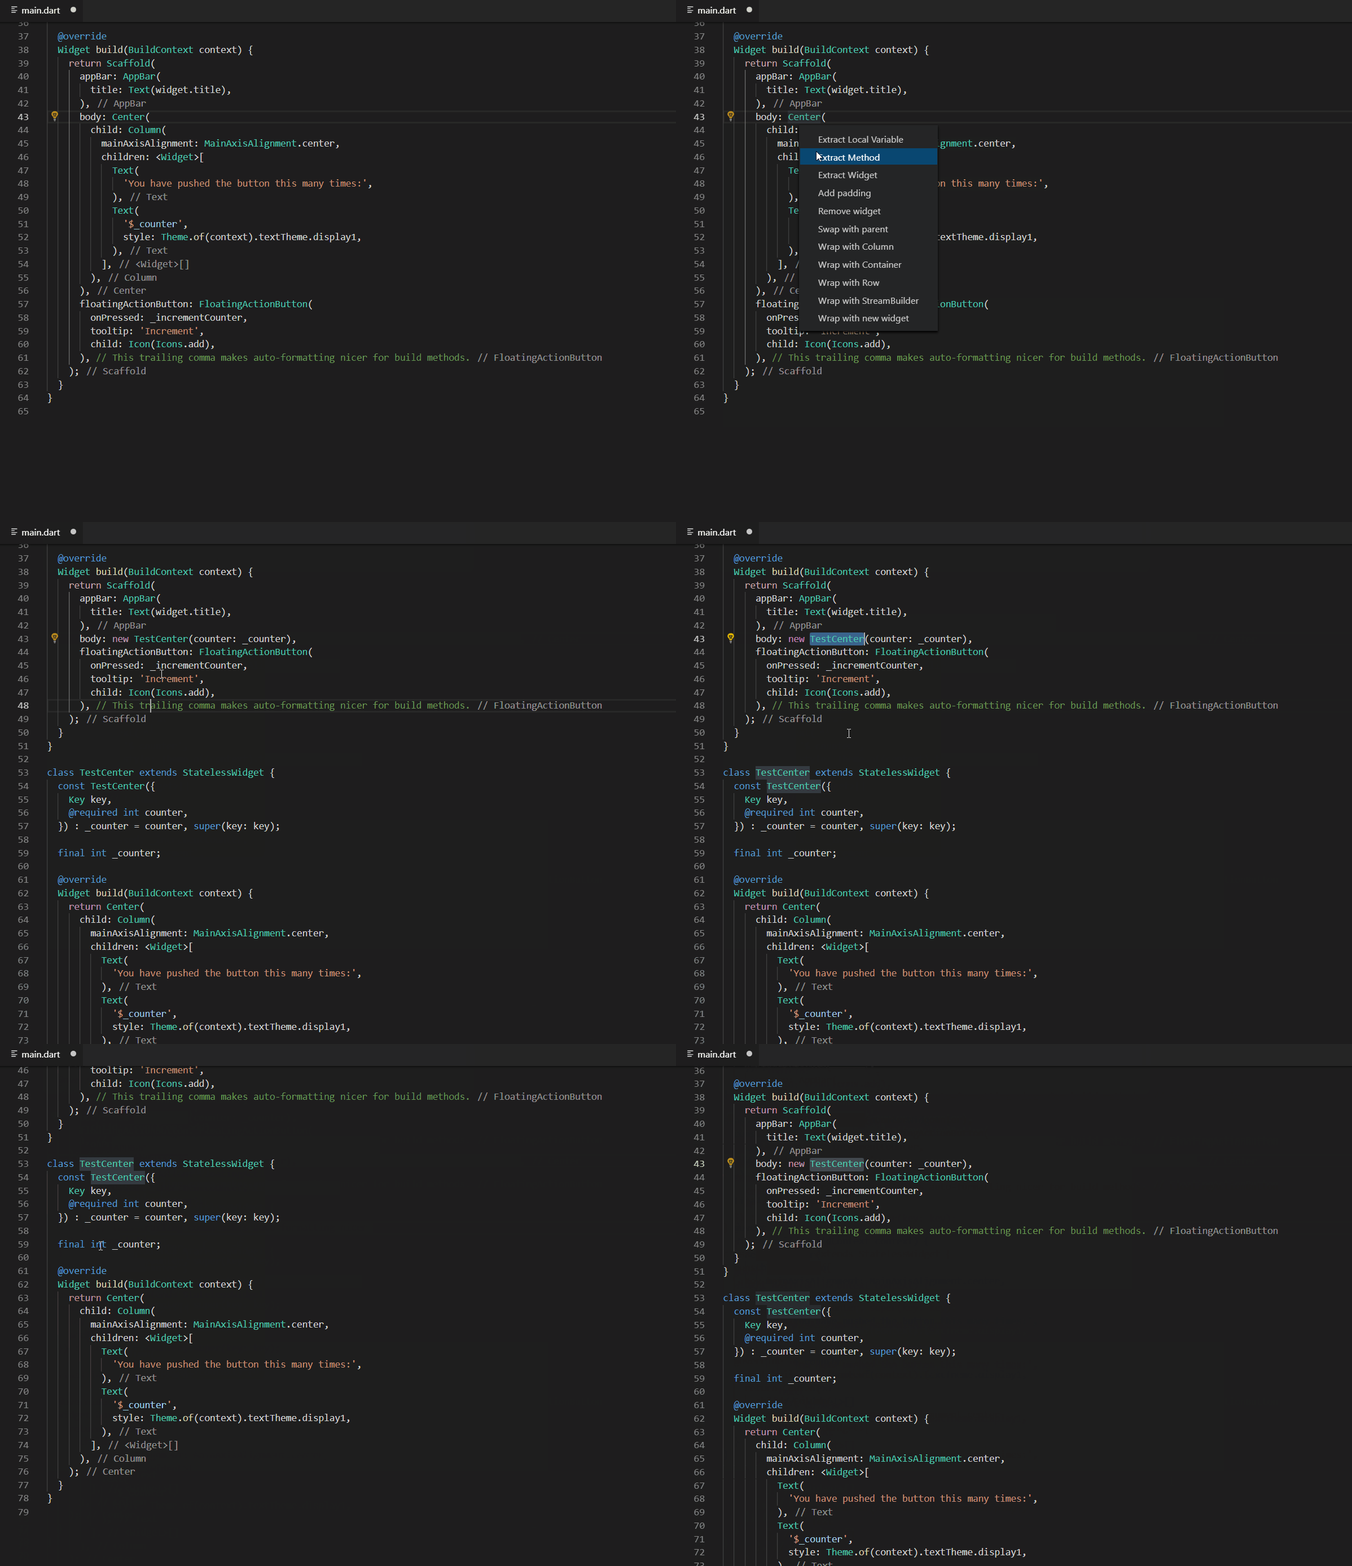
3. Extract Widget
This can come a lot in handy if you want to split your widgets into smaller widgets. Hope by now you know about the importance of splitting widgets to smaller widgets and it’s impact on performance 😉.
Just click on any widget and then click Ctrl+. and click Extract Widget option and give a name for the new widget and click Enter and that’s it.
4. StatelessWidget to StatefulWidget
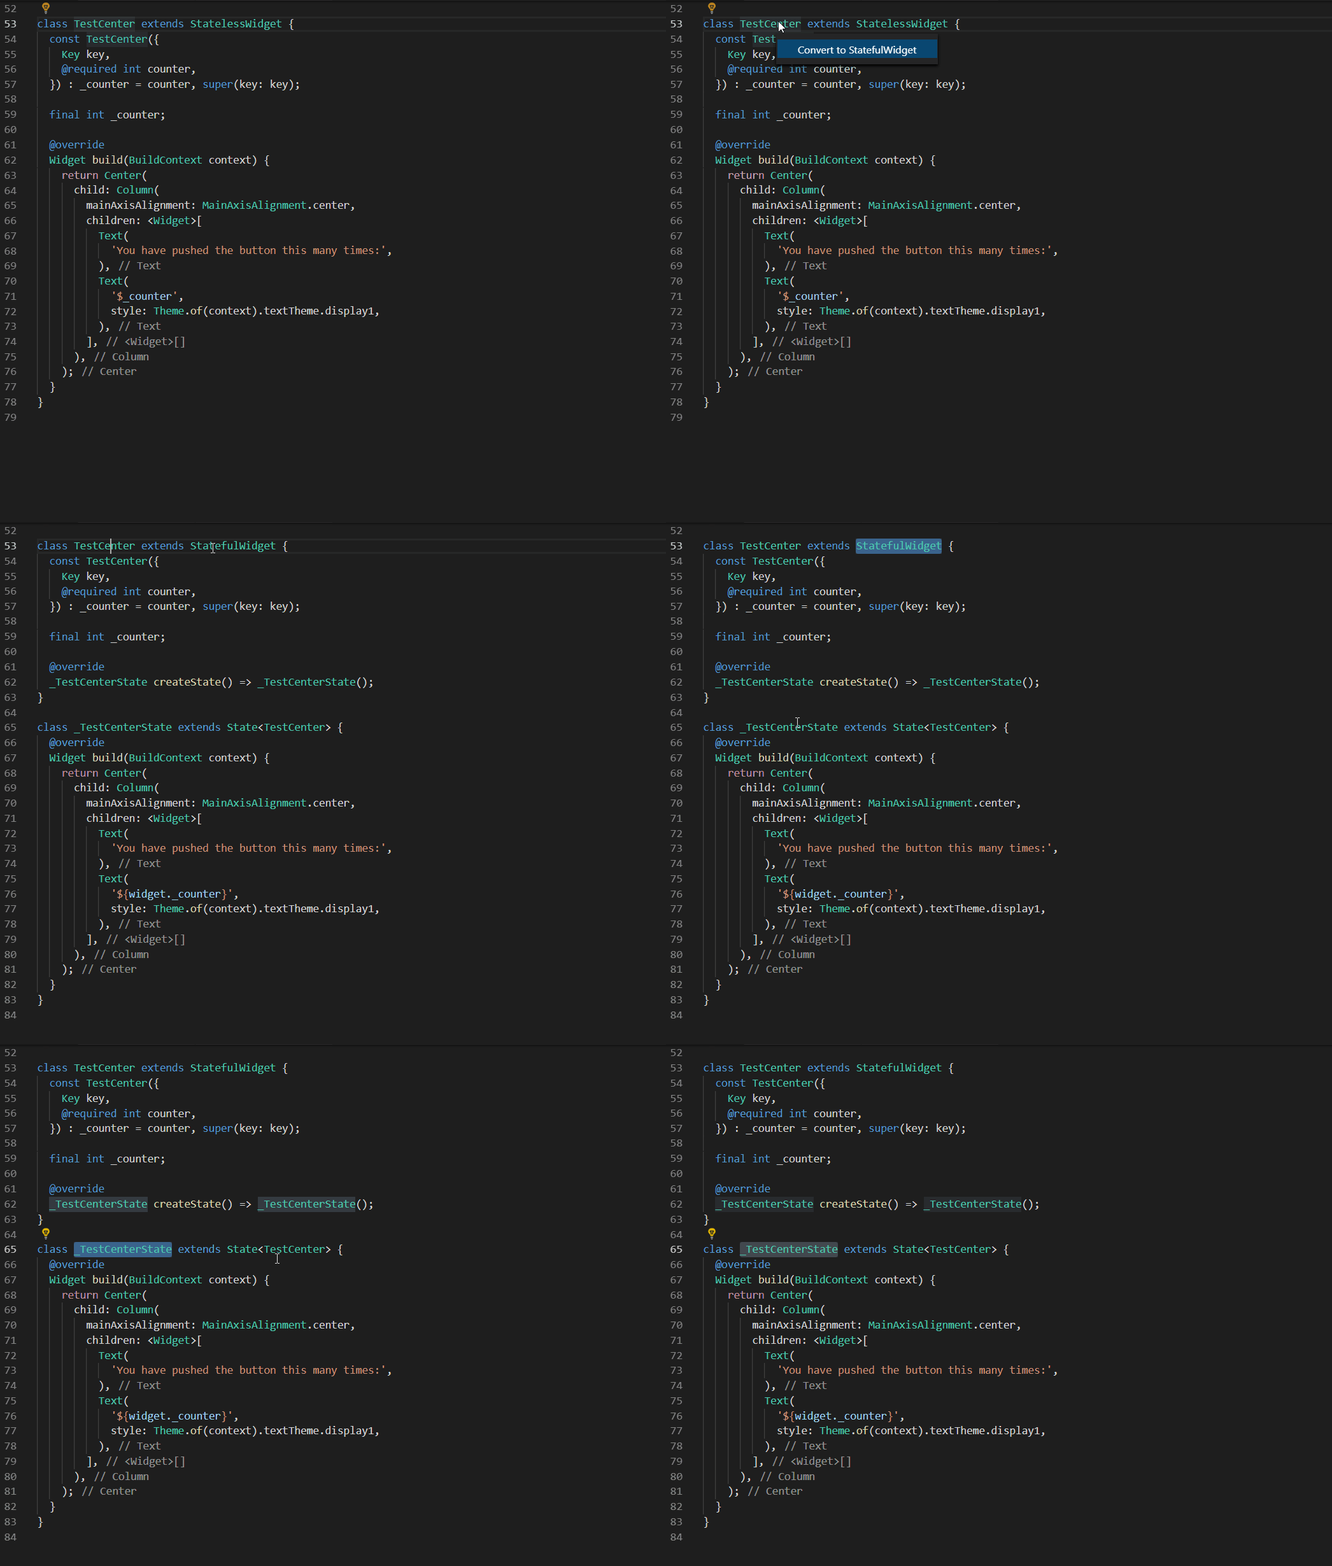
Now let’s say, you wanted a StatefulWidget, but this process only gives you a StatelessWidget, but there is a cool way to convert the StatelessWidget to StatefulWidget, may be by this time you would have guessed it…
Yes, you just have to click the StatelessWidget and click Ctrl+. and then “Ta Da” as if it’s magic you will get an option Convert to StatefulWidget click on that and that’s it 😍
5. Add padding
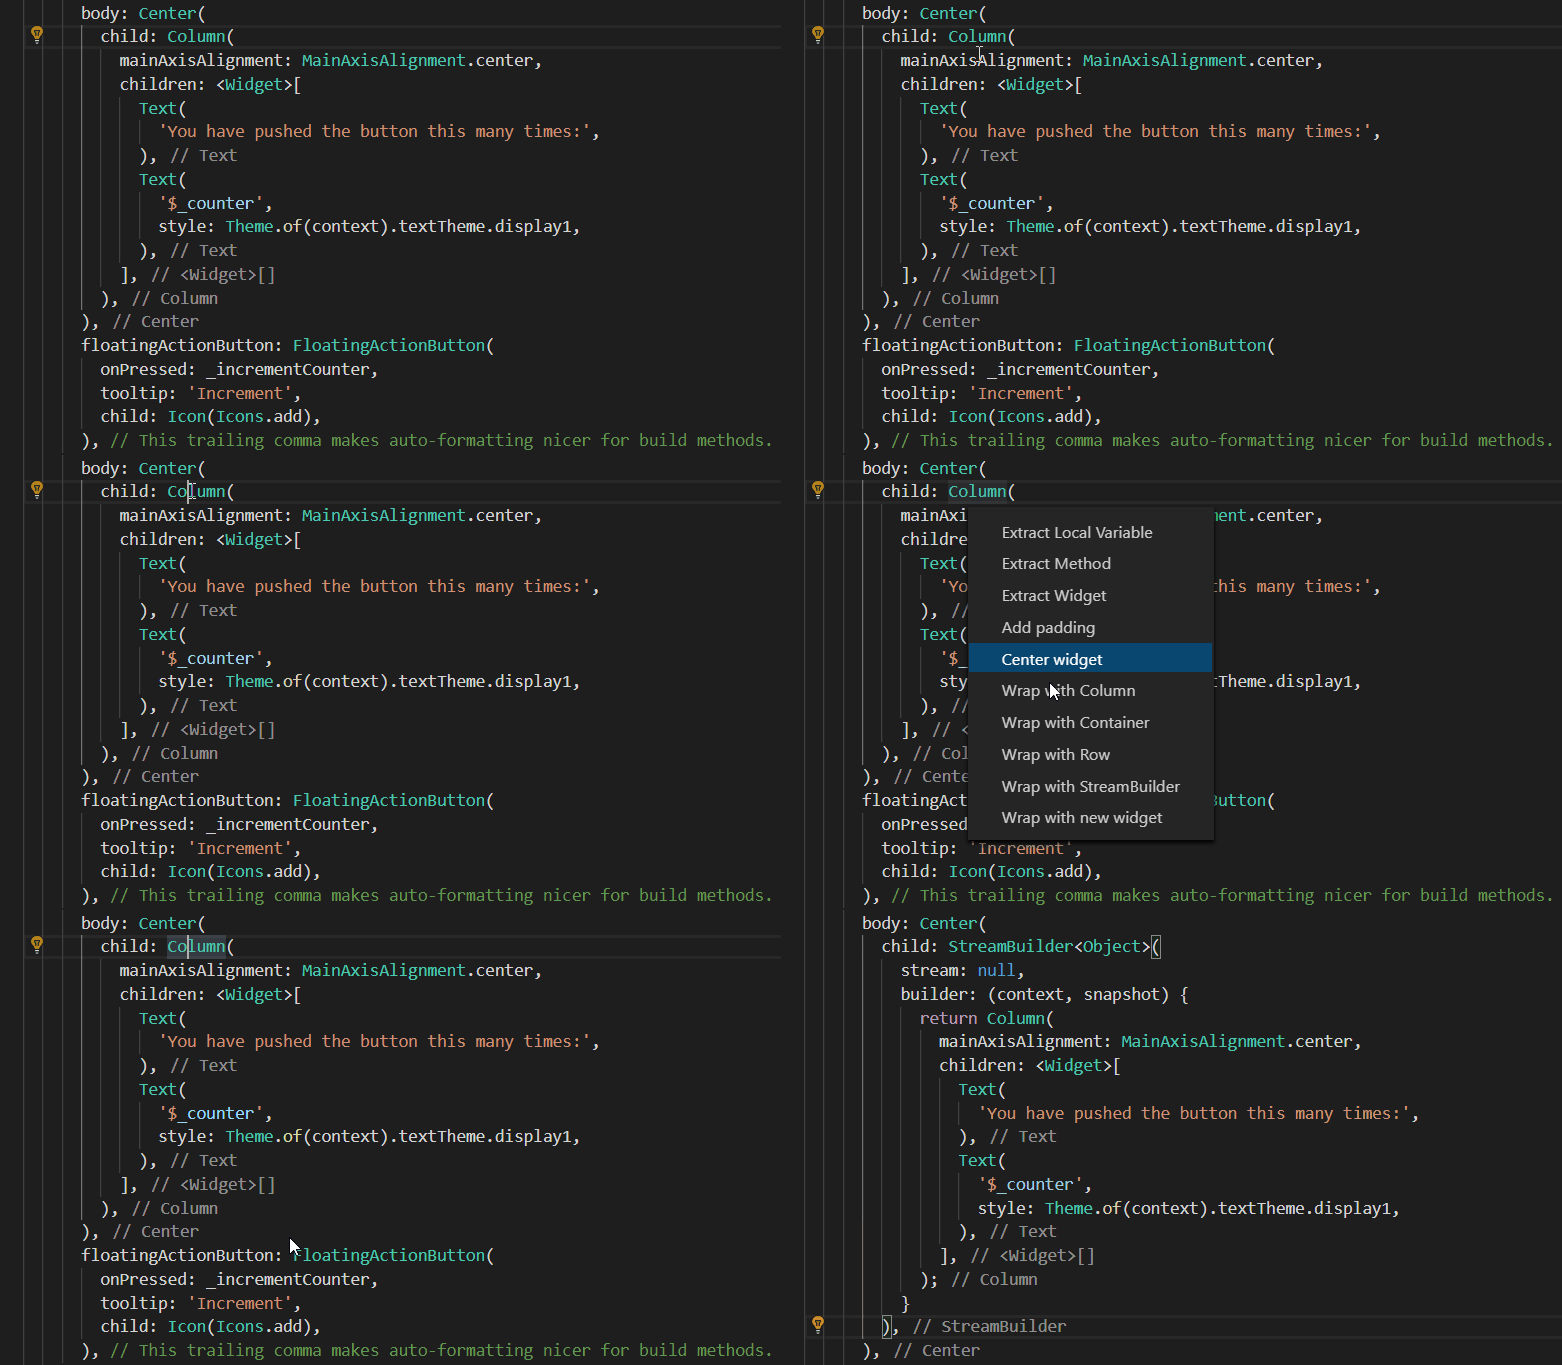
Adding padding to an existing widget is much more easier with the quick assist tool, just select Add padding and you will get padding around your widget without messing up your widget structure.

6. Center widget
This is used to wrap it with a center widget, thus centers your widget.
7. Wrap with Column, Container, Row, StreamBuilder, new Widget
You can use this same technique to wrap your required widget with a Column or Container or Row or StreamBuilder or any other widget or even custom widgets, to make that as your parent widget of the required widget.
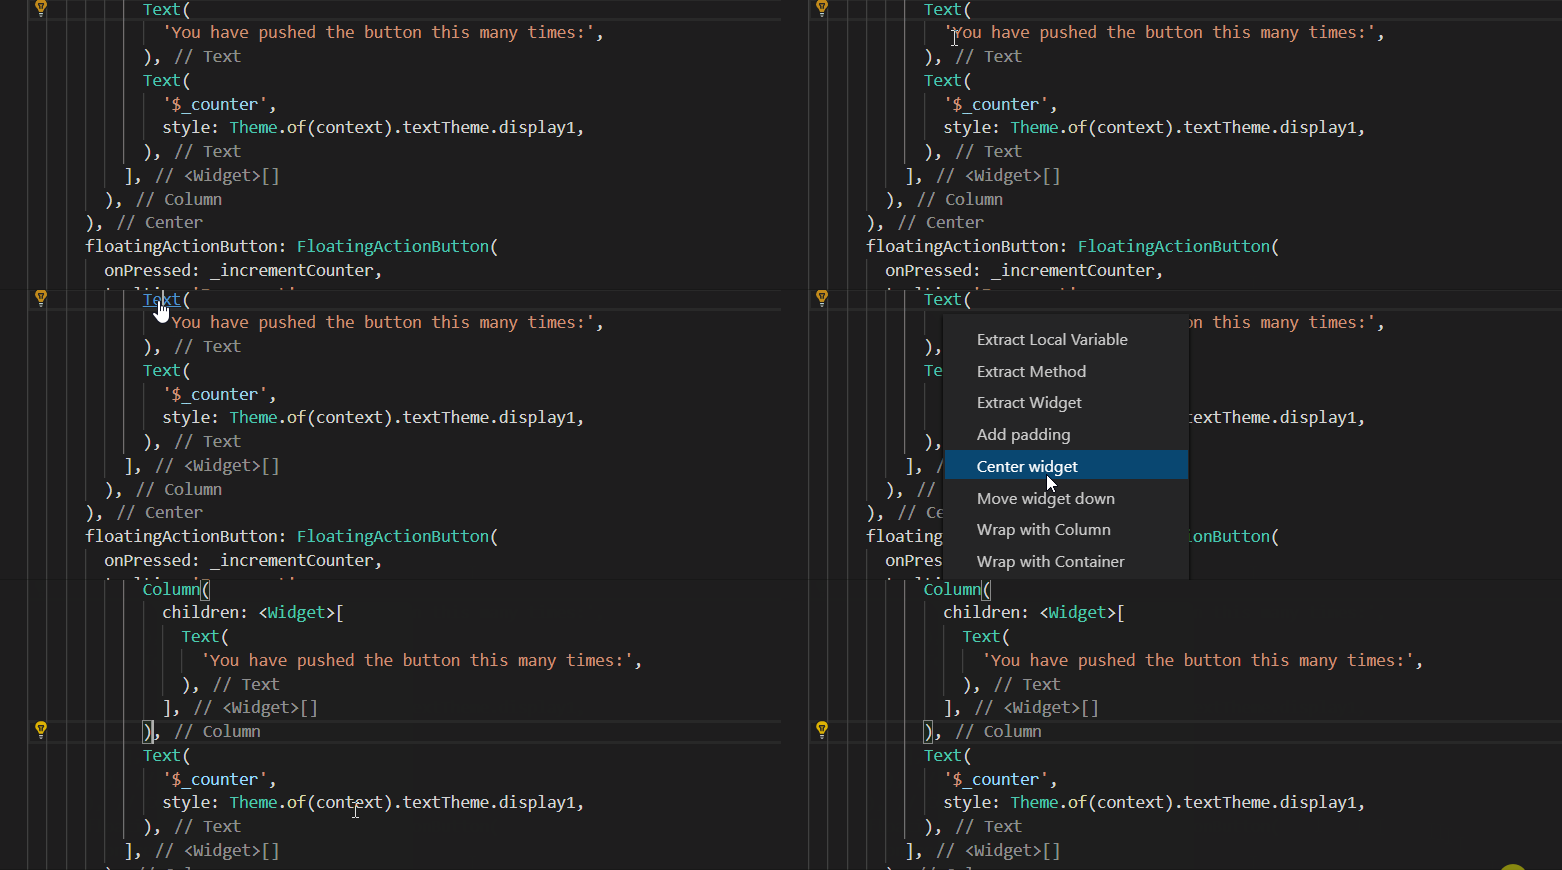
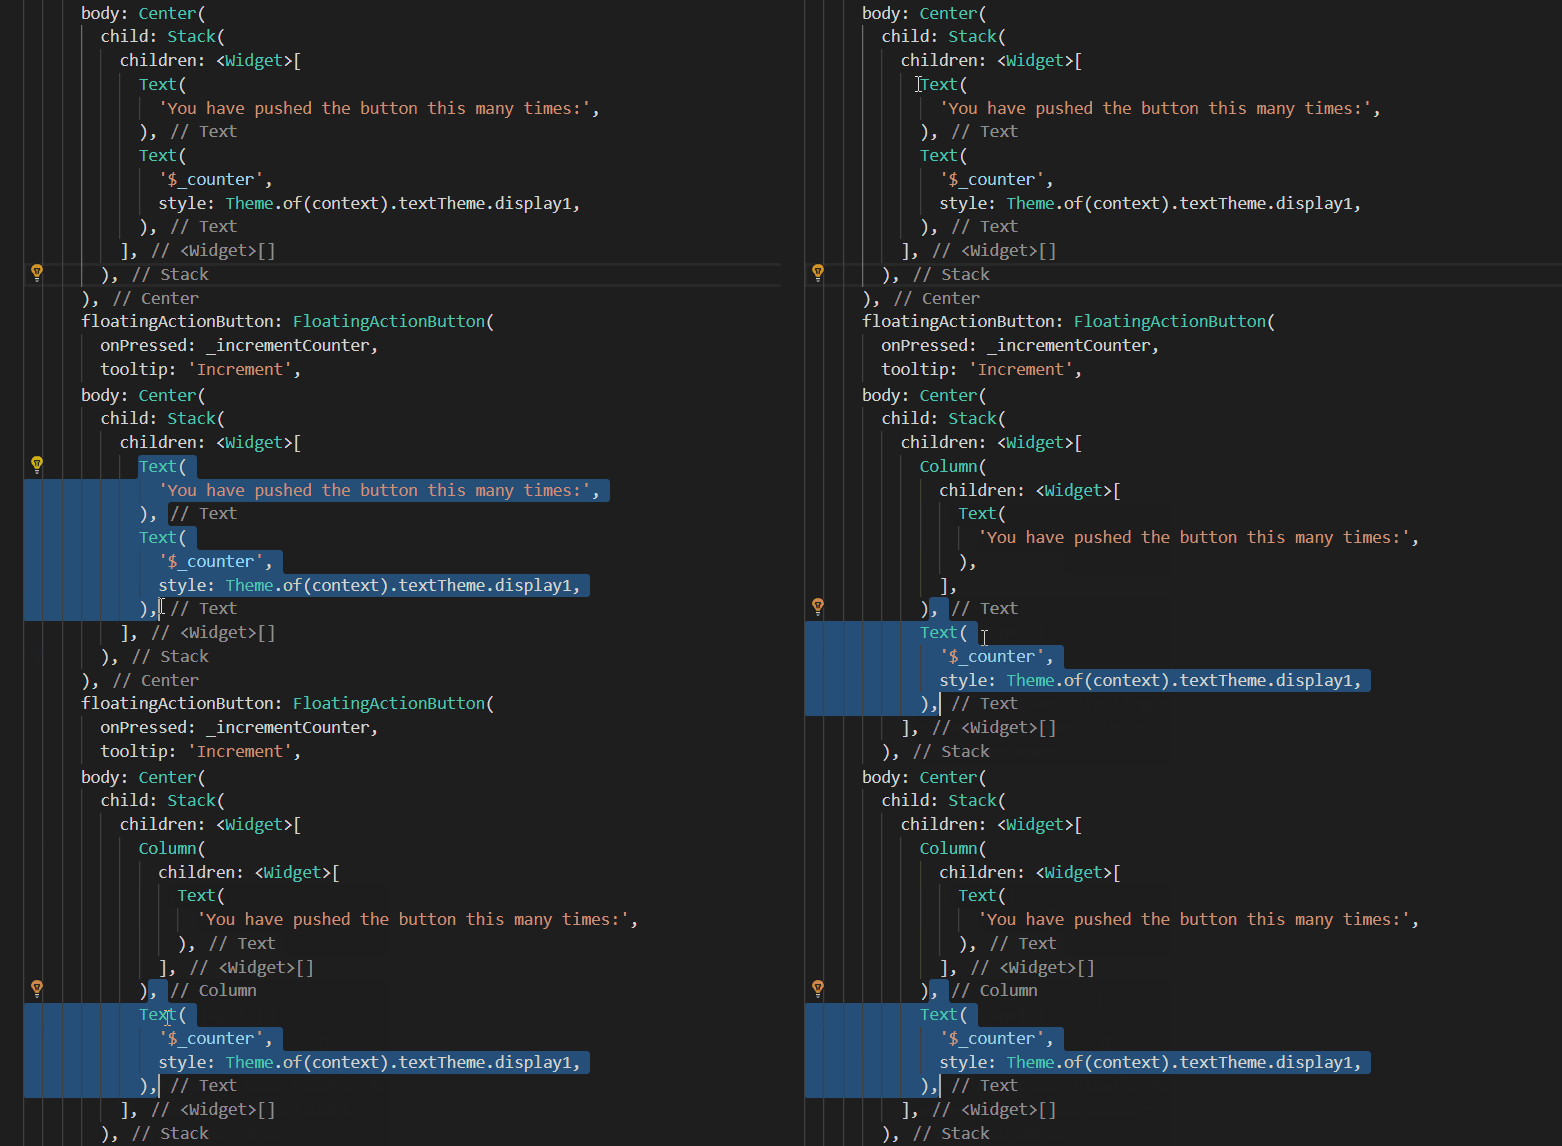
But, unlike the same tool in android studio, you cannot select multiple widgets to come under a column, as of now that feature is not available.
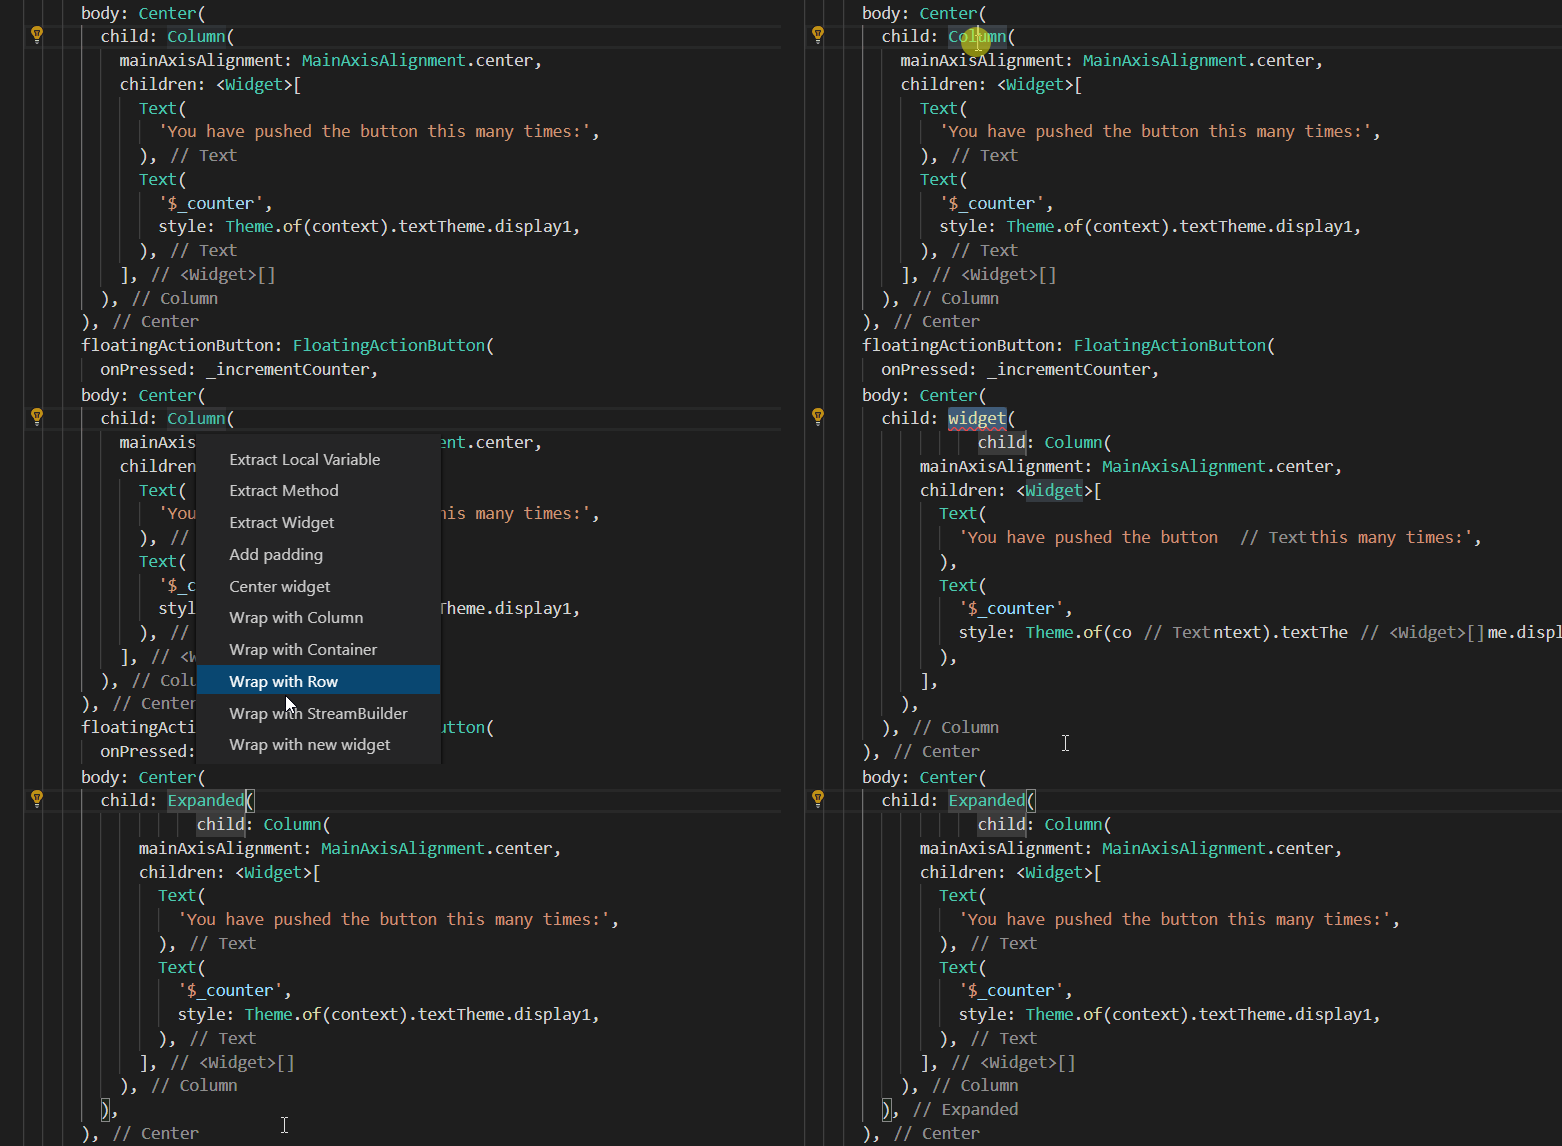
You can also wrap with any other widget or a custom widget
Flutter Specific Shortcuts — Create Stateful or Stateless Widgets
There are some flutter specific shortcuts as well, which will provide some boilerplate code to work upon, which you can call by typing prefixes, in case the menu doesn’t popup you can type Ctrl+space after typing the prefix.
- Prefix
stless: Create a new subclass ofStatelessWidget.

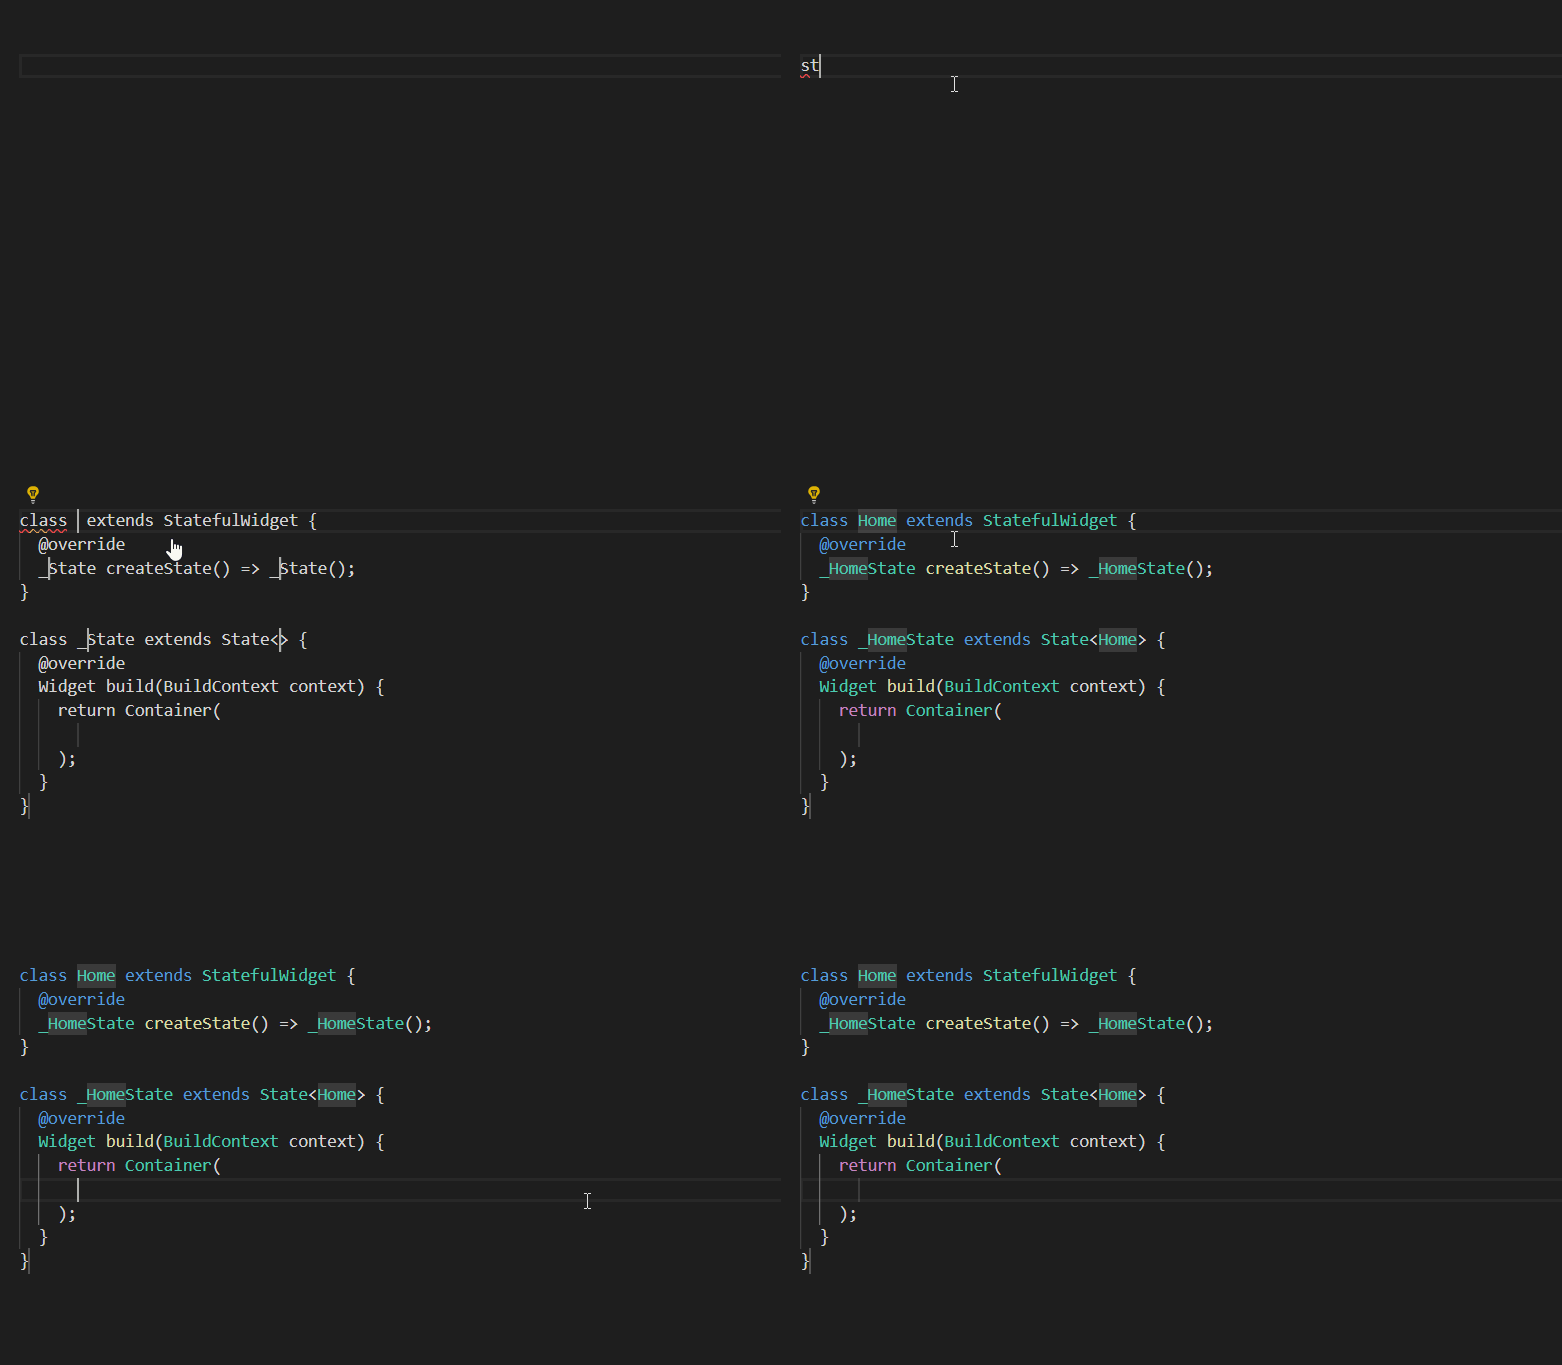
- Prefix
stful: Create a new subclass ofStatefulWidgetand it’s associated State subclass.
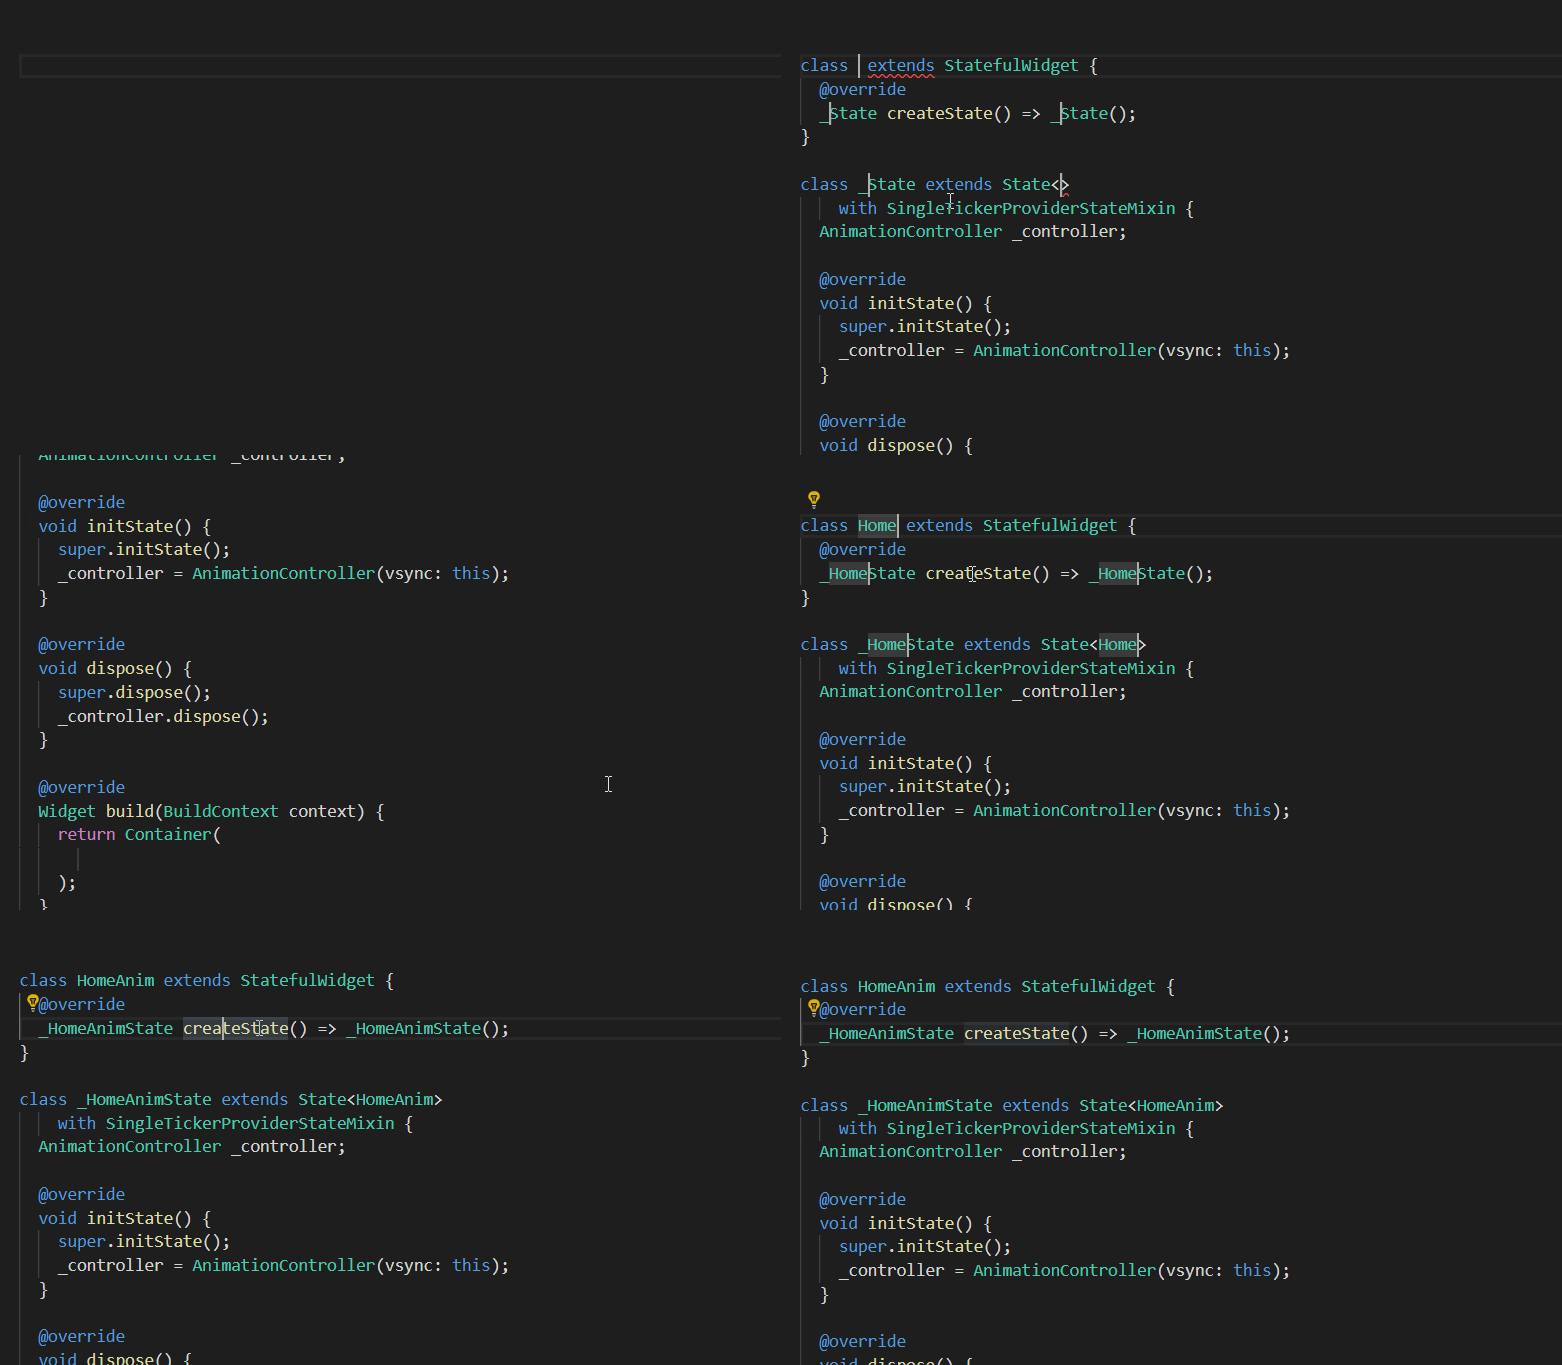
- Prefix
stanim: Create a new subclass ofStatefulWidget, and it’s associated State subclass including a field initialized with anAnimationController.
Hierarchy
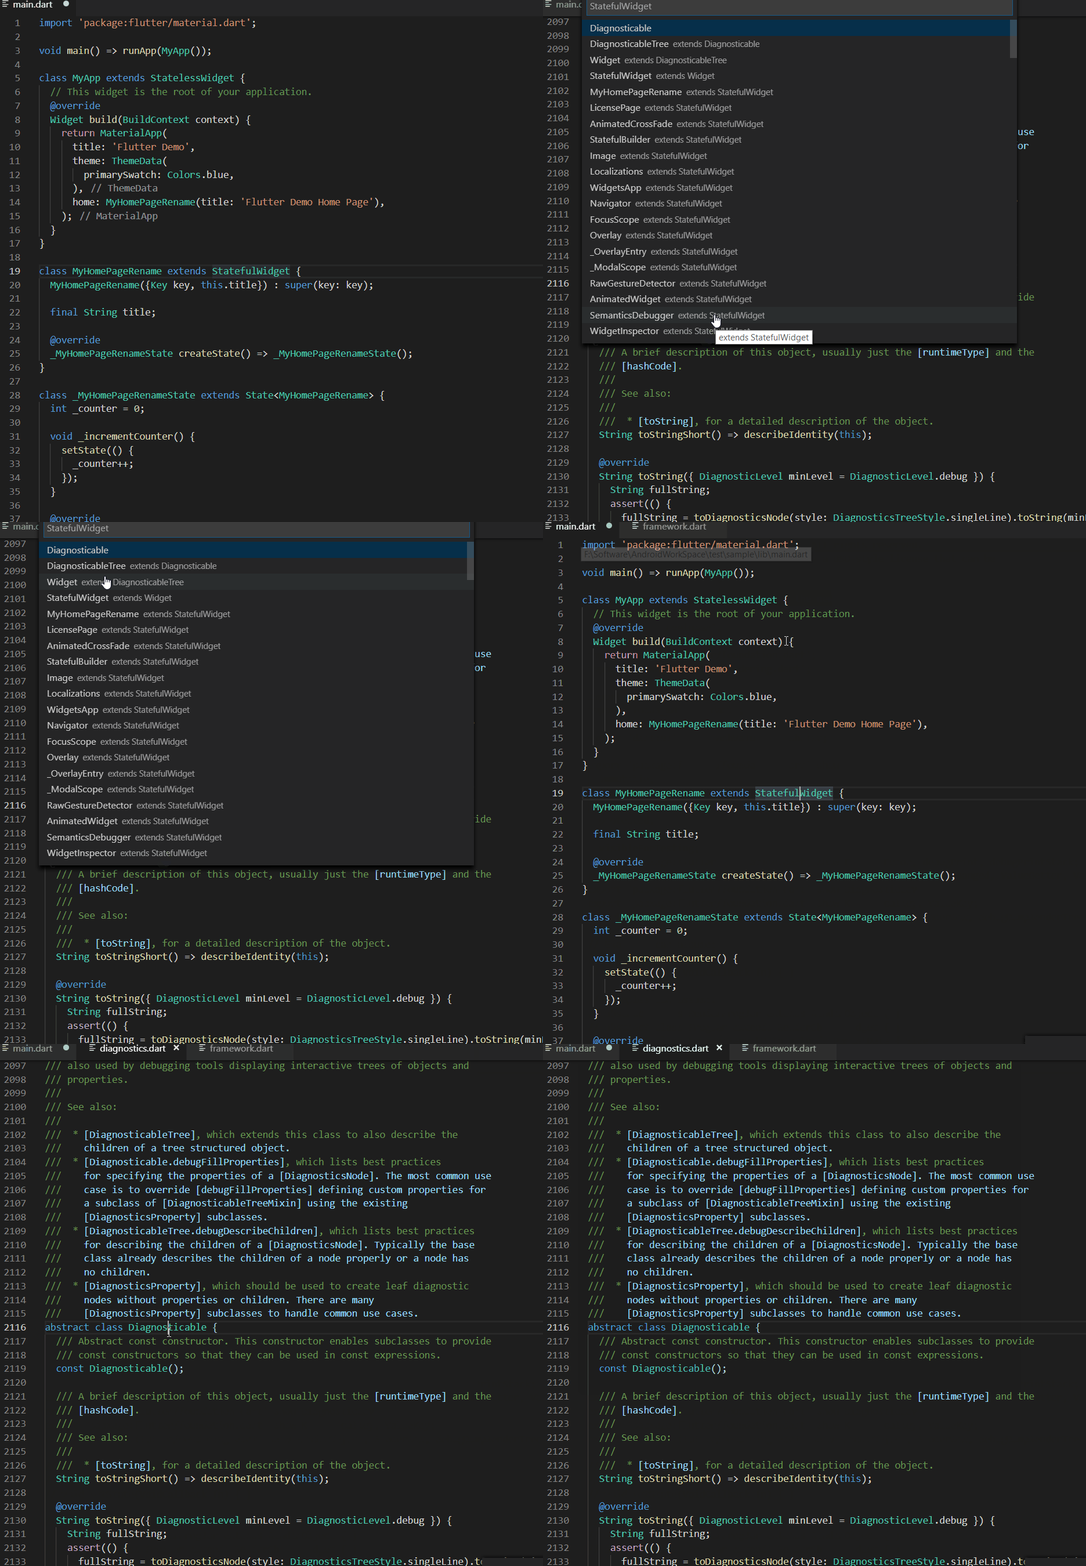
Inorder to see the class hierarchy press F4 on any widget and in a few seconds you will be able to see the widget hierarchy.
Shortcuts while Coding
Mouse Click Selection
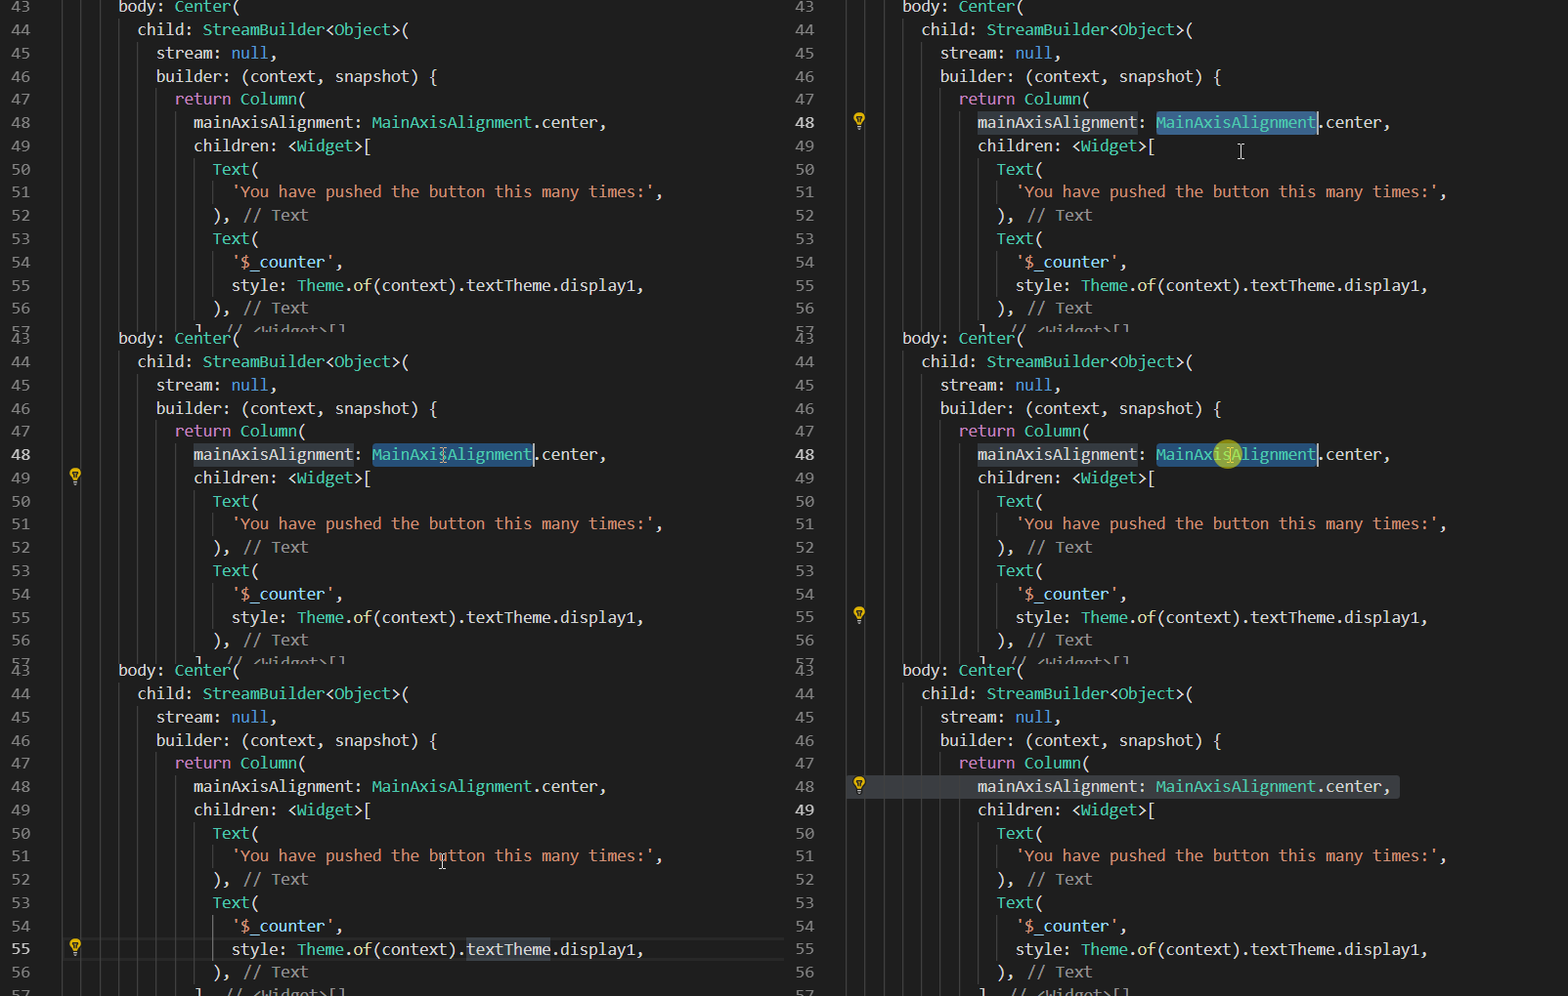
This is very common and is used usually in any editor, you can select any word by double clicking the left mouse button over that word and you can select the whole line by clicking the left mouse button 3 times consecutively.
View Source Code
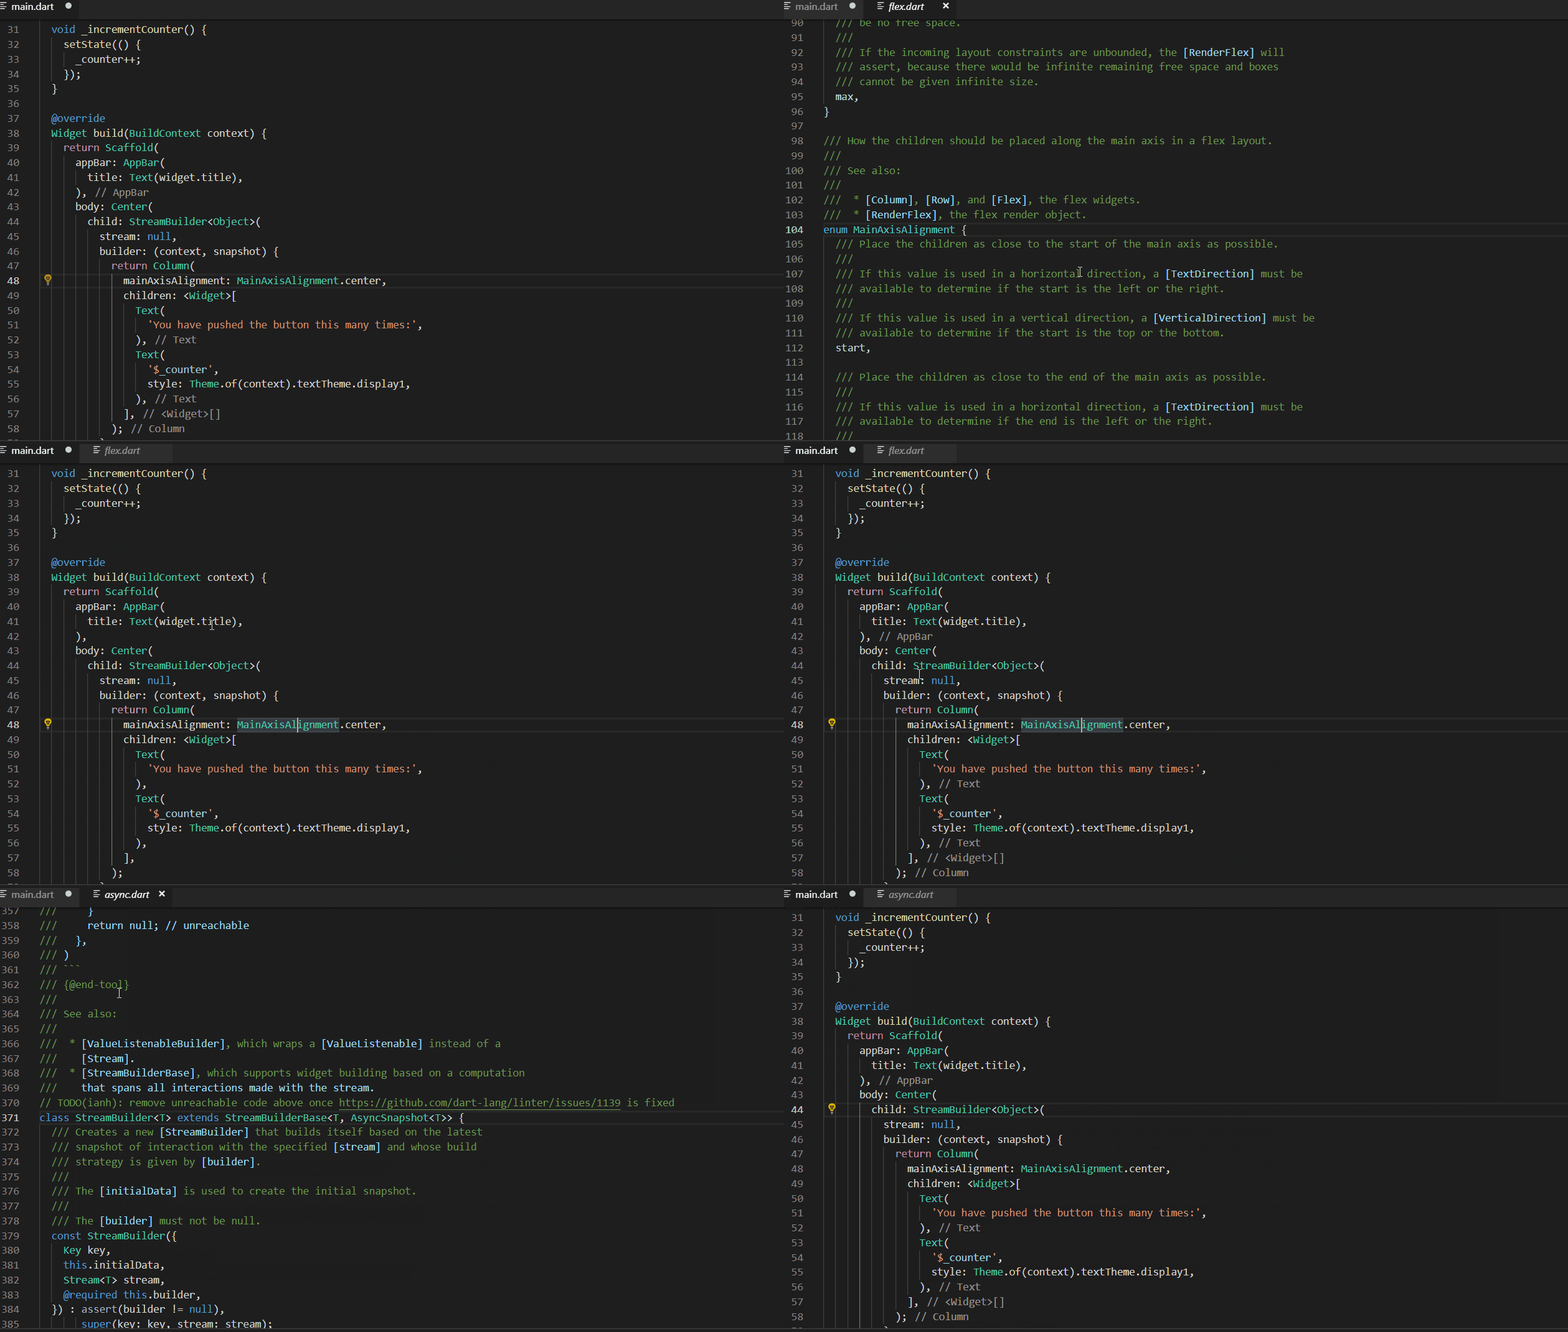
You can easily see behind the curtains of any widget and know it’s working or even find out the reason behind your errors or find the required parameters by going to the widget source code and reading about it, flutter provides a detailed documentation in the form of comments in the source code and can help you solve issue faster, in order to do that, it’s very easy, you just have to press ctrl and then left mouse click any widget to go into its source file, or you can use F12 while cursor is on the widget.
Cut or Copy and paste a line
You can cut a line by using Ctrl+x or copy the line using Ctrl+c when the cursor is at any point on the line and then you can use Ctrl+v to paste the same.


Go to line Number
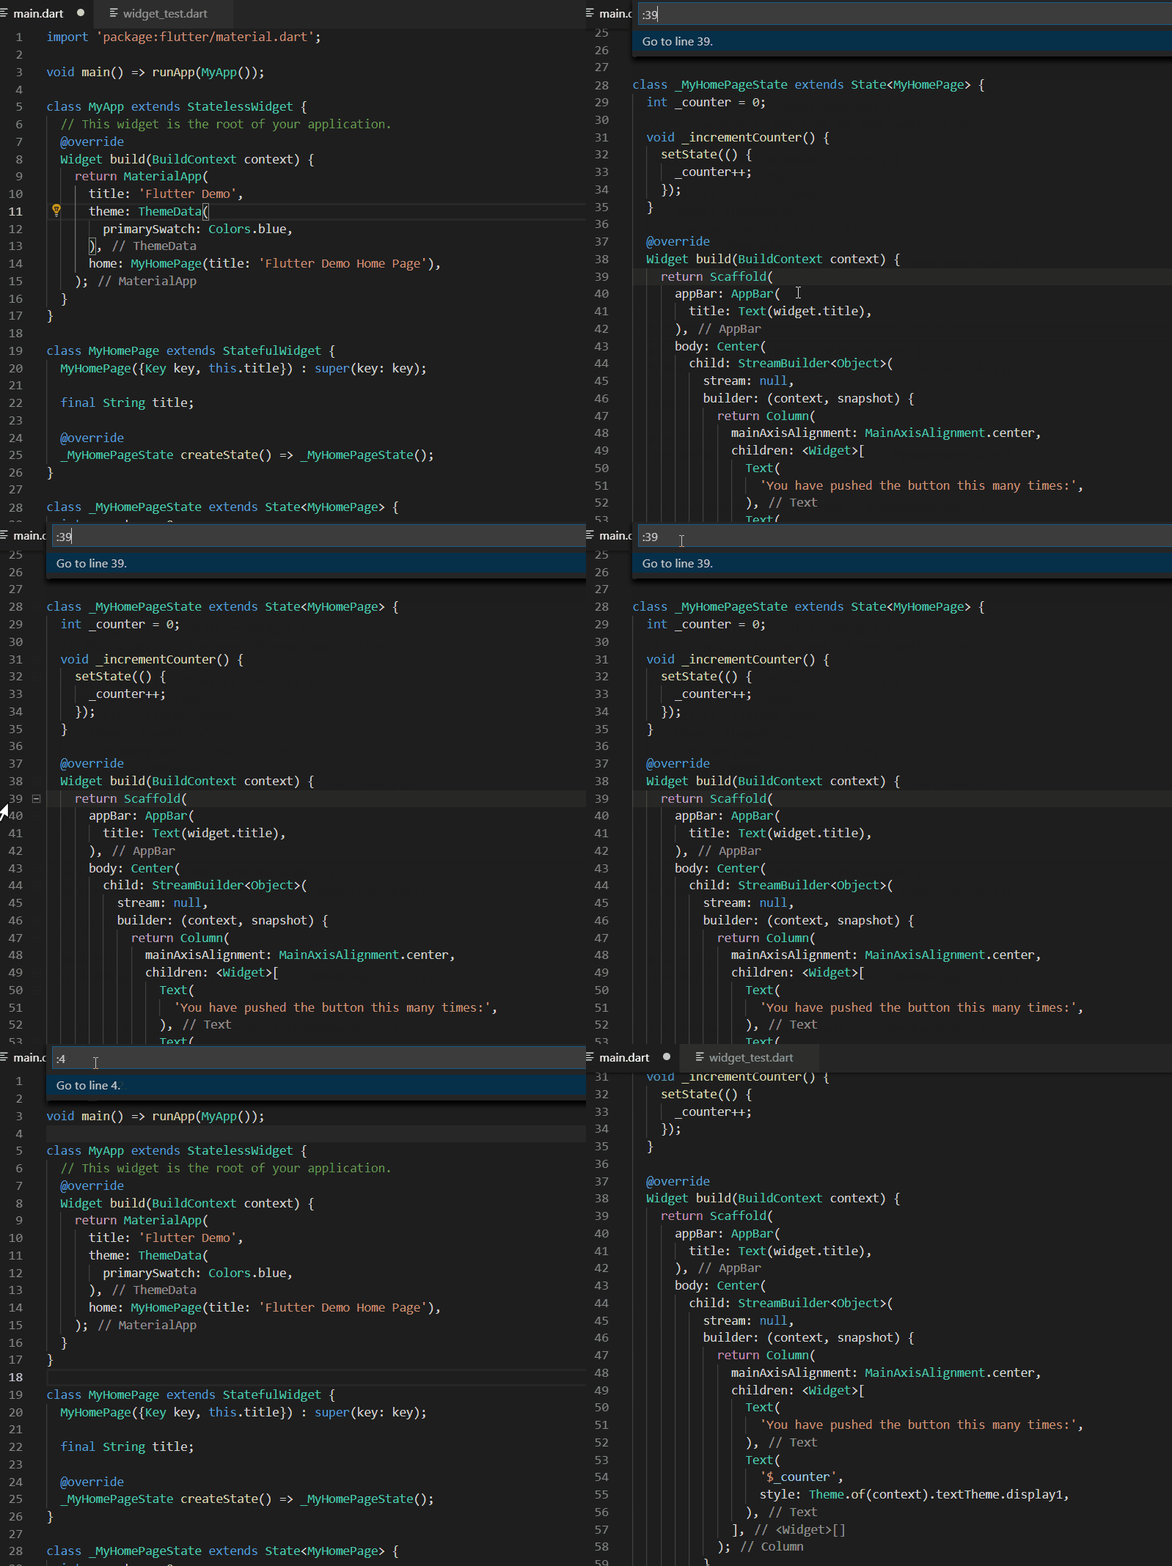
You can directly go to any line number by using Ctrl+g and typing the line number.
Move a line or a selection up or down
You can move a single line by clicking anywhere on the line and then clicking Alt+↑ or Alt+↓ you can move the line one line up or one line down.

Or you can move a whole selection in same way.

Similarly you can use Shift+Alt+↑ or Shift+Alt+↓ to copy a line/selection of lines up or down.
Expand/Shrink Selection — Select between Brackets
We have always come across long code where we have to select between brackets and this shortcut comes in hand during those times. First click on either of the start braces or the ending braces and then click Shift+Alt+→ and magically all the things inside those braces will be selected, you can keep on pressing Shift+Alt+→ to expand the selection more and you can also shrink the selection by using Shift+Alt+←
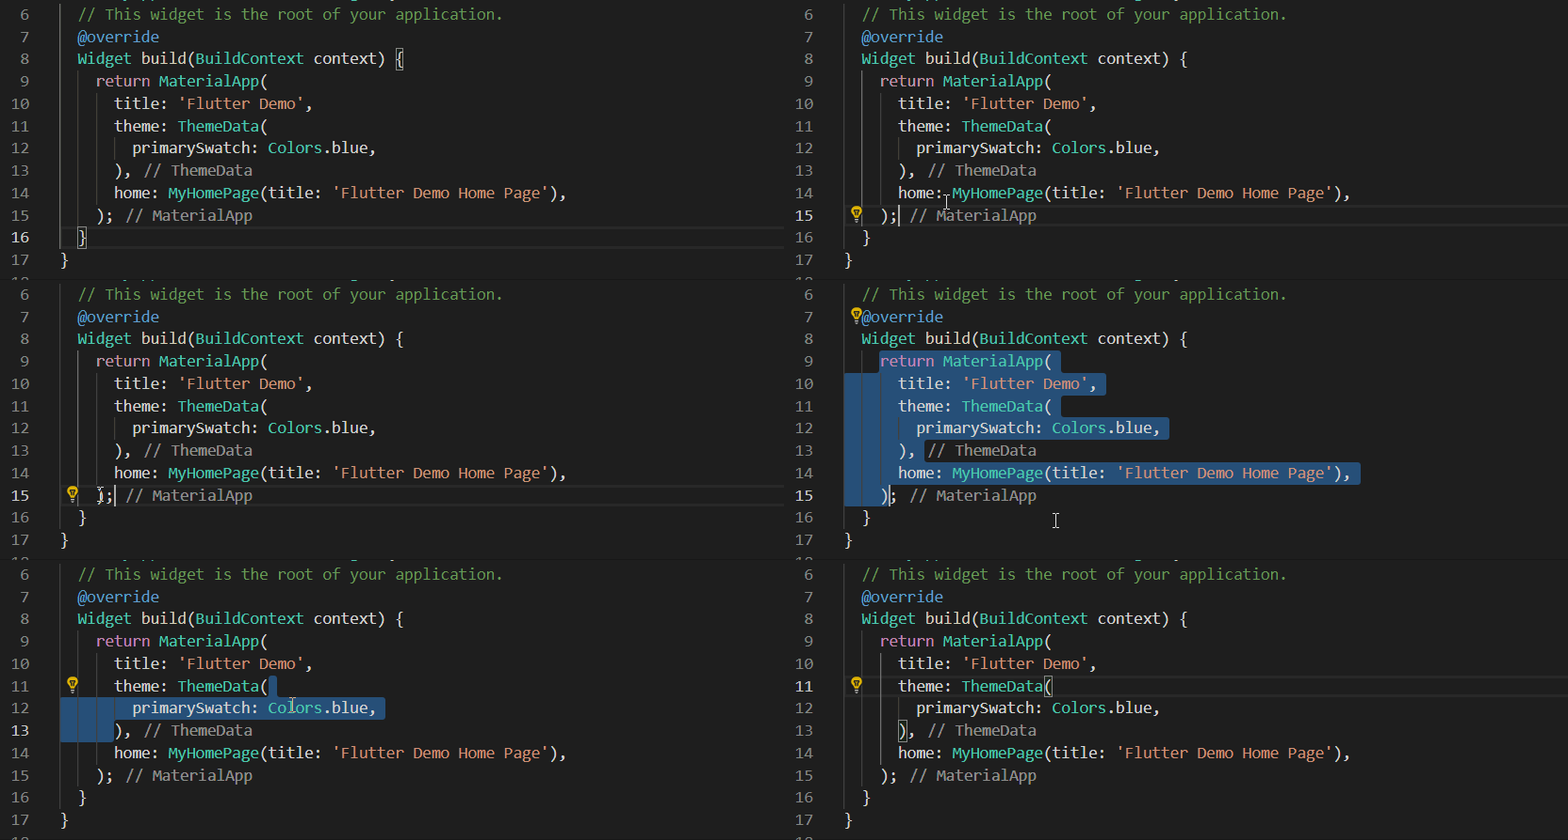
Finding the bracket pair
you can easily find the pair of a bracket using Ctrl+Shift+\

Easily trace your steps
Sometimes while we are coding and traversing through different files or implementation, we might forget how we reached to this exact code. You can easily trace your steps by using Alt+← to see which all code you had come through to get here, you can use Alt+→ to go forward as well.
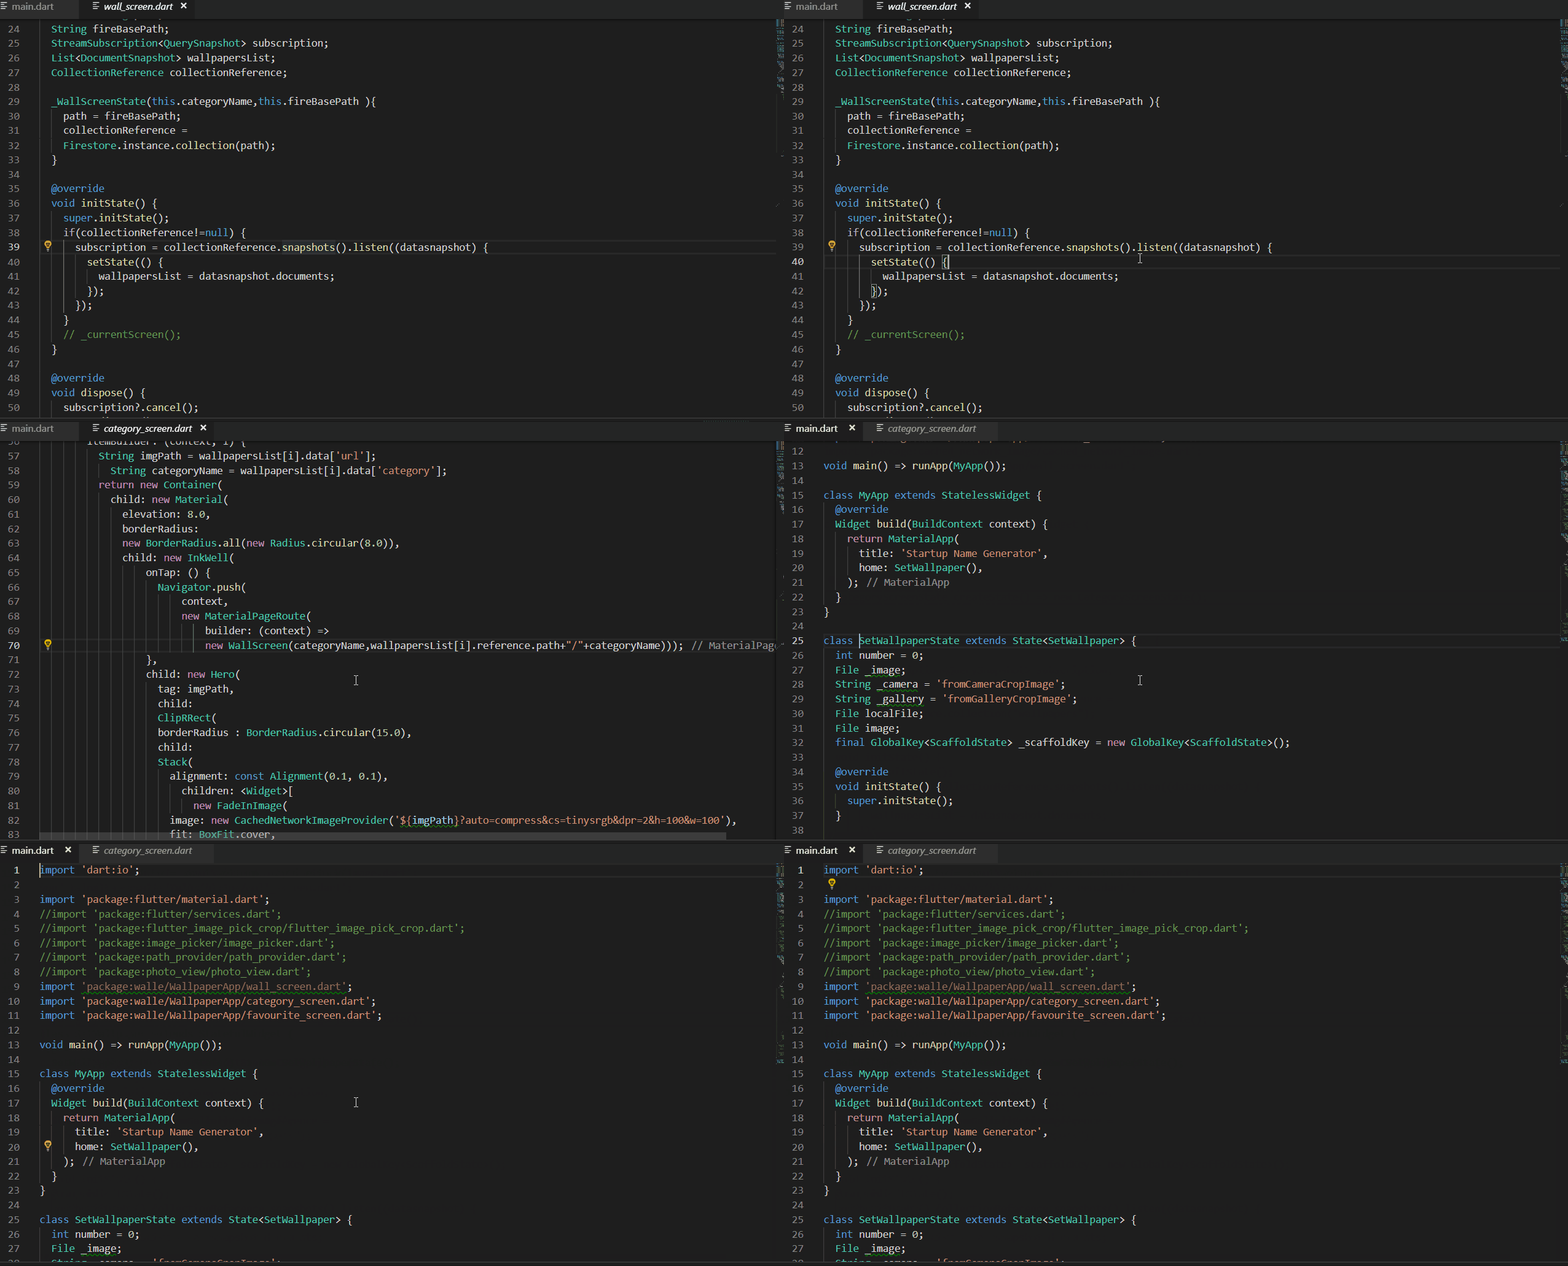
Switch files/tabs
You can easily switch between open files / tabs using Ctrl+Tab and then if you hold down Ctrl and keep pressing Tab you can choose which tab you want to traverse to.

Rename/Refactor
You can easily rename any widget by pressing F2 while you are on that widget and then type the new name and then press Enter
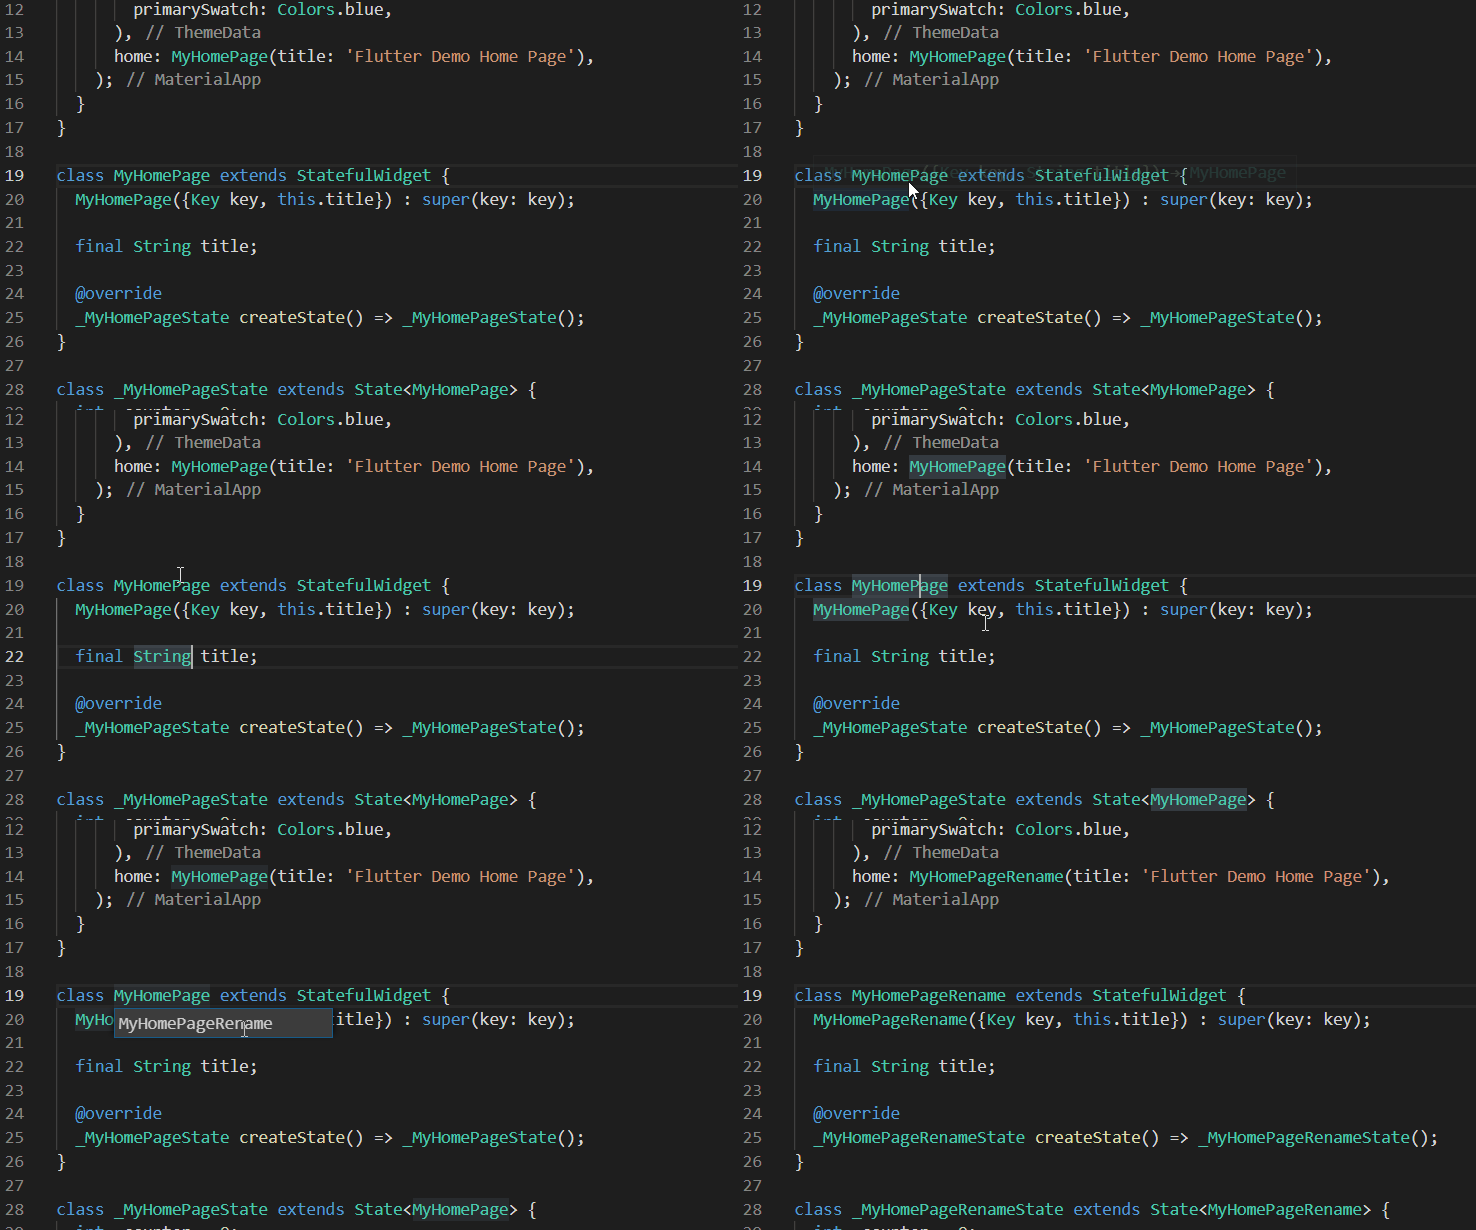
Open new workspace
Thanks to Chase Adams I came to know about this wonderful keyboard shortcut, you have to take the terminal and go to the location where the workspace is and then type code -r. and then that workspace will open in current visual code window. If you want it to open to a new window, use the command code -n. and it will open the workspace in a new VS code window
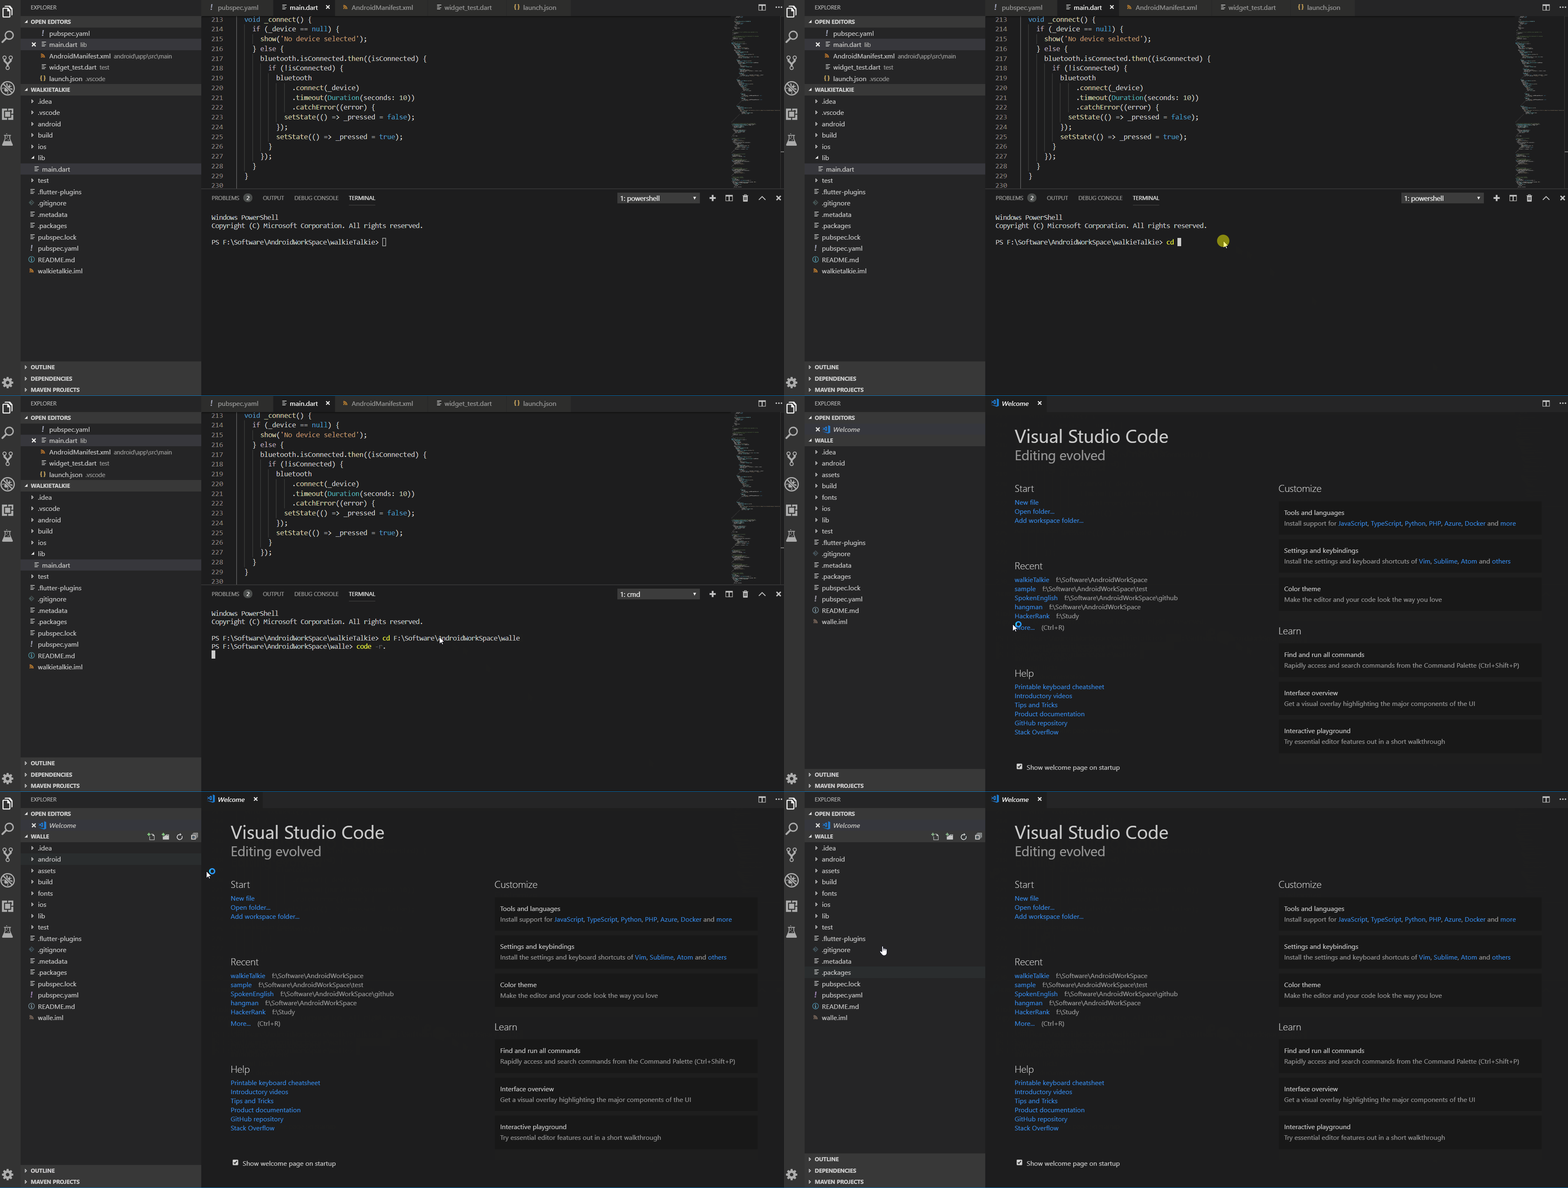
Code Cleaning Shortcuts
Writing efficient code is difficult and usually it ends up being messy with the usual time constraints and hence before pushing the code to git or any other versioning tool, you would want to clean it up and make it look good with good amount of comments so that it is well maintainable and for that here are some of the keyboard shortcuts which would come in handy.
Format/ Beautify code
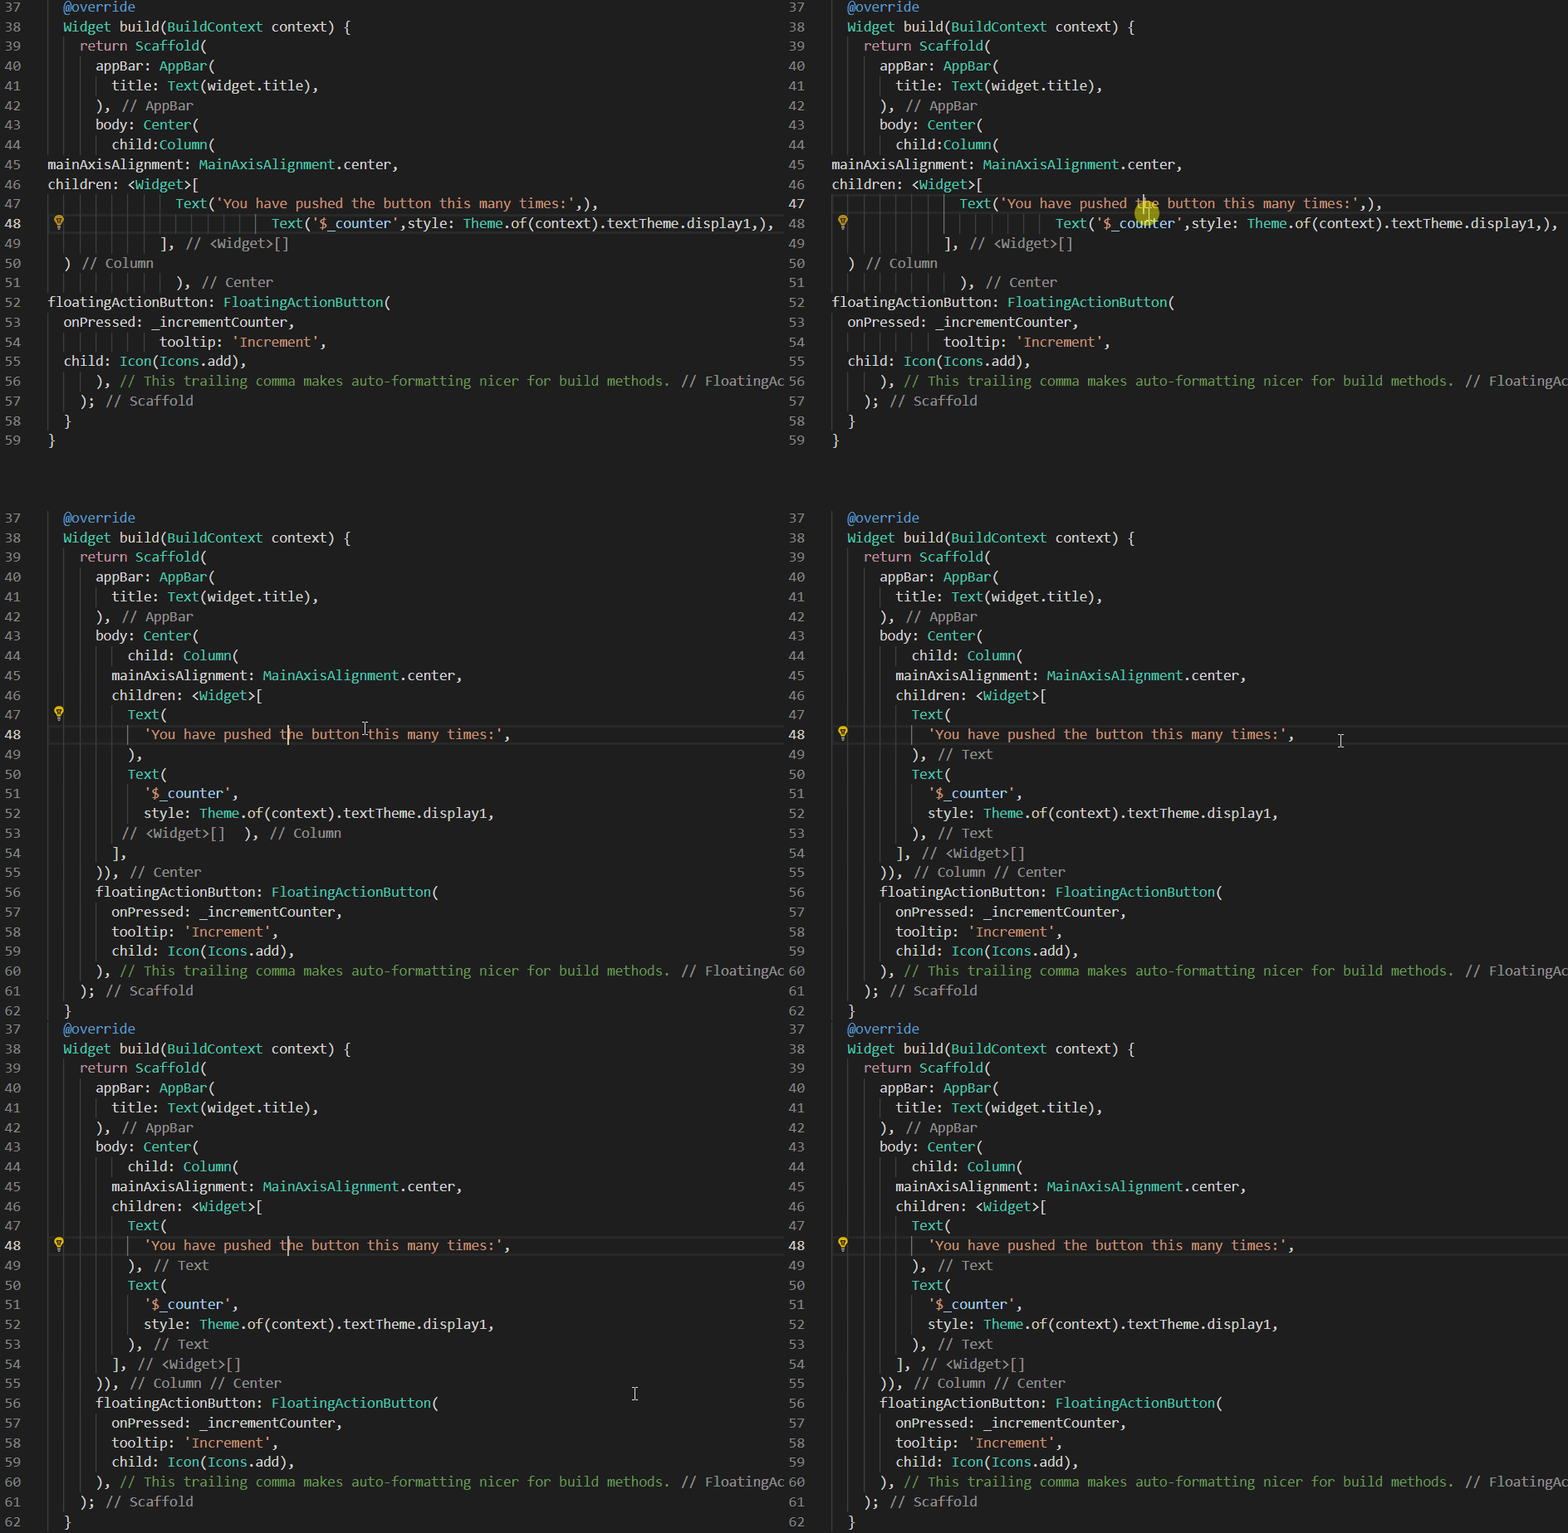
While coding, it is a best practice to follow the formatting, but sometimes we just go with the flow and at the worse case we end up with something like this:
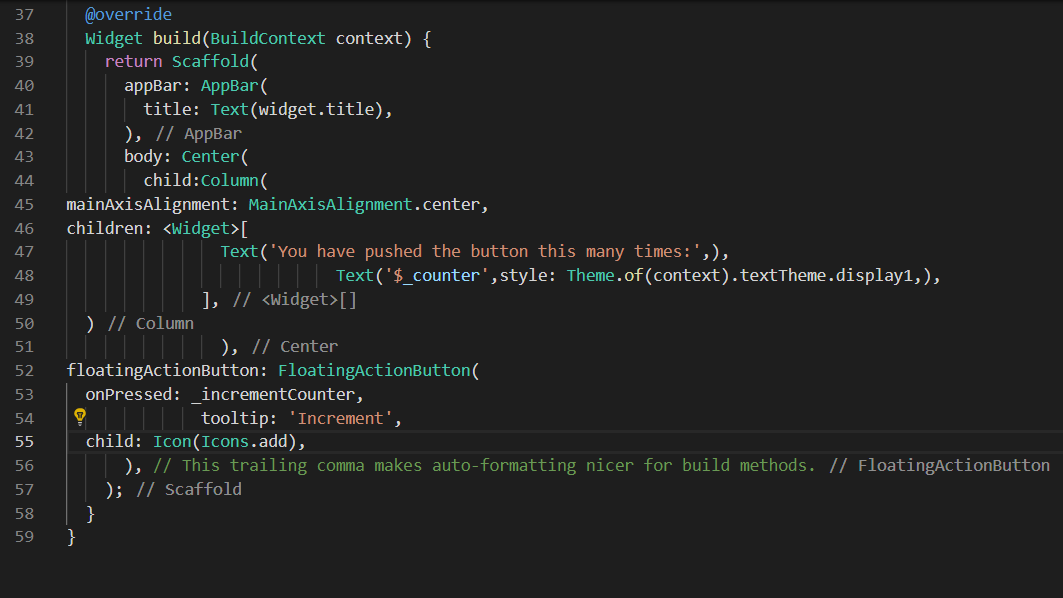
Now you can easily format this by pressing Alt+Shift+f to fix your indentation and reformat code.
PS:- Always put trailing commas to get this formatting to work accordingly.
Adding Comments
You can comment any existing line by pressing Ctrl+/ , you can use the same command to un-comment existing comments.

you can select some lines and press Ctrl+/ to comment all lines with prefix //or Alt+Shift+a to comment the selected lines by enclosing it inside the symbols/* Your — Code */ , you can use the same command to un-comment the commented lines

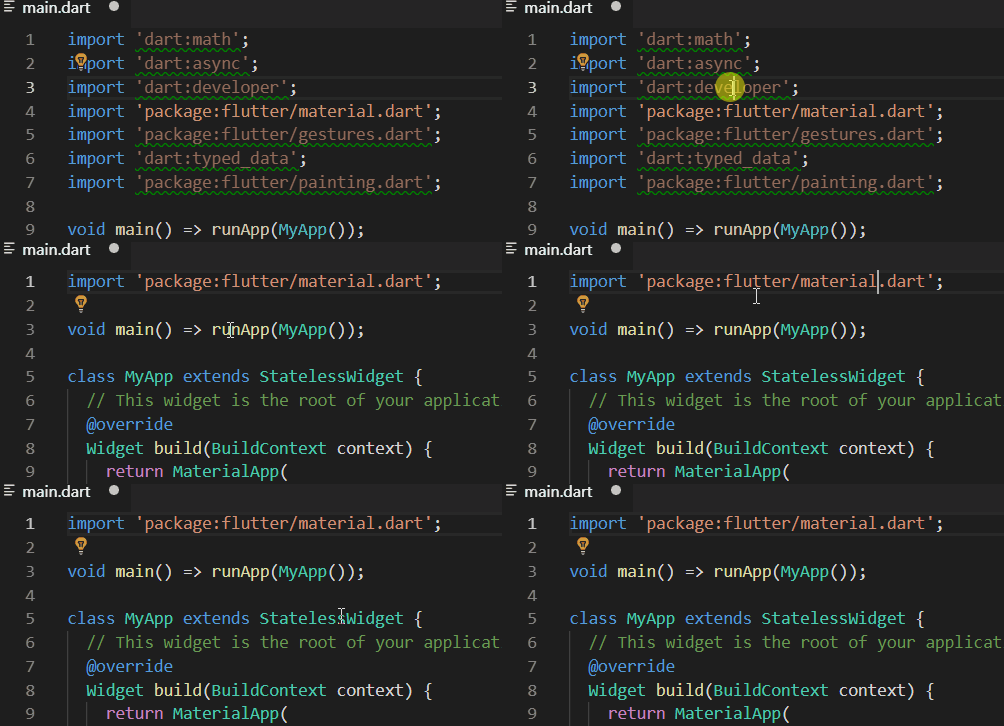
Remove unused imports
Removing unused imports is a big part of cleaning up code and instead of removing them one by one, you can directly use a keyboard shortcut to do it for you. You can easily remove unused imports using Alt+Shift+o
Debugging Shortcuts
These are some of the debugging shortcuts which will come in handy, hope you don’t need any examples for the same.
F5- Start DebuggingCtrl+F5- Start Without DebuggingShift+F5- Stop DebuggingCtrl+Shift+F5(macOS:Cmd+Shift+F5) - Restart Debugging (Hot Reload when debugging Flutter apps)Ctrl+F5- Hot Restart (when debugging Flutter apps and in a debug session)F9- Toggle BreakpointF10- Step OverF11- Step InShift+F11- Step Out
I hope I have covered all the shortcuts which I could find and thought are mostly useful, follow me for more tips, tricks and flutter stuff.There are a ton more shortcuts or tips if you are using extensions and I will cover that in a different article so stay tuned 😉.
✅ Further reading:
☞ The differences between Flutter vs React Native
☞ React Native vs Flutter (Which is best for startup ?)
☞ Flutter & Dart - The Complete Flutter App Development Course
#flutter #ios
