Getting started with Webpack for Beginners
Webpack is used to compile JavaScript modules. Once installed, you can interface with webpack either from its CLI or API. If you’re still new to webpack, please read through the core concepts and this comparison to learn why you might use it over the other tools that are out in the community.
Getting started with webpack - Part 1: Introduction
Webpack might seem daunting to get into at first, especially if your first encounter with it is within an already configured project.
In this tutorial series, we will be looking at webpack from scratch so it won’t be as confusing as looking at an already configured webpack file. We will proceed using mini projects so you can understand the basics of webpack and how it can be beneficial in your project.
If you are into web development, you must have, at some point, heard about webpack. Webpack is a module bundler that is used during development. It can take your modules and bundle them into static assets seamlessly.
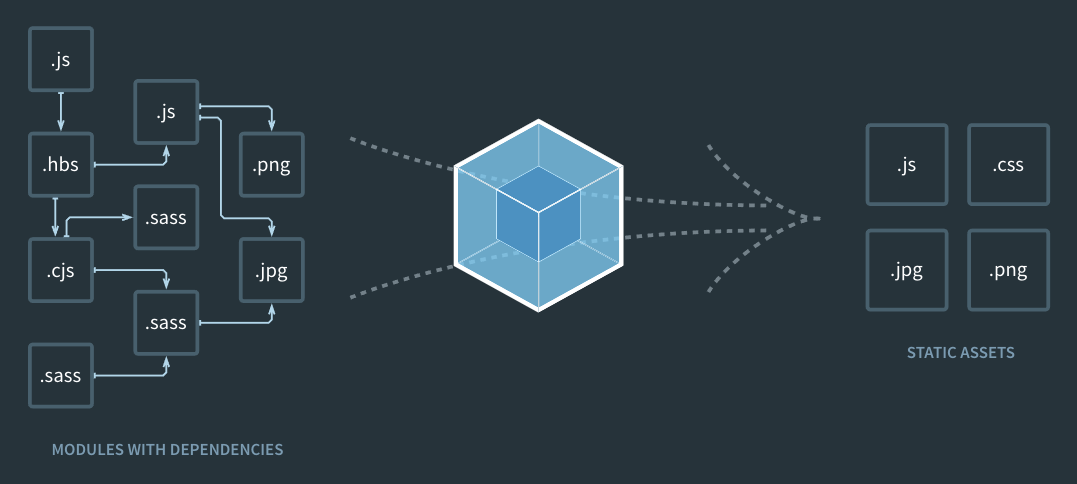
As seen from the image above, we have several modules with dependencies on the left and when they are run through webpack, they are compiled down more familiar assets like js, css, jpg, and .png. However, this is not all webpack can do. Webpack is a very robust bundler and it is extensible, thus, it can do a whole lot.
Let’s get started.
Source code for the application is available on GitHub.## Prerequisites
To follow along in this series, you need the following requirements:
- Basic knowledge of JavaScript.
- Basic knowledge of the CLI.
- A text editor. VS Code is recommended.
- Node.js (>=6.11.5) and npm installed locally. See next section on how to install if you haven’t.
Let’s get started with the series.
Installing Node.js and npm
In case you have not already installed Node.js and npm on your local machine, let’s do so. If you have it installed, then you can skip this part of the tutorial.
There are many resources on how to install Node.js on your machine so links will be posted below on how you can install Node.js, choose any of the following:
- Download the Node.js installer here.
- Install Node.js using a package manager.
- Install Node.js using NVM (Node Version Manager).
NVM is the recommended way to install Node.js as it allows you have multiple versions of Node.js installed on your machine. It also allows you switch seamlessly between the installed versions.## Creating your first app using webpack
Now that you have Node.js and npm installed on your local machine, let’s create a simple web application and compile it using webpack.
To get started, create a new project directory called sample. This is where we will add all the code for the app. In the project directory, create a new directory called src and inside that directory, create a new file index.js and paste the following code into the file:
    // File: ./src/index.js
    alert('Hello');
This is a simple alert that we will just use to test and see if webpack will compile the application.
Next, run the following command in the root directory of your application:
$ npm init -y
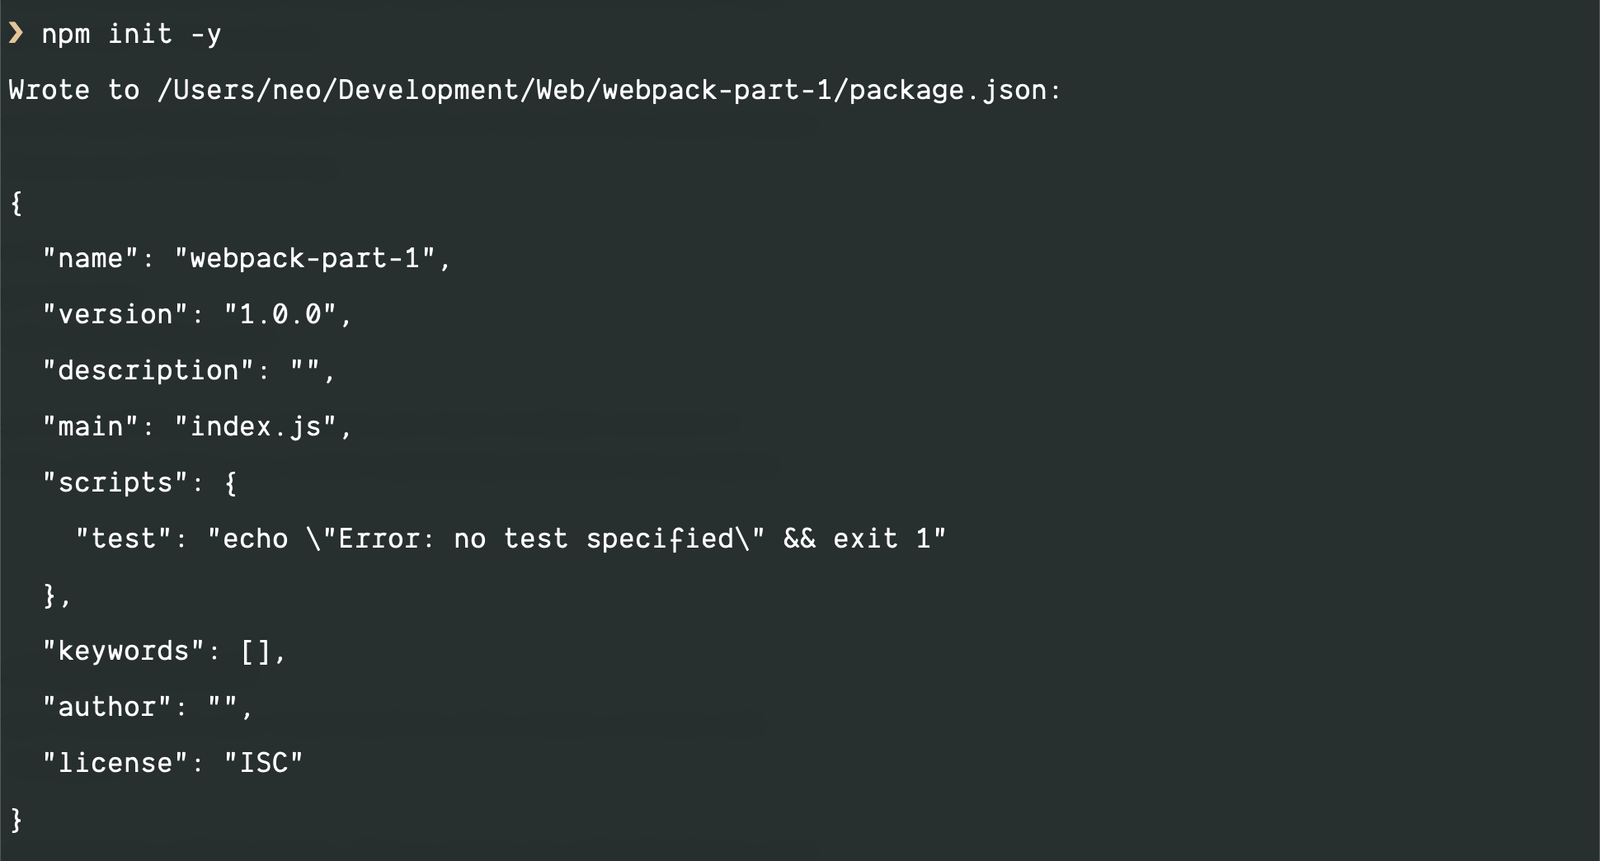
This will create a package.json file in the root directory of the project. Next, let’s install webpack to the project. There are two ways you can install webpack: globally or locally (per project). In this tutorial, we will be installing it locally.
In your terminal, run the following command to install webpack:
$ npm install webpack webpack-cli -D
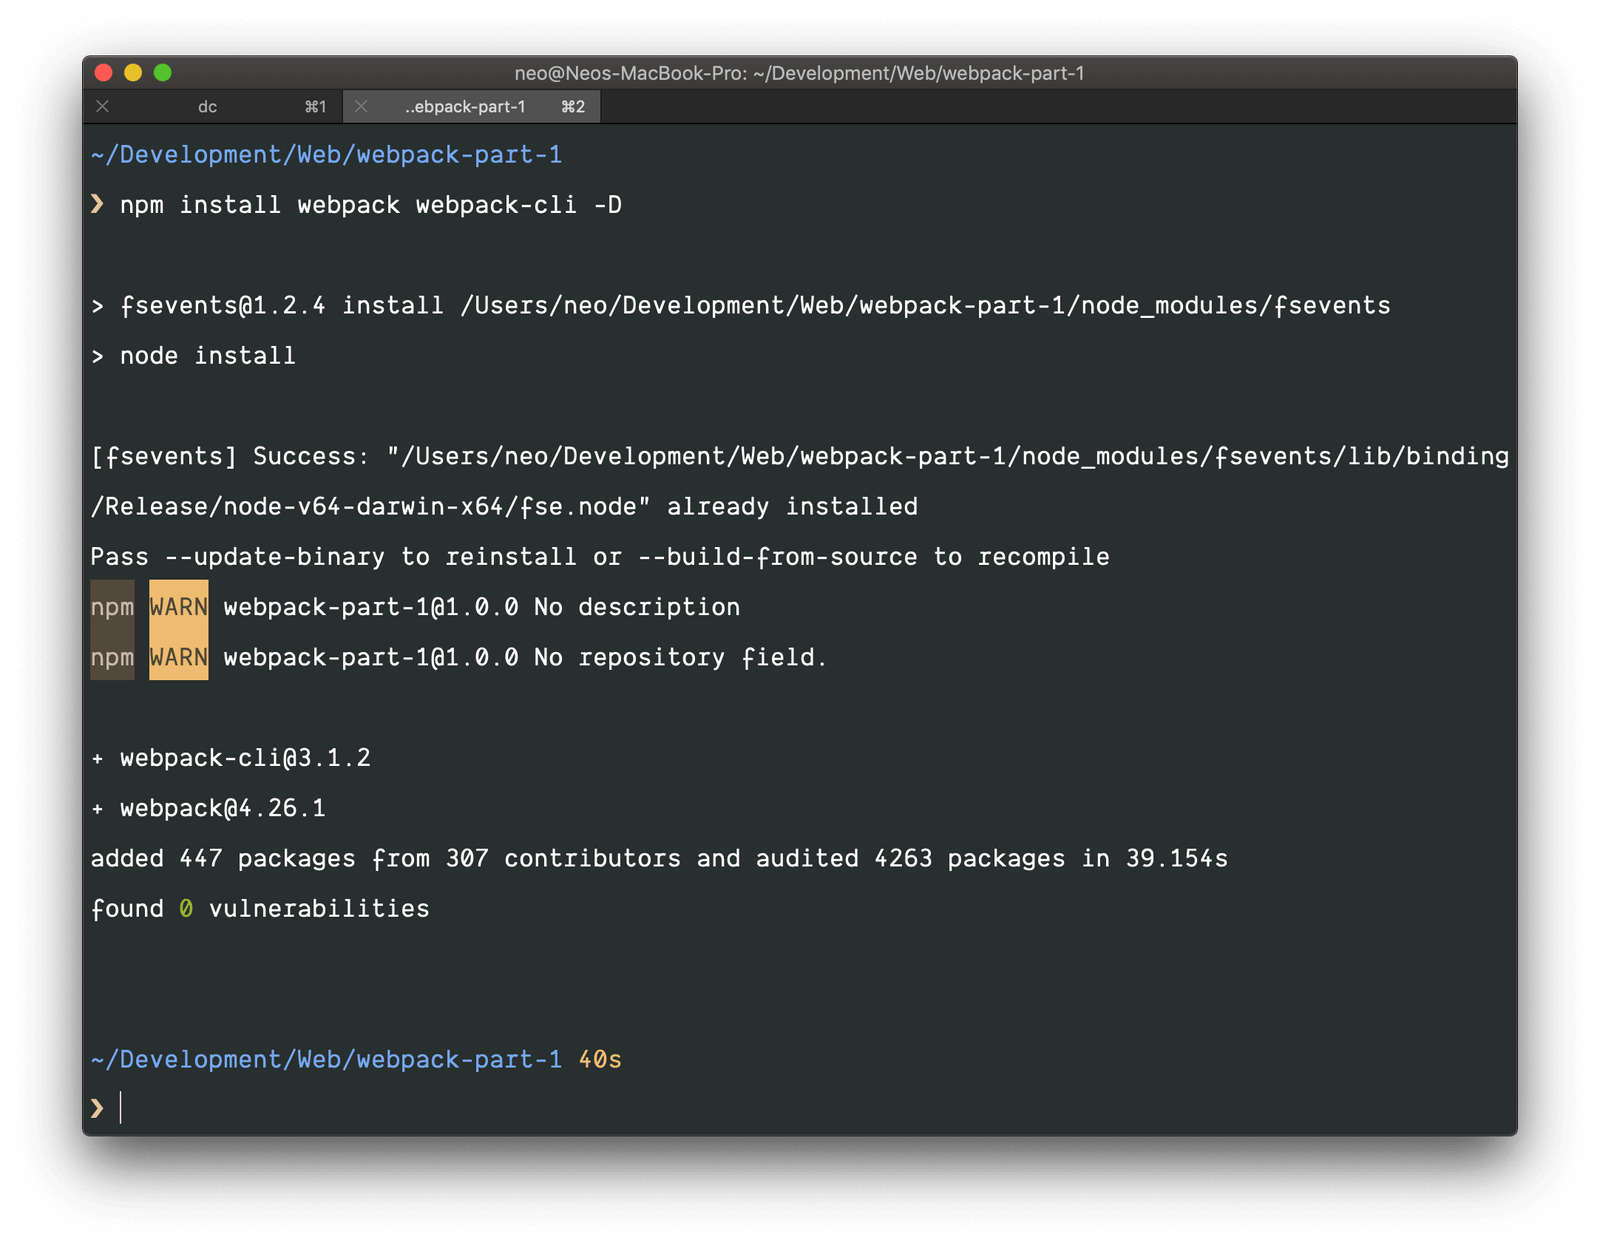
After the installation is complete, you will see that both webpack and webpack-cli have been added to the devDependencies list in the package.json file. As of the time of writing, the current version of webpack is version 4.x.
Your package.json file should look similar to this:
    // File: ./package.json
    {
      "name": "webpack-part-1",
      "version": "1.0.0",
      "description": "",
      "main": "index.js",
      "scripts": {
        "test": "echo \"Error: no test specified\" && exit 1"
      },
      "keywords": [],
      "author": "",
      "license": "ISC",
      "devDependencies": {
        "webpack": "^4.26.1",
        "webpack-cli": "^3.1.2"
      }
    }
In the package.json file replace the main key on line 6 with private and set its value to true:
    // File: ./package.json
    {
      "name": "webpack-part-1",
      "version": "1.0.0",
      "description": "",
      "private": true,
      "scripts": {
        "test": "echo \"Error: no test specified\" && exit 1"
      },
      "keywords": [],
      "author": "",
      "license": "ISC",
      "devDependencies": {
        "webpack": "^4.26.1",
        "webpack-cli": "^3.1.2"
      }
    }
Setting private to true makes it impossible to mistakenly publish the application to the npm directory.
Next, run the following command in the terminal:
$ node_modules/.bin/webpack src/index.js -o dist/bundle.js
The command above will bundle src/index.js into dist/bundle.js.
If you installed webpack globally, you can just replace
node_modules/.bin/webpackin the command above withwebpack. You can also use thenpxpackage that comes by default with npm > v5 using this command:npx webpack src/index.js -o dist/bundle.js.
Now inside thedistdirectory, create a newindex.htmlfile and paste the following code into it:
        Webpack Sample


        # Hello
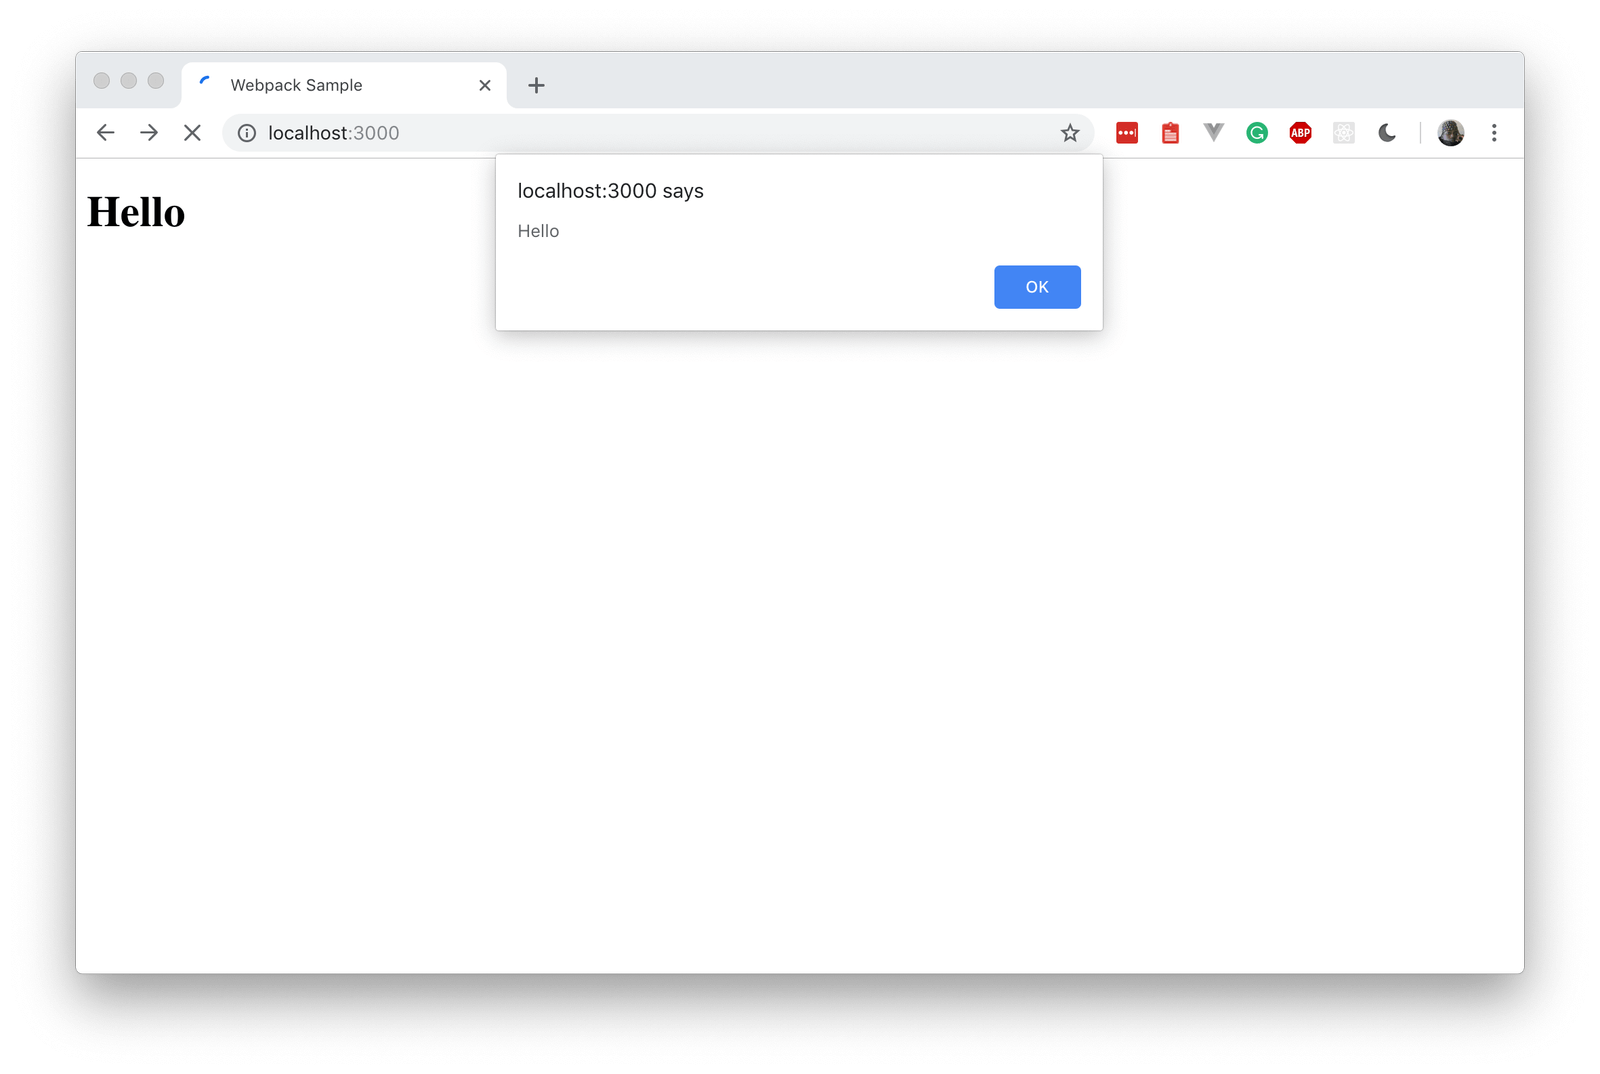
Now, open the index.html file in your browser of choice and you should see the following output:
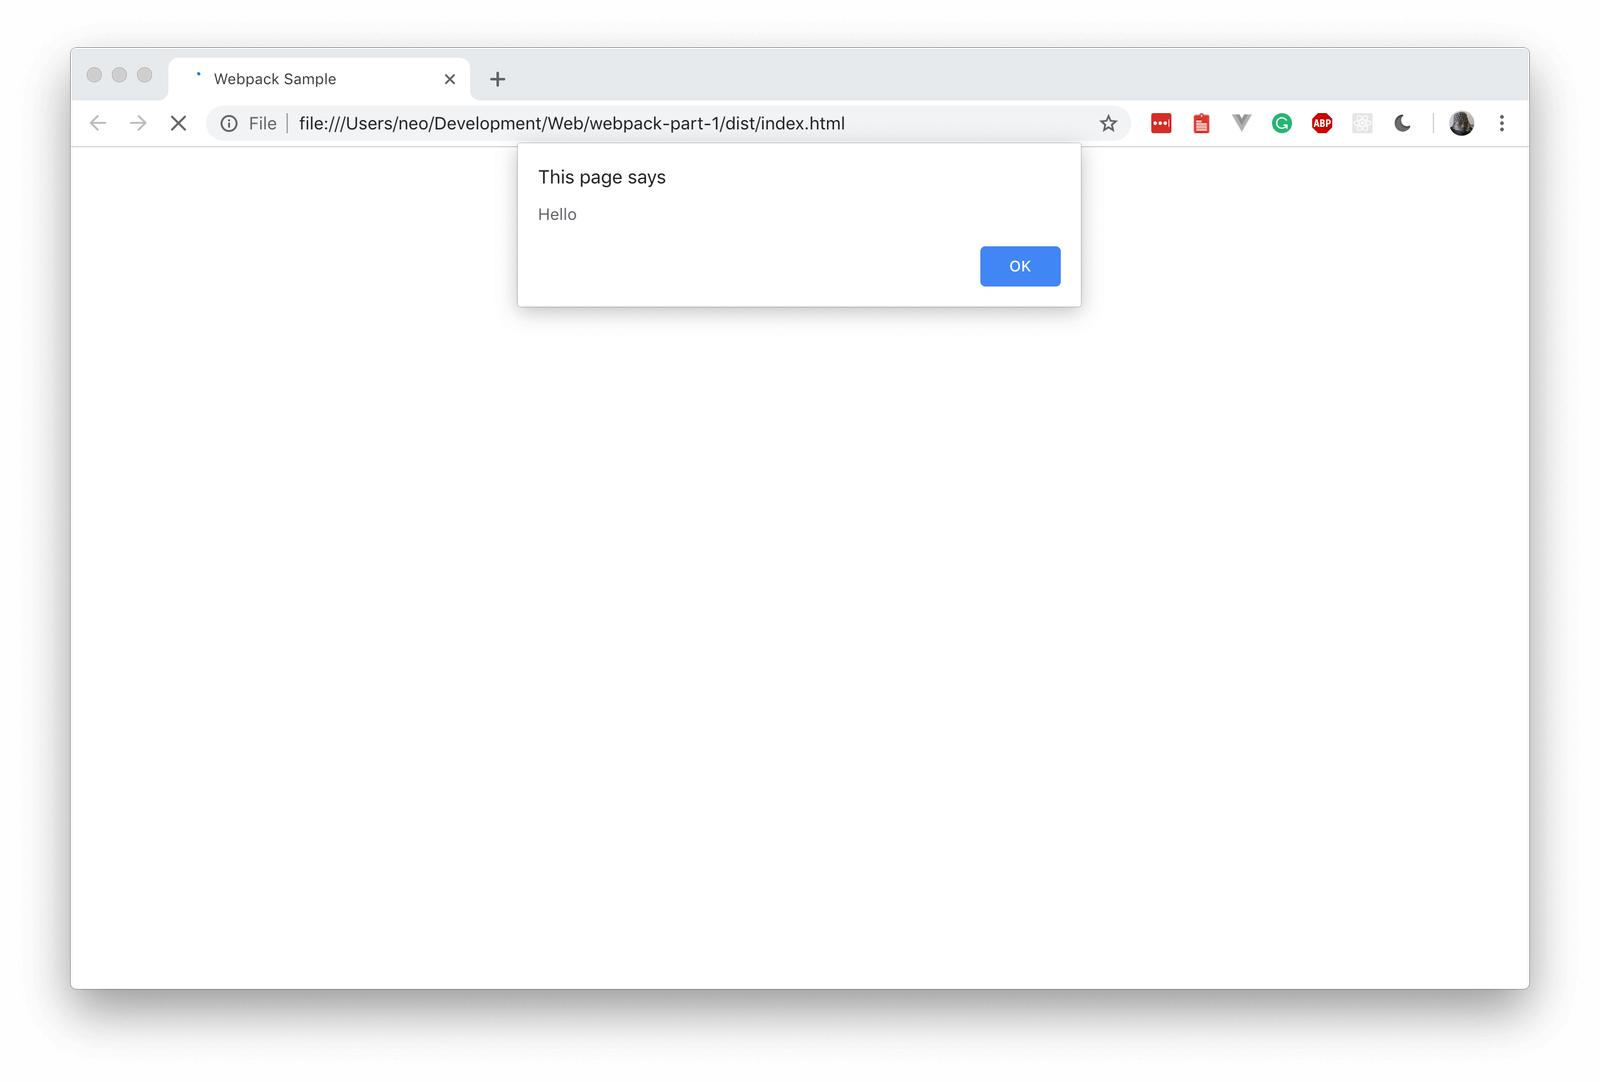
As seen, the JavaScript we created and bundled using webpack was run successfully in the browser.
Serving the application using Node.js
Now that we have the application showing, let’s set up a simple Node.js server so we can easily access the page using a localhost address.
In the dist directory, create a new server.js file and paste the following code into the file:
    // File: ./dist/server.js
    const express = require('express');
    const app = express();
    const path = require('path');

    app.get('/bundle.js', (req, res) => {
        res.sendFile(path.join(__dirname + '/bundle.js'));
    });

    app.get('/', (req, res) => {
      res.sendFile(path.join(__dirname + '/index.html'));
    });

    const port = 3000;
    app.listen(port, () => console.log(`Example app listening on port ${port}!`));
Now cd to the dist directory and run the following commands in the terminal:
    $ npm init -y
    $ npm install express --save
The above commands will:
- Initialize npm by creating a
package.jsonfile. - Install the Express package.
When the installation is complete, run the following command to start the Node.js server:
$ node server.js

This will start a new Node.js server and the application will now be available on http://localhost:3000.
Now that we have the application running on our Express web server, let’s look at some ways we can improve our development process.
Improving our development process
As it stands, every time we make a change to the src/index.js file, we have to run the long command to instruct webpack to bundle the JavaScript. Let’s make the command a little shorter.
Using npm scripts to make commands shorter
If you take a look at the package.json file in the root directory, you will see a scripts object with a test key. We can add custom scripts to this list and then call them with the npm run script-name command. We can take advantage of this feature to make the webpack command a little easier to remember.
Open the package.json file and replace the scripts value with the following:
    // File: ./package.json
    {
      // [...]

      "scripts": {
        "build": "webpack src/index.js -o dist/bundle.js --mode=development"
      },

      // [...]
    }
As seen above, we have added the build key with the command we want to run. In this case, it’s the command to run the webpack bundler.
When specifying commands in the scripts section, we can omit the
node_modules/.binpart of the command as npm is intelligent enough to check there first.
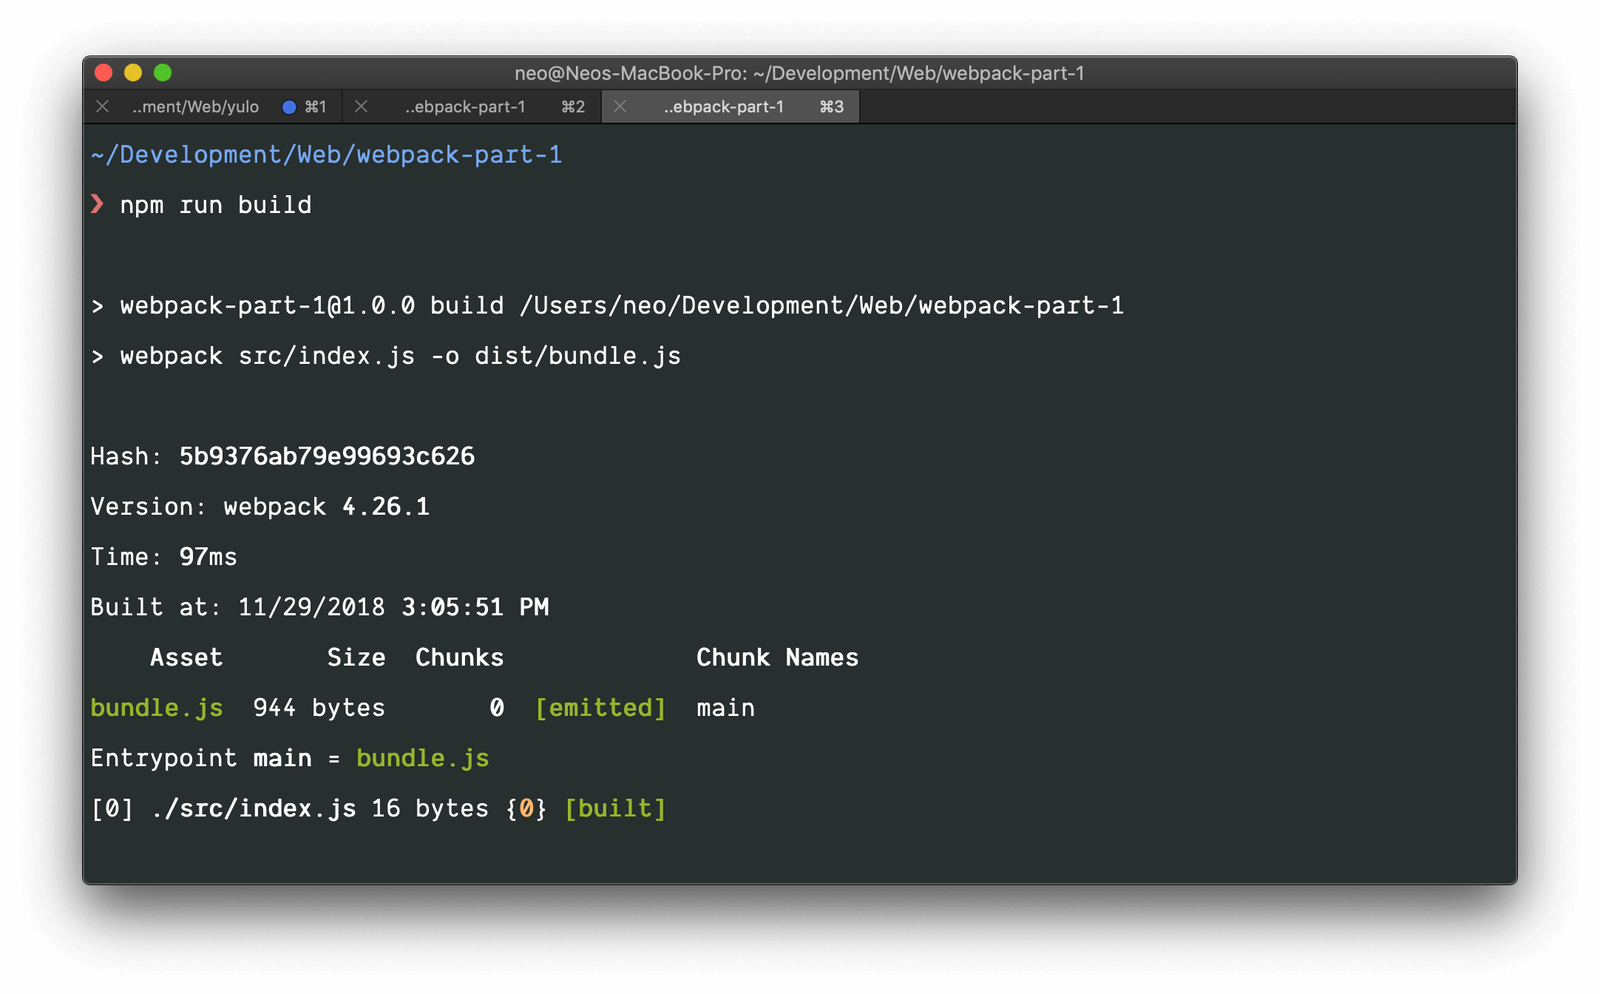
Now, anytime you update thesrc/index.jsfile and want to build it using webpack, all you need to do is run this command from the root of the project:
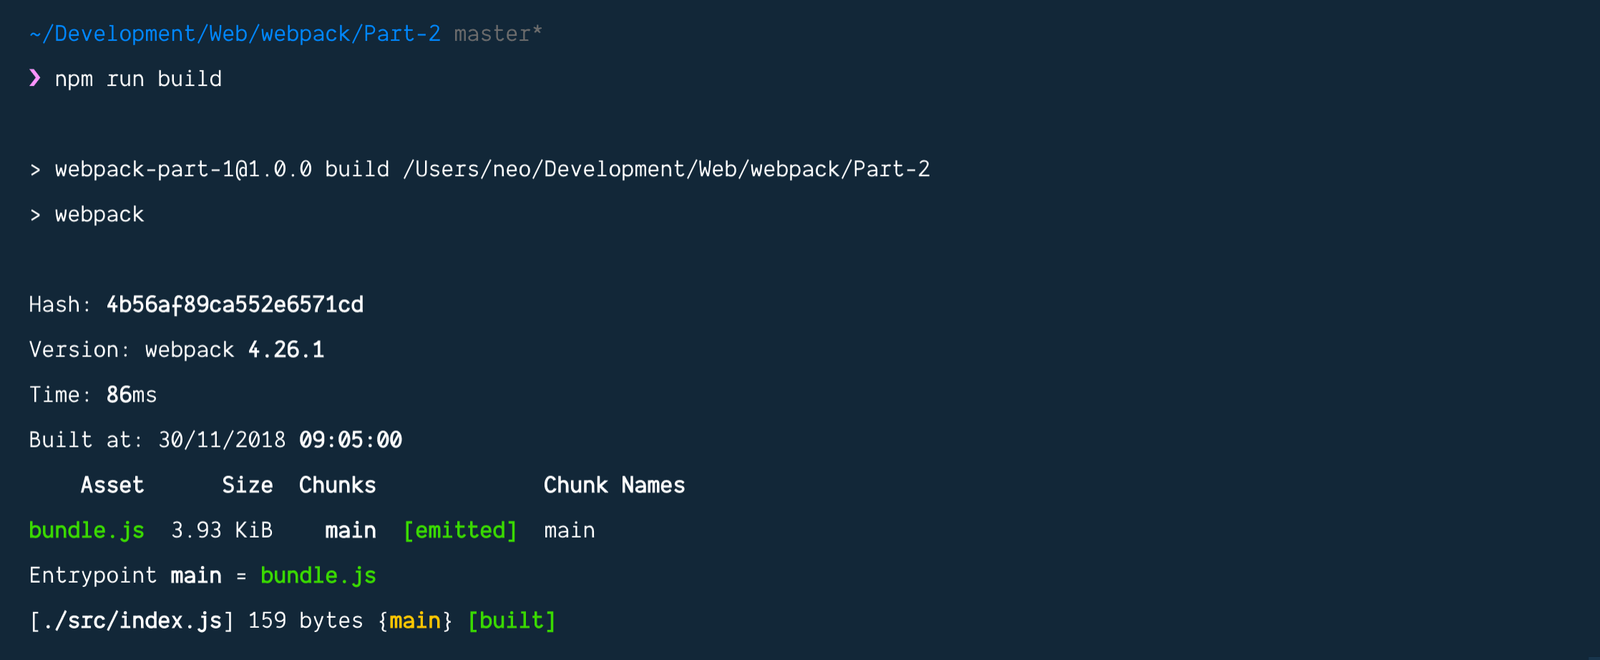
$ npm run build
This will build the webpack application just as it did before.
But wait, there’s more.
Automatically building the script when it’s updated
As it stands, we still have to manually run the npm run build command every time we update the script. This can get tiring quickly.
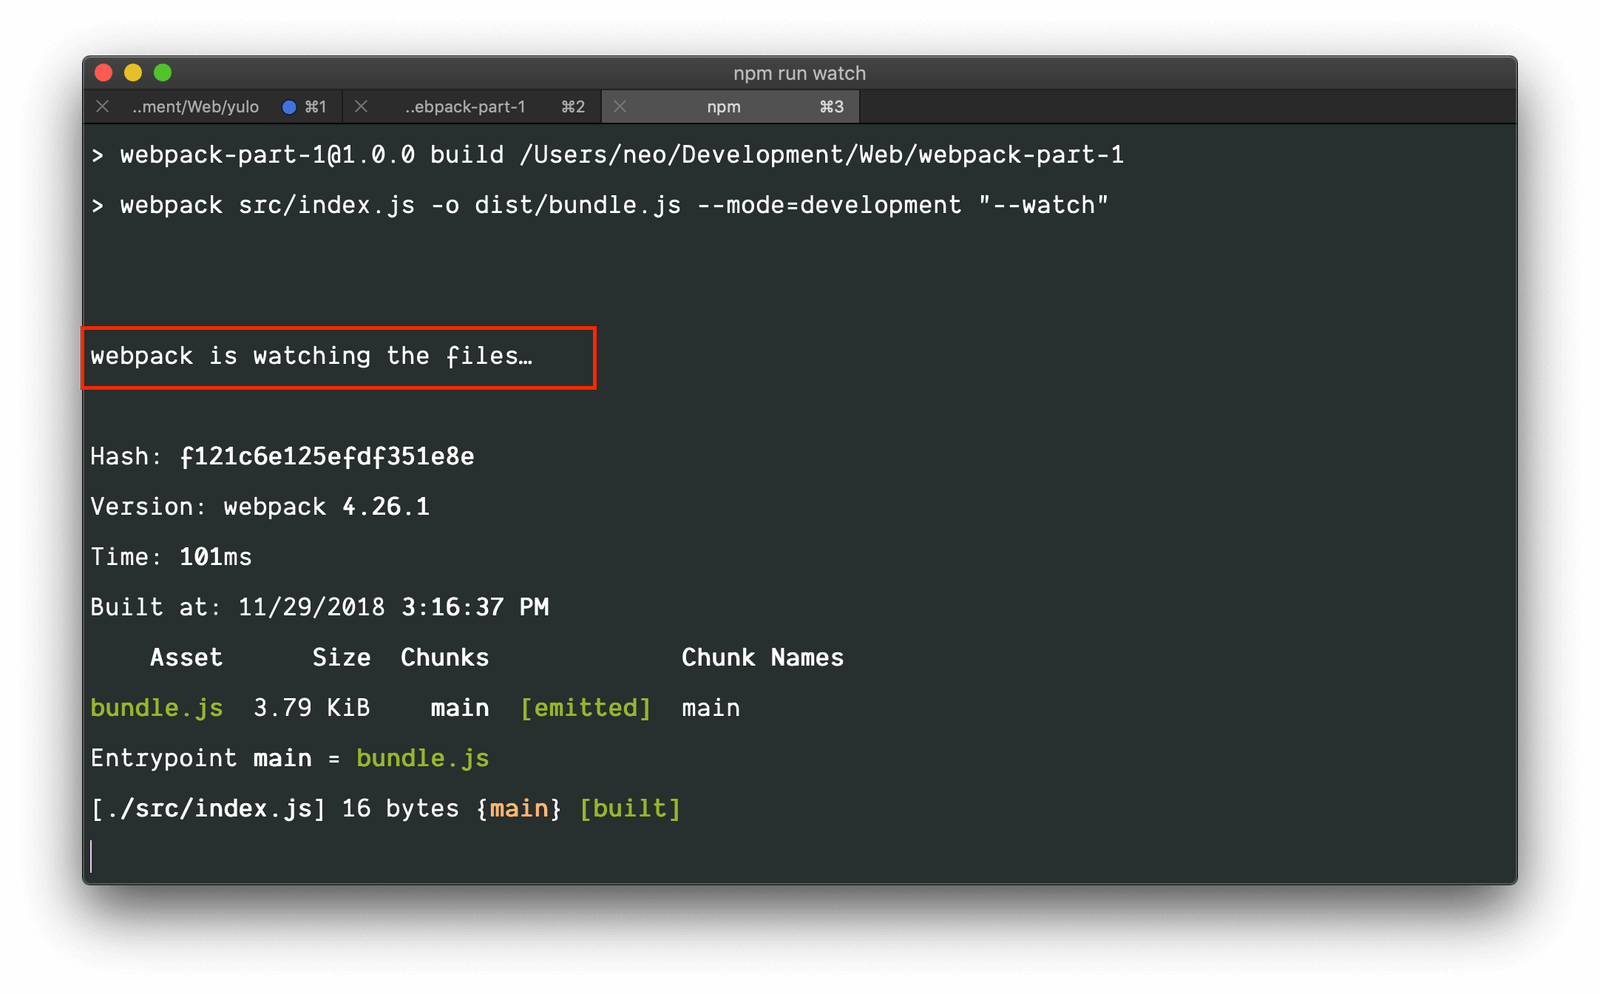
To remedy this, webpack comes with a --watch flag. This flag will keep the terminal active and watch for changes in the filesystem. When it finds changes, it will run the webpack bundler again automatically.
Open the package.json file again, and this time, let’s add a new flag to the scripts:
    // File: ./package.json
    {
      // [...]

      "scripts": {
        "build": "webpack src/index.js -o dist/bundle.js --mode=development",
        "watch": "npm run build -- --watch"
      },

      // [...]
    }
Above, we added a watch script to the scripts. However, we are not entering the entire webpack command again, instead, we are using the existing build command and adding the --watch flag to it.
We added the extra
--because npm requires it to pass extra arguments. See explanation here.
Now, we can run the command below to bundle the script and rebundle every time the script is changed:
$ npm run watch
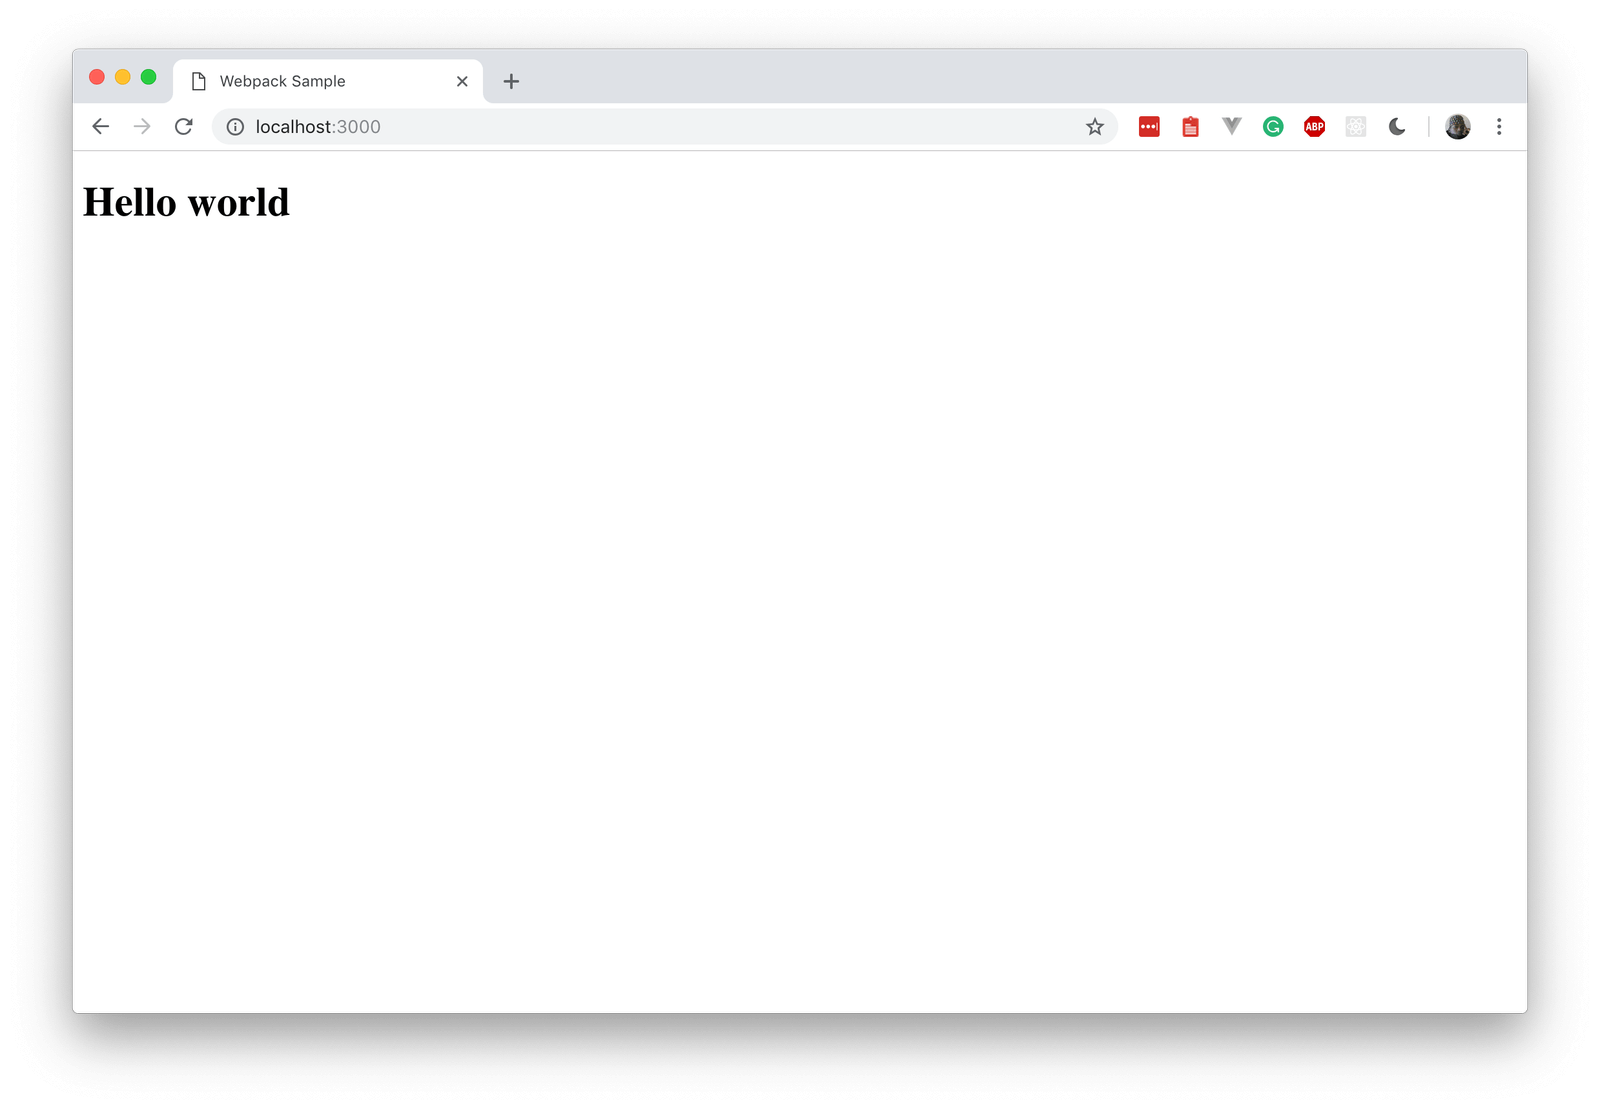
Now, while the watch command is running and the node dist/server.js command is also running, let’s update the script and see if it recompiles. Open the src/index.js file and update the contents to the following:
    // File: ./src/index.js
    document.addEventListener('DOMContentLoaded', function () {
      window.setTimeout(function () {
        document.getElementsByTagName('h1')[0].innerHTML = 'Hello world'
      }, 1000);
    });
When you save, the script should automatically recompile and you should see the changes when you look at http://localhost:3000.
Conclusion
In this part of the series, we have learned the very basics of webpack and how we can get started without any configuration at all. However, webpack is a lot more powerful than this.
The source code to this application is available on GitHub.
Getting started with webpack - Part 2: Configuration and modules
In this part of the series, we will dig deeper into webpack and see what else is possible. Let’s get started.
Source code for the application is available on GitHub.## Prerequisites
To follow along in this series, you need the following requirements:
- Completed all previous parts of the series.
- Basic knowledge of JavaScript.
- Basic knowledge of the CLI.
- A text editor. VS Code is recommended.
- Node.js (>=6.11.5) and npm installed locally.
Let’s continue with the series.
Configuring webpack
In the first part of the series, we did not have to configure webpack, we just installed it using npm and started using it. However, webpack requires a configuration file and if it does not find one in your project directory, it will use the one it comes bundled with.
The webpack configuration file contains many options and you can use these options to configure webpack to your liking. You can specify the entry points, output points, minification options, and more.
To create a webpack configuration file, create a webpack.config.js file in the root of the project. If you still have the project we created in the first part of the series, we will be using that. If you don’t have it, you can download it from the GitHub repository.
Now create a new webpack.config.js file in the project root. By default, webpack will look for this file in the root of your application. However, you can use whatever file name you want and instruct webpack on where to find the configuration file using the following command:
$ webpack --config "/path/to/webpack.config.js"
If you don’t have webpack installed globally, you’ll need to add
npxornode_modules/.binbefore the command as stated in the first part of the series.
Open thewebpack.config.jsfile and paste the following code:
    // File: ./webpack.config.js
    const webpack = require('webpack')

    module.exports = {
      // Insert the configuration here
    }
This is the base for the configuration and we will typically add our configuration options to the exports object above. Let’s start by telling webpack our input file and output file:
In the exports object, add the following:
    // File: ./webpack.config.js
    const webpack = require('webpack')
    const path = require('path')

    module.exports = {
      mode: 'development',
      entry: path.resolve(__dirname + '/src/index.js'),
      output: {
        path: path.resolve(__dirname + '/dist/assets'),
        filename: 'bundle.js'
      }
    }
We use
__dirnameandpath.resolvehere to get the absolute path to the current file. Webpack requires absolute paths when specifying thepathto a file.
Above, we have specified the entry point for webpack and also we have specified the output path and filename. This will make sure webpack starts compiling at thesrc/index.jsfile and outputs to the specified path and file. We also specified themodewebpack should run in asdevelopment. Other valid values formodeareproductionandnone.
Now that we have this minor configuration, let’s see if it’ll bundle our application as specified. Open the package.json file and replace the scripts with the following:
    // File: ./package.json
    {
      // [...]

      "scripts": {
        "build": "webpack",
        "watch": "npm run build -- --watch"
      },

      // [...]
    }
Above, we have removed the CLI options that specified the entry, output, and mode for webpack and we left just the webpack command. We can do this because we have configured the entry, output, and mode in the webpack.config.js file.
Now let’s update the ./src/index.js file to see if our changes will take effect. Replace the contents of the file with the following:
    // File: ./src/index.js
    document.addEventListener('DOMContentLoaded', function () {
      window.setTimeout(function () {
        document.getElementsByTagName('h1')[0].innerHTML = 'Hello there sport'
      }, 1000);
    });
Now, if you have not already, run the command below to install the dependencies:
$ npm install
After installation is complete, run the following command to compile the scripts:
$ npm run build
If all goes well, you should see that there is a new ./dist/assets/bundle.js file in the project as configured in the configuration file.
There is a lot more to configure when it comes to webpack, you can read more in the documentation here.
Understanding ES6 modules
While working with webpack, you will likely be doing a lot of module importing. So let’s see what modules are and how you can use them to make your JavaScript files modular.
JavaScript has had modules for a while but it was implemented via libraries. ES6 is the first time it was introduced as a built-in feature. Modules are essentially files that export some functionality that can then be reused in other places in your code.
Let’s see an example of what a module is. In this example JavaScript file, let’s define a function that generates random characters:
    // random.js
    function randomNumbers(min, max) {
        min = Math.ceil(min);
        max = Math.floor(max);
        return Math.floor(Math.random() * (max - min + 1)) + min;
    }
The function above is simple enough, you give it a min number and max number and it’ll return a random number from the min to the max.
Named module exports
To make the module export this function so it is available to other files we have to export it by adding the export keyword before the function keyword like this:
    // random.js

    export function randomNumbers(min, max) {
        min = Math.ceil(min);
        max = Math.floor(max);
        return Math.floor(Math.random() * (max - min + 1)) + min;
    }
After the function in your module has been exported, you can now import it in other JavaScript files and use the randomNumbers function. For example:
    // main.js

    // Imports the function from the module
    import { randomNumbers } from './random.js';

    // Displays a random number between 100 and 10000
    console.log(randomNumbers(100, 10000));
Multiple named module exports
There are other ways to import and export. Above, we made named exports. Named exports have to be imported with the name that they were exported with. You can have multiple named exports in a single file, for example:
    // random.js

    // First named export
    export function randomNumbers(min, max) {
        min = Math.ceil(min);
        max = Math.floor(max);
        return Math.floor(Math.random() * (max - min + 1)) + min;
    }

    // Second named export
    export function randomString() {
      function randStr(){
        return Math.random().toString(36).substring(2, 15)
      }

      return randStr() + randStr();
    }
Above, we can see that we added a new export randomString to our previous example and now we have two named exports in this module. We can import and use them as shown below:
    // main.js

    // Imports the function from the module
    import { randomNumbers, randomString } from './random.js';

    // Displays a random number between 100 and 10000
    console.log(randomNumbers(100, 10000));

    // Displays a random string
    console.log(randomString());
As seen above, we imported both the randomNumbers and randomString functions from the module and after that, we used it in the current file.
We can also import all available exports in a module in one go like this:
    // main.js

    // Imports the function from the module
    import * as generate from './random.js';

    // Displays a random number between 100 and 10000
    console.log(generate.randomNumbers(100, 10000));

    // Displays a random string
    console.log(generate.randomString());
Above, we have imported all the available exports by using the * wildcard. We also specified an alias object generate to store all the exports. This alias can be any word you want. Using this method, however, is not encouraged. You should import modules you need one by one when possible. This helps to keep the file size smaller and also makes it so you compile only what you use.
Default module exports
Generally, it’s always a good idea for your modules to have a single responsibility. In this case, we can have a default export in the module. It will look something like this:
    // random.js

    export default function (min, max) {
        min = Math.ceil(min);
        max = Math.floor(max);
        return Math.floor(Math.random() * (max - min + 1)) + min;
    }
As seen above, we have added the default keyword after the export keyword. We also removed the function’s name.
Now we can import the module like this:
    // main.js

    // Imports the function from the module
    import generateRandomNumbers from './random.js';

    // Displays a random number between 100 and 10000
    console.log(generateRandomNumbers(100, 10000));
As seen above, instead of importing any named export, we can define an arbitrary name for the default export when we are importing it.
Note that ES6 imports have to be top-level, therefore, you can’t conditionally import a module using an
ifstatement.### Using ES6 modules in our code
Let’s see how we can use modules in our code. Assuming you still have the code from part one, we will use that as the base.
Create a new file src/utilities/random.js and paste the following code:
    // File: ./src/utilities/random.js
    export default function() {
      function randStr() {
        return Math.random()
          .toString(36)
          .substring(2, 15)
      }

      return randStr() + randStr();
    }
Next, open the src/index.js file and replace the content with the following code:
// File: src/index.js
import generateRandomString from './utilities/random';
document.addEventListener('DOMContentLoaded', function () {
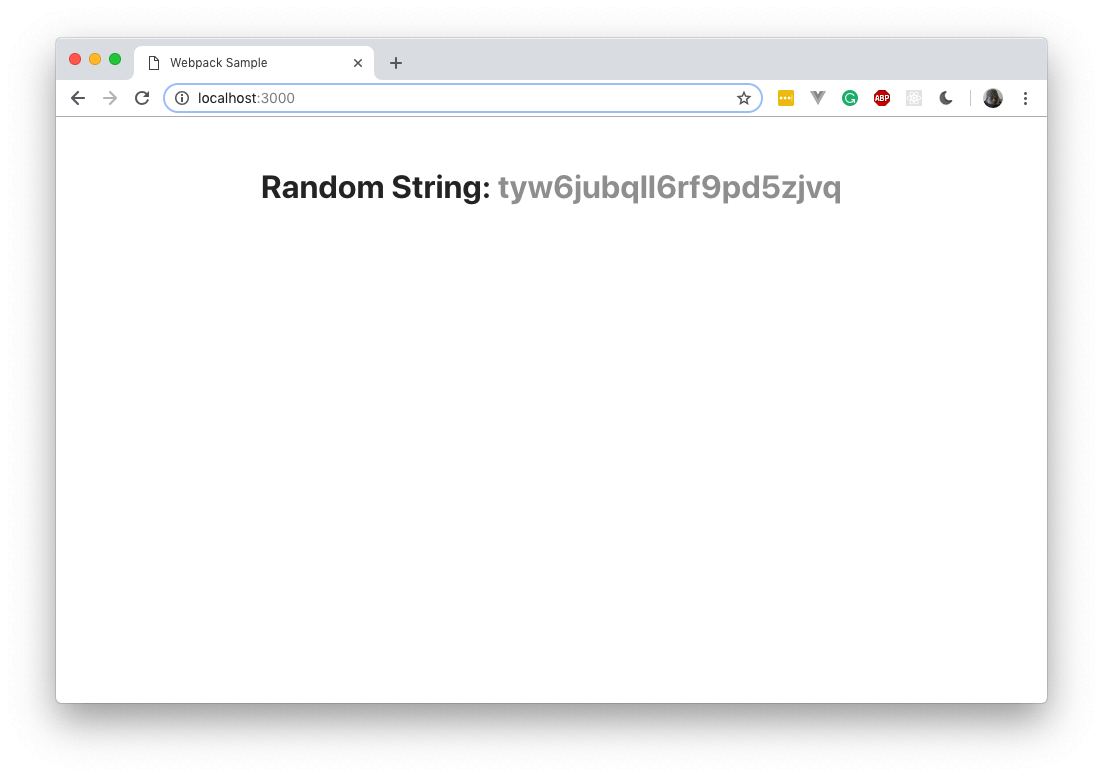
var randomString = 'Random String: ' + generateRandomString();
window.setTimeout(function () {
document.getElementsByTagName('h1')[0].innerHTML = randomString
}, 0);
});
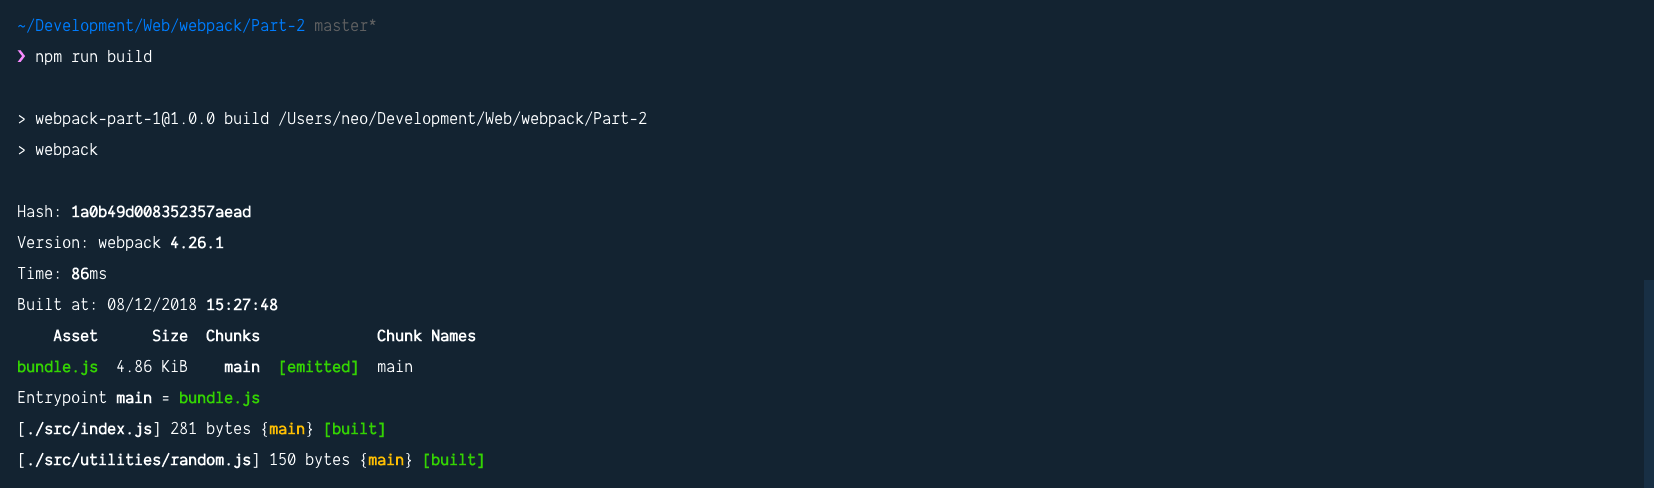
Now, let’s build the application. Run the command below to compile our code using webpack:
$ npm run build
When the build is complete, open the dist/index.html and replace the bundle.js script URL with assets/bundle.js:
        Webpack Sample


        # Hello
Then open the dist/server.js and replace the contents with the following:
    // File: ./dist/server.js
    const express = require('express');
    const app = express();
    const port = 3000;
    const path = require('path');

    app.get('/assets/bundle.js', (req, res) => (
      res.sendFile(path.join(__dirname + '/assets/bundle.js'))
    ));

    app.get('/', (req, res) => (
      res.sendFile(path.join(__dirname + '/index.html'))
    ));

    app.listen(port, () => console.log(`Example app listening on port ${port}!`));
Now you can run the following code to launch our Node.js server:
$ node dist/server.js
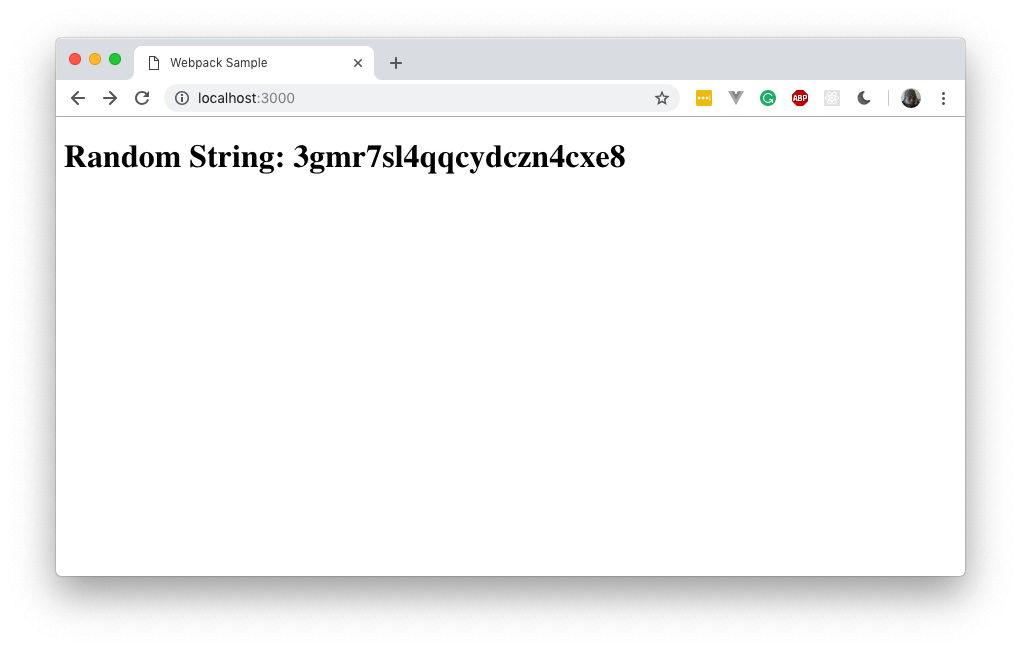
Now when you visit http://localhost:3000 on your browser, you should see the application run as seen above.
Conclusion
In this tutorial of the series, we have learned how to configure webpack and define some defaults. We also learned how modules work in ES6. However, webpack is a lot more powerful than this. We will dive a little deeper in the next part.
The source code to this application is available on GitHub.
Getting started with webpack - Part 3: Bundling other file types
In this part of the series, we will dig deeper into webpack and see what else is possible. We will specifically try to load other file types using webpack. As seen in the image below, webpack can handle other file types other than JavaScript.

Let’s get started.
Source code of the application is available on GitHub.## Prerequisites
To follow along in this series, you need the following requirements:
- Completed all previous parts of the series.
- Basic knowledge of JavaScript.
- Basic knowledge of the CLI.
- A text editor. VS Code is recommended.
- Node.js (>=6.11.5) and npm installed locally.
Let’s continue with the series.
Introducing loaders in webpack
By default, webpack has support for loaders. This is how webpack knows what to do with specific file types.
Loaders are transformations that are applied on the source code of a module. They allow you to pre-process files as you
importor “load” them. Thus, loaders are kind of like “tasks” in other build tools and provide a powerful way to handle front-end build steps. Loaders can transform files from a different language (like TypeScript) to JavaScript or inline images as data URLs. Loaders even allow you to do things likeimportCSS files directly from your JavaScript modules! - webpack documentation
With loaders, we will be able to tell webpack how to handle some other file types other than JavaScript. We will explore that in a bit but right now let’s see what loaders look like in code.
To get started with loaders, you need to install them using npm as they don’t come bundled with webpack by default. To install the TypeScript loader, you need to run the command below for example:
$ npm install --save ts-loader
This will install the loader and you can then instruct webpack to use it now that it is available to your application.
Loaders in webpack configuration file
To use a loader, you need to update the webpack configuration file and tell webpack which loader to use and for which file type. For example:
    module.exports = {
      module: {
        // [...]

        rules: [
          {
            test: /\.ts$/,
            use: 'ts-loader'
          }
        ]

        // [...]
      }
    };
In the code above, we see that we have a new rules key. The value being an array of rules. Each rule is an object containing at least the test and use key:
    {
      test: /\.ts$/,
      use: 'ts-loader'
    }
The test key is a regular expression that tells webpack to match TypeScript files, that is files that have the .ts extension. The use property has a string value that tells webpack the loader to use for this file type. In this case, we are using the ts-loader we installed earlier.
The use property can also take an array of loaders instead of the single loader passed as a string. For example:
    {
      test: /\.ts$/,
      use: [
        'yet-another-loader',
        'another-loader',
        'ts-loader'
      ]
    }
With this, webpack will know how to handle .ts files and will bundle it when it comes across it. In the example above, webpack will use all three loaders, starting from the bottom one.
If you need to specify options for a specific loader, you can also do so using this syntax:
    {
      test: /\.ts$/,
      use: [
        { loader: 'yet-another-loader' },
        {
          loader: 'another-loader',
          options: {
            // loader options...
          }
        },
        { loader: 'ts-loader' }
      ]
    }
Loaders get called from last to first. This means if you have multiple loaders defined in an array, the last one on that list will be the first one executed and the first one will be the last one executed. As in the example above, the
ts-loaderwill be called first, thenanother-loader, and finally, theyet-another-loaderloader.### Inline loaders
In addition to adding your loaders to the configuration file, which is recommended, you can load them inline.
When importing your file, you can specify the loaders that will be used for the file. To add them, separate loaders from the resource with !. Each part is resolved relative to the current directory:
import Styles from 'style-loader!css-loader?modules!./styles.css';
You can pass options to the loader with a query parameter, for example: ?foo=bar&bar=baz. You can also pass a JSON object, for example ?{"key":"value","foo":"bar"}.
While this method works, putting the loaders in your webpack configuration file is still the best way to handle webpack loaders.
CLI loaders
One final way to use loaders in webpack is through the command line. You can run the following command to bind the loaders
$ webpack --module-bind ts-loader --module-bind 'css=style-loader!css-loader'
This uses the ts-loader for .ts files, and the style-loader and css-loader for .css files.
Writing your own loaders
If you have a specific use case and you cannot find a loader for it in the npm repository, then you can look at the documentation on how to create your own webpack loader.
Adding a loader to our existing project
If you still have the code from part two, we will be using that as a base for this part. If you do not have it locally, download the code for the project from GitHub here.
In this part, we will be using loaders to handle the styling of our project. To get started, we will install the loaders we would be using. Run the following command to install the appropriate loaders:
$ npm install sass-loader node-sass css-loader style-loader --save-dev
Above, we are installing quite a few packages:
sass-loader- we need the sass-loader to load Sass files and convert them to CSS.
The sass-loader…requires you to install either Node Sass or Dart Sass on your own. This allows you to control the versions of all your dependencies, and to choose which Sass implementation to use. - GitHub repository’s readme*
node-sass- allows you to natively compile .scss files to CSS.
css-loader- we need the css-loader to handle the CSS generated from the sass-loader.style-loader- we need the style-loader to actually add the CSS loaded to the page.
After running the command, your package.json file should now be automatically updated with the new dependencies:
    // File: ./package.json
    {
        // [...]

        "devDependencies": {
          "css-loader": "^2.0.0",
          "node-sass": "^4.11.0",
          "sass-loader": "^7.1.0",
          "style-loader": "^0.23.1",

          // [...]
        }

        // [...]
    }
Next, open your webpack configuration file and update the configuration with the rules key as seen below:
    // File: ./webpack.config.js
    let webpack = require('webpack');
    let path = require('path');

    module.exports = {
      mode: 'development',

      entry: path.resolve(__dirname + '/src/index.js'),

      output: {
        path: path.resolve(__dirname + '/dist/assets'),
        filename: 'bundle.js'
      },

      module: {
        rules: [
          {
            test: /\.scss$/,
            use: [
              'style-loader',
              'css-loader',
              'sass-loader'
            ]
          }
        ]
      }

    };
As seen, we added the rules key so we can specify the loaders we want to use with the project. In this case, we are using the three loaders we installed earlier. Remember, the loaders are called from last to first in this list.
This means that the sass loader will first compile the .scss file to .css. Then the css-loader will be called to load the .css file, then finally, the style-loader will make sure it is injected into the final code.
Next, open the dist``/index.html file and replace the contents with the following code:
        Webpack Sample


          #
Above, the only change we made is wrapping the h1 tag inside a .container and removing the default content of the h1 tag.
Next, open the src/index.js file which contains the script for our page that is to be bundled and replace the code with the following:
    // File: ./src/index.js
    import generateRandomString from './utilities/random';

    import './style.scss';

    document.addEventListener('DOMContentLoaded', function () {
      var randomString = `Random String: ${generateRandomString()}`;

      window.setTimeout(function () {
        document.getElementsByTagName('h1')[0].innerHTML = randomString
      }, 0);
    });
Above, we made a few minor changes to what the script was before:
- We
imported the.scssfile directly to the JavaScript file. When webpack sees this import, it’ll match the file extension.scssand run the loaders that match the extension. - We added a
spanaround the randomly generated string. This is so we can style it separately.
Finally, create a new file in the src directory called style.scss and paste the following code in:
    /* File: ./src/style.scss */
    body {
      margin: 0;
      padding: 0;
    }

    .container {
      max-width: 900px;
      padding: 0 16px;
      margin: 50px auto 0;

      h1 {
        margin: 0;
        text-align: center;
        color: #272727;
        font-family: -apple-system, BlinkMacSystemFont, 'Segoe UI', Roboto, 'Open Sans',
          'Helvetica Neue', sans-serif;

        span {
          color: #999;
        }
      }
    }
Above, we have the Sass file that we want to use as the style to the page. Save it and run the following command below to install all the dependencies and then bundle our assets:
    $ npm install
    $ npm run build
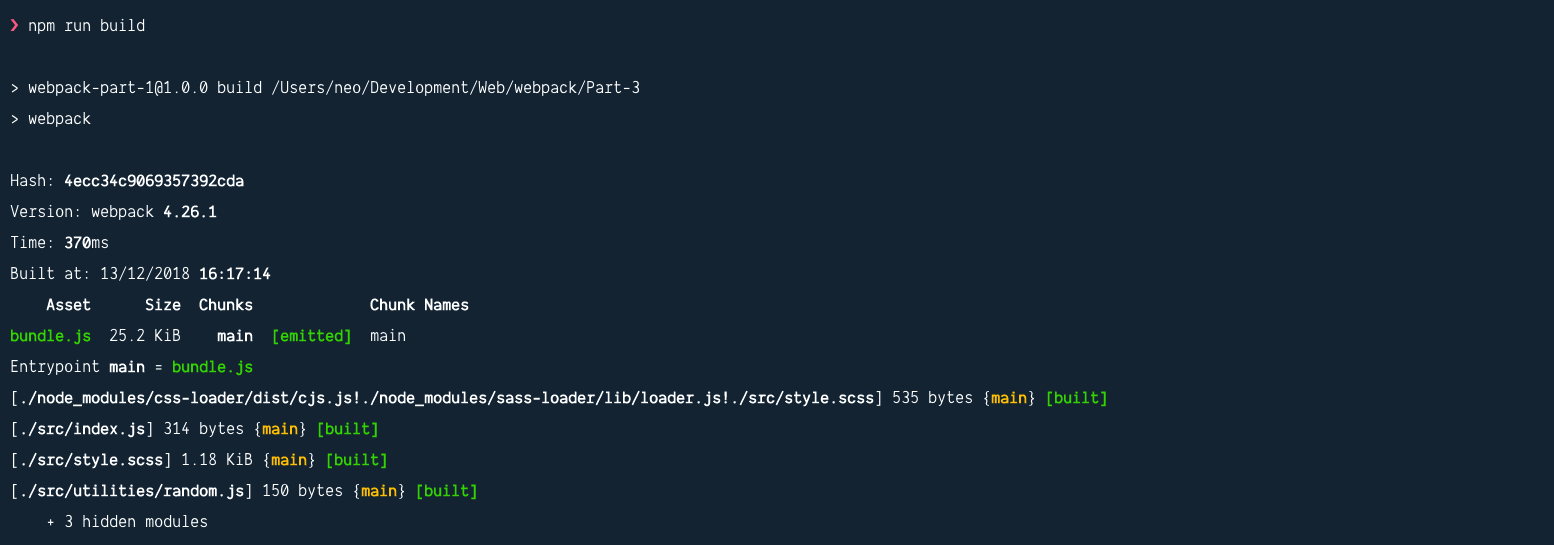
As seen above, the style.scss file is built successfully without issues. When the build is complete, you can now run the Node.js web server with the following command:
$ node dist/server.js
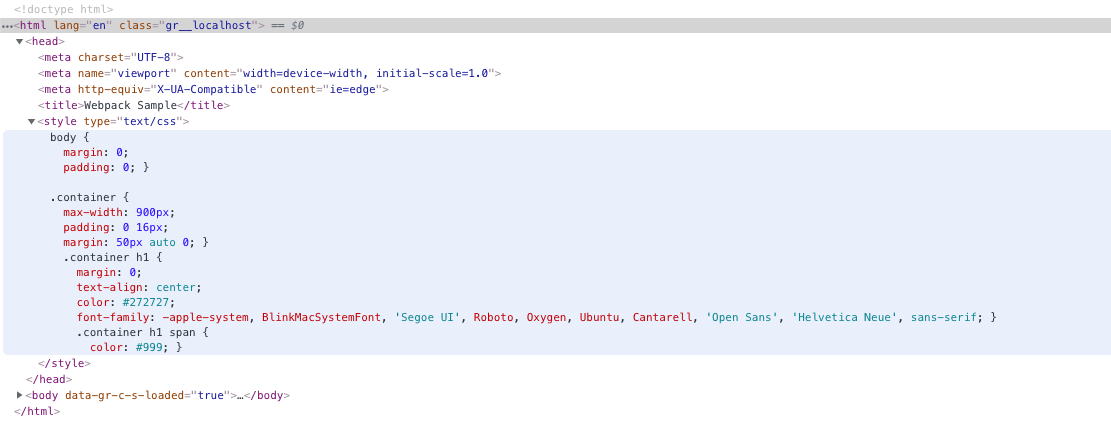
You should see the application running as shown above in http://localhost:3000. If you Inspect Element and look at the source code, you’ll see that the style has been bundled and injected into the web page by webpack.
Conclusion
In this tutorial of the series, we have learned how to use loaders to handle other asset files especially stylesheets. We also learned how loaders work. However, Webpack is a lot more powerful than this. We will dive a little deeper in the next part.
The source code to this application is available on GitHub.
Getting started with webpack - Part 4: Writing modern JavaScript
In this part of the series, we will dig deeper into webpack and see what else is possible. We will specifically try to use webpack to compile modern JavaScript, ES6+, so it’s available to all browsers.
Let’s get started.
Source code of the application is available on GitHub.## Prerequisites
To follow along in this series, you need the following requirements:
- Completed all previous parts of the series.
- Basic knowledge of JavaScript.
- Basic knowledge of the CLI.
- A text editor. VS Code is recommended.
- Node.js (>=6.11.5) and npm installed locally.
Let’s continue with the series.
What is ES6?
If you are a JavaScript developer, you’ll no doubt have heard of ECMAScript 6, which is also known as ES6 and ECMAScript 2015. This was a major update to the JavaScript language and it brought a lot of improvements over the older JavaScript version.
ES6 makes code a little shorter and a little more readable in some cases:
    // Pre-ES6
    function helloWorld() {
      return 'Hello world'
    }
Above is a regular JavaScript function and below is the same function written using ES6 arrow functions:
    // ES6+
    const helloWorld = () => 'Hello world'
ES6 also brings some new keywords to the mix like let and const which are supposed to replace the non-safe var keyword.
The let statement allows you to declare a variable with block scope:
    let name = 'Neo';

    if (1 == 1) {
      let name = 'Ighodaro'

      console.log(name) // prints: Ighodaro
    }

    console.log(name) // prints: Neo
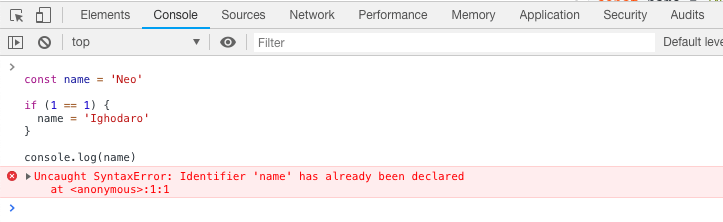
The const statement allows you to declare a constant that cannot be changed:
    const name = 'Neo'

    if (1 == 1) {
      name = 'Ighodaro'
    }

    console.log(name)
Attempting to change a const as seen above will throw an error:
If you want to read more about ES6, you can check out the tutorial here.
Why the need to compile ECMAScript 6?
ECMAScript 6 is relatively new and not all browser versions support the syntax yet. Because of this, we need to use webpack to compile the code from ECMAScript 6 to something the browser already understands: ECMAScript 5.
When we write our code using the ECMAScript 6 syntax, we can then use a tool called Babel to compile the code to ES5 so all browsers can process the JavaScript.
Getting started with the Babel loader for webpack
For this part, we will be building off the code in part three. If you don’t have it already, you can download the project code from GitHub. We will be using the code there as a base for the modifications we are going to make going forward. When you have downloaded the project, open Part-3 in your code editor and follow along.
Installing Babel in our project
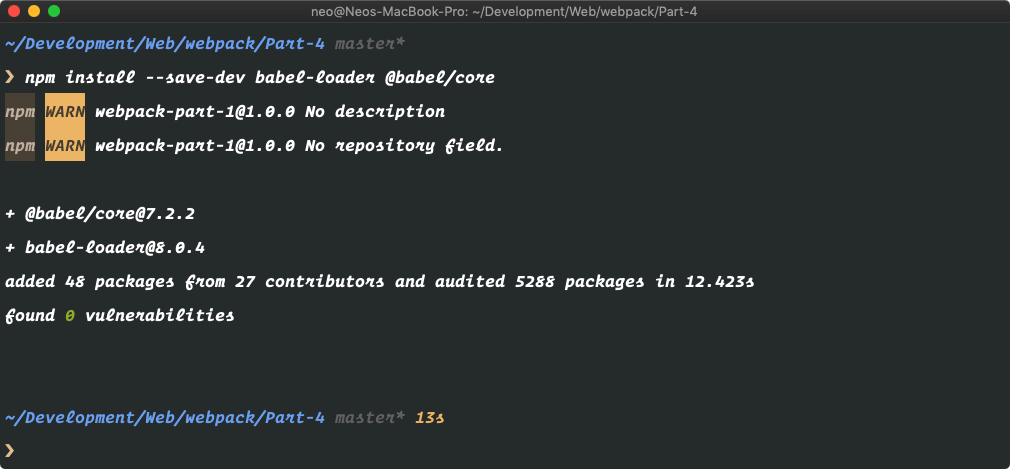
The first thing we need to do is install Babel. To install babel, cd to the root of the project and run the following command in your terminal:
$ npm install --save-dev babel-loader @babel/core
The command above will install the babel-loader for webpack and also the @babel/core package which is a dependency of the babel-loader.
When the installation is complete, we can now configure webpack to use the Babel loader for JavaScript files.
Configuring the Babel loader
Open the webpack.config.js file and replace the contents with the following code:
    // File: ./webpack.config.js
    let webpack = require('webpack');
    let path = require('path');

    module.exports = {
      mode: 'development',
      entry: path.resolve(__dirname + '/src/index.js'),
      output: {
        path: path.resolve(__dirname + '/dist/assets'),
        filename: 'bundle.js'
      },
      module: {
        rules: [
          {
            test: /\.scss$/,
            use: ['style-loader', 'css-loader', 'sass-loader']
          },
          {
            test: /\.js$/,
            exclude: /node_modules/,
            loader: 'babel-loader'
          }
        ]
      }
    };
As seen in the code above, we added a new rule to the rules array. This rule tests for JavaScript files in our project, excluding the node_modules directory, and runs the JavaScript through the babel-loader which we installed earlier.
Now that we have webpack configured with the babel-loader let’s write some ES6 code and see if our new babel-loader will handle the code appropriately.
Open the src/utilities/random.js file and replace the contents with the following code:
    // File: ./src/utilities/random.js
    export default class RandomStringGenerator {
      generate() {
        return this._rand() + this._rand();
      }

      _rand() {
        return Math.random()
            .toString(36)
            .substring(2, 15);
      }
    }
Above, we have replaced the function with a RandomStringGenerator class that does exactly the same thing. Classes were introduced in ES6 and are a very useful addition to JavaScript. We then export the class so we can import it into our main JavaScript file (and any other JavaScript file that may need it).
Next, let’s update the main JavaScript file to use the new class. Open the src/index.js and replace the contents of the file with the following code:
    // File: ./src/index.js
    import RandomStringGenerator from './utilities/random';
    import './style.scss';

    document.addEventListener('DOMContentLoaded', () => {
      const randomStringGenerator = new RandomStringGenerator();
      const randomStr = `Random String: ${randomStringGenerator.generate()}`;

      window.setTimeout(
        () => (document.getElementsByTagName('h1')[0].innerHTML = randomStr),
        0
      );
    });
Above, we have slightly modified the main JavaScript file to use the class we created and exported earlier. We also changed the syntax from the traditional JavaScript to ES6+ syntax. Now let’s compile to see what happens.
In your terminal, run the following command to install the npm dependencies and compile our assets using webpack:
    $ npm install
    $ npm run build
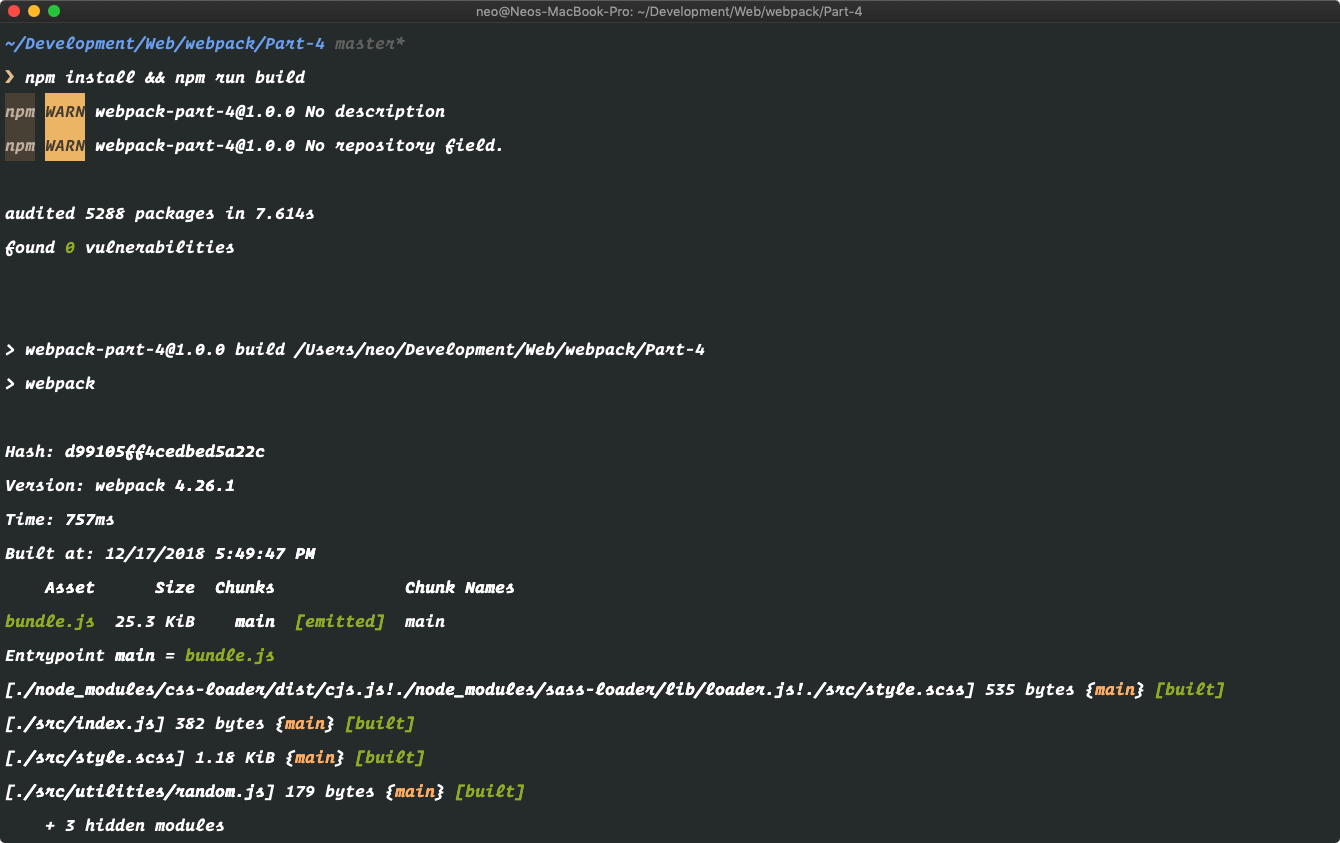
When the installation and build finishes, open the compiled JavaScript file in dist/assets/bundle.js and towards the bottom, you’ll notice that although the build succeeded, the class was not compiled to ECMAScript 5 syntax and remains as ECMAScript 6.
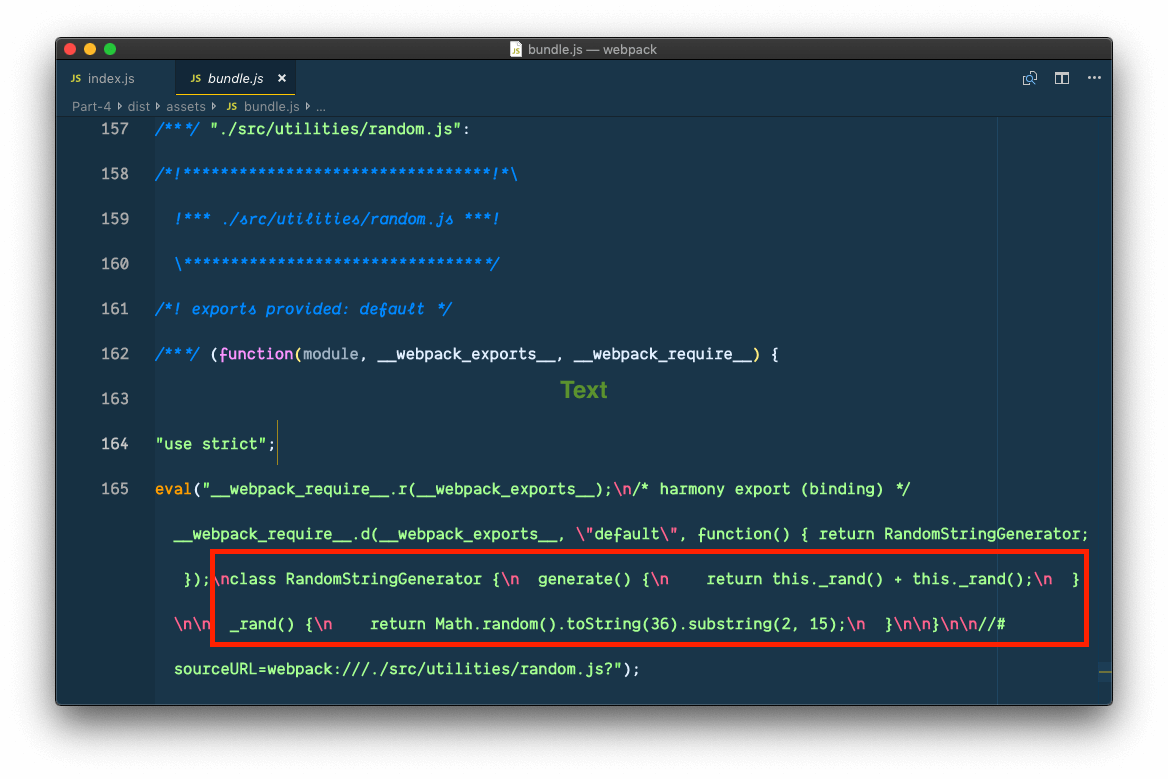
So why is this happening? Well we need to create a .babelrc file. This is a configuration file for Babel. Without this file, Babel will not be configured and thus will do nothing.
In the root of the project, create a new .babelrc file and paste the following contents into the file:
    // File: ./.babelrc
    {
      "presets": ["@babel/preset-env"]
    }
Alternatively, you can define the Babel configuration in the package.json file by adding the babel property to the JSON file like so:
    {
      // [...]

      "babel": {
        "presets": [
          "es2015"
        ]
      }

      // [...]
    }
Now that we have Babel configured, let’s move on to installing the Babel env preset, which enables transforms for ECMAScript 6+. To install the preset, run the following command:
$ npm install @babel/preset-env --save-dev
@babel/preset-envis a smart preset that allows you to use the latest JavaScript without needing to micromanage which syntax transforms (and optionally, browser polyfills) are needed by your target environment(s). This both makes your life easier and JavaScript bundles smaller! - Babel documentation.
This will install the dependency and after the installation is complete, we can build the assets using webpack:
$ npm run build
Now when the build is complete, you can open the dist/assets/bundle.js file and look for the affected area. You should see that unlike before where the class declaration was not converted to ES5, it is now compiled by Babel to ES5.
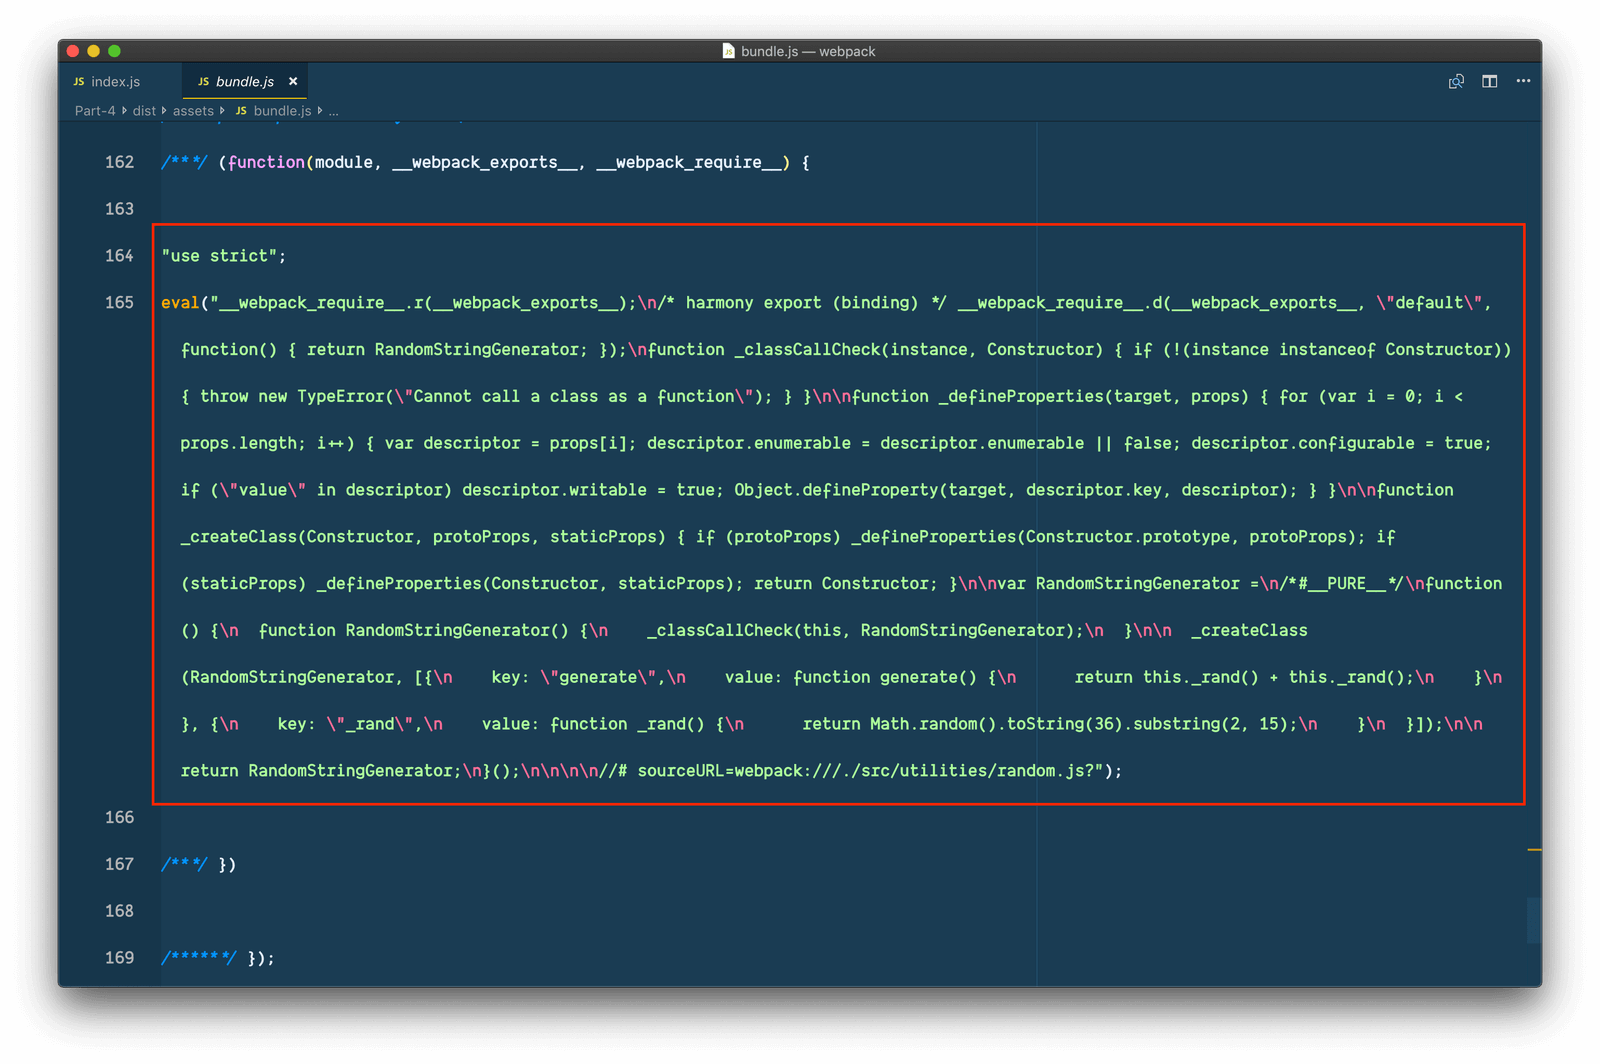
The code is not the easiest to read but if you look well you will see that the class has been compiled down to ES5 and will now work across older browsers. Let’s test it. In your terminal, run the following command to serve the Node.js server that comes with the code:
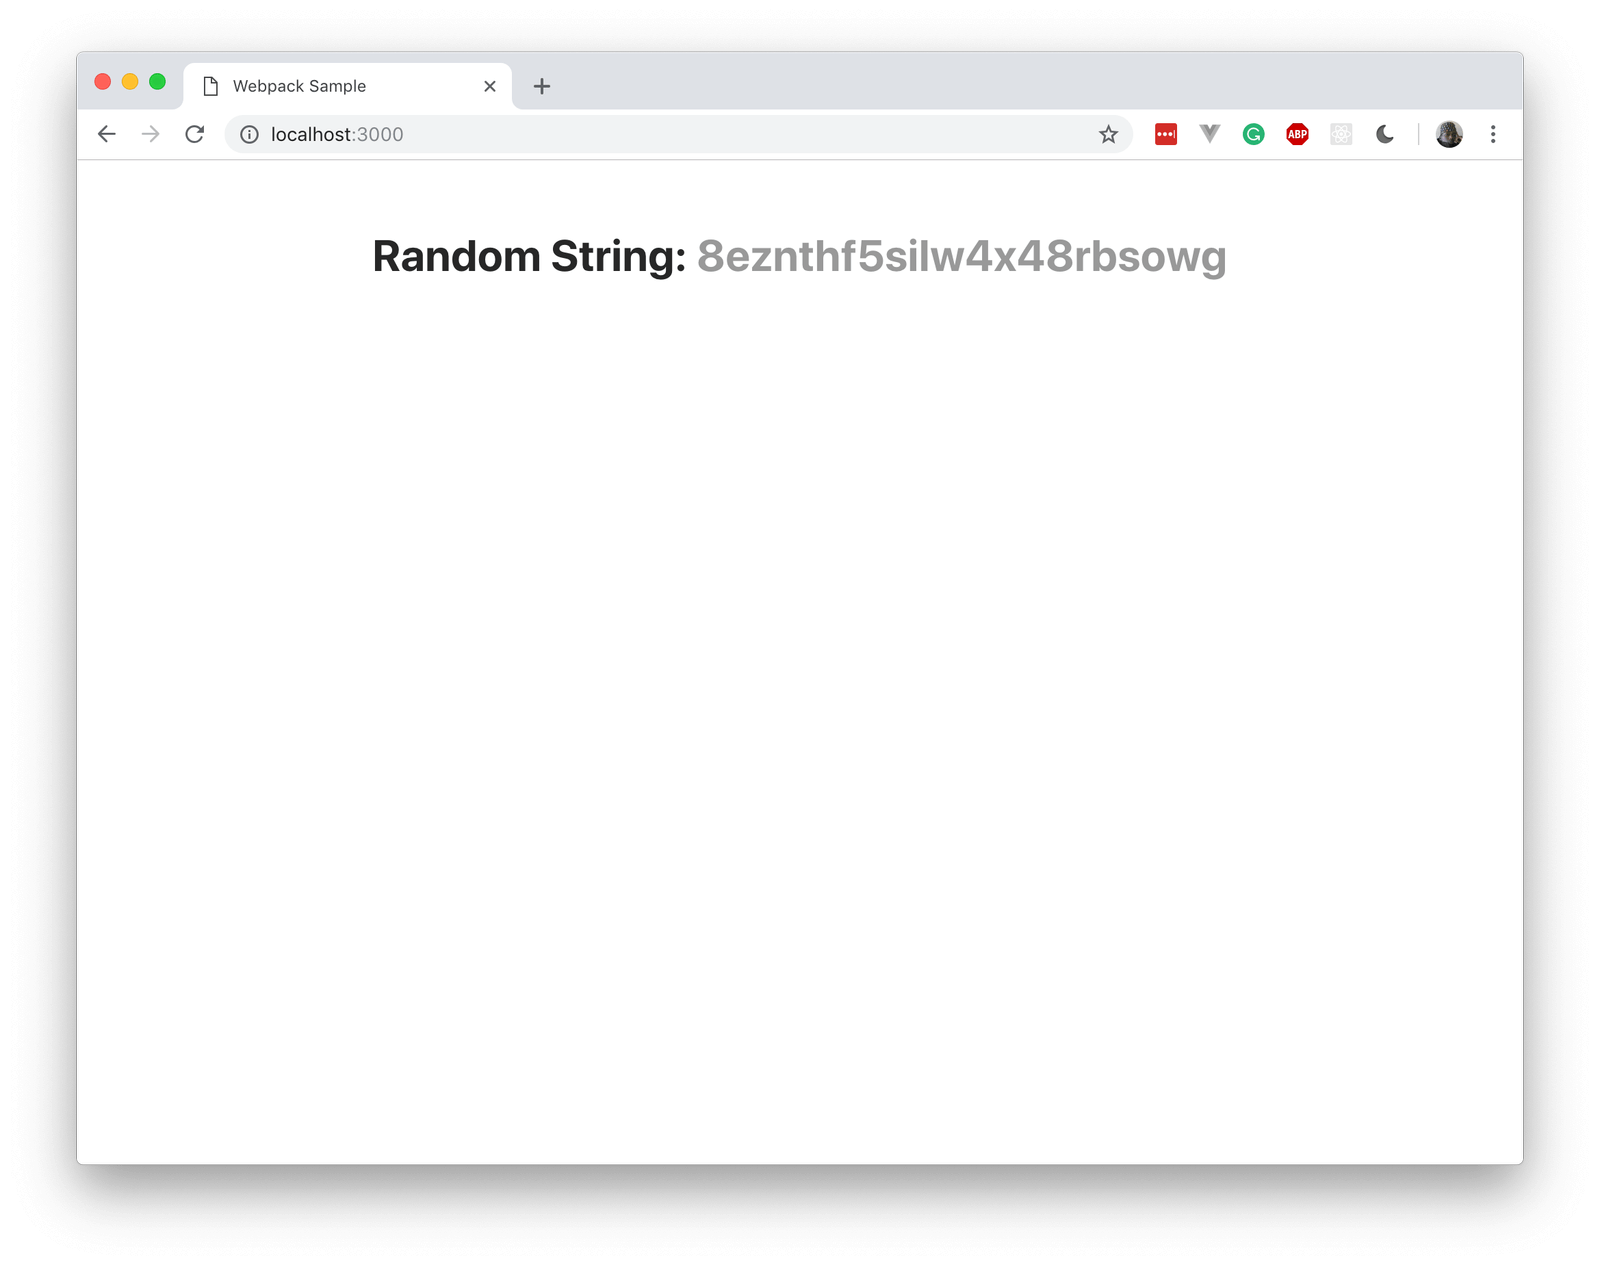
$ node dist/server.js
If you visit http://localhost:3000, you should see the same output with no changes even though we are now using ES6 syntax in the code.
Conclusion
In this part of the series, we have learned how to use Babel to compile JavaScript files written in ES6+ syntax. However, webpack is a lot more powerful than this. We will dive a little deeper in the next part.
The source code to this application is available on GitHub.
Getting started with webpack - Part 5: Introduction to plugins
In this part of the series, we will dig deeper into webpack to see what else is possible. We will specifically try to use webpack plugins. We will demonstrate how you can use plugins to make your webpack build better.
Let’s get started.
Source code of the application is available on GitHub.## Prerequisites
To follow along in this series, you need the following requirements:
- Completed all previous parts of the series.
- Basic knowledge of JavaScript.
- Basic knowledge of the CLI.
- A text editor. VS Code is recommended.
- Node.js (>=6.11.5) and npm installed locally.
Let’s continue with the series.
Getting started with webpack plugins
At its core, webpack has very good support for plugins. The bundler itself has many internal components that are plugins. This means webpack itself makes use of the plugin system. What can plugins do?
Well it’s really up to the imagination what the plugins are capable of doing. As seen from their documentation, there are a lot of plugins available that do different things when activated. Let’s see the syntax for adding plugins to webpack.
Plugins are usually installed using npm and then added to the webpack configuration file so they can be used as a part of webpack’s bundling process. Here is an example of a webpack plugin being activated:
    var HtmlWebpackPlugin = require('html-webpack-plugin');
    var path = require('path');

    module.exports = {
      entry: 'index.js',
      output: {
        path: path.resolve(__dirname, './dist'),
        filename: 'index_bundle.js'
      },
      plugins: [new HtmlWebpackPlugin()]
    };
In the code above, we are importing the html-webpack-plugin at the top and then in the plugins array, we are initializing the plugin. All plugins you intend to add to webpack have to be added to this array so they can be called when webpack is processing files. For example, if there are multiple plugins you would have something like this:
     module.exports = {
       // [...]

       plugins: [
         new HtmlWebpackPlugin(),
         new SomeOtherPlugin(),
         new YetAnotherPlugin(),
      ]

       // [...]
     }
Now that we know how to add and activate webpack plugins, you should also know that you can, based on the environment, load or ignore certain plugins. The webpack configuration file is just a JavaScript file, and thus, we can write pure JavaScript in it.
In this file, we have access to the process.env property. The process.env property returns an object containing the user environment. With this, we can easily access the NODE_ENV property and check what environment webpack is running on.
This is useful because we can decide to activate some plugins when building for the production environment and omit them when building for the development environment.
Conditionally loading plugins
As mentioned earlier, we can use the value from the process.env.NODE_ENV to conditionally load the plugins for webpack. Let’s see how this will look:
    var HtmlWebpackPlugin = require('html-webpack-plugin');
    var path = require('path');

    module.exports = {
      entry: 'index.js',
      output: {
        path: path.resolve(__dirname, './dist'),
        filename: 'index_bundle.js'
      },
      plugins: []
    };

    // Load this plugin only when running webpack in a production environment
    if (process.env.NODE_ENV == 'production') {
      module.exports.plugins.push(
        new HtmlWebpackPlugin()
      )
    }
As seen above, we have an if statement that checks which environment webpack is run on and if it is development, we can then load the HtmlWebpackPlugin. This works with custom environments also not just development and production. For example, we can have this:
    // [...]

    if (process.env.NODE_ENV == 'staging') {
      module.exports.plugins.push(
        new HtmlWebpackPlugin()
      )
    }
Above, we are now only loading the HtmlWebpackPlugin if the environment is staging. You can manually set the environment webpack is running on by appending the following during the build command:
NODE_ENV=environment
For example, to run in production environment, you can run the following command:
$ NODE_ENV=production npm run build
This will first set the NODE_ENV to production and then it’ll run the command to build using the environment we specified.
Adding plugins to our project
For this part, we will be building off the code in part four of the series. If you don’t have it already, you can download the project code from GitHub. We will be using the code there as a base for the modifications we are going to make going forward. When you have downloaded the project, open Part-4 in your code editor and follow along.
Before we get started, run the following command in the root of the project to install the npm dependencies:
$ npm install
To get started, we need to decide the plugins we want to use and then install them using npm. After installing them, we will activate them in the webpack configuration file. We will conditionally load some of the plugins to demonstrate how you could do this in a real app.
The plugins we will use are as follows:
- UglifyJS plugin - to minify the JavaScript bundle file when in production.
- mini-css-extract-plugin - to extract our CSS into its own bundled file on any environment.
- Optimize CSS asset plugin - to optimize and minify the CSS on production environment.
Let’s start adding the plugins one after the other.
UglifyJS webpack plugin
The first plugin we want to install and activate in the project is the UglifyJS plugin. We will be using this plugin to minify the outputted JavaScript. To install this package, run the following command in your terminal:
$ npm install --save-dev uglifyjs-webpack-plugin
When the installation is complete, you can then open the webpack.config.js file and replace the contents with the following code:
    const webpack = require('webpack');
    const path = require('path');
    const UglifyJsPlugin = require('uglifyjs-webpack-plugin');

    const env = process.env.NODE_ENV;

    module.exports = {
      mode: env == 'production' || env == 'none' ? env : 'development',
      entry: path.resolve(__dirname + '/src/index.js'),
      output: {
        path: path.resolve(__dirname + '/dist/assets'),
        filename: 'bundle.js'
      },
      module: {
        rules: [
          {
            test: /\.scss$/,
            use: ['style-loader', 'css-loader', 'sass-loader']
          },
          {
            test: /\.js$/,
            exclude: /node_modules/,
            loader: 'babel-loader'
          }
        ]
      },
      plugins: [],
      optimization: {
        minimizer: []
      }
    };

    if (env === 'production') {
      module.exports.optimization.minimizer.push(new UglifyJsPlugin());
    }
Above, we imported the UglifyJsPlugin, then we updated the mode config property to be automatically set depending on the NODE_ENV set when running webpack. To activate the plugin however, we are not using the plugins array because webpack has an optimization property with a minimizer array. This is the place where we added our Uglify plugin.
Before activating the Uglify plugin though, we check if webpack is being run for a production environment.
Since we now have a production environment, let’s update the scripts in our package.json file to support production builds. Open the package.json and replace the code in it with the following:
    // File: package.json
    {
      "name": "webpack-part-5",
      "version": "1.0.0",
      "description": "",
      "main": "index.js",
      "scripts": {
        "build": "webpack",
        "prod": "NODE_ENV=production webpack",
        "watch": "npm run build -- --watch"
      },
      "keywords": [],
      "author": "",
      "license": "ISC",
      "devDependencies": {
        "@babel/core": "^7.2.2",
        "@babel/preset-env": "^7.2.0",
        "babel-loader": "^8.0.4",
        "css-loader": "^2.0.0",
        "node-sass": "^4.11.0",
        "sass-loader": "^7.1.0",
        "style-loader": "^0.23.1",
        "webpack": "^4.26.1",
        "webpack-cli": "^3.1.2",
        "uglifyjs-webpack-plugin": "^2.0.1"
      },
      "dependencies": {
        "express": "^4.16.4"
      }
    }
If you are using a Windows machine, read here before continuing.
Above, we have added the newprodbuild script. This makes it so we are running webpack in a production environment anytime we run the command below:
$ npm run prod
To build our script and see if it works, run the following command:
$ npm run prod
This should generate a minified JavaScript file in dist/assets/bundle.js. If you run the other command:
$ npm run build
Then you should see an unminified JavaScript bundle file.
Next, let’s install the other dependencies:
$ npm install --save-dev mini-css-extract-plugin optimize-css-assets-webpack-plugin
When the installation is complete, open the webpack.config.js file and replace the contents with the following code:
    // File: ./webpack.config.js
    const webpack = require('webpack');
    const path = require('path');
    const UglifyJsPlugin = require('uglifyjs-webpack-plugin');
    const MiniCssExtractPlugin = require('mini-css-extract-plugin');
    const OptimizeCssAssetsPlugin = require('optimize-css-assets-webpack-plugin');

    const env = process.env.NODE_ENV;

    module.exports = {
      mode: env == 'production' || env == 'none' ? env : 'development',
      entry: path.resolve(__dirname + '/src/index.js'),
      output: {
        path: path.resolve(__dirname + '/dist/assets'),
        filename: 'bundle.js'
      },
      module: {
        rules: [
          {
            test: /\.scss$/,
            use: [MiniCssExtractPlugin.loader, 'css-loader', 'sass-loader']
          },
          {
            test: /\.js$/,
            exclude: /node_modules/,
            loader: 'babel-loader'
          }
        ]
      },
      plugins: [
        new MiniCssExtractPlugin({
          filename: '[name].css',
          chunkFilename: '[id].css'
        }),
        new OptimizeCssAssetsPlugin({
          cssProcessorPluginOptions: {
            preset: ['default', { discardComments: { removeAll: true } }]
          }
        })
      ],
      optimization: {
        minimizer: []
      }
    };

    if (env === 'production') {
      module.exports.optimization.minimizer.push(
        new UglifyJsPlugin()
      );
    }
Above, we have added both the MiniCssExtractPlugin and the OptimizeCssAssetsPlugin to the webpack configuration. These two plugins will make sure the CSS is extracted to its own file and minified so it has a smaller size.
Now let’s see if our plugins work. Open your terminal and run the following command:
$ npm run prod
If all goes well, you should have a new main.css file in the dist/assets folder. The CSS should be minified.
Quick gotcha
Webpack comes with uglification bundled automatically. When you set the mode to production, all JavaScript code will be minified automatically. With this knowledge, you can remove all the references to the UglifyJsPlugin in the code as we do not need it.
Previewing our application
To preview the app with the new changes, we need to update a few files. Open the dist/index.html file and replace the contents with the following:
        Webpack Sample


        #
In the code above, we just added a link to the CSS file that we know will be generated by webpack.
Next, open the dist/server.js and replace the contents of the file with the following:
    const express = require('express');
    const app = express();
    const port = 3000;
    const path = require('path');

    app.get('/assets/bundle.js', (req, res) => res.sendFile(path.join(__dirname + '/assets/bundle.js')));

    app.get('/assets/main.css', (req, res) => res.sendFile(path.join(__dirname + '/assets/main.css')));

    app.get('/', (req, res) => res.sendFile(path.join(__dirname + '/index.html')));

    app.listen(port, () => console.log(`Example app listening on port ${port}!`));
Above, we added a new route to handle the serving of the CSS asset file. That’s all. Now run the following command to start the Node.js server:
$ node dist/server.js
When the app is running, you can see it at http://localhost:3000.
Conclusion
In this part of the series, we have learned how use plugins in webpack. We also learned about optimizations in webpack and how we can use some plugins as minimizers. However, webpack is a lot more powerful than this. We will dive a little deeper in the next part.
The source code to this application is available on GitHub.
Getting started with webpack - Part 6: Working with images
In this part of the series, we will dig deeper into webpack to see what else is possible. We will specifically try to use other webpack plugins in our application to work with images.
In the previous part of the series, we have learned how to use plugins in webpack. We also learned about optimizations in webpack and how we can use some plugins as minimizers. We can use plugins to do many things while developing. In this article, we will consider a few uses specific to our application.
Let’s get started.
Source code of the application is available on GitHub.## Prerequisites
To follow along in this series, you need the following requirements:
- Completed all previous parts of the series.
- Basic knowledge of JavaScript.
- Basic knowledge of the CLI.
- A text editor. VS Code is recommended.
- Node.js (>=6.11.5) and npm installed locally.
Let’s continue with the series.
Minifying images using the imagemin plugin
When developing applications, we usually want to make our asset files smaller. Doing this will lead to smaller assets and thus a faster website. To achieve image compression, we will be using a webpack plugin called imagemin-webpack-plugin.
Before we add it to the application, let’s see how this will be implemented in our config file.
To add it to our webpack configuration, you would typically need to do something like this:
    var ImageminPlugin = require('imagemin-webpack-plugin').default

    module.exports = {
      plugins: [
        // Make sure that the plugin is after any plugins that add images
        new ImageminPlugin({
          disable: false,
          pngquant: {
            quality: [0.3, 0.5]
          },
        })
      ]
    }
Above, we imported the plugin and then we stored it to the ImageminPlugin variable. Next, in the actual webpack plugin, we instantiate the plugin and pass the following options to it:
disable: this accepts a boolean value. Iftrue, the plugin will be disabled. We would typically disable the plugin during development.pngquant: this accepts an object which will be the options for the imagemin pngquant plugin. To see the available options, check here.
There are other options we can specify, you can see all the options here.
One thing to remember though is, when you are adding other webpack plugins that work with images, you should always add them before the imagemin plugin.
Adding the imagemin plugin to our project
In this part, we will be building off the code in the previous part. If you don’t have it already, you can download the project code from GitHub. We will be using the code there as a base for the modifications we are going to make going forward. When you have downloaded the project, open Part-5 in your code editor and follow along.
Before we get started, run the following command in the root of the project to install the npm dependencies:
$ npm install
To get started, we need to decide the plugins we want to use and then install them using npm. After installing them, we will activate them in the webpack configuration file.
The plugins we will use are as follows:
- imagemin-webpack-plugin - to compress images
- copy-webpack-plugin - to copy compressed images around
- url-loader - a loader for webpack which transforms files into base64 URIs
- file-loader - resolves
import/require()on a file into a URL and emits the file into the output directory.
Let’s start adding them one after the other.
Loading images in our project
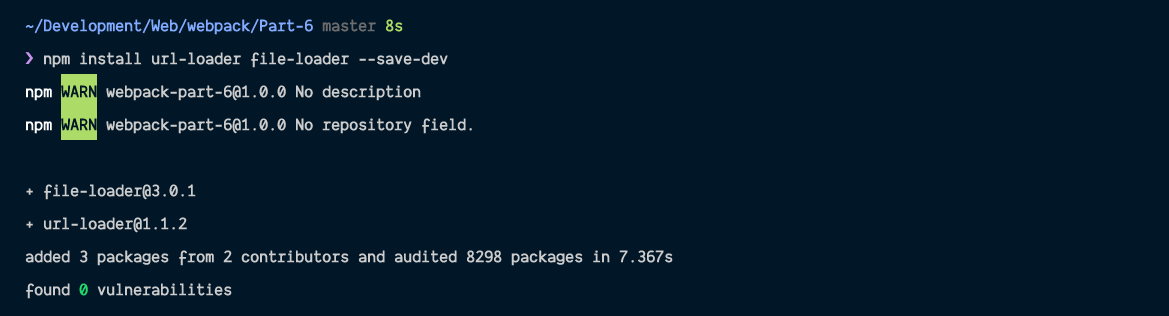
First, we will start with loading images in our project. For this, we need both file-loader and url-loader. To install them, run the following command:
$ npm install url-loader file-loader --save-dev
When the installation is complete, open the webpack configuration file and replace the contents with the following:
    // File: ./webpack.config.js
    const webpack = require('webpack');
    const path = require('path');
    const MiniCssExtractPlugin = require('mini-css-extract-plugin');
    const OptimizeCssAssetsPlugin = require('optimize-css-assets-webpack-plugin');
    const env = process.env.NODE_ENV;

    module.exports = {
      mode: env == 'production' || env == 'none' ? env : 'development',
      entry: path.resolve(__dirname + '/src/index.js'),
      output: {
        path: path.resolve(__dirname + '/dist/assets'),
        filename: 'bundle.js'
      },
      module: {
        rules: [
          {
            test: /\.scss$/,
            use: [MiniCssExtractPlugin.loader, 'css-loader', 'sass-loader']
          },
          {
            test: /\.js$/,
            exclude: /node_modules/,
            loader: 'babel-loader'
          },
          {
            test: /\.(png|jp(e*)g|svg)$/,
            use: [
              {
                loader: 'url-loader',
                options: {
                  limit: 8000,
                  name: 'images/[hash]-[name].[ext]',
                  publicPath: 'assets',
                }
              }
            ]
          }
        ]
      },
      plugins: [
        new MiniCssExtractPlugin({
          filename: '[name].css',
          chunkFilename: '[id].css'
        }),
        new OptimizeCssAssetsPlugin({
          cssProcessorPluginOptions: {
            preset: ['default', { discardComments: { removeAll: true } }]
          }
        })
      ]
    };
Above, we just added a new rule to the list of rules. We added the rule to look for images and pass them through the url-loader. The test we run for images is /\.(png|jp(e*)g|svg)``*$*``/ which will match images with the following extensions: png, jpg, jpeg, svg.
We also specified some options for the url-loader:
limit- when the image file size is smaller than 8000 bytes (8kb), the image is converted to base64 format and passed as thesrcof the image. This helps save a DNS request and thus make your application faster. If the size is greater than 8000 bytes, the image is passed to thefile-loaderwhich will load the image normally.name- this is passed to the file loader in the situation where the file size is greater than 8000 bytes.
Now that we have configured that, let’s download this icon and this icon from font-awesome. After downloading them, place them in the src/images directory. The icons we downloaded are both below 8000 bytes so we will use this to demonstrate the base64 URL that the url-loader generates.
Open the index.js file and import both images and add them to the HTML as seen below:
    // File: ./src/index.js
    // [...]
    import passwordIcon from './images/lock-solid.svg';
    import copyIcon from './images/copy-solid.svg';

    document.getElementById('copy_icon').src = copyIcon;
    document.getElementById('password_icon').src = passwordIcon;
Next, open the index.html file and replace the contents with the following:
        Webpack Sample


            #
Next, open the style.scss file and append the following code:
    /* File: ./src/style.scss */
    .text-center {
      text-align: center;
    }

    #password_icon,
    #copy_icon {
      width: 20px;
    }

    #random_password {
      display: inline-block;
      margin: 0 10px;
    }
Next, run the npm command to build the application:
$ npm run build
Now you can run the server to see the changes:
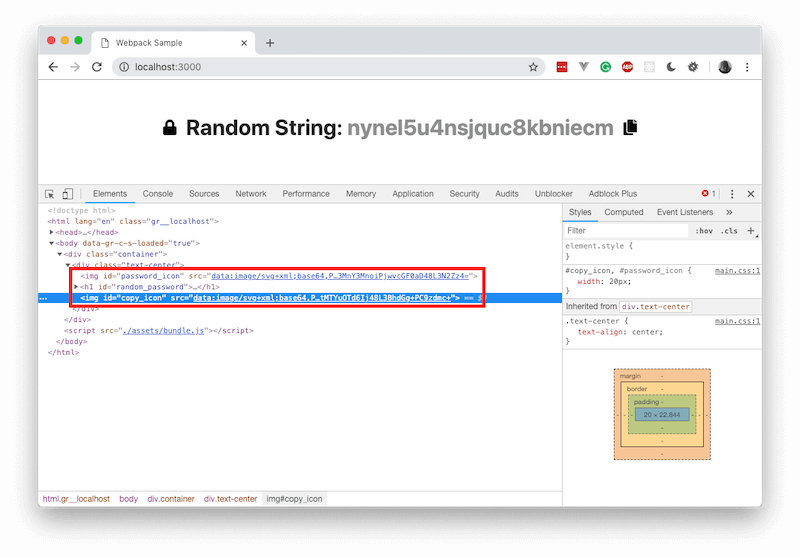
$ node dist/server.js
If all went well, you should see both images and if you Inspect Element and view the image source, you’ll notice it’ll be the Base64 representation.
Before we demonstrate the other way url-loader handles images, let’s implement the copy to clipboard feature.
Open the src/index.js file and replace:
document.getElementById('copy_icon').src = copyIcon;
With
    const copyIconElem = document.getElementById('copy_icon');
    copyIconElem.src = copyIcon;
    copyIconElem.onclick = () => {
      copyToClipboard(document.getElementById('actual_password').innerText);
      alert('Copied to clipboard');
    };
Next, create a new file ./src/utilities/copyToClipboard.js and paste the following into it:
    // File: ./src/utilities/copyToClipboard.js
    const copyToClipboard = str => {
      const el = document.createElement('textarea');
      el.value = str;
      el.setAttribute('readonly', '');
      el.style.position = 'absolute';
      el.style.left = '-9999px';
      document.body.appendChild(el);
      el.select();
      document.execCommand('copy');
      document.body.removeChild(el);
    };

    export default copyToClipboard;
The code above is just a function that copies the passed parameter to the clipboard.
In your src/index.js file, import the module you just created at the top:
    // File: ./src/index.js
    // [...]
    import copyToClipboard from './utilities/copyToClipboard'

    // [...]
Next, in the same file, replace:
    document.addEventListener('DOMContentLoaded', () => {
      const randomStringGenerator = new RandomStringGenerator();
      const randomStr = `Random String: ${randomStringGenerator.generate()}`;

      window.setTimeout(
        () => (document.getElementsByTagName('h1')[0].innerHTML = randomStr),
        0
      );
    });
With
    document.addEventListener('DOMContentLoaded', () => {
      const randomStringGenerator = new RandomStringGenerator();
      const randomString = `Random String: ${randomStringGenerator.generate()}`;
      document.getElementById('random_password').innerHTML = randomString;
    });
Now you can build the app and start the server if not already running. The copy to clipboard function should work now.
Loading images with full URLs
Now that we have demonstrated Base64 URLs for images, let’s demonstrate how larger images will be handled. Download an illustration from here and save it to your src/images directory. We are saving ours as security.svg.
To get started, open the src/index.js, import the image:
    // File: ./src/index.js
    // [...]

    import securityIllustration from './images/security.svg';

    document.getElementById('header_image').src = securityIllustration;

    // [...]
Next, open the dist/index.html file and update as seen below:
Now, open the ./src/style.scss and append this:
    #header_image {
      max-width: 500px;
      margin-bottom: 100px;
    }
Finally, open the dist/server.js and replace the content with the following:
    // File: ./dist/server.js
    const express = require('express');
    const app = express();
    const port = 3000;
    const path = require('path');

    app.use('/assets', express.static(path.join(__dirname, 'assets')));
    app.get('/', (req, res) => res.sendFile(path.join(__dirname + '/index.html')));
    app.listen(port, () => console.log(`Example app listening on port ${port}!`));
Above, we are using express to serve all the static files.
Now that we have completed that, let’s build the application and start the server. To do this, run the following commands:
    $ npm run build
    $ node dist/server.js
If you had the server running before, you need to stop it and restart it.
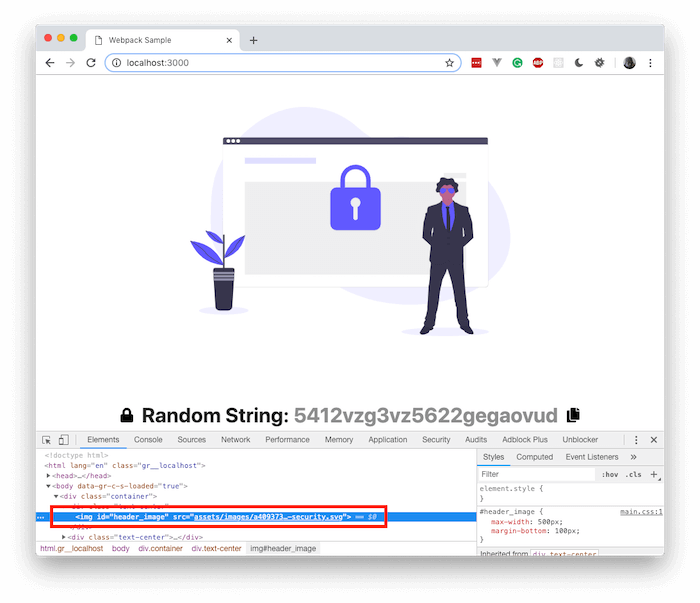
That’s all, we have our images compiled, compressed, and presented using our webpack plugins and loaders.
Conclusion
In this part of the series, we have learned how to work with images in webpack. We learned how to compress images and copy them to our public directory using webpack. However, Webpack is a lot more powerful than this. We will dive a little deeper in the next part.
The source code to this application is available on GitHub.
Getting started with webpack - Part 7: More optimizations
In this part, we will consider how to optimize our build for a production environment. We will be looking at how we can reduce the size of our CSS, allow for file caching using hashed file names, and more.
Let’s get started.
Source code of the application is available on GitHub.
In the previous post we learned how to use webpack to bundle images in our application. We considered how to compress the images and then serve the compressed images. We also considered how to use theurl-loaderto serve the Base64 representation of the image, when it is less than 8kb.
Prerequisites
To follow along in this series, you need the following requirements:
- Completed all previous parts of the series.
- Basic knowledge of JavaScript.
- Basic knowledge of the CLI.
- A text editor. VS Code is recommended.
- Node.js (>= v6.11.5) and npm installed locally.
Let’s continue with the series.
Setting up
For this part, we have moved a few file structure changes. There is a skeleton directory you can get from the repo if you would like to follow along. There is also a completed Part-7 folder you can use as reference.
Here are some of the changes to the file structure we made. You can look through to see what changed but here are the important changes made:
- The
dist/server.jsfile has been moved to the root directory. This file has no business inside thedistdirectory. We only want thedistdirectory to contain files generated by webpack. - The
dist/index.htmlfile has been moved tosrc/index.htmlfor the same reason as above. - The
srcdirectory now organizes the assets intojs,images, andscss. - The webpack configuration file was modified to build CSS files to
dist/assets/css, image files todist/assets/images, and JavaScript files todist/assets/js. - The new paths have been updated across all affected files to reflect the new directory structure.
OptimizeCssAssetsPluginonly runs when building for production.- We renamed the npm
buildscript todev.
Before we get started, run the following command in the root of the project to install the npm dependencies:
$ npm install
When the installation is complete, we can decide what additional plugins we want to use for this part and install them. Here are the plugins we will be using and what they do:
- purgecss-webpack-plugin - this will remove all the unused CSS selectors from the CSS files. This will make us have smaller CSS files.
- postcss-loader - loader for webpack to process CSS with PostCSS.
- precss - lets you use Sass-like markup and staged CSS features in CSS.
- autoprefixer - PostCSS plugin to parse CSS and add vendor prefixes to CSS rules.
- html-webpack-plugin - simplifies creation of HTML files to serve your bundles.
Optimizing our CSS files
The first thing we want to do is optimize our CSS. We will do this using the purgecss-webpack-plugin. This plugin will help us remove all unused CSS from our stylesheet. After this, we will minify the CSS files so they have an even smaller size when the build is complete.
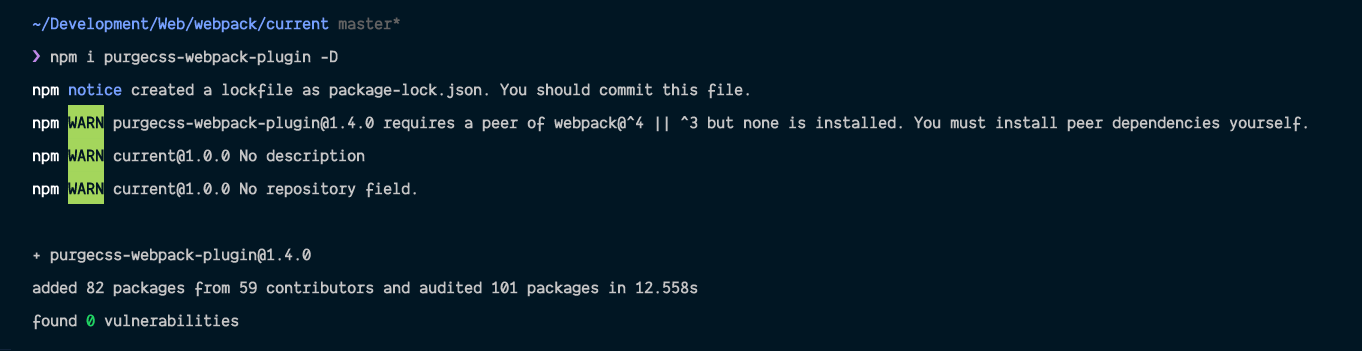
Open up your terminal application and run the following code:
$ npm i purgecss-webpack-plugin -D
When the installation is complete, let’s add some external CSS to really see the effects. Let’s pull in Bootstrap using npm:
$ npm i bootstrap --save
This will install the entire Bootstrap library as a dependency. We can then open the src/scss/app.scss and import the Bootstrap library at the top of the file:
    // File: ./src/scss/app.scss
    @import '~bootstrap/scss/bootstrap';

    // [...]
Next, let’s add the postcss-loader which is required by Bootstrap. In your terminal run the following command:
$ npm i postcss-loader autoprefixer precss -D
Next, open the webpack configuration file and add the postcss-loader to the file between the css-loader and sass-loader:
    // File: ./webpack.config.js

    // [...]
    module.exports = {
      // [...]

      module: {
        rules: [
          {
            test: /\.scss$/,
            use: [
              // [...]

              'css-loader',

              {
                loader: 'postcss-loader',
                options: {
                  plugins: function() {
                    return [require('precss'), require('autoprefixer')];
                  }
                }
              },

              'sass-loader',

              // [...]
            ]
          },

          // [...]
        ]
      }

      // [...]
    }

    // [...]
Now if we build, we will see the entire Bootstrap library has been loaded into the generated file in dist/assets/css/app.css. However, since we will not be using all the available classes Bootstrap has to offer, let’s use the purgecss-webpack-plugin to remove all unused classes from CSS file.
Open the webpack configuration file and import the required packages at the top, and then add the plugin to webpack as seen below:
    // File: ./webpack.config.js
    // [...]
    const glob = require('glob');
    const PurgeCssPlugin = require('purgecss-webpack-plugin');

    module.exports = {
      // [...]
    }

    if (env === 'production') {
      // [...]

      module.exports.plugins.push(
        new PurgeCssPlugin({
          paths: glob.sync(path.join(__dirname, 'src') + '/**/*', { nodir: true })
        })
      );
    }
As seen above, we first pull in the plugin, then to make sure we only run PurgeCSS when we are in production, we add the plugin inside our if check.
If you run the command:
$ npm run dev
You will notice that all the Bootstrap CSS classes, used or unused, will be included in the generated file.

However, if you run the command:
$ npm run prod
If you are a Windows user, and you have some issues with running the production command, do the following:> First, run
npm i cross-env -Dto install thecross-envpackage, then run the command below to build for production:>npx cross-env NODE_ENV=production webpack
You will notice that almost all Bootstrap classes are absent from the class. Remember, the PurgeCSS plugin will scan the HTML file(s) to see which selectors are used and which isn’t.
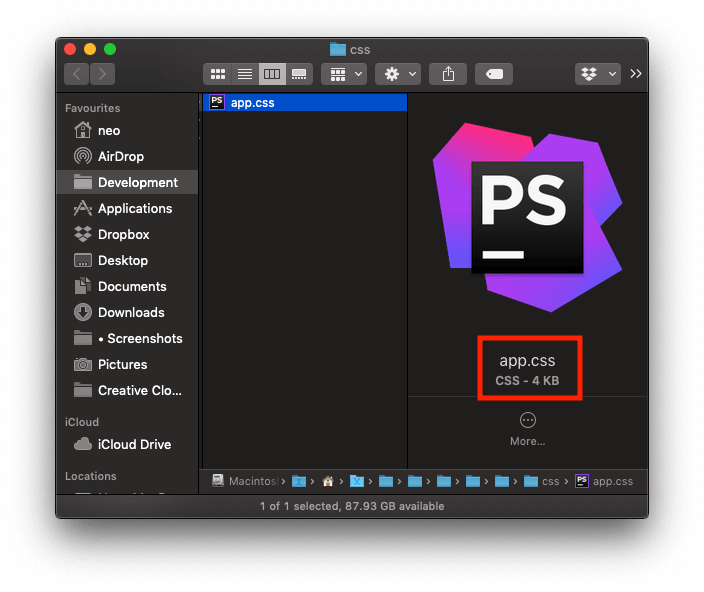
As you can see from both screenshots above, the file size reduced drastically when all the unused CSS selectors are removed.
Bundling our HTML file
Earlier, we mentioned that the HTML file is no longer in the dist directory. If you check the server.js however, you will notice the server will still try to load the index page from the dist/index.html file. Let’s use webpack to bundle our HTML.
In your terminal, run the following command:
$ npm i html-webpack-plugin -D
This will install the html-webpack-plugin. Next open the webpack configuration file, import and activate the plugin as seen below:
    // File: ./webpack.config.js
    // [...]
    const HtmlPlugin = require('html-webpack-plugin');

    module.exports = {
      // [...]

      plugins: [
        // [...]

        new HtmlPlugin({
          filename: 'index.html',
          minify: env === 'production'
            ? {
                collapseWhitespace: true,
                removeComments: true,
                removeRedundantAttributes: true,
                removeScriptTypeAttributes: true,
                removeStyleLinkTypeAttributes: true,
                useShortDoctype: true
              }
            : false,
          template: 'src/index.html'
        })
      ],

      // [...]
    };

    // [...]
As seen above, we have added the plugin to our webpack build process. This plugin will copy our src/index.html file to dist/index.html. It will also inject our main CSS and JavaScript file to the copied HTML so we do not need to include it ourselves.
In the options, we add the minify option so it minifies the generated HTML when running in production. This will make the HTML file size smaller and thus load a little faster.
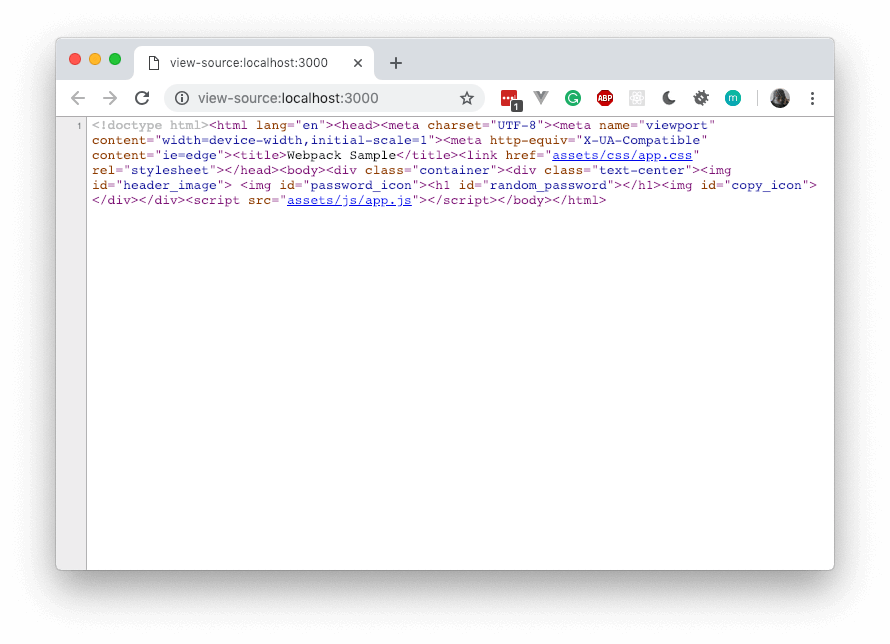
Now we can run the server to see the changes. If you view the source of the page you will notice the minified HTML:
$ npm run serve
The command above is a script we added to the package.json’s script property. It will build the application and start the server.
Hashing our assets for browser caching
Now that we have optimized our assets for production, let’s see another thing we can do to make the assets cache ready.
Browsers can be instructed by a server to store copies of the assets locally so that when it is requested again it will just load the local version. This is useful because if we do it properly, we will have faster apps that load cached assets instead of making an HTTP request every time for a file that has not changed.
The problem, however, is, if we cache let’s say, index.css, and we make a change to how the file is, the browser has no way of knowing that a change has occurred on the server. This will cause the browser to keep serving the outdated version of the CSS file.
With webpack, we can bundle the assets with a hash included in the name of the file. The hash will be generated from an MD5 of the file as is. This means that if the file changes, the hash will also change. This way, when we change some assets, the browser will have to reload the file because it cannot find that file cached locally.
Let’s see how this will look. Currently, in the dist directory, our assets are stored with name.ext. Open the webpack config file and replace all occurrences of [name] with [name]-[contenthash]. [name] will be the name of the bundled file and the [contenthash] will be an MD5 generated from the contents of the file.
Note: For the
url-loaderthere is an issue that may make[contenthash]fail, so use[name]-[hash]instead.
You can read more about caching here.
Here is our new webpack config:
    // file: ./webpack.config.js
    const webpack = require('webpack');
    const path = require('path');
    const glob = require('glob');
    const MiniCssExtractPlugin = require('mini-css-extract-plugin');
    const OptimizeCssAssetsPlugin = require('optimize-css-assets-webpack-plugin');
    const PurgeCssPlugin = require('purgecss-webpack-plugin');
    const HtmlPlugin = require('html-webpack-plugin');

    const env = process.env.NODE_ENV;

    module.exports = {
      mode: env == 'production' || env == 'none' ? env : 'development',
      entry: {
        app: [path.resolve(__dirname + '/src/js/app.js'), path.resolve(__dirname + '/src/scss/app.scss')]
      },
      output: {
        path: path.resolve(__dirname + '/dist'),
        filename: 'assets/js/[name]-[contenthash].js'
      },
      module: {
        rules: [
          {
            test: /\.scss$/,
            use: [
              MiniCssExtractPlugin.loader,
              'css-loader',
              {
                loader: 'postcss-loader',
                options: {
                  plugins: function() {
                    return [require('precss'), require('autoprefixer')];
                  }
                }
              },
              'sass-loader'
            ]
          },
          {
            test: /\.js$/,
            exclude: /node_modules/,
            loader: 'babel-loader'
          },
          {
            test: /\.(png|jp(e*)g|svg)$/,
            use: [
              {
                loader: 'url-loader',
                options: {
                  limit: 8000,
                  name: 'assets/images/[name]-[hash].[ext]'
                }
              }
            ]
          }
        ]
      },
      plugins: [
        new MiniCssExtractPlugin({
          filename: 'assets/css/[name]-[contenthash].css'
        }),
        new HtmlPlugin({
          filename: 'index.html',
          minify:
            env === 'production'
              ? {
                  collapseWhitespace: true,
                  removeComments: true,
                  removeRedundantAttributes: true,
                  removeScriptTypeAttributes: true,
                  removeStyleLinkTypeAttributes: true,
                  useShortDoctype: true
                }
              : false,
          template: 'src/index.html'
        })
      ]
    };

    if (env === 'production') {
      module.exports.plugins.push(
        new OptimizeCssAssetsPlugin({
          cssProcessorPluginOptions: {
            preset: ['default', { discardComments: { removeAll: true } }]
          }
        })
      );

      module.exports.plugins.push(
        new PurgeCssPlugin({
          paths: glob.sync(path.join(__dirname, 'src') + '/**/*', { nodir: true })
        })
      );
    }
Now when you build, you should notice the hash added to the file names in the dist/assets directory.
The next thing we will do now is instruct the server to cache the static assets. Open the server.js and replace:
    // File: ./server.js
    app.use('/assets', express.static(path.join(__dirname, '/dist/assets')));
With
    // File: ./server.js
    app.use('/assets', express.static(path.join(__dirname, '/dist/assets'), {
      maxAge: '30d'
    }));
Now run the following command to build and start the server:
$ npm run serve
If you load the first time and reload again, you will notice that the assets will now be loaded from memory.
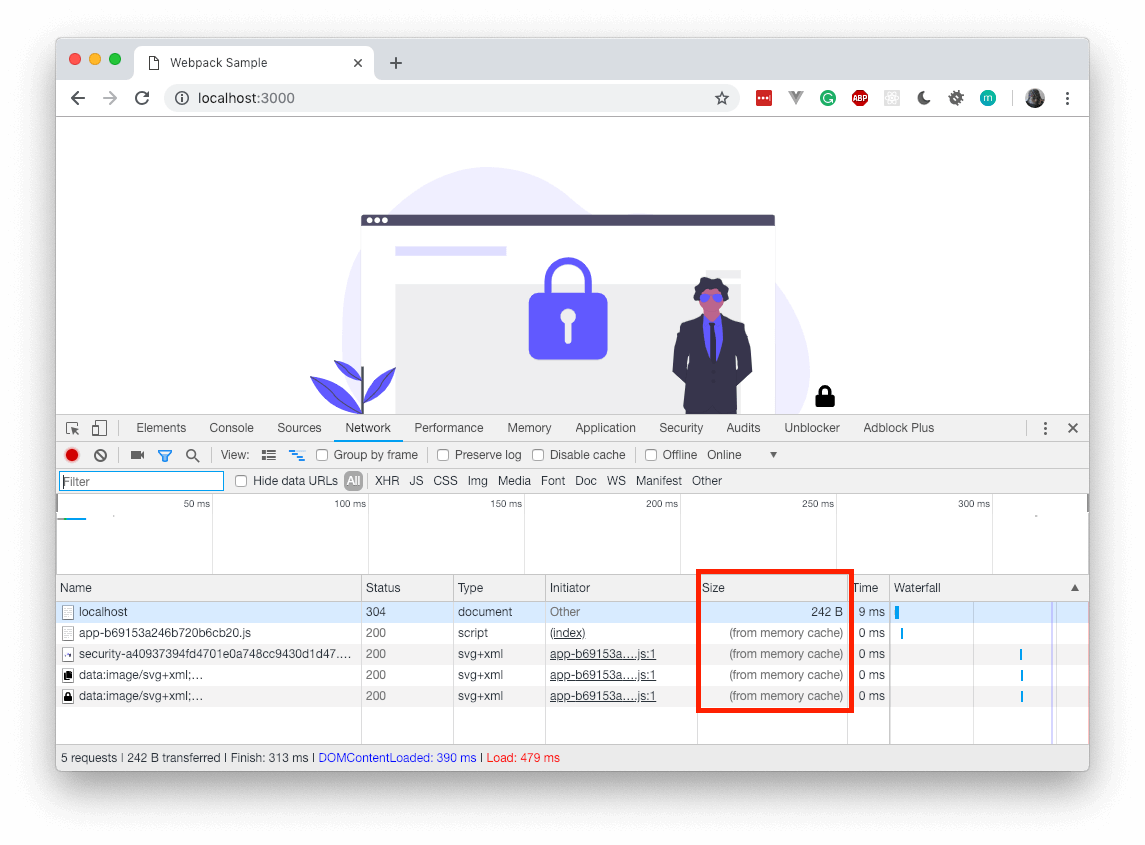
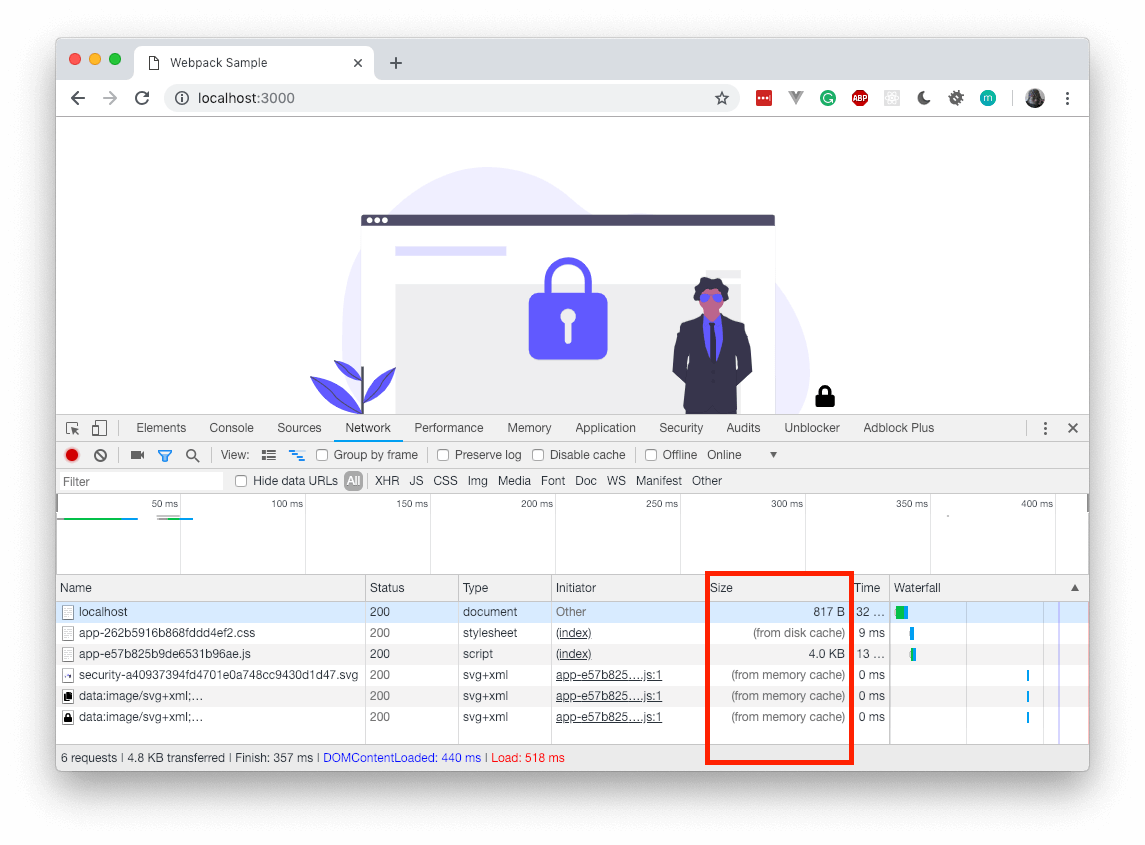
Great, now let’s make a change to the JavaScript file to force a new hash and see. We will just make a slight change to the ‘Copied to clipboard’ text in src/js/app.js. We will just add an exclamation mark to it and rebuild using the npm serve script.
When we look at the screenshot again, you will notice that the JavaScript file was loaded from the server unlike the rest that still loads from the cache. After the second reload, it’ll be cached again and will load from memory.
That’s all for this part.
Conclusion
In this part of the series, we learned how we can optimize our assets further and add some caching to the mix using contenthash. In the next part we will look into how we can create our own webpack plugins.
The source code to this application is available on GitHub.
Originally published by Neo Ighodaro at [pusher.com]((https://pusher.com “pusher.com”)
#webpack #javascript #node-js #web-development