In this tutorial, I will show you how to develop a small Progressive Web App (PWA) using the Vue framework. Vue is a framework that has been around for some time.
With the ever-increasing use of mobile devices over the last few years it has become more and more important for web developers to anticipate the need for users on these devices. The first step was the ability to cater for different screen sizes, thus creating the need for responsive user interface design. Over time the demands of the users increase and it is now becoming even more important to provide a high-quality user experience, independent of the network connectivity. Users have become accustomed to using native installable applications when they are offline. They are increasingly expecting the same from browser-based web applications.
This expectation is met by Progressive Web Applications (or PWAs). A PWA is a normal web application that leverages a number of modern browser technologies to improve the overall experience. The core component of a PWA is a service worker. The service worker is a piece of JavaScript code that runs in a separate thread from the main JavaScript application and intercepts any browser requests for resources from the server. If the service worker finds that it has an up-to-date version of that resource in the cache it will provide the cached resource instead. In addition, an application manifest allows the application to be installed in the browser. This makes it possible to start up the PWA on a mobile device, even if the device is offline.
In this tutorial, I will show you how to develop a small PWA using the Vue framework. Vue is a framework that has been around for some time. It has recently gained in popularity as developers have come to realize that Vue strikes a good balance between a low-level hackability and high-level over-design. The application will allow the user to browse through a catalog of books. It will be making use of the OpenLibrary API to provide the data.
Create Your Vue Application
To start you will need to install the Vue command line tool. I will assume that you have some knowledge of JavaScript and the Node Package Manager (npm). I will also assume you have npm installed on your system. Open a shell and type the command:
npm install -g @vue/cli@3.7.0
This installs the global vue command. Depending on your system, you might have to run this command using sudo. Once the Vue command line tool has been installed you can create your first Vue application. Navigate into a directory of your choice and run the command
vue create vue-books-pwa
You will be prompted for a number of choices. In the first question, select Manually select features. This is important because you want to include the PWA features that Vue can install into a new application.
On the following prompt, you are presented with a number of choices. Make sure you select the Progressive Web App (PWA) Support and Router choices. You will be implementing the client using TypeScript, so you will also need to select the TypeScript option. Keep the Babel option selected. You may also want to deselect the Linter choice for this tutorial. In larger applications, I would suggest keeping the linter switched on to ensure a consistent code style across your application. Altogether the choices should look as follows.
? Check the features needed for your project:
 ◉ Babel
 ◉ TypeScript
❯◉ Progressive Web App (PWA) Support
 ◉ Router
 ◯ Vuex
 ◯ CSS Pre-processors
 ◯ Linter / Formatter
 ◯ Unit Testing
 ◯ E2E Testing
Once you have made your choices, press Enter to continue. When the wizard asks you Use history mode for router? you must answer no. For all other questions, simply accept the default options.
The vue create command will create a directory and fill it with a skeleton application. This application consists of an App base component and two routed components Home and About. All components are stored in .vue files.
A .vue file can contain three sections identified by XML tags: ``, `
The `` element in the template defines the application’s top bar. It contains a menu with some links to the different sub-components. The splash screen is contained in `src/views/Home.vue`. Open it, and add a header and a sub-header.
Vue Books PWA
A simple progressive web application
The default application created by `vue-cli` contains the `About.vue` component. You will not be using this component. Instead, the central component that provides the main functionality will be a component in which the user can search for books and view the search results in a table. Rename `src/views/About.vue` to `src/views/Search.vue`. Replace the contents with the following.
      Search


    search


## Search Results


    Title
    Author
    Pub. Year
    View


    {{book.title}}
    {{book.author_name && book.author_name.join(', ')}}
    {{book.first_publish_year}}
    visibility
This file contains quite a lot, so let’s discuss each section one by one. The top part contains the HTML template. This consists of a search form followed by a table that will display the results of a search.

The `
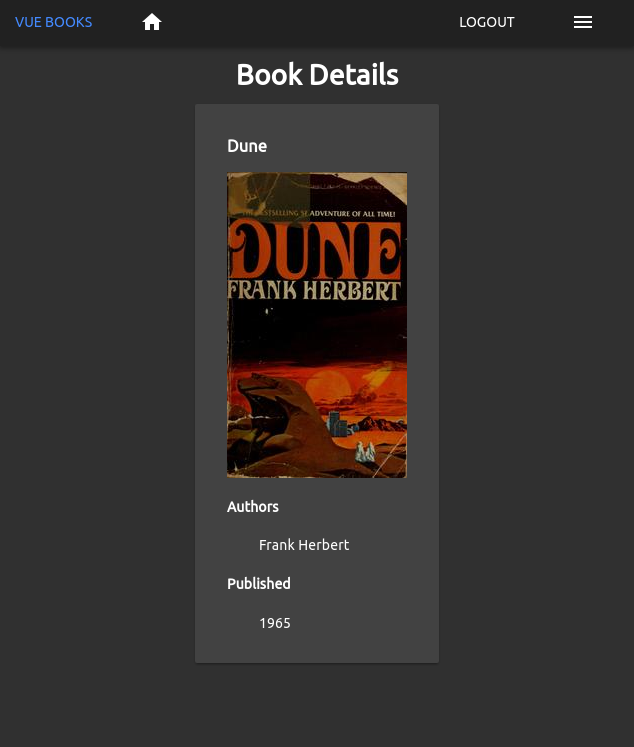
This component simply shows the book’s details obtained from the route’s query parameters. The only method, getImageSrc(), returns the URL of the cover image.
When the application was generated by the vue command line tool, it also created a HelloWorld component at src/components/HelloWorld.vue. This is not needed in the application, so you can delete it. If you delete this file, you’ll need to delete references to it in src/views/Home.vue as well.
In order for a sub-component to be shown, it must be registered with the router. Open src/router.ts and replace it with the code below.
import Vue from 'vue'
import Router from 'vue-router'
import Home from './views/Home.vue'
import Search from './views/Search.vue'
import Details from './views/Details.vue'

Vue.use(Router)

const router = new Router({
  routes: [
    {
      path: '/',
      name: 'home',
      component: Home
    },
    {
      path: '/search',
      name: 'search',
      component: Search,
    },
    {
      path: '/details',
      name: 'details',
      component: Details,
    }
  ]
})

export default router;
This completes the basic application. To try it out, you can run the command:
npm run serve
Open a browser and navigate to [http://localhost:8080](http://localhost:8080). You can search for a book and click on the eye icon to look at the book’s details.
Add Secure Authentication to Your Vue PWA
In many situations, you will want to restrict access to parts of your application to users that are registered. You could start implementing your own user registration and sign-in mechanism. This is not only cumbersome but can leave you with security risks if the user registration is not tested properly. Fortunately, Okta provides a single sign-on service that lets you add safe user authentication with little effort. In this section, I will be showing you how to restrict access to the /search and /details routes to registered users.
To start, you need to create an account with Okta. Visit developer.okta.com and click the Sign Up button. On the next screen, enter your details and click on Get Started.
Once you have finished the registration process, you will be taken to the developer dashboard. Each application that you want to use with Okta authentication must be registered and will receive its own client ID. Click on Add Application and, on the next screen, select Single Page Application. When you click on Next you will see a screen with settings. Make sure the port is set to 8080. This is the port that Vue uses to serve applications.

Once you are finished you will be given a clientId. This is needed in your application when configuring Okta. In your application directory now run the following command.
npm i @okta/okta-vue@1.1.0 @types/okta__okta-vue@1.0.2
This will install the Okta SDK for Vue. To set up Okta with your application, open src/router.ts. Add the following lines after the import statements.
import Auth from '@okta/okta-vue'

Vue.use(Auth, {
  issuer: 'https://{yourOktaDomain}/oauth2/default',
  client_id: '{yourClientId}',
  redirect_uri: 'http://localhost:8080/implicit/callback',
  scope: 'openid profile email'
});

const authGuard = async function(to: any, from: any, next: any) {
  console.log(to);
  const authenticated = await router.app.$auth.isAuthenticated();
  if (authenticated) {
    next();
  } else {
    router.app.$auth.loginRedirect(to.path);
    next(false);
  }
}
The Vue.use(Auth, ...) statement sets up Okta. You will need to copy the client ID from your Okta developer console as the client_id parameter. With this statement, the $auth property will be made available on every Vue component. The authGuard function will be used to protect selected routes with password authentication.
In the routes array, add the following entry.
{
  path: '/implicit/callback',
  component: Auth.handleCallback()
}
This route will handle the callback from Okta, once the user has logged on. Finally, you have to add the authentication guards. In the router entries for the /search and /details, add the following property.
beforeEnter: authGuard
With this, your application is protected. If you now try to navigate to the /search route, you will be redirected to the Okta login page. In addition to protecting certain routes, the application should also let the user know if the user is logged in and provide a direct link to the Okta login page. Open src/App.vue. In the template section add the following into the ``.
 Logout
 Login
Replace the contents of the script section with the following.
export default {
  data: () => ({
    title: "Vue Books",
    authenticated: false
  }),
  created() {
    this.authenticated = this.isAuthenticated();
  },
  watch: {
    $route: "isAuthenticated"
  },
  methods: {
    async isAuthenticated() {
      this.authenticated = await this.$auth.isAuthenticated();
    },
    login() {
      this.$auth.loginRedirect("/");
    },
    async logout() {
      await this.$auth.logout();
      await this.isAuthenticated();

      this.$router.push({ path: "/" });
    }
  }
};
The flag authenticated keeps track of the login status. This controls the visibility of the Login and Logout buttons. This completes the implementation of the Vue Books application.
Create Your PWA in Vue
Until now, I have guided you through creating a standard web application. The only step towards creating a PWA was the choice to support PWAs during the initial set-up of the application. It turns out that this is almost everything that needs to be done. You can check the performance of the application using Google Chrome’s Lighthouse extension.
To test your application properly, you need to serve it in production mode. First, build the application by running the command:
npm run build
This will compile the application into the dist/ subdirectory. Next, you need to install the http-server-spa package by running the following command.
npm install -g http-server-spa@1.3.0
Then start the server by running:
http-server-spa dist index.html 8080
Open the Chrome browser and navigate to [http://localhost:8080](http://localhost:8080). You can install the Lighthouse extension or use the Audits tab in Chrome Developer Tools to run Lighthouse.
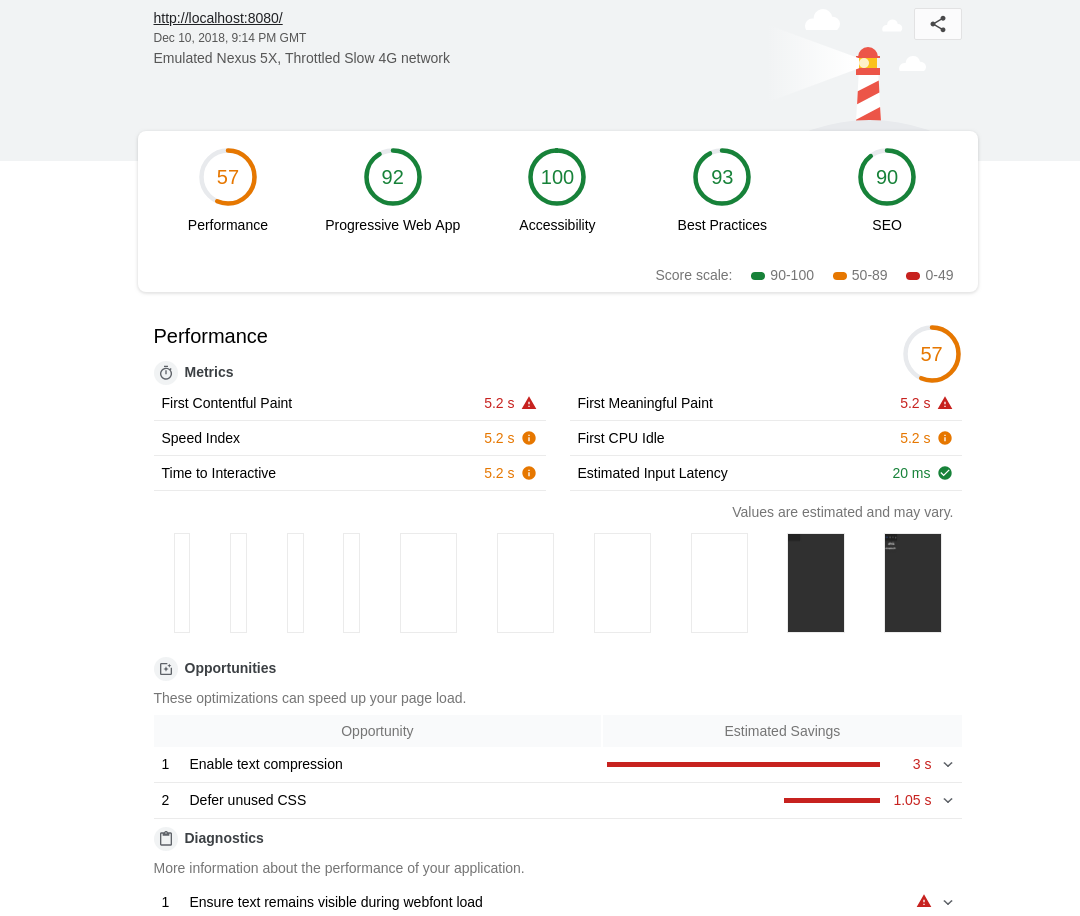
If you have the extension installed, you will notice a little Lighthouse icon in the navigation bar. If you click on it a little panel will open. Select Generate Report and Lighthouse will start analyzing your application. There are a number of checks and you should get a score of 92 on the Progressive Web Application score. If you served the application using a secure server through HTTPS protocol you would likely score 100.
You could stop here and say that you have created a perfectly scoring PWA. But you can do a little better. If the application is modified to cache past search requests, a user can re-issue past searches and still get results, even if the device is offline. The axios-extensions library includes a caching layer that can be used out of the box. Install the extensions.
npm i axios-extensions@3.0.4
Open src/main.ts and add the following import.
import { cacheAdapterEnhancer } from 'axios-extensions';
Then replace Vue.use(VueAxios, axios) with the following.
Vue.use(VueAxios, axios.create({
  adapter: cacheAdapterEnhancer(axios.defaults.adapter as any)
}));
That’s it! You have created a PWA with Vue. A service worker caches access to the server resources. Requests to the external API are cached allowing the user to use the application without a network connection. The vue command line tool also created a manifest in public/manifest.json and a set of icons in public/img/icons. This allows the browser to install the application locally. For a production application, you should edit the manifest and update the icons.
#web-development #vue-js #javascript #pwa