Using React-Router to Optimize Single Page Applications
React is often used for building single page applications (SPAs). SPAs tend to have multiple page views. When navigating from one-page view to another, reloading the entire page view is a tedious and not so efficient task. In fact, it diminishes the benefits of a SPA. To work as it should, a SPA must render parts of views when required instead of reloading the entire page.
Routing comes into the picture when navigating from one page to another in a SPA app. Routing can be categorized in two ways. Static and dynamic. SPAs follow a dynamic approach. In this tutorial, we will discuss a popular routing library used with React applications known as React Router.
Table of Contents
- Requirements
- Getting Started
- First Route with React Router
- What is BrowserRouter?
- The Link Component
- Active Links with NavLink
- Adding Parameters to the Routes
- Conclusion
Requirements
- NodeJS
v8.x.xor higher installed along with npm/yarn create-react-appinstalled globally to on your local dev machine generates a new React project
Bonus: You can also, use npx to generate a new React project without installing create-react-app.
Getting Started
To create a new React project run the following command at the desired location on your local machine.
create-react-app react-router-v4-demo
Once the project is generated, traverse inside the newly created directory. This strategy is the default way to generate a new React app.
React Router as a library contains three different npm packages.
- react-router
- react-router-dom
- react-router-native
Each of the packages has a different use case. The first one, react-router is the core package and is used with the next two packages listed above. The react-router-dom has to be used when building a web application. This is what we are going to use in this tutorial. The last one, react-router-nativetends to be used in a React Native application.
To add React Router in the React app, execute the following command from a terminal window.
yarn add react-router-dom
Please note that, for the rest of the tutorial, we will be using yarn as the JavaScript package manager to add or remove dependencies. If you wish to use npm, there is no one stopping you.
To run the React app, go to the terminal window and execute the command npm start. This will start the development server. You will be welcomed by the default boilerplate project screen in a web browser window on URL <a href="http://localhost:3000/" target="_blank">http://localhost:3000/</a>.

First Route with React Router
To create the first route in the React app, let us import BrowserRouter from react-router library.
import React from "react"
import { BrowserRouter as Router, Route } from "react-router-dom"
To create a route, we use <Route> from the react-router-dom. This is where the logic of routing is placed. It renders the UI of a component. A <Route>has a prop called path which is always matched with the current location of the app. On the basis of this prop, the desired component gets rendered. When the component is not getting rendered, Route returns null. The component name is also passed as a prop component. Look at the below snippet.
function App() {
    return (
        <Router>
            <Route path='/' component={Home} />
        </Router>
    )
}
There is the functional App component that returns a BrowserRouter which holds the very first Route component. The path is currently pointing towards the Home component which has the following UI logic.
function Home() {
    return (
        <div>
            <h1>Home Component</h1>
        </div>
    )
}
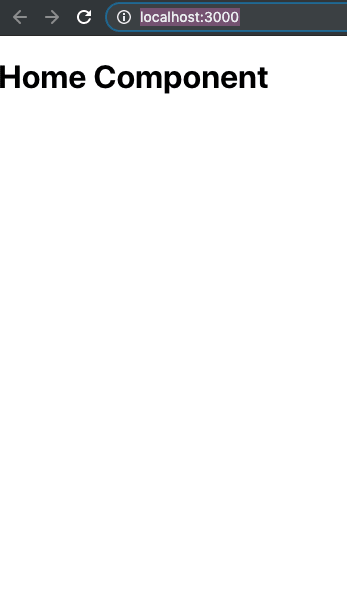
Now, visit the URL on port 3000 and you will see the Home component being rendered right now.
This is a bare minimum example. Now let us add another route with the same props as the Home. Call this route About with a similar rendering logic as Home.
function About() {
    return (
        <div>
            <h1>About Component</h1>
        </div>
    )
}
Now add this functional component as the second route, below the Homeroute. Also, add both routes inside a div element. A router component can hold a single child element and adding a div solves this problem and allows the router component to have as many children as we want.
function App() {
    return (
        <Router>
            <div>
                <Route path='/' component={Home} />
                <Route path='/about' component={About} />
            </div>
        </Router>
    )
}
Try visiting the URL <a href="http://localhost:3000/about" target="_blank">http://localhost:3000/about</a>. You will notice that both the components are being rendered right now on the path /about.
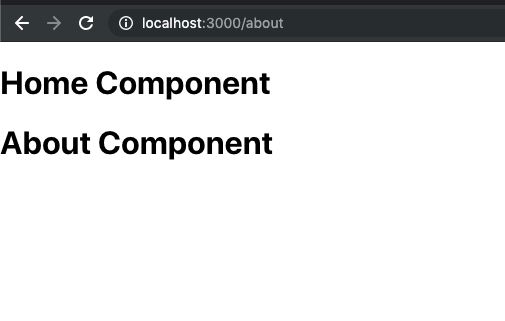
The reason for this is that regular expression engine that React Router uses internally considers both the routes that are being started with a forward slash / equal. To solve this issue, we can use another essential prop on the Home route called exact.
<Router>
    <div>
        <Route path='/' exact component={Home} />
        <Route path='/about' component={About} />
    </div>
</Router>
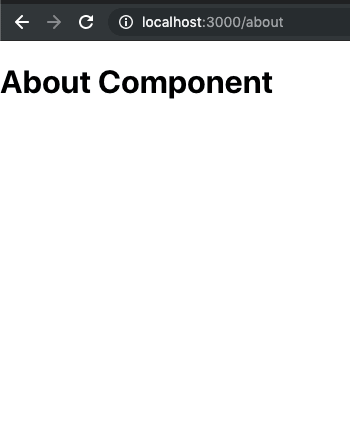
This exact is also known as a qualifier which states that the path must match the exactly the / and nothing after it, such as /about. Now, if you visit the browser window at the URL <a href="http://localhost:3000/about" target="_blank">http://localhost:3000/about</a> you will notice that only the about component is getting rendered this time.
What is BrowserRouter?
Do you remember reading earlier about that react-router-dom is used only in case of web applications? Well, react-router-dom library holds two types of routers API for a React application to use. One is called BrowserRouterthat you have seen in action in the previous section. The other one is called HashRouter.
A BrowserRouter will always listen to URLs like <a href="http://localhost:3000/about" target="_blank">http://localhost:3000/about</a> whereas a HashRouter will have <a href="http://localhost:3000/#/about" target="_blank">http://localhost:3000/#/about</a>, as the name suggests, uses a hash # in between. So why did we use the BrowserRouter?
BrowserRouter is a popular choice among modern day web applications. The main reason behind is that it uses HTML5 History API to keep track of the router history of your React app. The HashRouter has a use case for legacy browsers where window.location.hash is still being used to keep a track of routes in a SPA.
DIY Exercise 👇
Here is a small task for you. Modify directory structure like below screenshot and separate the two functional components Home and about in their own component files such that, in future, if they grow with more JSX to render.

You can totally skip this if you want and move on to the next section. But performing this small task will benefit you to have an understanding of the above concepts.
The Link Component
To navigate between to web pages in HTML, there is an <a href=""></a>anchor tag available. However, using this traditional approach will lead to a browser refresh. In order to overcome this, React Router API offers a Linkcomponent that can be used to navigate to a particular URL or a component.
Let us try to create a navigation menu with this new knowledge. Import Link from react-router-dom in App.js file. Here is the modified snippet of App component.
// App.js

import React from "react"
import { BrowserRouter as Router, Route, Link } from "react-router-dom"

import Home from "./components/Home"
import About from "./components/About"

function App() {
    return (
        <Router>
            <div>
                <nav style={{ margin: 10 }}>
                    <Link to='/' style={{ padding: 10 }}>
                        Home
                    </Link>

                    <Link to='/about' style={{ padding: 10 }}>
                        About
                    </Link>
                </nav>
                <Route path='/' exact component={Home} />
                <Route path='/about' component={About} />
            </div>
        </Router>
    )
}

export default App
In the above snippet, notice that all the Links are being added before all the Route components. The styling attributes inside style are optional for now. Start the development server and visit the browser window and you will notice a navigation menu pops up at the top. Try clicking links to navigate between different components.
Wherever a Link is rendered in a React project, an anchor <a> will be rendered in the application’s HTML.
Active Links with NavLink
In React Router API, NavLink is the extended version of the Linkcomponent. You can say that is a special type of the Link that can style itself as to represent the active state when matches the current route.
To demonstrate this, first, let us replace all the Link tags with NavLink in App.js file.
// App.js
import React from "react"
import { BrowserRouter as Router, Route, NavLink } from "react-router-dom"

import Home from "./components/Home"
import About from "./components/About"

function App() {
    return (
        <Router>
            <div>
                <nav style={{ margin: 10 }}>
                    <NavLink to='/' style={{ padding: 10 }}>
                        Home
                    </NavLink>

                    <NavLink to='/about' style={{ padding: 10 }}>
                        About
                    </NavLink>
                </nav>
                <Route path='/' exact component={Home} />
                <Route path='/about' component={About} />
            </div>
        </Router>
    )
}

export default App
At this point, each NavLink link is going to behave like an ordinary Linkcomponent which means there is no change so far. To make a link active, add an activeClassName prop to that. Such as below.
<NavLink to='/' style={{ padding: 10 }} activeClassName='active'>
To set up the corresponding CSS for this to work, open App.css file and add the below.
a {
    padding: 10px;
}

a,
a:visited {
    color: blue;
}

a.active {
    color: red;
}
Do not forget to import this file inside App.js. Also, modify the about route to have an activeClassName.
import "./App.css"

// ...

return (
  {/* */}
  <nav style={{ margin: 10 }}>
      <NavLink to='/' activeClassName='active'>
          Home
      </NavLink>

      <NavLink to='/about' activeClassName='active'>
          About
      </NavLink>
  </nav>

 {/* */}
)
Go back to the browser, open develop tools like below and you will notice, at first, the Home route has a class name active.
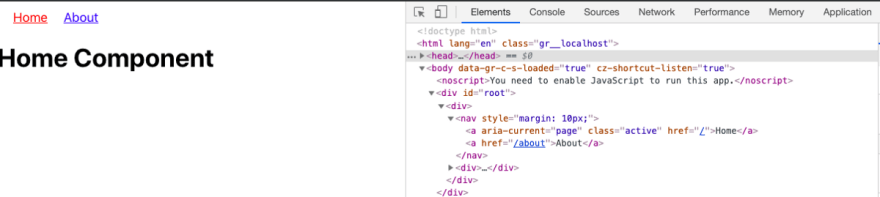
Try navigating to the About route and see what happens.

On navigating to About route did you notice that the active class name is also added to the corresponding route? However, the Home route still has the active class even though the URL matches the /about. Why?
The way NavLink works is almost similar to Route component in React Router API. To make sure that only one route has the class active state, try modifying the home route in the navigation menu, as below.
// App.js

<NavLink to='/' exact activeClassName='active'>
    Home
</NavLink>
You will get the desired output this time.
Adding Parameters to the Routes
In this section, you will learn how to create and manage dynamic routes based on a query parameter such as :id. We start by creating a static array in the App.js file that will serve as the mock data.
The idea is to demonstrate a route as /posts which displays all the posts that are coming from the array. However, each post in the array will be having an id or a unique identifier. Using that unique identifier, you will be approaching the concept of dynamic content rendering by writing the logic for URLs such as /posts/:id where :id will be represented by the specific id of a post.
To start, let us add a bunch of mock posts in the state inside a new component file called components/posts.js.
// Posts.js
import React from "react"
import "../App.css"

class Posts extends React.Component {
    state = {
        posts: [
            { id: 1, title: "Hello Blog World!" },
            { id: 2, title: "My second post" },
            { id: 3, title: "What is React Router?" }
        ]
    }

    render() {
        return (
            <div className='posts'>
                <h1>Posts List</h1>
            </div>
        )
    }
}

export default Posts
The corresponding styles to the above are added in App.css file for brevity.
.posts ul {
    list-style: none;
    margin: 0;
    margin-bottom: 20px;
    padding: 0;
}

.posts ul li {
    padding: 10px;
}

.posts a {
    text-decoration: none;
}
Now, import the newly created component inside App.js where other routes already exist.
//App.js
// ...
import Posts from "./components/Posts"

function App() {
    return (
        <Router>
            <div>
                <nav style={{ margin: 10 }}>
                    <NavLink to='/' exact activeClassName='active'>
                        Home
                    </NavLink>
                    <NavLink to='/about' activeClassName='active'>
                        About
                    </NavLink>
                    <NavLink to='/posts' activeClassName='active'>
                        Posts
                    </NavLink>
                </nav>
                <Route path='/' exact component={Home} />
                <Route path='/about' component={About} />
                <Route path='/posts' component={Posts} />
            </div>
        </Router>
    )
}

export default App
The existing navigation menu has a new route and its called Posts.

Open Posts.js to render the list of Posts and display them as a list whenever the current location in the web browser matches /posts.
import React from "react"
import { Link, Route } from "react-router-dom"
import "../App.css"

function Child({ match }) {
    return (
        <div>
            <h3>ID: {match.params.id}</h3>
        </div>
    )
}

class Posts extends React.Component {
    state = {
        posts: [
            {
                id: 1,
                title: "Hello Blog World!"
            },
            {
                id: 2,
                title: "My second post"
            },
            {
                id: 3,
                title: "What is React Router?"
            }
        ]
    }

    render() {
        const { posts } = this.state
        return (
            <div className='posts'>
                <h1>Posts List</h1>
                <ul>
                    {posts.map(post => (
                        <li key={post.id}>
                            <Link to={`/posts/${post.id}`}>{post.title}</Link>
                        </li>
                    ))}
                </ul>
                <Route path='/posts/:id' component={Child} />
            </div>
        )
    }
}

export default Posts
Also, the Child component reads anything coming from the URL parameters, such as, in the above case, the id of each post. A match object contains information about how a <Route path> matched the URL, thus, in our case, the id of each post.

Conclusion
Hopefully, by now, you are familiar with the basic concepts of how React Router library works. It is a powerful library that helps you build better React apps.
Thanks for reading. If you liked this post, share it with all of your programming buddies!
Further reading
☞ Typescript Masterclass & FREE E-Book
☞ React - The Complete Guide (incl Hooks, React Router, Redux)
☞ Modern React with Redux [2019 Update]
☞ The Complete React Developer Course (w/ Hooks and Redux)
☞ React JS Web Development - The Essentials Bootcamp
☞ React JS, Angular & Vue JS - Quickstart & Comparison
☞ The Complete React Js & Redux Course - Build Modern Web Apps
☞ React JS and Redux Bootcamp - Master React Web Development
#react-native #reactjs #web-development