Realm for React Native: The Beginner's Guide
In this tutorial, you will learn how to get started with Realm and Realm Studio, an easier alternative to SQLite, for database management in React Native
For a long time now, SQLite has been the go-to database library for mobile and cross-platform developers. It’s lightweight, serverless, and offers an easy learning curve for anyone familiar with SQL. SQLite is written in C and supports more than 30 other programming languages and platforms, including Android and React Native.
In recent years, a new competitor, Realm, has emerged. Realm is a mobile-first database that is object-oriented and intended for use in cross-platform and mobile applications.
In this post, we’ll cover the following topics:
- What is Realm?
- Features of Realm
- How does Realm differ from other databases?
- Realm schema structures
- Setting up Realm for React Native
- Using Realm with React Native
- Adding React Native Navigation
- Writing
addoperations in Realm - Writing data from a form to Realm
- Displaying a list from the realm
- Adding
updatefunctionality in Realm with Realm Studio - Importing and exporting data with Realm Studio
What is Realm?
Introduced in 2014, Realm is an open source database platform with real-time, two-way synchronization and Node.js SDK support. The now-legacy product has been downloaded over 2 billion times.
In 2019, Realm was acquired by MongoDB, who maintains it now. MongoDB Realm (or simply Realm, as it is now called) combines the old Realm database and MongoDB Stitch, the serverless platform for MongoDB, into a unified solution to enable easier development on mobile devices.
According to Realm.io, “Thousands of apps are built on Realm — from hyper-growth startups to Fortune 500 companies.”
As of today, Realm is supported by various programming languages, including:
- Objective-C
- Swift
- Java and Kotlin (both only on Android devices)
- C# (for Xamarin, Win32, and UWP)
- JavaScript/TypeScript (with Node.js and React Native)
Features of Realm
Realm offers cross-platform support and is easy to work with. It’s also faster than SQLite for normal operations and requires less code to perform regular operations than SQLite or Core Data.
Some of the features of Realm include:
- Mobile-first: Realm is the first database built from scratch to target execution inside phones, tablets, and wearable devices
- Lightweight and fast: Realm is lightweight and includes lazy loading and a zero-copy architecture, meaning that developers can work with objects directly
- Easy to scale up: Realm uses an object-oriented data model in the form of a JSON-like structure, so it doesn’t require an ORM or DAO, providing better DX
- Modern features: Realm includes encryption, JSON support, and data change notifications
- Live, real-time data: Realm offers real-time, mobile-to-cloud data sync, which helps maintain data synchronization across devices, users, and more
Developers can also use Realm to persist data on local disk storage or store it temporarily in memory based on the specific requirements of your application.
How does Realm differ from other databases?
Unlike other databases, a realm does not represent a single, application-wide database. It is not even a relational table; it can contain any number of object types essential to a given domain. The data persisted in the application by the Realm database will be stored in a default Realm file called default.realm.
There are also additional files that may be used by the database, such as files that are suffixed with .lock, i.e., default.realm.lock. The purpose of the lock file is to monitor versions of data in a realm actively being used.
Realm schema structures
The structure of a realm object is defined via a schema. An object cannot contain a property that is not described by its schema. Since we will be using TypeScript for examples, the schema will be defined in a .ts file.
Each realm makes use of a versioned schema. When that schema changes, say, if you added a new column (or “property”, in Realm jargon) or modified a column name, then you must define a migration through a new version to move object data between schema versions.
Setting up Realm for React Native
Realm included React Native support through a package that developers install as a dependency. Then, around a year ago, the @realm/react library was published, which has made using Realm in React Native much easier and better.
The rationale for publishing this can be summed up from the npm website:
Setting up Realm in a React Native application has historically been complex. Re-rendering of components when objects in the database change requires manually adding and removing listeners, which produce a lot of boilerplate code and is error-prone (if listeners properly removed on unmount). This library alleviates that by providing React hooks which return Realm data that is state aware. As a consequence, any change to the Realm data will cause components using the hook to re-render.
This library requires React Native version ≥ 0.59 and Realm v ≥ 11 to be installed on your system.
Using Realm with React Native
Let’s explore using Realm in a React Native application. There are several approaches you can choose from:
- Start from scratch
- Create a standard TypeScript-templated project and add Realm to it
- Use a ready-made Realm-TypeScript template, and then tweak it to add functionality
We’ll use the third approach. The Realm team provides a React Native template with Realm and TypeScript on their GitHub.
To begin with, you can type:
npx react-native init AwesomeRealmProject --template @realm/react-native-template-tsYou may also give a custom name to your project. Let’s use reactrealmdemo as the name.
Once the project is created, you can test it by running Metro or any other dev client from within the project folder and then, run the project:
cd reactrealmdemo

npm start (or react-native start)

npm run android
The templated Realm-React Native project is designed to add and delete tasks in a to-do list. It uses Realm for persistence and Realm React Hooks for React integration. It also supports syncing, which allows users to login and synchronize their to-do lists across multiple devices.
If you open the project to examine its files, especially package.json, you will see the packages that have been automatically installed for you.
{
  "name": "reactrealmdemo",
  "version": "0.0.1",
  "private": true,
  "scripts": {
    "android": "react-native run-android",
    "ios": "react-native run-ios",
    "start": "react-native start",
    "test": "jest",
    "lint": "eslint . --ext .js,.jsx,.ts,.tsx"
  },
  "dependencies": {
    "@realm/react": "^0.4.0",
    "react": "^18.1.0",
    "react-native": "^0.70.3",
    "react-native-get-random-values": "^1.8.0",
    "realm": "^11.0.0"
  },
  "devDependencies": {
    "@babel/core": "^7.12.9",
    "@babel/plugin-proposal-decorators": "^7.19.0",
    "@babel/runtime": "^7.12.5",
    "@react-native-community/eslint-config": "^2.0.0",
    "@realm/babel-plugin": "^0.1.0",
    "@types/jest": "^26.0.23",
    "@types/react-native": "^0.67.3",
    "@types/react-test-renderer": "^17.0.1",
    "@typescript-eslint/eslint-plugin": "^5.17.0",
    "@typescript-eslint/parser": "^5.17.0",
    "babel-jest": "^26.6.3",
    "eslint": "^7.32.0",
    "jest": "^26.6.3",
    "metro-react-native-babel-preset": "^0.72.3",
    "react-test-renderer": "^18.1.0",
    "typescript": "^4.4.4"
  },
  "resolutions": {
    "@types/react": "^17"
  },
  "jest": {
    "preset": "react-native",
    "moduleFileExtensions": [
      "ts",
      "tsx",
      "js",
      "jsx",
      "json",
      "node"
    ]
  }
}
The template application contains several crucial files and also has two versions: one for syncing data, and one which does not sync. The crucial files include:
Task.tsundermodels— defines the schema through an object model with a class namedTaskAddTaskForm.tsx— contains the code to create and add new tasks via a formTaskItem.tsxTaskList.tsx— displays a list of tasksTaskManager.tsxundercomponentsAppSync.tsxAppWrapperSync.tsxunderapp
Note that the type/class name given in the model has to be unique among object types in a Realm.
I built upon this template example to create an application that allowed me to perform CRUD operations to add, view, update, and delete movies from a list. I also wanted to incorporate navigation between screens using React Native Navigation.
Let’s initialize the project:
npx react-native init reactrealmdemo --template @realm/react-native-template-tsNext, we’ll define a Movie object model in Movie.ts:
import {Realm} from '@realm/react';
export class Movie extends Realm.Object<Movie> {
  description!: string;
  title!:string;
  releaseyear!: number;
  userId!: string;
  constructor(realm: Realm, description: string, title:string, releaseyear: number, userId?: string) {
    super(realm, {description, title, releaseyear, userId: userId || '_SYNC_DISABLED_'});
  }
}
Our index.ts under models is defined thusly:
import {createRealmContext} from '@realm/react';
import {Movie} from './Movie';
export const MovieRealmContext = createRealmContext({
  schema: [Movie]
});
The createRealmContext() method is used to create a React Context
object for a realm with a given Realm.Configuration. The Context object comprises inbuilt Hooks and a wrapper component that provides its child components with access to the Hooks to work with the realm and a context provider.
Next, if you observe the parent component of the template application, AppWrapperNonSync.tsx, you will see that it is wrapped with the RealmProvider component included in the Context object, which was returned from createRealmContext().
Here is what our AppWrapperNonSync.tsx file looks like:
...
<SafeAreaView style={styles.screen}>
      <RealmProvider>
        <AppNonSync />
      </RealmProvider>
    </SafeAreaView>
The RealmProvider provides your main component and its children access to the configured Realm through the inbuilt Hooks useRealm(), useObject(), and useQuery().
Adding React Native Navigation
In the template app, the code for actually writing to the realm and retrieving/deleting from the realm is enclosed in TaskManager.ts, which is called in the AppNonSync.ts file.
return <TaskManager tasks={tasks} />;However, I followed a different approach after playing around with the code. After creating the Movie object model, I installed various dependencies for navigation and gesture handling.
npm install react-navigation react-native-gesture-handler react-native-safe-area-context @react-native-community/masked-view react-native-screens react-native-reanimated react-navigation-stack react-navigation/native-stackSince I want to use React Native Navigation with Realm in my project, I created a RootStackParams.ts file to hold the navigation screen names.
Here’s what my RootStackParams.ts file looks like:
export type RootStackParamList = {
    MainScreen: undefined;
    HomeScreen: undefined;
    NewAddMovieScreen: undefined;
    TestUpdateScreen: undefined;
    UpdateMovieScreen: undefined;
    DeleteMovieScreen:undefined;
    ViewMovieScreen:undefined};
I called these in my App.tsx, the entry point of my project, and I have wrapped my main component between <RealmProvider> tags so that all child components will get access to Realm’s inbuilt Hooks. Observe the lines in our App.tsx file that are in bold below:
import React from 'react';
import {NavigationContainer} from '@react-navigation/native';
import {createStackNavigator} from '@react-navigation/stack';
import 'react-native-gesture-handler';
import {RootStackParamList} from './RootStackParams';
import HomeScreen from './screens/HomeScreen';
import NewAddMovieScreen from './screens/NewAddMovie';
import ViewMovieScreen from './screens/ViewMovieScreen';
import { MovieRealmContext } from './models';
import DeleteMovieScreen from './screens/DeleteMovieScreen';
const Stack = createStackNavigator<RootStackParamList>();

export default function App() {
  const {RealmProvider} = MovieRealmContext;
  return (
    <NavigationContainer>
      <RealmProvider>
      <Stack.Navigator>
      <Stack.Screen name="HomeScreen" component={HomeScreen} />
      <Stack.Screen name="NewAddMovieScreen" component={NewAddMovieScreen}/>
      <Stack.Screen name="ViewMovieScreen" component={ViewMovieScreen} />
      <Stack.Screen name="DeleteMovieScreen" component={DeleteMovieScreen} />
      </Stack.Navigator>
      </RealmProvider>
    </NavigationContainer>
  );
}
Writing add operations in Realm
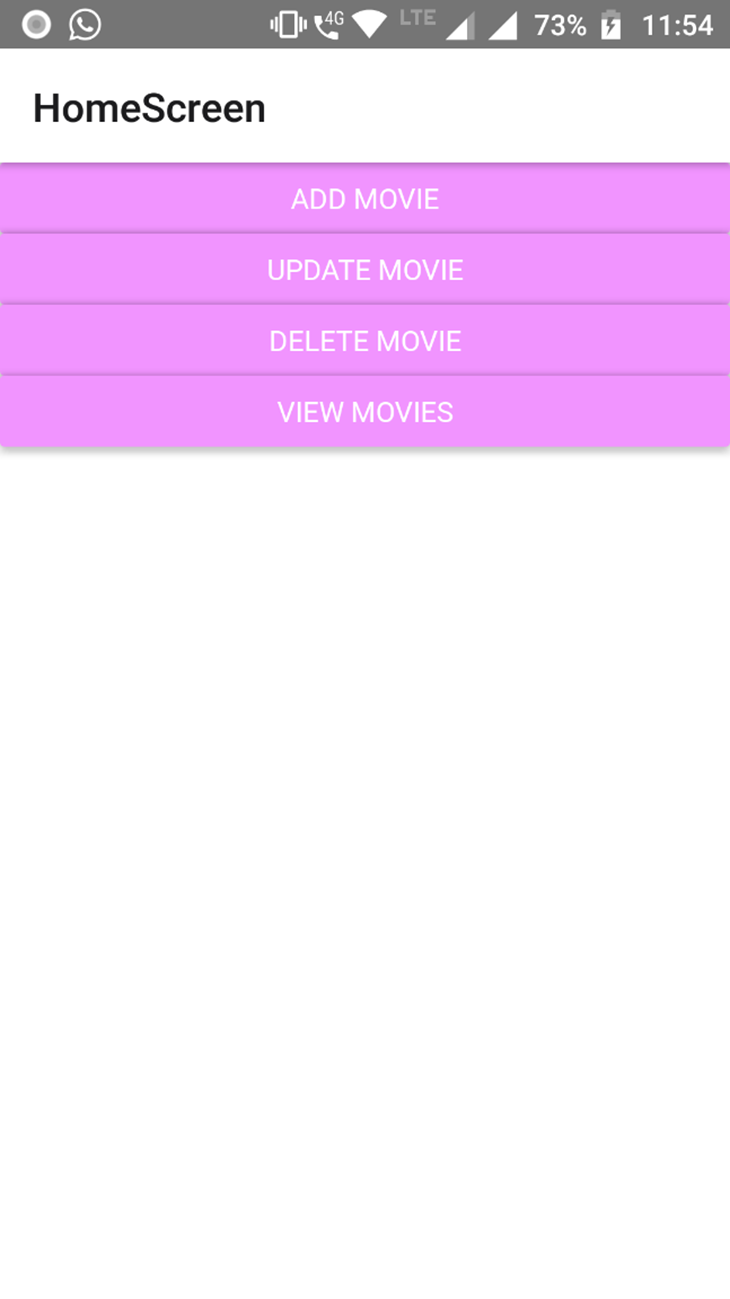
Within HomeScreen, I configured the UI so it would take us to different screens as we perform CRUD operations.
In AddMovieScreen.tsx below, I reused some of the code present throughout various files in the template application, mostly AddTaskForm.tsx and TaskManager.tsx, to create a single screen that would perform the add operation.
import { View, StyleSheet, ScrollView, KeyboardAvoidingView, TextInput, Text, Pressable, Platform } from 'react-native';
import { StackNavigationProp } from '@react-navigation/stack';
import { RootStackParamList } from '../RootStackParams';
import { Movie } from '../models/Movie';
import colors from '../styles/colors';
import { shadows } from '../styles/shadows';
import { buttonStyles } from '../styles/button';
import { useNavigation } from '@react-navigation/native';
import { MovieRealmContext } from '../models';
import React, { useState, useCallback } from 'react';
type addScreenProp = StackNavigationProp<RootStackParamList, 'NewAddMovieScreen'>;
const { useRealm } = MovieRealmContext;
const AddMovieScreen = () => {
const realm = useRealm();
const handleAddMovie = useCallback(
(description: string, title: string, releaseyear: number, userId: string): void => {
if (!description) {
return;
}
realm.write(() => {
return new Movie(realm, description, title, releaseyear, userId);
});
},
[realm],
);
return (
<View style={styles.content}>
{<AddMovieForm onSubmit={handleAddMovie} />}
</View>
);
};
type AddMovieFormProps = {
onSubmit: (description: string, title: string, releaseyear: number, userId: string) => void;
};
export const AddMovieForm: React.FC<AddMovieFormProps> = ({ onSubmit }) => {
const [description, setDescription] = useState('');
const [title, setTitle] = useState('');
const [releaseyear, setYear] = useState('');
const [userId] = useState('');
const navigation = useNavigation<addScreenProp>();
const convertdate = (textyear: string) => {
var dt = new Date(textyear);
return dt.getFullYear();
}
const handleSubmit = () => {
onSubmit(description, title,
convertdate(releaseyear), userId);
setDescription('');
setTitle('');
setYear('');
};
return (
<View style={styles.listContainer}>
<ScrollView keyboardShouldPersistTaps="handled" >
<KeyboardAvoidingView
behavior="padding"
style={{ flex: 1, justifyContent: 'space-
between' }}>
<TextInput
value={title}
placeholder="Enter new movie title"
onChangeText={setTitle}
autoCorrect={false}
autoCapitalize="none"
style={styles.textInput}
/>
<TextInput
value={description}
placeholder="Enter new movie description"
onChangeText={setDescription}
autoCorrect={false}
autoCapitalize="none"
style={styles.textInput}
/>
<TextInput
value={releaseyear}
placeholder="Enter new movie year"
onChangeText={setYear}
maxLength={4}
keyboardType="numeric"
style={styles.textInput}
/>
<View >
<Pressable onPress={handleSubmit}
style={styles.submit}>
<Text>Submit</Text>
</Pressable>
</View>
<Pressable style={styles.button} onPress={()
=> navigation.navigate('HomeScreen')}>
<Text style={styles.buttontext}>Go
Home</Text>
</Pressable>
</KeyboardAvoidingView>
</ScrollView>
</View>
);
};
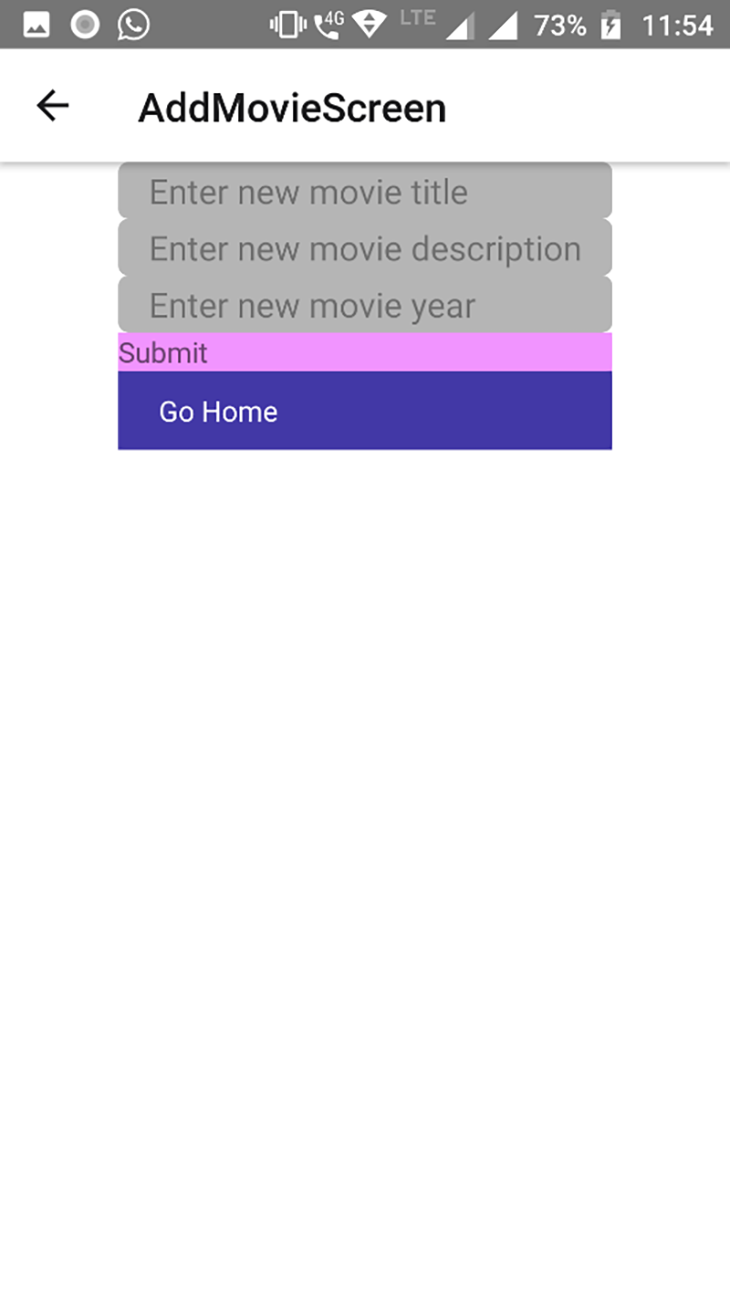
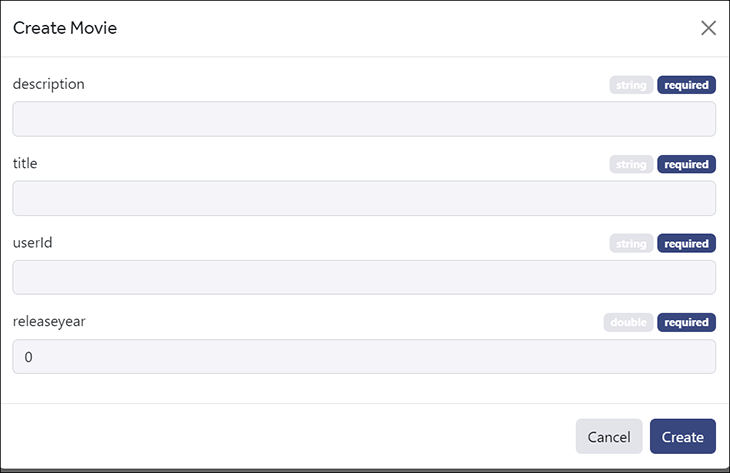
export default AddMovieScreen;In this file, I included code to display a form that accepts movie details via user input. We use the inbuilt useRealm() Hook to retrieve the currently open Realm instance. The data from the form fields is then passed to the method handleAddMovie(), which in turn is wrapped around a callback.
Writing data from a form to Realm
The data from the form is written to the realm using realm.write(). A write operation in Realm is a callback function passed to a Realm instance function, and enables you to create, modify, and delete Realm objects. This means that even to delete data in a realm, you will be calling realm.write().
Upon testing my project on a real device (since it was faster than an Android emulator), I opened the app to the HomeScreen.
Clicking Add Movie brings me to this screen:
Likewise, in DeleteMovieScreen.tsx, I added code to perform delete operations in the realm.
import React from 'react';
import {View, StyleSheet,  Pressable, Text, FlatList, SafeAreaView} from 'react-native';
import {Movie} from '../models/Movie';
import {MovieRealmContext} from '../models';
import {StackNavigationProp} from '@react-navigation/stack';
import {RootStackParamList} from '../RootStackParams';
import { useNavigation } from '@react-navigation/native';
import colors from '../styles/colors';
const {useRealm, useQuery} = MovieRealmContext;
type delScreenProp = StackNavigationProp<RootStackParamList, 'DeleteMovieScreen'>;

function DeleteMovieScreen() {
  const navigation = useNavigation<delScreenProp>();
  const realm = useRealm();
  const movies = useQuery(Movie);


  return (
    <SafeAreaView style={styles.listContainer}>
      <View style={{ flexDirection: 'row', justifyContent: 'center', margin: 10 }}>
       </View>
        <FlatList data={movies.sorted("releaseyear")} renderItem={({ item }) => {
        return (
          <View style={{ flexDirection: 'row', justifyContent: 'center', margin: 10 }}>
            <Text style={styles.text} >{item.title}</Text>
            <Pressable style={styles.button}
              onPress={() => {
                realm.write(() => {
                  realm.delete(item)
                })
              }} ><Text style={styles.buttontext}>{"Delete "}</Text></Pressable>
          </View>
        );
      }} ></FlatList>
      <Pressable style={styles.button} onPress={() => navigation.navigate('HomeScreen')}>
        <Text style={styles.buttontext}>Go Home</Text>
        </Pressable>
    </SafeAreaView >
  );
}
export default DeleteMovieScreen;
Observe the lines in bold above. The statement realm.delete() is included within a realm.write(). The outcome of this screen will be a sorted list of existing movies with a Delete button and trash can icon next to each movie title.

Clicking the Delete button will delete the specific record for the selected movie title from the realm.
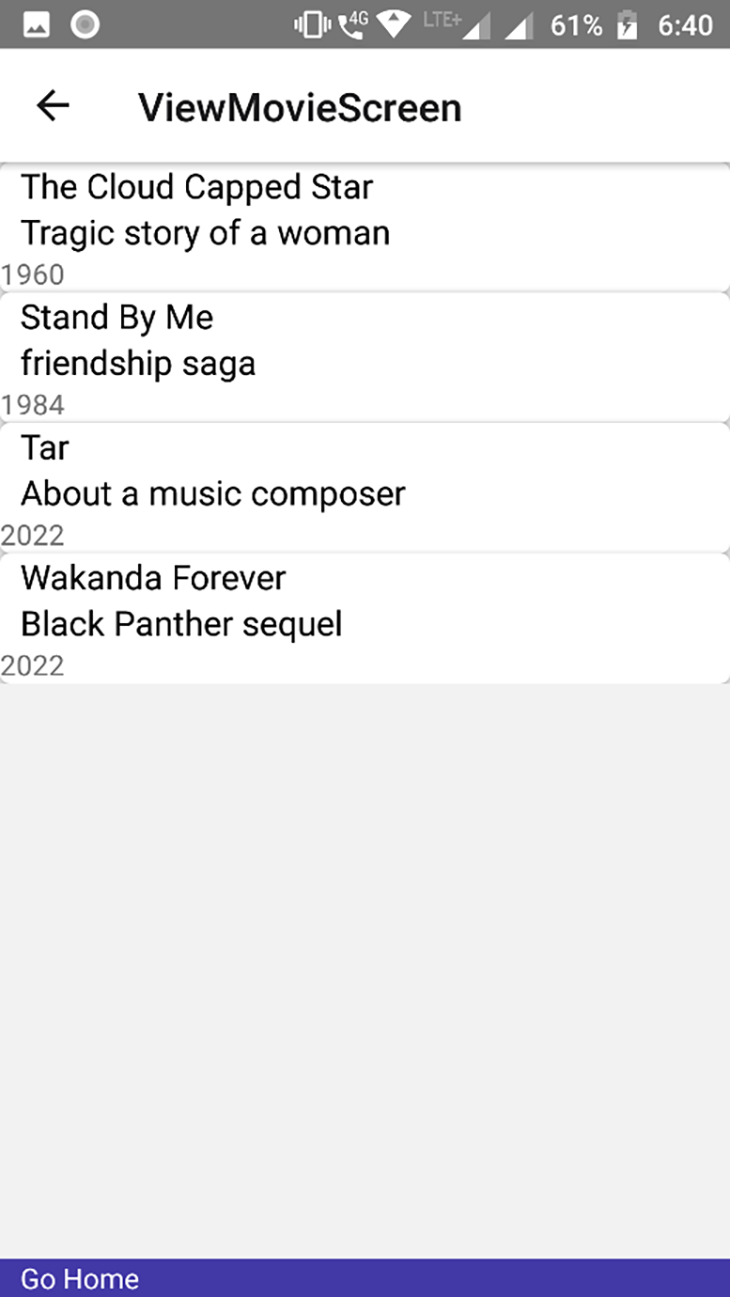
Displaying a list from the realm
In ViewMovieScreen.tsx, I wrote code to display a list of movies from the realm. The inbuilt useQuery() Hook will return a collection of Realm objects of a given type. It can be either invoked with the Object Schema class or the model name given as a string. The useQuery() Hook monitors updates to any objects in the collection and re-renders the component on any change to the query results.
import React from 'react';
import { View, StyleSheet, Pressable, Text, FlatList } from 'react-native';
import { Movie } from '../models/Movie';
import { MovieRealmContext } from '../models';
import { StackNavigationProp } from '@react-navigation/stack';
import { RootStackParamList } from '../RootStackParams';
import { useNavigation } from '@react-navigation/native';
/* import { ViewMovieItem } from '../components/ViewMovieItem'; */
import { shadows } from '../styles/shadows';
import colors from '../styles/colors';

type updateScreenProp = StackNavigationProp<RootStackParamList, 'ViewMovieScreen'>;

function ViewMovieScreen() {
  const navigation = useNavigation<updateScreenProp>();
  const { useQuery } = MovieRealmContext;
  const result = useQuery(Movie);
  const movies = result.sorted("releaseyear");
  return (
    <View style={styles.listContainer}>
      <FlatList
        data={movies}
        renderItem={({ item }) => (
          <ViewMovieItem
            movie={item}
          />
        )}
      />
      <Pressable style={styles.button} onPress={() => navigation.navigate('HomeScreen')}>
        <Text style={styles.buttontext}>Go Home</Text>
      </Pressable>
    </View>
  );
}

type ViewMovieItemProps = {
  movie: Movie & Realm.Object;
};

export const ViewMovieItem = React.memo<ViewMovieItemProps>(
  ({ movie }) => {
    return (
      <View style={styles.movie}>
        <View style={styles.movieContainer}>
          <Text numberOfLines={1} style={styles.text}>
            {movie.title}
          </Text>
          <Text numberOfLines={1} style={styles.text}>
            {movie.description}
          </Text>
          <Text numberOfLines={1} >
            {movie.releaseyear}
          </Text>
        </View>
      </View>
    );
  },
);
export default ViewMovieScreen;
The output is a list of movie details sorted by release year.
If you change the schema after the app has been executed and data already exists in the database, you must migrate the schema or increase the schema version. You can do this in the index.ts file, as shown here:
import {createRealmContext} from '@realm/react';
import {Movie} from './Movie';
export const MovieRealmContext = createRealmContext({
  schema: [Movie],
  schemaVersion:2
});
A sample use case for schema change would be changing the name or type of a property. In such a case, increasing the schema version is the easiest way to continue with executing the app. If you don’t do this, the application fails to run and raises an error about migration.
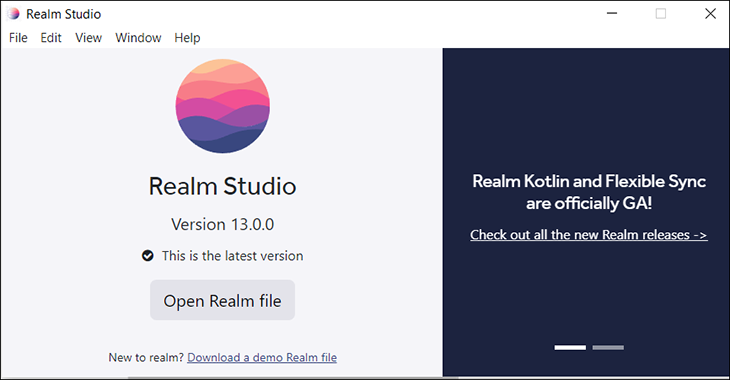
Adding update functionality in Realm with Realm Studio
For the Update task of CRUD, I decided to go offbeat. Instead of creating a screen similar to the View, Delete, and Add screens we built to manipulate realm data, I used MongoDB’s Realm Studio v 13.0 to more easily manage my Realm database. Opening existing realms and adding and modifying data in them becomes a lot simpler with a GUI-based tool.
To achieve the Update task using Realm Studio, let’s first locate our Realm file. You can determine the local path of the Realm file on your device or simulator using the below code:
Realm.open({}).then(realm => {
    console.log("Realm is located at: " + realm.path);
});
For example, in the current project, the path would be:
/data/data/com.reactrealmdemo/files/default.realmWe can then open this file through Android Studio’s Device File Explorer tool, but only when then app is running. Ensure that you have configured Android Studio as a framework for the project regardless of which IDE you used to edit your project files. For instance, I used VS Code to edit my project files, so when I opened the project for the first time in Android Studio, I was prompted to configure the framework.
Once you’re past that step and have opened the Device File Explorer, scroll down until you find your realm file.
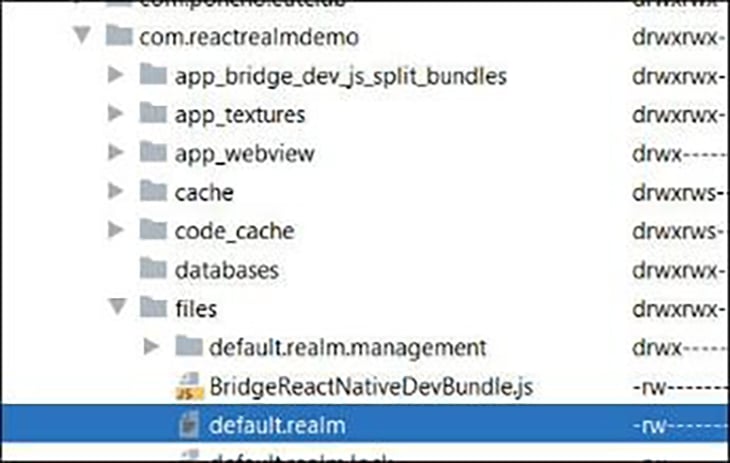
Right-click default.realm and click Save As to save the realm file to your disk. Once this is done, you can use Realm Studio to open, view, and edit the file.
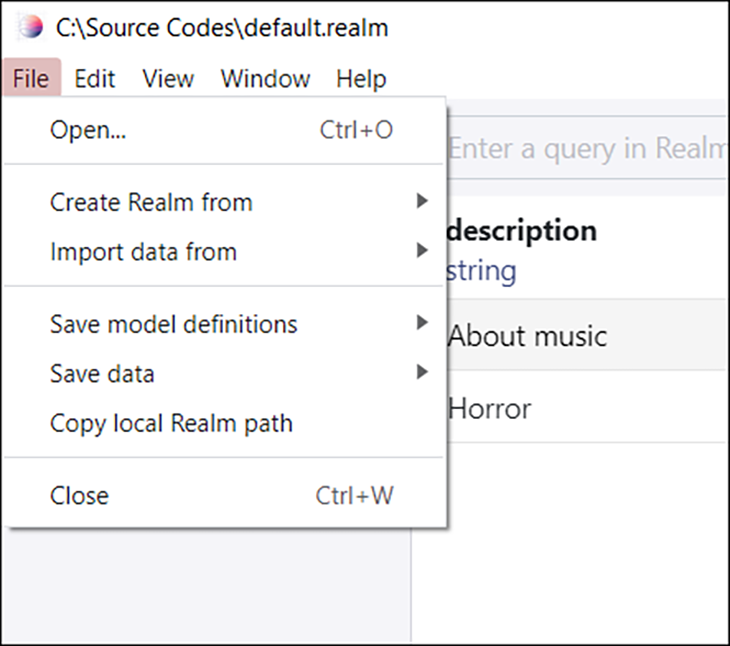
Launch Realm Studio and click Open Realm file on its main screen. Select the location where you just saved the file.
Here is the default.realm file I had saved to C:\Source Codes. Our movie data is now visible in the GUI tool. I can click any property (column) and make edits.

I can even add new properties, delete existing records, and so on.
Note that this data is now present on the local disk and not on the emulator or the device where the project was running, so the original realm file remains unaffected by any changes we make here, unless we replace that file with an updated one.
It is also possible to set the realm location and name to a different one than the default one before it is created for the first time using Realm.Configuration.
Importing and exporting data with Realm Studio
Realm Studio also allows you to import and export realm data. You can import data from any CSV or export existing realm data to a CSV.
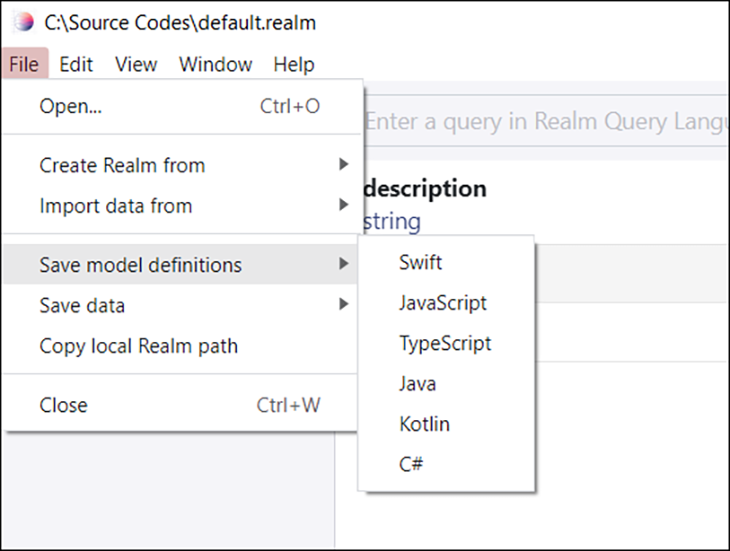
You can also save your model definitions to specific formats and reuse them in other applications.
You can save data to JSON format or another local realm file.
Conclusion
Thus, using Realm with React Native is quite easy, more so with the @realm/react library. A developer can make good use of this library, its ready-made templates, and Realm Studio to handle data storage and manipulation tasks quickly and efficiently in mobile applications.
Some final do’s and don’ts when working with Realm for React Native:
- Be aware of the difference between Realm database (now legacy/obsolete) and MongoDB Realm (current and latest Realm)
- Using the @react/realm library makes working with realms much easier and faster
- Realm Studio is a GUI tool that lets you quickly view, update, and delete data in realms and more
- Don’t delete a realm file when the app is running
Useful links
Source: https://blog.logrocket.com
#realm #reactnative