In this article, you will learn the basic concepts of React. After that, you will have the chance to see React in action while creating a simple Q&A (Questions & Answers) app that relies on a backend API.
If needed, you can check this GitHub repository to check the code that supports this article. Have fun!
Prerequisites
Although not mandatory, you should know a few things about JavaScript, HTML, and CSS before diving into this React app tutorial. If you do not have previous experience with these technologies, you might not have an easy time following the instructions in this article, and it might be a good idea to step back and learn about them first. If you do have previous experience with web development, then stick around and enjoy the article.
Also, you will need to have Node.js and NPM installed in your development machine. If you don’t have these tools yet, please, read and follow the instructions on the official documentation to install Node.js. NPM, which stands for Node Package Manager, comes bundled into the default Node.js installation.
Lastly, you will need access to a terminal in your operating system. If you are using MacOS or Linux, you are good to go. If you are on Windows, you will probably be able to use PowerShell without problems.
React Introduction
React is a JavaScript library that Facebook created to facilitate the development of Single-Page Applications (a.k.a. SPAs). Since Facebook open-sourced and announced React, this library became extremely popular all around the world and gained mass adoption by the developer community. Nowadays, although still mainly maintained by Facebook, other big companies (like Airbnb, Auth0, and Netflix) embraced this library and are using it to build their products. If you check this page, you will find a list with more than a hundred companies that use React.
In this section, you will learn about some basic concepts that are important to keep in mind while developing apps with React. However, you have to be aware that the goal here is not to give you a complete explanation of these topics. The goal is to give you enough context so you can understand what is going on while creating your first React application.
For more information on each topic, you can always consult the official React documentation.
React and the JSX Syntax
First and foremost, you need to know that React uses a funny syntax called JSX. JSX, which stands for JavaScript XML, is a syntax extension to JavaScript that enables developers to use XML (and, as such, HTML) to describe the structure of the user interface. This section won’t get into the details of how JSX really works. The idea here is to give you a heads up, so you don’t get surprised when you see this syntax in the next sections.
So, when it comes to JSX, it is perfectly normal to see things like this:
function showRecipe(recipe) {
  if (!recipe) {
    return <p>Recipe not found!</p>;
  }
  return (
    <div>
      <h1>{recipe.title}</h1>
      <p>{recipe.description}</h1>
    </div>
  );
}
In this case, the showRecipe function is using the JSX syntax to show the details of a recipe (i.e., if the recipe is available) or a message saying that the recipe was not found. If you are not familiar with this syntax, don’t worry. You will get used to it quite soon. Then, if you are wondering why React uses JSX, you can read their official explanation here.
“React embraces the fact that rendering logic is inherently coupled with other UI logic: how events are handled, how the state changes over time, and how the data is prepared for display.” - Introducing JSX### React Components
Components in React are the most important pieces of code. Everything you can interact with in a React application is (or is part of) a component. For example, when you load a React application, the whole thing will be handled by a root component that is usually called App. Then, if this application contains a navigation bar, you can bet that this bar is defined inside a component called NavBar or similar. Also, if this bar contains a form where you can input a value to trigger a search, you are probably dealing with another component that handles this form.
The biggest advantage of using components to define your application is that this approach lets you encapsulate different parts of your user interface into independent, reusable pieces. Having each part on its own component facilitates reasoning, testing, and reusing each piece easily. When you start finding your bearings with this approach, you will see that having a tree of components (that’s what you get when you divide everything into components) also facilitates state propagation.
Defining Components in React
Now that you learned that React applications are nothing more than a tree of components, you have to learn how to create components in React. So, basically, there are two types of React components that you can create: Functional Components and Class Components.
The difference between these two types is that functional components are simply “dumb” components that do not hold any internal state (making them great to handle presentation), and class components are more complex components that can hold internal state. For example, if you are creating a component that will only show the profile of the user that is authenticated, you can create a functional component as follows:
function UserProfile(props) {
  return (
    <div className="user-profile">
      <img src={props.userProfile.picture} />
      <p>{props.userProfile.name}</p>
    </div>
  );
}
There is nothing particularly interesting about the component defined above as no internal state is handled. As you can see, this component simply uses a userProfile that was passed to it to define a div element that shows the user’s picture (the img element) and their name (inside the p element).
However, if you are going to create a component to handle things that need to hold some state and perform more complex tasks, like a subscription form, you will need a class component. To create a class component in React, you would proceed as follows:
class SubscriptionForm extends React.Component {
  constructor(props) {
    super(props);

    this.state = {
      acceptedTerms: false,
      email: '',
    };
  }

  updateCheckbox(checked) {
    this.setState({
      acceptedTerms: checked,
    });
  }

  updateEmail(value) {
    this.setState({
      email: value,
    });
  }

  submit() {
    // ... use email and acceptedTerms in an ajax request or similar ...
  }

  render() {
    return (
      <form>
        <input
          type="email"
          onChange={(event) => {this.updateEmail(event.target.value)}}
          value={this.state.email}
        />
        <input
            type="checkbox"
            checked={this.state.acceptedTerms}
            onChange={(event) => {this.updateCheckbox(event.target.checked)}}
          />
        <button onClick={() => {this.submit()}}>Submit</button>
      </form>
    )
  }
}
As you can see, this new component is handling way more stuff than the other one. For starters, this component is defining three input elements (actually, two input tags and one button, but the button is also considered an input element). The first one enables users to input their email addresses. The second one is a checkbox where users can define if they agree or not to some arbitrary terms. The third one is a button that users will have to click to end the subscription process.
Also, you will notice that this component is defining an internal state (this.state) with two fields: acceptedTerms and email. In this case, the form uses the acceptedTerms field to represent the choice of the users in relation to the fictitious terms and the email field to hold their email addresses. Then, when users click on the submit button, this form would use its internal state to issue an AJAX request.
So, basically speaking, if you need a component to handle dynamic things that depend on an internal state, like user input, you will need a class component. However, if you need a component that won’t perform any logic internally that relies on an internal state, you can stick with a functional component.
“React embraces the fact that rendering logic is inherently coupled with other UI logic: how events are handled, how the state changes over time, and how the data is prepared for display.” - Introducing JSX### Re-Rendering React Components
Another very important concept that you have to understand is how and when React re-renders components. Luckily, this is an easy concept to learn. There are only two things that can trigger a re-render in a React component: a change to the props that the component receives or a change to its internal state.
Although the previous section didn’t get into the details about how to change the internal state of a component, it did show how to achieve this. Whenever you use a stateful component (i.e., a class component), you can trigger a re-render on it by changing its state through the setState method. What is important to keep in mind is that you should not change the state field directly. You have to call the setState method with the new desired state:
// this won't trigger a re-render:
updateCheckbox(checked) {
  this.state.acceptedTerms = checked;
}

// this will trigger a re-render:
this.setState({
  acceptedTerms: checked,
});
In other words, you have to treat this.state as if it were immutable.
“React embraces the fact that rendering logic is inherently coupled with other UI logic: how events are handled, how the state changes over time, and how the data is prepared for display.” - Introducing JSX
Now, when it comes to a stateless component (i.e., a functional component), the only way to trigger a re-render is to change thepropsthat are passed to it. In the last section, you didn’t have the chance to see the whole context of how a functional component is used nor whatpropsreally are. Luckily again, this is another easy topic to grasp. In React,propsare nothing more than the properties (thus its name) passed to a component.
So, in the UserProfile component defined in the last section, there was only one property being passed/used: userProfile. In that section, however, there was a missing piece that was responsible for passing properties (props) to this component. In that case, the missing piece was where and how you use that component. To do so, you just have to use your component as if it were an HTML element (this is a nice feature of JSX) as shown here:
import React from 'react';
import UserProfile from './UserProfile';

class App extends () {
  constructor(props) {
    super(props);
    this.state = {
      user: {
        name: 'Bruno Krebs',
        picture: 'https://cdn.auth0.com/blog/profile-picture/bruno-krebs.png',
      },
    };
  }

  render() {
    return (
      <div>
        <UserProfile userProfile={this.state.user} />
      </div>
    );
  }
}
That’s it. This is how you define and pass props to a child component. Now, if you change the user in the parent component (App), this will trigger a re-render in the whole component and, subsequently, it will change the props being passed to UserProfile triggering a re-render on it as well.
“React embraces the fact that rendering logic is inherently coupled with other UI logic: how events are handled, how the state changes over time, and how the data is prepared for display.” - Introducing JSX## What You Will Build with React
All right! With the concepts describe in the last section in mind, you are ready to start developing your first React application. In the following sections, you will build a simple Q&A (Question & Answer) app that will allow users to interact with each other asking and answering questions. To make the whole process more realistic, you will use Node.js and Express to create a rough backend API. Don’t worry if you are not familiar with developing backend apps with Node.js. This is going to be a very straightforward process, and you will be up and running in no time.
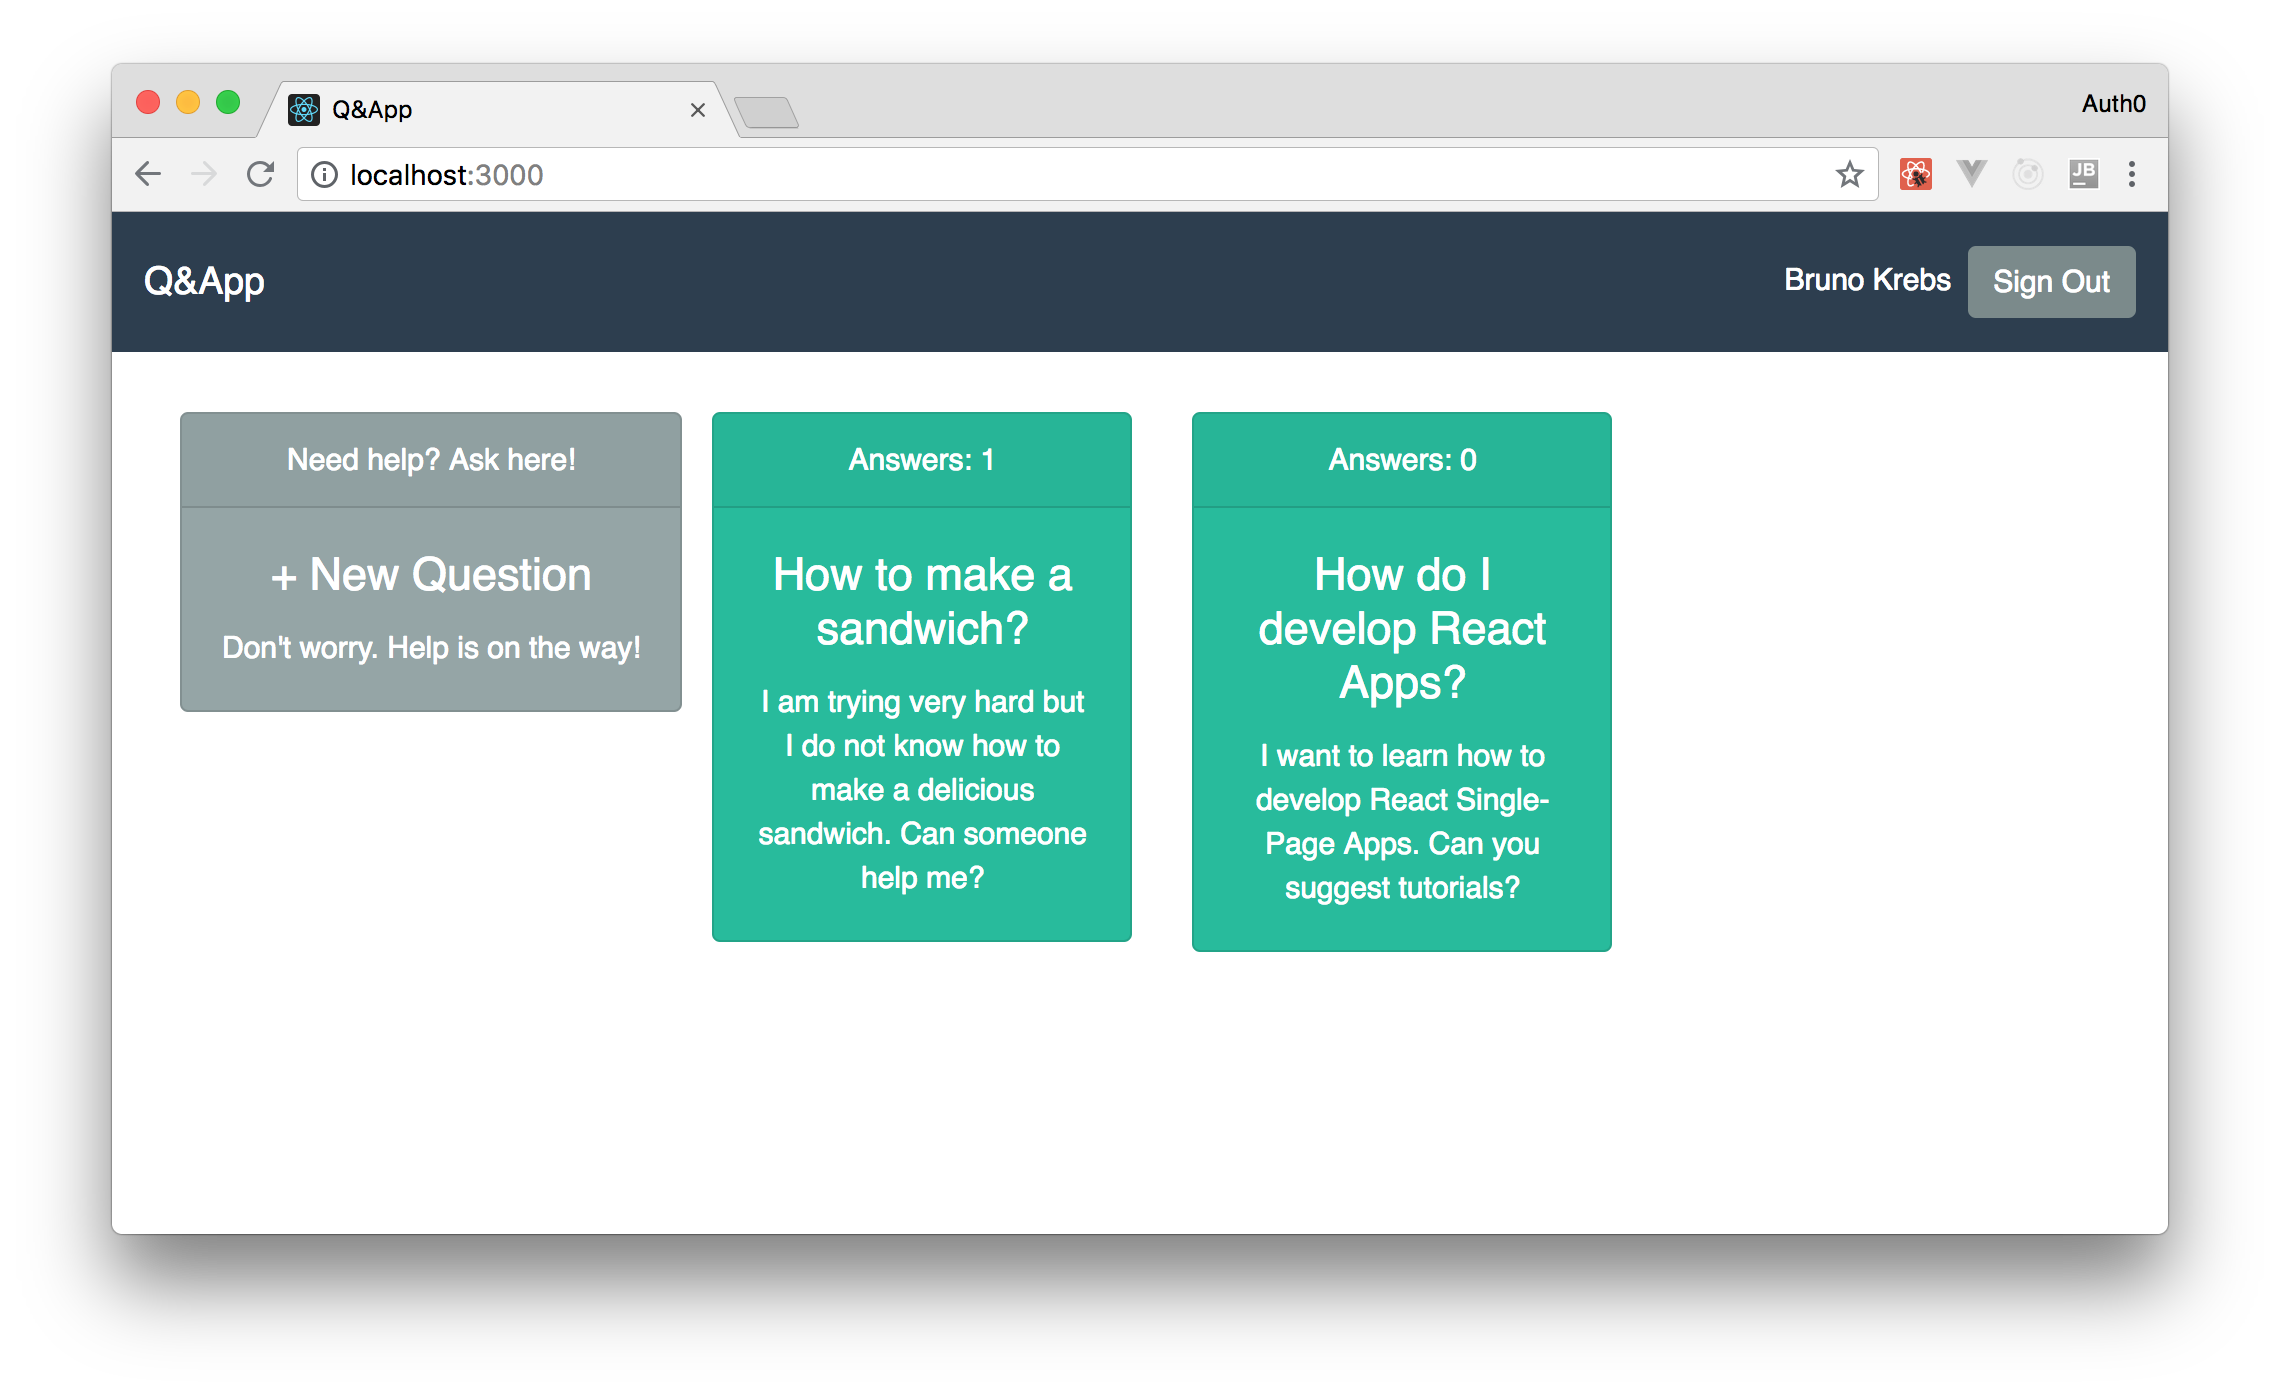
At the end of this tutorial, you will have a React app supported by a Node.js backend that looks like this:
Developing a Backend API with Node.js and Express
Before diving into React, you will quickly build a backend API to support your Q&A app. In this section, you will use Express alongside with Node.js to create this API. If you don’t know what Express is or how it works, don’t worry, you don’t need to get into its details now. Express, as stated by its official documentation, is an unopinionated, minimalist web framework for Node.js. With this library, as you will see here, you can quickly build apps to run on servers (i.e., backend apps).
So, to get things started, open a terminal in your operating system, move to a directory where you create your projects, and issue the following commands:
# create a directory for your project
mkdir qa-app

# move into it
cd qa-app

# create a directory for your Express API
mkdir backend

# move into it
cd backend

# use NPM to start the project
npm init -y
The last command will create a file called package.json inside your backend directory. This file will hold the details (like the dependencies) of your backend API. Then, after these commands, run the following one:
npm i body-parser cors express helmet morgan
This command will install five dependencies in your project:
[body-parser](https://github.com/expressjs/body-parser "body-parser"): This is a library that you will use to convert the body of incoming requests into JSON objects.[cors](https://github.com/expressjs/cors "cors"): This is a library that you will use to configure Express to add headers stating that your API accepts requests coming from other origins. This is also known as Cross-Origin Resource Sharing (CORS).[express](https://github.com/expressjs/express "express"): This is Express itself.[helmet](https://github.com/helmetjs/helmet "helmet"): This is a library that helps to secure Express apps with various HTTP headers.[morgan](https://github.com/expressjs/morgan "morgan"): This is a library that adds some logging capabilities to your Express app.
“React embraces the fact that rendering logic is inherently coupled with other UI logic: how events are handled, how the state changes over time, and how the data is prepared for display.” - Introducing JSX
After installing these libraries, you will be able to see that NPM changed yourpackage.jsonfile to include them in thedependenciesproperty. Also, you will see a new file calledpackage-lock.json. NPM uses this file to make sure that anyone else using your project (or even yourself in other environments) will always get versions compatible with those that you are installing now.
Then, the last thing you will need to do is to develop the backend source code. So, create a directory called src inside your backend directory and create a file called index.js inside this new directory. In this file, you can add the following code:
//import dependencies
const express = require('express');
const bodyParser = require('body-parser');
const cors = require('cors');
const helmet = require('helmet');
const morgan = require('morgan');

// define the Express app
const app = express();

// the database
const questions = [];

// enhance your app security with Helmet
app.use(helmet());

// use bodyParser to parse application/json content-type
app.use(bodyParser.json());

// enable all CORS requests
app.use(cors());

// log HTTP requests
app.use(morgan('combined'));

// retrieve all questions
app.get('/', (req, res) => {
  const qs = questions.map(q => ({
    id: q.id,
    title: q.title,
    description: q.description,
    answers: q.answers.length,
  }));
  res.send(qs);
});

// get a specific question
app.get('/:id', (req, res) => {
  const question = questions.filter(q => (q.id === parseInt(req.params.id)));
  if (question.length > 1) return res.status(500).send();
  if (question.length === 0) return res.status(404).send();
  res.send(question[0]);
});

// insert a new question
app.post('/', (req, res) => {
  const {title, description} = req.body;
  const newQuestion = {
    id: questions.length + 1,
    title,
    description,
    answers: [],
  };
  questions.push(newQuestion);
  res.status(200).send();
});

// insert a new answer to a question
app.post('/answer/:id', (req, res) => {
  const {answer} = req.body;

  const question = questions.filter(q => (q.id === parseInt(req.params.id)));
  if (question.length > 1) return res.status(500).send();
  if (question.length === 0) return res.status(404).send();

  question[0].answers.push({
    answer,
  });

  res.status(200).send();
});

// start the server
app.listen(8081, () => {
  console.log('listening on port 8081');
});
To keep things short, the following list briefly explains how things work in this file (also, be sure to check the comments in the code above):
[body-parser](https://github.com/expressjs/body-parser "body-parser"): This is a library that you will use to convert the body of incoming requests into JSON objects.[cors](https://github.com/expressjs/cors "cors"): This is a library that you will use to configure Express to add headers stating that your API accepts requests coming from other origins. This is also known as Cross-Origin Resource Sharing (CORS).[express](https://github.com/expressjs/express "express"): This is Express itself.[helmet](https://github.com/helmetjs/helmet "helmet"): This is a library that helps to secure Express apps with various HTTP headers.[morgan](https://github.com/expressjs/morgan "morgan"): This is a library that adds some logging capabilities to your Express app.
With this file in place, you are good to go. To run your app, just issue the following command:
# from the qa-app directory
node src
Then, to test if everything is really working, open a new terminal and issue the following commands:
# issue an HTTP GET request
curl localhost:8081

# issue a POST request
curl -X POST -H 'Content-Type: application/json' -d '{
  "title": "How do I make a sandwich?",
  "description": "I am trying very hard, but I do not know how to make a delicious sandwich. Can someone help me?"
}' localhost:8081

curl -X POST -H 'Content-Type: application/json' -d '{
  "title": "What is React?",
  "description": "I have been hearing a lot about React. What is it?"
}' localhost:8081

# re-issue the GET request
curl localhost:8081
“React embraces the fact that rendering logic is inherently coupled with other UI logic: how events are handled, how the state changes over time, and how the data is prepared for display.” - Introducing JSX
The first command will trigger an HTTP GET request that will result in an empty array being printed out ([]). Then, the second and the third commands will issue POST requests to insert two questions into your API, and the fourth command will issue another GET request to verify if these questions were properly inserted.
If you manage to get the expected results, leave your server running and move on to the next section.
Developing Applications with React
With your backend API up and running, you are finally ready to start developing your React application. Not that long ago, developers willing to create apps with React would have a hard time setting up all the tools needed (e.g., webpack) to scaffold a React application. However (and luckily), the scenario has changed after Facebook published a tool called Create React App.
With this tool, you can scaffold a new React application with just one command. As such, to create your React app, open a new terminal and go to the same directory where you created the backend Node.js app (i.e., from the qa-app directory). From there, issue the following command:
# the npx command was introduced on npm@5.2.0
npx create-react-app frontend
This will make NPM download and run create-react-app in a single command, passing to it frontend as the desired directory for your new application. The process involved in scaffolding a new application, as you will see after running the command above, is not that simple. The tool even needs a bunch of seconds (or a couple of minutes depending on your internet connection) to create the whole thing. However, when this tool finishes, you can issue the following commands to run your React app:
# move into the new directory
cd frontend
# start your React app
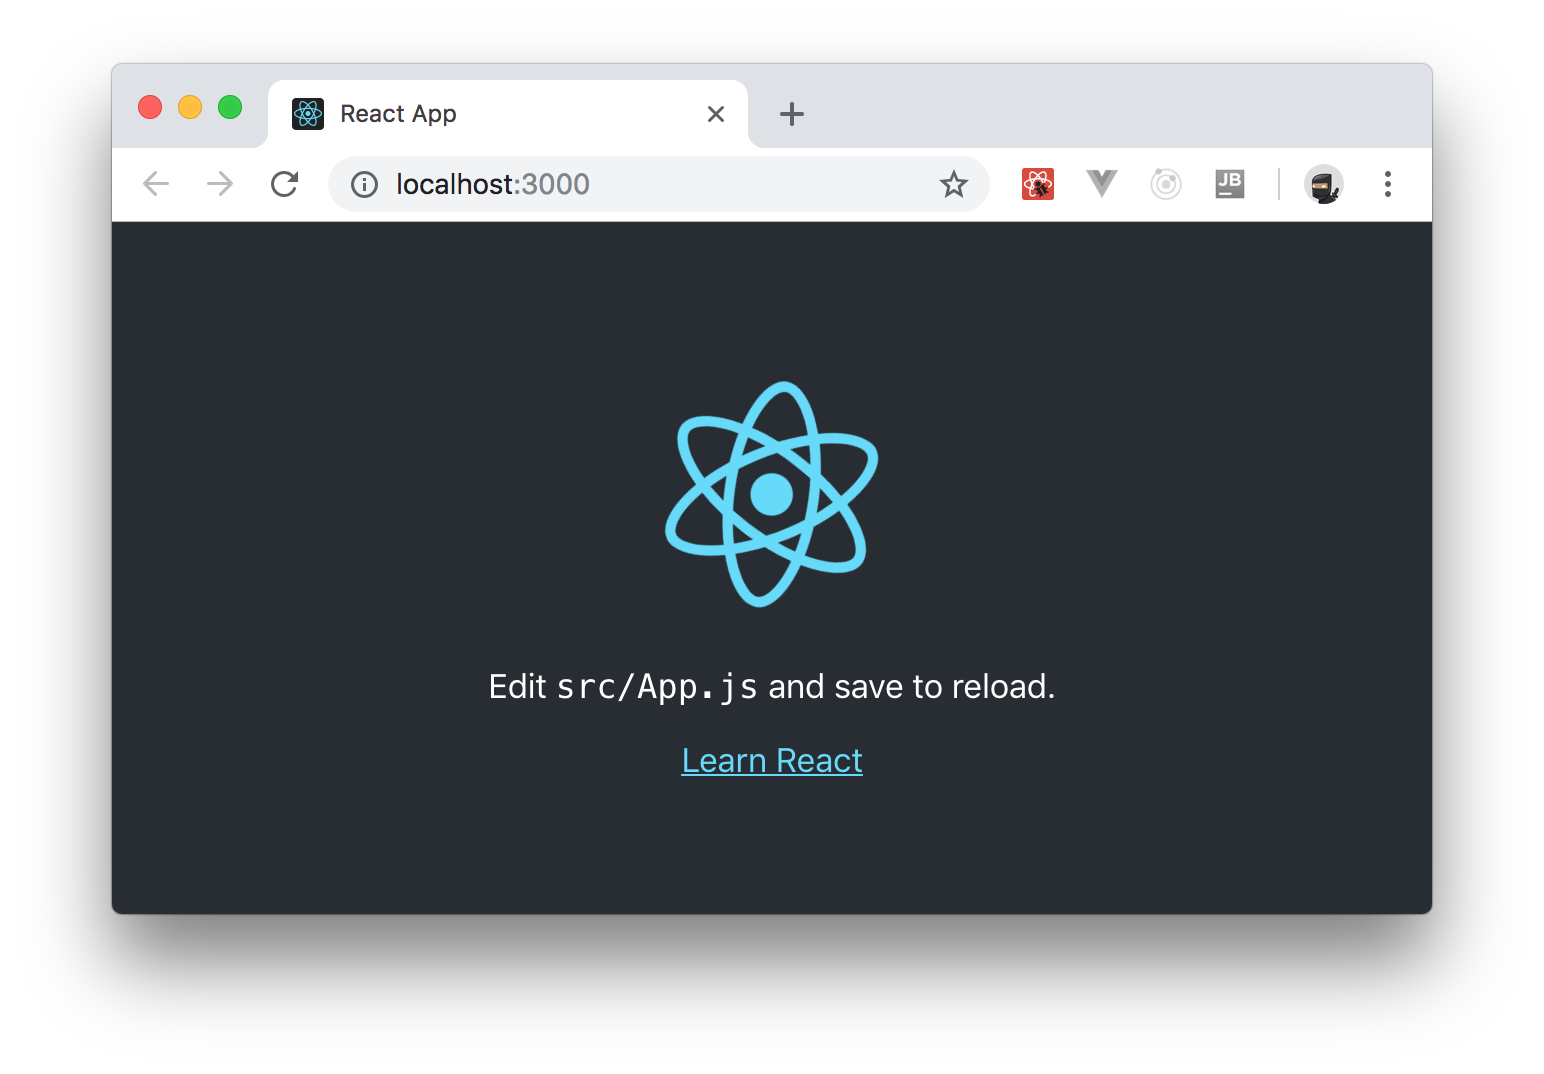
npm start
“React embraces the fact that rendering logic is inherently coupled with other UI logic: how events are handled, how the state changes over time, and how the data is prepared for display.” - Introducing JSX
The last command issued above will start a development server that listens on port3000and will open the new app in your default web browser.
After seeing your app, you can stop the server by hitting Ctrl + C so you can install a couple dependencies that you will need in your application. So, back in your terminal and after stopping the server, run the following command:
npm i react-router react-router-dom
This command will install two libraries to help you handle the navigation in your app. The first one, react-router, is the main library that enables seamless navigation. The second one, react-router-dom, provides DOM bindings for React Router.
“React embraces the fact that rendering logic is inherently coupled with other UI logic: how events are handled, how the state changes over time, and how the data is prepared for display.” - Introducing JSX
Then, after installing these libraries, you can open your React project in your preferred IDE so you can start the real work.
Cleaning Up your React App
Well, actually, before start developing your app, you can remove a few files from it and clean up its code a little bit. For starter, you can remove the ./src/App.test.js file because you won’t create automated tests in this tutorial. Although this is an important topic, you will skip it for now so you can focus on learning React.
“React embraces the fact that rendering logic is inherently coupled with other UI logic: how events are handled, how the state changes over time, and how the data is prepared for display.” - Introducing JSX
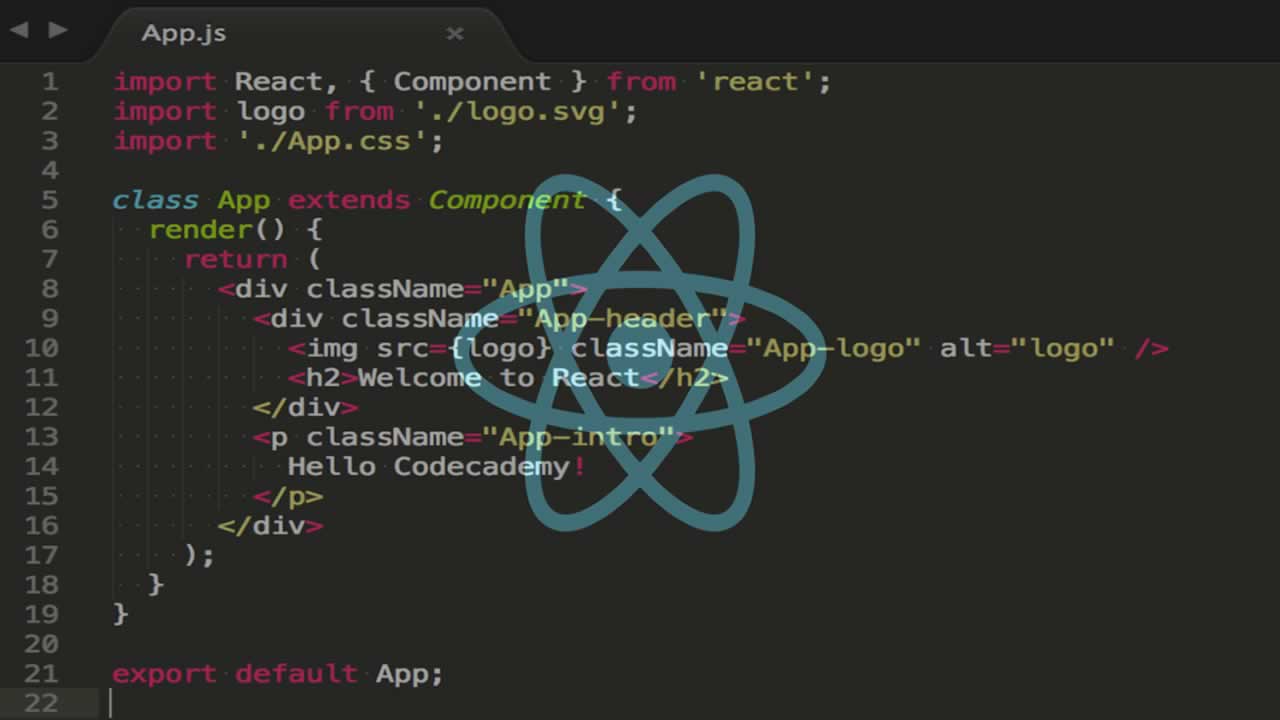
Besides that, you can also remove two other files as you won’t use them:./src/logo.svgand./src/App.css. Then, after removing these files, open the./src/App.jsfile and replace its code with this:
import React, { Component } from 'react';

class App extends Component {
  render() {
    return (
      <div>
        <p>Work in progress.</p>
      </div>
    );
  }
}

export default App;
You won’t really use the new version of your App component as you will soon replace the contents of this file again. However, to avoid having code that won’t compile, it is a good idea to refactor your App component.
Configuring the React Router in Your App
After cleaning things up, you will need to configure React Router in your app. This will be a pretty simple step, as you will see. However, keep in mind that to master React Router you would need to read at least one other article that specifically introduces the subject and all its features.
The thing is, React Router is a very complete solution and, in your first React app, you will touch only the tip of the iceberg. If you do want to learn more about React Router, please, head to the official documentation.
Having that in mind, open the ./src/index.js file and replace its contents with this:
import React from 'react';
import ReactDOM from 'react-dom';
import {BrowserRouter} from 'react-router-dom';
import './index.css';
import App from './App';
import * as serviceWorker from './serviceWorker';

ReactDOM.render(
  <BrowserRouter>
    <App />
  </BrowserRouter>
, document.getElementById('root'));

// If you want your app to work offline and load faster, you can change
// unregister() to register() below. Note this comes with some pitfalls.
// Learn more about service workers: http://bit.ly/CRA-PWA
serviceWorker.unregister();
In the new version of this file, you are just importing BrowserRouter from the react-router-dom library, and encapsulating your App component inside this router. That’s all you need to start using React Router.
“React embraces the fact that rendering logic is inherently coupled with other UI logic: how events are handled, how the state changes over time, and how the data is prepared for display.” - Introducing JSX### Configuring Bootstrap in Your React App
To make your React app more appealing from the User Interface (UI) point of view, you are going to configure Bootstrap on it. If you don’t know Bootstrap, this is an extremely popular library that helps developers create good-looking, responsive web apps with ease.
There are multiple ways to integrate React and Bootstrap together. However, as the requirements for your first application will be quite simple and as you won’t need any of its interactive components (i.e., you are just interested into the basic styles that this library provides), you are going to follow the easiest strategy available. That is, you are simply going to open your ./public/index.html file and update it as follows:
<!DOCTYPE html>
<html lang="en">
  <head>
    <!-- ... tags above the title stay untouched ... -->
    <title>Q&App</title>
    <link rel="stylesheet" href="https://bootswatch.com/4/flatly/bootstrap.min.css">
  </head>
  <!-- ... body definition stays untouched ... -->
</html>
In this case, you are actually doing two things: you are changing the title of your React app to Q&App, and you are making your app load a variation of Bootstrap called flatly. If you are interested, you can use any variation available at Bootswatch, or you can also use the default flavor of Bootstrap. However, you will probably find the variations available on Bootswatch more appealing.
Creating a Navigation Bar in Your React App
Now that you have configured your app to use Bootstrap, you are ready to create your first React component. In this section, you will create a component called NavBar (which stands for Navigation Bar), and you will add it to your React app.
To do so, create a new directory called NavBar inside the src directory of your application and insert a new file called NavBar.js inside it. In this file, input the following code:
import React from 'react';
import {Link} from 'react-router-dom';

function NavBar() {
  return (
    <nav className="navbar navbar-dark bg-primary fixed-top">
      <Link className="navbar-brand" to="/">
        Q&App
      </Link>
    </nav>
  );
}

export default NavBar;
As you can see, the navigation bar component that you are creating is a functional component. You can create it like a stateless (i.e., functional) component because you don’t really need to hold any internal state.
Now, to use your new component, you can open your ./src/App.js file and update it as follows:
import React, { Component } from 'react';
import NavBar from './NavBar/NavBar';

class App extends Component {
  render() {
    return (
      <div>
        <NavBar/>
        <p>Work in progress.</p>
      </div>
    );
  }
}

export default App;
Then, if you run your app by issuing npm start from a terminal, you will see the navigation bar at the top of it. However, what you won’t see is the “work in progress” message that your App component contains. The problem here is that the navigation bar that you created is using a CSS class (fixed-top) provided by Bootstrap that makes it fixed to the top. This means that this component is not taking the default vertical space as it would if it were a normal div element.
To fix this situation, open the ./src/index.css file and add a margin-top rule, as shown here:
body {
  /* ... other rules ... */
  margin-top: 100px;
}

/* ... other rules ... */
Now, if you check your app again, you will see your navigation bar and the “work in progress” message.

Creating a Class Component with React
After creating the navigation bar, what you can do next is to create a stateful component (a class component) to fetch questions from your backend and to show it to your users. To fetch these questions, you will need the help of another library, Axios. In a few words, Axios is a promise-based HTTP client for the browser and for Node.js. In this tutorial, you will only use it in the browser (i.e., in your React app).
To install Axios, stop the React development server and issue the following command:
npm i axios
Then, create a new directory called Questions inside src and a new file called Questions.js inside it. In this file, you can insert the following code:
import React, {Component} from 'react';
import {Link} from 'react-router-dom';
import axios from 'axios';

class Questions extends Component {
  constructor(props) {
    super(props);

    this.state = {
      questions: null,
    };
  }

  async componentDidMount() {
    const questions = (await axios.get('http://localhost:8081/')).data;
    this.setState({
      questions,
    });
  }

  render() {
    return (
      <div className="container">
        <div className="row">
          {this.state.questions === null && <p>Loading questions...</p>}
          {
            this.state.questions && this.state.questions.map(question => (
              <div key={question.id} className="col-sm-12 col-md-4 col-lg-3">
                <Link to={`/question/${question.id}`}>
                  <div className="card text-white bg-success mb-3">
                    <div className="card-header">Answers: {question.answers}</div>
                    <div className="card-body">
                      <h4 className="card-title">{question.title}</h4>
                      <p className="card-text">{question.description}</p>
                    </div>
                  </div>
                </Link>
              </div>
            ))
          }
        </div>
      </div>
    )
  }
}

export default Questions;
There are a few important things going on in this file. First, as mentioned before, you are creating a stateful component that will hold the questions available in your backend API. So, to do it properly, you are starting your component with the questions property set to null and, when React finishes mounting your component (which triggers the componentDidMount method), you are issuing a GET request (through the axios.get call) to your backend. In the meantime between your request and the response from the backend, React renders your component with a message saying “loading questions…” (it does so because you instructed it to behave like that by adding this.state.questions === null && before the message).
“React embraces the fact that rendering logic is inherently coupled with other UI logic: how events are handled, how the state changes over time, and how the data is prepared for display.” - Introducing JSX
Then, whenever Axios gets a response from the backend, you put thedatareturned inside a constant calledquestions, and you update the state of the component (this.setState) with it. This update, as you already learned, triggers a re-render and makes React show all the questions retrieved.
Now, in relation to how your questions are shown, you are using a bunch of div elements with CSS classes provided by Bootstrap to create a nice Card component. If you want to tweak how this card is shown, make sure to check the docs.
Besides that, note that you are using a component called Link (from react-router-dom) to make this redirect users to the following path when clicked: /question/${question.id}. In the next section, you will create a component to show the answers to a question chosen by the user.
So, as you already understand how your component behaves, the next thing you will need to do is to update the code of your App component to use your new component:
import React, { Component } from 'react';
import NavBar from './NavBar/NavBar';
import Questions from './Questions/Questions';

class App extends Component {
  render() {
    return (
      <div>
        <NavBar/>
        <Questions/>
      </div>
    );
  }
}

export default App;
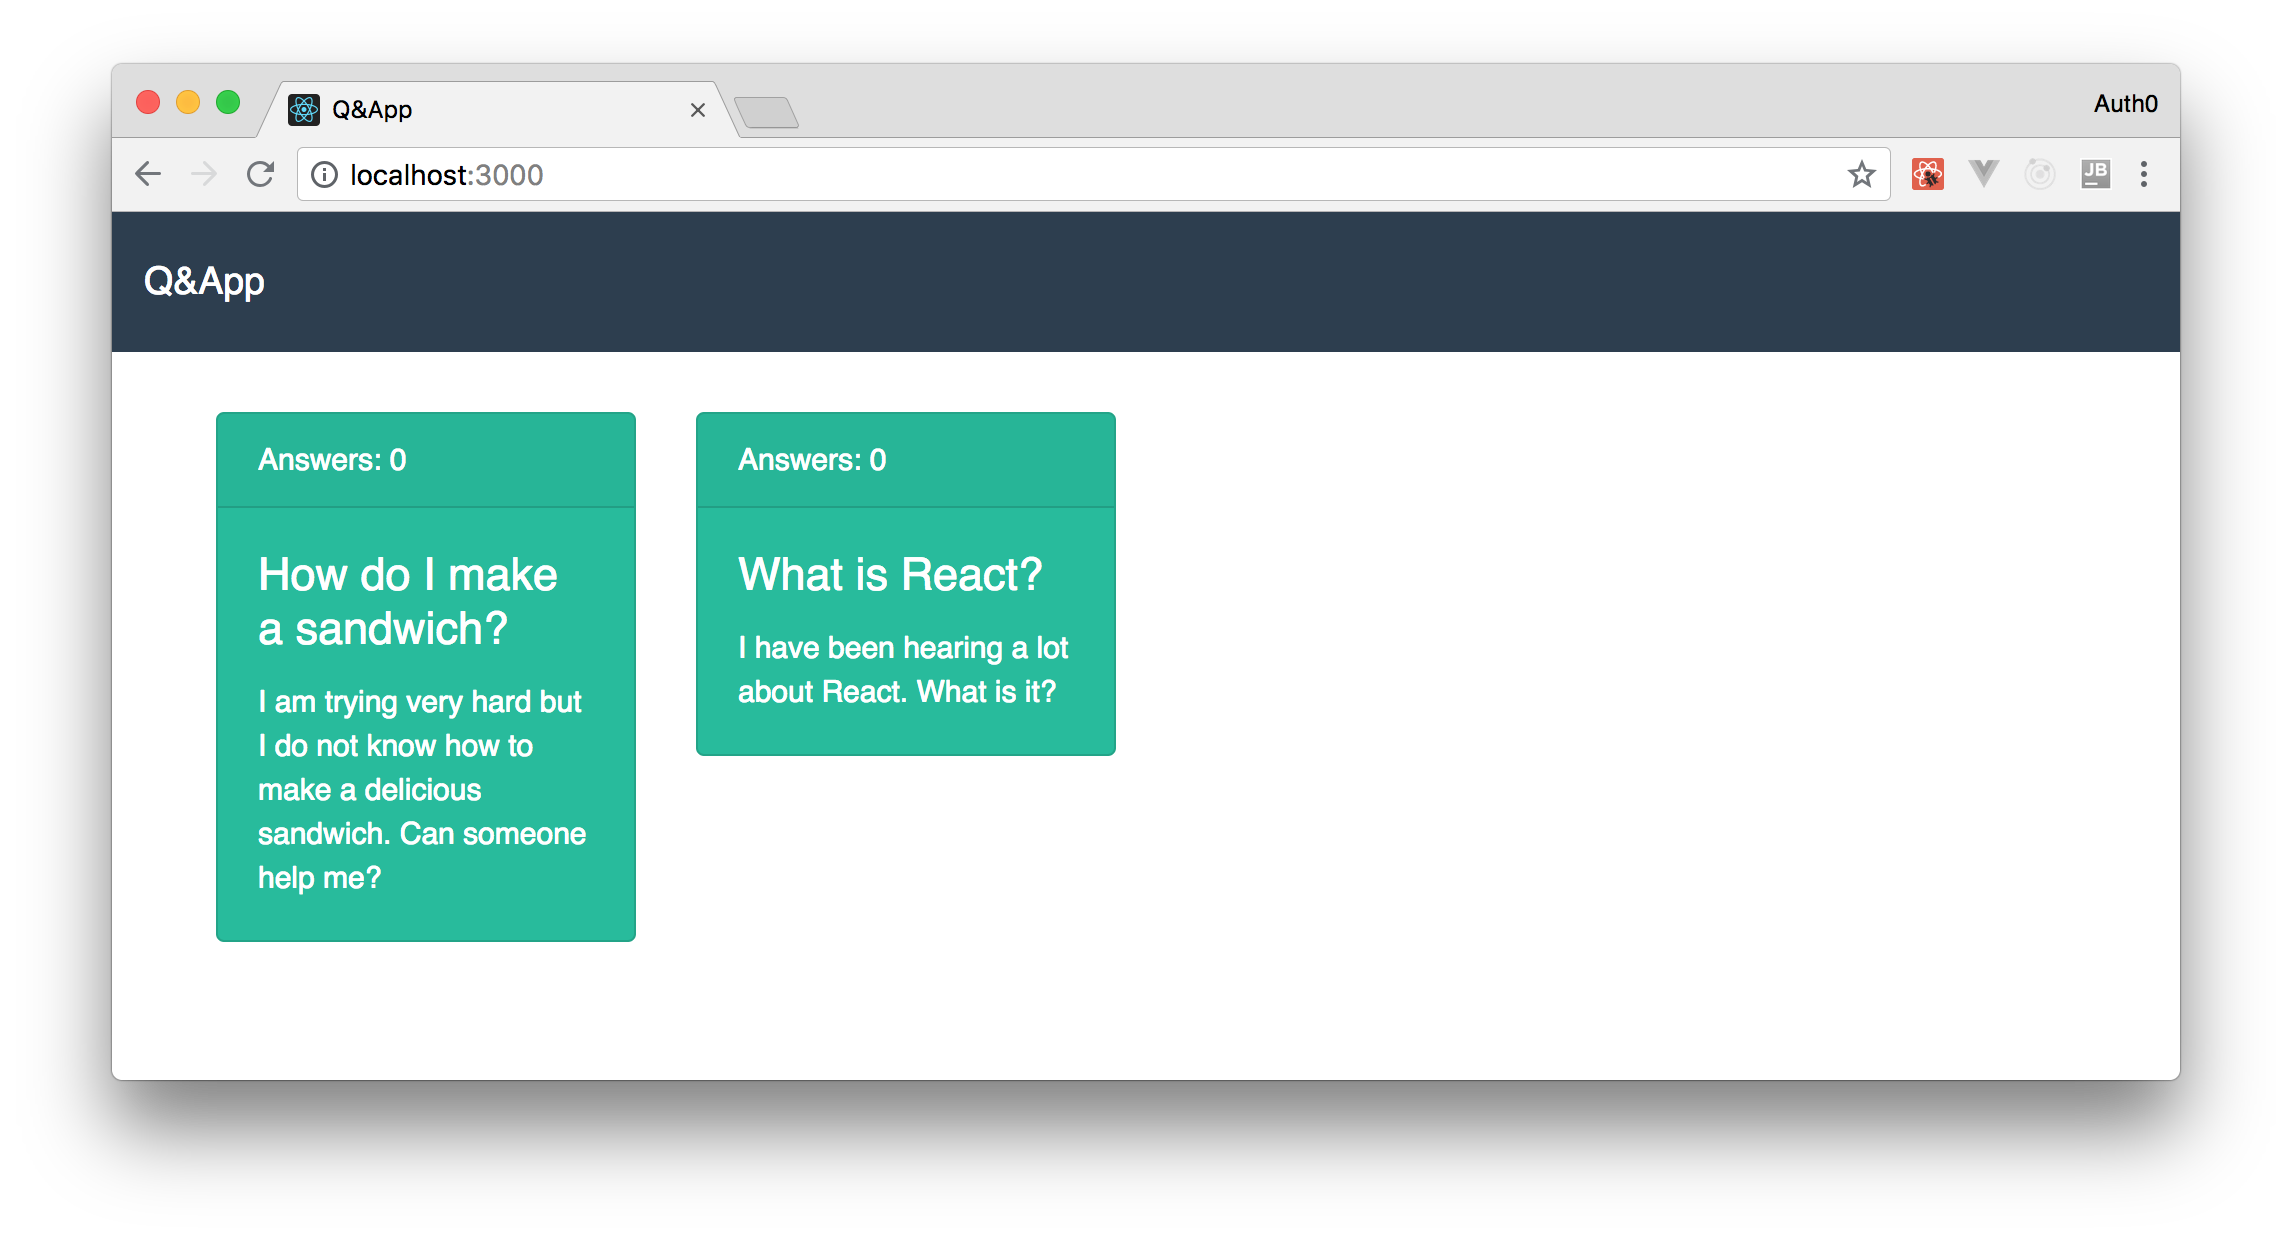
Then, if you run your app again (npm start), you will see this nice page:
Routing Users with React Router
With all these features in place, one important step that you have to learn about is how to handle routing in your React app. In this section, you will learn about this topic while creating a component that shows the details of the questions available in your backend.
For starters, you can create a new directory called Question (singular now) and a file called Question.js (also singular) inside it. Then, you can insert the following code into this file:
import React, {Component} from 'react';
import axios from 'axios';

class Question extends Component {
  constructor(props) {
    super(props);
    this.state = {
      question: null,
    };
  }

  async componentDidMount() {
    const { match: { params } } = this.props;
    const question = (await axios.get(`http://localhost:8081/${params.questionId}`)).data;
    this.setState({
      question,
    });
  }

  render() {
    const {question} = this.state;
    if (question === null) return <p>Loading ...</p>;
    return (
      <div className="container">
        <div className="row">
          <div className="jumbotron col-12">
            <h1 className="display-3">{question.title}</h1>
            <p className="lead">{question.description}</p>
            <hr className="my-4" />
            <p>Answers:</p>
            {
              question.answers.map((answer, idx) => (
                <p className="lead" key={idx}>{answer.answer}</p>
              ))
            }
          </div>
        </div>
      </div>
    )
  }
}

export default Question;
The way this new component works is actually very similar to the way the Questions component works. This is a stateful component that uses Axios to issue a GET request to the endpoint that retrieves the whole details of a question, and that updates the page whenever it gets a response back.
Nothing really new here. What is going to be new is the way this component gets rendered.
So, open the App.js file, and replace its contents with this:
import React, { Component } from 'react';
import {Route} from 'react-router-dom';
import NavBar from './NavBar/NavBar';
import Question from './Question/Question';
import Questions from './Questions/Questions';

class App extends Component {
  render() {
    return (
      <div>
        <NavBar/>
        <Route exact path='/' component={Questions}/>
        <Route exact path='/question/:questionId' component={Question}/>
      </div>
    );
  }
}

export default App;
In the new version of your App component, you are using two Route elements (provide by react-router-dom) to tell React when you want the Questions component rendered and when you want the Question component rendered. More specifically, you are telling React that if your users navigate to / (exact path='/') you want them to see Questions and, if they navigate to /question/:questionId, you want them to see the details of a specific question.
Note that the last route defines a parameter called questionId. When you created the Questions (plural) component, you added a link that uses the id of the question. React Router uses this id to form the link and then gives it to your Question component (params.questionId). With this id, your component uses Axios to tell the backend what question exactly is being requested.
If you check your application now, you will be able to see all your questions in the home page, and you will be able to navigate to a specific question. However, you probably won’t see any answer in your new component because you never added one. For now, to add answers to your questions, you can issue requests similar to the following one:
curl -X POST -H 'Content-Type: application/json' -d '{
  "answer": "Just spread butter on the bread, and that is it."
}' localhost:8081/answer/1
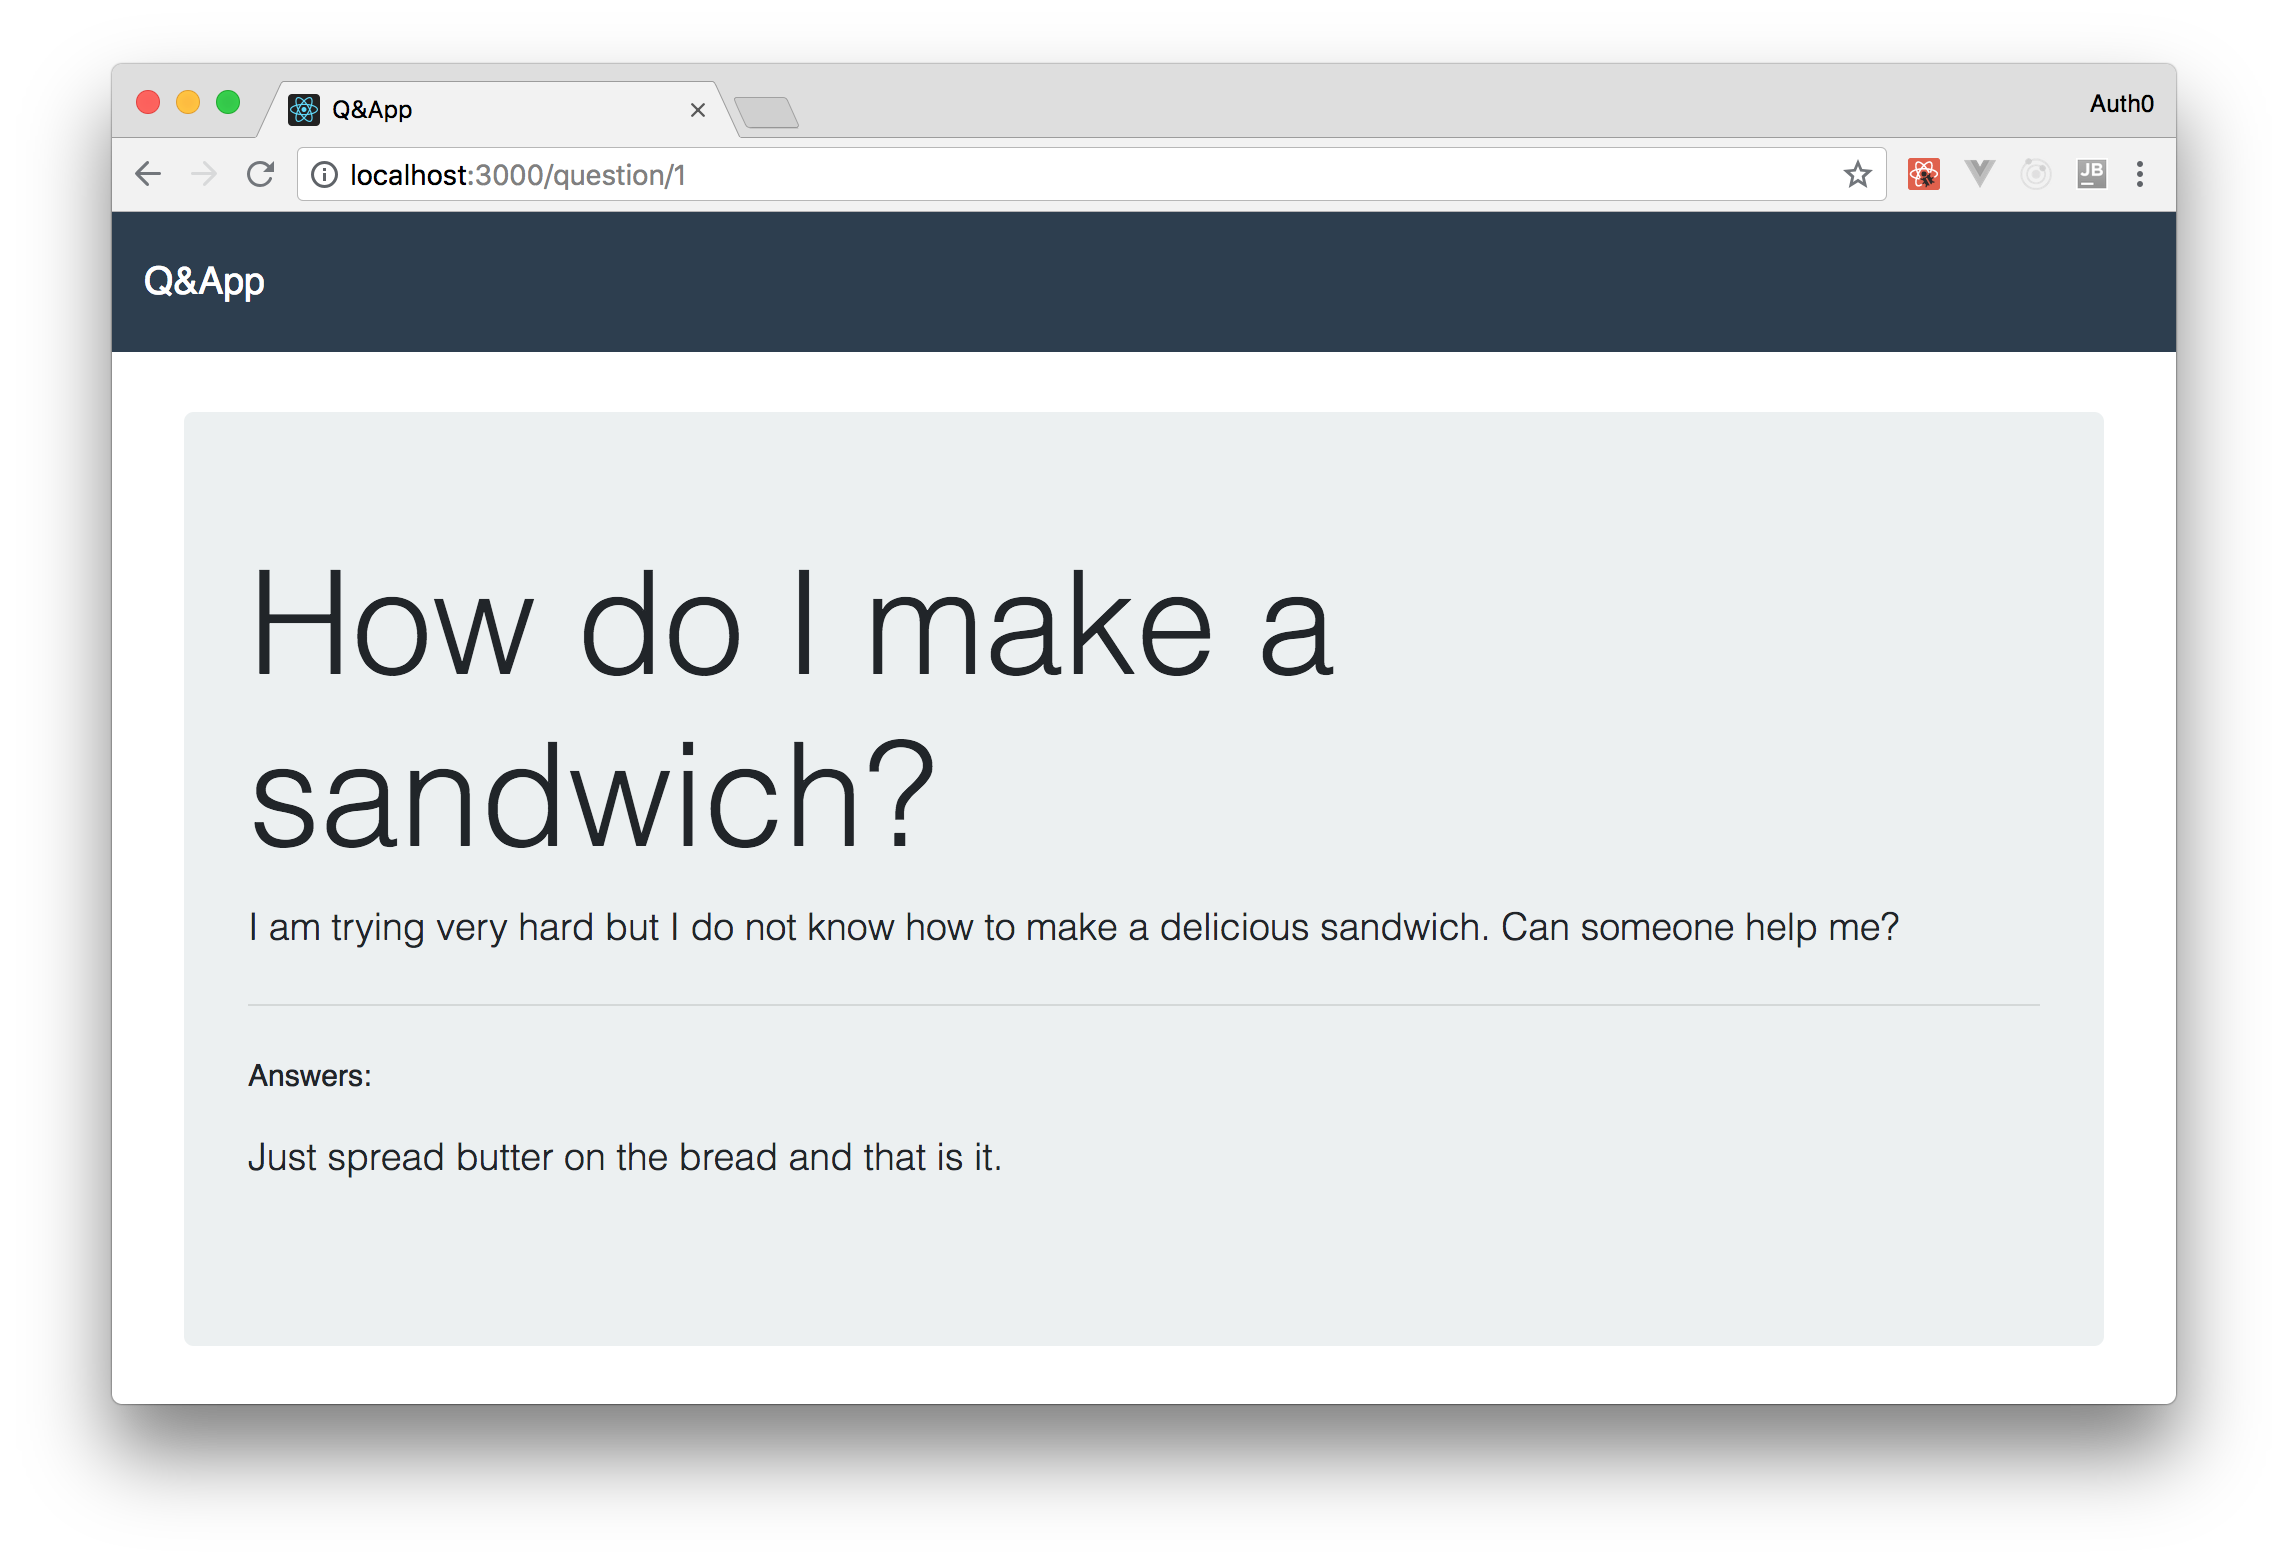
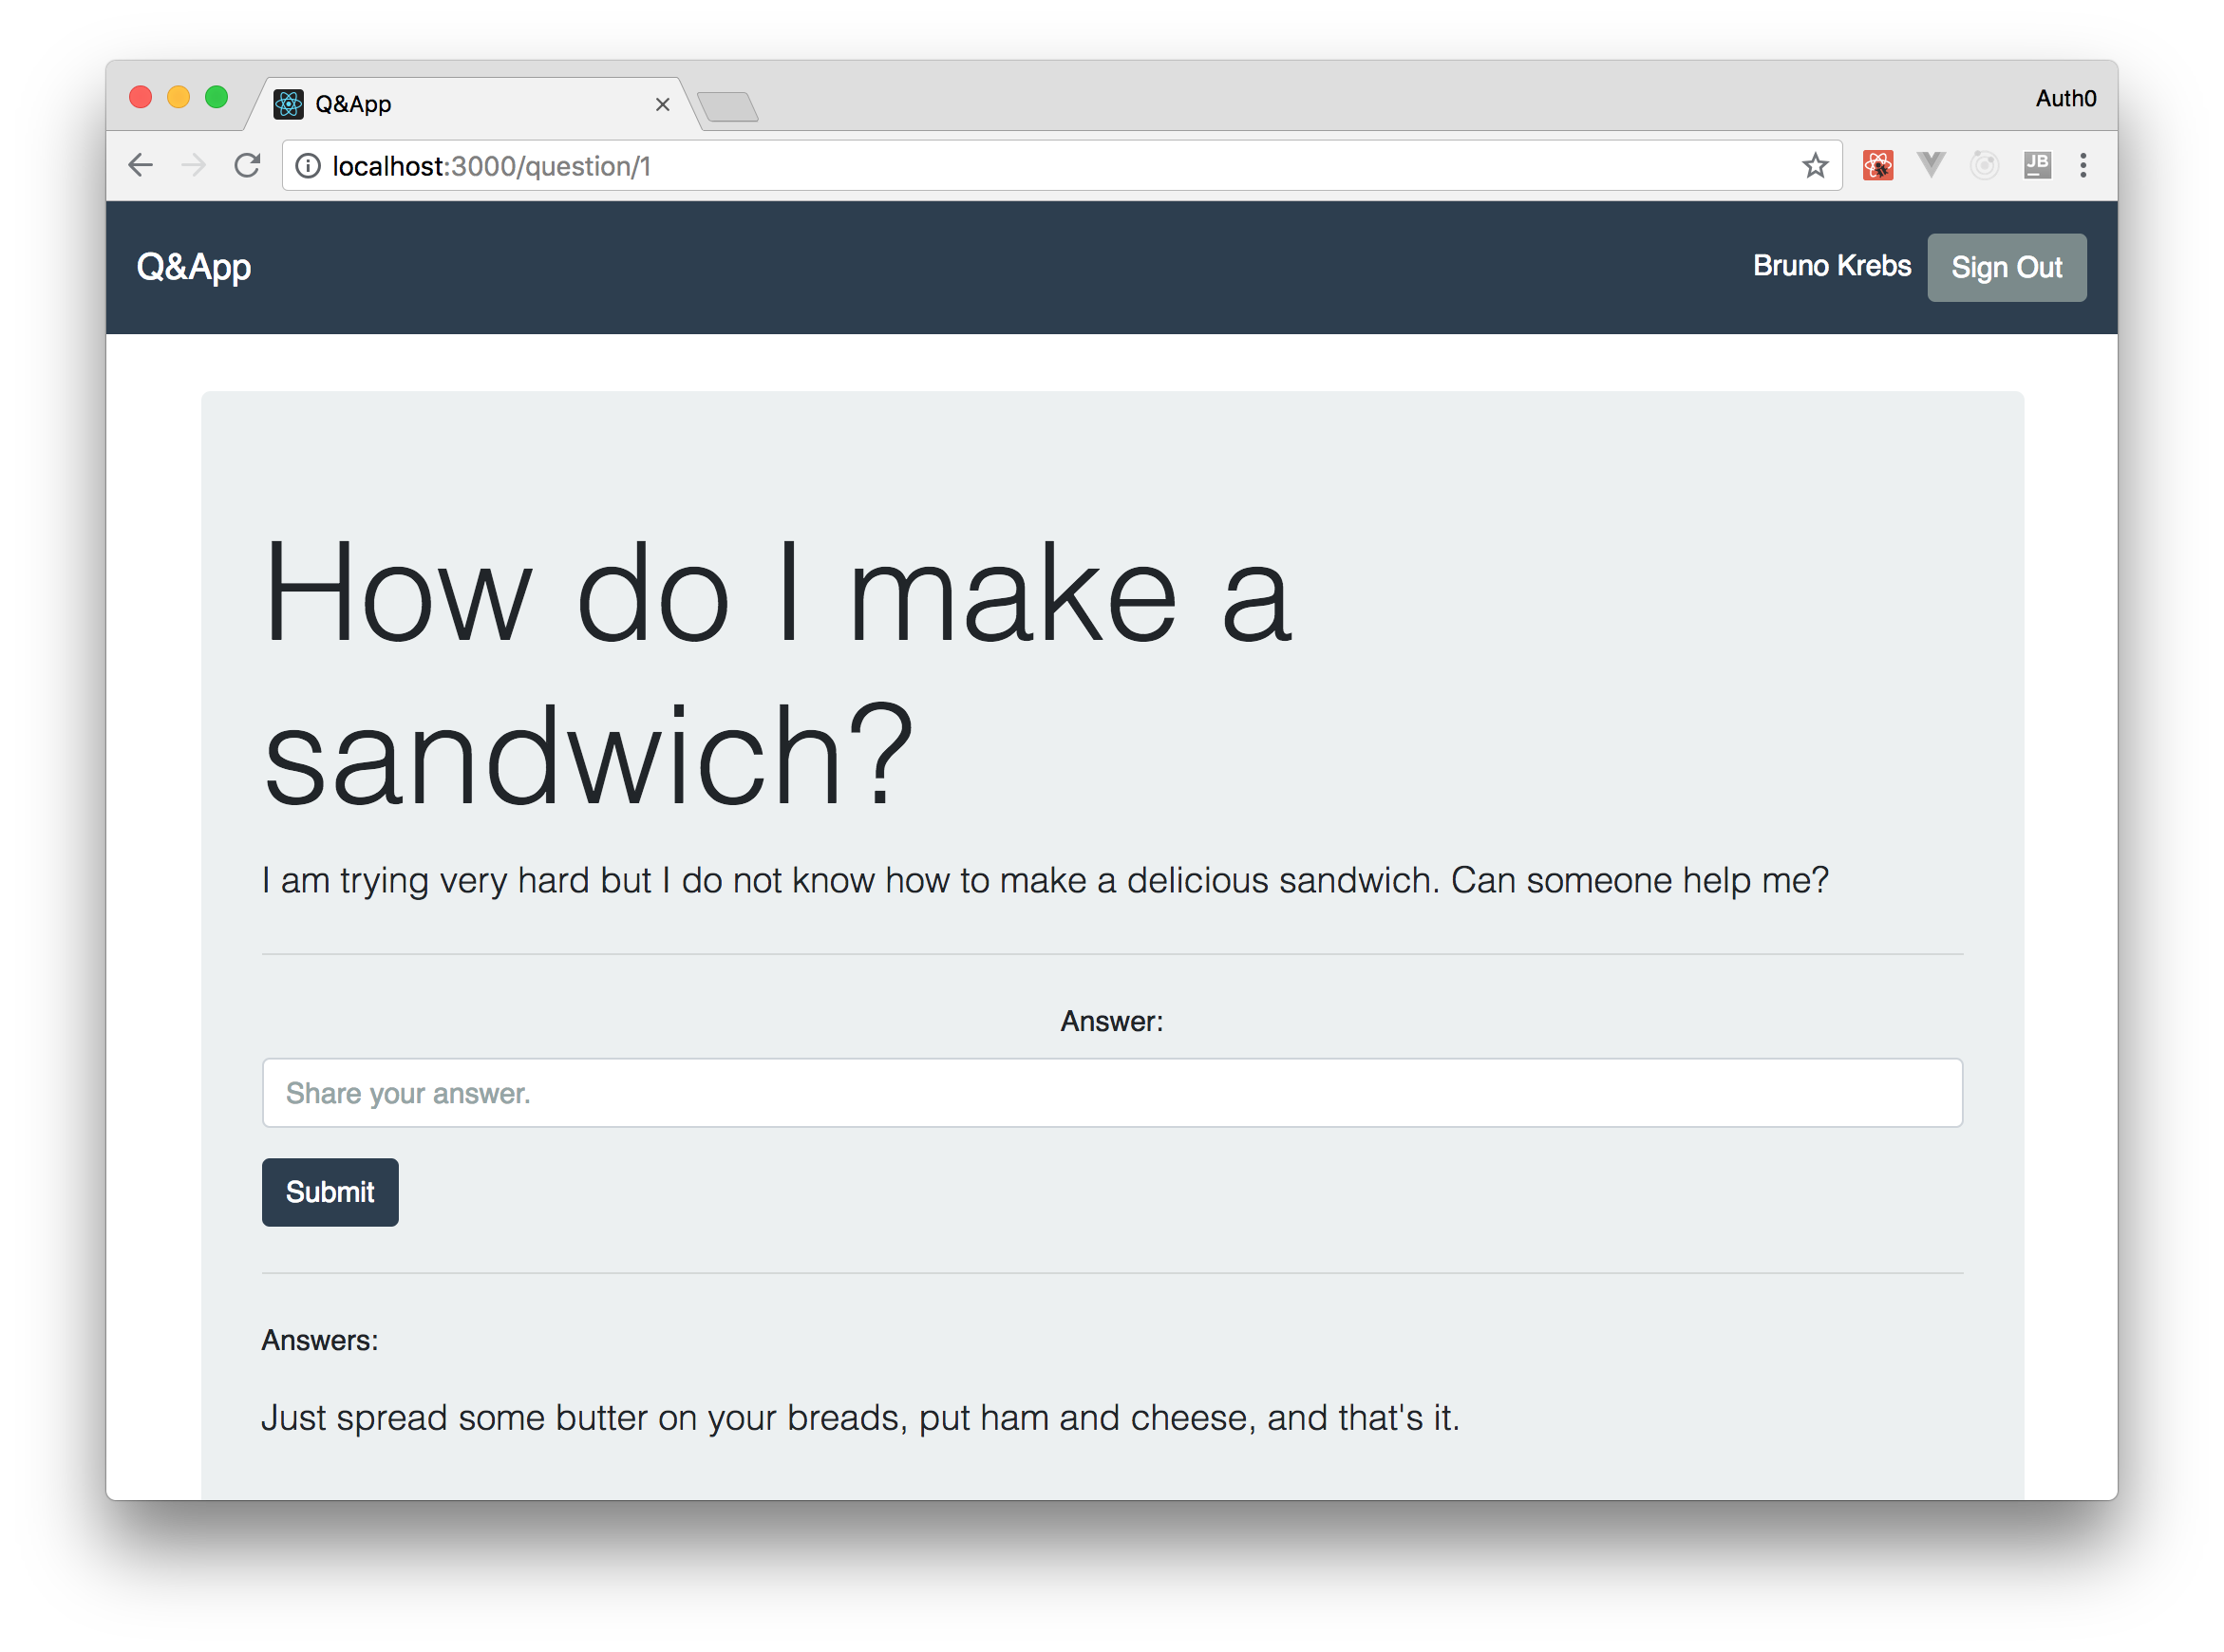
After that, if you reload your app and go to [http://localhost:3000/question/1](http://localhost:3000/question/1 "http://localhost:3000/question/1"), you will see a page similar to this:
Securing your React App
Your application has reached a state where it has almost everything it needs for prime time. There are just a few features missing. For example, right now, your users have no means of creating questions nor answering them through your app. Another example is that there is no way to log into your application. Besides that, the questions and answers do not provide information about their authors.
In this section, you will learn how to implement all these features with ease. You will start by subscribing to Auth0 to help you with the authentication feature, then you will secure your backend and, to wrap things up, you will secure your React app and refactor the Question component so that authenticated users can answer questions.
Configuring an Auth0 Account
For starters, you will need to sign up to Auth0 so you can integrate it in your application. If you already have an existing account, you can use it without a problem. If you do not have one, now is a good time to sign up for a free Auth0 account. With your free account, you will have access to the following features:
[body-parser](https://github.com/expressjs/body-parser "body-parser"): This is a library that you will use to convert the body of incoming requests into JSON objects.[cors](https://github.com/expressjs/cors "cors"): This is a library that you will use to configure Express to add headers stating that your API accepts requests coming from other origins. This is also known as Cross-Origin Resource Sharing (CORS).[express](https://github.com/expressjs/express "express"): This is Express itself.[helmet](https://github.com/helmetjs/helmet "helmet"): This is a library that helps to secure Express apps with various HTTP headers.[morgan](https://github.com/expressjs/morgan "morgan"): This is a library that adds some logging capabilities to your Express app.
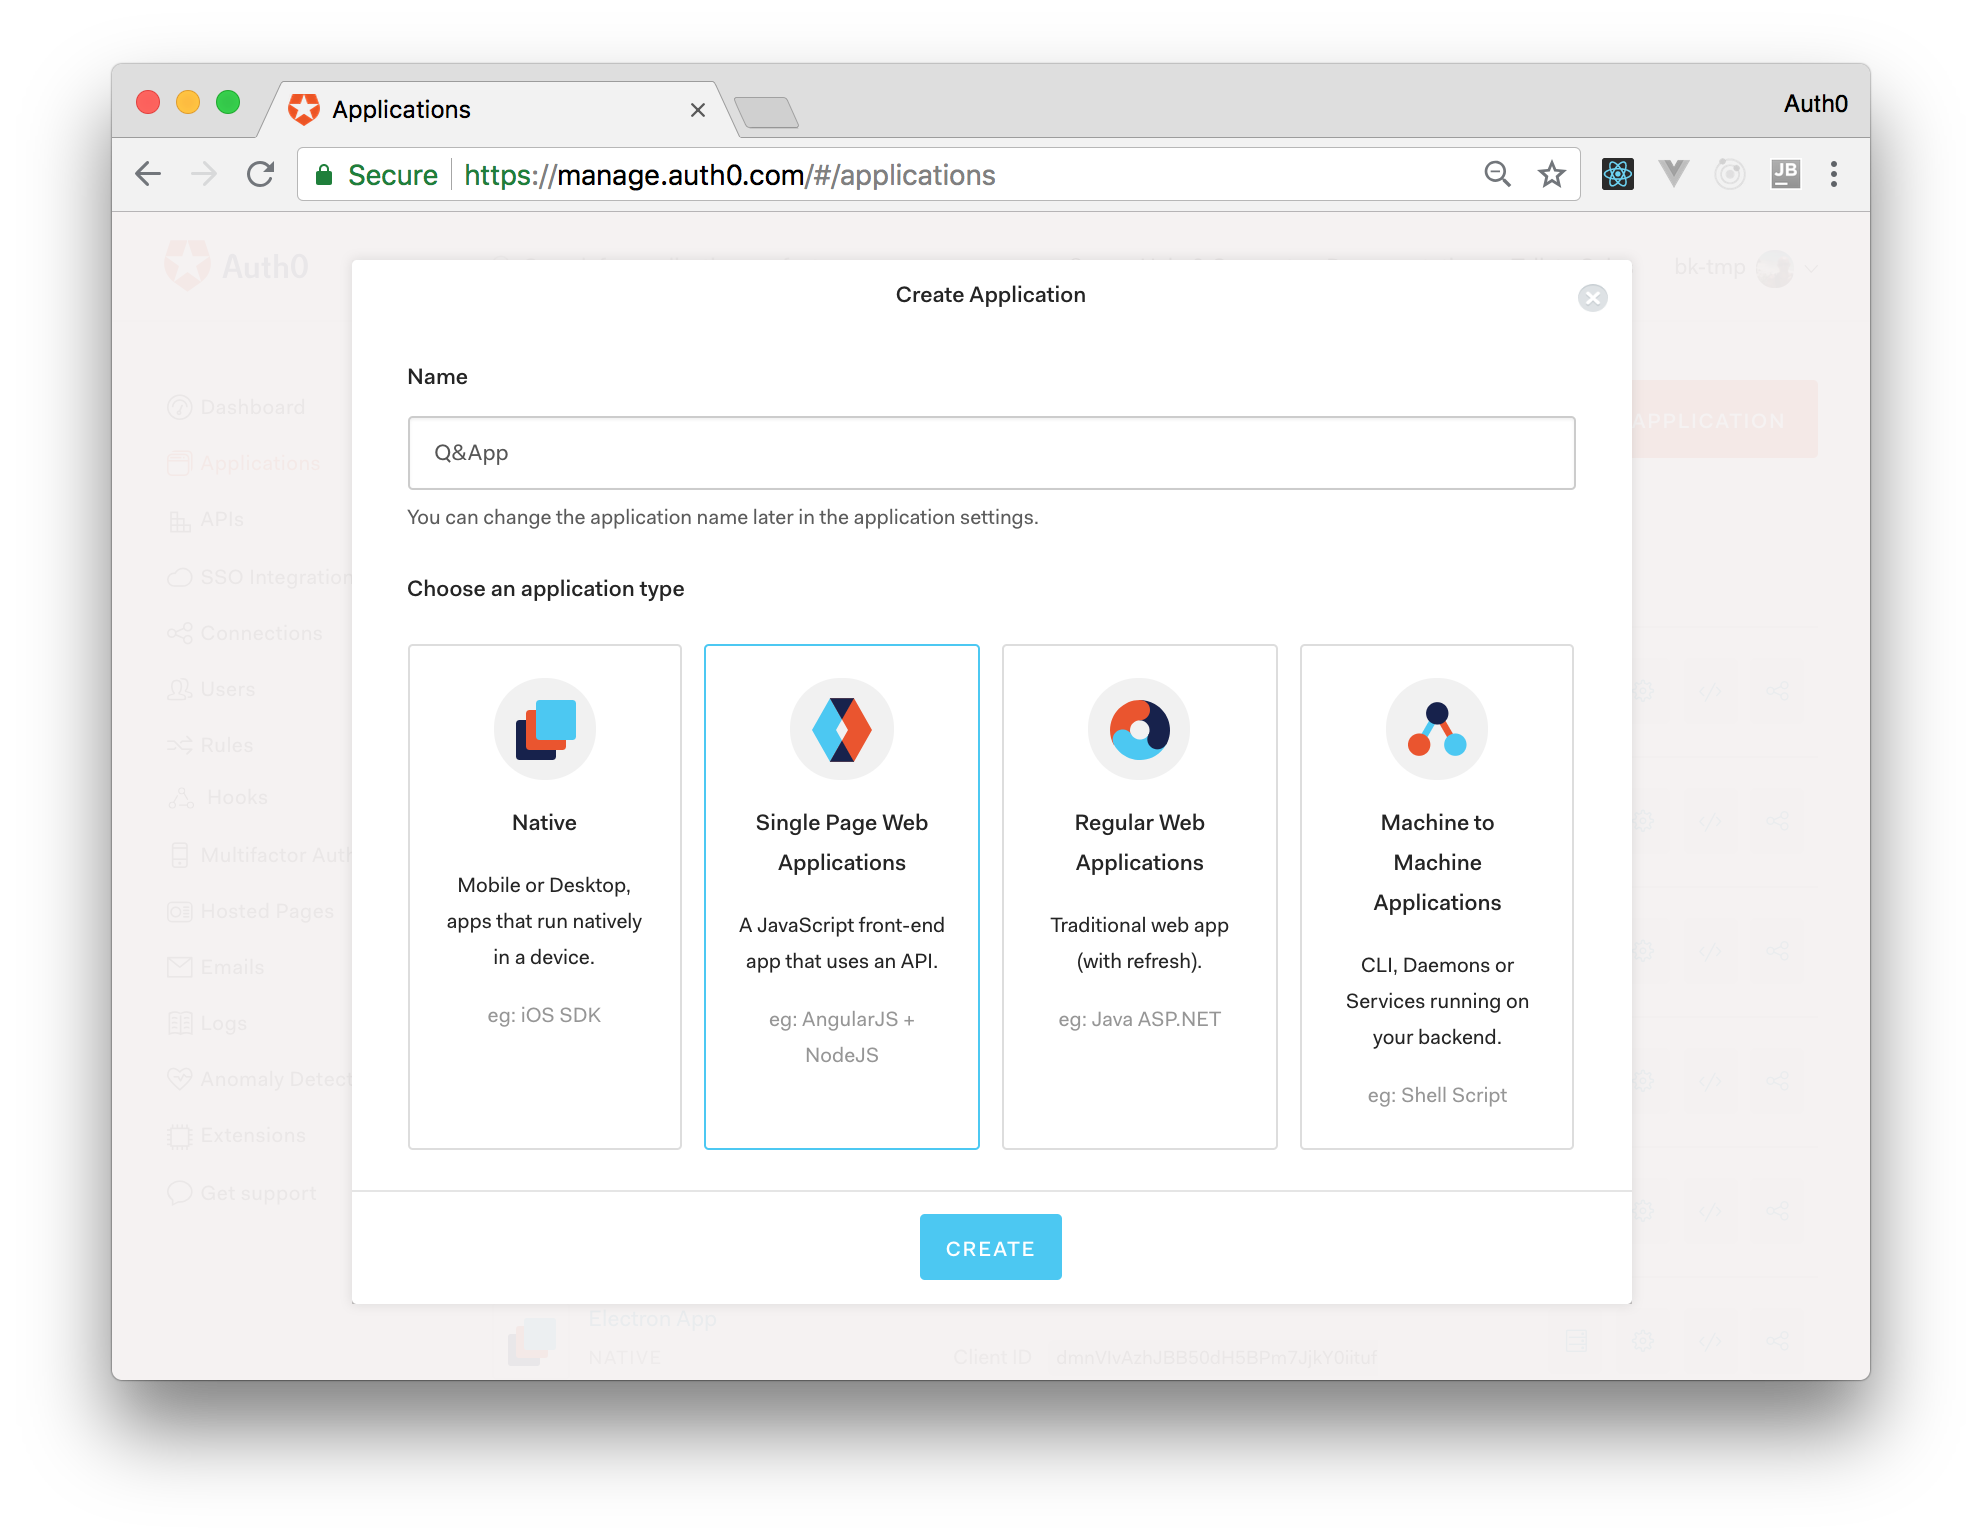
After signing up, you will have to create an Auth0 Application to represent your app. So, in your dashboard, click on the Applications section on the vertical menu and then click on Create Application.
On the dialog shown, you will have to insert a name for your application (for example, “Q&App”) and then you will have to choose Single Page Application as its type. Then, when you click on the Create button, Auth0 will create your Application and redirect you to its Quick Start section. From there, you will have to click on the Settings tab to change the configuration of your Auth0 Application and to copy some values from it.
So, after heading to the Settings tab, search for the Allowed Callback URLs field and insert [http://localhost:3000/callback](http://localhost:3000/callback "http://localhost:3000/callback") on it.
You are probably wondering what this URL means and why you need it. The reason why you need this URL is that, while authenticating through Auth0, your users will be redirected to its Universal Login Page and, after the authentication process (successful or not), they will be redirected back to your application. For security reasons, Auth0 will redirect your users only to URLs registered on this field.
With this value in place, you can click on the Save Changes button and leave this page open.
Securing your Backend API with Auth0
To secure your Node.js API with Auth0, you will have to install and configure only two libraries:
[body-parser](https://github.com/expressjs/body-parser "body-parser"): This is a library that you will use to convert the body of incoming requests into JSON objects.[cors](https://github.com/expressjs/cors "cors"): This is a library that you will use to configure Express to add headers stating that your API accepts requests coming from other origins. This is also known as Cross-Origin Resource Sharing (CORS).[express](https://github.com/expressjs/express "express"): This is Express itself.[helmet](https://github.com/helmetjs/helmet "helmet"): This is a library that helps to secure Express apps with various HTTP headers.[morgan](https://github.com/expressjs/morgan "morgan"): This is a library that adds some logging capabilities to your Express app.
To install these libraries, stop your backend API by hitting Ctrl + C and issue the following command:
# from the backend directory
npm i express-jwt jwks-rsa
After that, open its ./src/index.js file and import these libraries as follows:
// ... other require statements ...
const jwt = require('express-jwt');
const jwksRsa = require('jwks-rsa');
Then, still on this file, create the following constant right before the first POST endpoint (app.post):
// ... require statements ...

// ... app definitions ...

// ... app.get endpoints ...

const checkJwt = jwt({
  secret: jwksRsa.expressJwtSecret({
    cache: true,
    rateLimit: true,
    jwksRequestsPerMinute: 5,
    jwksUri: `https://<YOUR_AUTH0_DOMAIN>/.well-known/jwks.json`
  }),

  // Validate the audience and the issuer.
  audience: '<YOUR_AUTH0_CLIENT_ID>',
  issuer: `https://<YOUR_AUTH0_DOMAIN>/`,
  algorithms: ['RS256']
});

// ... app.post endpoints ...

// ... app.listen ...
This constant is actually an Express middleware that will validate ID tokens. Note that, to make it work, you will have to replace the <YOUR_AUTH0_CLIENT_ID> placeholder with the value presented in the Client ID field of your Auth0 Application. Also, you will have to replace <YOUR_AUTH0_DOMAIN> with the value presented in the Domain field (e.g. bk-tmp.auth0.com).
Then, you will have to make your two POST endpoints use the checkJwt middleware. To do this, replace these endpoints with this:
// insert a new question
app.post('/', checkJwt, (req, res) => {
  const {title, description} = req.body;
  const newQuestion = {
    id: questions.length + 1,
    title,
    description,
    answers: [],
    author: req.user.name,
  };
  questions.push(newQuestion);
  res.status(200).send();
});

// insert a new answer to a question
app.post('/answer/:id', checkJwt, (req, res) => {
  const {answer} = req.body;

  const question = questions.filter(q => (q.id === parseInt(req.params.id)));
  if (question.length > 1) return res.status(500).send();
  if (question.length === 0) return res.status(404).send();

  question[0].answers.push({
    answer,
    author: req.user.name,
  });

  res.status(200).send();
});
Both endpoints introduce only two changes. First, both of them declare that they want to use checkJwt, which makes them unavailable to unauthenticated users. Second, both add a new property called author on questions and answers. These new properties receive the name (req.user.name) of the users issuing requests.
With these changes in place, you can start your backend API again (node src) and start refactoring your React application.
“React embraces the fact that rendering logic is inherently coupled with other UI logic: how events are handled, how the state changes over time, and how the data is prepared for display.” - Introducing JSX> “React embraces the fact that rendering logic is inherently coupled with other UI logic: how events are handled, how the state changes over time, and how the data is prepared for display.” - Introducing JSX### Securing your React App with Auth0
To secure your React application with Auth0, you will have to install only one library: [auth0-js](https://github.com/auth0/auth0.js "auth0-js"). This is the official library provided by Auth0 to secure SPAs like yours. To install it, stop the development server and issue this command:
# from the frontend directory
npm install auth0-js
After that, you can create a class to help you with the authentication workflow. For that, create a new file called Auth.js inside the src directory, and insert the following code:
import auth0 from 'auth0-js';

class Auth {
  constructor() {
    this.auth0 = new auth0.WebAuth({
      // the following three lines MUST be updated
      domain: '<YOUR_AUTH0_DOMAIN>',
      audience: 'https://<YOUR_AUTH0_DOMAIN>/userinfo',
      clientID: '<YOUR_AUTH0_CLIENT_ID>',
      redirectUri: 'http://localhost:3000/callback',
      responseType: 'id_token',
      scope: 'openid profile'
    });

    this.getProfile = this.getProfile.bind(this);
    this.handleAuthentication = this.handleAuthentication.bind(this);
    this.isAuthenticated = this.isAuthenticated.bind(this);
    this.signIn = this.signIn.bind(this);
    this.signOut = this.signOut.bind(this);
  }

  getProfile() {
    return this.profile;
  }

  getIdToken() {
    return this.idToken;
  }

  isAuthenticated() {
    return new Date().getTime() < this.expiresAt;
  }

  signIn() {
    this.auth0.authorize();
  }

  handleAuthentication() {
    return new Promise((resolve, reject) => {
      this.auth0.parseHash((err, authResult) => {
        if (err) return reject(err);
        if (!authResult || !authResult.idToken) {
          return reject(err);
        }
        this.idToken = authResult.idToken;
        this.profile = authResult.idTokenPayload;
        // set the time that the id token will expire at
        this.expiresAt = authResult.idTokenPayload.exp * 1000;
        resolve();
      });
    })
  }

  signOut() {
    // clear id token, profile, and expiration
    this.idToken = null;
    this.profile = null;
    this.expiresAt = null;
  }
}

const auth0Client = new Auth();

export default auth0Client;
“React embraces the fact that rendering logic is inherently coupled with other UI logic: how events are handled, how the state changes over time, and how the data is prepared for display.” - Introducing JSX
As you can see, in this file, you are creating a module that defines theAuthclass with seven methods:
[body-parser](https://github.com/expressjs/body-parser "body-parser"): This is a library that you will use to convert the body of incoming requests into JSON objects.[cors](https://github.com/expressjs/cors "cors"): This is a library that you will use to configure Express to add headers stating that your API accepts requests coming from other origins. This is also known as Cross-Origin Resource Sharing (CORS).[express](https://github.com/expressjs/express "express"): This is Express itself.[helmet](https://github.com/helmetjs/helmet "helmet"): This is a library that helps to secure Express apps with various HTTP headers.[morgan](https://github.com/expressjs/morgan "morgan"): This is a library that adds some logging capabilities to your Express app.
Lastly, this module creates an instance of the Auth class and exposes it to the world. That is, in your app, you won’t have more than one instance of the Auth class.
After defining this helper class, you can refactor your NavBar component to allow users to authenticate. So, open the NavBar.js file and replace its code with the following one:
import React from 'react';
import {Link, withRouter} from 'react-router-dom';
import auth0Client from '../Auth';

function NavBar(props) {
  const signOut = () => {
    auth0Client.signOut();
    props.history.replace('/');
  };

  return (
    <nav className="navbar navbar-dark bg-primary fixed-top">
      <Link className="navbar-brand" to="/">
        Q&App
      </Link>
      {
        !auth0Client.isAuthenticated() &&
        <button className="btn btn-dark" onClick={auth0Client.signIn}>Sign In</button>
      }
      {
        auth0Client.isAuthenticated() &&
        <div>
          <label className="mr-2 text-white">{auth0Client.getProfile().name}</label>
          <button className="btn btn-dark" onClick={() => {signOut()}}>Sign Out</button>
        </div>
      }
    </nav>
  );
}

export default withRouter(NavBar);
The new version of your navigation bar component imports two new elements:
[body-parser](https://github.com/expressjs/body-parser "body-parser"): This is a library that you will use to convert the body of incoming requests into JSON objects.[cors](https://github.com/expressjs/cors "cors"): This is a library that you will use to configure Express to add headers stating that your API accepts requests coming from other origins. This is also known as Cross-Origin Resource Sharing (CORS).[express](https://github.com/expressjs/express "express"): This is Express itself.[helmet](https://github.com/helmetjs/helmet "helmet"): This is a library that helps to secure Express apps with various HTTP headers.[morgan](https://github.com/expressjs/morgan "morgan"): This is a library that adds some logging capabilities to your Express app.
With the auth0Client instance, the NavBar decides if it must render a Sign In button (which it does for unauthenticated users) or a Sign Out button (for authenticated users). If the user is properly authenticated, this component also shows its name. And, if an authenticated user hits the Sign Out button, your component calls the signOut method of auth0Client and redirects the user to the home page.
After refactoring the NavBar component, you will have to create a component to handle the callback route ([http://localhost:3000/callback](http://localhost:3000/callback "http://localhost:3000/callback")). To define this component, create a new file called Callback.js inside the src directory and insert the following code into it:
import React, {Component} from 'react';
import {withRouter} from 'react-router-dom';
import auth0Client from './Auth';

class Callback extends Component {
  async componentDidMount() {
    await auth0Client.handleAuthentication();
    this.props.history.replace('/');
  }

  render() {
    return (
      <p>Loading profile...</p>
    );
  }
}

export default withRouter(Callback);
The component you just defined is responsible for two things. First, it calls the handleAuthentication method to fetch the user information sent by Auth0. Second, it redirects your users to the home page (history.replace('/')) after it finishes the handleAuthentication process. In the meantime, this component shows the following message: “Loading profile”.
Then, to wrap the integration with Auth0, you will have to open the App.js file and update it as follows:
// ... other import statements ...
import Callback from './Callback';

class App extends Component {
  render() {
    return (
      <div>
        <!-- ... NavBar and the other two Routes ... -->
        <Route exact path='/callback' component={Callback}/>
      </div>
    );
  }
}

export default App;
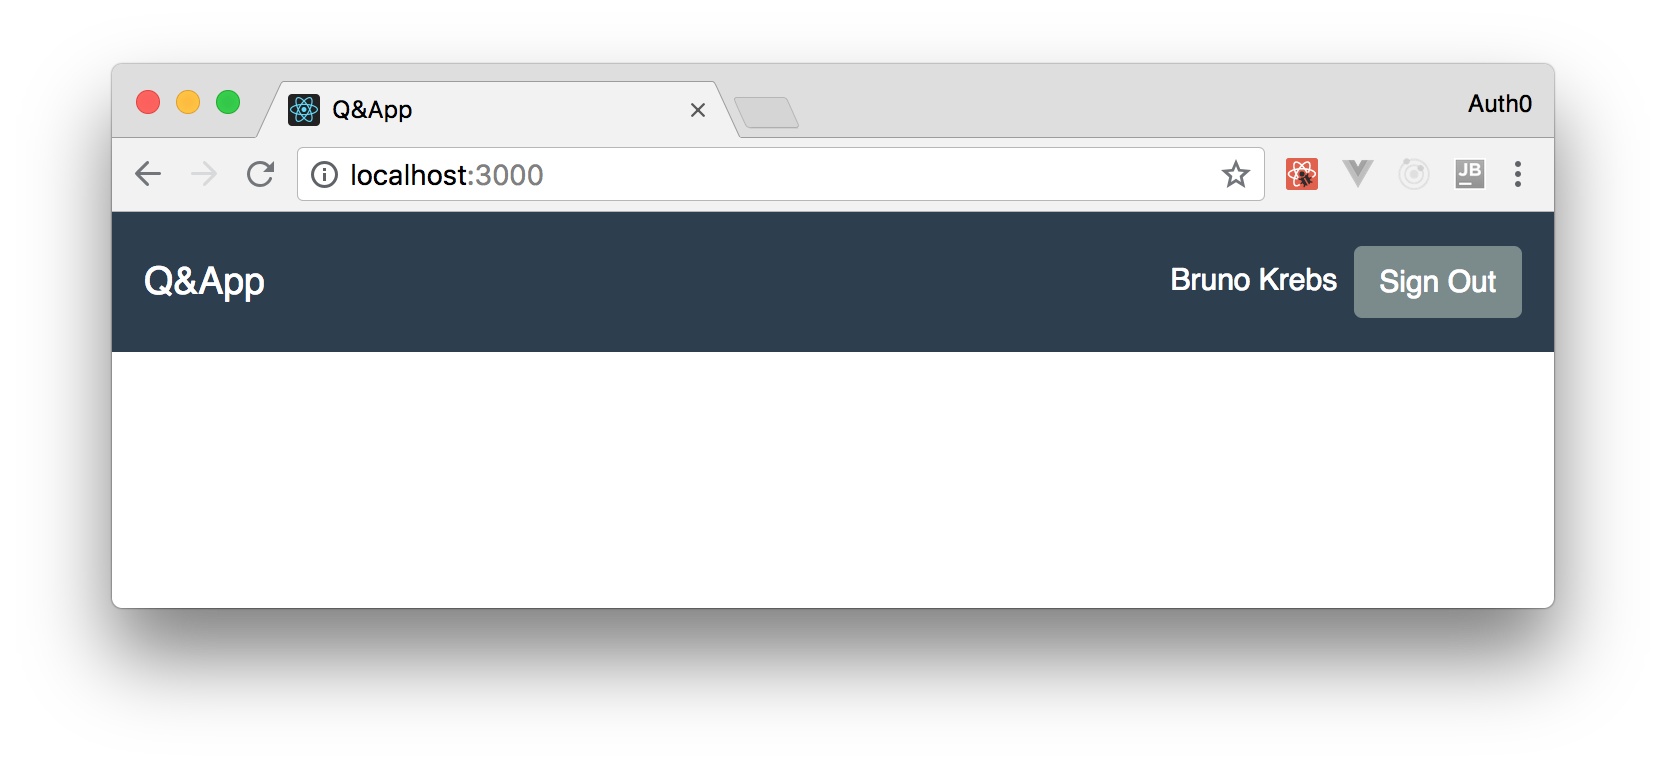
Now, if you run your React app again (npm start), you will be able to authenticate yourself through Auth0. After the authentication process, you will be able to see your name on the navigation bar.
Adding Features to Authenticated Users
Now that you have finished integrating Auth0 into your React application, you can start adding features that only authenticated users will have access to. To conclude this tutorial, you will implement two features. First, you will enable authenticated users to create new questions. Then, you will refactor the Question (singular) component to show a form so authenticated users can answer these questions.
For the first feature, you will create a new route in your application, /new-question. This route will be guarded by a component that will check if the user is authenticated or not. If the user is not authenticated yet, this component will redirect them to Auth0 so they can do so. If the user is already authenticated, the component will let React render the form where new questions will be created.
So, for starters, you will create a new directory called SecuredRoute and create a file called SecuredRoute.js inside it. Then, in this file, you will insert the following code:
import React from 'react';
import {Route} from 'react-router-dom';
import auth0Client from '../Auth';

function SecuredRoute(props) {
  const {component: Component, path} = props;
  return (
    <Route path={path} render={() => {
        if (!auth0Client.isAuthenticated()) {
          auth0Client.signIn();
          return <div></div>;
        }
        return <Component />
    }} />
  );
}

export default SecuredRoute;
The goal of this component is to restrict access to whatever route you configure on it. The implementation of this is quite simple. In this case, you are creating a functional component that takes two properties: another Component, so it can render it in case the user is authenticated; and a path, so it can configure the default Route component provided by React Router. However, before rendering anything, this component checks if the user isAuthenticated. If they are not, this component triggers the signIn method to redirect users to the login page.
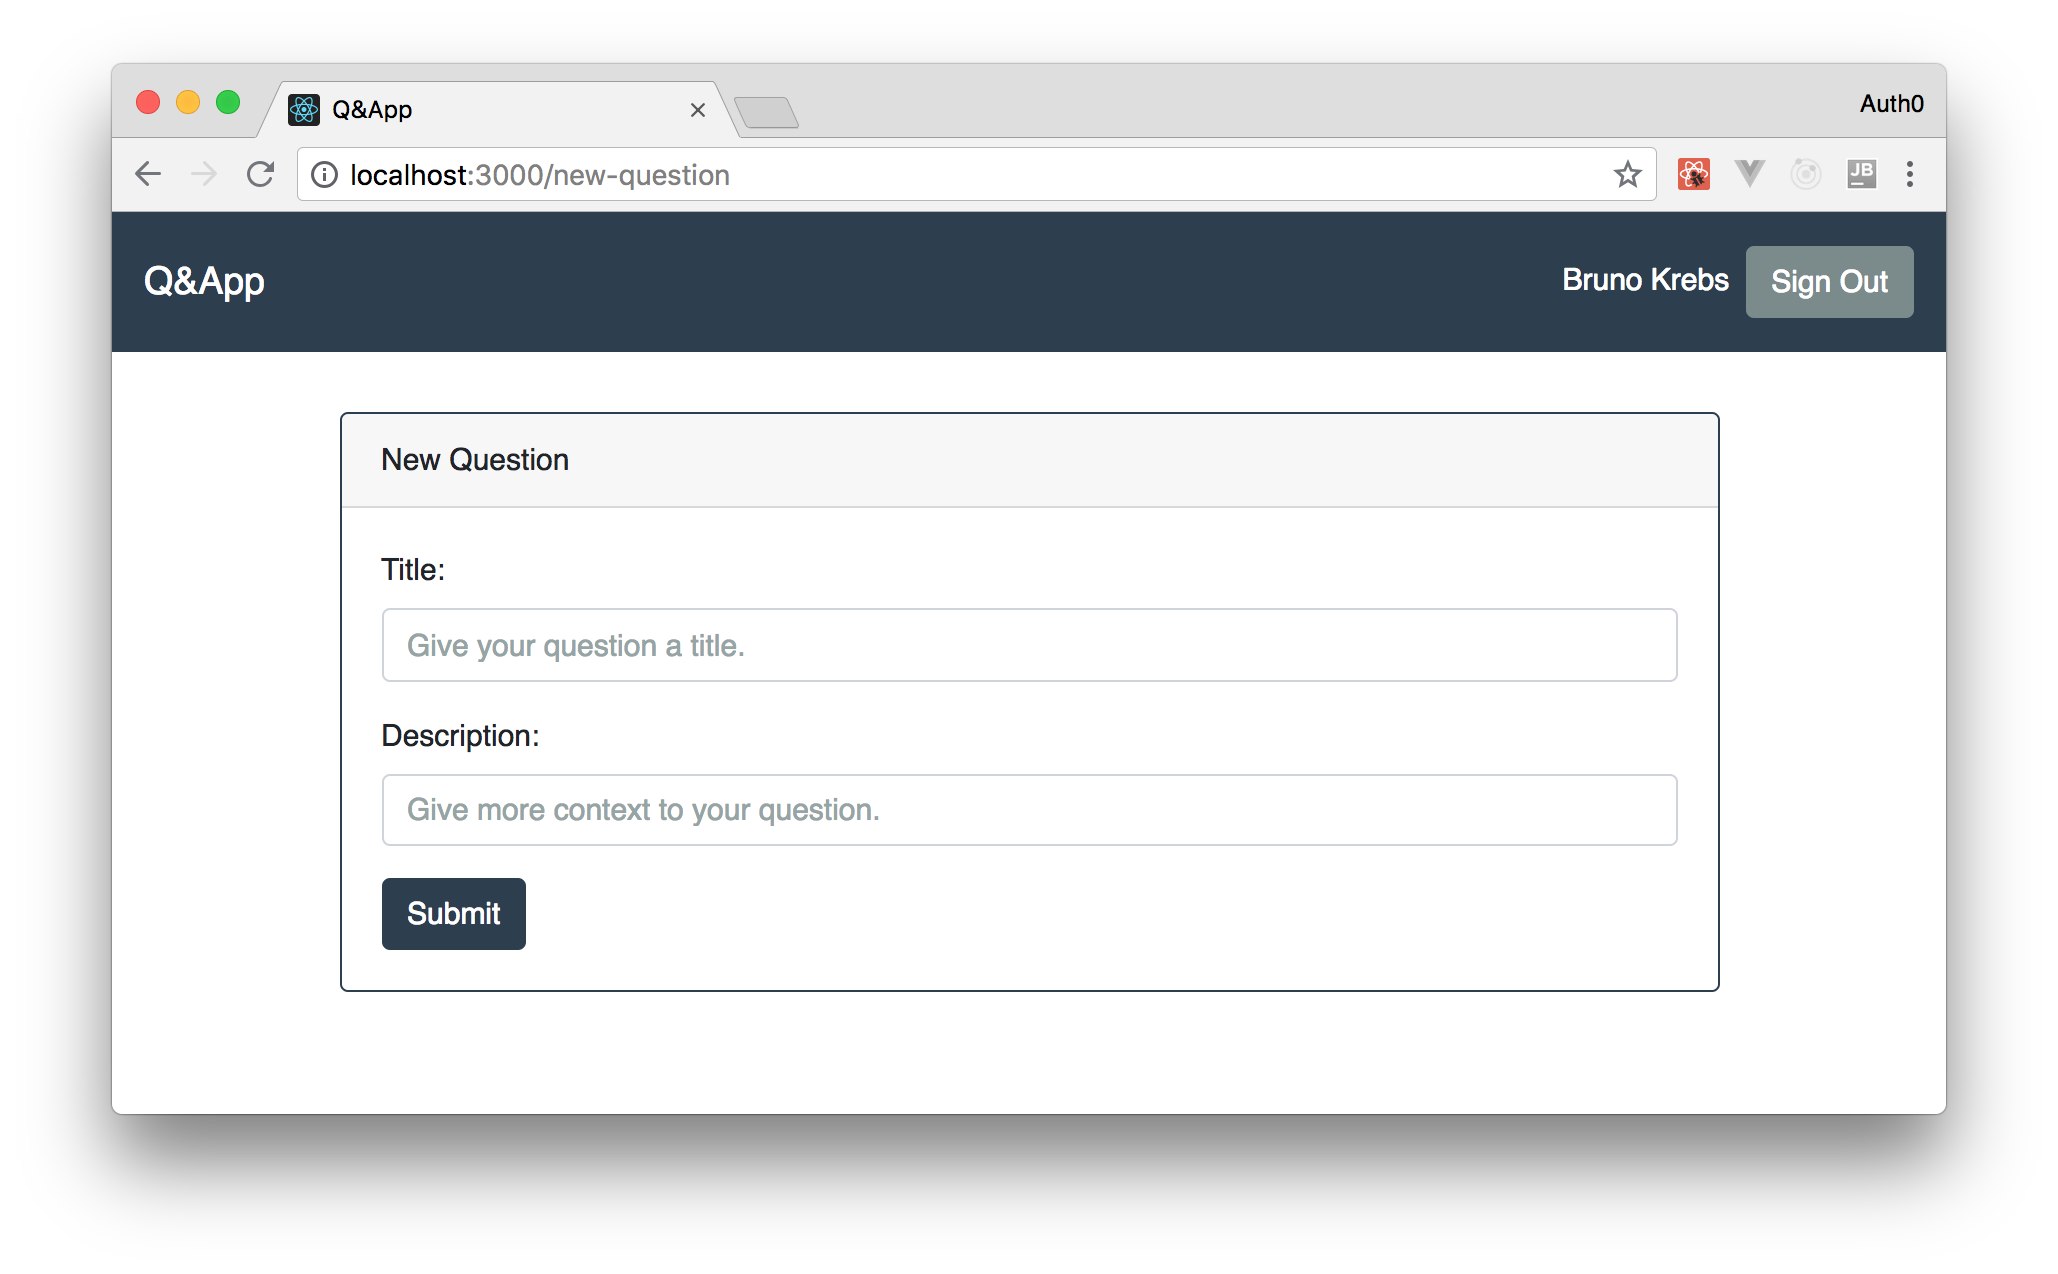
Then, after creating the SecuredRoute component, you can create the component that will render the form where users will create questions. For that, create a new directory called NewQuestion and a file called NewQuestion.js inside it. Then, insert this code in the file:
import React, {Component} from 'react';
import {withRouter} from 'react-router-dom';
import auth0Client from '../Auth';
import axios from 'axios';

class NewQuestion extends Component {
  constructor(props) {
    super(props);

    this.state = {
      disabled: false,
      title: '',
      description: '',
    };
  }

  updateDescription(value) {
    this.setState({
      description: value,
    });
  }

  updateTitle(value) {
    this.setState({
      title: value,
    });
  }

  async submit() {
    this.setState({
      disabled: true,
    });

    await axios.post('http://localhost:8081', {
      title: this.state.title,
      description: this.state.description,
    }, {
      headers: { 'Authorization': `Bearer ${auth0Client.getIdToken()}` }
    });

    this.props.history.push('/');
  }

  render() {
    return (
      <div className="container">
        <div className="row">
          <div className="col-12">
            <div className="card border-primary">
              <div className="card-header">New Question</div>
              <div className="card-body text-left">
                <div className="form-group">
                  <label htmlFor="exampleInputEmail1">Title:</label>
                  <input
                    disabled={this.state.disabled}
                    type="text"
                    onBlur={(e) => {this.updateTitle(e.target.value)}}
                    className="form-control"
                    placeholder="Give your question a title."
                  />
                </div>
                <div className="form-group">
                  <label htmlFor="exampleInputEmail1">Description:</label>
                  <input
                    disabled={this.state.disabled}
                    type="text"
                    onBlur={(e) => {this.updateDescription(e.target.value)}}
                    className="form-control"
                    placeholder="Give more context to your question."
                  />
                </div>
                <button
                  disabled={this.state.disabled}
                  className="btn btn-primary"
                  onClick={() => {this.submit()}}>
                  Submit
                </button>
              </div>
            </div>
          </div>
        </div>
      </div>
    )
  }
}

export default withRouter(NewQuestion);
Although long, the code for this component is not complex. As you can see, in this case, you needed to create a class component so it can hold the following state:
[body-parser](https://github.com/expressjs/body-parser "body-parser"): This is a library that you will use to convert the body of incoming requests into JSON objects.[cors](https://github.com/expressjs/cors "cors"): This is a library that you will use to configure Express to add headers stating that your API accepts requests coming from other origins. This is also known as Cross-Origin Resource Sharing (CORS).[express](https://github.com/expressjs/express "express"): This is Express itself.[helmet](https://github.com/helmetjs/helmet "helmet"): This is a library that helps to secure Express apps with various HTTP headers.[morgan](https://github.com/expressjs/morgan "morgan"): This is a library that adds some logging capabilities to your Express app.
Also, you can see that you needed three methods besides constructor and render:
[body-parser](https://github.com/expressjs/body-parser "body-parser"): This is a library that you will use to convert the body of incoming requests into JSON objects.[cors](https://github.com/expressjs/cors "cors"): This is a library that you will use to configure Express to add headers stating that your API accepts requests coming from other origins. This is also known as Cross-Origin Resource Sharing (CORS).[express](https://github.com/expressjs/express "express"): This is Express itself.[helmet](https://github.com/helmetjs/helmet "helmet"): This is a library that helps to secure Express apps with various HTTP headers.[morgan](https://github.com/expressjs/morgan "morgan"): This is a library that adds some logging capabilities to your Express app.
Note that, in the submit method, you are using auth0Client to get the ID Token of the current user to add it in the request. Without this token, the backend API would deny the request.
From the UI perspective, this component is using a bunch of Bootstrap classes to produce a nice form. Be sure to check this resource after finishing the tutorial if you need to learn about forms on Bootstrap.
Now, to see this working, you will have to update two files. First, you will have to register the new route in your App.js file:
// ... other import statements ...
import NewQuestion from './NewQuestion/NewQuestion';
import SecuredRoute from './SecuredRoute/SecuredRoute';

class App extends Component {
  render() {
    return (
      <div>
        <!-- ... navbar and other routes ... -->
        <SecuredRoute path='/new-question' component={NewQuestion} />
      </div>
    );
  }
}

export default App;
Then, you will have to add a link in the Questions.js file to this new route. To do so, open this file and update it as follows:
// ... import statements ...

class Questions extends Component {
  // ... constructor and componentDidMount ...

  render() {
    return (
      <div className="container">
        <div className="row">
          <Link to="/new-question">
            <div className="card text-white bg-secondary mb-3">
              <div className="card-header">Need help? Ask here!</div>
              <div className="card-body">
                <h4 className="card-title">+ New Question</h4>
                <p className="card-text">Don't worry. Help is on the way!</p>
              </div>
            </div>
          </Link>
          <!-- ... loading questions message ... -->
          <!-- ... questions' cards ... -->
        </div>
      </div>
    )
  }
}

export default Questions;
With these changes in place, you will be able to create new questions after authenticating.
Then, to finish your app’s features, you can refactor the Question component to include a form where users will be able to answer questions. To define this form, create a new file called SubmitAnswer.js inside the Question directory with the following code:
import React, {Component, Fragment} from 'react';
import {withRouter} from 'react-router-dom';
import auth0Client from '../Auth';

class SubmitAnswer extends Component {
  constructor(props) {
    super(props);
    this.state = {
      answer: '',
    };
  }

  updateAnswer(value) {
    this.setState({
      answer: value,
    });
  }

  submit() {
    this.props.submitAnswer(this.state.answer);

    this.setState({
      answer: '',
    });
  }

  render() {
    if (!auth0Client.isAuthenticated()) return null;
    return (
      <Fragment>
        <div className="form-group text-center">
          <label htmlFor="exampleInputEmail1">Answer:</label>
          <input
            type="text"
            onChange={(e) => {this.updateAnswer(e.target.value)}}
            className="form-control"
            placeholder="Share your answer."
            value={this.state.answer}
          />
        </div>
        <button
          className="btn btn-primary"
          onClick={() => {this.submit()}}>
          Submit
        </button>
        <hr className="my-4" />
      </Fragment>
    )
  }
}

export default withRouter(SubmitAnswer);
This component works in a similar fashion to the NewQuestion component. The difference here is that instead of handling the POST request by itself, the component delegates it to someone else. Also, if the user is not authenticated, this component renders nothing.
To use this component, open the Question.js file and replace its contents with this:
import React, {Component} from 'react';
import axios from 'axios';
import SubmitAnswer from './SubmitAnswer';
import auth0Client from '../Auth';

class Question extends Component {
  constructor(props) {
    super(props);
    this.state = {
      question: null,
    };

    this.submitAnswer = this.submitAnswer.bind(this);
  }

  async componentDidMount() {
    await this.refreshQuestion();
  }

  async refreshQuestion() {
    const { match: { params } } = this.props;
    const question = (await axios.get(`http://localhost:8081/${params.questionId}`)).data;
    this.setState({
      question,
    });
  }

  async submitAnswer(answer) {
    await axios.post(`http://localhost:8081/answer/${this.state.question.id}`, {
      answer,
    }, {
      headers: { 'Authorization': `Bearer ${auth0Client.getIdToken()}` }
    });
    await this.refreshQuestion();
  }

  render() {
    const {question} = this.state;
    if (question === null) return <p>Loading ...</p>;
    return (
      <div className="container">
        <div className="row">
          <div className="jumbotron col-12">
            <h1 className="display-3">{question.title}</h1>
            <p className="lead">{question.description}</p>
            <hr className="my-4" />
            <SubmitAnswer questionId={question.id} submitAnswer={this.submitAnswer} />
            <p>Answers:</p>
            {
              question.answers.map((answer, idx) => (
                <p className="lead" key={idx}>{answer.answer}</p>
              ))
            }
          </div>
        </div>
      </div>
    )
  }
}

export default Question;
Here, you can see that you are defining the submitAnswer method that will issue the requests to the backend API (with the user’s ID Token), and that you are defining a method called refreshQuestion. This method will refresh the contents of the question in two situations, on the first time React is rendering this component (componentDidMount) and right after the backend API respond to the POST request of the submitAnswer method.
After refactoring the Question component, you will have a complete version of your app. To test it, you can go to [http://localhost:3000/](http://localhost:3000/ "http://localhost:3000/") and start using your full React app. After signing in, you will be able to ask questions, and you will be able to answer them as well. How cool is that?
Keeping Users Signed In after a Refresh
Although you have a fully-functional app, after signing into your application, if you refresh your browser, you will notice that you will be signed out. Why is that? Because you are saving you tokens in memory (as you should do) and because the memory is wiped out when you hit refresh. Not the best behavior, right?
Luckily, solving this problem is easy. You will have to take advantage of the Silent Authentication provided by Auth0. That is, whenever your application is loaded, it will send a silent request to Auth0 to check if the current user (actually the browser) has a valid session. If they do, Auth0 will send back to you an idToken and an idTokenPayload, just like it does on the authentication callback.
To use the silent authentication, you will have to refactor two classes: Auth and App. However, before refactoring these classes, you will have to change a few configurations in your Auth0 account.
For starters, you will have to go to the Applications section in your Auth0 dashboard, open the application that represents your React app, and change two fields:
- Allowed Web Origins: As your app is going to issue an AJAX request to Auth0, you will need to add
[http://localhost:3000](http://localhost:3000 "http://localhost:3000")to this field. Without this value there, Auth0 would deny any AJAX request coming from your app. - Allowed Logout URLs: To enable users to end their session at Auth0, you will have to call the logout endpoint. Similarly to the authorization endpoint, the log out endpoint only redirects users to whitelisted URLs after the process. As such, you will have to add
[http://localhost:3000](http://localhost:3000 "http://localhost:3000")in this field too.
After updating these fields, you can hit the Save Changes button. Then, the last thing you will have to do before focusing in your app’s code is to replace the development keys that Auth0 is using to enable users to authenticate through Google.
You might not have noticed but, even though you didn’t configure anything related to Google in your Auth0 account, the social login button is there and works just fine. The only reason this feature works out of the box is because Auth0 auto-configure all new accounts to use development keys registered at Google. However, when developers start using Auth0 more seriously, they are expected to replace these keys with their own. And, to force this, every time an app tries to perform a silent authentication, and that app is still using the development keys, Auth0 returns that there is no session active (even though this is not true).
So, to change these keys, move to the Social Connections on your dashboard, and click on Google. There, you will see two fields among other things: Client ID and Client Secret. This is where you will insert your keys. To get your keys, please, read the Connect your app to Google documentation provided by Auth0.
“React embraces the fact that rendering logic is inherently coupled with other UI logic: how events are handled, how the state changes over time, and how the data is prepared for display.” - Introducing JSX
Now that you have finished configuring your Auth0 account, you can move back to your code. There, open the./src/Auth.jsfile of your React app and update it as follows:
import auth0 from 'auth0-js';

class Auth {
  // ... constructor, getProfile, getIdToken, isAuthenticated, signIn ...

  handleAuthentication() {
    return new Promise((resolve, reject) => {
      this.auth0.parseHash((err, authResult) => {
        if (err) return reject(err);
        if (!authResult || !authResult.idToken) {
          return reject(err);
        }
        this.setSession(authResult);
        resolve();
      });
    })
  }

  setSession(authResult) {
    this.idToken = authResult.idToken;
    this.profile = authResult.idTokenPayload;
    // set the time that the id token will expire at
    this.expiresAt = authResult.idTokenPayload.exp * 1000;
  }

  signOut() {
    this.auth0.logout({
      returnTo: 'http://localhost:3000',
      clientID: '<YOUR_AUTH0_CLIENT_ID>',
    });
  }

  silentAuth() {
    return new Promise((resolve, reject) => {
      this.auth0.checkSession({}, (err, authResult) => {
        if (err) return reject(err);
        this.setSession(authResult);
        resolve();
      });
    });
  }
}

// ... auth0Client and export ...
“React embraces the fact that rendering logic is inherently coupled with other UI logic: how events are handled, how the state changes over time, and how the data is prepared for display.” - Introducing JSX
In the new version of this class, you are:
[body-parser](https://github.com/expressjs/body-parser "body-parser"): This is a library that you will use to convert the body of incoming requests into JSON objects.[cors](https://github.com/expressjs/cors "cors"): This is a library that you will use to configure Express to add headers stating that your API accepts requests coming from other origins. This is also known as Cross-Origin Resource Sharing (CORS).[express](https://github.com/expressjs/express "express"): This is Express itself.[helmet](https://github.com/helmetjs/helmet "helmet"): This is a library that helps to secure Express apps with various HTTP headers.[morgan](https://github.com/expressjs/morgan "morgan"): This is a library that adds some logging capabilities to your Express app.
Then, to wrap things up, you will have to open the ./src/App.js file, and update it as follows:
// ... other imports ...
import {Route, withRouter} from 'react-router-dom';
import auth0Client from './Auth';

class App extends Component {
  async componentDidMount() {
    if (this.props.location.pathname === '/callback') return;
    try {
      await auth0Client.silentAuth();
      this.forceUpdate();
    } catch (err) {
      if (err.error !== 'login_required') console.log(err.error);
    }
  }

  // ... render ...
}

export default withRouter(App);
As you can see, the new version of this file is defining what to do when your app loads (componentDidMount):
- Allowed Web Origins: As your app is going to issue an AJAX request to Auth0, you will need to add
[http://localhost:3000](http://localhost:3000 "http://localhost:3000")to this field. Without this value there, Auth0 would deny any AJAX request coming from your app. - Allowed Logout URLs: To enable users to end their session at Auth0, you will have to call the logout endpoint. Similarly to the authorization endpoint, the log out endpoint only redirects users to whitelisted URLs after the process. As such, you will have to add
[http://localhost:3000](http://localhost:3000 "http://localhost:3000")in this field too.
“React embraces the fact that rendering logic is inherently coupled with other UI logic: how events are handled, how the state changes over time, and how the data is prepared for display.” - Introducing JSX### Avoiding Redirecting Authenticated Users to Auth0
Before you call it a day, there is one last thing that you will have to do. The solution above will work smoothly if you are on any route but the protected one. If you are on the protected route (i.e., on /new-question) and you refresh your browser, you will get redirected to Auth0 to sign in again. The problem here is that the SecuredRoute component checks whether users are authenticated or not (if (!auth0Client.isAuthenticated())) before your app get a response from the silent authentication process. As such, the app thinks that your users is not authenticated and redirects them to Auth0 (auth0Client.signIn();) so they can sign in.
To fix this misbehavior, you will have to open your SecuredRoute.js file and update it as follows:
// ... import statements ...
function SecuredRoute(props) {
  const {component: Component, path, checkingSession} = props;
  return (
    <Route path={path} render={() => {
      if (checkingSession) return <h3 className="text-center">Validating session...</h3>;
      // ... leave the rest untouched ...
     }} />
  );
}

export default SecuredRoute;
The difference now is that your SecuredRoute component will verify a boolean called checkingSession that comes from props and, if this boolean is set to true, it will show an h3 element saying that the app is validating session. If this property is set to false, the component will behave just like before.
Now, to pass this property to SecuredRoute, you will have to open the App.js file and update it as follows:
// ... import statements ...
class App extends Component {
  constructor(props) {
    super(props);
    this.state = {
      checkingSession: true,
    }
  }

  async componentDidMount() {
    if (this.props.location.pathname === '/callback') {
      this.setState({checkingSession:false});
      return;
    }
    // ... leave try-catch untouched
    this.setState({checkingSession:false});
  }

  render() {
    // ... leave other routes untouched ...
    // replace SecuredRoute with this:
    <SecuredRoute path='/new-question'
                  component={NewQuestion}
                  checkingSession={this.state.checkingSession} />
  }
}

export default withRouter(App);
That’s it! After these changes, you finally finished developing your React application. Now, if you sign in and refresh your browser (no matter which route you are in), you will see that you won’t lose your session and that you won’t have to sign in again. Hurray!
Conclusion
In this article, you had the chance to play with a lot of cool technologies and concepts. First, you learned about some important concepts that React introduces (like the component architecture and the JSX syntax). Then, you briefly learned how to create a backend API with Node.js and Express. After that, you learned how to create a nice React application and how to secure the whole thing with Auth0.
As the article introduced a lot of different topics, you didn’t really have the chance to grasp all of them fully. For example, you barely touched the tip of the iceberg on some important concepts like the Component Lifecycle. You also didn’t have the chance to learn what gives React a solid foundation when it comes to manipulating HTML elements. Unfortunately, diving deep into these topics is not possible as it would make the article massive (more than it is already).
So, now that you finished developing your first React application, be sure to check the links and references left throughout the tutorial and, to learn more about how React works, be sure to check the Virtual DOM and Internals article.
Also, if you need help, do not hesitate to leave a message on the comments section down below. Cheers!
*Originally published by Bruno Krebs at *https://auth0.com
Learn More
☞ Full Stack Developers: Everything You Need to Know
☞ Learn React.js for Beginners
☞ React Hooks Tutorial for Beginners: Getting Started With React Hooks
☞ Learn React - React Crash Course 2019 - React Tutorial with Examples
☞ React Router: Add the Power of Navigation
☞ React - The Complete Guide (incl Hooks, React Router, Redux)
☞ Modern React with Redux [2019 Update]
☞ React Native - The Practical Guide
☞ MERN Stack Front To Back: Full Stack React, Redux & Node.js
☞ Full-Stack Web Apps with Meteor and React
#reactjs #javascript