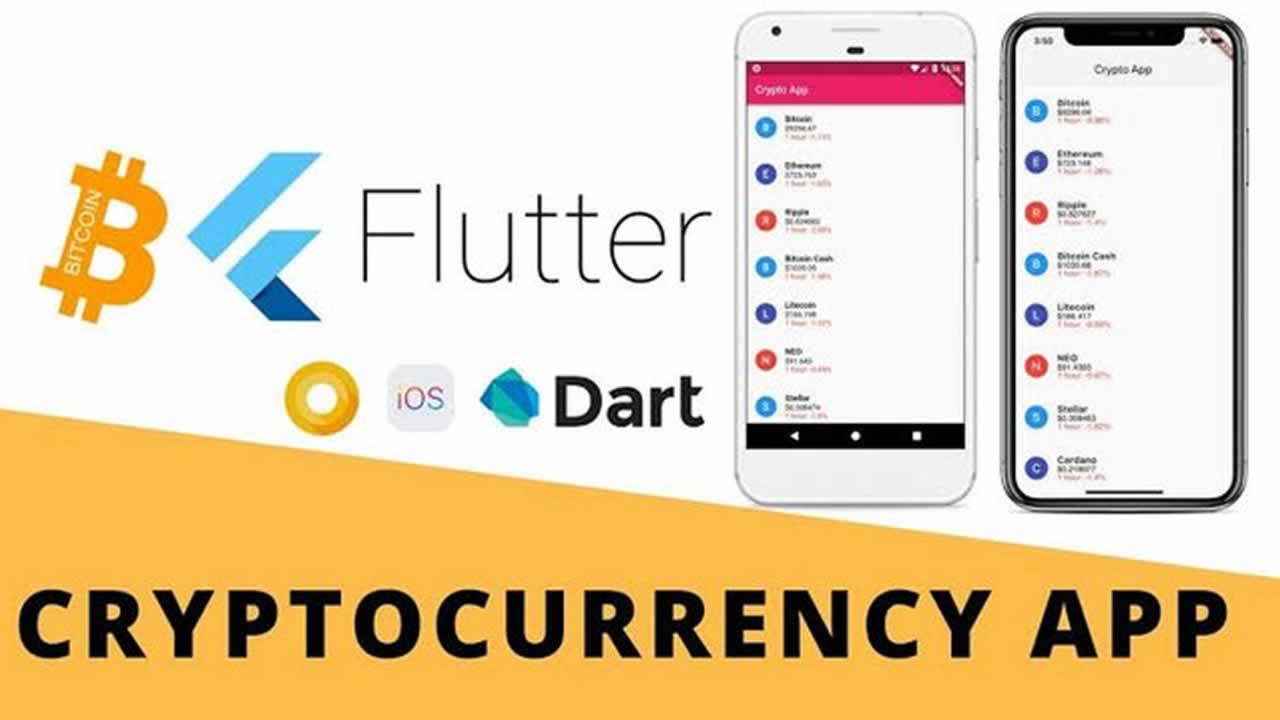
Building Cryptocurrency Pricing App with Flutter
I’ve come across Google’s new open-source toolkit for cross-platform development recently, and decided to give it a try. You can read about the various benefits here (spoiler, it seems really great), but I thought I would share with you on how to get started with Flutter with something other than their tutorial.
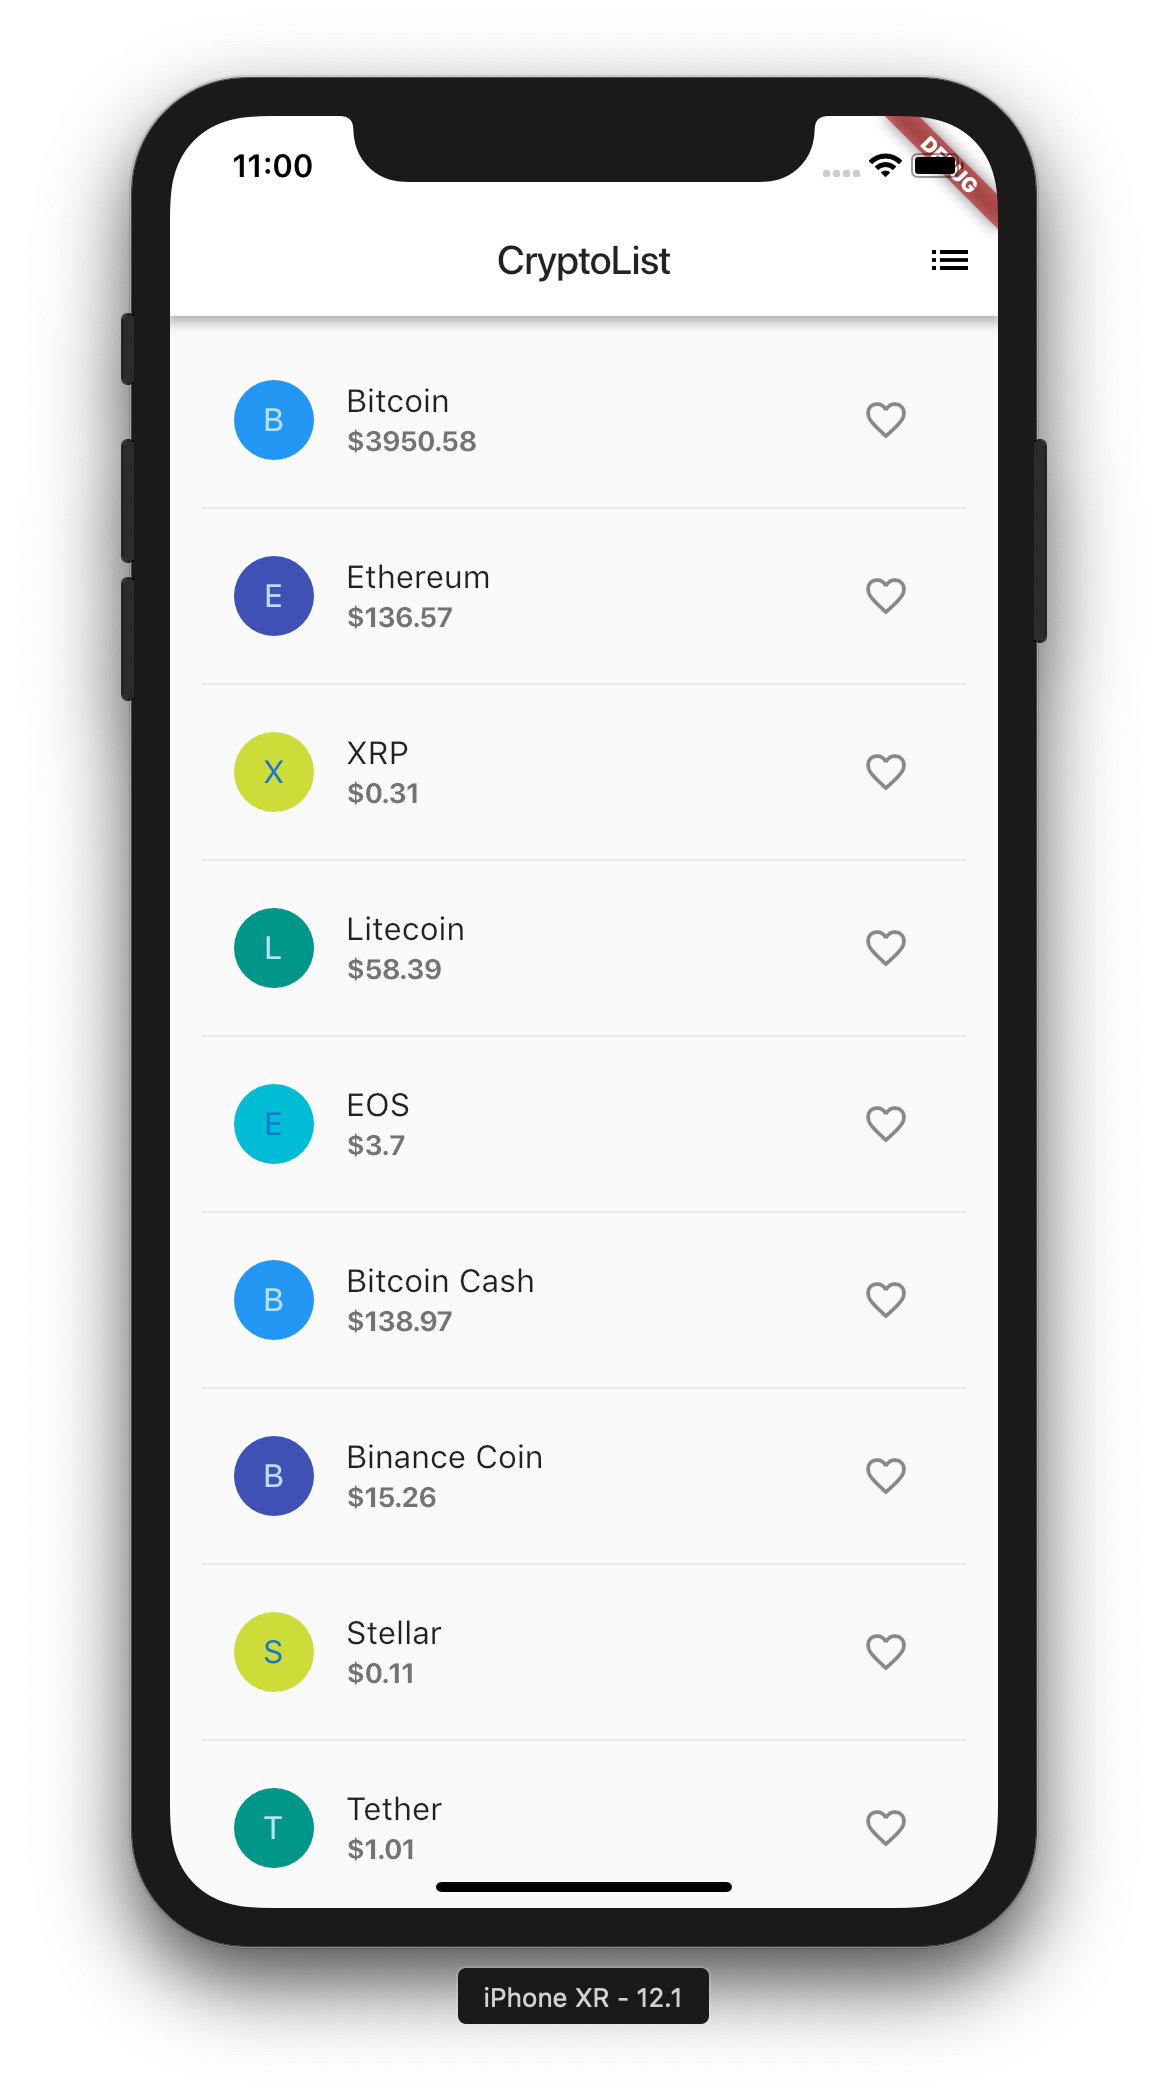
We will be creating a Cryptocurrency Price List app with pull-to-refresh functionality and also to keep track of your favourite Cryptocurrencies.
Prerequisites
I will be using a Macbook with iOS simulator to build this app. Feel free to use Windows machine and an Android emulator.
Before we begin, head over to Flutter and install Flutter and various dependencies. While you are at it, grab your favourite IDE and set it up to use with flutter (we will be using VS Code in this tutorial).
Let’s get started!
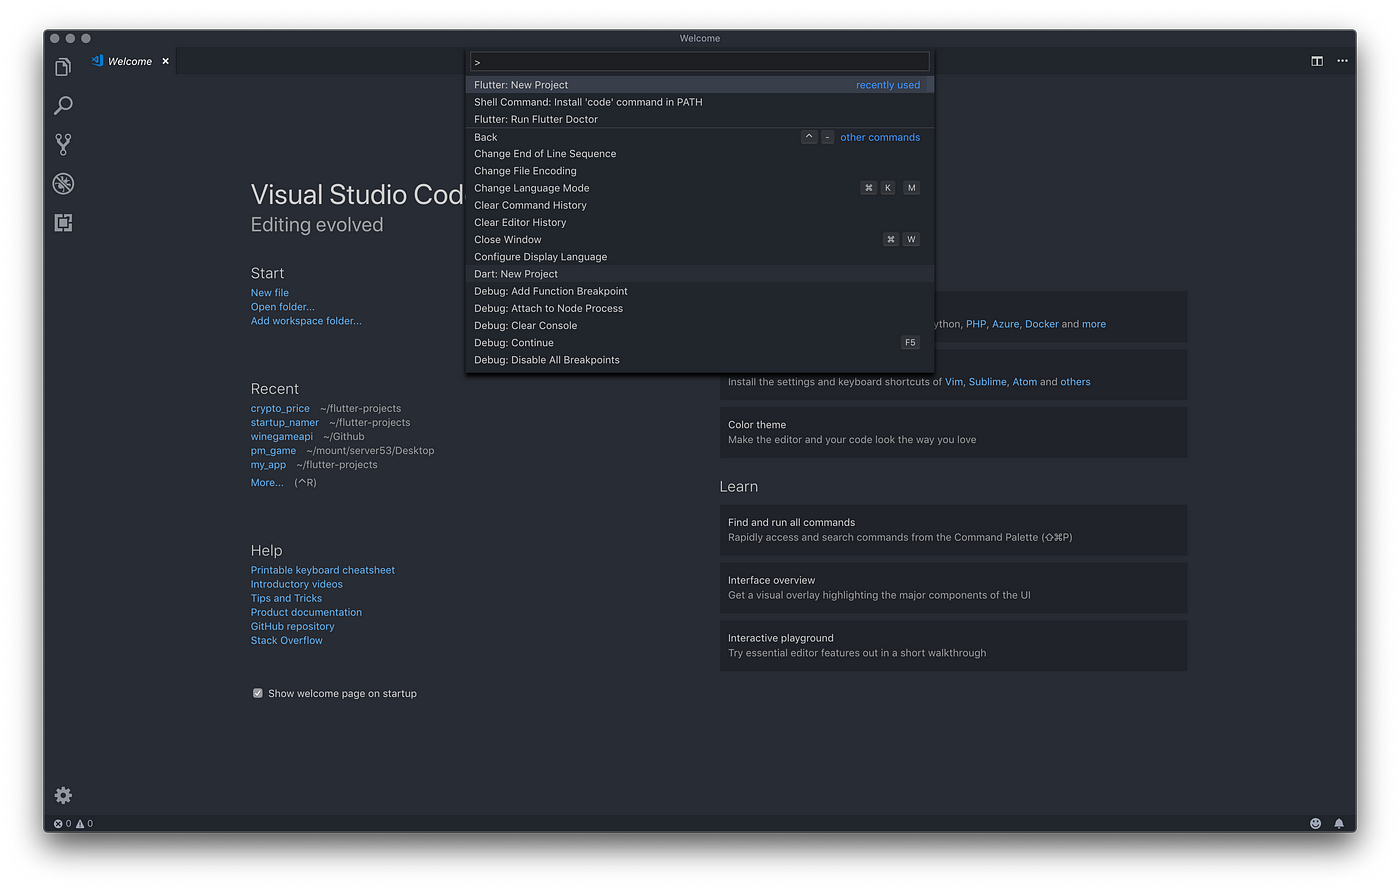
In VS Code (follow steps here if needed), search for Flutter New Project to create a new flutter project. Name it crypto_list and let flutter initialise the project for us.
A file main.dart is created, and this will be the point of entry for our app. We will be building the app from scratch, so go ahead and delete all the code there.
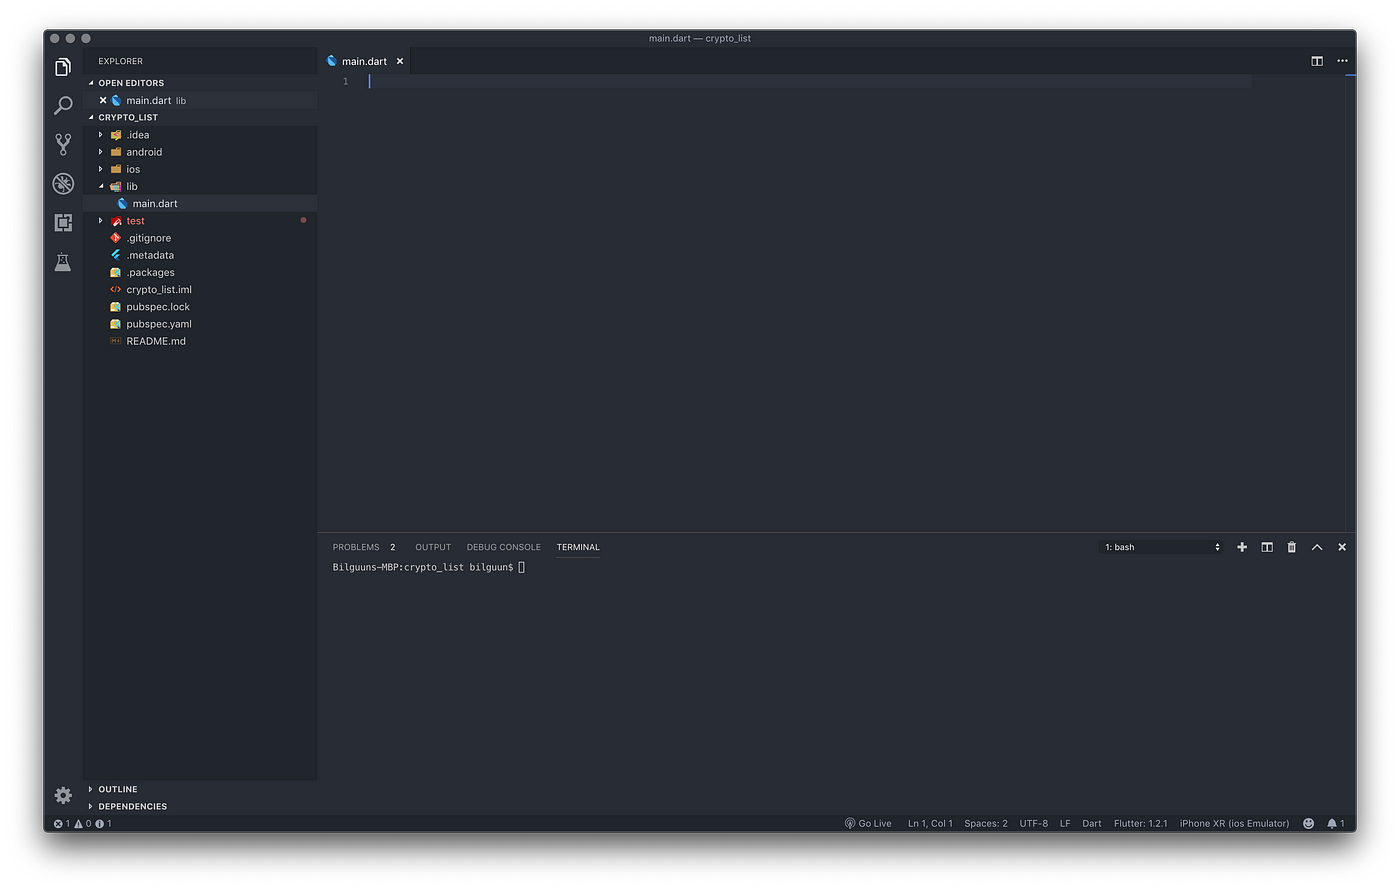
This is how your IDE should look at this point.
Creating basic UI
import 'package:flutter/material.dart';

//runApp calls MyApp
void main() => runApp(MyApp());

//Stateless Widget since this class has no state, once created will be immutable
class MyApp extends StatelessWidget {
  @override
  Widget build(BuildContext context) {
    //A convenience widget that wraps a number of widgets that are commonly
    //required for applications implementing Material Design.
    return MaterialApp(
        title: 'Crypto Price List',
        theme: new ThemeData(primaryColor: Colors.white), //will be used later
        home: new Center(child: new Text('my crypto app'),)); //centralize the text
  }
}
main.dart
When you start the app, the code will be executed from the main function. So let’s go ahead and create it as above.
open -a Simulator
flutter run
This opens the default simulator used on your machine, and runs the application. Run it and it should show the following
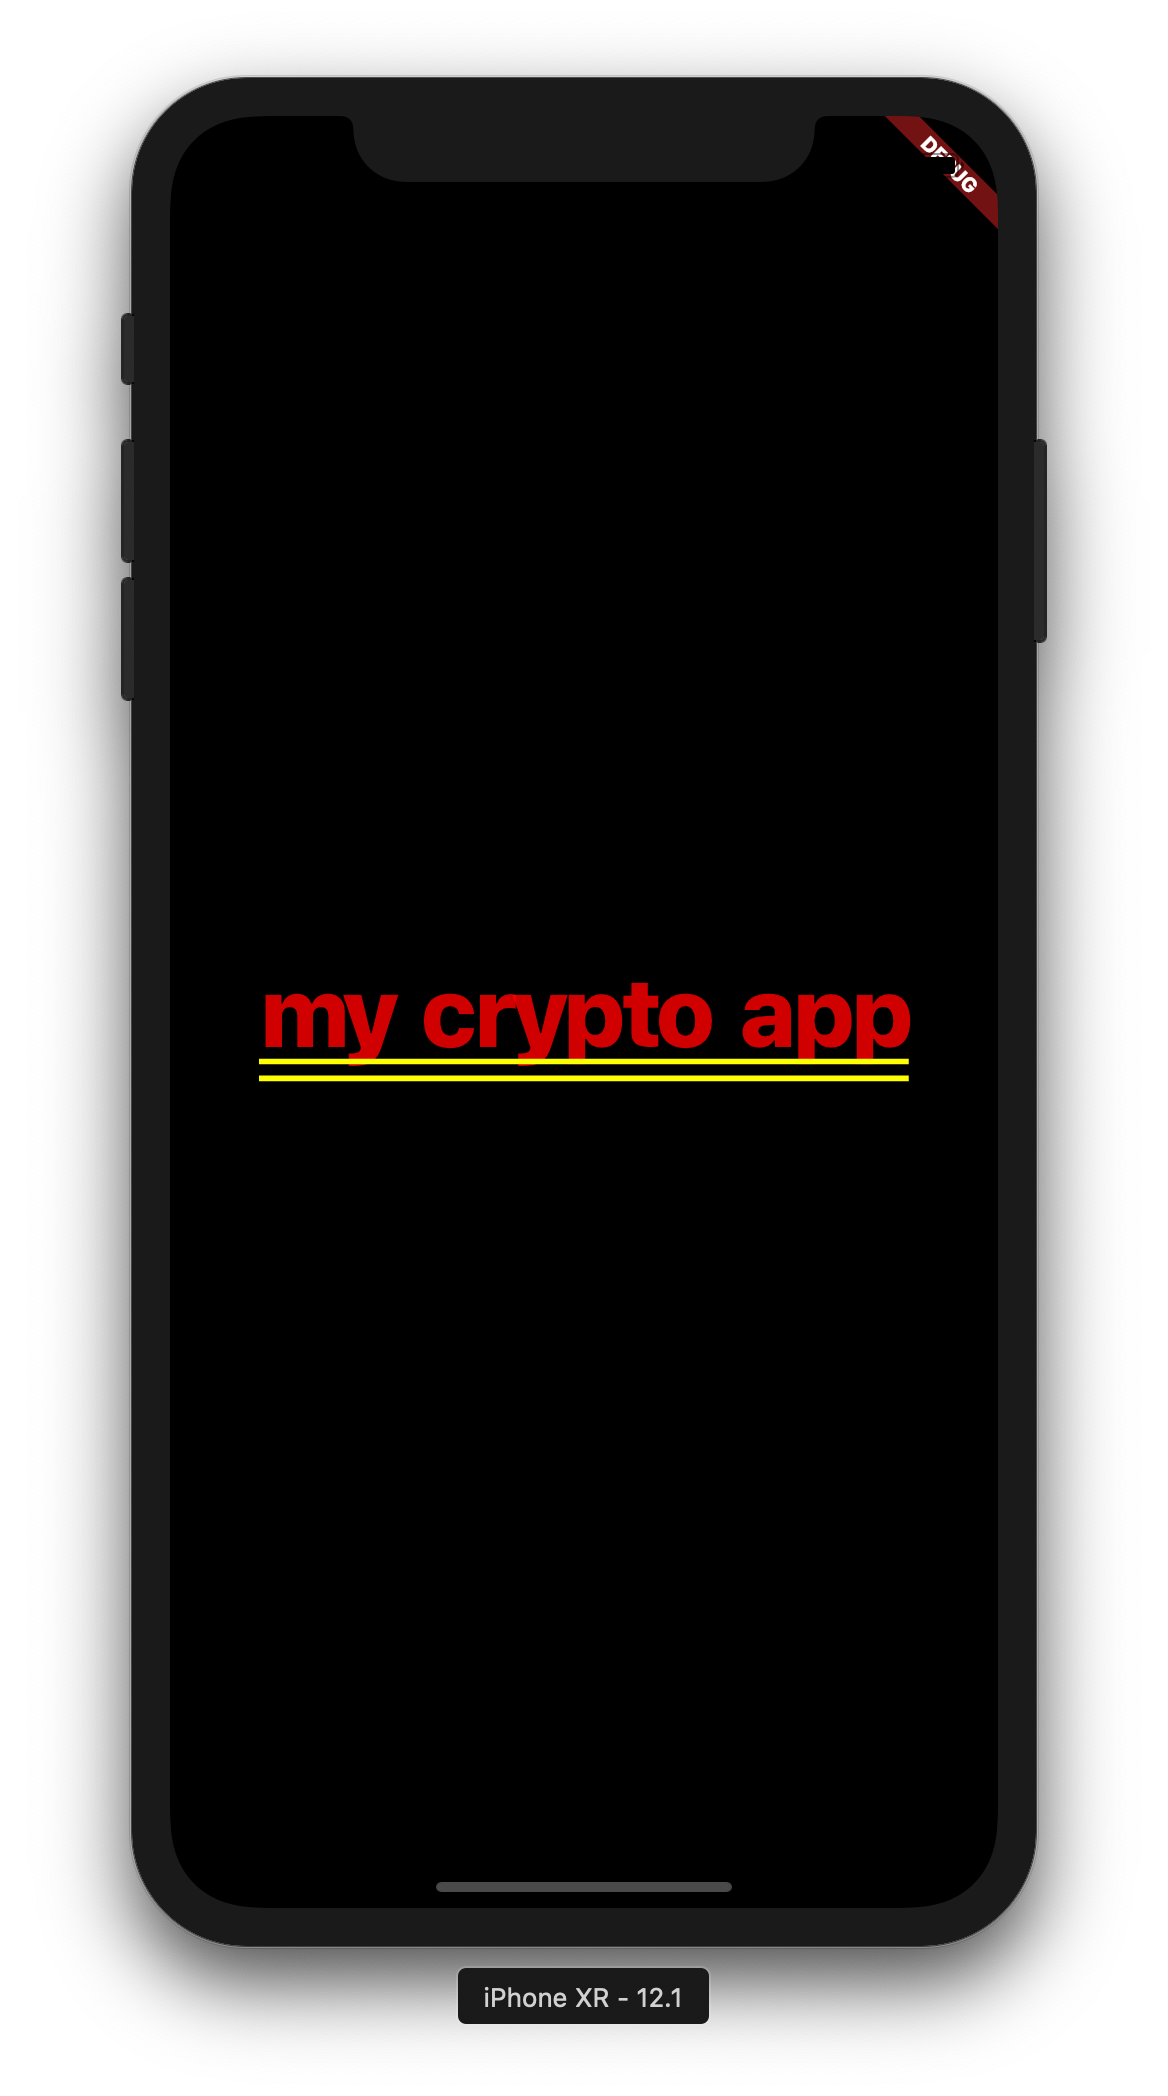
Ok great! You have build your first UI using flutter! It is quite ugly now so let’s create couple of widgets to beautify our app.
Adding widgets
import 'package:flutter/material.dart';

void main() => runApp(MyApp());

class MyApp extends StatelessWidget {
  @override
  Widget build(BuildContext context) {
    //material app widget
    return MaterialApp(
      title: 'Crypto Price List',
      theme: new ThemeData(primaryColor: Colors.white),
      home: CryptoList(),
    ); //use our widget instead of the text previously
  }
}

//creates a stateful widget (data inside will change once created)
class CryptoList extends StatefulWidget {
  @override
  CryptoListState createState() => CryptoListState();
}

class CryptoListState extends State {
  //will be used later to view favourited cryptos
  void _pushSaved() {}

//build method
  @override
  Widget build(BuildContext context) {
    //Implements the basic Material Design visual layout structure.
    //This class provides APIs for showing drawers, snack bars, and bottom sheets.
    return Scaffold(
        appBar: AppBar(
          title: Text('CryptoList'),
          actions: [
            // will be used to view favourites
            new IconButton(icon: const Icon(Icons.list), onPressed: _pushSaved),
          ],
        ),
        body: new Center(
          // body of the scaffold
          child: new Text('my crypto app'),
        ));
  }
}
main.dart
Stateless widgets are immutable, meaning that their properties can’t change — all values are final
Stateful widgets maintain state that might change during the lifetime of the widget. Implementing a stateful widget requires at least two classes: 1) a StatefulWidget class that creates an instance of 2) a State class. The StatefulWidget class is, itself, immutable, but the State class persists over the lifetime of the widget.
Edit our code to be like what is shown above.
What we have done is:
- Add a stateful widget
CryptoListwhich creates its state classCryptoListState - Most of the logic will be stored in
CryptoListStateandCryptoListjust creates its State class buildto describe how the widget will look. Here we are returningScaffoldwhich creates anappBarwithtitleandiconsandbodywith centralised text.
Press r to reload changes or R to hot restart (and rebuild state)
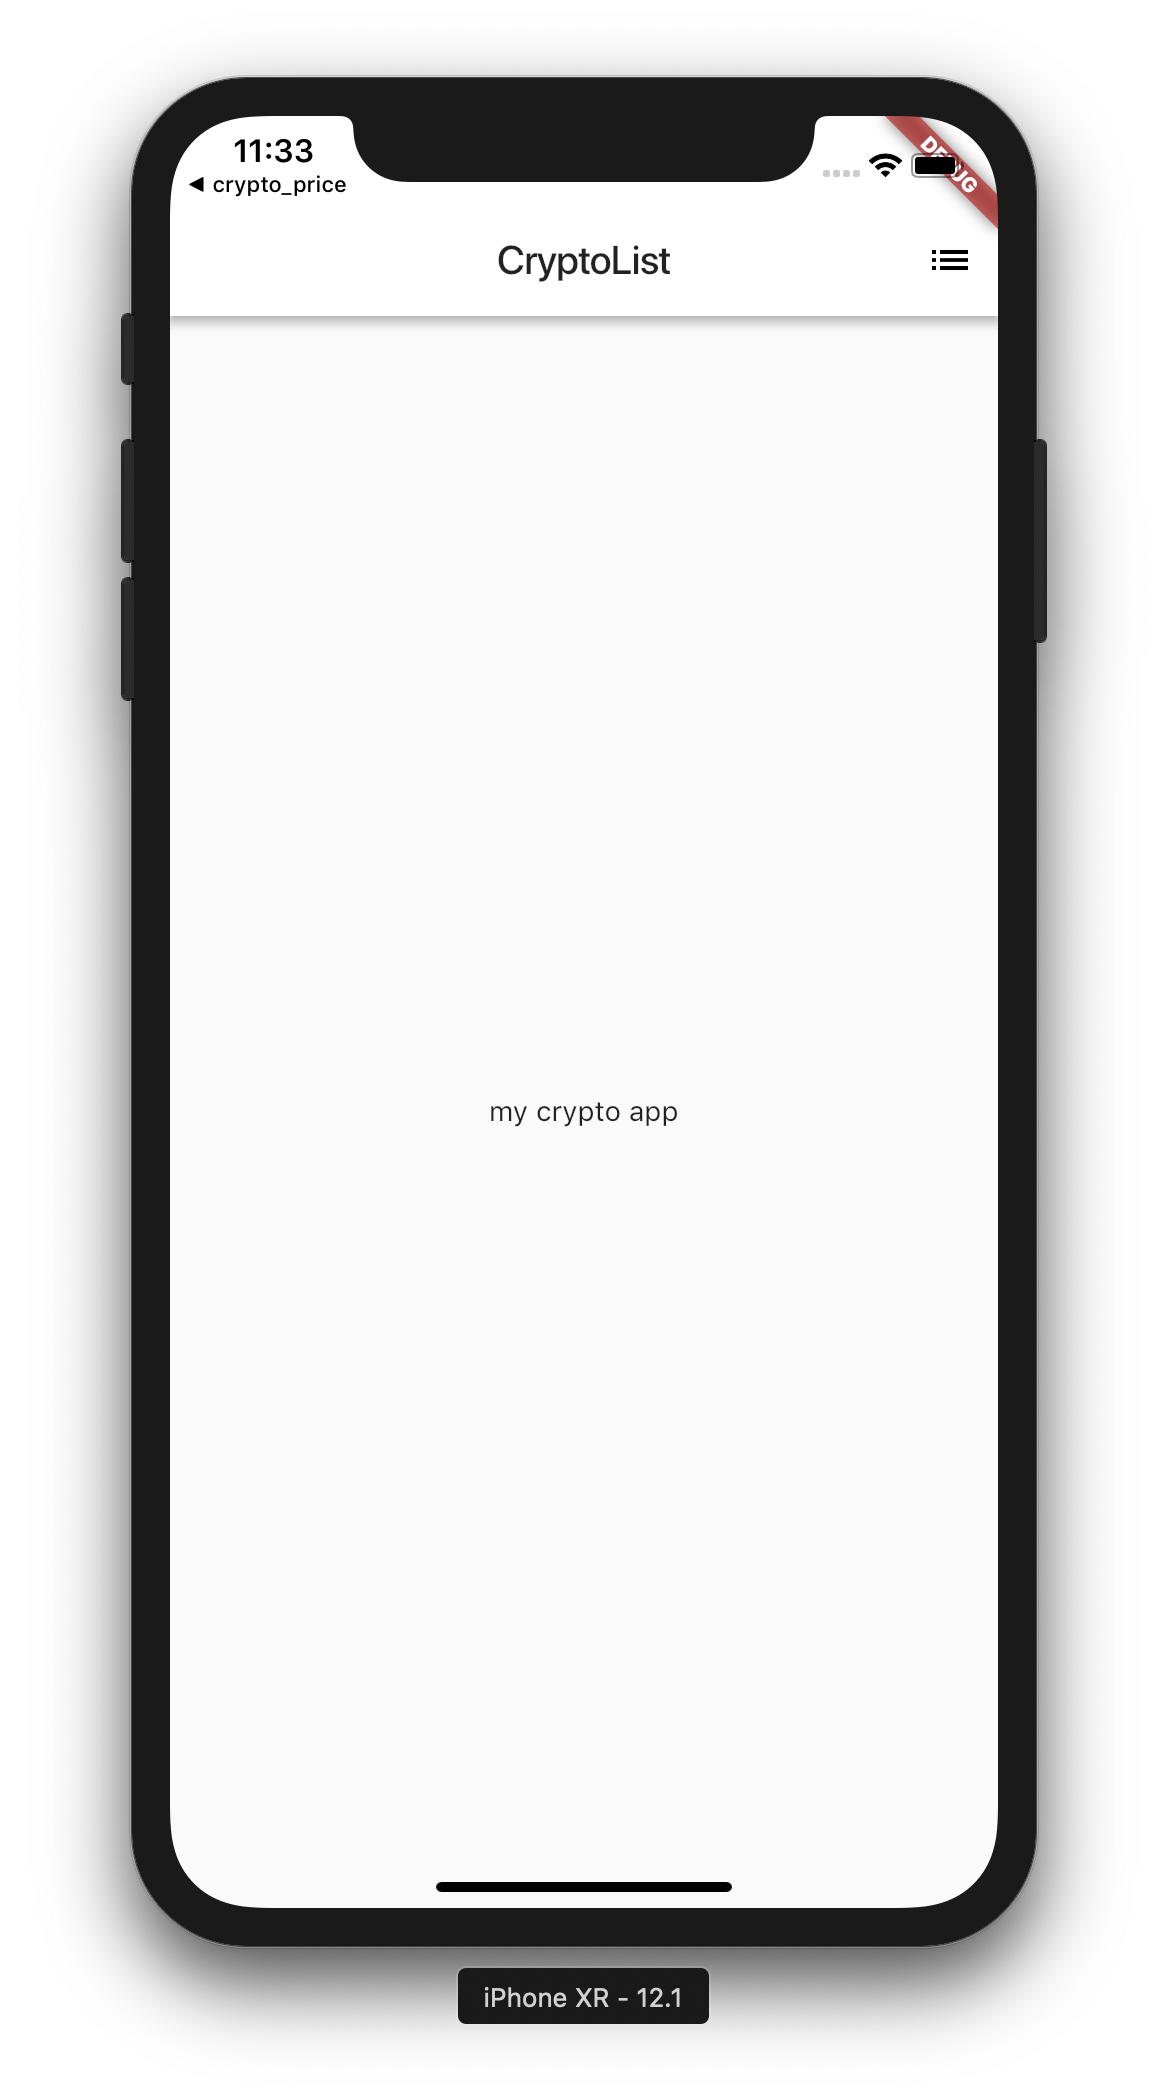
With Scaffold we have infinitely improved the overall UI of our app. Remember we used theme in the MyApp class? It was used to set the primary colour of our app, (and by extension appBar's colour).
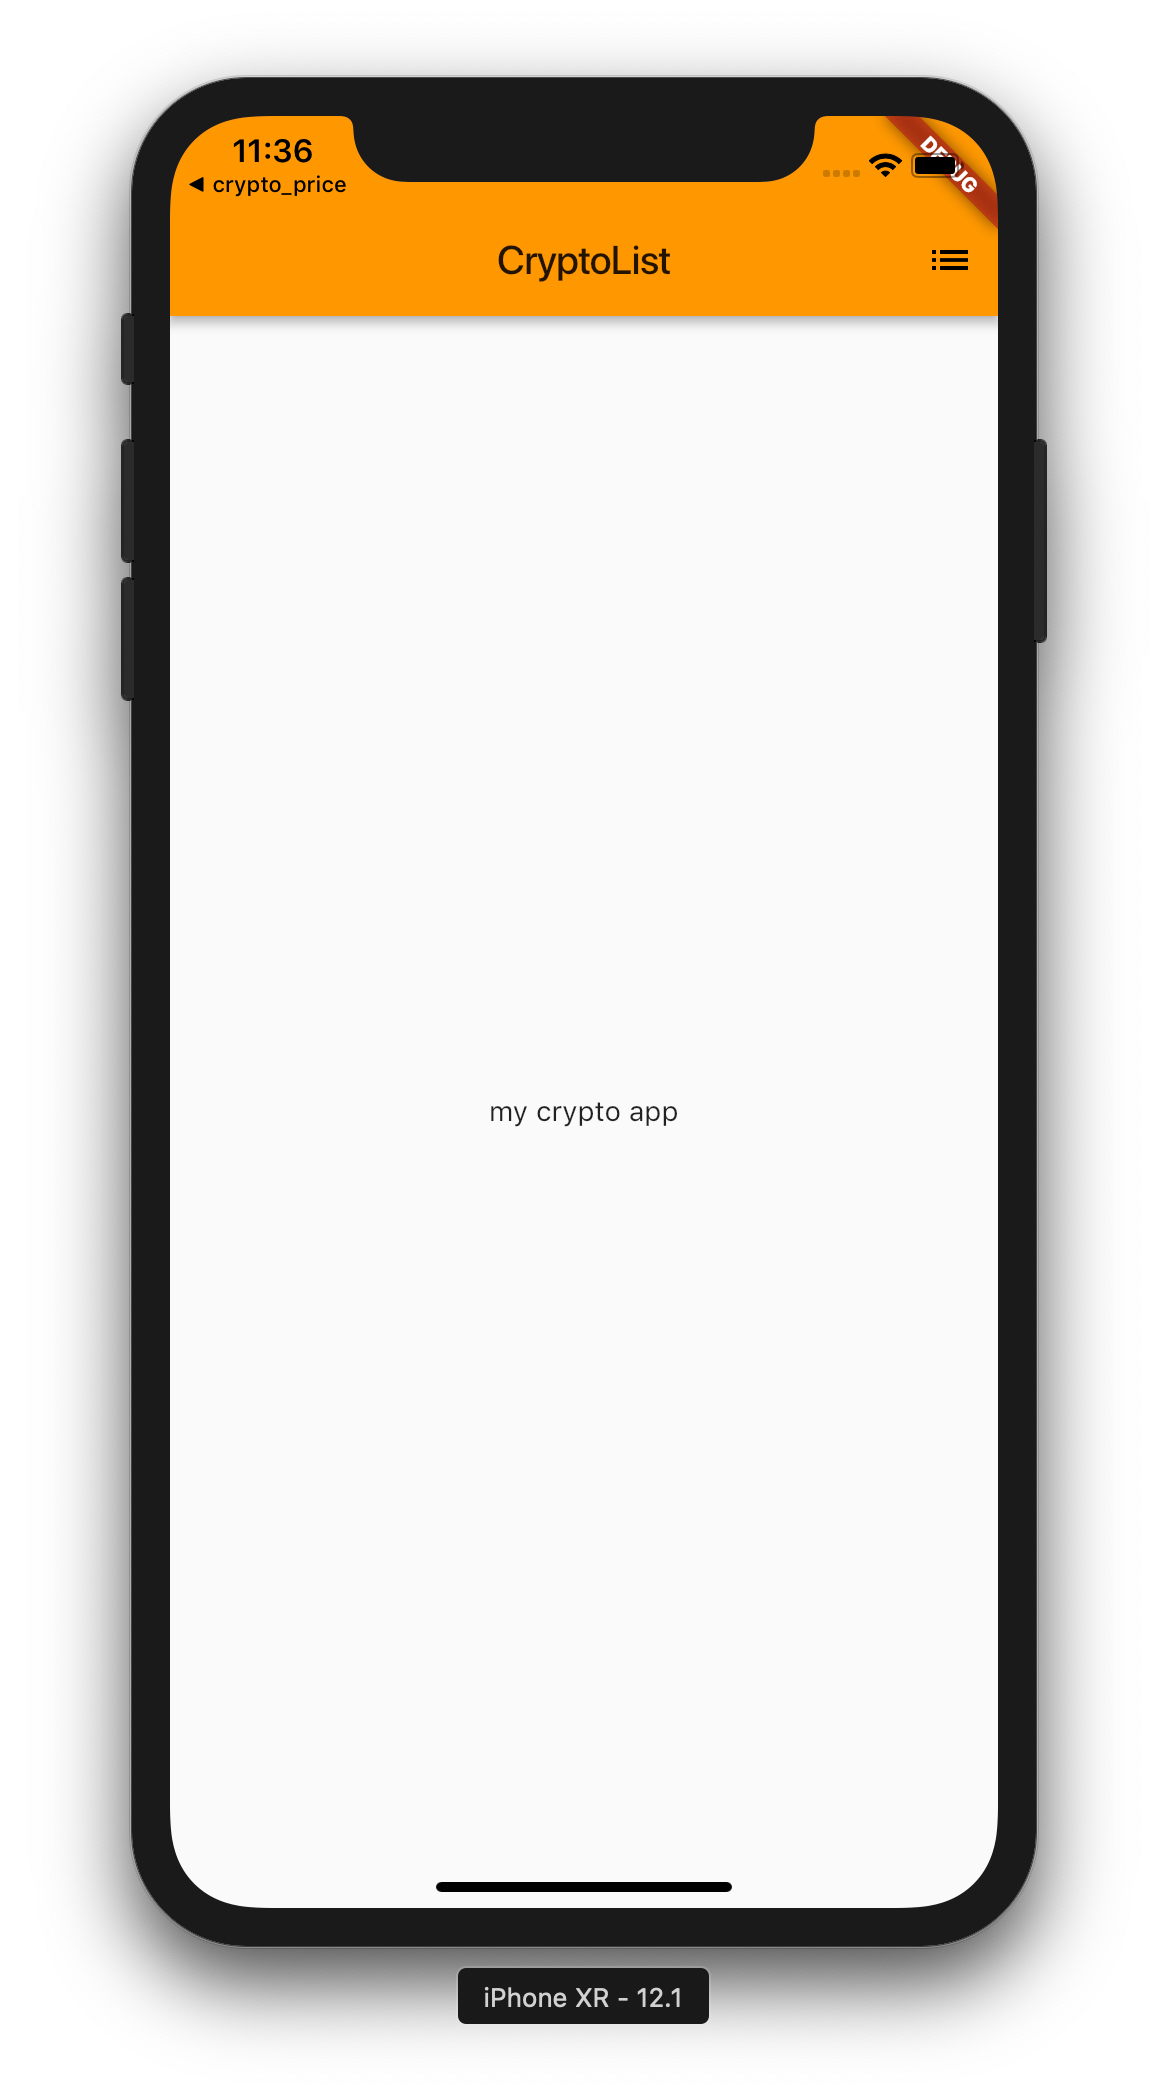
Feel free to change it accordingly, for eg new ThemeData(primaryColor: Colors.orange) but we will continue using white.
Making HTTP request to get data
Before we add a list of Cryptocurrencies into the body of our view, let’s first get all the data required for us to continue.
import 'package:flutter/material.dart';
import 'dart:math';
import 'dart:async';
import 'dart:convert';
import 'dart:core';
import 'package:http/http.dart' as http;
Import all these modules we will be using at the top of your main.dart file. Find the file pubspec.yaml and http: ^0.12.0+1 (which is required to make http requests) so that it looks like this:
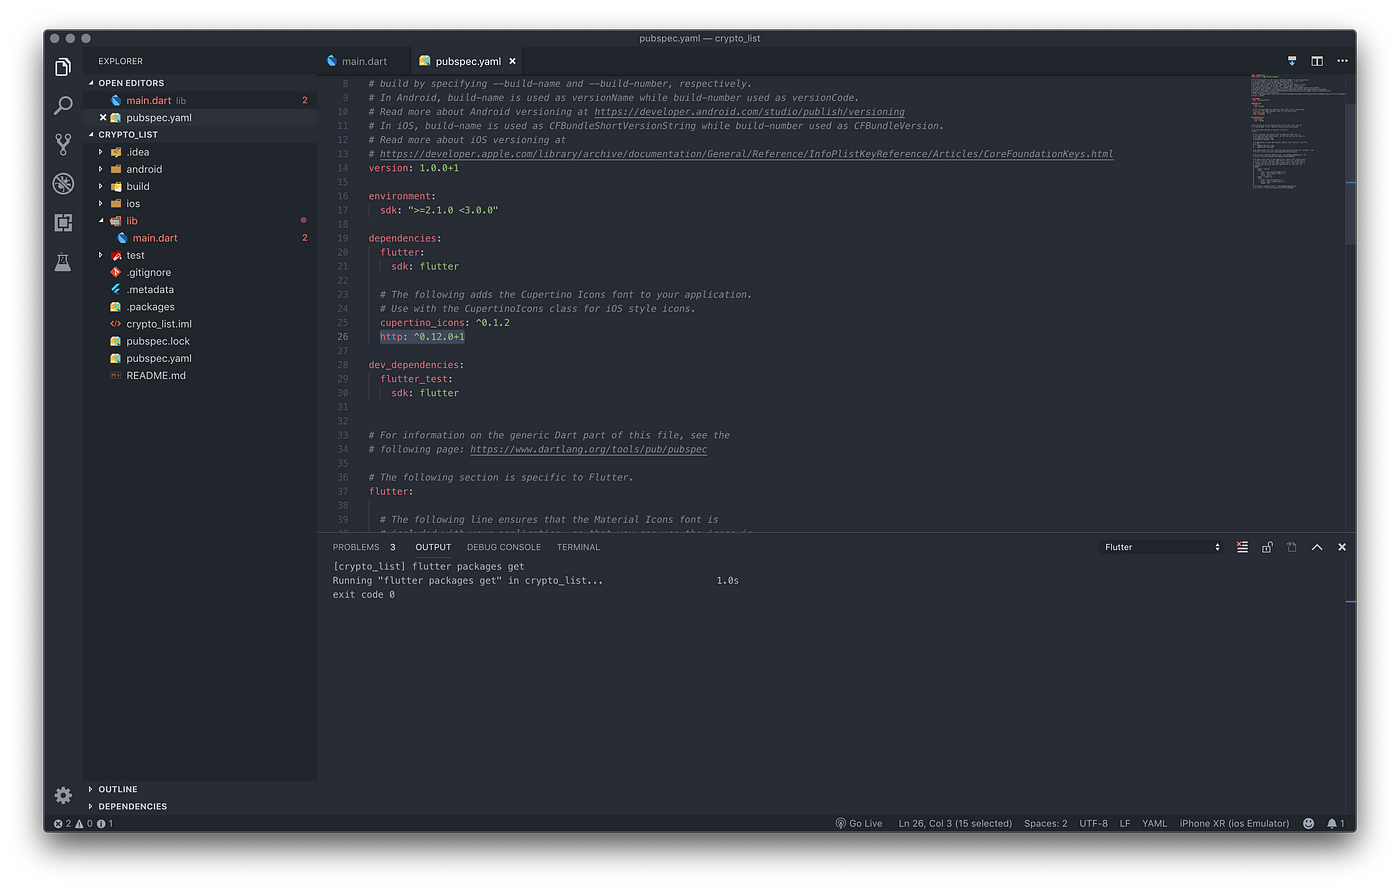
pubspecis where the packages metadata is storeddart:asyncallows writing asynchronous code usingFutureclassdart:convertallows decoding JSON responsepackage:http/http.dartallows making http requestsdart:mathanddart:codeprovides some helper functions to manipulate data
import 'package:flutter/material.dart';
import 'dart:math';
import 'dart:async';
import 'dart:convert';
import 'dart:core';
import 'package:http/http.dart' as http;

void main() => runApp(MyApp());

class MyApp extends StatelessWidget {
  @override
  Widget build(BuildContext context) {
    //material app widget
    return MaterialApp(
      title: 'Crypto Price List',
      theme: new ThemeData(primaryColor: Colors.white),
      home: CryptoList(),
    ); //use our widget instead of the text previously
  }
}

//creates a stateful widget (data inside will change once created)
class CryptoList extends StatefulWidget {
  @override
  CryptoListState createState() => CryptoListState();
}

class CryptoListState extends State {
  List _cryptoList;
  //this means that the function will be executed sometime in the future (in this case does not return data)
  Future getCryptoPrices() async {
    //async to use await, which suspends the current function, while it does other stuff and resumes when data ready
    print('getting crypto prices'); //print
    String _apiURL =
        "https://api.coinmarketcap.com/v1/ticker/"; //url to get data
    http.Response response = await http.get(_apiURL); //waits for response
    setState(() {
      this._cryptoList =
          jsonDecode(response.body); //sets the state of our widget
      print(_cryptoList); //prints the list
    });
    return;
  }

  @override
  void initState() { //override creation of state so that we can call our function
    super.initState();
    getCryptoPrices(); //this function is called which then sets the state of our app
  }

//build method
  @override
  Widget build(BuildContext context) {
    //Implements the basic Material Design visual layout structure.
    //This class provides APIs for showing drawers, snack bars, and bottom sheets.
    return Scaffold(
        appBar: AppBar(
          title: Text('CryptoList'),
          actions: [
            // will be used to view favourites
            new IconButton(icon: const Icon(Icons.list), onPressed: _pushSaved),
          ],
        ),
        body: new Center(
          // body of the scaffold
          child: new Text('my crypto app'),
        ));
  }

  //will be used later to view favourited cryptos
  void _pushSaved() {}
}
main.dart
Update the code as shown above. Please read the comments on what is added. Essentially, we have asked our widget to execute getCryptoPrices when the state is initialized. We then perform an async operation to get the data from an api, and set state of cryptoList.
Perform hot restart by pressing R

Great! Our data is available for us to use. We can now generate UI to show this data.
Creating ListView
import 'package:flutter/material.dart';
import 'dart:math';
import 'dart:async';
import 'dart:convert';
import 'dart:core';
import 'package:http/http.dart' as http;

void main() => runApp(MyApp());

class MyApp extends StatelessWidget {
  @override
  Widget build(BuildContext context) {
    //material app widget
    return MaterialApp(
      title: 'Crypto Price List',
      theme: new ThemeData(primaryColor: Colors.white),
      home: CryptoList(),
    ); //use our widget instead of the text previously
  }
}

//creates a stateful widget (data inside will change once created)
class CryptoList extends StatefulWidget {
  @override
  CryptoListState createState() => CryptoListState();
}

class CryptoListState extends State {
  List _cryptoList; //store cryptolist
  final _saved = Set(); //store favourited cryptos
  final _boldStyle =
      new TextStyle(fontWeight: FontWeight.bold); //bold text style to be reused
  bool _loading = false; //will be used later to control state
  final List _colors = [
    //to show different colors for different cryptos
    Colors.blue,
    Colors.indigo,
    Colors.lime,
    Colors.teal,
    Colors.cyan
  ];
  //this means that the function will be executed sometime in the future (in this case does not return data)
  Future getCryptoPrices() async {
    //async to use await, which suspends the current function, while it does other stuff and resumes when data ready
    print('getting crypto prices'); //print
    String _apiURL =
        "https://api.coinmarketcap.com/v1/ticker/"; //url to get data
    http.Response response = await http.get(_apiURL); //waits for response
    setState(() {
      this._cryptoList =
          jsonDecode(response.body); //sets the state of our widget
      print(_cryptoList); //prints the list
    });
    return;
  }

  //takes in an object and returns the price with 2 decimal places
  String cryptoPrice(Map crypto) {
    int decimals = 2;
    int fac = pow(10, decimals);
    double d = double.parse(crypto['price_usd']);
    return "\$" + (d = (d * fac).round() / fac).toString();
  }

  // takes in an object and color and returns a circle avatar with first letter and required color
  CircleAvatar _getLeadingWidget(String name, MaterialColor color) {
    return new CircleAvatar(
      backgroundColor: color,
      child: new Text(name[0]),
    );
  }

  @override
  void initState() {
    //override creation of state so that we can call our function
    super.initState();
    getCryptoPrices(); //this function is called which then sets the state of our app
  }

//build method
  @override
  Widget build(BuildContext context) {
    //Implements the basic Material Design visual layout structure.
    //This class provides APIs for showing drawers, snack bars, and bottom sheets.
    return Scaffold(
        appBar: AppBar(
          title: Text('CryptoList'),
          actions: [
            // will be used to view favourites
            new IconButton(icon: const Icon(Icons.list), onPressed: _pushSaved),
          ],
        ),
        body: _buildCryptoList());
  }

  //will be used later to view favourited cryptos
  void _pushSaved() {}

  //widget that builds the list
  Widget _buildCryptoList() {
    return ListView.builder(
        itemCount: _cryptoList
            .length, //set the item count so that index won't be out of range
        padding:
            const EdgeInsets.all(16.0), //add some padding to make it look good
        itemBuilder: (context, i) {
          //item builder returns a row for each index i=0,1,2,3,4
          // if (i.isOdd) return Divider(); //if index = 1,3,5 ... return a divider to make it visually appealing

          // final index = i ~/ 2; //get the actual index excluding dividers.
          final index = i;
          print(index);
          final MaterialColor color = _colors[index %
              _colors.length]; //iterate through indexes and get the next colour
          return _buildRow(_cryptoList[index], color); //build the row widget
        });
  }

  Widget _buildRow(Map crypto, MaterialColor color) {
    // if _saved contains our crypto, return true
    final bool favourited = _saved.contains(crypto);

    // function to handle when heart icon is tapped
    void _fav() {
      setState(() {
        if (favourited) {
          //if it is favourited previously, remove it from the list
          _saved.remove(crypto);
        } else {
          _saved.add(crypto); //else add it to the array
        }
      });
    }

    // returns a row with the desired properties
    return ListTile(
      leading: _getLeadingWidget(crypto['name'],
          color), // get the first letter of each crypto with the color
      title: Text(crypto['name']), //title to be name of the crypto
      subtitle: Text(
        //subtitle is below title, get the price in 2 decimal places and set style to bold
        cryptoPrice(crypto),
        style: _boldStyle,
      ),
      trailing: new IconButton(
        //at the end of the row, add an icon button
        // Add the lines from here...
        icon: Icon(favourited
            ? Icons.favorite
            : Icons
                .favorite_border), // if button is favourited, show favourite icon
        color:
            favourited ? Colors.red : null, // if button is favourited, show red
        onPressed: _fav, //when pressed, let _fav function handle
      ),
    );
  }
}
main.dart
Update your code with the one shown above. A lot of codes have been added, but I have tried to add as much comments as possible to make it understandable. Here is what we have done:
- Replace our
Scaffold bodywith_buildCryptoList. This returns aListView. Rows are build using_buildRow _buildRowtakes in the each cryptocurrency object with colour. It builds a row accordingly: Avatar, Title, Subtitle and Icon_favhandles when the heart icon is clicked._savedcontains the list ofcryptoobjects we have favourited.
Perform hot restart by pressing R
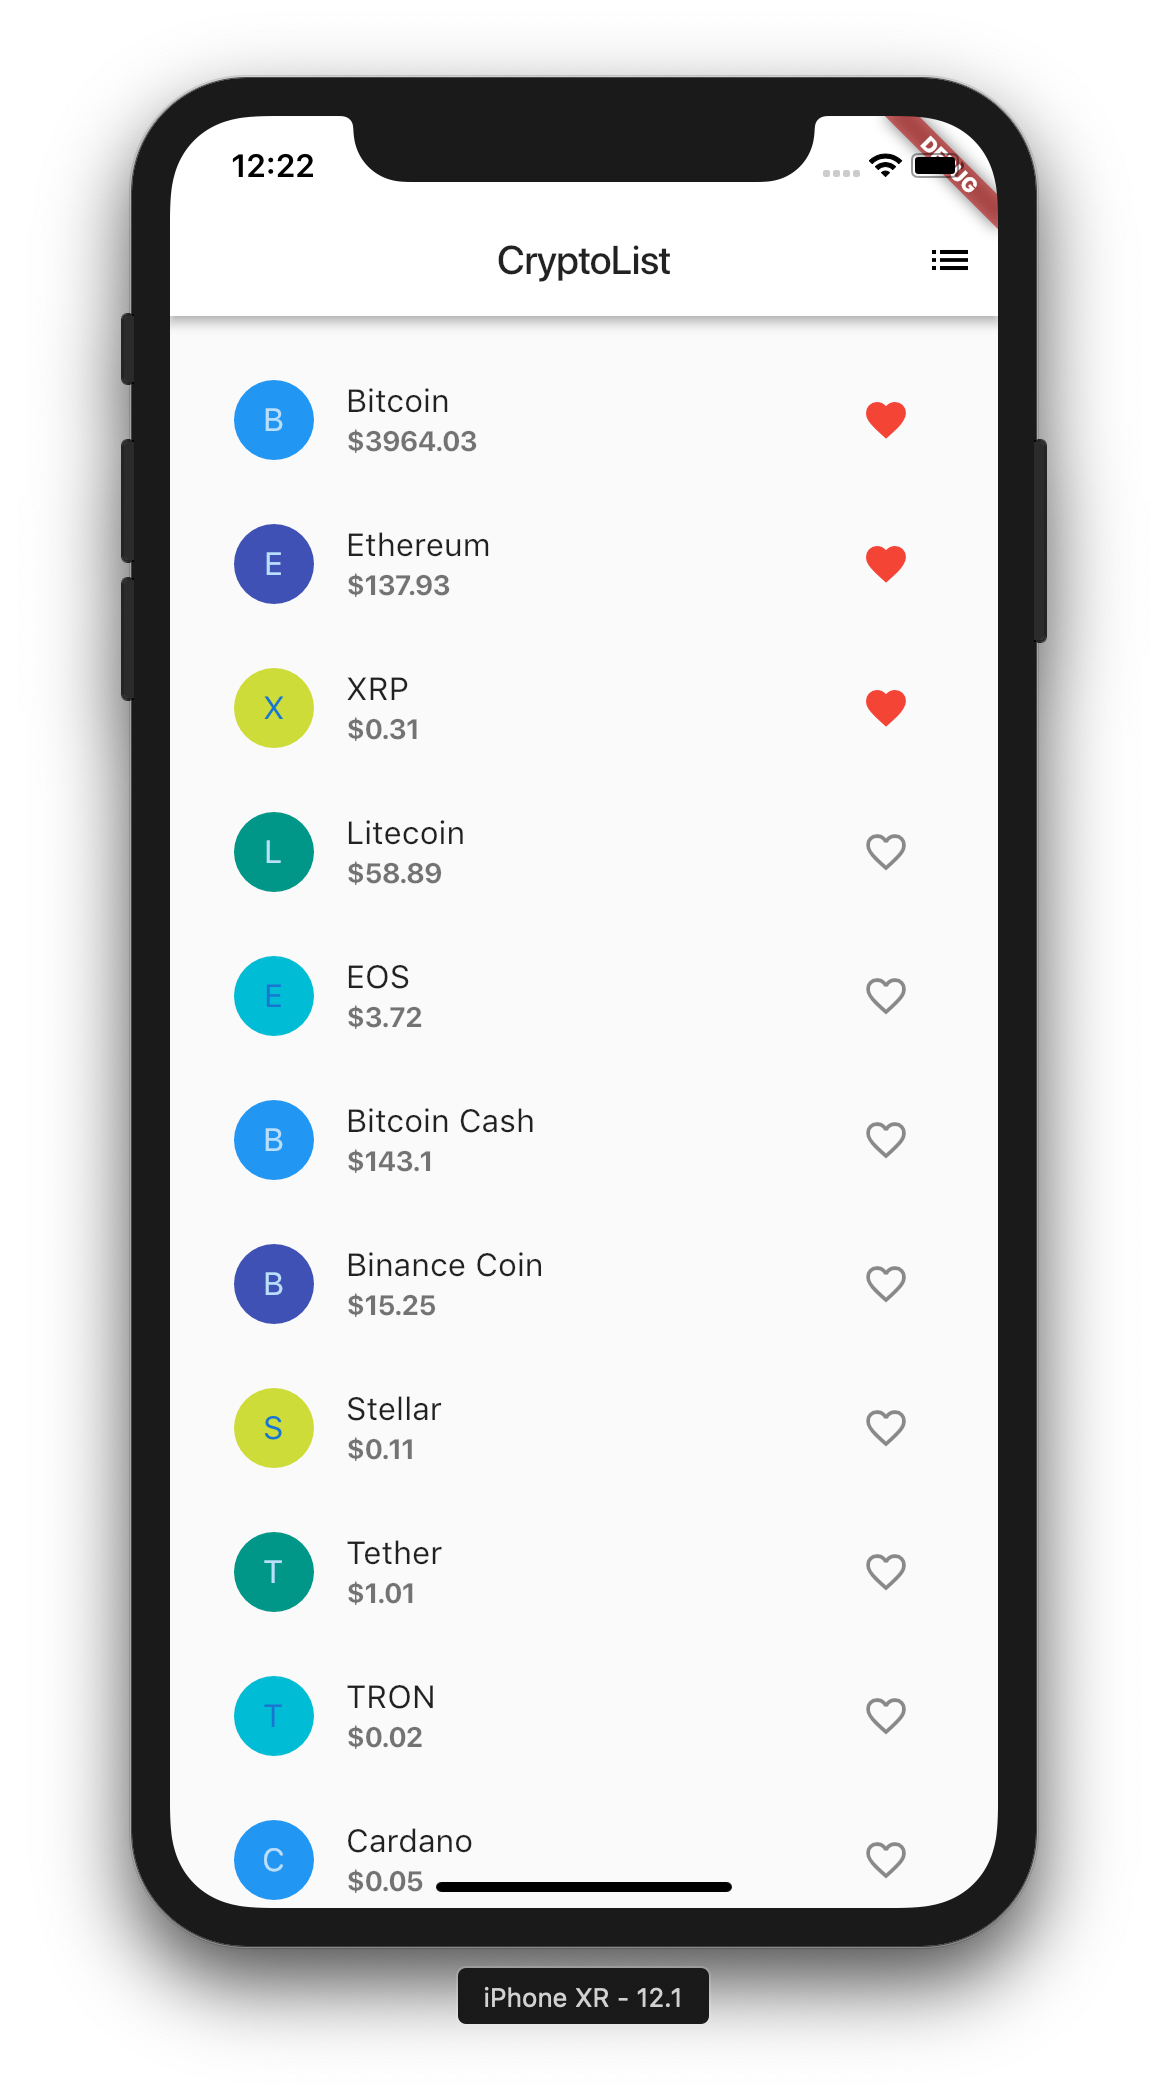
Great! You have now built an extremely decent looking UI that contains real data about various Cryptocurrencies. If you could not understand the code, it is okay! Take your time and with enough practice, you will get the hang of it. Else, feel free to leave a comment below.
Adding Loading Bar
If you noticed, when you restart the app, there is a brief second where an error is displayed. This is because when the getCryptoPrices is called, the _cryptoList state, which is used to build the list view, is not set, and thus you get an error until the state is set. Let’s edit the code to show an loading bar until _cryptoList is set.
import 'package:flutter/material.dart';
import 'dart:math';
import 'dart:async';
import 'dart:convert';
import 'dart:core';
import 'package:http/http.dart' as http;

void main() => runApp(MyApp());

class MyApp extends StatelessWidget {
  @override
  Widget build(BuildContext context) {
    //material app widget
    return MaterialApp(
      title: 'Crypto Price List',
      theme: new ThemeData(primaryColor: Colors.white),
      home: CryptoList(),
    ); //use our widget instead of the text previously
  }
}

//creates a stateful widget (data inside will change once created)
class CryptoList extends StatefulWidget {
  @override
  CryptoListState createState() => CryptoListState();
}

class CryptoListState extends State {
  List _cryptoList; //store cryptolist
  final _saved = Set(); //store favourited cryptos
  final _boldStyle =
      new TextStyle(fontWeight: FontWeight.bold); //bold text style to be reused
  bool _loading = false; //will be used later to control state
  final List _colors = [
    //to show different colors for different cryptos
    Colors.blue,
    Colors.indigo,
    Colors.lime,
    Colors.teal,
    Colors.cyan
  ];
  //this means that the function will be executed sometime in the future (in this case does not return data)
  Future getCryptoPrices() async {
    //async to use await, which suspends the current function, while it does other stuff and resumes when data ready
    print('getting crypto prices'); //print
    String _apiURL =
        "https://api.coinmarketcap.com/v1/ticker/"; //url to get data
    setState(() {
      this._loading = true; //before calling the api, set the loading to true
    });
    http.Response response = await http.get(_apiURL); //waits for response
    setState(() {
      this._cryptoList =
          jsonDecode(response.body); //sets the state of our widget
      this._loading = false; //set the loading to false after we get a response
      print(_cryptoList); //prints the list
    });
    return;
  }

  //takes in an object and returns the price with 2 decimal places
  String cryptoPrice(Map crypto) {
    int decimals = 2;
    int fac = pow(10, decimals);
    double d = double.parse(crypto['price_usd']);
    return "\$" + (d = (d * fac).round() / fac).toString();
  }

  // takes in an object and color and returns a circle avatar with first letter and required color
  CircleAvatar _getLeadingWidget(String name, MaterialColor color) {
    return new CircleAvatar(
      backgroundColor: color,
      child: new Text(name[0]),
    );
  }

  _getMainBody() {
    if (_loading) { //return progress indicator if it is loading
      return new Center(
        child: new CircularProgressIndicator(),
      );
    } else {
      return _buildCryptoList(); //return the list view
    }
  }

  @override
  void initState() {
    //override creation of state so that we can call our function
    super.initState();
    getCryptoPrices(); //this function is called which then sets the state of our app
  }

//build method
  @override
  Widget build(BuildContext context) {
    //Implements the basic Material Design visual layout structure.
    //This class provides APIs for showing drawers, snack bars, and bottom sheets.
    return Scaffold(
        appBar: AppBar(
          title: Text('CryptoList'),
          actions: [
            // will be used to view favourites
            new IconButton(icon: const Icon(Icons.list), onPressed: _pushSaved),
          ],
        ),
        body: _getMainBody());
  }

  //will be used later to view favourited cryptos
  void _pushSaved() {}

  //widget that builds the list
  Widget _buildCryptoList() {
    return ListView.builder(
        itemCount: _cryptoList
            .length, //set the item count so that index won't be out of range
        padding:
            const EdgeInsets.all(16.0), //add some padding to make it look good
        itemBuilder: (context, i) {
          //item builder returns a row for each index i=0,1,2,3,4
          // if (i.isOdd) return Divider(); //if index = 1,3,5 ... return a divider to make it visually appealing

          // final index = i ~/ 2; //get the actual index excluding dividers.
          final index = i;
          print(index);
          final MaterialColor color = _colors[index %
              _colors.length]; //iterate through indexes and get the next colour
          return _buildRow(_cryptoList[index], color); //build the row widget
        });
  }

  Widget _buildRow(Map crypto, MaterialColor color) {
    // if _saved contains our crypto, return true
    final bool favourited = _saved.contains(crypto);

    // function to handle when heart icon is tapped
    void _fav() {
      setState(() {
        if (favourited) {
          //if it is favourited previously, remove it from the list
          _saved.remove(crypto);
        } else {
          _saved.add(crypto); //else add it to the array
        }
      });
    }

    // returns a row with the desired properties
    return ListTile(
      leading: _getLeadingWidget(crypto['name'],
          color), // get the first letter of each crypto with the color
      title: Text(crypto['name']), //title to be name of the crypto
      subtitle: Text(
        //subtitle is below title, get the price in 2 decimal places and set style to bold
        cryptoPrice(crypto),
        style: _boldStyle,
      ),
      trailing: new IconButton(
        //at the end of the row, add an icon button
        // Add the lines from here...
        icon: Icon(favourited
            ? Icons.favorite
            : Icons
                .favorite_border), // if button is favourited, show favourite icon
        color:
            favourited ? Colors.red : null, // if button is favourited, show red
        onPressed: _fav, //when pressed, let _fav function handle
      ),
    );
  }
}
main.dart
Update the code with this. Instead of directly calling the _buildCryptoList in the body of our Scaffold we are calling another function _getMainBody.
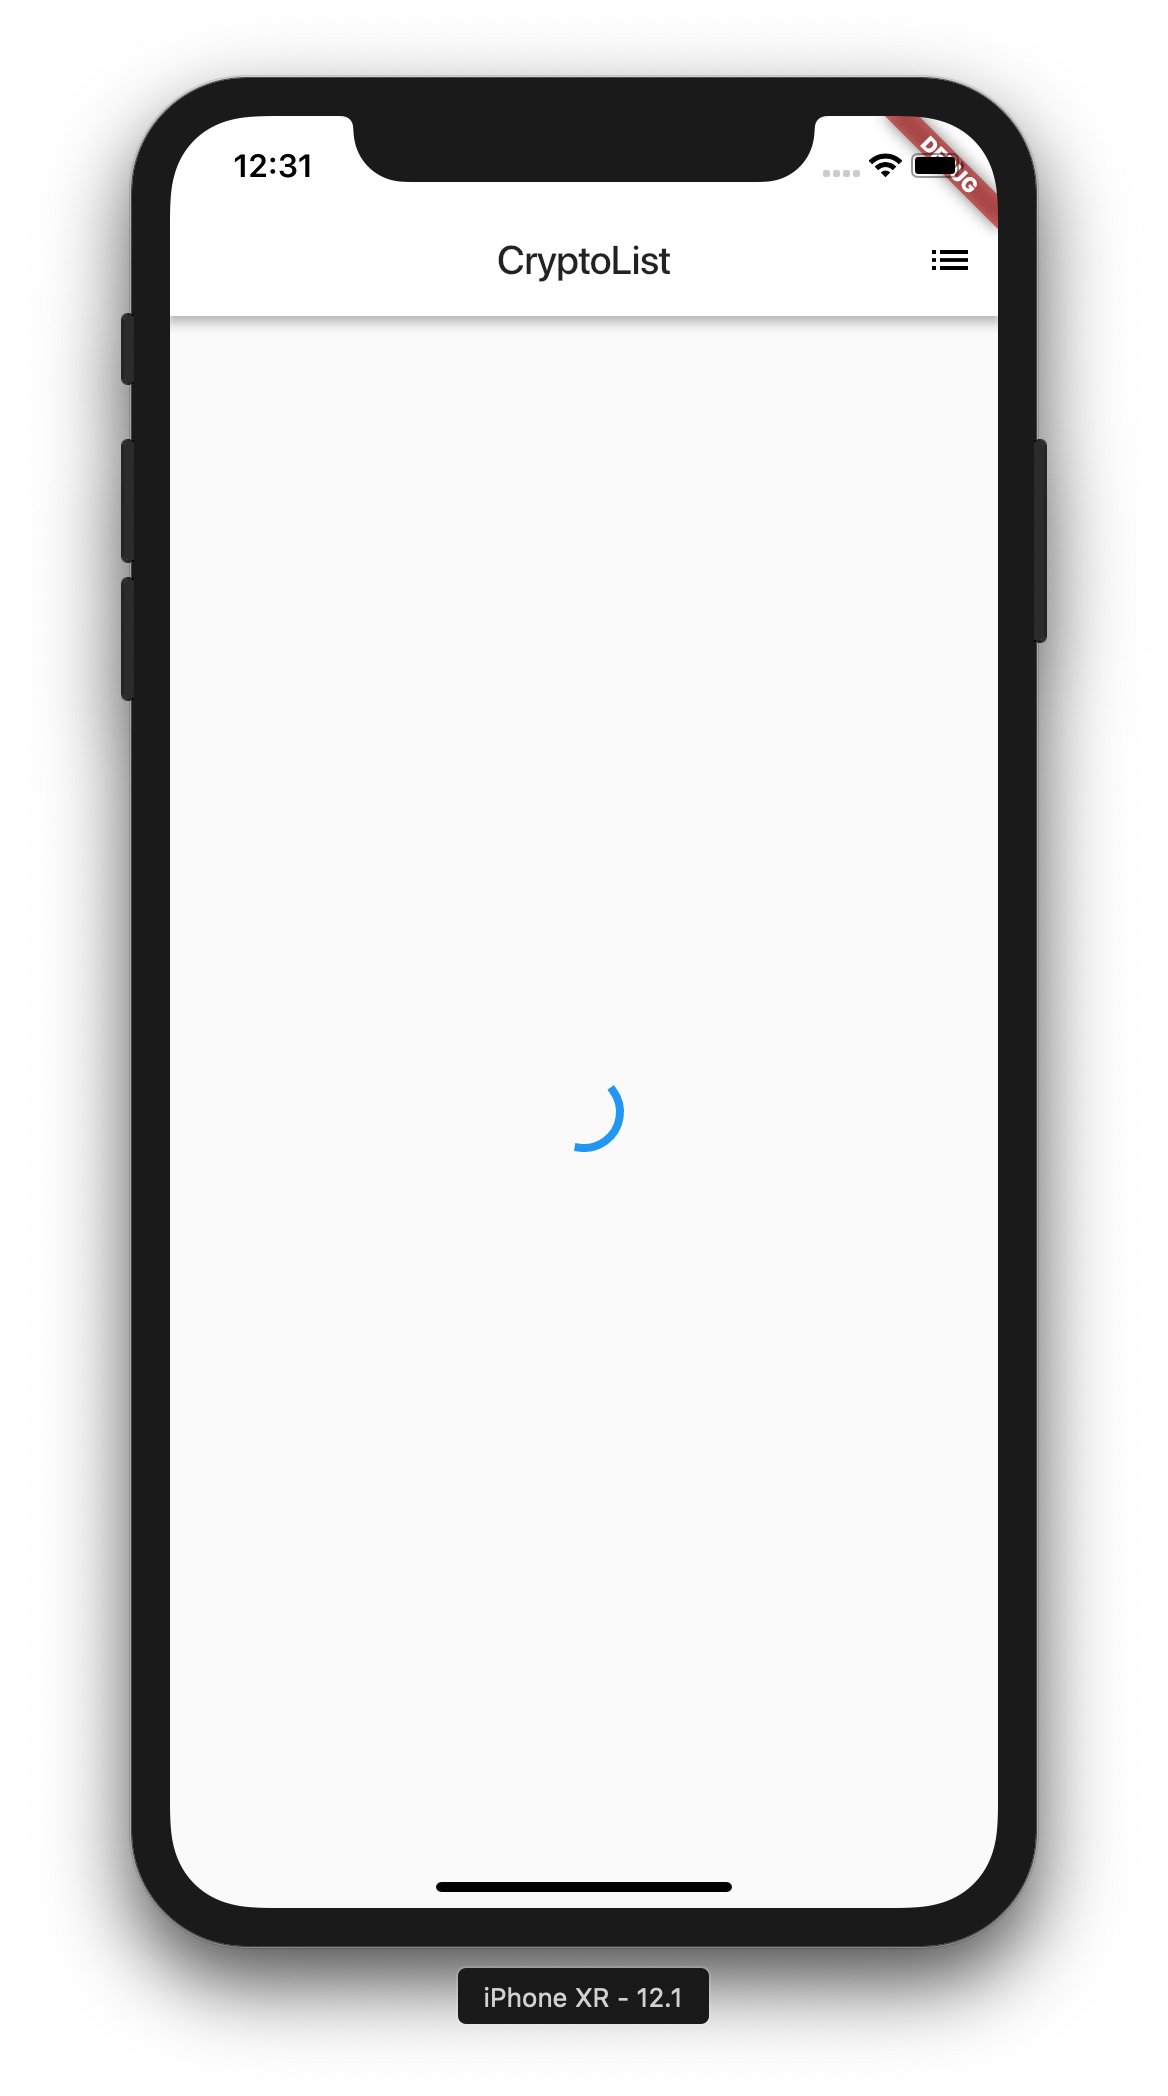
In getCryptoPrices we have also set _loadingto true before we make a request and _loadingto false after have completed the request. _getMainBody then checks and returns a progress bar if _loading is true.
When you run the app, you should see a circular progress indicator for a split second instead of an error page we saw earlier.
Pull to Refresh
We have a decently working app right now. Since I have had prior experience building iOS apps, I wanted to see how it would be to mimic some functionalities. One of the most commonly used functionalities is Pull to Refresh.
Turns out, it is actually very simple.
 _getMainBody() {
    if (_loading) {
      return new Center(
        child: new CircularProgressIndicator(),
      );
    } else {
      return new RefreshIndicator(
        child: _buildCryptoList(),
        onRefresh: getCryptoPrices,
      );
    }
  }
main.dart
Replace the _getMainBody with the above function. What it does is, instead of returning ListView directly, it wraps it around RefreshIndicator which allows pull to refresh possible. We then point the onRefresh to the function where we make the api call.
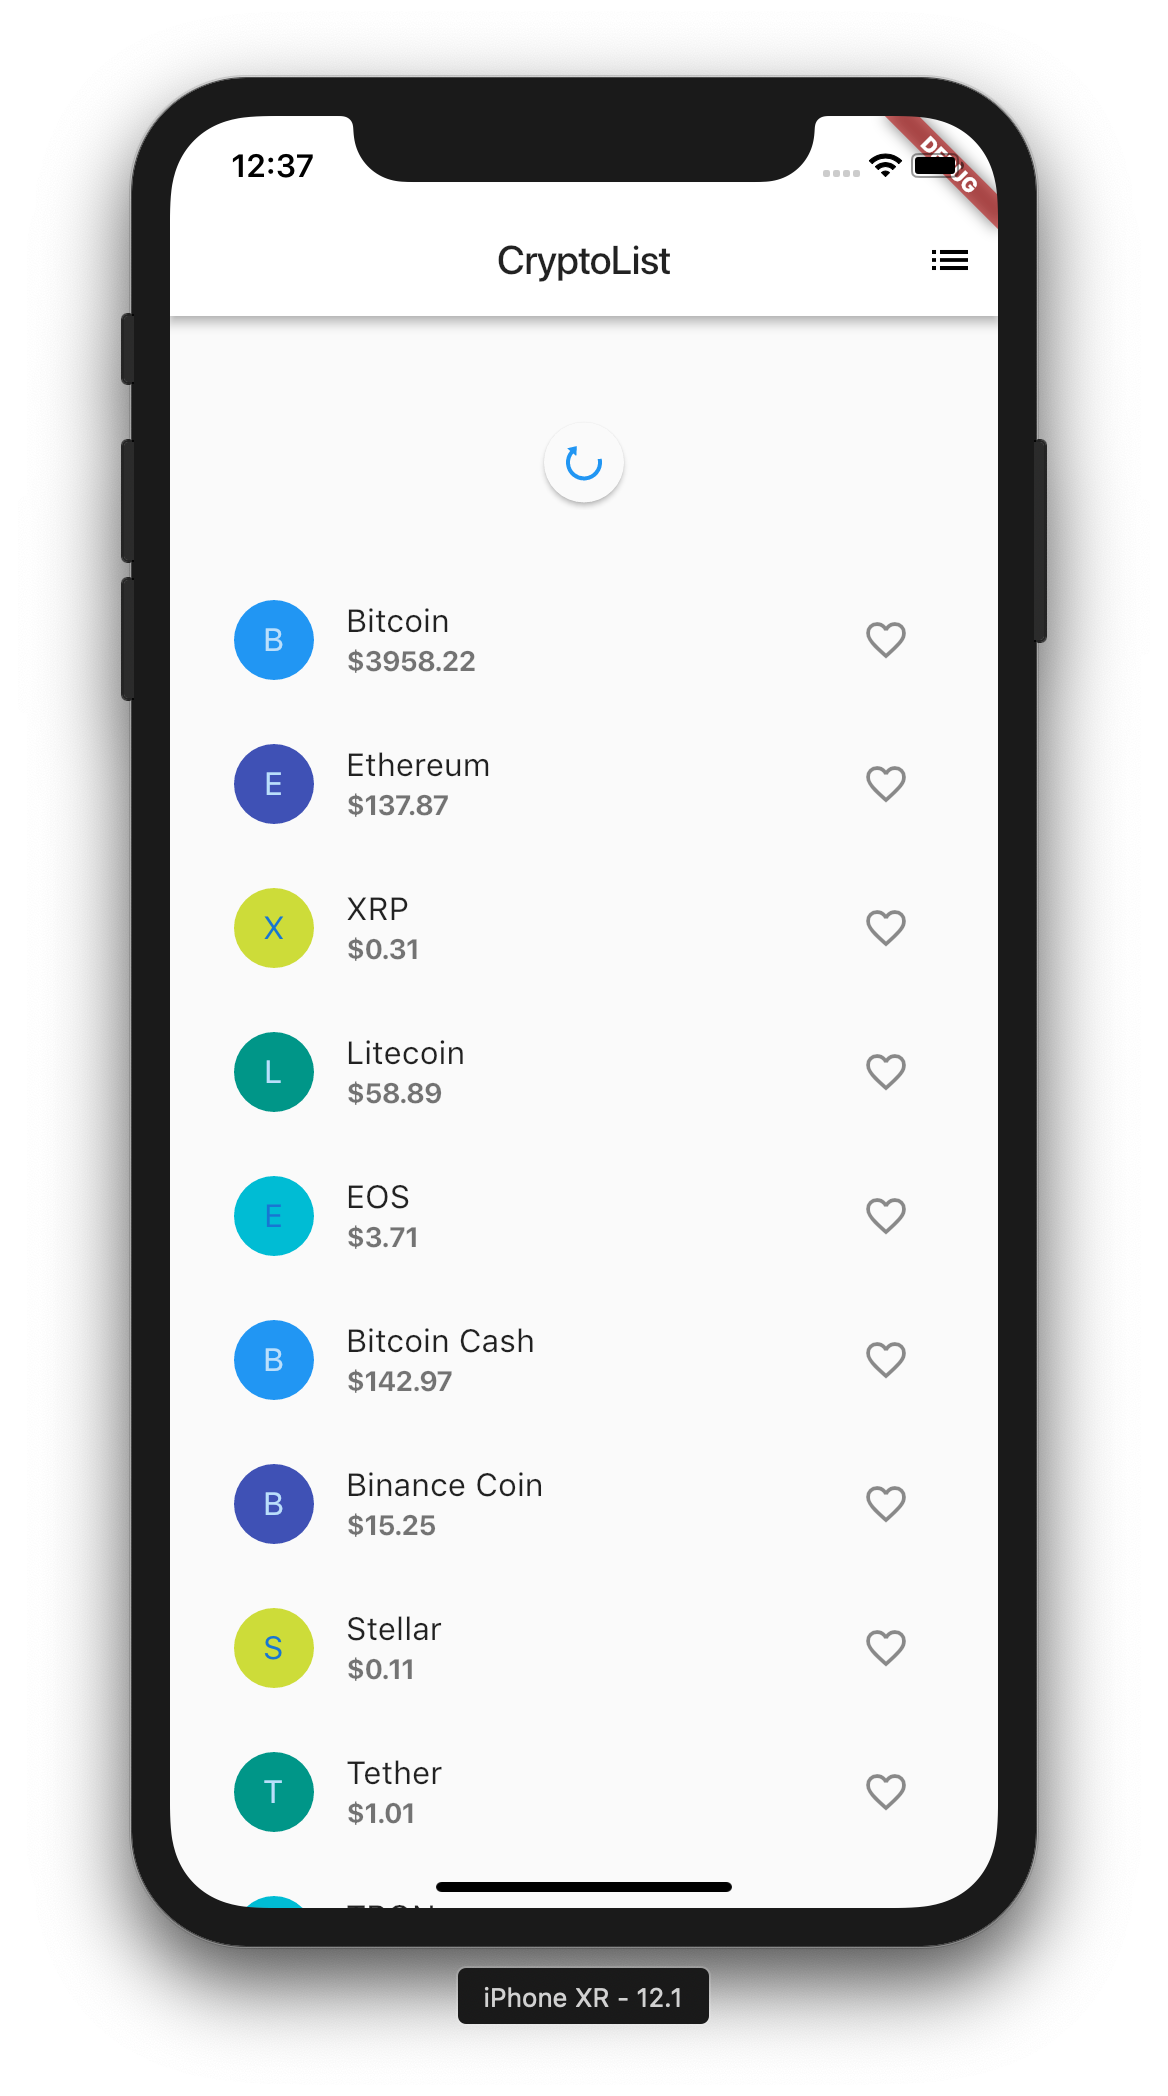
This is why we needed our widget to be Stateful. When the data is changed, either through polling or serve pushes, we want the data to change and UI to be rendered accordingly. If we just want to display the data once for the duration of the application, we can make our widget to be Stateless.
Pushing New View
We have mentioned earlier that we want to be able to view the favourited Cryptocurrencies. So let’s implement that.
//called when the button is pressed to go to the next view
  void _pushSaved() {
    Navigator.of(context).push( //get the current navigator
      new MaterialPageRoute( //A modal route that replaces the entire screen with a platform-adaptive transition.
        builder: (BuildContext context) {
          final Iterable tiles = _saved.map( //iterate through our saved cryptocurrencies sequentially
            (crypto) {
              return new ListTile( //same list tile as what we have shown in the previous page
                leading: _getLeadingWidget(crypto['name'], Colors.blue),
                title: Text(crypto['name']),
                subtitle: Text(
                  cryptoPrice(crypto),
                  style: _boldStyle,
                ),
              );
            },
          );
          final List divided = ListTile.divideTiles( //divided tiles allows to insert the dividers for visually pleasing outcome
            context: context,
            tiles: tiles,
          ).toList();
          return new Scaffold( //return a new scaffold with a new appbar and listview as a body
            appBar: new AppBar(
              title: const Text('Saved Cryptos'),
            ),
            body: new ListView(children: divided),
          );
        },
      ),
    );
  }
main.dart
Implement _pushSaved function we have declared previously as above. I’ve written in comments what is happening. Basically we get each saved item and build a new list and pass it to the new route’s Scaffold.
This function is triggered when:
new IconButton(icon: const Icon(Icons.list), onPressed: _pushSaved),
in the home screen. Let’s run the app and see what happens.
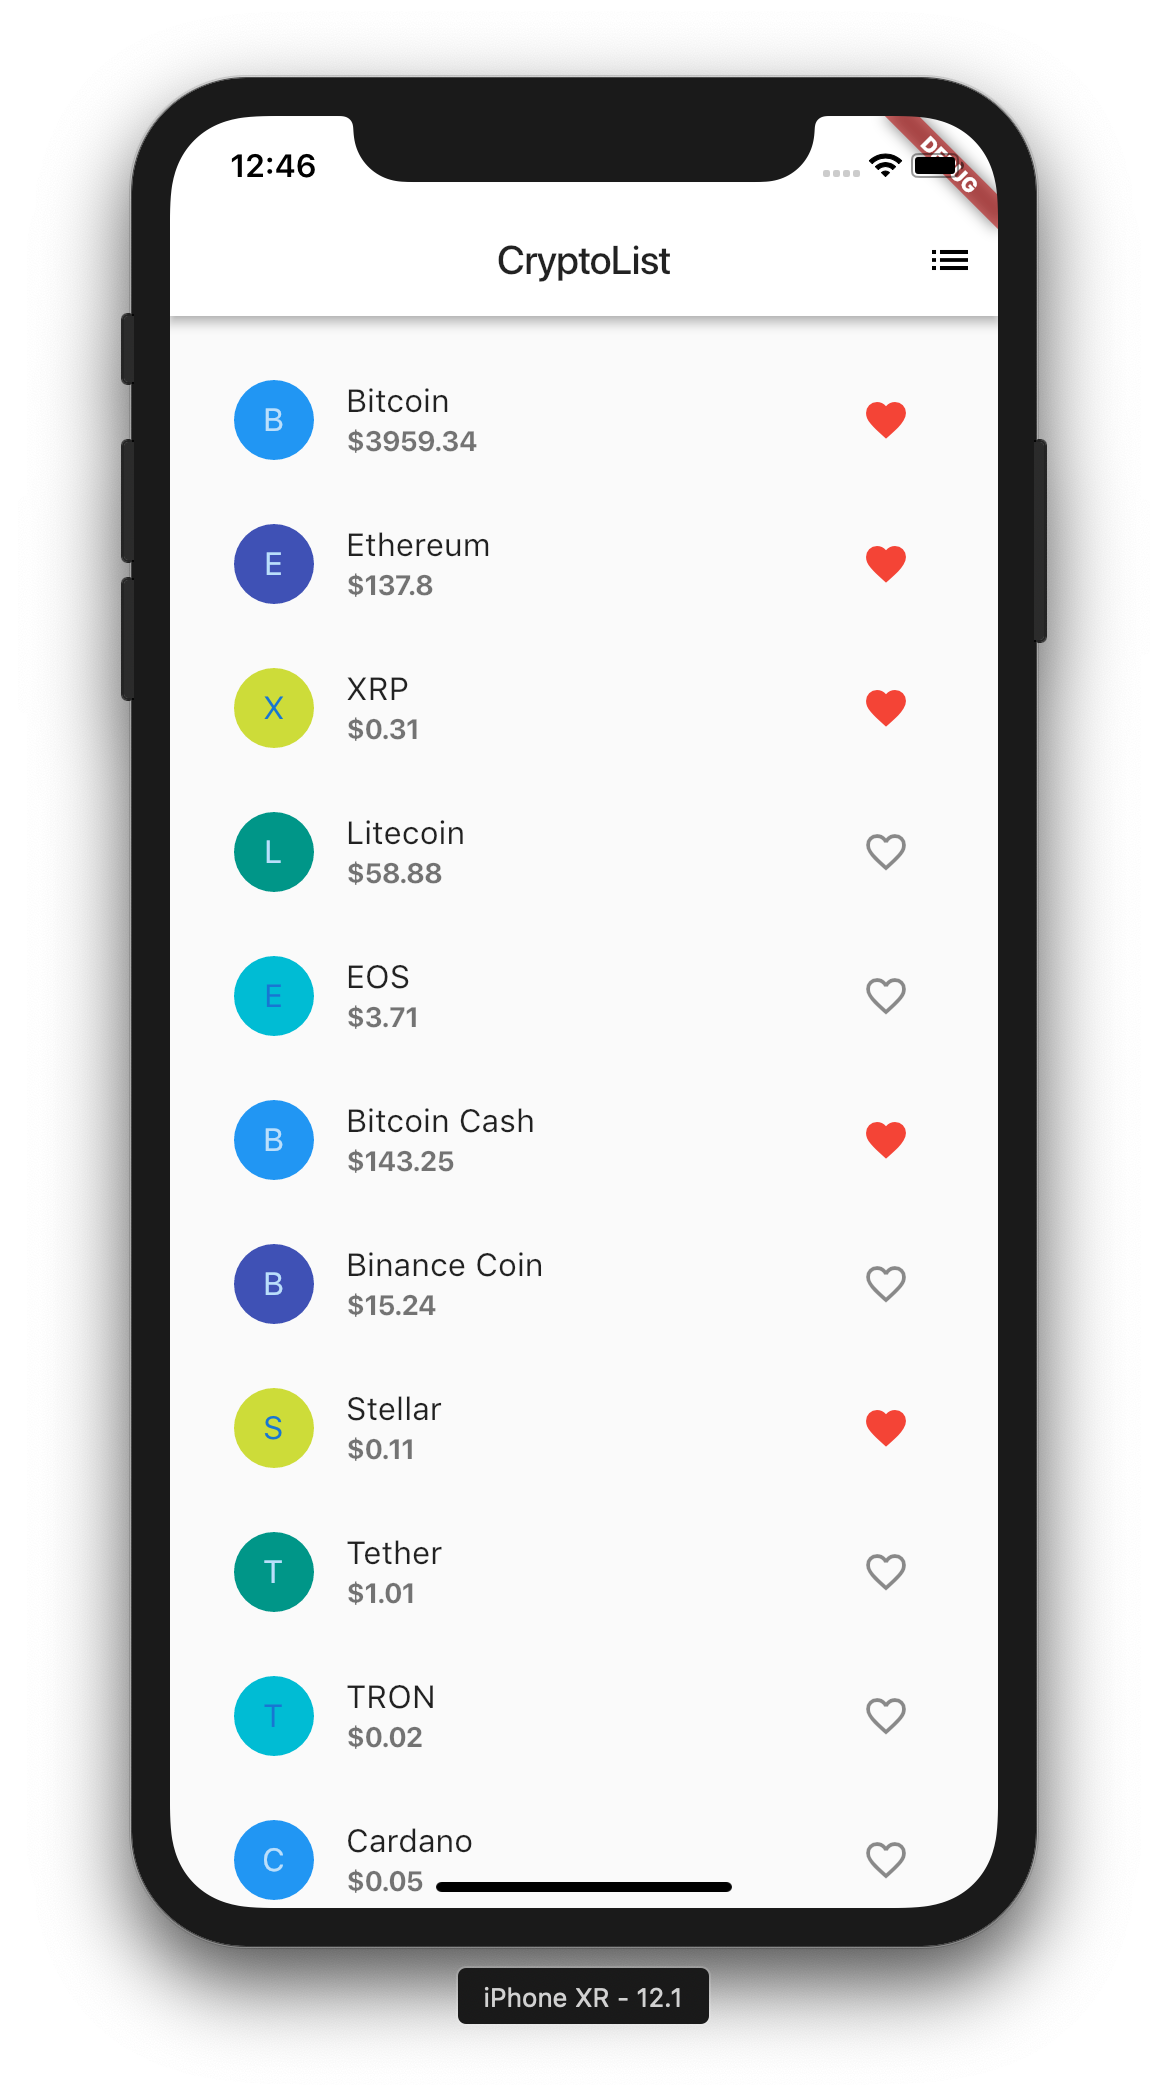
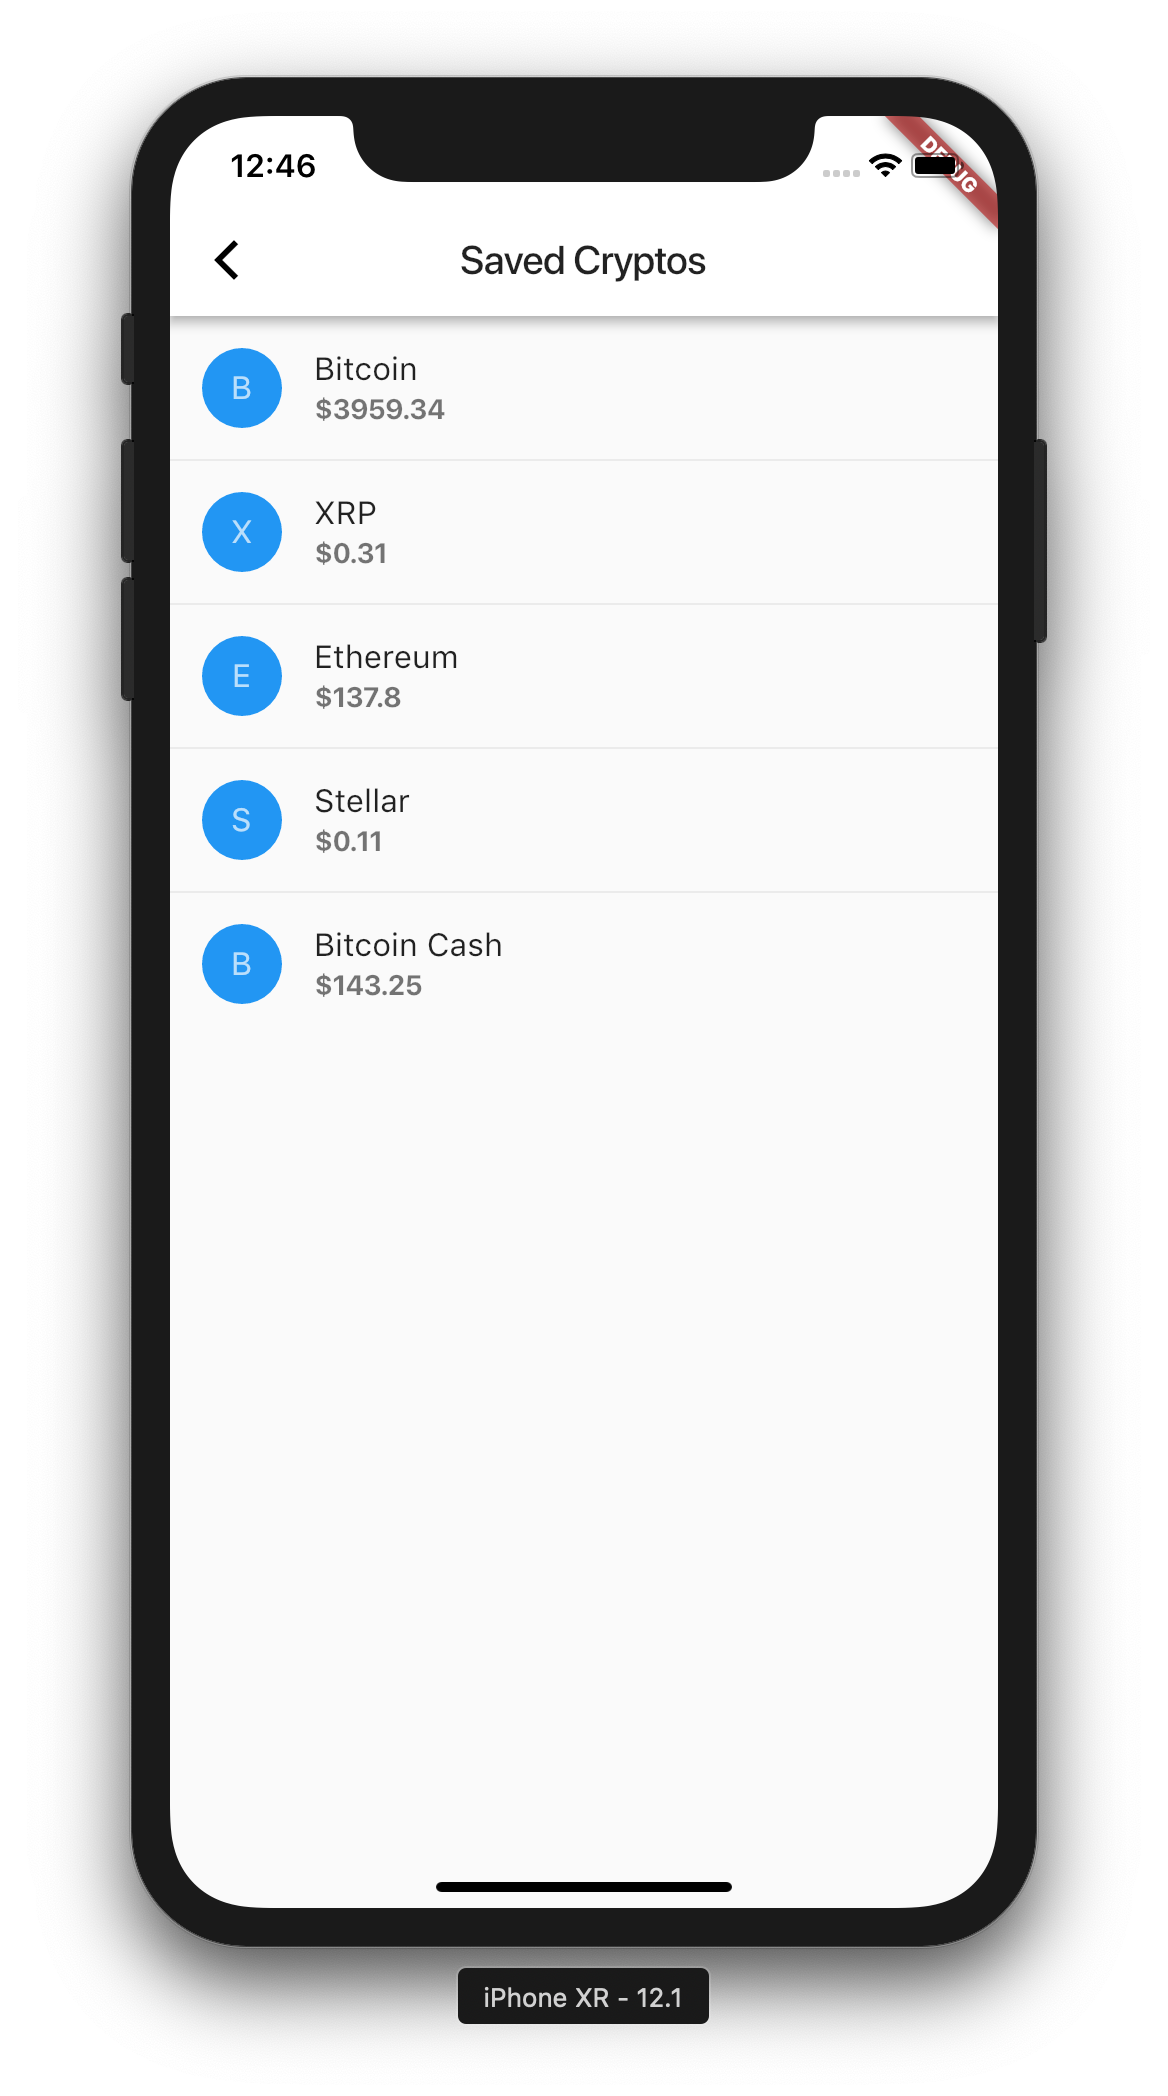
And of course, cross platform framework would not be useful if we cannot run it on both Android and iOS! So here are the Android equivalent screenshots with no code change.
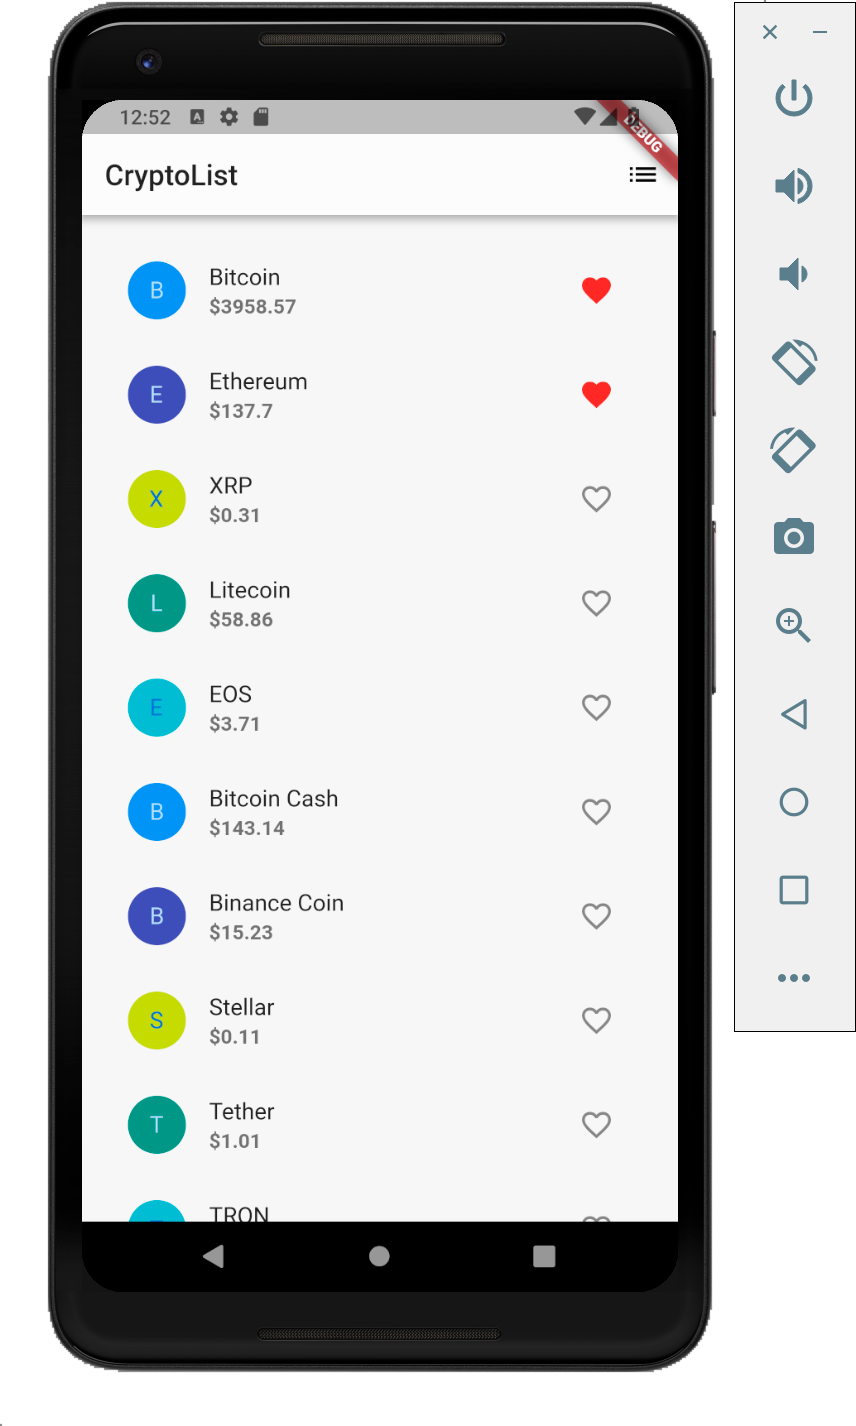
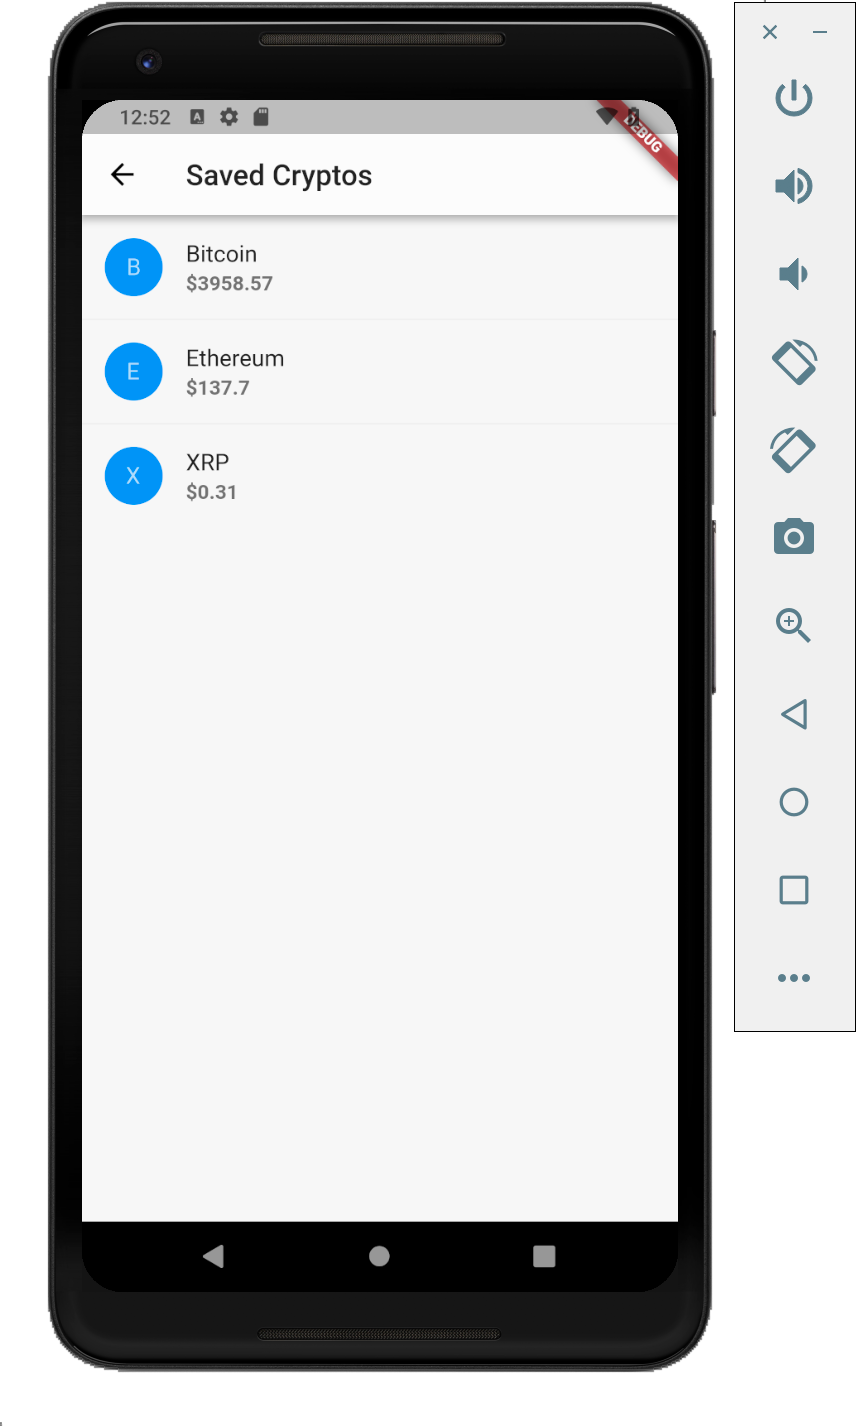
I believe certain customisations are definitely possible to better suit the native looks of each platforms, such as by using cupertino style widgets but that is not covered in this tutorial.
Follow
Final Thoughts
This was my first project I have made using Flutter. I have referenced the original sample shown in the official Flutter page, but have extended it to facilitate my own learning. The framework really feels cool, so I might write other complex tutorials in the future.
✅ 30s ad
☞ The Complete Flutter App Development Course for Android, iOS
☞ The Complete Flutter and Firebase Developer Course
☞ Dart 2 Complete Bootcamp - Go Hero from Zero in Dart Flutter
☞ Flutter - Firebase - CRUD - Build 2 Apps super easy!
☞ Dart Masterclass Programming Course: iOS/Android Bible
#flutter
