Uploading Files and Images With Vue and Express
I am pretty sure you must have googled this before:
How to upload images using Node.js?
How to validate uploaded files using Node.js?
File uploading using MERN stack
If you haven’t, I can assure you that in future you will. Files are an important part of the web ecosystem.
Dread it. Run from it. File uploading still arrives.

Ahh, okay. This post is about uploading images using Express and a popular frontend framework called Vue. I choose Vue because I think it’s underrated and under-appreciated because of the popularity of both Angular and React, and there exists already a bunch of tutorials for everything on React and Angular. Yep, You can say I have a soft corner for the underdogs ❤.
And the reason for choosing Express is because I don’t have experience with any other Node.js frameworks🤐.
We will not only focus on uploading the files but also make sure the uploaded files are correct (people like calling it, Validation). I’ll not consume more of your time with this intro and will get straight to the point.
Let’s hop into this tutorial🤩.
Creating the form
We will be using Vue CLI, so if you have not installed it then do install it.
npm i -g @vue/cli
#OR
yarn global add @vue/cli
Now we need to create the project:
vue create vue-uploader
Once done, we have to start our Vue application using,
cd vue-uploader
yarn serve
The first thing to do is to create a component that is responsible for all the file uploading. Create a file FileUpload.vue in the components directory and drop the following code in the file.
<template>
<div class="file">
</div>
</template>
<script>
export default {
  name: 'FileUpload'
}
</script>
Next obvious step is to include this component into your App component,
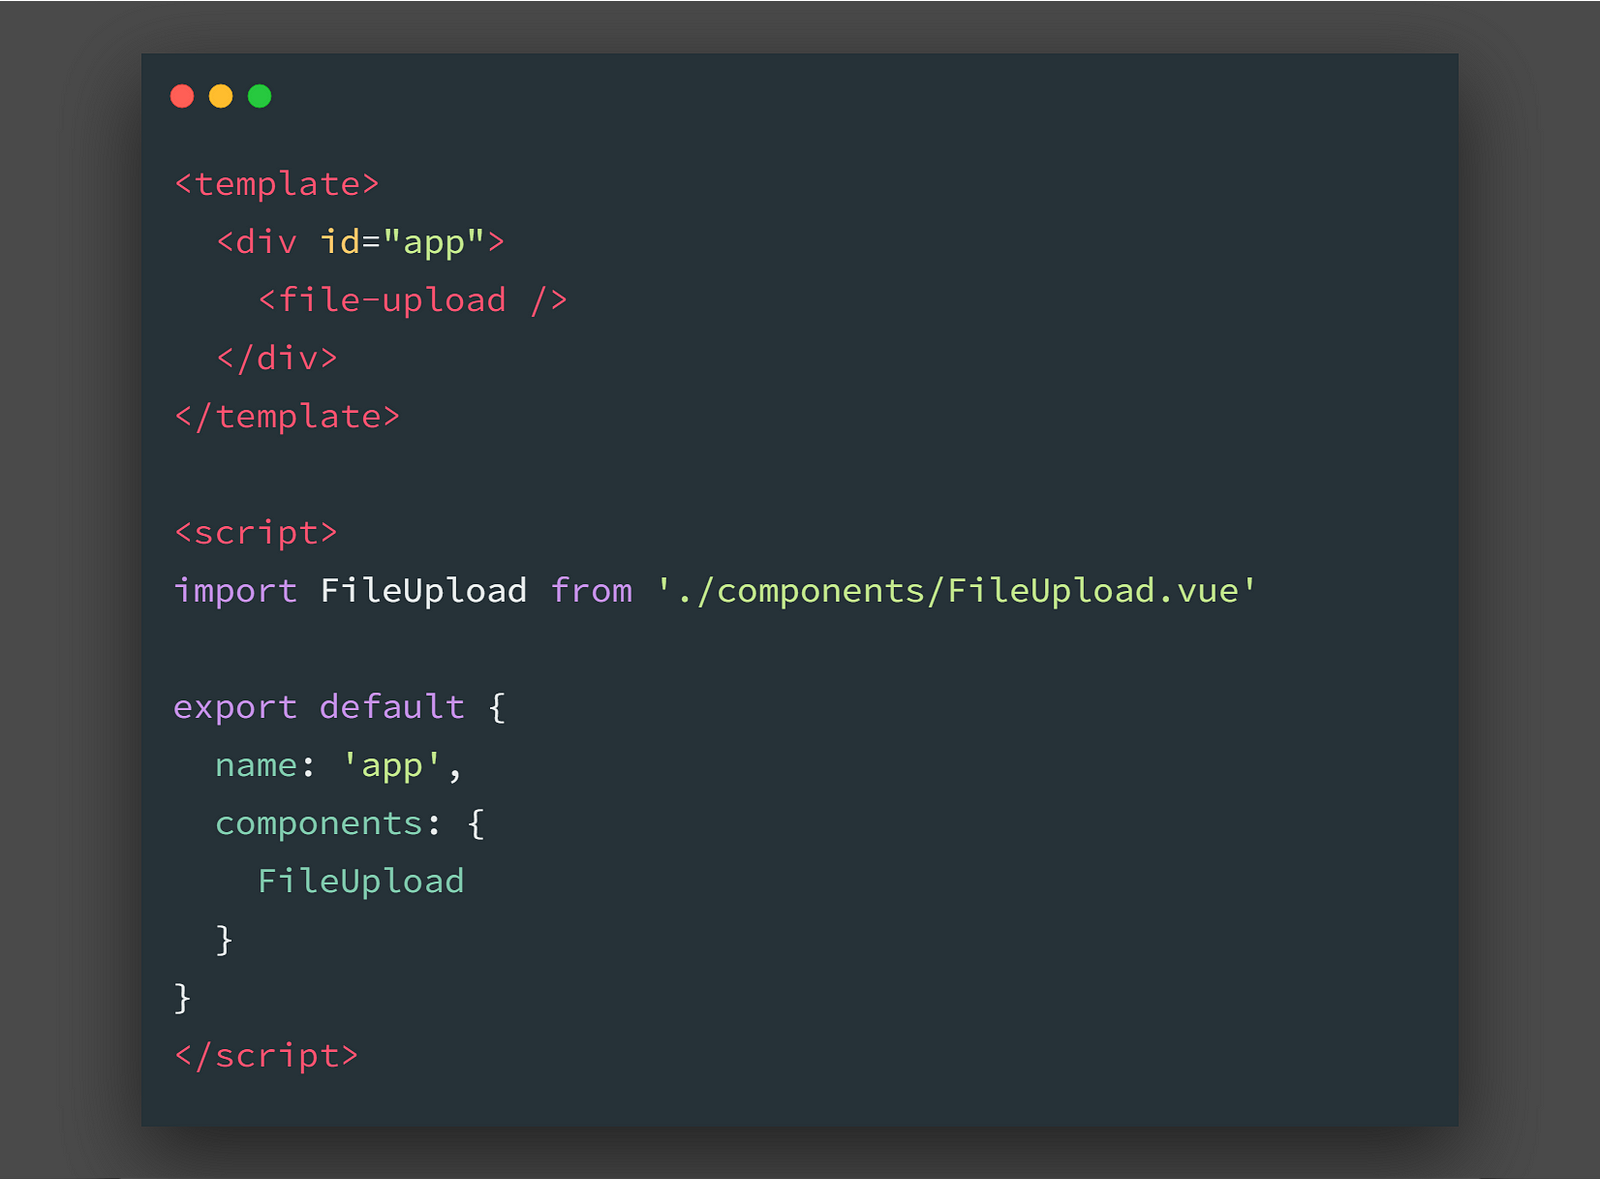
Good, nothing more to be added to the App.vue file. We will focus and concern ourselves only with FileUpload component. We need to create an input form for our user so that they can upload the file.
The static form would look something like this:-
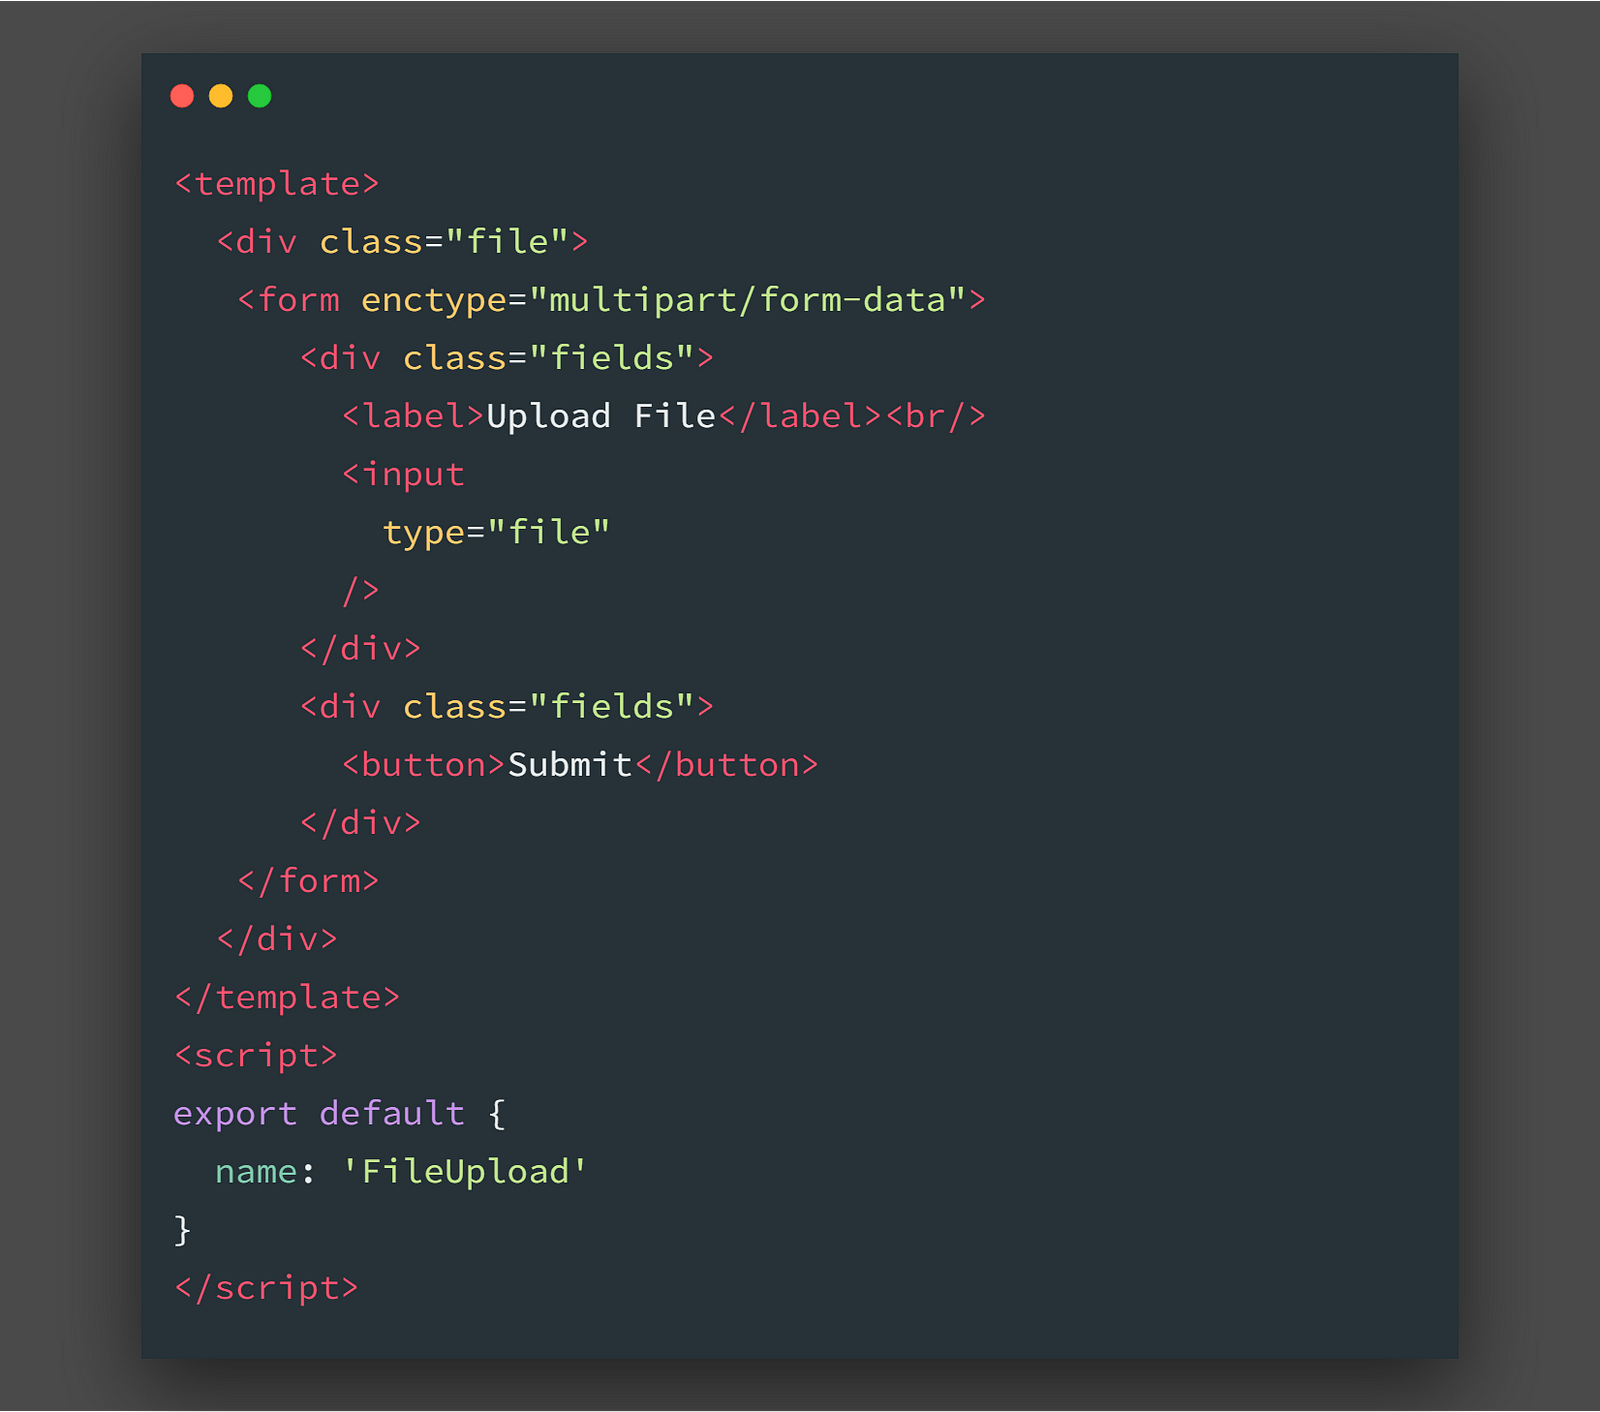
So, if you visit localhost:8080 you would see a form which allows you to input the file. But it doesn’t do anything. You submit the file but nothing happens. So what to do?
We should get the file entered by our user and store it inside the component’s data property and then make an ajax post request to the server with the file data.
We will be using axios for making our request to the backend.
yarn add axios
# OR
npm i axios
We will use the ‘onChange’ event handler on the input field to get the file. We will be using refs to get the current file at that moment. And use the onSubmit event handler for making the post request with the file.
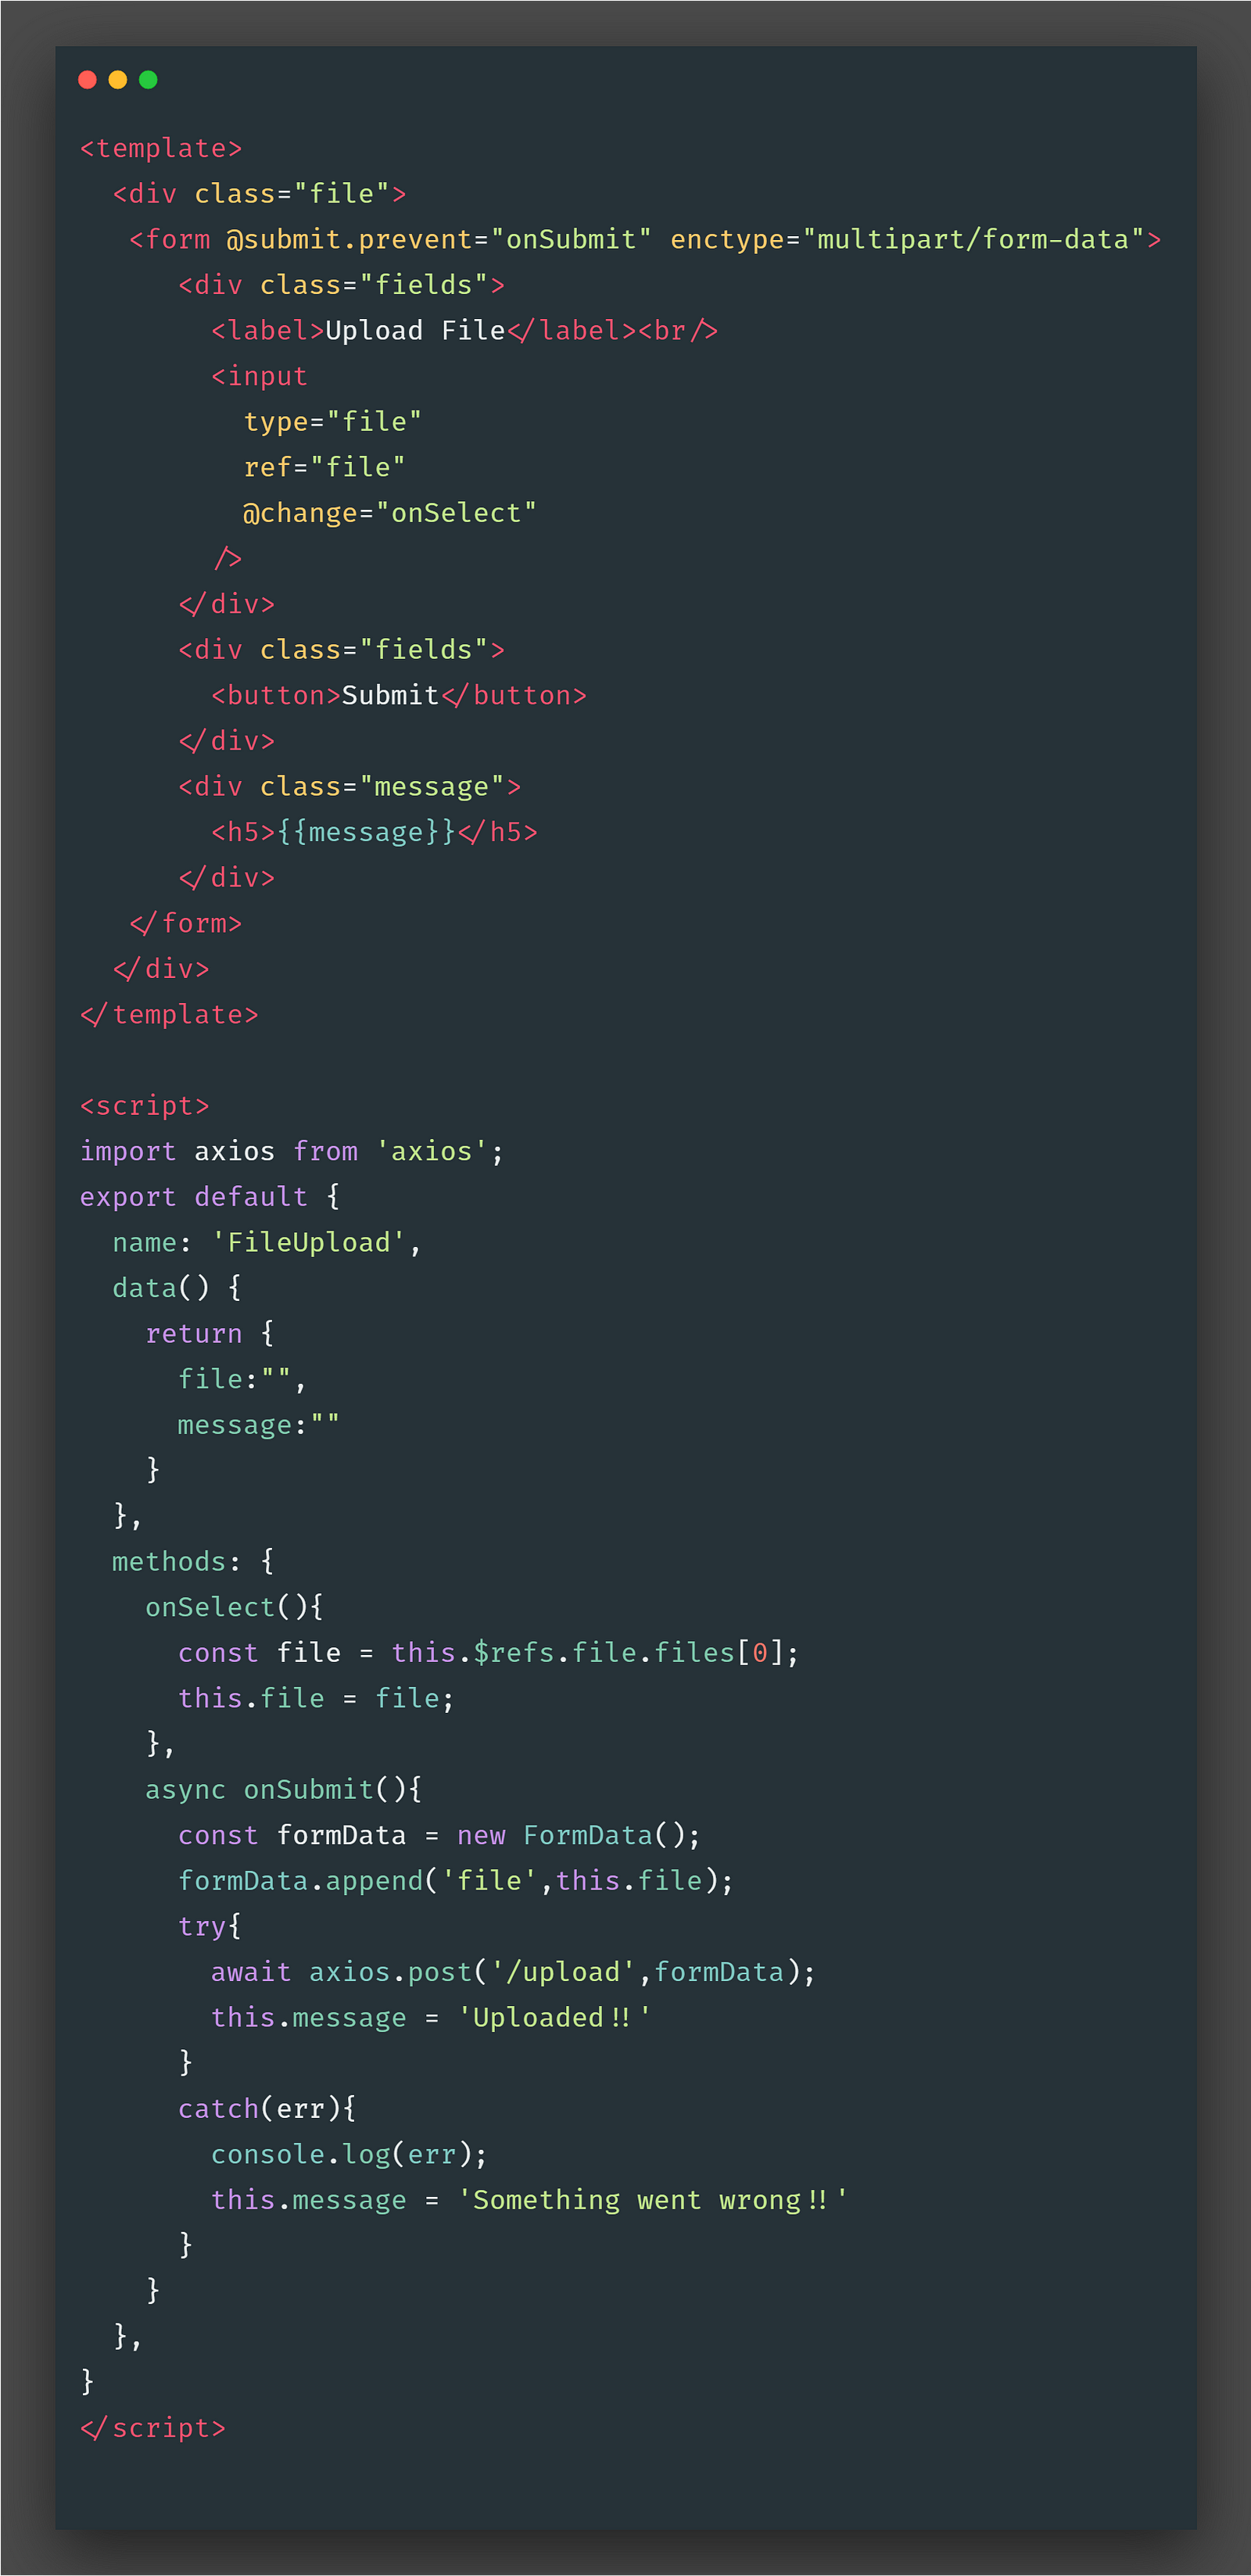
We will get the file using _this.$refs.file_. The onChange event will run once the file is selected, and the onSelect method is called which gets the file and stores in the file data property. On the submit button click, the onSubmit method is fired which gets the file and makes a post request (thanks to axios) using async-await.
Will use the message data to display the message based on the status of the response from the server.
Ohkayy, everything makes sense but what is this FormData?
The
[FormData](https://developer.mozilla.org/en-US/docs/Web/API/FormData)object lets you compile a set of key/value pairs to send using[XMLHttpRequest](https://developer.mozilla.org/en-US/docs/Web/API/XMLHttpRequest). It is primarily intended for use in sending form data, but can be used independently from forms in order to transmit keyed data.
Now we have to set up our backend API, to store our files on the server.
Setting up the backend
We create another directory and dive into the terminal and type:
npm init
Just fill in the details asked by npm or ignore them (suit yourself). Once we are done with this create a file named index.js. This script is the one where all of our code goes in.
We will add express and cors as dependencies:
npm i express cors
We will use nodemon so if you have it set up then no worries else run a simple command and you are all set.
npm i -g nodemon
The package.json should look like this:
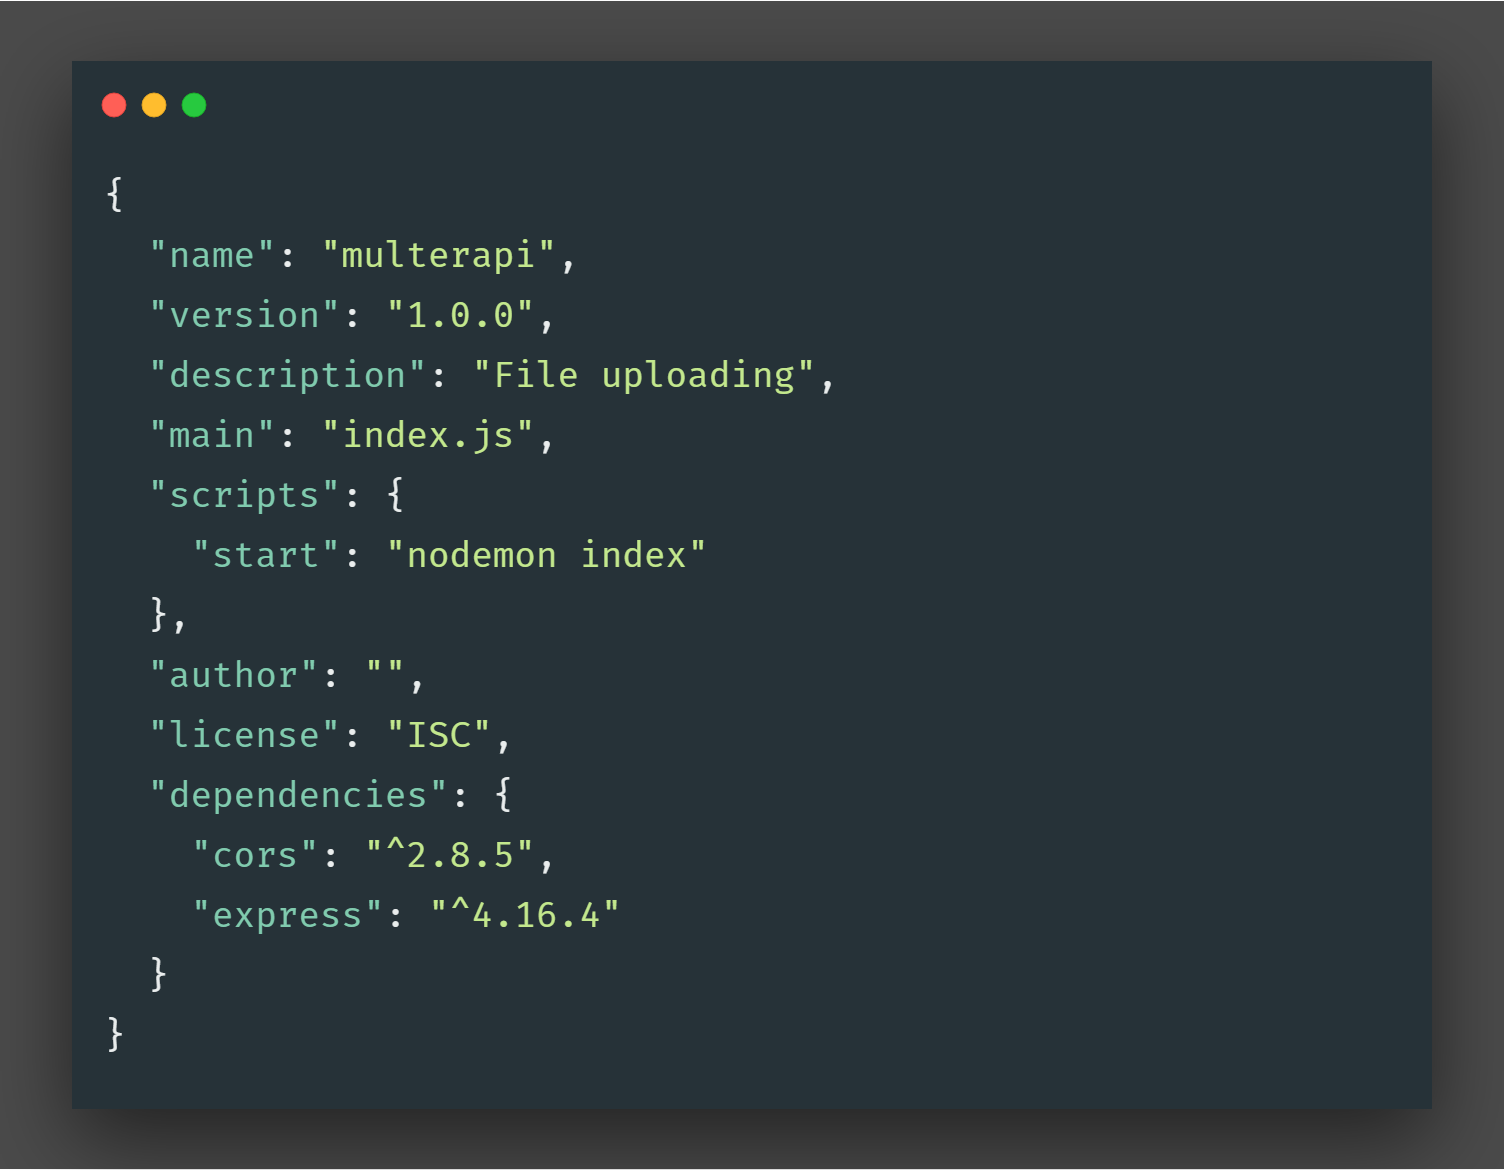
Time to write some code in index.js and set up our server.
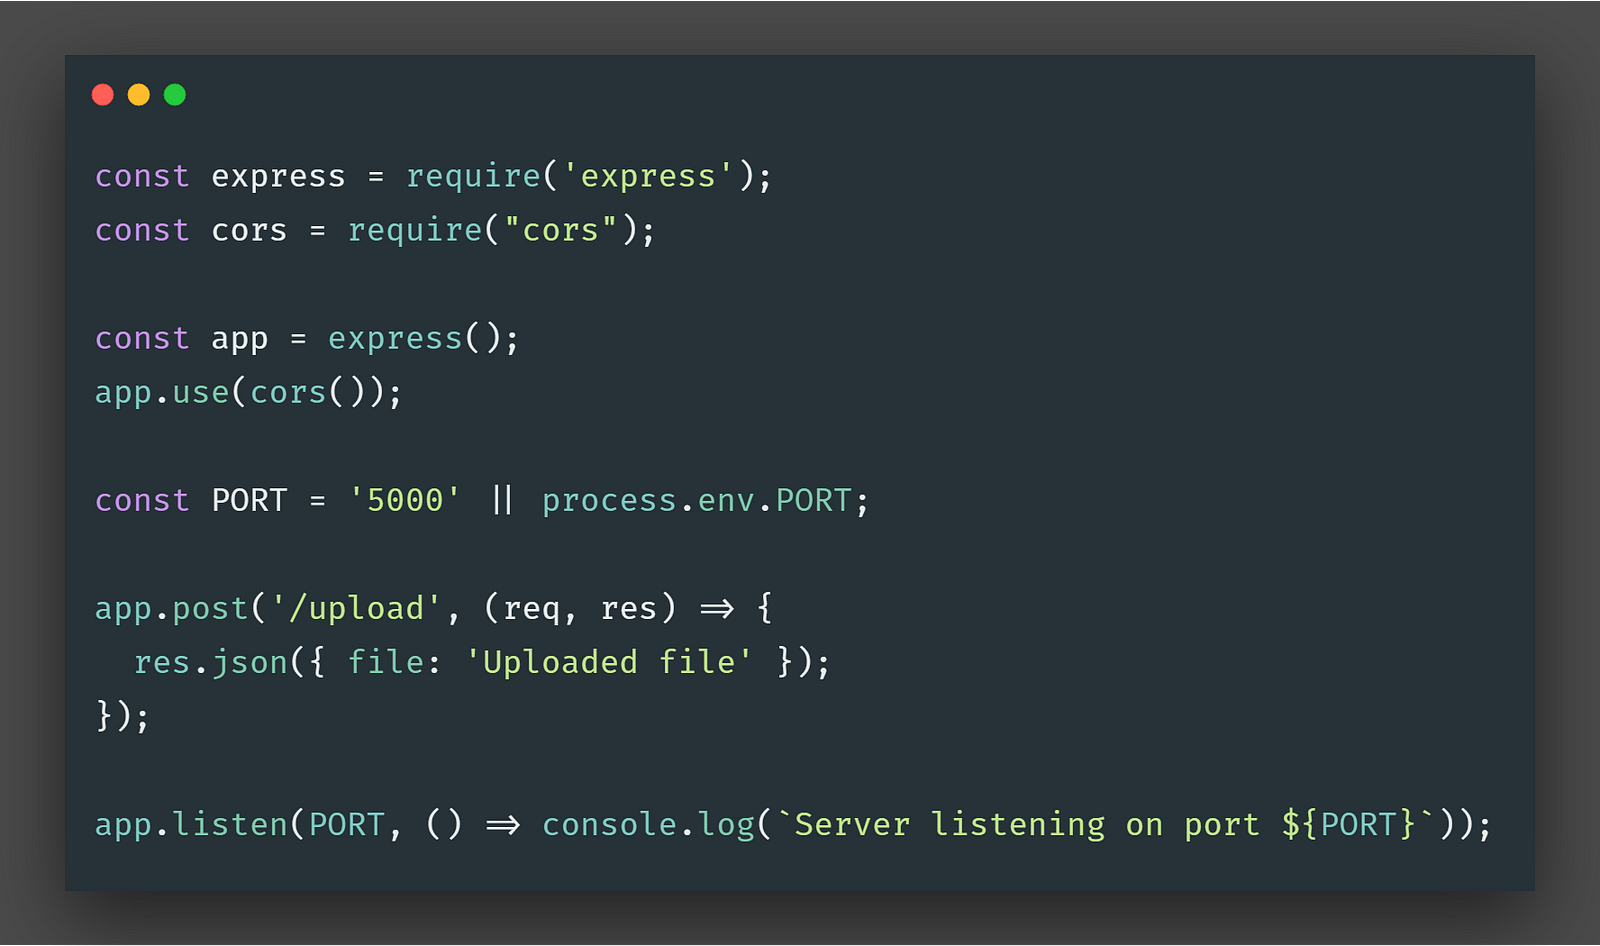
Run npm start and spin up the server.
Not very useful for file uploading. True, and here comes Multer to the rescue.
Multer
Multer is a node.js middleware for handling multipart/form-data, which is primarily used for uploading files. It is written on top of busboy for maximum efficiency.
Installation
npm i multer
Once we are done with the installation, time to write some code for file handling on the server side.
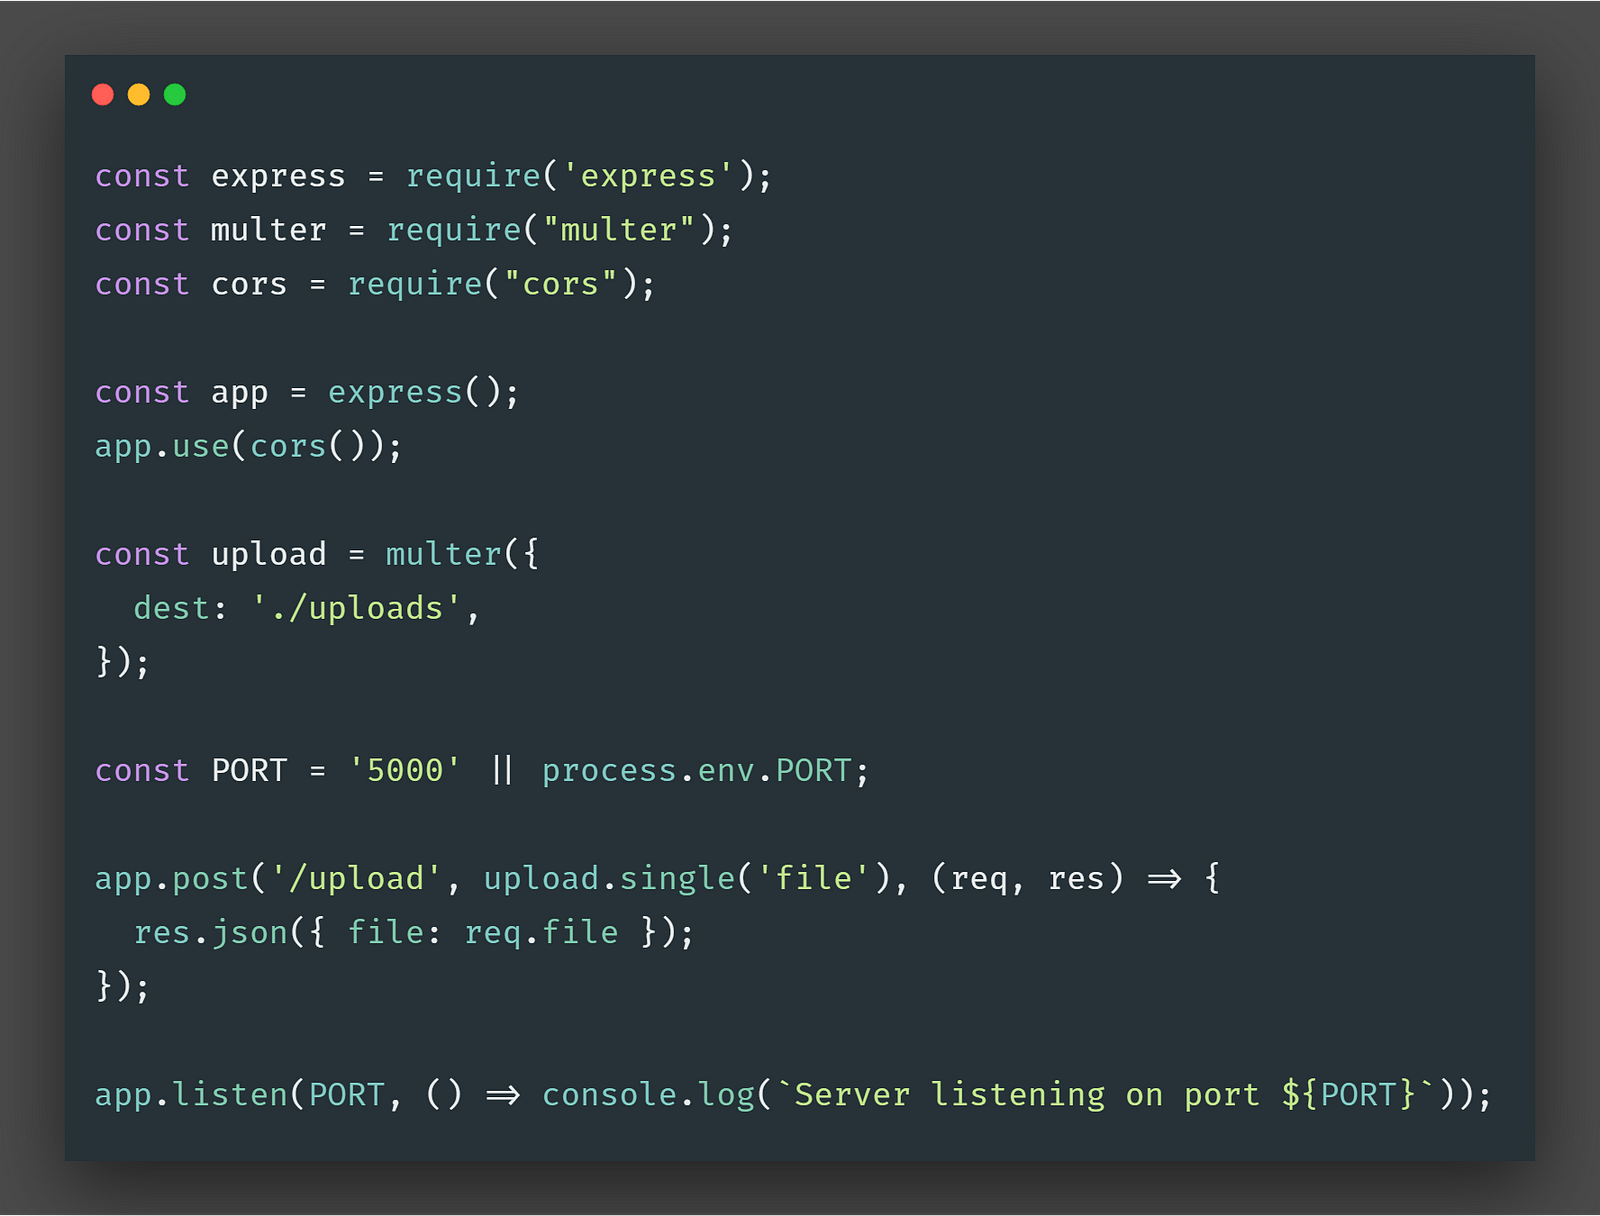
Multer adds a body object and a file or files object to the request object. The bodyobject contains the values of the text fields of the form, the file or files object contains the files uploaded via the form.
The file key in upload.single should match with ‘FormData’ key in the Vue component.
After the successful request, you will notice that there exists a directory upload with the uploaded files.
Woohoo!!!. Uploaded the files successfully on the server.
But we need one more thing, Validation. We don’t want our users to upload the wrong type of files or incorrect files, we want them to upload the files which meet certain criteria. We will be heading towards the validation both on server and client side.
Server-Side Validation
Two things we will be validating:-
- Type of file
- Size of file
Type of file
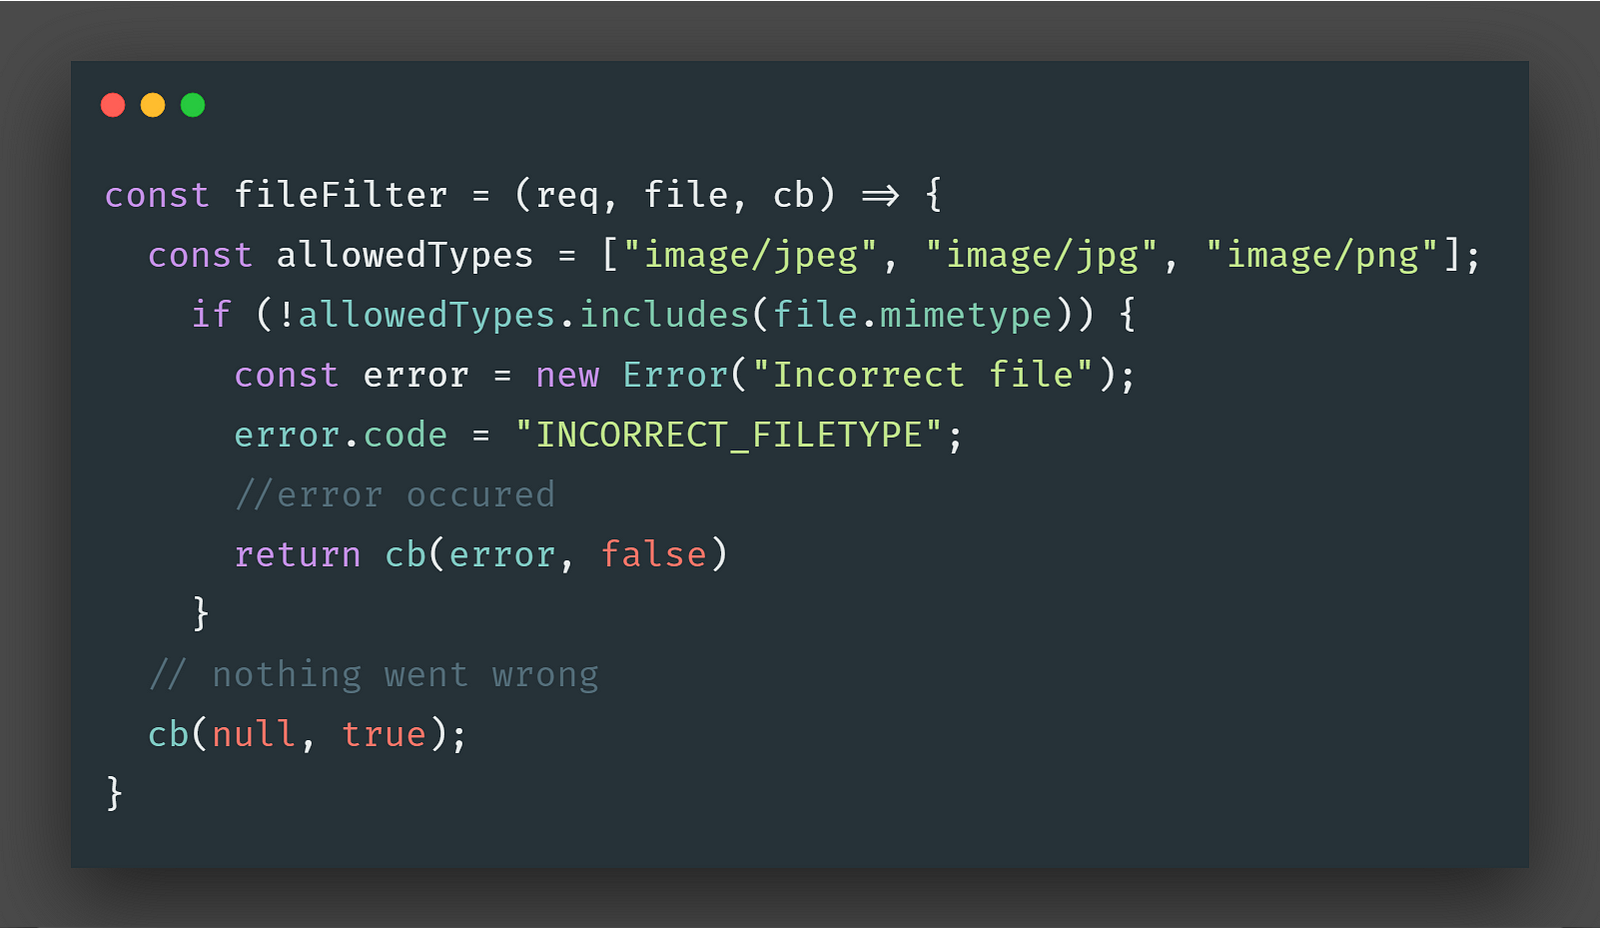
Let’s say, we only accept images. We want the uploaded file to have an extension of _.png_, _.jpeg_, and _.jpg_. We validate the files on the basis of their extension.
const upload = multer({
  dest: './uploads',
  fileFilter
});
If the file’s mimetype, doesn’t exist in our allowedTypes array then we create an error object and return that error with an error code attached to it.
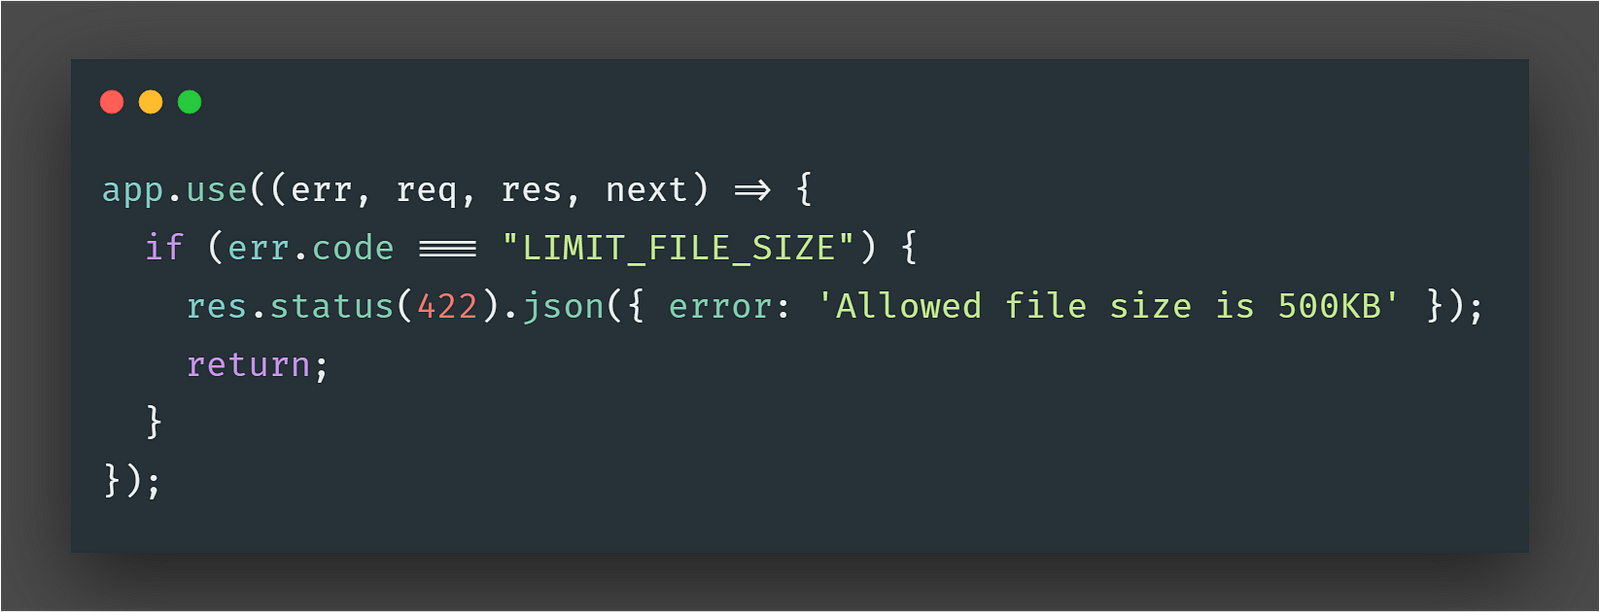
Now the next thing is to catch this error and handle it. We will be creating a middleware to handle this situation by sending an error response on the client side -
Size of file
Our users should not be able to enter a file of any size. We need to set a certain size limit for the valid files.
const upload = multer({
  dest: './uploads',
  fileFilter,
  limits: {
    fileSize: 500000
  }
});
That’s it if the files size increase more than 500KB then an error will be thrown which will be handled by our middleware.
Finally, our index.js will look like this:-
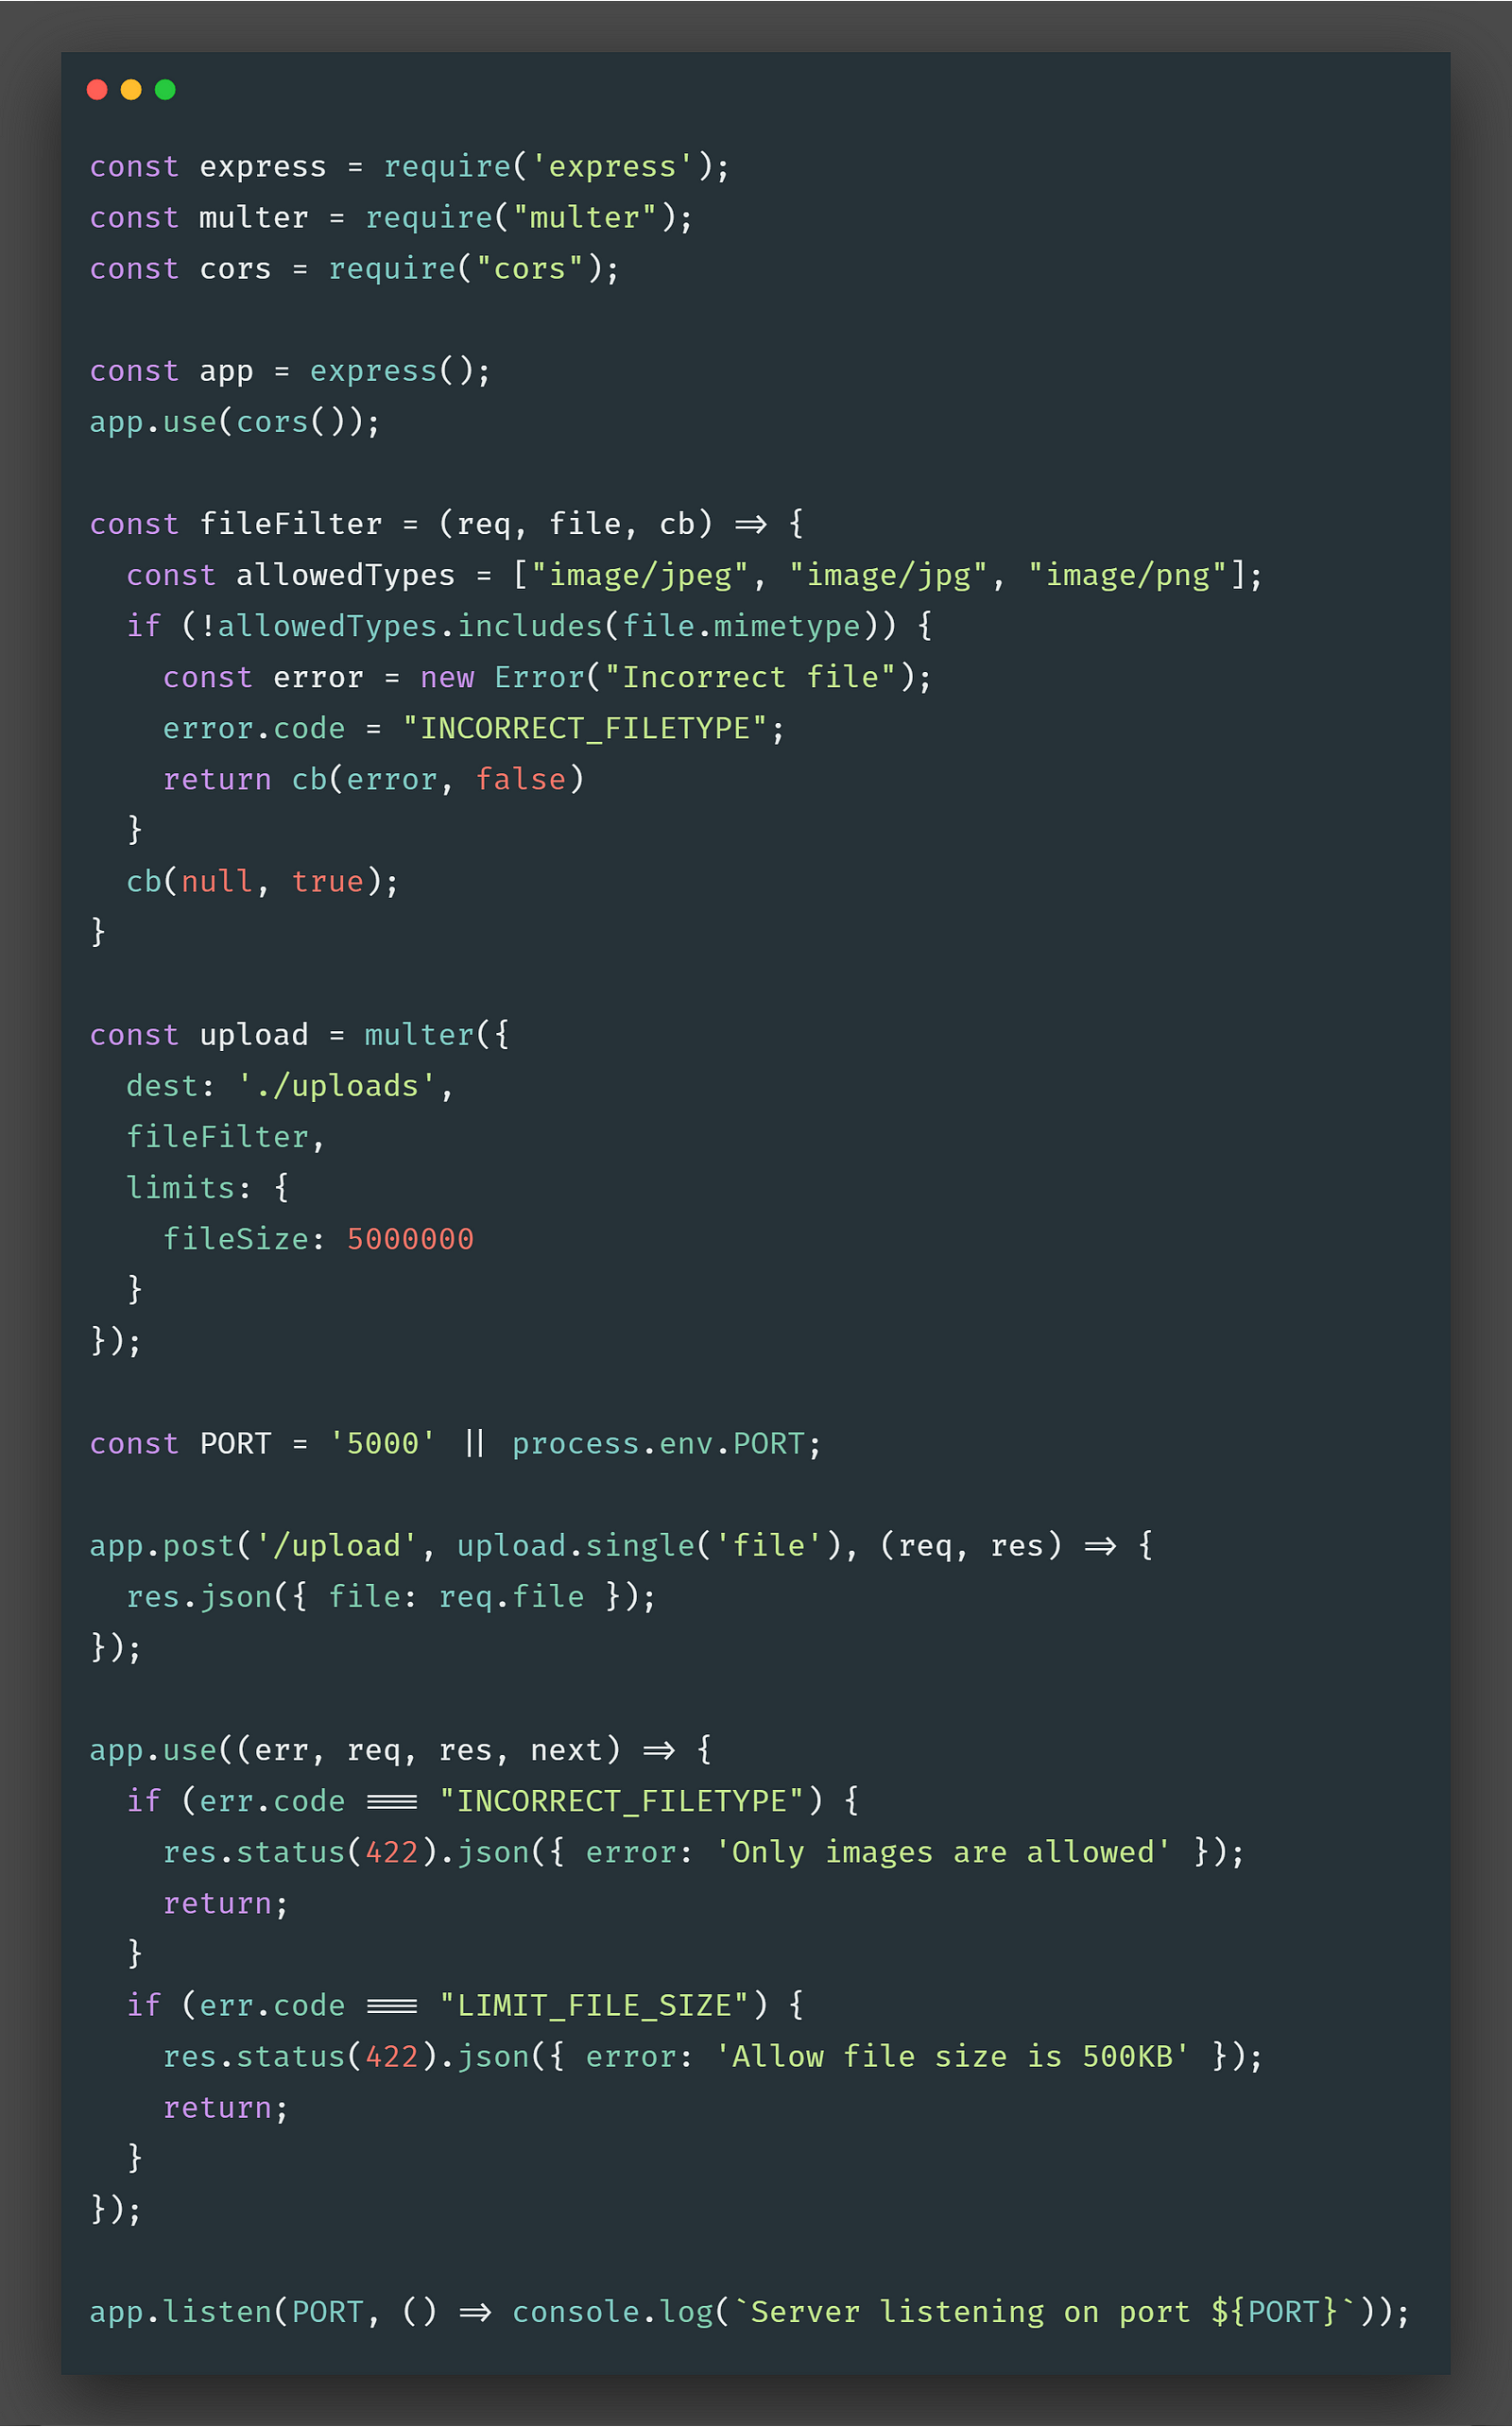
We will use this response error message and display it on the client side.
catch(err){
  this.message = err.response.data.error
}
Client-side Validation
Client-side validation is pretty much simple, once we select the file we can easily check for the file type and size in the onSelect method.
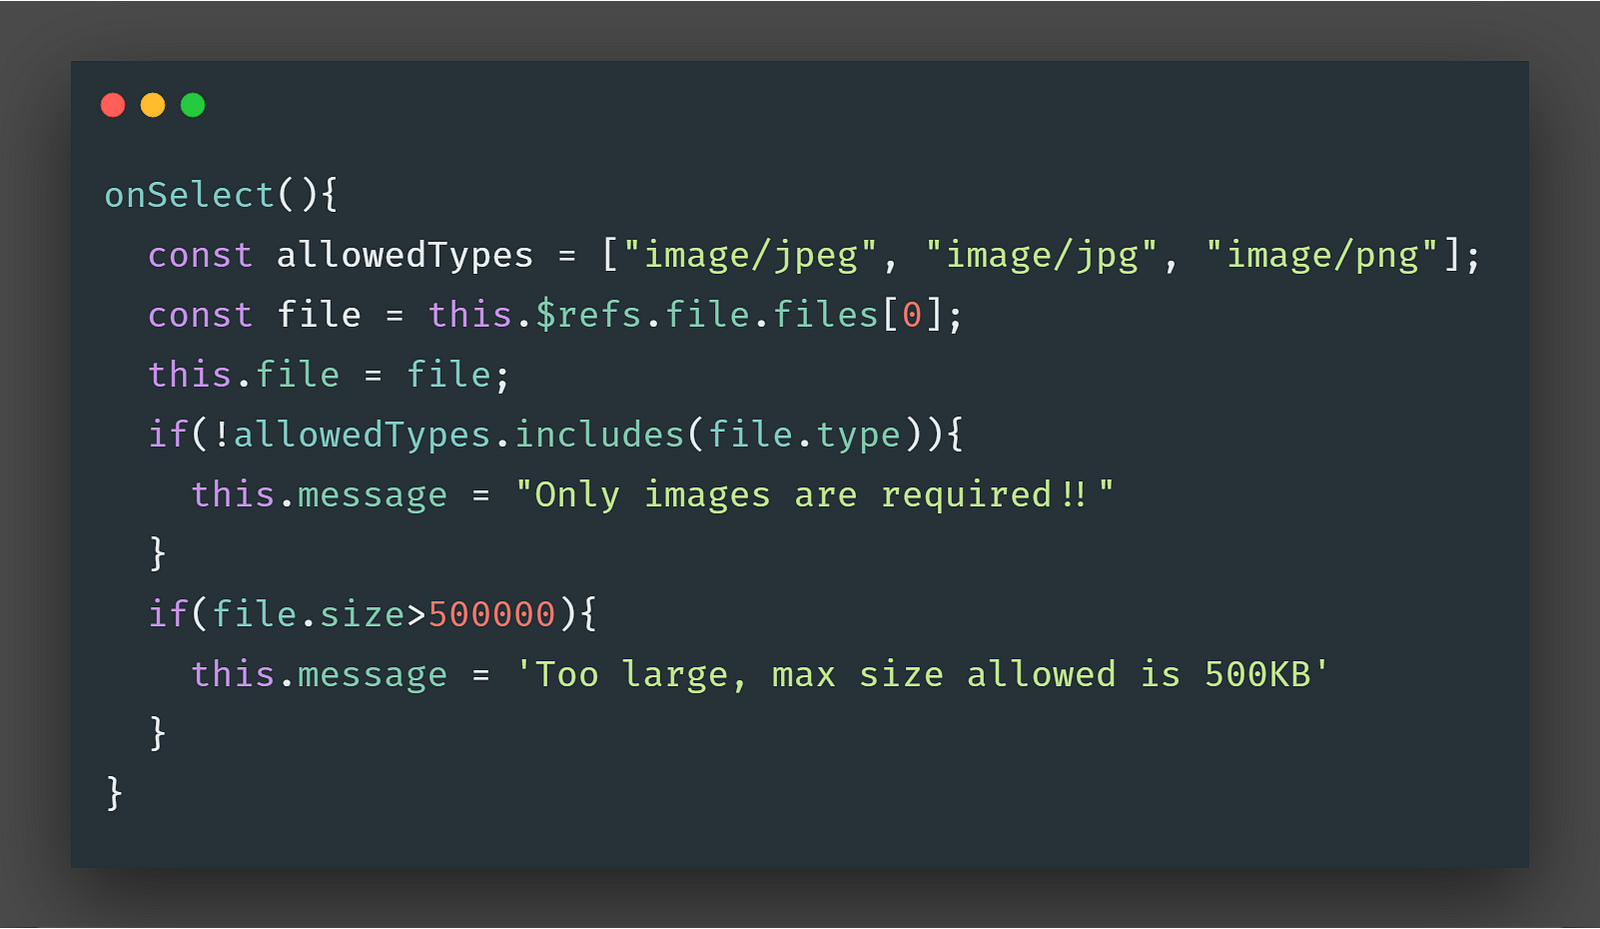
Self-explanatory!! And that sums up the client side validation.
Note:
file.typeon the client is equivalent tofile.mimetypeon server
You can check out the complete Github repo here.
Conclusion
In this article, we learned about uploading files on the server using Express and Vue.js. Hope you liked this article and learned something new, and if you did, clap your 💖 out and follow me for more content on Medium and Twitter. Thanks for reading 🙏 Please feel free to comment and ask anything.
Learn more
☞ Curso Avanzado de Vuejs 2, Vuex y AdonisJs 4
☞ VueJS + Firebase: Desde 0 hasta una proyecto en internet
☞ Vuejs 2 y Vuex desde 0 con las mejores prácticas
☞ Secure Your VueJs Applications With Auth0
☞ Crea Sistemas de Compras - Ventas con Laravel 5.7 y VuejS
☞ Desarrolla sistemas Web en ASP Net Core, SQL Server y Vuejs
#vue-js #node-js
