Top 10 Tips and Tricks for Reactjs Developers in 2020
All right, folks — it’s time for another piece to help you improve your React game, become better React devs, write better code, and excel at coding interviews.
1. Use React Hooks In Functional Components
Hooks were introduced in React v16.8 and are a huge boost for functional programming within React. With Hooks you can, and should, make use of functional components instead of class components. But wait…functional components and state? And what’s with lifecycle methods?
Have no fear — React Hooks have that covered for you. Let’s see some examples:

This was the traditional way of using a class. With hooks, we can now do i using the useState Hook, like this:

Looks easier? It is! We’re using the useState Hook to set the initial state to an empty String (‘’) and it returns an array with the current state (value) and a method to mutate that state (setValue). We are also using array destructuring to get access to value and setValue.
Functional components don’t have access to lifecycle methods by default. But now we have Hooks and the useEffect Hook comes to our rescue. First, the traditional way, using a class:

Here’s the same example making use of the useEffect Hook:

How awesome is that? useEffect will aways run when one of the values in the passed array (value) changes.
These are just two examples of using React Hooks — there are more out there. You can even create your own custom hooks. In my opinion, every ReactJS Dev should learn this concept!
2. Use The React Context API For Passing Props
Maybe you’ve experienced a situation where you have deeply nested components and a need to pass down props from the higher to the lower tier, with some components sitting in the middle, just letting those props pass. Instead of editing each component in the chain, you can make use of the React Context API.
In this example, we create a new context in a separate file like this:

Then we need to wrap the parent element, hence the highest tier from where we want to distribute props with the provider we created:

Now, all of the ParentComponent’s children have access to auth as a prop. How cool is that?
Now, all we have to do is to consume the context in a child component. I’ll make use of functional components and the useContext Hook to do so:

If there were more child components nested, they would have access to the context as well. Awesome!
3. Styled-Components
Styled-Components belong effectively to the CSS-in-JS libraries that abstract the CSS to component level, using just JavaScript to describe styles. They can be created via the ES6 Template Literal Notation using back-ticks like this:

Now you have a custom-styled button component that you can use all over your application, instead of the normal HTML button. All styles are encapsulated and won’t interfere with other styles in the DOM. Pretty sick, right?
4. React Fragments
For a long time, you had to wrap everything in a return statement into a single div for react to render it correctly in the DOM or make use of array notation.
For example:

With the introduction of React Fragments you no longer have to use either of these methods. Instead, you can do something like this:

Or, since Babel 7, even something like this:

5. Use Error Boundaries
Having errors in your application is one thing but if they appear in the view at the very least they should not break the whole application. For this case “Error Boundaries” have been implemented into React. These are basically components that you can use to to wrap other components. They catch errors during rendering and in lifecycle methods down the tree. Via the componentDidCatch method (note that there’s no React Hook for this yet so you have to use a class-based component) you can then react to the error and render a fallback or log the error. Here’s a short example:

You can now use the ErrorBoundary component like this:
https://miro.medium.com/max/1306/1*3rmd_T0dgXTjMu_WGP4jog.png
6. React and Typescript
Typescript is a really hot topic and one of the developers’ top choices for learning in the near future. With the newer versions of create-react-app (CRA) it comes with built-in Support for Typescript. You just have to add the typescript flag when creating a new project with CRA, like this:

The key benefits of using Typescript with React are:
- Latest JavaScript features available
- Interfaces for complex type definitions
- VS Code was made for TypeScript
- Readability and Validation to avoid bugs during development
Here’s a simple example of using TypeScript in a functional React Component:

And with an interface:

If you want to learn something new in 2020, definitely give TypeScript a go!
7. Jest and Enzyme for Testing
Every dev should test their applications — it is mandatory in many corporations. Testing React apps can be really cool with the right setup. A widely-used setup consists of Jest and Enzyme. Take a look!
Jest comes bundled with the create-react-app by default and is a test runner, assertion library, and mocking library. It also provides snapshot testing, which basically creates a rendered snapshot of a component that will automatically be compared to previous snapshots. If those two don’t match, the test will fail.
This is really cool for unit and integrations tests but what about real components of your React App? Enter Enzyme, a testing library for React Components developed and maintained by Airbnb and the ideal partner for Jest.
With these libraries in place we can do neat tests like this:

This tests the basic rendering behaviour of one of our components. But we can do even more. For example, testing for props:

This looks awesome, right? There is so much more you can do with this setup like mocking API calls or testing lifecycle methods…
8. Conditionals in JSX
Writing JSX is really cool and one of the main features of React. To improve your capabilities you can make use of the following trick.
Instead of using this:

You can do a short-circuit evaluation like this:

9. Higher-Order Components
Higher-Order Components (HOC) are an advanced React concept used to abstract shared code to make it accessible where needed. The concept is similar to higher-order functions in JavaScript — HOCs take components and return components but they are not components themselves; they are functions. On an abstract level it looks like this:

A good example is “connect” from Redux. A more practical example could look like this:

At first we create the HOC (colorizeElement) with an element that keeps all its props and gets a new prop for the color (blue). We can then use that HOC to create a new, blue-colored button like this:

Looks cool, doesn’t it?
10. React DevTools
React DevTools is a cool browser extension available for Chrome and Firefox and maintained by the Facebook React Core Team. Version 4 came out in August 2019 — this extension is really useful for any React dev.
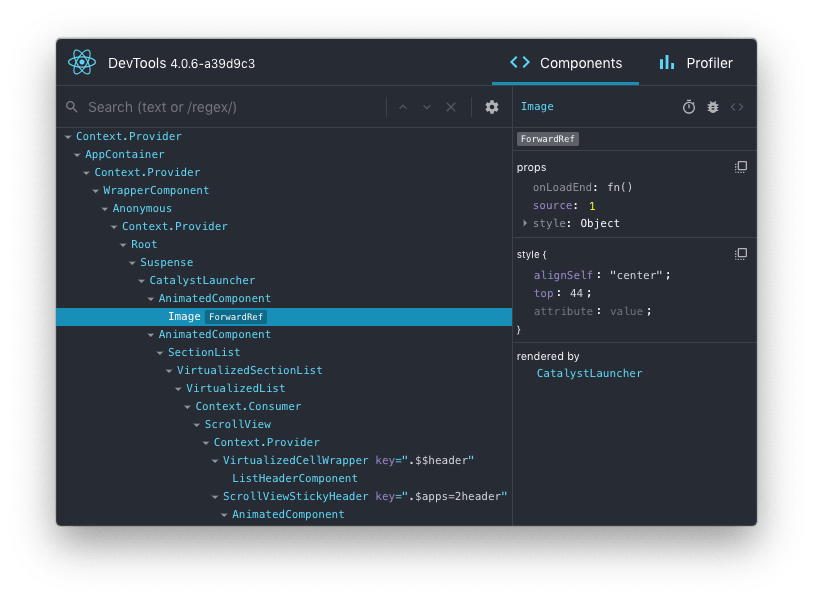
It works well with React and React Native and really helps you understand what happens inside your react App.
What’s really cool, and you may not be aware of this, is that some big companies like Airbnb and Netflix are using React. If you visit their websites you can find information about their sites in your browser console if you have the React DevTools installed:

It’s always nice to see what the big players are doing. The same thing can be applied to Redux DevTools!
Bonus: Must-have VS Code Extensions for React Devs
All right, you have made it all the way down to this point, now it’s time for a little bonus! I’ve identified some of the best VS Code Extensions for React Devs.
ES7 React/Redux/GraphQL/React-Native snippets
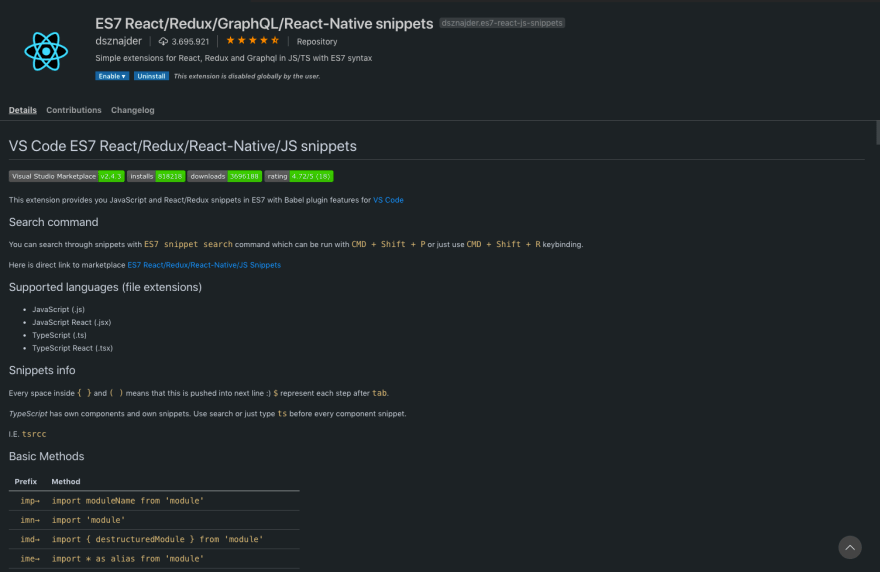
A really cool extension with almost four million downloads. It brings you tons of code snippets for React, Redux and GraphQL.
Jest and Jest Snippets

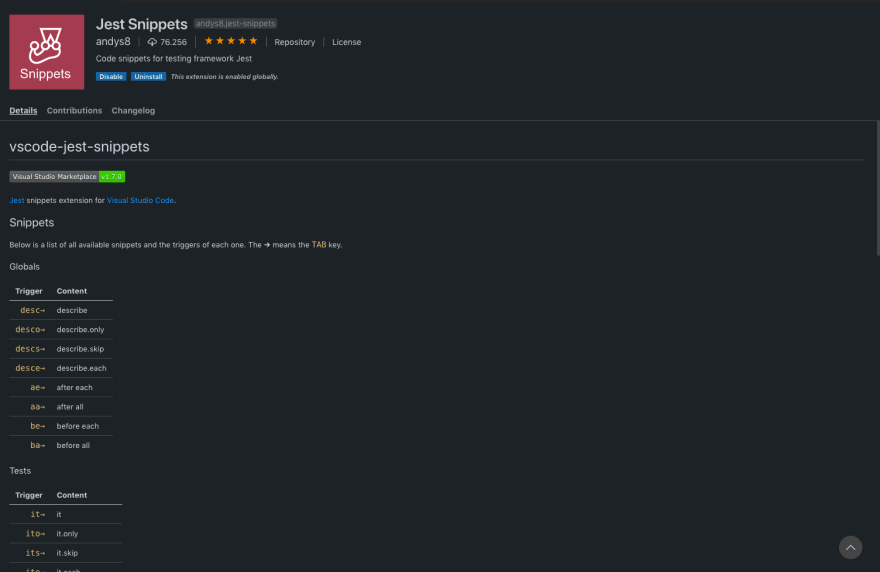
Two extensions that harmonize perfectly with Jest and provide you snippets for better testing
Typescript React code snippets

A cool extension that’s helpful if you work with Typescript and React.
While these are some extensions specifically for React development, you should also use the more general ones. I have written an article about the 10 VS Code Extensions that Front-End Developers Should Know in 2020, make sure to check those out as well!
Conclusion
Well, everything has to come to an end and this is it for this piece. I hope I could give you some insights to help you become better React devs, whether you’re just starting out or you’re already an experienced developer. I would love to hear your opinions, so feel free to leave a comment.
Thank you !
#React #JavaScript #Programming #Technology