Motivation
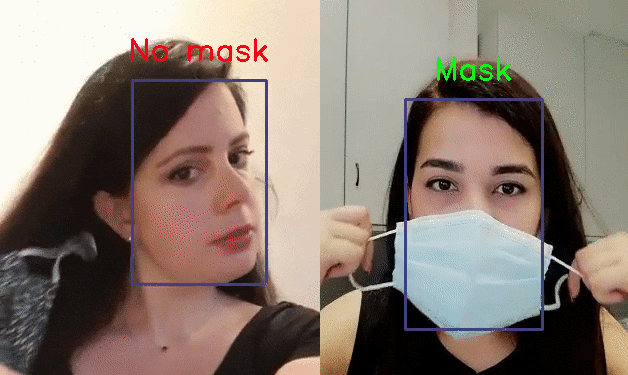
A couple of days before the end of quarantine in France, I was reading the news, and I stumbled upon an article: France is using AI to check whether people are wearing masks on public transport.
French startup DatakaLab, which created the program, says the goal is not to identify or punish individuals who don’t wear masks, but to generate anonymous statistical data that will help authorities anticipate future outbreaks of COVID-19
So I decided to give it a try, and build my own face mask detector to detect whether someone is wearing a mask or not.

1. Dataset
To train a deep learning model to classify whether a person is wearing a mask or not, we need to find a good dataset with a fair amount of images for both classes:
- wearing a mask
- not wearing a mask
Real World Masked Face Dataset (RMFD) provides just what we need! This dataset was created for facial recognition purposes. However, we’re going to use it for face mask detection.
2. Steps
The rest of this post is organized in the following way:
2.1. Data extraction
2.2. Building the Dataset class
2.3. Building our face mask detector model
2.4. Training our model
2.5. Testing our model on real data
2.6. Results
Without further ado, let’s jump right into it!
2.1. Data extraction
The RMFD provides 2 datasets:
- Real-world masked face recognition dataset: it contains 5,000 masked faces of 525 people and 90,000 normal faces.
- Simulated masked face recognition datasets.
In this experiment, we are going to use the first dataset. After downloading and unzipping the dataset, its structure looks as follows:
self-built-masked-face-recognition-dataset
├AFDB_masked_face_dataset
│ ├subject-id
│ │ ├image-id.jpg
│ │ └...
│ └...
└AFDB_face_dataset
  ├subject-id
  │ ├image-id.jpg
  │ └...
  └...
We create our pandas DataFrame by iterating over the images and assigning to each image a label of 0 if the face is not masked, and 1 if the face is masked. The images of this dataset are already cropped around the face, so we won’t need to extract the face from each image.
The following code illustrates the data extraction process:
datasetPath = Path('dataset/self-built-masked-face-recognition-dataset')
	maskPath = datasetPath/'AFDB_masked_face_dataset'
	nonMaskPath = datasetPath/'AFDB_face_dataset'
	maskDF = pd.DataFrame()

	for subject in tqdm(list(nonMaskPath.iterdir()), desc='non mask photos'):
	    for imgPath in subject.iterdir():
	        image = cv2.imread(str(imgPath))
	        maskDF = maskDF.append({
	            'image': image,
	            'mask': 0
	        }, ignore_index=True)

	for subject in tqdm(list(maskPath.iterdir()), desc='mask photos'):
	    for imgPath in subject.iterdir():
	        image = cv2.imread(str(imgPath))
	        maskDF = maskDF.append({
	            'image': image,
	            'mask': 1
	        }, ignore_index=True)

	maskDF.to_pickle('data/mask_df.pickle')
view raw
maskDetector_data_preparation.py hosted with ❤ by GitHub
Store images in a pandas DataFrame alongside their corresponding label
2.2. Building the Dataset class
Now that we have our pandas DataFrame ready, it is time to build the Dataset class, which will be used for querying samples by batches in a way interpretable by PyTorch. Our model is going to take 100x100 images as input, so we transform each sample image when querying it, by resizing it to 100x100 and then convert it to a Tensor , which is the base data type that PyTorch can manipulate:
class MaskDataset(Dataset):
	    """ Masked faces dataset
	        0 = 'no mask'
	        1 = 'mask'
	    """
	    def __init__(self, dataFrame):
	        self.dataFrame = dataFrame

	        self.transformations = Compose([
	            ToPILImage(),
	            Resize((100, 100)),
	            ToTensor(), # [0, 1]
	        ])

	    def __getitem__(self, key):
	        row = self.dataFrame.iloc[key]
	        return {
	            'image': self.transformations(row['image']),
	            'mask': tensor([row['mask']], dtype=long),
	        }

	    def __len__(self):
	        return len(self.dataFrame.index)
view raw
maskDetector_datatest.py hosted with ❤ by GitHub
dataset module
2.3. Building our face mask detector model
Now for the fun part!
We’re going to be using PyTorch Lightning, which is a thin wrapper around PyTorch. PyTorch Lightning structures your code efficiently in a single class containing everything we need to define and train a model, and you can overwrite any method provided to your needs, making it easy to scale up while avoiding spaghetti code.
PyTorch Lightning exposes many methods for the training/validation loop. However, we are going to be using some of them for our needs. The following are the methods we’re going to override, and are going to be called in the following order internally:
1. Setup:
- init()
- prepare_data()
- configure_optimizer()
- train_dataloader()
- val_dataloader()
2. Training loop:
- training_step()
3. Validation loop:
- validation_step()
- validation_epoch_end()
#covid19 #deep-learning #face-mask #pytorch #classification #deep learning
