Let’s dive into the Flutter CLI (Command Line Interface) and see how we can improve our workflow
Using an IDE such as IntelliJ’s Android Studio or Visual Studio Code for developing Flutter apps makes our lives easier. At a push of a button, we can deploy our app, debug it, hot-reload, etc… And although we can have hotkeys to dismiss using the mouse, it can be troublesome having to move your mouse all around the screen. Or, you just like using the terminal or are curious about it and want to know different ways to interact with Flutter.
Thankfully Flutter comes with a handy CLI (Command Line Interface) that lets us easily do the same tasks that you would on any IDE, such as $ flutter doctor which shows if everything went fine and dandy with our Flutter Installation and checks the latest updates from the Flutter Github repository.
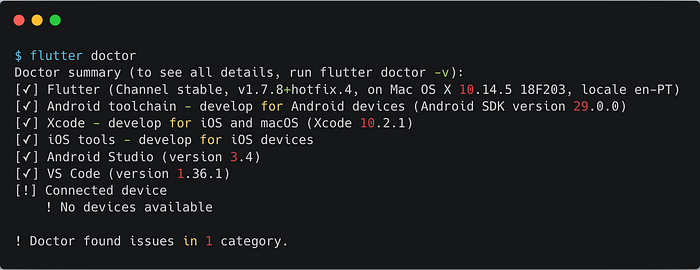
Flutter doctor
So let’s dive into the CLI to see what we can use on an everyday basis.
Exploring the Help section
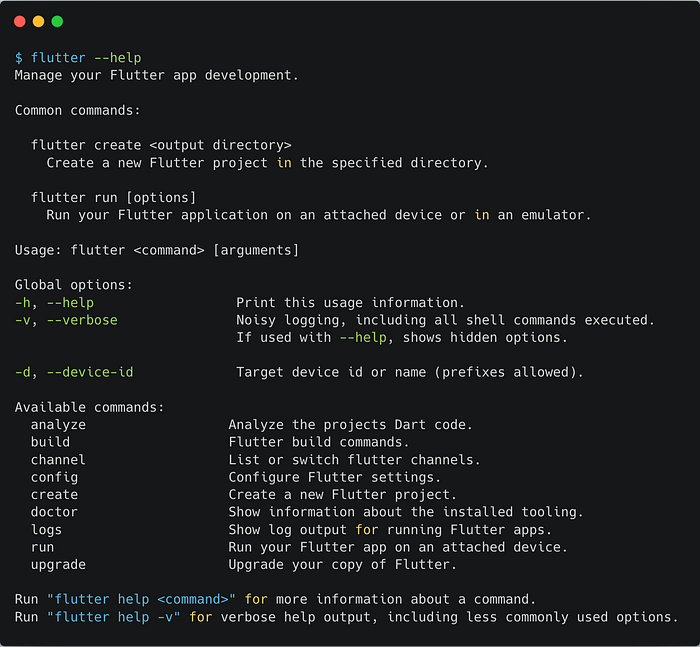
Using $ flutter help will show us a long and intimidating list of commands, such as analyze, build, channel, clean, create, install, logs, pub and run, each with a small description. But how can we use each command?
As with many other CLI, we can use the helpful -help argument after any command to prompt the CLI to show us a small help screen.
Flutter Help reduced log
In this present case, if we use the following command:
$ flutter analyze --watch --no-pub
We will analyze the code from the current Flutter project “/continuously, watching the filesystem for changes/” ( -watch) and without getting or updating our dependencies from pub --no-pub.
Running our Projects
When developing any type of application, the one thing every developer needs is to run their code. After all, how can we marvel at what we have done (or despair as each new bug tries to underpin our progress)?
For that, all we have to do is use the simple command:
$ flutter run
Which is simple enough to use, right? But sometimes we may have more than one device (or simulator) connected to our machine, and so the following error message appears:
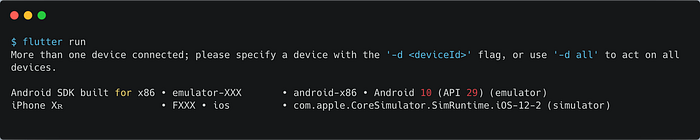
Flutter run with more than one device attached
So let’s do as we are told and use the correct flag for our device using -d <device id>. Assuming that our device id is emulator-4, we can run our project to that device using:
$ flutter run -d emulator-4
Now, this is where things get interesting. Let’ say that our app users Flavors and we have different entry points for our app: main.dart and main_dev.dart for prod and dev flavors/schemes. How can we run each one of them? Let’s use the -help command and search for arguments that may help us.
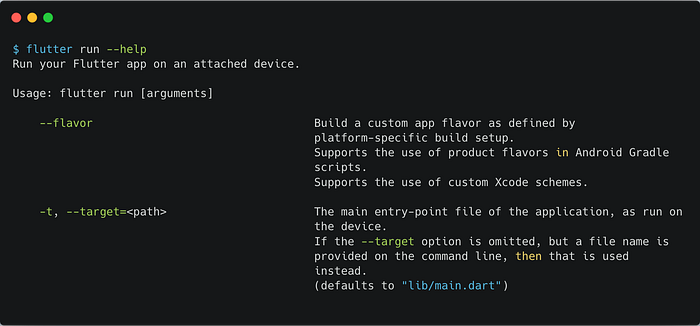
Flutter run help
As seen above, we can use the --flavors and -t flags to help us choose a Flavor and an entry point, respectively. As such, we can have two different commands for running our app:
$ flutter run -d emulator-4 -t lib/main_dev.dart --flavor dev$ flutter run -d emulator-4 -t lib/main.dart --flavor prod
This will get our app up and running! 🚀
But… something is missing.
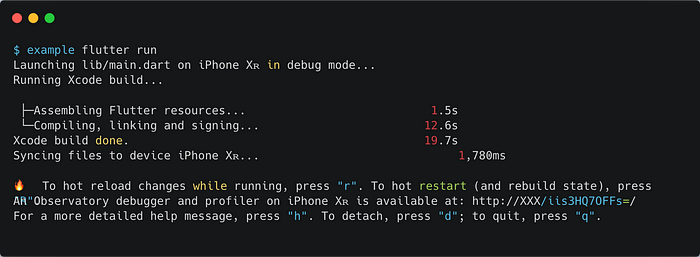
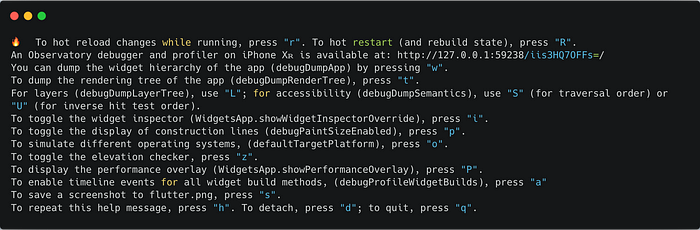
Flutter is known for the Hot Reload feature, that we can easily access in our favourite IDE, most of the times by clicking in a ⚡ symbol. But how can we do that with the command line? The only reference to hot reload we have is in the --hot argument, but that only lets us enable or disable that function.
If we pay close attention to the console output when we run our app, we see that it does mention the Hot Reload and Hot Restart features. Only, instead of using named arguments, the command line is prompting us to type each character as we need it.
Flutter run output
So let’s follow its instructions and click on r.
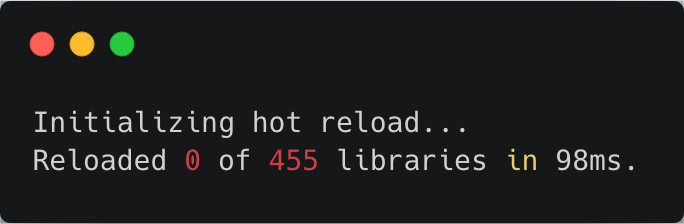
Hot reload
And how we can hot restart? Using Shift + R
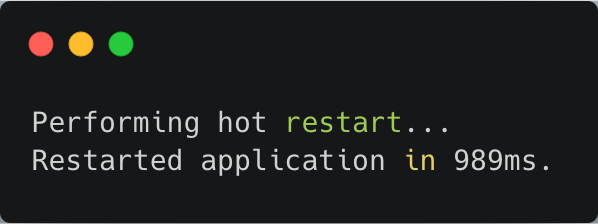
Hot restart
And that’s it! But, what other functionalities are hidden behind the run command? We can check them out by using the h key.
Detailed help for Flutter run
So, for instance, if we click on p we will have a helpful UI overlay with the construction guidelines for each widget, which can prove useful when trying to fix nasty UI bugs.
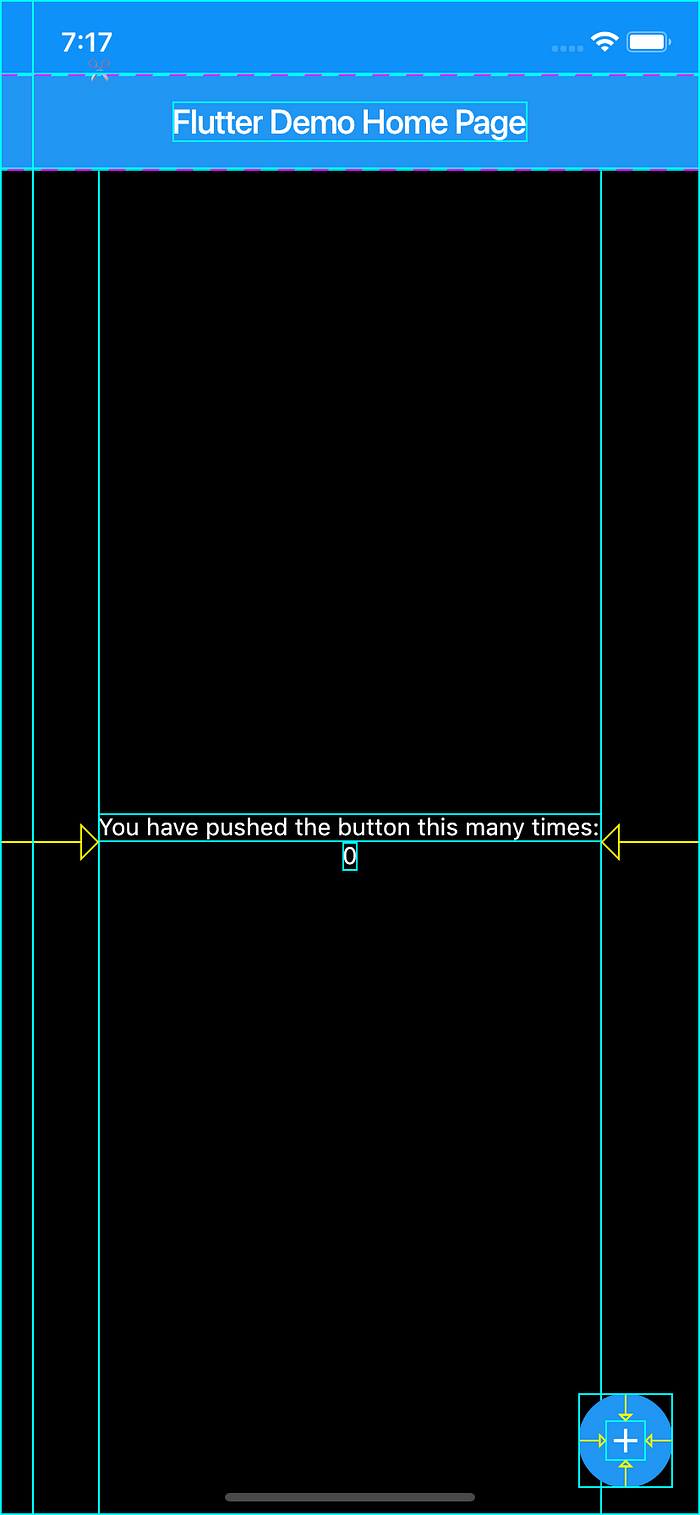
Flutter app with widget construction lines
(Protip: this screenshot was taken using the s key, which saves a screenshot in the project directory)
Flutter Channel
Another useful command from the Flutter CLI is the ability to change the current Flutter channel. A channel is nothing more than the git branch in which we are getting Flutter’s source code. When do we need to change it? When we are using experimental features, such as Flutter Web or if we can’t wait for a specific bug-fix to land in the stable channel.
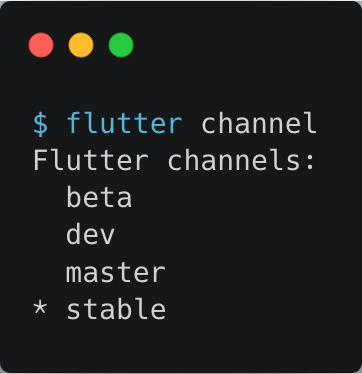
Flutter channels — stable channel currently selected
After we change a channel via $ flutter channel master, we should always use the $ flutter doctor command to verify if the Flutter tools are correct or if we need to upgrade our version of Flutter, which we can do by using $ flutter upgrade.
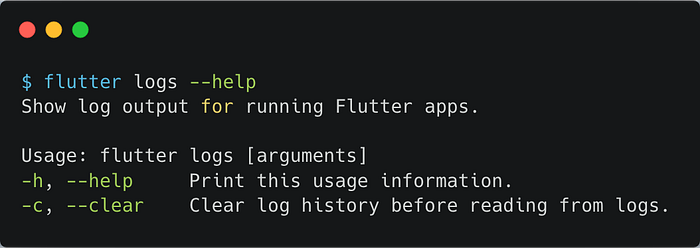
Flutter Logs
$ flutter logs -d emulator-4
This one is quite explanatory: it shows the flutter logs for the device. But not just the Flutter logs for the current running app, but for all apps that use Flutter in the connected device.
Flutter logs help
Why is this helpful?
- This can help us verify if in the --release version of the app (or even the version sent to the app/play store) has any logs that we forgot to hide
- It can help us save time to see the logs of the current app without needing to re-run the app.
- If for some reason $ flutter run outputs the system’s logs alongside Flutter logs, you can open a new terminal tab and run $ flutter logs to see just the Flutter logs for that device.
Creating a New Project
Running a project and changing the Flutter channel can be pretty cool, but all that is for nothing if we don’t have a project to test them on!
When creating a project we might be interested in:
- Giving it a name
- Assign an organisation for the bundle name (example: com.vanethos)
- The language used for the Android project (Kotlin or Java)
- The language used for the iOS project (Swift or Objective-C)
Thankfully, we can find a solution for each of them in the following arguments:
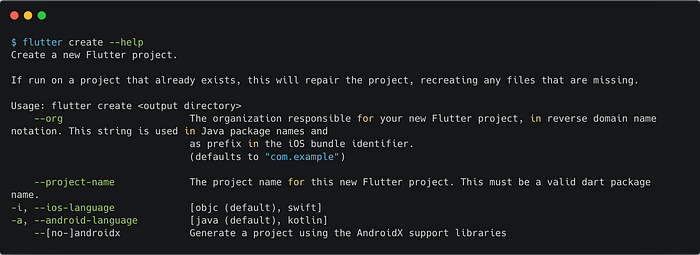
Flutter Create Help
Thus, to create a new project in the flutter_cli_test folder with the bundle prefix com.vanethos , project name clitest and using Kotlin and Swift, without AndroidX we need to use:
$ flutter create --org com.vanethos --project-name flutter_cli_test -a kotlin -i swift flutter_cli_test
And, if we didn’t know how to run our project, Flutter guides us into running it directly from the command line, which is pretty neat!
Flutter create help
Creating Custom Scripts in Bash
We know how to create and run projects, and if we look into the help section we also know how to clean our code (using $ flutter clean).
However, our principles tell us that for each run of the project we must:
- Clean the Android project
- Clean the Flutter Project
- Run the dev flavour of our app in our favourite device
Which require us to type the following in the terminal:
cd android
./gradlew clean
cd ..
flutter clean
flutter run --flavor dev -t lib/main_dev.dart -d emulator-4
What if we could just type in a single command to run the app in each flavour?
In MacOs, we might want to research how to create bash scripts. Thankfully Tania Rascia made a great article , in which we can see that in order to create a bash script we need to create a file where in the first line we add the following:
As such, we can now create a simple bash script by:
- Creating a file called dev_build.sh (we can do it with the command touch dev_build.sh
- Adding the following to the file:
#!/bin/bash
cd android
./gradlew clean
cd ..
flutter clean
flutter run --flavor dev -t lib/main_dev.dart -d emulator-4
How can we run it? Simply by calling the file using:
$ sh dev_build.sh
And voila! We can now with a single command clean our code thoroughly and deploy our app in a specific flavour!
Bonus Tip: Using Pubx
Let us take our love for the command line even a step further: we want to search for packages and add them to our pub spec.yaml file?
Though Flutter does not allow this natively, we can rely on the Flutter Community to meet our wishes, and meet them they have with the pubx package by Scott Hyndman.
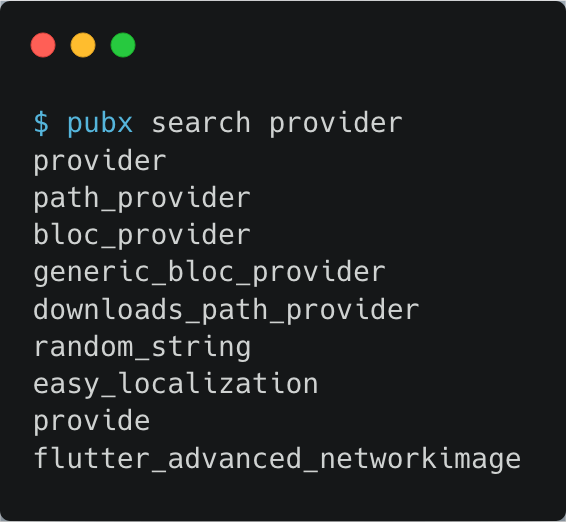
Want to search for a specific package? Use $ pubx search provider
pubx search
Found a package and want to know more about it? Use $ pubx view provider

pubx view
And finally, want to add dependencies to your pub spec.yaml file from the command line? Easily done with the $ pubx add provider
Conclusion
We’ve gone through a brief introduction to the Flutter CLI 💻.
It’s up to us to choose if this is the right option for us or not. Maybe we like to use the terminal, maybe we just want to use the IDE and have it deal with it, none should judge us about that. However, it’s always good to know the alternatives. Why?
- With the command line we can run project without opening them
- We can easily change the Flutter Channel
- We can analyze our code before a big commit
- If we quickly want to test a new plugin/package we can do it easily via:
$ git clone https://github.com/Vanethos/stream_disposable.git
$ cd stream_disposable/examples
$ flutter run
- You can easily create new release builds of your app via
$ flutter build ios
$ flutter build appbundle
- It just looks cool
Tell me your opinion about this! 😄 Are you going to use it? What are your favorite commands?
#flutter #mobile-apps