Creating Extensions for Visual Studio Code: A Complete Guide
- Ganesan Rengasamy
- July 2, 2020
- 0 Comments
Extensions are an indispensable part of project development. They play a vital role in improving your productivity on a project, helping you customize your project, and more. Visual Studio Code extensions are add-ons that enhance your productivity and allow you to customize your project by adding new features or integrating existing tools into it. These extensions can customize existing or new projects by adding files, new palettes, menus, commands, and so on.
This post explains how to create a Visual Studio Code extension that creates a new project palette.
Let’s get started!
Prerequisites
Create a VSIX project
Follow these steps to create a VSIX project:
Step 1: Create a new VSIX project in Visual Studio Code through Terminal > New Terminal.
Step 2: Run the following command to install the Code Generator:
npm install -g yo generator-code
Now the extension is ready for use with a TypeScript or JavaScript project.
Step 3: Run the following generator command and wait for some time (approximately 5 minutes) for the extension generator to be loaded.
yo code
Step 4: Fill out all the fields for a TypeScript project as illustrated in the following screenshot.
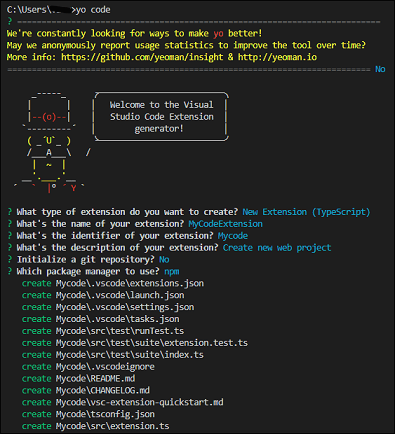
The extension project has been created successfully.
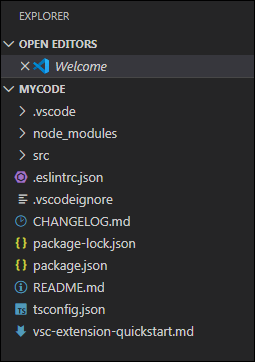
Step 5: Open the project by executing the following command:
cd Mycode //The Mycode is an extension identifier name.
code .
The project will be shown in the Explorer window as in the following screenshot.
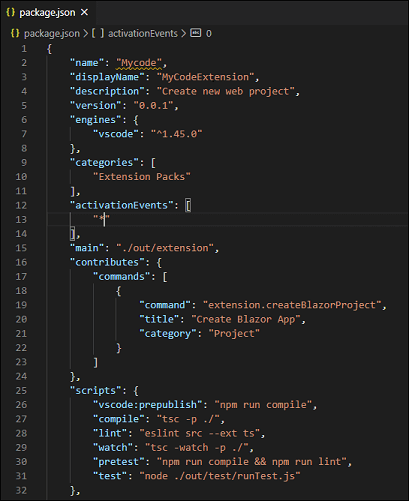
Update the extension details
The package.json file has the VS Code extension name, description, author, license, and other details. Open the package.json file to edit the extension details as shown in the following screenshot.
Create a Visual Studio Code project template
We can create a project template for any project type available in the dotnet new command. Here, I am going to create a new **Blazor **project for demonstration purposes.
Step 1: Create a new folder in the following structure.
{VSIX Project Location}/templates/BlazorServer
Step 2: Open the Terminal (Terminal > New Terminal) and navigate to the BlazorServer location using cd command.
Step 3: Run the following command to create the Blazor server app.
dotnet new blazorserver
The following screenshot shows the output on running the command.

#blazor #extensions #visual studio code #extensions #productivity #tech guide