React Native Firebase Tutorial - Install Firebase React Native
How to use firebase in react native, including installing firebase for android and iOS. In this video, we will see how React Native is configured to use the latest react-native-firebase version 6 library, as the version 5 library recently was upgraded.
We will set up the baseline for getting react native firebase install working in an example with a new application for react native as well as an existing one. This will include setting up the dependencies and logging into google firebase console to add a new project, creating the settings for apple iPhone and android systems.
This will be the first video in a series about React Firebase where we install and test out different features. In the next videos, we will take a look at react native firebase analytics.
Welcome to React Native Firebase! To get started, you must first setup a Firebase project and install the “app” module.
React Native Firebase is the officially recommended collection of packages that brings React Native support for all Firebase services on both Android and iOS apps.
Installation
Installing React Native Firebase requires a few steps; installing the npm module, adding the Firebase config files & rebuilding your apps.
Template (optional)
If you’re starting a fresh React Native project, you can take advantage of the template for React Native Firebase:
npx react-native init --template @react-native-firebase/template MyAwesomeApp
You can now skip to Step 2 (Android Setup).
1. Install via npm
Install the React Native Firebase “app” module to the root of your React Native project with npm or Yarn:
# Using npm
npm install --save @react-native-firebase/app

# Using Yarn
yarn add @react-native-firebase/app
The @react-native-firebase/app module must be installed before using any other Firebase service.
2. Android Setup
To allow the Android app to securely connect to your Firebase project, a configuration file must be downloaded and added to your project.
Generating Android credentials
On the Firebase console, add a new Android application and enter your projects details. The “Android package name” must match your local projects package name which can be found inside of the manifest tag within the /android/app/src/main/AndroidManifest.xml file within your project.
The debug signing certificate is optional to use Firebase with your app, but is required for Dynamic Links, Invites and Phone Auth. To generate a certificate run
cd android && ./gradlew signingReportand copy the SHA1 from thedebugkey. This generates two variant keys. You can copy the ‘SHA1’ that belongs to thedebugAndroidTestvariant key option.
Download the google-services.json file and place it inside of your project at the following location: /android/app/google-services.json.
Validate Android credentials
To allow Android to validate the credentials, the google-services plugin must be enabled on the project. This requires modification to two files in the Android directory.
First, add the google-services plugin as a dependency inside of the /android/build.gradle file:
buildscript {
  dependencies {
    // ... other dependencies
    classpath 'com.google.gms:google-services:4.2.0'
  }
}
Lastly, execute the plugin by adding the following to the very bottom of the /android/app/build.gradle file:
apply plugin: 'com.google.gms.google-services'
3. iOS Setup
To allow the iOS app to securely connect to your Firebase project, a configuration file must be downloaded and added to your project.
Generating iOS credentials
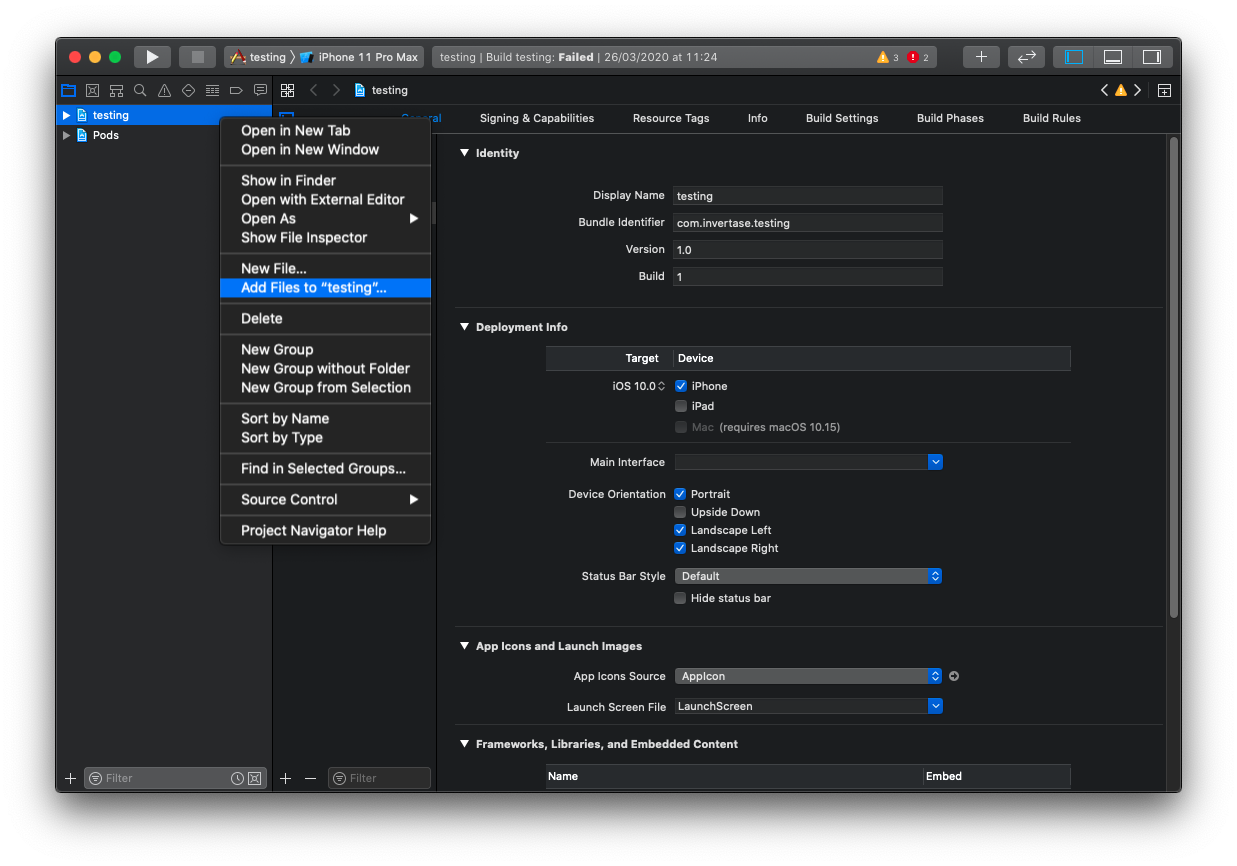
On the Firebase console, add a new iOS application and enter your projects details. The “iOS bundle ID” must match your local project bundle ID. The bundle ID can be found within the “General” tab when opening the project with XCode.
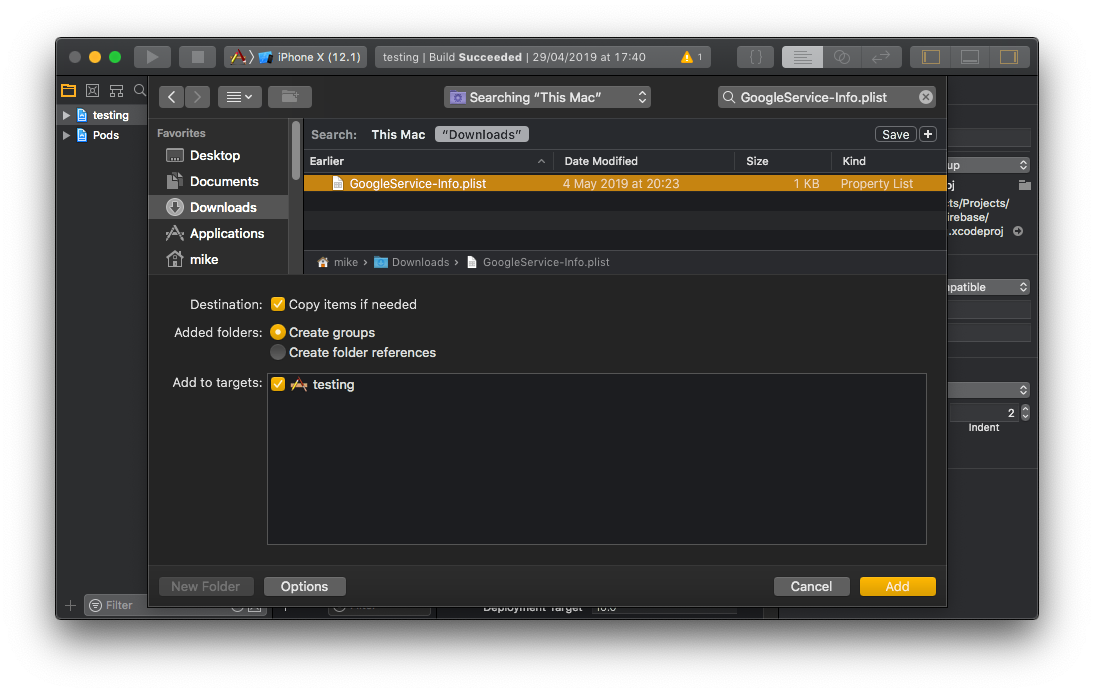
Download the GoogleService-Info.plist file.
Using Xcode, open the projects /ios/{projectName}.xcodeproj file (or /ios/{projectName}.xcworkspace if using Pods).
Right click on the project name and “Add files” to the project, as demonstrated below:
Select the downloaded GoogleService-Info.plist file from your computer, and ensure the “Copy items if needed” checkbox is enabled.
Validate iOS credentials
To allow iOS to validate the credentials, the Firebase iOS SDK must be configured during the bootstrap phase of the app. To do this, open the /ios/{projectName}/AppDelegate.m file, and add the following lines:
At the top of the file, import the Firebase SDK:
#import <Firebase.h>
Within the didFinishLaunchingWithOptions method, add the configure method:
- (BOOL)application:(UIApplication *)application didFinishLaunchingWithOptions:(NSDictionary *)launchOptions {
  if ([FIRApp defaultApp] == nil) {
    [FIRApp configure];
  }
4. Autolinking & rebuilding
Once the above steps have been completed, the React Native Firebase library must be linked to your project and the app needs to be rebuilt.
Users on React Native 0.60+ automatically have access to “autolinking”, requiring no further manual installation steps. To automatically link the package, rebuild your project:
# Android apps
npx react-native run-android

# iOS apps
cd ios/
pod install --repo-update
npx react-native run-ios
Once successfully linked and rebuilt, your app will be connected to Firebase using the @react-native-firebase/app module. This module does not provide much functionality, therefore to use other Firebase services the modules need installing separately.
Manual Linking
If you’re using an older version of React Native without autolinking support, or wish to integrate into an existing project, you can follow the manual installation steps for iOS and Android
Miscellaneous
Android Enabling Multidex
As your application starts to grow with more native dependencies, your builds may start to fail with the common Execution failed for task ':app:mergeDexDebug' error. This error occurs when Android reaches the 64k methods limit.
One common solution is to enable multidex support for Android. This is a common solution to solving the problem, however it is recommended you read the Android documentation to understand how it may impact your application.
Hermes Support
At this time, React Native Firebase does not support the Hermes JavaScript engine due to compatibility issues. We are actively tracking the changes to Hermes and will ensure support once both are compatible with each other.
Overriding Native SDK Versions
React Native Firebase internally sets the versions of the native SDKs which each module uses. Each release of the library is tested against a fixed set of SDK versions (e.g. Firebase SDKs), allowing us to be confident that every feature the library supports is working as expected.
Sometimes it’s required to change these versions to play nicely with other React Native libraries; therefore we allow manually overriding these native SDK versions.
Using your own SDK versions is generally not recommended as it can lead to breaking changes in your application. Proceed with caution.
Android
Within your projects /android/app/build.gradle file, provide your own versions by specifying any of the following options shown below:
project.ext {
  set('react-native', [
    versions: [
      // Overriding Build/Android SDK Versions
      android : [
        minSdk    : 16,
        targetSdk : 28,
        compileSdk: 28,
        buildTools: "28.0.3"
      ],

      // Overriding Library SDK Versions
      firebase: [
        // Override Firebase SDK Version
        bom           : "21.1.0",

        // Override Crashlytics SDK Version
        crashlytics   : "2.10.0",

        // Override Crashlytics SDK Version
        crashlyticsNdk: "2.1.0"
      ],
    ],
  ])
}
Once changed, rebuild your application with npx react-native run-android.
iOS
Open your projects /ios/Podfile and add any of the globals shown below to the top of the file:
# Override Firebase SDK Version
$FirebaseSDKVersion = '6.8.1'

# Override Fabric SDK Version
$FabricSDKVersion = '1.6.0'

# Override Crashlytics SDK Version
$CrashlyticsSDKVersion = '3.1.0'
Once changed, reinstall your projects pods via pod install and rebuild your project with npx react-native run-ios.
Increasing Android build memory
As you add more Firebase modules, there is an incredible demand placed on the Android build system, and the default memory settings will not work. To avoid OutOfMemoryErrors during Android builds, you should uncomment the alternate gradle memory setting present in /android/gradle.properties:
# Specifies the JVM arguments used for the daemon process.
# The setting is particularly useful for tweaking memory settings.
# Default value: -Xmx10248m -XX:MaxPermSize=256m
org.gradle.jvmargs=-Xmx2048m -XX:MaxPermSize=512m -XX:+HeapDumpOnOutOfMemoryError -Dfile.encoding=UTF-8
Allow iOS Static Frameworks
If you are using Static Frameworks on iOS, you need to manually enable this for the project. To enable Static Framework support, add the following global to the top of your /ios/Podfile file:
$RNFirebaseAsStaticFramework = true
#firebase #react-native #mobile-apps #reactjs